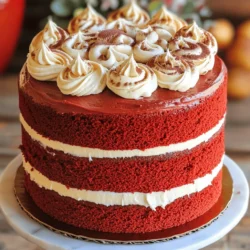
Are you ready to impress your friends and family with a stunning dessert? This Red Velvet Cake Irresistible Dessert Recipe Guide is packed with everything you need to create this classic treat. From the essential ingredients to expert tips for a moist cake, I’ve got you covered. Plus, discover fun variations and storage tips to keep your cake fresh. Let’s dive into the world of red velvet, and make your next gathering unforgettable!
Ingredients
Essential Ingredients for Red Velvet Cake
To make a perfect red velvet cake, you need the right ingredients. Here’s what you will need:
– 2 ½ cups all-purpose flour
– 1 ½ cups granulated sugar
– 1 teaspoon baking soda
– 1 teaspoon salt
– 1 teaspoon cocoa powder
– 1 ½ cups vegetable oil
– 1 cup buttermilk, at room temperature
– 2 large eggs, at room temperature
– 2 tablespoons red food coloring
– 1 teaspoon vanilla extract
– 1 teaspoon white vinegar
These ingredients work together to create the soft and moist texture of the cake. The buttermilk adds richness, while the cocoa powder gives a subtle chocolate taste.
Cream Cheese Frosting Ingredients
Frosting makes the cake even better. You can choose to buy store-bought cream cheese frosting or make your own. Here are the key components for creamy frosting:
– 8 oz cream cheese, softened
– ½ cup unsalted butter, softened
– 4 cups powdered sugar
– 1 teaspoon vanilla extract
For a twist, consider adding some lemon zest or a pinch of salt to enhance the flavor. This frosting is smooth and rich, perfect for topping your red velvet cake.
Step-by-Step Instructions
Preparation Steps
1. Preheat your oven and prepare cake pans: Start by preheating your oven to 350°F (175°C). Grease and flour two 9-inch round cake pans. This will help the cake come out easily after baking.
2. Combine dry ingredients in a mixing bowl: In a large mixing bowl, whisk together the following dry ingredients:
– 2 ½ cups all-purpose flour
– 1 teaspoon baking soda
– 1 teaspoon salt
– 1 teaspoon cocoa powder
– 1 ½ cups granulated sugar
Make sure these ingredients are mixed well. This ensures your cake will rise and have a great texture.
Mixing Process
3. How to properly mix wet and dry ingredients: In another bowl, mix the wet ingredients:
– 1 ½ cups vegetable oil
– 1 cup buttermilk (at room temperature)
– 2 large eggs (at room temperature)
– 2 tablespoons red food coloring
– 1 teaspoon vanilla extract
– 1 teaspoon white vinegar
Whisk these together until smooth. Slowly add this mix to your dry ingredients.
4. Importance of folding vs. mixing: When you combine the wet and dry ingredients, use a spatula or wooden spoon to gently fold them together. This method keeps your batter light and airy. Don’t overmix, as it can make the cake dense.
Baking and Cooling
5. Ideal temperature and baking duration: Once mixed, divide the batter between the prepared pans. Bake in your preheated oven for 25-30 minutes. Check if they are done by inserting a toothpick in the center. It should come out clean.
6. Cooling techniques for perfect texture: After baking, let the cakes cool in the pans for about 10 minutes. Then, carefully transfer them to a wire rack. Let them cool completely before frosting. This step is crucial for a smooth texture when you frost the cake.
This guide will help you create a stunning red velvet cake that everyone will love.
Tips & Tricks
Achieving the Perfect Texture
To make a moist and flavorful red velvet cake, follow these tips:
– Use buttermilk. It adds moisture and a slight tang.
– Choose vegetable oil. It keeps the cake tender and light.
The combination of buttermilk and oil creates the perfect cake texture. Buttermilk helps the cake rise well while adding a rich flavor. Oil prevents it from being dry and crumbly.
Troubleshooting Common Issues
Sometimes, cakes don’t turn out as planned. Here are some common problems and solutions:
– Overmixing: This can make your cake tough. Mix just until combined.
– Underbaking: A wet center means the cake is not done. Always do the toothpick test.
To avoid a dry cake, measure your flour properly. Spoon flour into the measuring cup and level it off with a knife. For sinking tops, don’t open the oven door while baking.
Essential Frosting Tips
Applying cream cheese frosting can be tricky. Here’s how to do it right:
– Start with a cool cake. This helps the frosting stay put.
– Use a spatula to spread the frosting evenly.
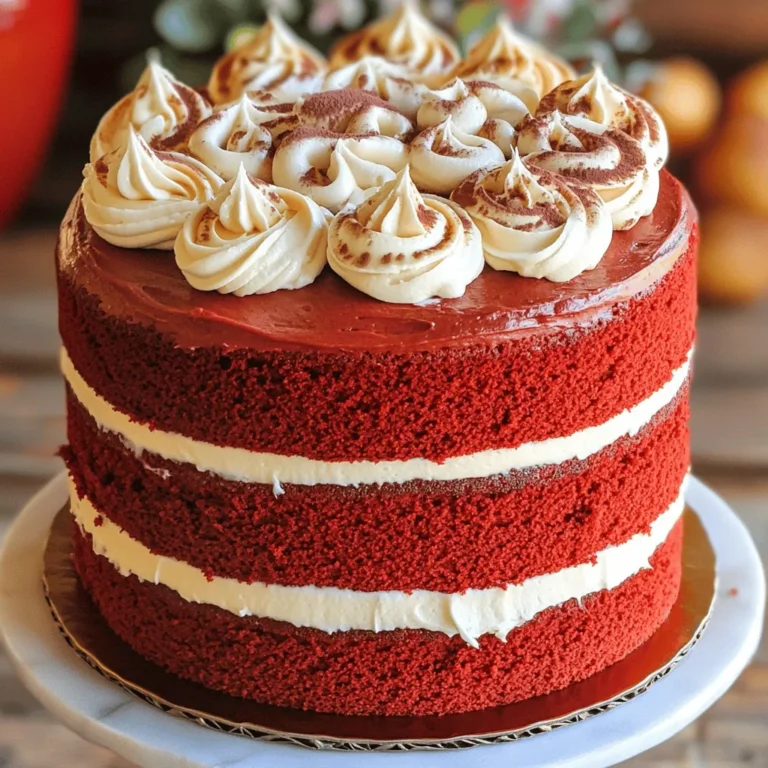
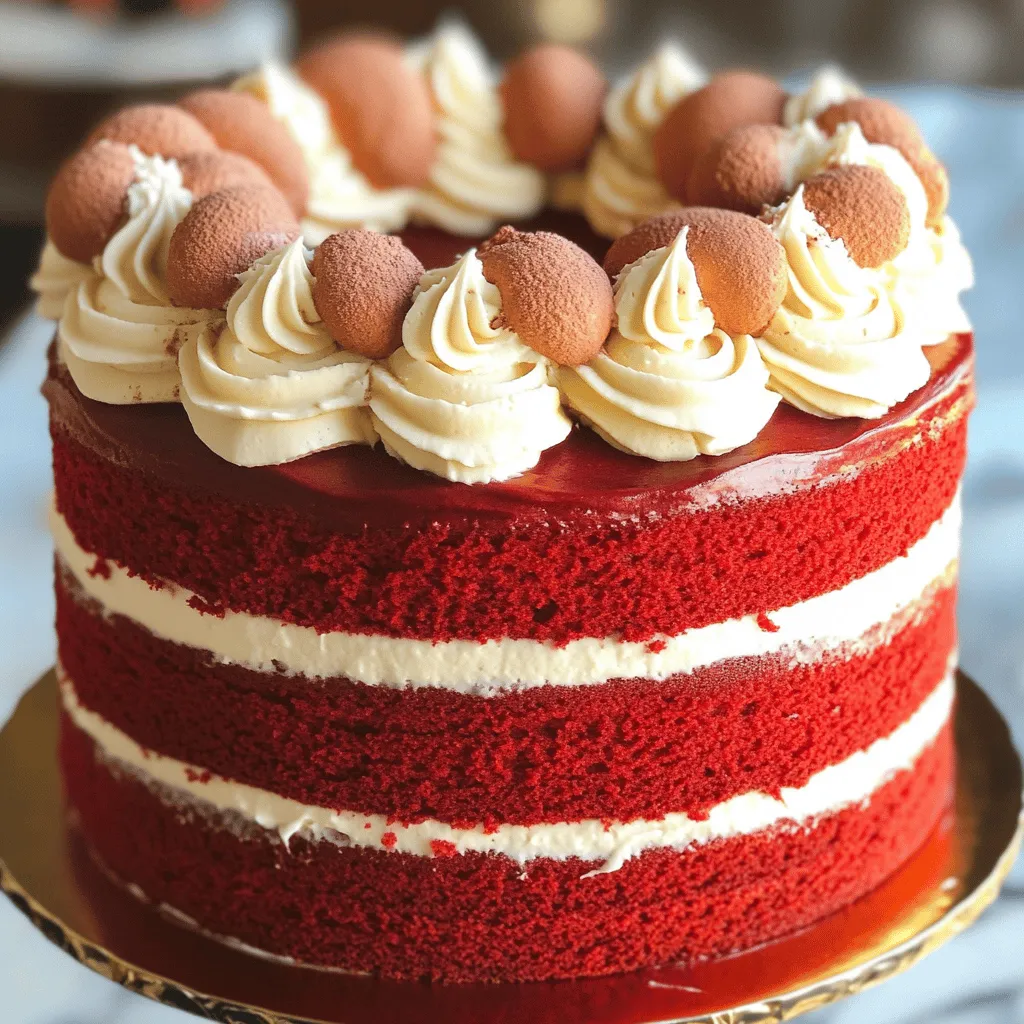
For an elegant finish, try these decoration techniques:
– Add swirls with the spatula or a piping bag.
– Sprinkle cocoa powder or red velvet crumbs on top.
These tips help you create a beautiful and tasty red velvet cake.
Variations
Creative Twists on Red Velvet
You can have fun with red velvet cake. One great twist is to make red velvet cupcakes. To adapt the recipe, use the same ingredients but pour the batter into cupcake liners. Bake for about 20 minutes. These cupcakes are cute and perfect for parties.
Another unique dessert option is red velvet cheesecake. Start with a red velvet cake base, then top it with a creamy cheesecake layer. Mix cream cheese, sugar, and eggs for the filling. Pour it over the baked red velvet layer and bake again. This dessert is rich and delicious.
Seasonal Adaptations
You can change the flavors for holidays. Think about adding spices like cinnamon and nutmeg for fall. For winter, mix in peppermint extract for a fresh taste. These flavors make the cake festive and fun.
Color-themed variations are also a hit. For a spring celebration, add some lemon zest to brighten the flavor. You could also use pastel colors for frosting to match the season. These small changes make the cake perfect for any event.
Gluten-Free & Vegan Options
Making red velvet cake gluten-free is easy. Just substitute gluten-free flour for regular flour in the recipe. This keeps the cake light and fluffy.
For a vegan version, swap the eggs and dairy. Use flaxseed meal mixed with water as an egg substitute. For the buttermilk, try almond milk with a splash of vinegar. These simple swaps help everyone enjoy this delicious cake.Enjoy experimenting with these variations!
Storage Info
How to Store Red Velvet Cake
To keep your red velvet cake fresh, follow these simple steps:
– Short-term storage: Place the cake in an airtight container. You can also cover it tightly with plastic wrap. This keeps moisture in and prevents drying out. Store it at room temperature if you plan to eat it within three days.
– Long-term storage: For longer storage, wrap the cake layers with plastic wrap and then aluminum foil. This method protects the cake from freezer burn. You can store it in the freezer for up to three months.
Freezing Tips
If you want to freeze your red velvet cake layers, here’s how:
1. Cool completely: Always let your cake layers cool fully before freezing. This prevents condensation from forming.
2. Wrap tightly: Wrap each layer in plastic wrap. Then, add an extra layer of foil. This protects your cake from freezer odors.
3. Label the layers: Write the date on the foil. This way, you can track how long they’ve been in the freezer.
When you’re ready to enjoy your cake, use these thawing techniques:
– Thaw in the fridge: Move the wrapped cake to the fridge for several hours or overnight. This keeps the cake moist and fresh.
– Room temperature: If you’re in a hurry, you can unwrap the cake and let it sit at room temperature for about an hour.
Shelf Life Guidelines
How long does red velvet cake last in the fridge?
– It can last up to five days if stored properly in an airtight container.
What are the signs of spoilage to watch for?
– Mold: If you see any mold, throw the cake away.
– Off smell: A sour or strange smell means it’s time to discard the cake.
– Dry texture: If the cake feels dry, it may not taste good.
Following these storage tips helps you enjoy your red velvet cake at its best!
FAQs
What is the origin of red velvet cake?
Red velvet cake has a rich history. It likely started in the 1800s. Many say it comes from the South. It became popular in the 1920s. A hotel in New York helped spread its fame. The cake’s name refers to its soft, velvety texture. The red color adds to its charm. Cocoa powder gives it a hint of chocolate. This cake is often linked to special occasions, especially Valentine’s Day.
How can I make red velvet cake without food coloring?
You can use natural options to color your cake. Beet juice is a great choice. It gives a nice red hue. You might also try pomegranate juice. Keep in mind that the color may be lighter. Cocoa powder can deepen the shade too. These options add flavor along with color. Expect a more earthy taste with these substitutes.
Can I make this cake in advance?
Yes, you can make red velvet cake ahead of time. Bake the cakes one day before. Cool them completely and wrap them tightly. Store in the fridge overnight. Frost the cake on the day you serve it. This keeps the cake fresh and moist. You can also freeze layers for later use. Just remember to thaw them before frosting.
Where can I buy the best red velvet cake?
You can find great red velvet cake at local bakeries. Look for ones that use fresh ingredients. Check online reviews for quality. Some bakeries offer delivery. You can also order from well-known online stores. When choosing a cake, check for a rich color and moist texture. A good frosting should be smooth and creamy.It takes about 30 minutes to prep. The total time is roughly 1 hour and 30 minutes. This recipe makes 12 delicious slices.Enjoy baking this beautiful dessert!
Red velvet cake is a delightful treat made from simple ingredients. You learned about essential components, steps for baking, and tips for the best results. I shared creative variations and storage methods so your cake stays fresh. Remember, practice makes perfect in the kitchen. With each attempt, you get closer to mastering this beloved dessert. Whether for a special occasion or a simple indulgence, this cake will impress anyone. Enjoy your baking journey and savor every bite of your delicious creation.