Are you craving a dessert that’s both easy and refreshing? Look no further! This No-Bake Key Lime Pie is perfect for any occasion. With zesty lime, a smooth filling, and a crunchy crust, it’s a treat you can’t resist. I’ll guide you through simple steps, essential tips, and even fun variations. Let’s dive into a recipe that will impress friends and family without the oven!
Ingredients
Key Ingredients
To make No-Bake Key Lime Pie, you need a few key ingredients. Here’s a list to start you off:
– 1 ½ cups graham cracker crumbs
– ⅓ cup granulated sugar
– ½ cup unsalted butter, melted
– 1 cup sweetened condensed milk
– ½ cup sour cream
– ½ cup fresh key lime juice (or regular lime juice)
– 1 tablespoon lime zest
– Whipped cream (for topping)
– Lime slices and additional zest (for garnish)
The most vital ingredient is fresh key lime juice. It gives the pie its bright, tangy flavor. If fresh key limes are hard to find, regular limes work too. However, fresh juice always tastes best.
You can customize your pie with optional ingredients. For a sweeter taste, add more sugar to the filling. Want a richer flavor? Use more sour cream. You can also experiment with toppings. Try adding toasted coconut or different fruits. Each twist can change the pie’s flavor and style.
Step-by-Step Instructions
Preparing the Crust
Start by mixing the graham cracker crumbs, sugar, and melted butter in a bowl. Use a fork to combine them well. You want it to look crumbly but hold together when pressed. Next, take this mixture and press it firmly into a 9-inch pie dish. Make sure to cover the bottom and the sides evenly. This step is key!
After pressing, place the crust in the fridge for about 15 minutes. Chilling the crust helps it set and hold its shape. A cool crust will make your pie look neat and tasty.
Making the Filling
While the crust chills, let’s prepare the filling. In another bowl, whisk together sweetened condensed milk, sour cream, and fresh lime juice. Mix them until smooth. This step is important for a creamy texture.
Next, add lime zest to the filling. This gives it an extra burst of flavor. For a smooth filling, mix gently but thoroughly. Avoid over-mixing, as that can introduce air bubbles.
Assembling the Pie
Now, pour the filling into your chilled crust. Use a spatula to spread it evenly. This ensures every slice has the same great taste.
Once spread, place the pie back in the fridge. Chill it for at least 4 hours, but overnight is best. This time allows the pie to set properly. A well-chilled pie will slice beautifully.
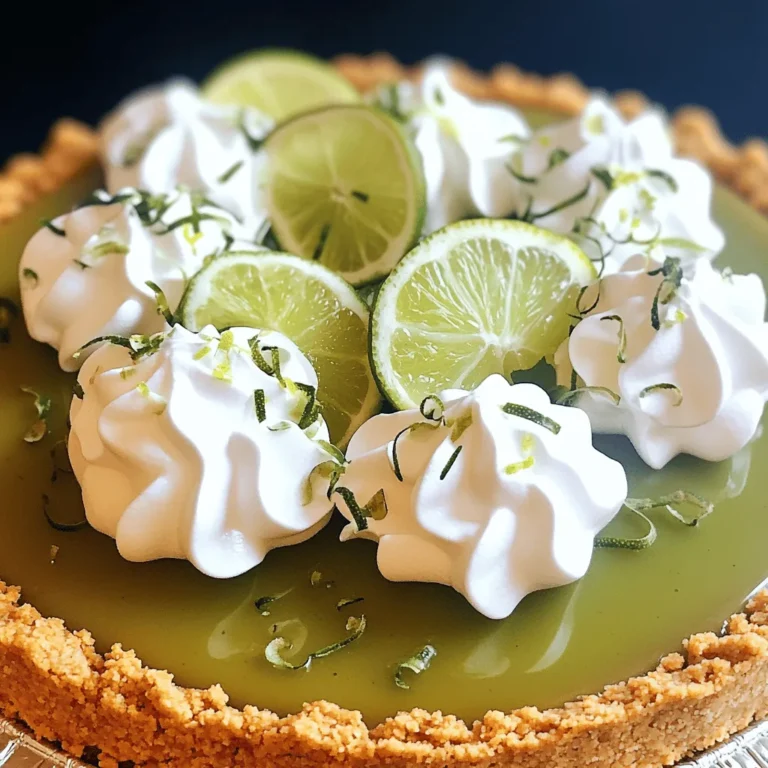
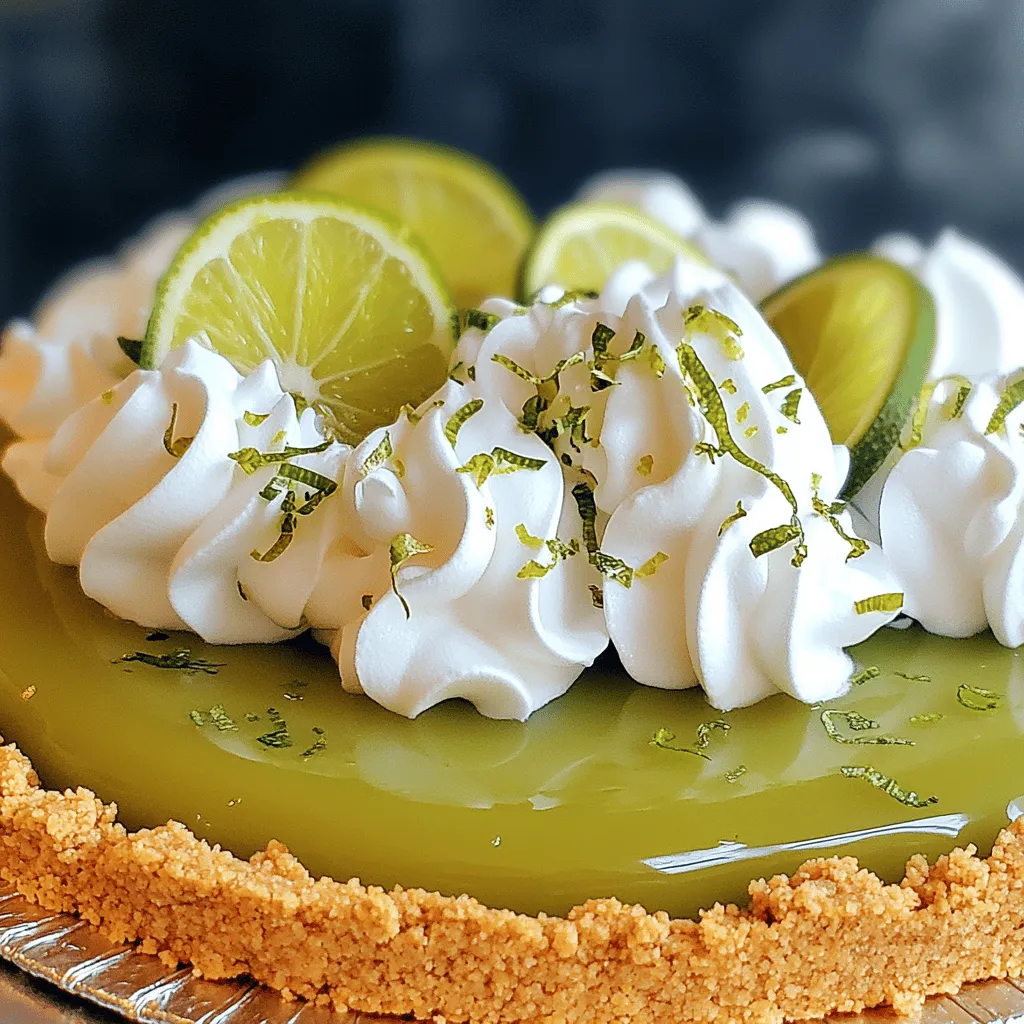
When ready, remove the pie from the fridge. Top it with whipped cream and garnish with lime slices and zest. Enjoy your delicious No-Bake Key Lime Pie!
Tips & Tricks
Perfecting the Pie
To create the best filling, mix the sweetened condensed milk, sour cream, key lime juice, and lime zest thoroughly. This mix should be smooth and creamy. If it’s lumpy, you may need to whisk longer. A great filling has a bright flavor and a silky texture.
For chilling, I recommend at least 4 hours. If you can wait overnight, the pie tastes even better. The flavors meld together, and the texture improves. This is key for the perfect no-bake key lime pie.
Toppings can elevate your pie’s look and taste. I love using whipped cream for a fluffy touch. Lime slices and extra zest add a pop of color. Consider mint leaves for a fresh twist. They also provide a nice contrast to the pie’s tartness.
Common Mistakes to Avoid
One mistake is over-mixing the filling. This can add air and create a foamy texture. Aim for smooth and creamy instead.
Another issue is not chilling the pie long enough. If you cut into it too early, the filling may not hold. It’s best to be patient and let it set fully.
Using stale graham crackers can ruin your crust. Always check the date on the package. Fresh crackers give a better crunch and flavor. For the best results, use high-quality ingredients.
Variations
Flavor Infusions
You can add fun flavors to your no-bake key lime pie. Try using lemon or orange juice instead of lime juice. This gives a nice twist to the taste. You can also make flavored whipped cream. For example, add some lime zest or a little vanilla extract for extra flavor. These small changes make each pie unique and exciting.
Alternative Crust Options
Switching up the crust can change the whole pie. Use Oreo cookies to make a chocolate crust. Just crush the cookies and mix them with melted butter. This adds a rich, chocolatey taste. If you need gluten-free options, try almond flour or coconut flour. Both work well to create a tasty base. You can enjoy the pie without worrying about gluten. These changes let you customize your pie just how you like it.
Storage Info
Best Storage Practices
To keep your No-Bake Key Lime Pie fresh, store it in the fridge. Use an airtight container for best results. This keeps the pie from drying out and losing flavor. If you have leftovers, cover the pie with plastic wrap. This will help maintain its taste and texture. Make sure to consume the pie within three days for the best experience.
Freezing Instructions
Can you freeze No-Bake Key Lime Pie? Yes, you can! Freezing is a great option if you want to save some for later. Just cut the pie into slices and wrap each piece tightly in plastic wrap. After that, place the slices in a freezer-safe container. This method keeps them fresh for up to three months.
When you’re ready to enjoy your pie, thaw it in the refrigerator overnight. This slow thawing helps keep the texture nice. Avoid thawing at room temperature, as it can make the pie soggy.
FAQs
How long does No-Bake Key Lime Pie last?
No-Bake Key Lime Pie lasts about 3 to 5 days in the fridge. Make sure to cover it well to keep it fresh. If you freeze it, it can last for up to 2 months. However, the texture may change a bit after thawing. Always thaw it in the fridge for best results.
Can I use regular limes instead of key limes?
Yes, you can use regular limes. Key limes are smaller and have a stronger flavor. They also have more acidity. If you use regular limes, your pie will taste a bit different. You may need to adjust the sugar to balance the flavor.
Is it possible to make this pie vegan?
Yes, you can make this pie vegan. Replace sweetened condensed milk with coconut cream or a dairy-free alternative. Use a vegan sour cream or cashew cream instead. For the crust, make sure the graham crackers are vegan or use crushed nuts mixed with coconut oil. Enjoy a tasty vegan treat!
You learned how to make a delicious No-Bake Key Lime Pie. I covered the key ingredients, making the crust, and preparing the filling. I also shared tips to avoid common mistakes and ways to customize your pie. Remember, fresh key lime juice matters for flavor. You can try different crusts and toppings. With the right storage, your pie stays fresh for days. Enjoy your baking, and have fun experimenting with flavors! This pie is sure to impress everyone.

