![To make these delightful lemon ricotta cheesecake bars, gather the following ingredients: - 1 ½ cups ricotta cheese - 1 cup cream cheese, softened - 1 cup granulated sugar - 3 large eggs - Zest of 2 large lemons - ⅓ cup freshly squeezed lemon juice - 1 teaspoon vanilla extract - ½ cup all-purpose flour - ½ teaspoon baking powder - A pinch of salt - 1 tablespoon butter (for greasing the pan) These simple ingredients come together to create a creamy, zesty treat. If you need alternatives, consider these: - Replace ricotta with cottage cheese for a lighter version. - Use Greek yogurt instead of cream cheese for a tangy twist. - If you want it sweeter, add a bit more sugar. - For a gluten-free option, swap all-purpose flour with almond flour or a gluten-free blend. These swaps can change the taste and texture, so choose based on your needs. Using high-quality ingredients makes a big difference. Fresh ricotta and cream cheese provide the best flavor. Fresh lemons give a bright, zesty taste that bottled juice can't match. When you pick quality, you ensure each bite is rich and flavorful. Good ingredients lead to a more enjoyable dessert. For the best results, don’t skimp on quality. Begin by gathering all your ingredients. Preheat your oven to 325°F (163°C). This is a key step; it helps the bars cook evenly. Grease a 9x9 inch baking pan with butter. Now, line it with parchment paper, leaving some paper hanging over the sides. This makes it easy to lift the bars out later. In a large bowl, add the ricotta cheese and cream cheese. Use an electric mixer to beat them together until smooth. This mix needs to be creamy for the best texture. Gradually add the granulated sugar. Keep mixing until the sugar blends in well. Next, add the eggs, one by one. Mix on low speed after each egg until just combined. Now, stir in the lemon zest, lemon juice, and vanilla extract. This adds a bright flavor to your bars. In another bowl, whisk together the flour, baking powder, and a pinch of salt. Gradually fold this dry mix into the wet mixture. Be careful not to over mix; this can make the bars tough. Pour the cheesecake batter into your prepared pan. Spread it evenly across the surface. Place it in the oven and bake for 35-40 minutes. The edges should be set, and the center should jiggle a bit. The top will turn lightly golden. Once baked, take it out of the oven. Let it cool in the pan for about 1 hour. After that, pop it into the fridge for at least 4 hours or overnight for the best taste and texture. When you are ready, lift the cheesecake out using the parchment paper. Cut into bars and enjoy this delightful treat! For the full recipe, refer to the ingredients section above. To get that creamy texture, make sure your ricotta and cream cheese are soft. I suggest leaving them out for about 30 minutes before you start. This helps them blend easily. When mixing, use a medium speed. Beat until the mixture is smooth and free of lumps. Do not over mix after adding the flour. This keeps your bars light and fluffy. One big mistake is using cold ingredients. Cold cheese won’t mix well, and your bars may turn out lumpy. Another mistake is baking too long. Overbaking dries out the bars. Look for the edges to set with a slight jiggle in the center. Always let your bars cool before cutting. This helps them hold their shape. To make your cheesecake bars look great, dust them with powdered sugar right before serving. This adds a nice touch and a bit of sweetness. You can also add a thin slice of lemon and a sprig of mint on top. These little details make your bars not just tasty but beautiful too. For the full recipe, refer to the recipe section above. {{image_2}} You can easily change the flavor of these Lemon Ricotta Cheesecake Bars. Try adding fresh berries like blueberries or raspberries. This gives a fruity twist. You can also mix in a bit of almond extract for a nutty flavor. Another fun option is to swirl in some chocolate or caramel before baking. Each change brings new taste and joy. If you need a gluten-free version, swap the all-purpose flour with almond flour or gluten-free flour mix. This keeps the bars tasty and light. For a dairy-free option, use dairy-free cream cheese and ricotta. They work well and maintain the creamy texture. These swaps ensure everyone can enjoy this treat. Change the lemon for other fruits to match the seasons! In summer, try strawberries or peaches for a refreshing taste. In fall, use pumpkin puree with spices for a cozy vibe. During winter, citrus like blood oranges can add a unique flair. These seasonal changes let you celebrate with flavors all year round. For the full recipe, you can refer to the [Full Recipe]. To keep your Lemon Ricotta Cheesecake Bars fresh, place them in an airtight container. Line the container with parchment paper for easy removal. Store them in the fridge for up to five days. This helps maintain their creamy texture and bright flavor. If you want to save some bars for later, freezing is a great option. First, cut the bars into pieces. Wrap each piece tightly with plastic wrap to prevent freezer burn. Then, place the wrapped bars in a freezer-safe container. They can last in the freezer for up to three months. When you're ready to enjoy your frozen bars, take them out of the freezer. Let them thaw in the fridge overnight. If you want to serve them warm, you can microwave each bar for about 10-15 seconds. This will give you a soft, delightful treat again. For the complete recipe, check the Full Recipe section! To make Lemon Ricotta Cheesecake Bars gluten-free, simply swap the all-purpose flour. Use almond flour or coconut flour instead. These options work well and keep the bars light. You may need to adjust the amount slightly. Almond flour is denser, so use less than the recipe calls for. Coconut flour is very absorbent, so use more liquid if you choose this. Yes, you can use other cheeses. Cream cheese works nicely on its own. Mascarpone is another great choice for smoothness. Both add a rich flavor but keep the texture creamy. If you want a lighter option, try cottage cheese. Blend it well to avoid lumps. Each cheese will change the taste, so choose what you like best! These cheesecake bars pair well with fresh fruits. Strawberries, blueberries, or raspberries make great choices. You can also add a dollop of whipped cream on top. A drizzle of honey or a berry sauce adds sweetness, too. For a crunchy touch, serve with crushed nuts or granola on the side. This adds texture and complements the creamy bars perfectly. You learned about the key ingredients, substitutes, and the importance of quality. We discussed easy steps for mixing, baking, and cooling your treats. I shared tips to help you avoid errors and make your dessert shine. You can also explore fun variations and proper storage methods for leftovers. Always remember, good cooking starts with the right ingredients and knowledge. Enjoy your baking journey and the tasty results!](https://pureeatsnow.com/wp-content/uploads/2025/06/dfcc5ec9-4530-49dc-839e-b39a40f79ba3-768x768.webp)
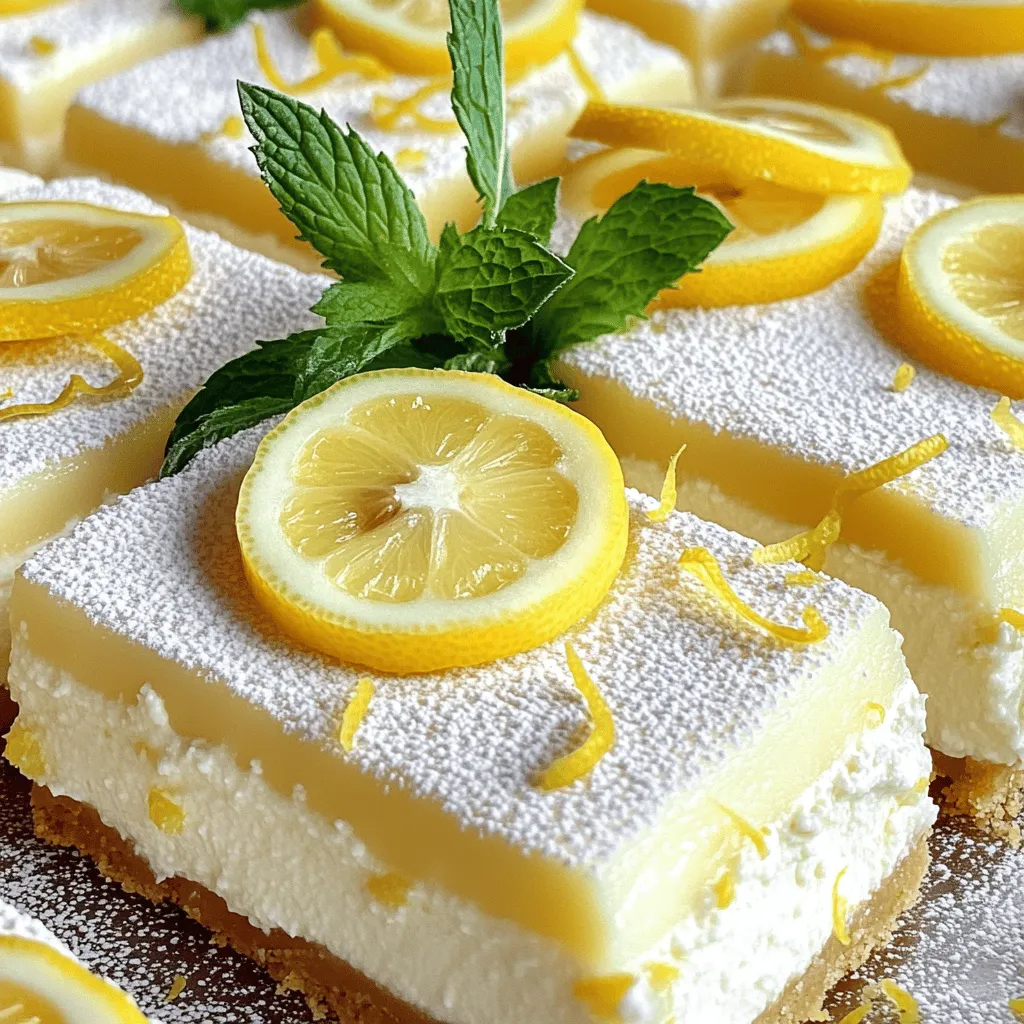
If you crave a sweet treat that’s easy to make, I have just the recipe for you: Lemon Ricotta Cheesecake Bars! These bars blend creamy ricotta with zesty lemon for a dessert that’s both tangy and rich. In this post, I’ll guide you through simple steps, offer helpful tips, and share fun variations. Get ready to impress your friends and family with a delightful treat that’s sure to brighten any day!
Ingredients
List of Necessary Ingredients
To make these delightful lemon ricotta cheesecake bars, gather the following ingredients:
– 1 ½ cups ricotta cheese
– 1 cup cream cheese, softened
– 1 cup granulated sugar
– 3 large eggs
– Zest of 2 large lemons
– ⅓ cup freshly squeezed lemon juice
– 1 teaspoon vanilla extract
– ½ cup all-purpose flour
– ½ teaspoon baking powder
– A pinch of salt
– 1 tablespoon butter (for greasing the pan)
These simple ingredients come together to create a creamy, zesty treat.
Ingredient Substitutes and Recommendations
If you need alternatives, consider these:
– Replace ricotta with cottage cheese for a lighter version.
– Use Greek yogurt instead of cream cheese for a tangy twist.
– If you want it sweeter, add a bit more sugar.
– For a gluten-free option, swap all-purpose flour with almond flour or a gluten-free blend.
These swaps can change the taste and texture, so choose based on your needs.
Importance of Quality Ingredients
Using high-quality ingredients makes a big difference. Fresh ricotta and cream cheese provide the best flavor. Fresh lemons give a bright, zesty taste that bottled juice can’t match.
When you pick quality, you ensure each bite is rich and flavorful. Good ingredients lead to a more enjoyable dessert. For the best results, don’t skimp on quality.
Step-by-Step Instructions
Preparation Stage and Preheating
Begin by gathering all your ingredients. Preheat your oven to 325°F (163°C). This is a key step; it helps the bars cook evenly. Grease a 9×9 inch baking pan with butter. Now, line it with parchment paper, leaving some paper hanging over the sides. This makes it easy to lift the bars out later.
Mixing and Incorporating Ingredients
In a large bowl, add the ricotta cheese and cream cheese. Use an electric mixer to beat them together until smooth. This mix needs to be creamy for the best texture. Gradually add the granulated sugar. Keep mixing until the sugar blends in well. Next, add the eggs, one by one. Mix on low speed after each egg until just combined. Now, stir in the lemon zest, lemon juice, and vanilla extract. This adds a bright flavor to your bars.
In another bowl, whisk together the flour, baking powder, and a pinch of salt. Gradually fold this dry mix into the wet mixture. Be careful not to over mix; this can make the bars tough.
Baking Process and Cooling Time
Pour the cheesecake batter into your prepared pan. Spread it evenly across the surface. Place it in the oven and bake for 35-40 minutes. The edges should be set, and the center should jiggle a bit. The top will turn lightly golden. Once baked, take it out of the oven. Let it cool in the pan for about 1 hour. After that, pop it into the fridge for at least 4 hours or overnight for the best taste and texture. When you are ready, lift the cheesecake out using the parchment paper. Cut into bars and enjoy this delightful treat!
Tips & Tricks
Achieving the Perfect Texture
To get that creamy texture, make sure your ricotta and cream cheese are soft. I suggest leaving them out for about 30 minutes before you start. This helps them blend easily. When mixing, use a medium speed. Beat until the mixture is smooth and free of lumps. Do not over mix after adding the flour. This keeps your bars light and fluffy.
Common Mistakes to Avoid
One big mistake is using cold ingredients. Cold cheese won’t mix well, and your bars may turn out lumpy. Another mistake is baking too long. Overbaking dries out the bars. Look for the edges to set with a slight jiggle in the center. Always let your bars cool before cutting. This helps them hold their shape.
Presentation Tips for Serving
To make your cheesecake bars look great, dust them with powdered sugar right before serving. This adds a nice touch and a bit of sweetness. You can also add a thin slice of lemon and a sprig of mint on top. These little details make your bars not just tasty but beautiful too.
Variations
Flavor Additions and Modifications
You can easily change the flavor of these Lemon Ricotta Cheesecake Bars. Try adding fresh berries like blueberries or raspberries. This gives a fruity twist. You can also mix in a bit of almond extract for a nutty flavor. Another fun option is to swirl in some chocolate or caramel before baking. Each change brings new taste and joy.
Gluten-Free and Dairy-Free Options
If you need a gluten-free version, swap the all-purpose flour with almond flour or gluten-free flour mix. This keeps the bars tasty and light. For a dairy-free option, use dairy-free cream cheese and ricotta. They work well and maintain the creamy texture. These swaps ensure everyone can enjoy this treat.
Seasonal Variations for Different Occasions
Change the lemon for other fruits to match the seasons! In summer, try strawberries or peaches for a refreshing taste. In fall, use pumpkin puree with spices for a cozy vibe. During winter, citrus like blood oranges can add a unique flair. These seasonal changes let you celebrate with flavors all year round.
Storage Info
Best Practices for Storing Leftovers
To keep your Lemon Ricotta Cheesecake Bars fresh, place them in an airtight container. Line the container with parchment paper for easy removal. Store them in the fridge for up to five days. This helps maintain their creamy texture and bright flavor.
Freezing Instructions
If you want to save some bars for later, freezing is a great option. First, cut the bars into pieces. Wrap each piece tightly with plastic wrap to prevent freezer burn. Then, place the wrapped bars in a freezer-safe container. They can last in the freezer for up to three months.
Thawing and Reheating Tips
When you’re ready to enjoy your frozen bars, take them out of the freezer. Let them thaw in the fridge overnight. If you want to serve them warm, you can microwave each bar for about 10-15 seconds. This will give you a soft, delightful treat again.
FAQs
How to make Lemon Ricotta Cheesecake Bars gluten-free?
To make Lemon Ricotta Cheesecake Bars gluten-free, simply swap the all-purpose flour. Use almond flour or coconut flour instead. These options work well and keep the bars light. You may need to adjust the amount slightly. Almond flour is denser, so use less than the recipe calls for. Coconut flour is very absorbent, so use more liquid if you choose this.
Can I use other cheeses instead of ricotta?
Yes, you can use other cheeses. Cream cheese works nicely on its own. Mascarpone is another great choice for smoothness. Both add a rich flavor but keep the texture creamy. If you want a lighter option, try cottage cheese. Blend it well to avoid lumps. Each cheese will change the taste, so choose what you like best!
What can I serve with Lemon Ricotta Cheesecake Bars?
These cheesecake bars pair well with fresh fruits. Strawberries, blueberries, or raspberries make great choices. You can also add a dollop of whipped cream on top. A drizzle of honey or a berry sauce adds sweetness, too. For a crunchy touch, serve with crushed nuts or granola on the side. This adds texture and complements the creamy bars perfectly.
You learned about the key ingredients, substitutes, and the importance of quality. We discussed easy steps for mixing, baking, and cooling your treats. I shared tips to help you avoid errors and make your dessert shine. You can also explore fun variations and proper storage methods for leftovers.
Always remember, good cooking starts with the right ingredients and knowledge. Enjoy your baking journey and the tasty results!
![To make these delightful lemon ricotta cheesecake bars, gather the following ingredients: - 1 ½ cups ricotta cheese - 1 cup cream cheese, softened - 1 cup granulated sugar - 3 large eggs - Zest of 2 large lemons - ⅓ cup freshly squeezed lemon juice - 1 teaspoon vanilla extract - ½ cup all-purpose flour - ½ teaspoon baking powder - A pinch of salt - 1 tablespoon butter (for greasing the pan) These simple ingredients come together to create a creamy, zesty treat. If you need alternatives, consider these: - Replace ricotta with cottage cheese for a lighter version. - Use Greek yogurt instead of cream cheese for a tangy twist. - If you want it sweeter, add a bit more sugar. - For a gluten-free option, swap all-purpose flour with almond flour or a gluten-free blend. These swaps can change the taste and texture, so choose based on your needs. Using high-quality ingredients makes a big difference. Fresh ricotta and cream cheese provide the best flavor. Fresh lemons give a bright, zesty taste that bottled juice can't match. When you pick quality, you ensure each bite is rich and flavorful. Good ingredients lead to a more enjoyable dessert. For the best results, don’t skimp on quality. Begin by gathering all your ingredients. Preheat your oven to 325°F (163°C). This is a key step; it helps the bars cook evenly. Grease a 9x9 inch baking pan with butter. Now, line it with parchment paper, leaving some paper hanging over the sides. This makes it easy to lift the bars out later. In a large bowl, add the ricotta cheese and cream cheese. Use an electric mixer to beat them together until smooth. This mix needs to be creamy for the best texture. Gradually add the granulated sugar. Keep mixing until the sugar blends in well. Next, add the eggs, one by one. Mix on low speed after each egg until just combined. Now, stir in the lemon zest, lemon juice, and vanilla extract. This adds a bright flavor to your bars. In another bowl, whisk together the flour, baking powder, and a pinch of salt. Gradually fold this dry mix into the wet mixture. Be careful not to over mix; this can make the bars tough. Pour the cheesecake batter into your prepared pan. Spread it evenly across the surface. Place it in the oven and bake for 35-40 minutes. The edges should be set, and the center should jiggle a bit. The top will turn lightly golden. Once baked, take it out of the oven. Let it cool in the pan for about 1 hour. After that, pop it into the fridge for at least 4 hours or overnight for the best taste and texture. When you are ready, lift the cheesecake out using the parchment paper. Cut into bars and enjoy this delightful treat! For the full recipe, refer to the ingredients section above. To get that creamy texture, make sure your ricotta and cream cheese are soft. I suggest leaving them out for about 30 minutes before you start. This helps them blend easily. When mixing, use a medium speed. Beat until the mixture is smooth and free of lumps. Do not over mix after adding the flour. This keeps your bars light and fluffy. One big mistake is using cold ingredients. Cold cheese won’t mix well, and your bars may turn out lumpy. Another mistake is baking too long. Overbaking dries out the bars. Look for the edges to set with a slight jiggle in the center. Always let your bars cool before cutting. This helps them hold their shape. To make your cheesecake bars look great, dust them with powdered sugar right before serving. This adds a nice touch and a bit of sweetness. You can also add a thin slice of lemon and a sprig of mint on top. These little details make your bars not just tasty but beautiful too. For the full recipe, refer to the recipe section above. {{image_2}} You can easily change the flavor of these Lemon Ricotta Cheesecake Bars. Try adding fresh berries like blueberries or raspberries. This gives a fruity twist. You can also mix in a bit of almond extract for a nutty flavor. Another fun option is to swirl in some chocolate or caramel before baking. Each change brings new taste and joy. If you need a gluten-free version, swap the all-purpose flour with almond flour or gluten-free flour mix. This keeps the bars tasty and light. For a dairy-free option, use dairy-free cream cheese and ricotta. They work well and maintain the creamy texture. These swaps ensure everyone can enjoy this treat. Change the lemon for other fruits to match the seasons! In summer, try strawberries or peaches for a refreshing taste. In fall, use pumpkin puree with spices for a cozy vibe. During winter, citrus like blood oranges can add a unique flair. These seasonal changes let you celebrate with flavors all year round. For the full recipe, you can refer to the [Full Recipe]. To keep your Lemon Ricotta Cheesecake Bars fresh, place them in an airtight container. Line the container with parchment paper for easy removal. Store them in the fridge for up to five days. This helps maintain their creamy texture and bright flavor. If you want to save some bars for later, freezing is a great option. First, cut the bars into pieces. Wrap each piece tightly with plastic wrap to prevent freezer burn. Then, place the wrapped bars in a freezer-safe container. They can last in the freezer for up to three months. When you're ready to enjoy your frozen bars, take them out of the freezer. Let them thaw in the fridge overnight. If you want to serve them warm, you can microwave each bar for about 10-15 seconds. This will give you a soft, delightful treat again. For the complete recipe, check the Full Recipe section! To make Lemon Ricotta Cheesecake Bars gluten-free, simply swap the all-purpose flour. Use almond flour or coconut flour instead. These options work well and keep the bars light. You may need to adjust the amount slightly. Almond flour is denser, so use less than the recipe calls for. Coconut flour is very absorbent, so use more liquid if you choose this. Yes, you can use other cheeses. Cream cheese works nicely on its own. Mascarpone is another great choice for smoothness. Both add a rich flavor but keep the texture creamy. If you want a lighter option, try cottage cheese. Blend it well to avoid lumps. Each cheese will change the taste, so choose what you like best! These cheesecake bars pair well with fresh fruits. Strawberries, blueberries, or raspberries make great choices. You can also add a dollop of whipped cream on top. A drizzle of honey or a berry sauce adds sweetness, too. For a crunchy touch, serve with crushed nuts or granola on the side. This adds texture and complements the creamy bars perfectly. You learned about the key ingredients, substitutes, and the importance of quality. We discussed easy steps for mixing, baking, and cooling your treats. I shared tips to help you avoid errors and make your dessert shine. You can also explore fun variations and proper storage methods for leftovers. Always remember, good cooking starts with the right ingredients and knowledge. Enjoy your baking journey and the tasty results!](https://pureeatsnow.com/wp-content/uploads/2025/06/dfcc5ec9-4530-49dc-839e-b39a40f79ba3-250x250.webp)
