Greek Veggie Stuffed Pitas Flavorful and Healthy Meal

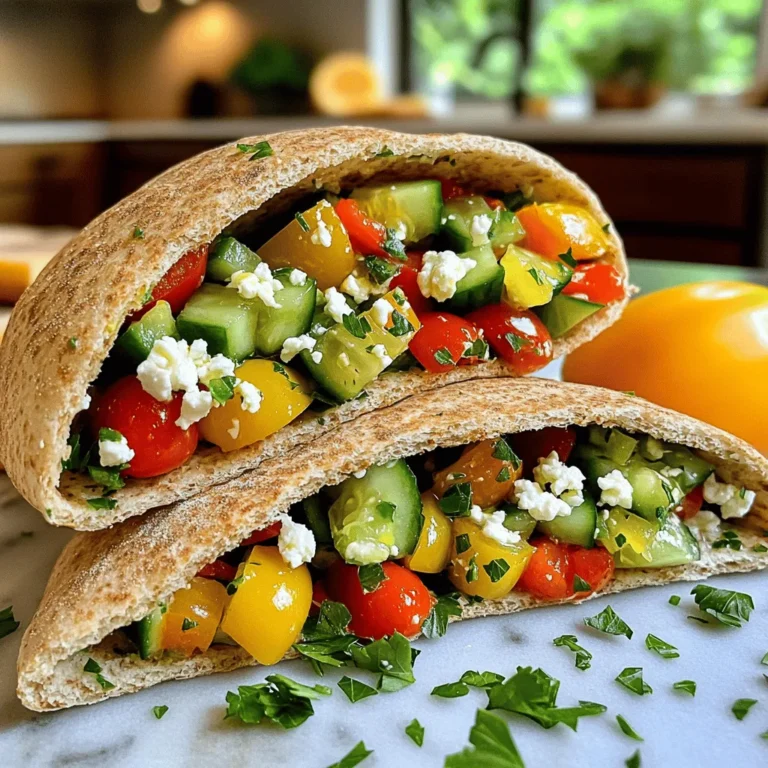
Looking for a tasty, healthy meal that’s easy to make? Greek Veggie Stuffed Pitas are your answer! Bursting with fresh veggies, fluffy quinoa, and tangy feta, these pitas are packed with flavor. Whether you’re a busy parent or a student on the go, this dish fits right into your lifestyle. Let’s dive into the fresh flavors and simple steps that will make your taste buds dance!

Ingredients

Main Ingredients

– 4 whole wheat pitas

– 1 cup cooked quinoa

– 1 cup cucumber, diced

– 1 cup cherry tomatoes, halved

– 1/2 red onion, finely chopped

– 1 cup bell peppers, diced

– 1/2 cup Kalamata olives, pitted and sliced

– 1 cup feta cheese, crumbled

– 1/4 cup fresh parsley, chopped

These ingredients make a colorful and tasty meal. Whole wheat pitas add fiber and nutrients. Quinoa brings protein and a nutty flavor. Fresh vegetables like cucumber and bell peppers give crunch. Cherry tomatoes add sweetness and color. Red onion adds a slight bite. Kalamata olives contribute a briny taste, and feta cheese adds creaminess.

Additional Seasonings

– 2 tablespoons olive oil

– 2 tablespoons lemon juice

– Salt and pepper to taste

Olive oil adds richness. Lemon juice gives a fresh, zesty touch. Salt and pepper enhance all the flavors. Together, they create a balanced taste for the filling. You can find the full recipe in the mentioned section.

Step-by-Step Instructions

Preparation of the Veggie Filling

First, I gather all the fresh veggies. I use a large bowl to mix everything. I add 1 cup of cooked quinoa to the bowl. Then, I chop 1 cup of cucumber, dice 1 cup of bell peppers, and halve 1 cup of cherry tomatoes. I finely chop 1/2 red onion and toss all the veggies into the bowl.

Next, I add 1/2 cup of sliced Kalamata olives. I sprinkle in 1 cup of crumbled Feta cheese. For flavor, I drizzle 2 tablespoons of olive oil and 2 tablespoons of lemon juice over the mixture. Finally, I season with salt and pepper to taste. I toss everything gently until it blends well.

Assembling the Pitas

Now, I prepare the pitas. I slice 4 whole wheat pitas in half to create pockets. I carefully stuff each half with the veggie filling. I make sure to fill them generously but not too much. This keeps everything inside without spilling.

If I want a crispy texture, I can toast the stuffed pitas. I heat a skillet over medium heat. I place the pitas in the skillet and toast them for 1-2 minutes on each side.

Serving Suggestions

When I serve the stuffed pitas, I love to garnish them. Fresh parsley adds a nice touch. I also enjoy pairing them with dips or salads. Tzatziki or hummus makes a great addition. You can serve these pitas warm or at room temperature. Enjoy the fresh flavors and healthy ingredients in every bite! For the full details, check out the Full Recipe.

Tips & Tricks

Customization Options

You can easily customize Greek Veggie Stuffed Pitas. Adding proteins makes them heartier. Try grilled chicken, shrimp, or chickpeas. You can also use different vegetables. Spinach, zucchini, or roasted eggplant work well.

For a vegan option, replace the feta cheese with cashew cheese or a tofu crumble. These alternatives still give you that creamy texture. You can mix in nutritional yeast for a cheesy flavor without dairy.

Key Cooking Techniques

To get the perfect pita texture, warm them slightly before stuffing. This makes them soft and easy to work with. You can use a skillet to heat them for a minute on each side.

When mixing the filling, gently toss the ingredients. This helps keep the veggies intact. If you stir too hard, you might squash them. Aim for a colorful and vibrant mix.

Meal Prep Recommendations

Preparing the filling ahead of time is a great idea. You can store it in the fridge for up to three days. This makes it easy to whip up pitas quickly.

For storing stuffed pitas, wrap them tightly in foil or plastic wrap. They can last in the fridge for two days. If you want to eat them later, avoid adding fresh vegetables until you’re ready to serve. For the full recipe, check out the details above!

Variations

Different Fillings

You can change the filling to keep things exciting. For a Mediterranean twist, try adding artichokes or roasted vegetables. These add a unique taste and texture. You can also spice things up. Use jalapeños for heat or spicy feta for a zesty kick. Both options will make your stuffed pitas pop with flavor.

Alternative Breads

If you want a gluten-free option, use gluten-free pitas. They work just as well and taste great. You can also explore using wraps or lettuce cups. These alternatives give a fresh twist and can be lighter. They allow you to enjoy the same delicious filling while mixing up the experience.

Dressings and Sauces

Pair your stuffed pitas with tasty sauces. Tzatziki is a classic choice, with its cool and tangy flavor. Hummus also adds a creamy touch that complements the veggies. If you want to change it up, try vinaigrettes. They can add a burst of flavor and a different texture. Experiment with your favorites to find the perfect match!

Storage Info

Refrigeration Guidelines

To store leftover stuffed pitas, first let them cool down. Place them in an airtight container. This keeps them fresh for up to three days. I prefer using glass containers for easy viewing. You can also wrap them in plastic wrap or foil if you don’t have containers. Just make sure to press out any air before sealing.

Freezing Options

For freezing unstuffed pitas, stack them with parchment paper between each pita. This prevents them from sticking together. Place the stack in a freezer-safe bag or container. They will last for about three months.

To reheat frozen fillings, thaw them in the fridge overnight. When ready to eat, warm them in a skillet over medium heat. Stir until heated through. You can also microwave them for a quick option, but stirring halfway through helps them heat evenly.

FAQs

How long do Greek Veggie Stuffed Pitas last in the fridge?

Greek Veggie Stuffed Pitas stay fresh for about 3 to 5 days in the fridge. Store them in an airtight container. This keeps the pitas soft and the filling tasty.

Can I make Greek Veggie Stuffed Pitas ahead of time?

Yes, you can prepare the filling ahead. Keep the filling in the fridge and stuff the pitas just before serving. This keeps the pitas from getting soggy. You can make the filling up to two days in advance.

What can I substitute for quinoa?

If you don’t have quinoa, try using couscous or brown rice. Both give a nice texture and flavor. You can also use lentils for a protein boost and a different taste.

Are Greek Veggie Stuffed Pitas suitable for a vegan diet?

Yes, Greek Veggie Stuffed Pitas can be vegan! Just skip the Feta cheese. You can use a vegan cheese or add more veggies for flavor. The olives and herbs add great taste too.

How can I elevate the flavor of the filling?

To make the filling pop, try adding spices like oregano or cumin. A dash of red pepper flakes adds heat. You can also mix in some sun-dried tomatoes for a sweet tang. Drizzling extra lemon juice right before serving brightens the taste. For the full recipe, check out the instructions above.

Greek veggie stuffed pitas mix whole wheat pitas, quinoa, and fresh veggies. You can customize with olives, feta, and seasonings. Follow easy steps to prepare and serve them. Meal prep makes these pitas a quick option for busy days.

Explore variations with different fillings and sauces. Store leftovers safely or freeze for later use. These pitas are not only tasty but also healthy. Enjoy creating meals that fit your lifestyle and taste!

- 4 whole wheat pitas - 1 cup cooked quinoa - 1 cup cucumber, diced - 1 cup cherry tomatoes, halved - 1/2 red onion, finely chopped - 1 cup bell peppers, diced - 1/2 cup Kalamata olives, pitted and sliced - 1 cup feta cheese, crumbled - 1/4 cup fresh parsley, chopped These ingredients make a colorful and tasty meal. Whole wheat pitas add fiber and nutrients. Quinoa brings protein and a nutty flavor. Fresh vegetables like cucumber and bell peppers give crunch. Cherry tomatoes add sweetness and color. Red onion adds a slight bite. Kalamata olives contribute a briny taste, and feta cheese adds creaminess. - 2 tablespoons olive oil - 2 tablespoons lemon juice - Salt and pepper to taste Olive oil adds richness. Lemon juice gives a fresh, zesty touch. Salt and pepper enhance all the flavors. Together, they create a balanced taste for the filling. You can find the full recipe in the mentioned section. First, I gather all the fresh veggies. I use a large bowl to mix everything. I add 1 cup of cooked quinoa to the bowl. Then, I chop 1 cup of cucumber, dice 1 cup of bell peppers, and halve 1 cup of cherry tomatoes. I finely chop 1/2 red onion and toss all the veggies into the bowl. Next, I add 1/2 cup of sliced Kalamata olives. I sprinkle in 1 cup of crumbled Feta cheese. For flavor, I drizzle 2 tablespoons of olive oil and 2 tablespoons of lemon juice over the mixture. Finally, I season with salt and pepper to taste. I toss everything gently until it blends well. Now, I prepare the pitas. I slice 4 whole wheat pitas in half to create pockets. I carefully stuff each half with the veggie filling. I make sure to fill them generously but not too much. This keeps everything inside without spilling. If I want a crispy texture, I can toast the stuffed pitas. I heat a skillet over medium heat. I place the pitas in the skillet and toast them for 1-2 minutes on each side. When I serve the stuffed pitas, I love to garnish them. Fresh parsley adds a nice touch. I also enjoy pairing them with dips or salads. Tzatziki or hummus makes a great addition. You can serve these pitas warm or at room temperature. Enjoy the fresh flavors and healthy ingredients in every bite! For the full details, check out the Full Recipe. You can easily customize Greek Veggie Stuffed Pitas. Adding proteins makes them heartier. Try grilled chicken, shrimp, or chickpeas. You can also use different vegetables. Spinach, zucchini, or roasted eggplant work well. For a vegan option, replace the feta cheese with cashew cheese or a tofu crumble. These alternatives still give you that creamy texture. You can mix in nutritional yeast for a cheesy flavor without dairy. To get the perfect pita texture, warm them slightly before stuffing. This makes them soft and easy to work with. You can use a skillet to heat them for a minute on each side. When mixing the filling, gently toss the ingredients. This helps keep the veggies intact. If you stir too hard, you might squash them. Aim for a colorful and vibrant mix. Preparing the filling ahead of time is a great idea. You can store it in the fridge for up to three days. This makes it easy to whip up pitas quickly. For storing stuffed pitas, wrap them tightly in foil or plastic wrap. They can last in the fridge for two days. If you want to eat them later, avoid adding fresh vegetables until you're ready to serve. For the full recipe, check out the details above! {{image_2}} You can change the filling to keep things exciting. For a Mediterranean twist, try adding artichokes or roasted vegetables. These add a unique taste and texture. You can also spice things up. Use jalapeños for heat or spicy feta for a zesty kick. Both options will make your stuffed pitas pop with flavor. If you want a gluten-free option, use gluten-free pitas. They work just as well and taste great. You can also explore using wraps or lettuce cups. These alternatives give a fresh twist and can be lighter. They allow you to enjoy the same delicious filling while mixing up the experience. Pair your stuffed pitas with tasty sauces. Tzatziki is a classic choice, with its cool and tangy flavor. Hummus also adds a creamy touch that complements the veggies. If you want to change it up, try vinaigrettes. They can add a burst of flavor and a different texture. Experiment with your favorites to find the perfect match! To store leftover stuffed pitas, first let them cool down. Place them in an airtight container. This keeps them fresh for up to three days. I prefer using glass containers for easy viewing. You can also wrap them in plastic wrap or foil if you don't have containers. Just make sure to press out any air before sealing. For freezing unstuffed pitas, stack them with parchment paper between each pita. This prevents them from sticking together. Place the stack in a freezer-safe bag or container. They will last for about three months. To reheat frozen fillings, thaw them in the fridge overnight. When ready to eat, warm them in a skillet over medium heat. Stir until heated through. You can also microwave them for a quick option, but stirring halfway through helps them heat evenly. Greek Veggie Stuffed Pitas stay fresh for about 3 to 5 days in the fridge. Store them in an airtight container. This keeps the pitas soft and the filling tasty. Yes, you can prepare the filling ahead. Keep the filling in the fridge and stuff the pitas just before serving. This keeps the pitas from getting soggy. You can make the filling up to two days in advance. If you don’t have quinoa, try using couscous or brown rice. Both give a nice texture and flavor. You can also use lentils for a protein boost and a different taste. Yes, Greek Veggie Stuffed Pitas can be vegan! Just skip the Feta cheese. You can use a vegan cheese or add more veggies for flavor. The olives and herbs add great taste too. To make the filling pop, try adding spices like oregano or cumin. A dash of red pepper flakes adds heat. You can also mix in some sun-dried tomatoes for a sweet tang. Drizzling extra lemon juice right before serving brightens the taste. For the full recipe, check out the instructions above. Greek veggie stuffed pitas mix whole wheat pitas, quinoa, and fresh veggies. You can customize with olives, feta, and seasonings. Follow easy steps to prepare and serve them. Meal prep makes these pitas a quick option for busy days. Explore variations with different fillings and sauces. Store leftovers safely or freeze for later use. These pitas are not only tasty but also healthy. Enjoy creating meals that fit your lifestyle and taste!

Greek Veggie Stuffed Pitas

Discover the delightful taste of Greek Veggie Stuffed Pitas in just 30 minutes! This healthy and satisfying recipe features whole wheat pitas filled with a colorful mix of quinoa, fresh veggies, Kalamata olives, and Feta cheese, all drizzled with zesty lemon and olive oil. Perfect for a quick lunch or a light dinner, these pitas are both nutritious and delicious. Click through to explore this easy recipe and enjoy a burst of Mediterranean flavors!

Ingredients
  

4 whole wheat pitas

1 cup cooked quinoa

1 cup cucumber, diced

1 cup cherry tomatoes, halved

1/2 red onion, finely chopped

1 cup bell peppers (any color), diced

1/2 cup Kalamata olives, pitted and sliced

1 cup Feta cheese, crumbled

1/4 cup fresh parsley, chopped

2 tablespoons olive oil

2 tablespoons lemon juice

Salt and pepper to taste

Instructions
 

In a large mixing bowl, combine the cooked quinoa, diced cucumber, halved cherry tomatoes, chopped red onion, diced bell peppers, sliced olives, and crumbled Feta cheese.

    Drizzle the olive oil and lemon juice over the mixture, and season with salt and pepper to taste. Toss gently until all ingredients are well combined.

      Slice the pitas in half to form pockets.

        Carefully stuff each pita half with the veggie filling, ensuring they are generously filled but not overstuffed.

          Optionally, you can toast the pitas in a hot skillet for 1-2 minutes on each side for a crispy texture.

            Serve the stuffed pitas warm or at room temperature, garnished with fresh parsley.

              Prep Time: 15 minutes | Total Time: 30 minutes | Servings: 4

                Leave a Comment

                Recipe Rating