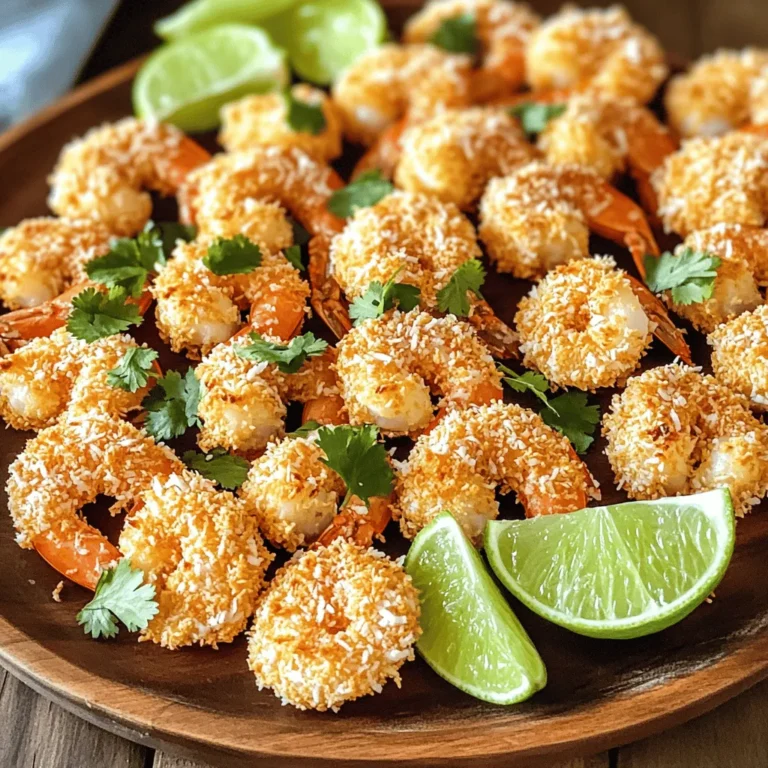
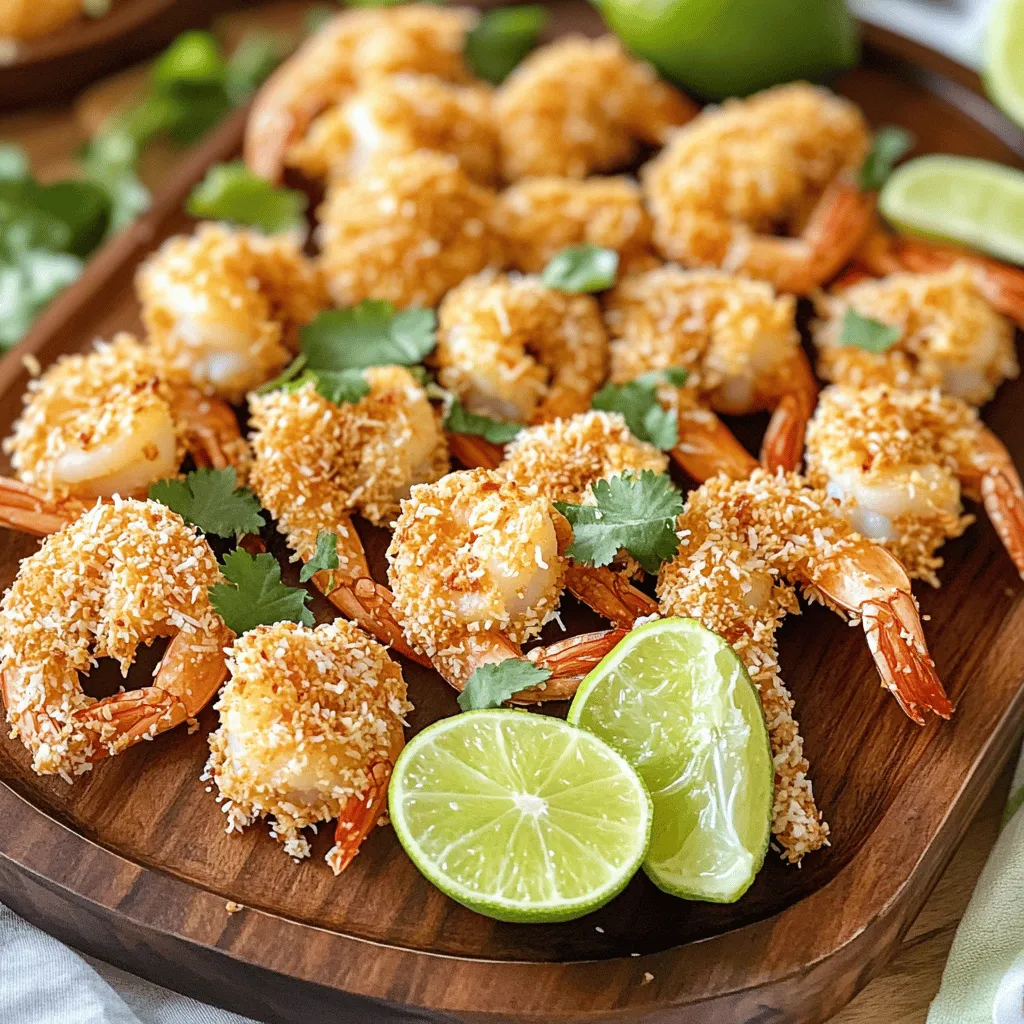
If you crave a tasty and quick meal, then you’ll love this Air Fryer Coconut Shrimp recipe. This dish showcases juicy, tender shrimp coated in a crispy coconut layer. It’s perfect for a snack, a party, or even dinner with loved ones. Ready to impress your friends and family? Let’s dive into how to make this delightful dish that will leave everyone asking for seconds!
Ingredients
List of Ingredients for Air Fryer Coconut Shrimp
To make Air Fryer Coconut Shrimp, gather these key ingredients:
– 1 pound large shrimp, peeled and deveined
– 1 cup all-purpose flour
– 2 large eggs, beaten
– 1 cup shredded coconut (unsweetened)
– 1 cup panko breadcrumbs
– 1 teaspoon garlic powder
– 1 teaspoon paprika
– 1/2 teaspoon salt
– 1/2 teaspoon black pepper
– Coconut oil spray (for greasing)
– Lime wedges (for serving)
Tips for Choosing Fresh Shrimp
When selecting shrimp, freshness is key. Look for shrimp that:
– Have a mild, clean smell.
– Are firm to the touch and not slimy.
– Have a glossy appearance.
– Are still in their shells for maximum freshness.
If you can, buy shrimp from a trusted source. You can also ask your fishmonger about the catch date. Fresh shrimp should be the best for your recipe.
Alternative Ingredients (Gluten-free options, etc.)
If you need gluten-free options, here are some swaps you can use:
– Replace all-purpose flour with almond flour or a gluten-free flour blend.
– Use gluten-free panko breadcrumbs for the coating.
– For a nut-free option, use crushed cornflakes instead of panko.
These alternatives will still give you crispy and tasty shrimp without the gluten. Enjoy your cooking!
Step-by-Step Instructions
Preparing the Shrimp
To make great coconut shrimp, start with fresh shrimp. Rinse one pound of large shrimp under cold water. This helps remove any grit. Next, pat the shrimp dry using paper towels. Dry shrimp hold the coating better. You want them ready for the breading.
Setting Up the Breading Station
Now, set up your breading station. Grab three bowls. In the first bowl, add one cup of all-purpose flour. This will be your first coating. In the second bowl, beat two large eggs. This is your binding agent. In the third bowl, mix one cup of shredded coconut, one cup of panko breadcrumbs, one teaspoon of garlic powder, one teaspoon of paprika, half a teaspoon of salt, and half a teaspoon of black pepper. This mixture gives the shrimp a tasty crunch.
Cooking in the Air Fryer
Next, preheat your air fryer to 380°F (193°C). This should take about five minutes. While it heats, dredge each shrimp in flour, shaking off any extra. Then dip the shrimp in the beaten eggs. Finally, coat the shrimp in the coconut-panko mix. Press gently to make sure it sticks well.
Once your shrimp are breaded, lightly spray the air fryer basket with coconut oil. This stops the shrimp from sticking. Arrange the shrimp in a single layer, leaving space between each piece. Air fry them for about 8-10 minutes. Flip the shrimp halfway through cooking. They should turn golden brown and crispy. Cooking times may differ based on your air fryer, so keep an eye on them.
After cooking, remove the shrimp and let them rest for one minute. Serve with lime wedges for a fresh burst of flavor. Enjoy your crispy, delightful coconut shrimp!
Tips & Tricks
Achieving Perfectly Crispy Coconut Shrimp
To get crispy coconut shrimp, follow these steps closely. First, rinse the shrimp well and pat them dry. This helps the coating stick. Use fresh, large shrimp for the best flavor. When you coat the shrimp, do it in this order: flour, egg, then coconut-panko mix. Press gently to make sure the coating sticks.
Preheat your air fryer to 380°F (193°C). This step is key to perfect crispness. Place the shrimp in a single layer in the basket. Make sure they are not touching each other. This allows hot air to circulate and cook them evenly. Spray the basket lightly with coconut oil. This helps create that golden crisp.
How to Avoid Common Air Fryer Mistakes
Avoid overcrowding the air fryer basket. If you put too many shrimp in at once, they won’t cook well. Each shrimp needs space for hot air to flow. Also, don’t skip preheating. It makes a big difference in cooking time and texture. Keep an eye on the shrimp while they cook, flipping them halfway through. This helps them brown evenly.
Recommended Sides and Dipping Sauces
For sides, fresh salad or coleslaw pairs well with coconut shrimp. You can also serve them with rice or quinoa for a filling meal.
For dipping sauces, sweet chili sauce adds a nice kick. A homemade lime aioli is a tasty option too. Just mix mayonnaise with lime juice and zest for a creamy dip. Serve lime wedges on the side for an extra zesty flavor.
Variations
Spicy Coconut Shrimp Variation
To give your coconut shrimp a kick, try adding spice. Mix in cayenne pepper or hot sauce. You can sprinkle cayenne into the flour or the coconut-panko mix. This adds heat without changing the texture. Make sure to taste as you go. You want a nice balance of heat and flavor.
Baked Coconut Shrimp Option
If you prefer baking, you can still achieve crunch. Preheat your oven to 400°F (200°C). Place the shrimp on a lined baking sheet. Spray them lightly with coconut oil. Bake for about 15-20 minutes, flipping halfway. Keep an eye on them until golden brown. They may not be as crispy as air-fried, but they’ll still taste great.
Using Different Coatings
You can experiment with coatings to change the flavor. Almond flour gives a nutty taste. Cornflakes add a fun crunch. For almond flour, use it just like you would flour. For cornflakes, crush them slightly for better adhesion. Each option offers a unique twist to the classic recipe. Enjoy the creativity in your cooking!
Storage Info
How to Store Leftover Coconut Shrimp
To keep your leftover coconut shrimp fresh, place them in an airtight container. Make sure the shrimp cool completely before sealing the container. Store your shrimp in the fridge for up to 2 days. This method helps maintain their crunch and flavor.
Reheating Tips for Best Quality
When you’re ready to enjoy your leftover shrimp, use your air fryer for reheating. Set it to 350°F (175°C). Cook the shrimp for about 4-5 minutes. This helps restore their crispy texture. You can also use an oven, but the air fryer gives the best results.
Freezing Coconut Shrimp for Future Meals
If you want to save coconut shrimp for later, freezing is a great option. First, let the shrimp cool completely. Then, arrange them in a single layer on a baking sheet. Freeze them for about 1-2 hours. Once frozen, transfer them to a freezer-safe bag or container. They can last up to 3 months in the freezer. When you’re ready, cook them straight from frozen in the air fryer. Adjust the cooking time to about 12-15 minutes for best results.
FAQs
How Long Does it Take to Cook Coconut Shrimp in an Air Fryer?
Cooking coconut shrimp in an air fryer takes about 8 to 10 minutes. I suggest preheating your air fryer to 380°F (193°C) before cooking. This ensures even heat distribution. Check the shrimp halfway through and flip them. This helps them cook evenly and get crispy on both sides. Cooking time may vary based on your air fryer model, so keep an eye on them.
Can I Use Frozen Shrimp for This Recipe?
Yes, you can use frozen shrimp! Just make sure to thaw them first. Place the frozen shrimp in the fridge overnight or run them under cold water. After thawing, rinse and dry them well. This step is key for getting the coating to stick. Once the shrimp are dry, you can follow the same steps for breading and cooking.
What are the Best Dipping Sauces for Coconut Shrimp?
I love pairing coconut shrimp with dipping sauces for extra flavor. Here are some great options:
– Sweet chili sauce
– Lime aioli
– Mango chutney
– Spicy remoulade
– Honey mustard sauce
These sauces add a nice contrast to the crispy, sweet shrimp. Try them all and find your favorite!
This blog post covers everything you need for air fryer coconut shrimp. You learned about ingredient choices, tips for fresh shrimp, and alternatives. We walked through easy steps for preparation and cooking. I shared tips for crispy shrimp and how to avoid common mistakes. You also found variations and storage advice for leftovers. Remember, making this dish can be simple and fun. With practice, you’ll impress everyone with your tasty coconut shrimp. Enjoy your cooking adventure!

