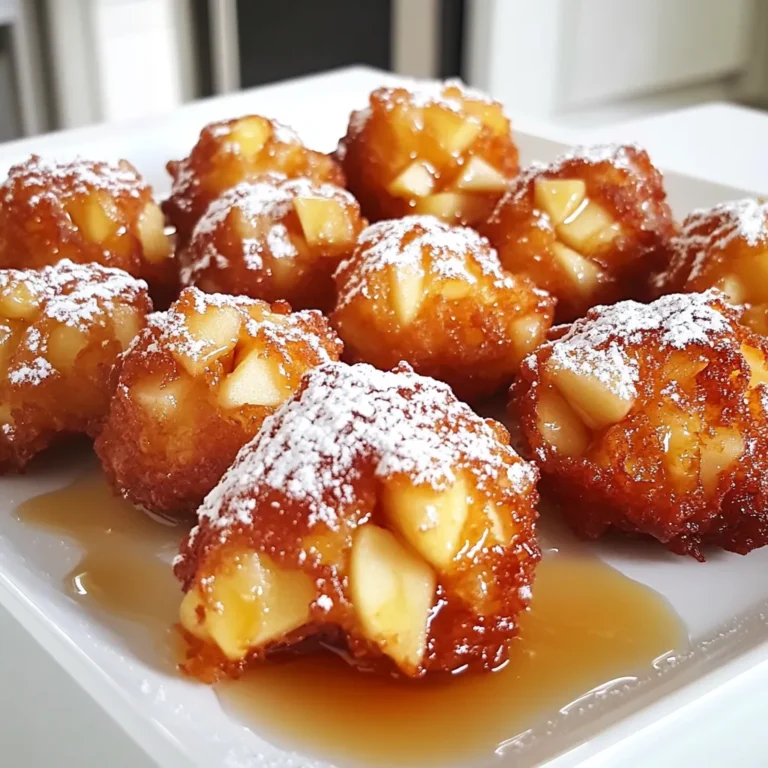
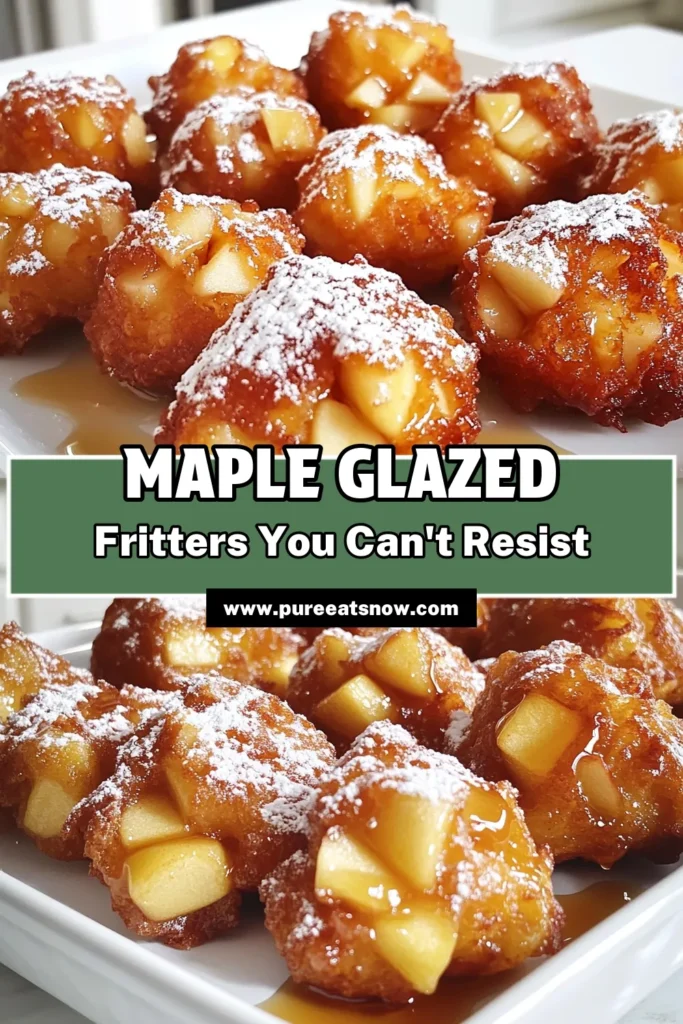
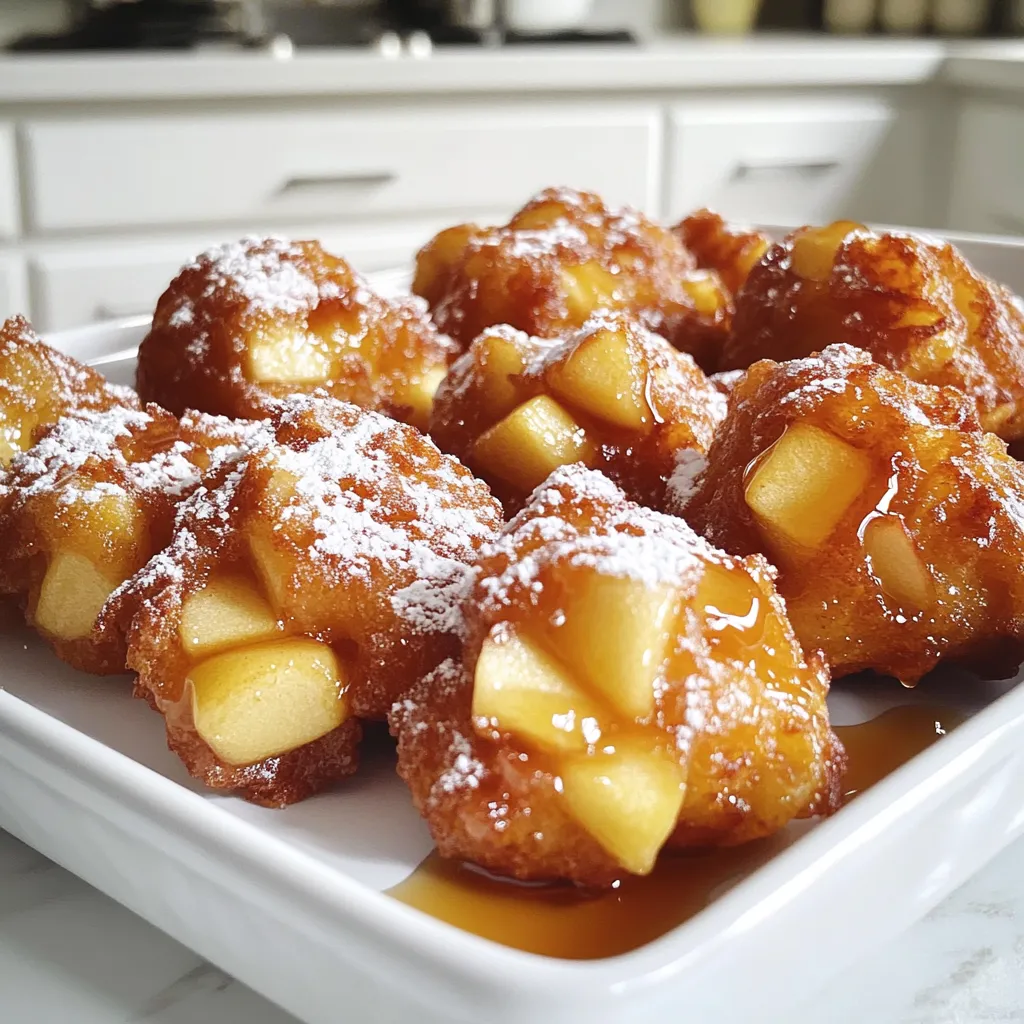
Are you ready to bite into a warm, sweet Maple Glazed Apple Fritter? These treats blend tender apples with a crispy crust, making them simply irresistible. In this post, I’ll guide you through each step, from gathering ingredients to frying up your perfect fritters. Whether you want a delicious snack or a fun dessert, you’ll find everything you need here. Let’s get started on making this tasty, tempting treat!
Ingredients
List of Ingredients
– 2 medium apples (Granny Smith or Honeycrisp)
– 1 cup all-purpose flour
– 1/2 cup granulated sugar
– 1 teaspoon baking powder
– 1/2 teaspoon baking soda
– 1/2 teaspoon ground cinnamon
– 1/4 teaspoon nutmeg
– 1/4 teaspoon salt
– 1/2 cup whole milk
– 1 large egg
– 1 teaspoon vanilla extract
– 1/4 cup maple syrup (plus extra for drizzling)
– Oil for frying
– Powdered sugar for dusting
I love using Granny Smith or Honeycrisp apples for this recipe. They add a nice tartness that works well with the sweet maple glaze.
Measurement Conversions
For different serving sizes, you can easily adjust the ingredients. If you want to make more fritters, just double the amounts.
Tips for measuring ingredients accurately:
– Use dry measuring cups for flour and sugar.
– Level off the top with a knife for precision.
– For liquids, use a clear measuring cup with markings.
Recommended Tools
– Mixing bowls: You’ll need at least two bowls for dry and wet ingredients.
– Whisk: This helps mix the dry ingredients well.
– Heavy-bottomed pot or deep fryer: A good pot ensures even frying.
– Slotted spoon: Use this to lift the fritters out of the oil.
Having the right tools makes the cooking process easier and more fun!
Step-by-Step Instructions
Preparation Steps
Preparing the apples
Start by peeling, coring, and dicing the apples. I suggest using Granny Smith or Honeycrisp for their great flavor. In a medium bowl, mix the diced apples with one tablespoon of sugar. Let this sit for a bit. This helps the apples release their juices, making them sweeter and tastier.
Mixing dry ingredients
In a large bowl, combine the dry ingredients. Use one cup of all-purpose flour, half a cup of granulated sugar, one teaspoon of baking powder, half a teaspoon of baking soda, half a teaspoon of ground cinnamon, a quarter teaspoon of nutmeg, and a quarter teaspoon of salt. Whisk them together until they are mixed well.
Combining Ingredients
Whisking wet ingredients
In another bowl, whisk together the wet ingredients. Use half a cup of whole milk, one large egg, one teaspoon of vanilla extract, and a quarter cup of maple syrup. Make sure everything blends well.
Combining wet and dry mixtures
Gradually pour the wet mixture into the dry ingredients. Stir gently until just combined. It’s okay if there are a few lumps. Next, fold in the diced apples gently. This ensures the apples are evenly spread through the batter.
Frying the Fritters
Heating oil to the right temperature
In a heavy-bottomed pot or a deep fryer, heat the oil to about 350°F (175°C). Make sure there’s enough oil so the fritters can float while frying.
Dropping batter in oil
Using a spoon or small ice cream scoop, carefully drop spoonfuls of the batter into the hot oil. Do not overcrowd the pot. Fry in batches if you need to.
Cooking times for perfect fritters
Fry the fritters for about 3 to 4 minutes on each side. They should turn golden brown and crispy. Use a slotted spoon to gently flip the fritters. Once cooked, move them to a paper towel-lined plate to drain any excess oil.
Tips & Tricks
Achieving Perfect Fritters
To keep your fritters from getting soggy, make sure the oil is hot enough. Heat your oil to 350°F (175°C) before frying. This temperature helps create a crispy outside while keeping the inside soft. If the oil is too cool, the fritters absorb more oil.
For a golden-brown color, watch them closely as they fry. They usually need about 3-4 minutes on each side. Flip them gently with a slotted spoon when they look ready.
Drizzling and Dusting
When drizzling syrup on your fritters, use a spoon to control the flow. Start in the center and swirl outward. This technique ensures even coverage and adds a nice touch.
For dusting with powdered sugar, choose a fine texture. A sifter helps spread it evenly. Dust right before serving to keep it fresh and beautiful.
Serving Suggestions
Try serving fritters on a rustic wooden board. Add extra syrup and powdered sugar on the side. This lets your guests drizzle and sprinkle as they like.
For drinks, pair fritters with hot apple cider or a cold glass of milk. Both drinks enhance the flavor and make for a comforting treat.
Variations
Ingredient Substitutions
You can change the apples in this recipe. Granny Smith gives a tart taste. Honeycrisp offers a sweet crunch. Try Fuji or Gala for something sweeter. Each type of apple gives a different flavor and texture.
You can also use whole wheat flour. This gives your fritters a nutty flavor. If you need gluten-free, almond or oat flour works well. Just remember, the texture may change a bit.
Flavor Enhancements
To make these fritters even better, add spices. A pinch of nutmeg or cloves adds warmth. These spices make each bite more interesting. You can also mix in chopped nuts. Walnuts or pecans add crunch. Dried fruits like raisins or cranberries work too.
Seasonal Variations
As the seasons change, so can your fritters. In fall, try a pumpkin spice version. Add pumpkin puree and more cinnamon for a cozy treat. In summer, make berry fritters. Use fresh blueberries or raspberries for a juicy twist. Each season brings a new way to enjoy these treats!
Storage Info
Short-term Storage
To keep your maple glazed apple fritters fresh for 1-2 days, store them in an airtight container. Place a paper towel at the bottom to absorb moisture. This keeps the fritters from getting soggy. Avoid stacking them too high, as this can flatten the fritters. If you have leftovers, remember to drizzle extra maple syrup on top for an added treat.
Long-term Storage
For long-term storage, you can freeze the fritters. First, let them cool completely. Then, wrap each fritter tightly in plastic wrap. Place the wrapped fritters in a freezer bag or container. They can stay in the freezer for up to 3 months. When you’re ready to enjoy them, just take out what you need and thaw at room temperature.
Reheating Tips
To reheat your fritters and keep them crispy, use an oven. Preheat the oven to 350°F (175°C). Place the fritters on a baking sheet lined with parchment paper. Heat for about 10 minutes, flipping halfway through. This method helps restore their texture and flavor. You can also microwave them for about 20-30 seconds, but they might be softer. Drizzle with maple syrup before serving for that fresh taste!
FAQs
Commonly Asked Questions
Can I make apple fritters in advance?
Yes, you can. Make the batter and keep it in the fridge. Use it within 24 hours for the best taste. You can also fry them and store them in an airtight container. Just reheat in the oven before serving.
How do I know when the oil is hot enough?
To check the oil’s temperature, drop a small amount of batter in it. If it sizzles and rises, the oil is ready. A good temperature is around 350°F (175°C). Use a thermometer for accuracy.
Dietary Concerns
Can these fritters be made vegan?
Yes, you can easily make these fritters vegan. Substitute the egg with a flax egg, which is made from ground flaxseed and water. Use plant-based milk and maple syrup as sweeteners.
Are there gluten-free options available?
Absolutely! You can use a gluten-free all-purpose flour blend instead of regular flour. This will keep the fritters tasty and safe for those who need gluten-free options.
Troubleshooting
Why are my fritters soggy?
Soggy fritters can happen if the oil is not hot enough. Make sure your oil reaches 350°F (175°C). Fry in small batches to avoid crowding, which can lower the oil temperature.
How to fix overmixed batter?
If you overmix the batter, it can become tough. To fix this, gently fold in a bit more flour to absorb excess moisture. Just be careful not to mix too much again. A few lumps are okay!
In this blog post, we explored how to make delicious apple fritters. We covered ingredients, measurement tips, and essential tools. You learned step-by-step instructions for preparing, combining, and frying the fritters perfectly. Plus, I shared useful tips for a great texture and unique serving ideas.
With variations and storage tips, you can enjoy these fritters anytime. Remember, practice makes perfect. Don’t be afraid to get creative with flavors and toppings. Happy cooking!

