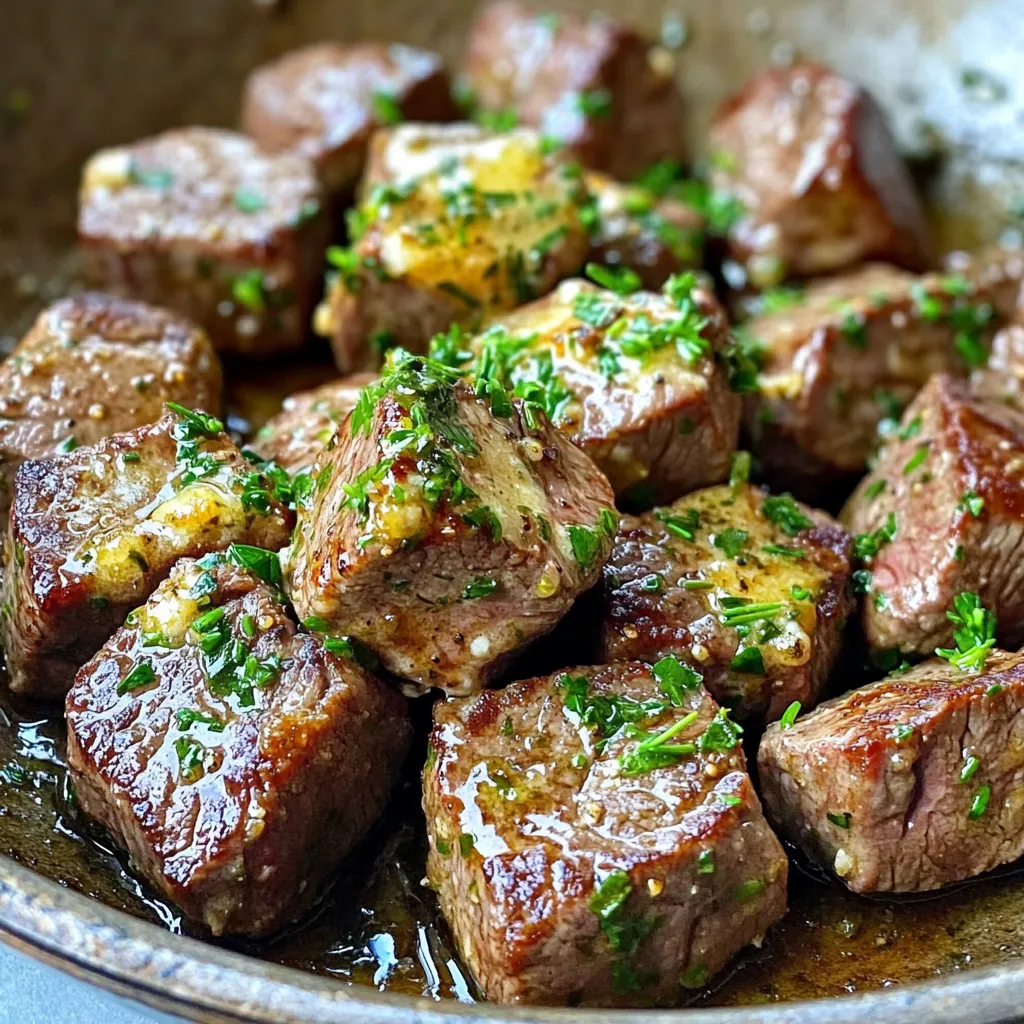
Garlic Herb Butter Steak Bites Savory and Easy Recipe
Are you ready to elevate your weeknight dinners? This Garlic Herb Butter Steak Bites recipe is not only savory and
Are you ready to elevate your weeknight dinners? This Garlic Herb Butter Steak Bites recipe is not only savory and

Looking to spice up your dinner routine? These Savory Sweet Chili Chicken Lettuce Wraps are the perfect answer! With crunchy
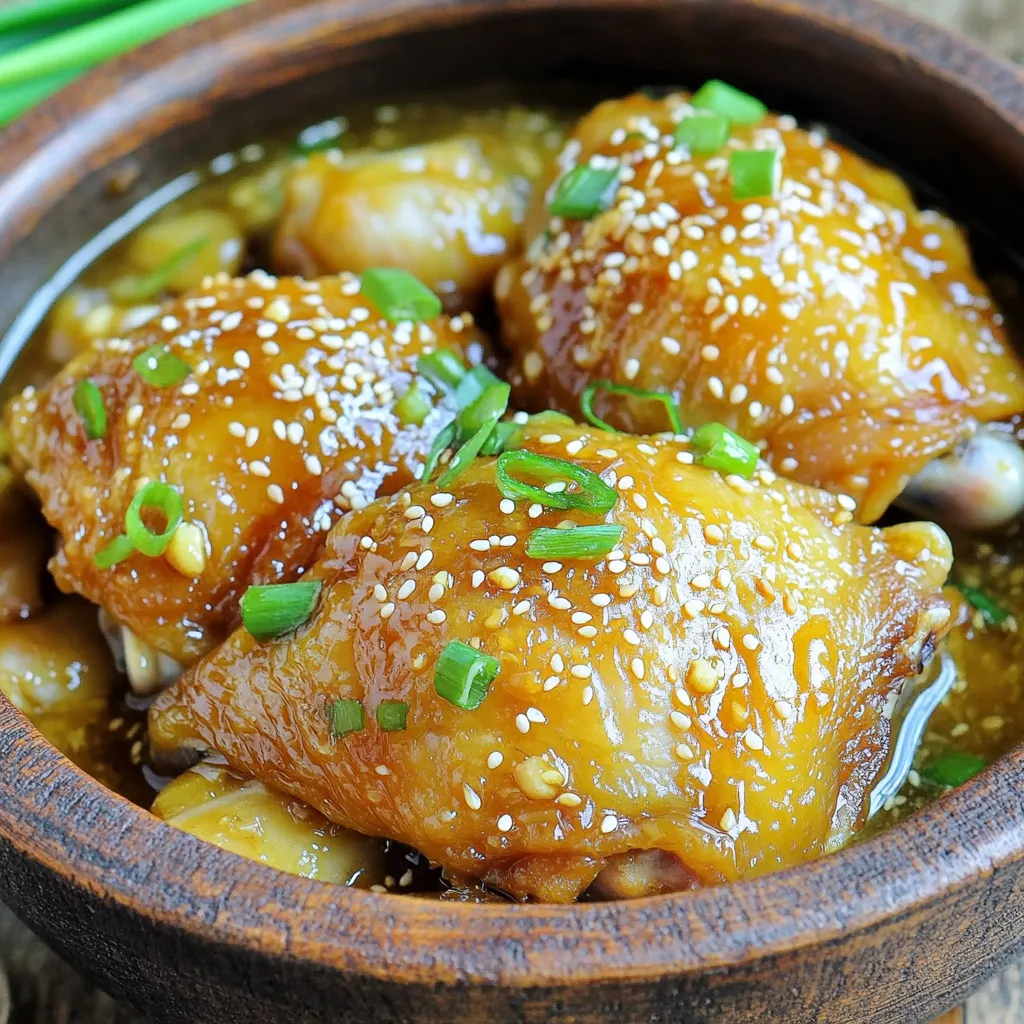
Are you ready to elevate your dinner game? Slow Cooker Honey Garlic Chicken Thighs are a simple, tasty dish that

Get ready to spice up taco night with these Air Fryer Buffalo Cauliflower Tacos! They are easy to make and
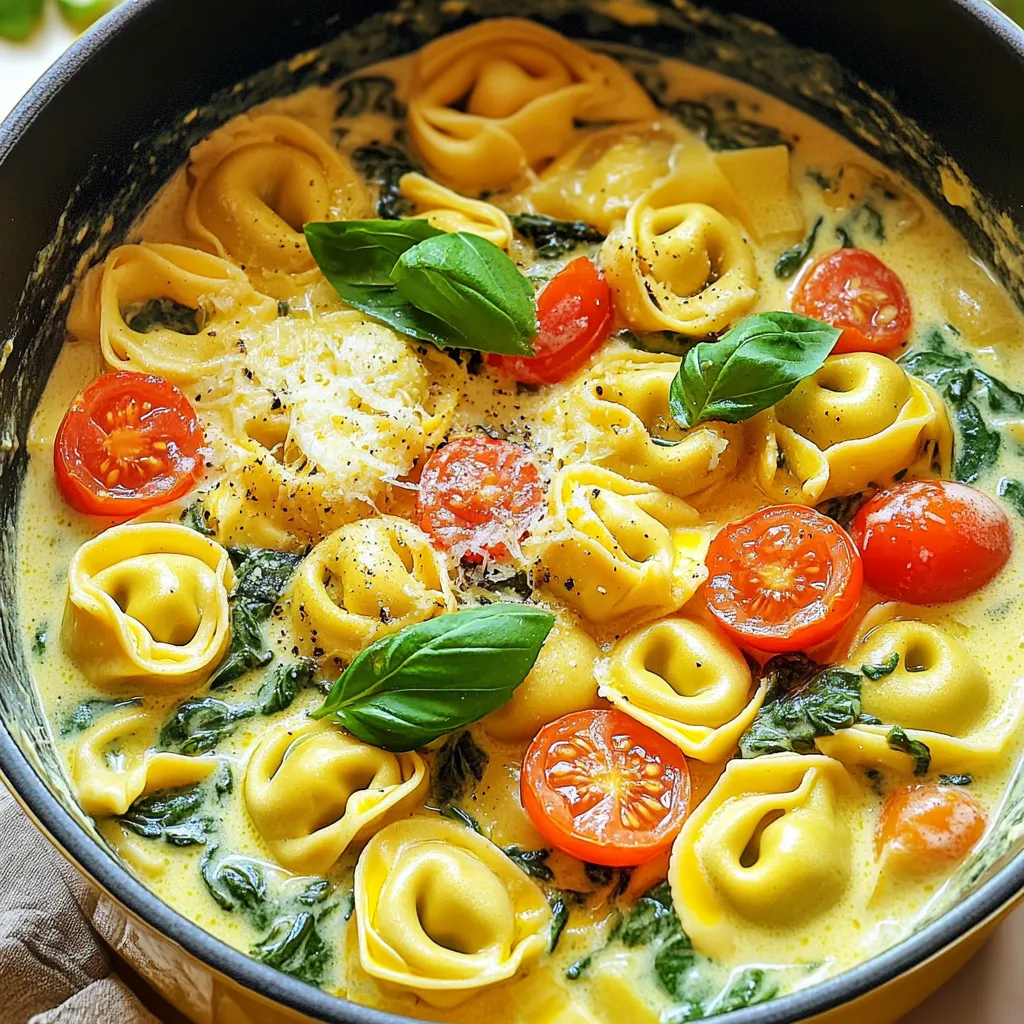
Welcome to my creamy one-pot lemon spinach tortellini delight! This dish not only satisfies your tastebuds, but it makes cooking
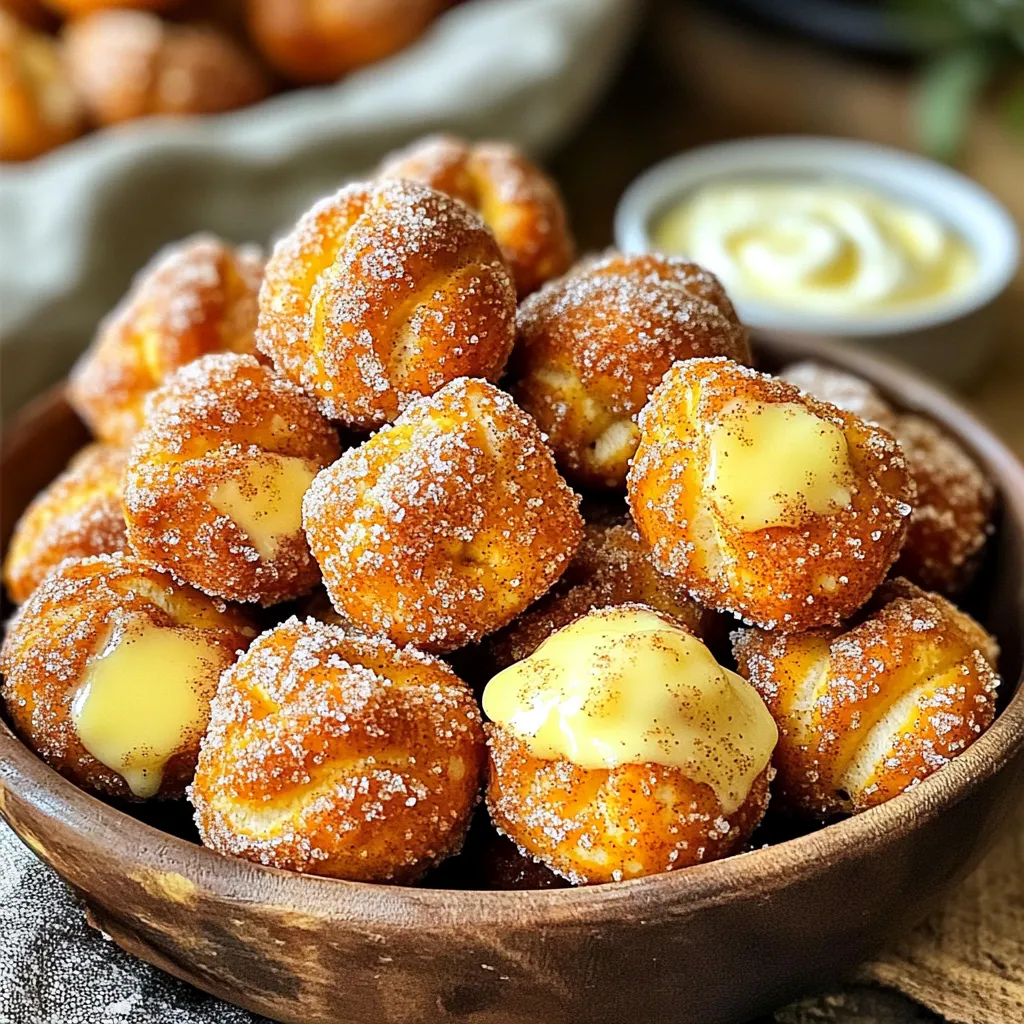
If you crave a warm, sweet snack, these Bakery-Style Cinnamon Sugar Pretzel Bites are for you! They’re soft, chewy, and
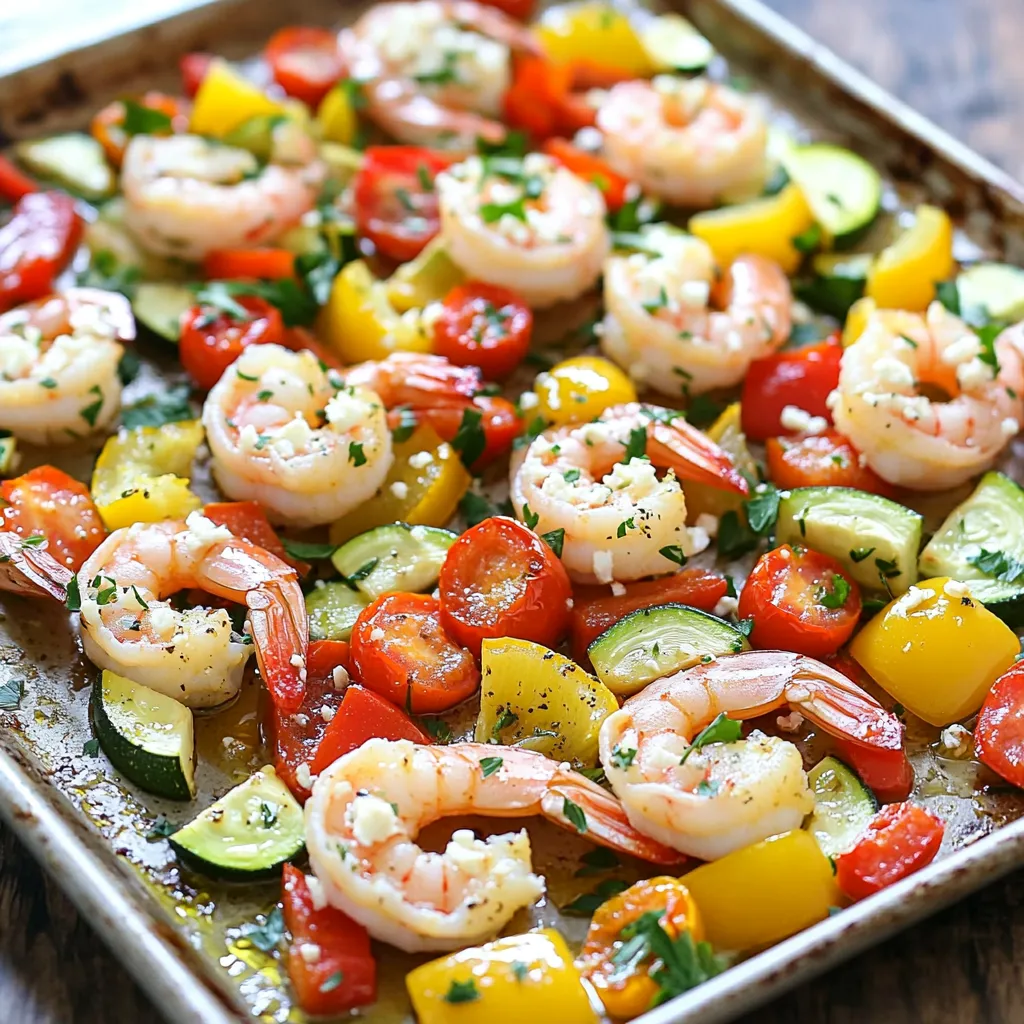
Looking for a quick, tasty meal that dazzles your taste buds? My Sheet-Pan Greek Shrimp and Veggies combines fresh shrimp
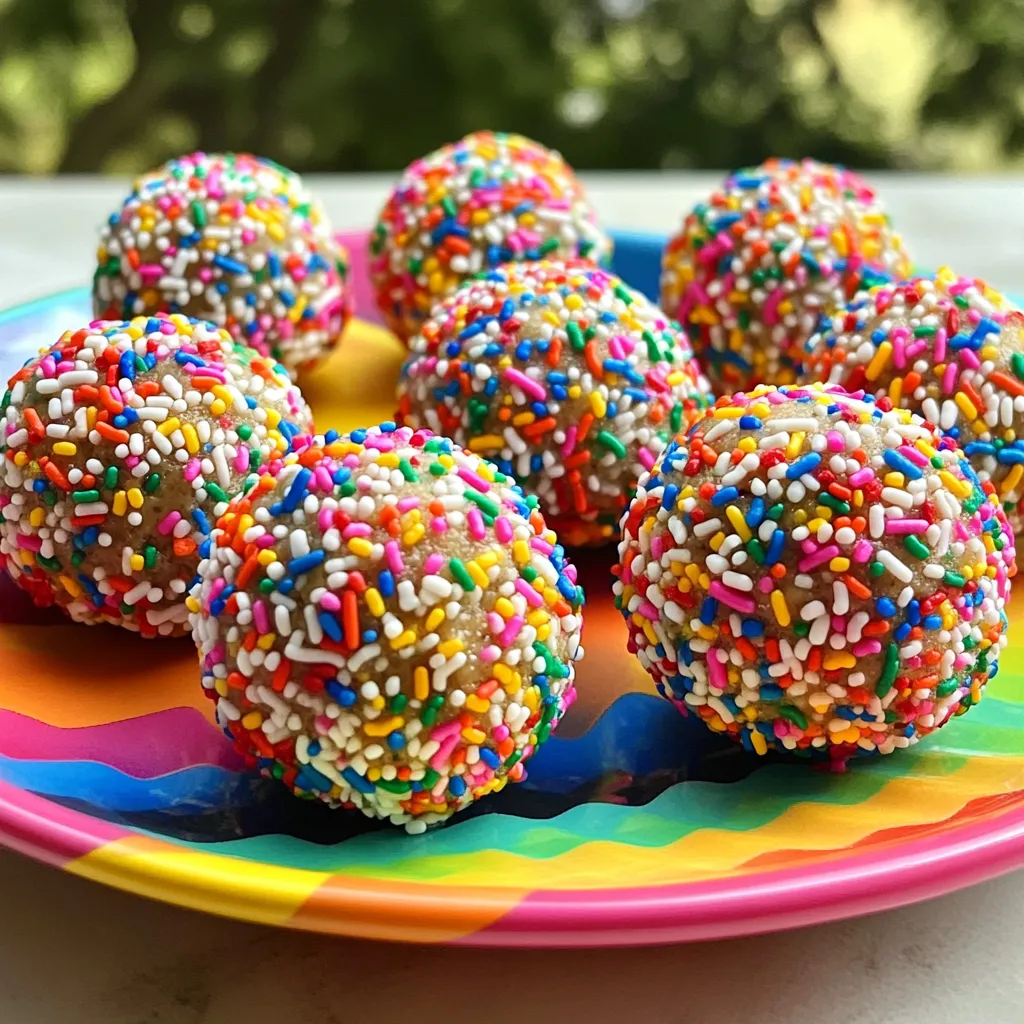
Looking for a tasty treat that packs a protein punch? I’ve got you covered! These No-Bake Birthday Cake Protein Balls
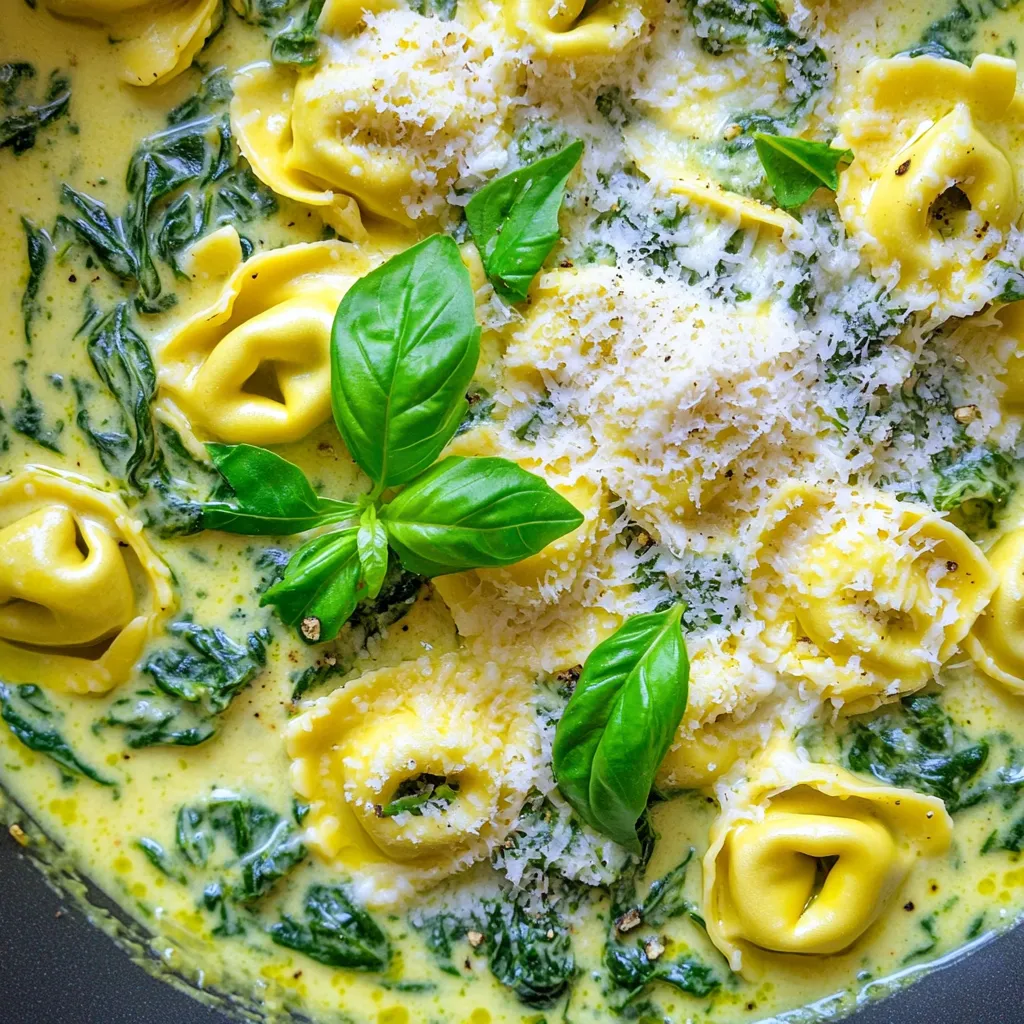
Welcome to your new favorite meal—One-Pot Creamy Spinach Ricotta Tortellini Delight! This dish combines rich flavors and easy prep for
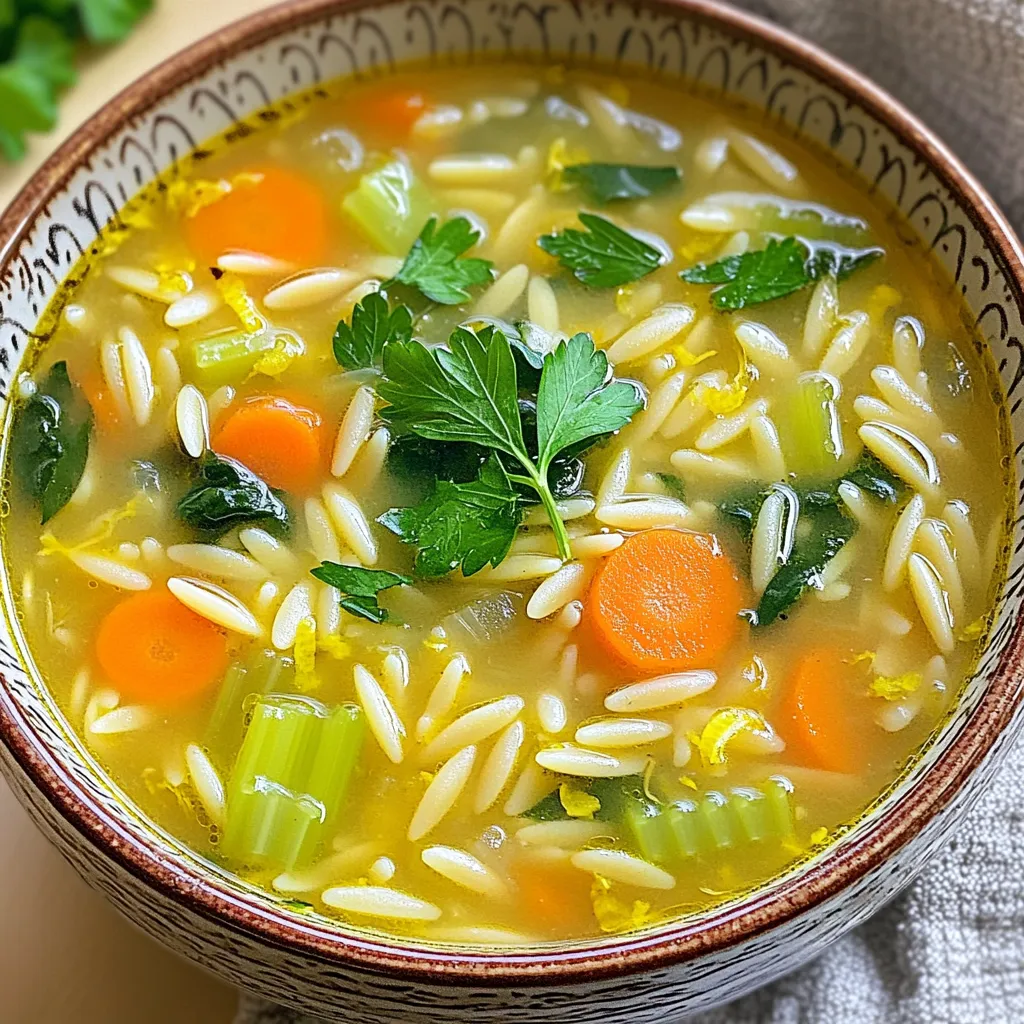
Are you ready to warm up with a hearty bowl of goodness? My Slow Cooker Lemon Garlic Orzo Soup is
