Skip to content
DisclaimerTerms Of UseGDPR PolicyCookie Policy

pureeatsnow

  • Home
  • Drinks
  • Appetizers
  • Dinner
  • Dessert
  • About
  • Contact
  • Privacy Policy
DisclaimerTerms Of UseGDPR PolicyCookie Policy

Rachel

To make Lemony Greek Pasta Salad, gather these fresh ingredients: - 8 oz. whole wheat pasta (e.g., fusilli or penne) - 1 cup cherry tomatoes, halved - 1 cucumber, diced - 1 red bell pepper, diced - 1/2 red onion, finely chopped - 1 cup Kalamata olives, pitted and halved - 1 cup feta cheese, crumbled - 1/4 cup fresh parsley, chopped - 1/4 cup fresh mint, chopped - Zest and juice of 2 lemons - 3 tablespoons olive oil - 1 teaspoon dried oregano - Salt and pepper to taste Using fresh ingredients makes this salad bright and flavorful. Fresh herbs like parsley and mint add a crisp taste. Fresh lemon juice gives a zesty kick that dried lemon cannot. I recommend using fresh tomatoes and cucumbers for crunch. Dried oregano works well here, too, since it adds a nice earthy flavor. If you don’t have all the ingredients, don’t worry! You can swap some items. For pasta, use any type you like, even gluten-free. Instead of Kalamata olives, try black olives or green olives for a different taste. Feta cheese can be replaced with goat cheese for a creamier texture. If you want a vegan option, skip the cheese or use a plant-based alternative. {{ingredient_image_1}} Start by boiling water in a large pot. Add a pinch of salt to the water. Once it boils, add 8 oz. of whole wheat pasta. You can use fusilli or penne. Cook it according to the package instructions until it is al dente. This usually takes about 8 to 10 minutes. Once done, drain the pasta in a colander. Rinse it under cold water. This stops the cooking process and cools the pasta. Set it aside while you prepare the other ingredients. Next, wash and chop your vegetables. Take 1 cup of cherry tomatoes and cut them in half. Dice 1 cucumber and 1 red bell pepper. For the onion, finely chop 1/2 of a red onion. You will also need 1 cup of Kalamata olives. Make sure they are pitted and halved. Gather these in a large mixing bowl. This bowl will hold all your fresh ingredients. Now it's time to make the lemon dressing. In a small bowl, add the zest and juice of 2 lemons. This will give your salad a bright flavor. Pour in 3 tablespoons of olive oil. Next, add 1 teaspoon of dried oregano, salt, and pepper to taste. Use a whisk to mix everything well. The dressing should be smooth and combined. It adds a nice tang to the salad. Take the large bowl with the pasta and vegetables. Pour the lemon dressing over this mixture. Then, add 1 cup of crumbled feta cheese, 1/4 cup of chopped fresh parsley, and 1/4 cup of chopped fresh mint. Gently toss everything together. Make sure the pasta and vegetables are well coated with the dressing. This is where all the flavors come together. After combining, it's best to chill the salad. Cover the bowl with plastic wrap or a lid. Place it in the refrigerator for at least 30 minutes. Chilling allows the flavors to meld. It makes every bite taste even better. When ready to serve, you can garnish with extra feta or lemon wedges for a fresh look. Enjoy your Lemony Greek Pasta Salad! To cook pasta just right, follow these steps: 1. Use a large pot with water. Add a good amount of salt. This adds flavor. 2. Bring the water to a boil before adding the pasta. This helps it cook evenly. 3. Stir the pasta often in the pot. This prevents it from sticking together. 4. Cook until it's al dente, which means firm to the bite. Check the package for time. 5. Once cooked, drain the pasta in a colander. Rinse it under cold water to stop the cooking. Seasoning is key to making your pasta salad taste great. Here are some tips: - Use fresh herbs like parsley and mint. They add bright flavors. - Lemon juice and zest give the salad a refreshing taste. Don’t skip this step! - Dried oregano offers a nice depth. Just a teaspoon will do. - Always taste your dressing before mixing. Adjust salt and pepper as needed. Meal prep makes cooking easy and fun. Here’s how to do it well: - Chop all your veggies ahead of time. Store them in the fridge until you’re ready to mix. - Cook the pasta and let it cool. You can store it for up to three days. - Make the lemon dressing in advance. It stays fresh in the fridge for about a week. - Combine everything just before serving. This keeps the salad crisp and fresh. Pro Tips Use Fresh Ingredients: Always opt for fresh vegetables and herbs to enhance the flavor and nutritional value of your salad. Customize the Pasta: Feel free to substitute whole wheat pasta with gluten-free or protein-rich alternatives like chickpea or lentil pasta. Make Ahead of Time: Prepare the salad a day in advance for a more robust flavor as the ingredients have time to marinate. Experiment with Dressings: Add a splash of balsamic vinegar or a pinch of red pepper flakes for an extra layer of flavor in your dressing. {{image_2}} You can make this salad heartier by adding protein. Great choices are grilled chicken, shrimp, or chickpeas. For chicken, grill or roast it, then slice it thin. If you prefer shrimp, sauté them in olive oil until pink. For a plant-based option, use canned chickpeas. Just rinse and add them right in. Each option boosts flavor and keeps you full. If you're looking for vegetarian or vegan swaps, feta cheese is easy to replace. Use a vegan feta or skip it altogether. You can also add more veggies. Think about artichoke hearts or roasted red peppers. These keep the dish fresh while making it rich in taste. For extra creaminess, try adding avocado. It pairs well with the lemon and herbs. This salad is fun to customize based on the season. In summer, add fresh corn or zucchini for crunch. In fall, roasted butternut squash or sweet potatoes work great. You can also switch the herbs. Use basil in summer or thyme in the fall. Seasonal swaps keep this dish exciting and flavorful all year long. To store leftovers of your Lemony Greek Pasta Salad, first, let it cool completely. Place the salad in an airtight container. This helps keep it fresh longer. You can also separate the feta cheese to avoid sogginess. I suggest using glass containers for storage. Glass keeps food fresh and is easy to clean. Look for containers with tight-fitting lids. This helps prevent spills and keeps odors in check. Your pasta salad will stay good in the fridge for about 3 to 5 days. Make sure to check for any signs of spoilage. If it looks or smells off, it’s best to toss it. Enjoy your salad while it tastes fresh! Yes, you can make this salad ahead of time. I recommend making it a few hours before serving. This allows the flavors to blend well. Just keep it in the fridge until you are ready to serve. You can add many tasty ingredients to this salad. Consider adding grilled chicken for protein. You could also add artichokes or spinach for more veggies. Try using different cheeses like goat cheese or mozzarella. The options are endless! Absolutely! To make this salad gluten-free, choose gluten-free pasta. Many brands offer great options. The rest of the ingredients are naturally gluten-free, so you can enjoy this dish without worry. To make this recipe low-carb, swap out the pasta for spiralized zucchini or cauliflower rice. These options keep the salad light and fresh. You can still add all the veggies and the delicious lemon dressing! This blog post covered how to create a delicious salad with tasty ingredients. We discussed fresh versus dried ingredients and substitutions. You learned step-by-step instructions, like cooking pasta and making lemon dressing. I shared tips for perfect pasta and enhancing flavor too. In closing, enjoy experimenting with variations, and don’t forget about storage tips. Creating this salad can be fun and rewarding. With practice, you’ll become a salad pro in no time!

Lemony Greek Pasta Salad Refreshing and Easy Recipe

Craving a dish that bursts with fresh flavors? My Lemony Greek Pasta Salad is perfect for you! This easy recipe

To make my Honey Lime Shrimp Tacos, you need the following main ingredients: - 1 lb large shrimp, peeled and deveined - 2 tablespoons honey - 2 tablespoons fresh lime juice - 1 teaspoon lime zest - 2 cloves garlic, minced - 1 teaspoon chili powder - Salt and pepper to taste - 8 small corn tortillas - 1 cup red cabbage, finely shredded - 1 avocado, sliced - Fresh cilantro, for garnish - Lime wedges, for serving These ingredients create a fresh and tasty taco. The shrimp soak up the sweet and tangy flavors from the honey and lime. You can top your tacos with extra ingredients for more flavor. Some great options include: - Diced tomatoes - Sliced jalapeños - Crumbled feta cheese - Sour cream or Greek yogurt Feel free to mix and match these toppings. They can add a fun twist to your meal. To make these tacos, you need a few simple kitchen tools: - A mixing bowl for the marinade - A whisk to mix the marinade - A skillet for cooking the shrimp - A spatula to flip the shrimp - A knife and cutting board for chopping toppings Having these tools on hand makes cooking easier and more fun. {{ingredient_image_1}} First, grab a bowl. Whisk together 2 tablespoons of honey and 2 tablespoons of fresh lime juice. Add 1 teaspoon of lime zest for a zesty kick. Then, mince 2 cloves of garlic and toss them in. Sprinkle in 1 teaspoon of chili powder, along with salt and pepper to taste. This mixture creates a sweet and tangy marinade that makes your shrimp sing. Now, take 1 pound of large shrimp, peeled and deveined. Place them in the bowl with the marinade. Use your hands to toss the shrimp well, ensuring they are fully coated. Let them rest for at least 15 to 20 minutes. If you have time, marinate them for up to 1 hour for even more flavor. Heat a skillet over medium-high heat. Once hot, add the marinated shrimp in a single layer. Cook for 2 to 3 minutes on each side. Watch for the shrimp to turn pink and opaque. This means they are ready to enjoy. While the shrimp cook, warm 8 small corn tortillas in another skillet or microwave. They should be soft and pliable. When the shrimp are done, assemble your tacos. Place a few shrimp on each tortilla, and add your favorite toppings. Enjoy this fresh and flavorful dish! To cook shrimp just right, start with fresh shrimp. They should be firm and pink. Remove the shells and devein them for the best taste. Heat a skillet to medium-high heat. Add the marinated shrimp directly to the hot skillet. Cook them for 2-3 minutes on each side. The shrimp are done when they turn pink and opaque. Don't overcook them, or they will become rubbery. Warm your corn tortillas right before serving. You can do this in a skillet or microwave. If using a skillet, heat it on medium. Place a tortilla in the skillet for about 30 seconds. Flip it and heat for another 30 seconds. This makes the tortilla soft and easy to fold. If using a microwave, wrap the tortillas in a damp paper towel. Heat them for about 20 seconds. To boost flavor, add lime zest to your marinade. This gives a fresh, zesty kick. Consider adding chopped jalapeños for a spicy touch. Fresh cilantro adds a bright flavor and looks nice too. A squeeze of lime over the assembled tacos adds a nice finish. You can also top with salsa for extra flavor and texture. Enjoy experimenting with these ideas! Pro Tips Marinate for Maximum Flavor: Allow the shrimp to marinate for at least 30 minutes to enhance the flavor profile. The longer they sit, the more the flavors will infuse. Use Fresh Ingredients: For the best taste, use fresh lime juice and zest. Fresh ingredients elevate the entire dish and provide a vibrant flavor. Perfectly Cooked Shrimp: Avoid overcooking the shrimp. They should turn pink and opaque, which usually takes about 2-3 minutes per side on medium-high heat. Customize Your Toppings: Feel free to add your favorite toppings such as diced tomatoes, jalapeños, or a drizzle of chipotle sauce for extra flavor and texture. {{image_2}} You can swap shrimp for other proteins. Chicken works great. You can also use firm fish, like tilapia or cod. For a meatier taste, try pork. Just adjust cooking times to ensure everything is cooked through. The marinade will still add that sweet and tangy flavor. For a vegetarian option, use grilled tofu or portobello mushrooms. They soak up the marinade well. If you want a vegan dish, chickpeas can be a fun choice. You can roast them for crunch. Both options give you great texture and flavor. Want to change the flavors? You can add spices to the marinade. For a kick, mix in jalapeños or cayenne pepper. If you like sweet, try adding mango or pineapple. These fruits pair well with the honey and lime. You can also play with herbs. Try basil or mint for a fresh twist. Each change brings a new taste experience. To store leftover tacos, place them in an airtight container. Keep the shrimp, tortillas, and toppings separate. This helps maintain freshness. Store in the fridge for up to two days. When you are ready to enjoy your leftovers, reheat the shrimp in a skillet. Heat on medium for about two minutes until warm. Avoid overcooking, as this makes shrimp tough. Warm the tortillas in a microwave or skillet for about 20 seconds. You can freeze the shrimp for later use. Place the marinated shrimp in a freezer bag. Remove as much air as possible before sealing. Freeze for up to three months. When ready to use, thaw in the fridge overnight. Cook them fresh for the best taste. Yes, you can prepare some parts in advance. You can marinate the shrimp a few hours before cooking. This helps the shrimp soak up the honey and lime flavors. Just keep the shrimp in the fridge until you're ready to cook. You can also warm the tortillas in advance and store them in a towel to keep them soft. However, I recommend assembling the tacos just before serving. This keeps everything fresh and tasty. I love to serve these tacos with a side of black beans or corn salad. They add color and flavor. You can also make a simple salsa with tomatoes, onions, and cilantro. Guacamole pairs well too, adding creaminess to balance the flavors. Don't forget lime wedges to squeeze over the tacos. The extra lime juice boosts the taste! Honey Lime Shrimp Tacos have a mild spice level. The chili powder adds a light kick, but it’s not overpowering. If you like more heat, you can add jalapeños or a hot sauce. For those who prefer less spice, you can cut back on the chili powder. The honey and lime balance the heat, making these tacos enjoyable for everyone. Honey lime shrimp tacos combine fresh flavors and easy prep. We explored main ingredients, optional toppings, and essential kitchen tools. You learned step-by-step instructions for marinade and cooking. Tips on perfect shrimp cooking and tortilla prep can boost your meal. Variations allow you to switch proteins or go vegetarian. Proper storage keeps leftovers tasty, and reheating tips save time. Enjoy making new taco creations with friends and family. Happy cooking!

Honey Lime Shrimp Tacos Flavorful Fresh Delight

If you’re searching for a fresh, tasty meal that’s easy to make, you’ll love these Honey Lime Shrimp Tacos! Packed

For this Lemon Blueberry Greek Yogurt Loaf, you need the following: - 1 cup all-purpose flour - 1 teaspoon baking powder - 1/2 teaspoon baking soda - 1/4 teaspoon salt - 1 cup Greek yogurt (plain, preferably non-fat) - 1/2 cup granulated sugar - 2 large eggs - Zest of 1 lemon - 1/4 cup fresh lemon juice - 1 teaspoon vanilla extract - 1 cup fresh blueberries (or frozen, if out of season) - 2 tablespoons butter, melted You can swap some ingredients if needed: - Use whole wheat flour for added fiber. - Substitute honey or maple syrup for granulated sugar. - Egg substitutes can include flaxseed meal or applesauce for vegan options. - For a different flavor, try using lime juice instead of lemon juice. - You can use non-dairy yogurt for a dairy-free version. Choosing the best ingredients matters for great taste. Here are some tips: - Use fresh blueberries whenever possible for better flavor. - Look for ripe lemons with smooth skin for more juice and zest. - Select a high-quality Greek yogurt for creaminess and tang. - Check the expiration date on baking powder and soda for effectiveness. - Always sift your flour to avoid lumps and ensure even baking. {{ingredient_image_1}} Start by preheating your oven to 350°F (175°C). This step is key. While it heats, grease a standard loaf pan with butter. You can also line it with parchment paper. This helps the loaf come out easily. In a large bowl, take your Greek yogurt and granulated sugar. Blend them together until smooth. Next, add two large eggs, lemon zest, lemon juice, vanilla extract, and melted butter. Whisk this mixture well. You want it to be fully combined and smooth. Now, take a medium bowl. Whisk together the all-purpose flour, baking powder, baking soda, and salt. This mixture should be light and fluffy. Once mixed, set it aside for later use. Gradually add the dry mixture to the wet ingredients. Stir gently until just combined. It’s okay if you see a few lumps. Now, fold in your blueberries carefully. You don’t want to break them. Pour the batter into your prepared loaf pan. Smooth the top with a spatula. Bake for 55-65 minutes. Use a toothpick to check if it’s done. If the top browns too fast, cover it lightly with foil. Once baked, let it cool in the pan for about 10 minutes. Then, transfer it to a wire rack to cool completely. To get the best texture, use room temperature ingredients. Cold eggs or yogurt can affect how the batter mixes. Always mix the wet and dry ingredients gently. Stir just until combined. This keeps your loaf light and fluffy. One common mistake is overmixing the batter. This can lead to a dense loaf. Another mistake is not measuring the flour correctly. Use the spoon-and-level method for best results. Also, don’t skip the zest. It adds bright flavor. Serve the loaf fresh for the best taste. Slice it and add a dollop of Greek yogurt on the side. You can also garnish with fresh blueberries and lemon zest for a pretty touch. It’s perfect for breakfast, brunch, or as a snack. Enjoy it with a nice cup of tea or coffee! Pro Tips Fresh Ingredients: Use fresh blueberries for the best flavor and texture. If using frozen, make sure they are not thawed to prevent excess moisture in the batter. Don’t Overmix: When combining the wet and dry ingredients, mix just until incorporated. Overmixing can lead to a dense loaf. Check for Doneness: Start checking the loaf for doneness at the 55-minute mark. An inserted toothpick should come out clean, with a few moist crumbs being acceptable. Cooling Time: Allow the loaf to cool in the pan for at least 10 minutes before transferring to a wire rack. This helps maintain its structure and prevents it from breaking apart. {{image_2}} You can easily change the flavors of this loaf. Try using vanilla yogurt instead of plain. This swap gives a sweeter taste. You can also use almond flour for a nutty hint. If you want a tropical twist, add mashed bananas. They pair well with lemon and blueberries! To make this loaf gluten-free, use a good gluten-free flour blend. Many blends work well in baking. Just make sure it has xanthan gum for the right texture. This option keeps the loaf soft and tasty without gluten. Spices can elevate your loaf’s flavor. A pinch of cinnamon or nutmeg adds warmth. For extra crunch, mix in chopped nuts like walnuts or pecans. They add texture and a nice contrast to the soft loaf. This way, you can customize your treat to match your taste! To keep your Lemon Blueberry Greek Yogurt Loaf fresh, store it in an airtight container. This helps keep the moisture in. You can also wrap the loaf tightly in plastic wrap. Make sure to store it at room temperature. Enjoy it within three days for the best taste and texture. If you want to save some for later, freezing works great! First, let the loaf cool completely. Then, slice it into pieces for easy serving. Wrap each slice in plastic wrap. Place the wrapped slices in a freezer-safe bag or container. You can store it in the freezer for up to three months. When you're ready to enjoy your frozen loaf, take out a slice. Unwrap it and place it on a plate. You can microwave it for about 20-30 seconds. If you prefer, you can also toast it in a toaster oven. This will give it a nice, warm texture and flavor. Enjoy your treat! Yes, you can use frozen blueberries. They work well in this loaf. Just make sure to add them directly from the freezer. This helps keep the batter cool. It also stops the berries from breaking apart. If you use frozen blueberries, bake the loaf a few minutes longer. To cut down on sweetness, reduce the sugar. Try using only 1/3 cup of sugar instead of 1/2 cup. You can also use a sugar substitute. Just make sure it measures like sugar. Adding more lemon juice can help balance the taste too. A bit of salt can enhance flavors without adding sweetness. You can use sour cream as a great substitute for Greek yogurt. Plain yogurt also works well. If you want a dairy-free option, try almond or coconut yogurt. These substitutes will change the flavor slightly but still keep the loaf moist. Adjust the moisture level by reducing other liquids if needed. In this blog post, I covered the key ingredients for your recipe, including substitutions and tips for quality. I walked you through step-by-step instructions for baking the loaf and shared helpful tips to achieve the perfect texture. You also learned about delicious variations and storage methods. Remember, the right ingredients and techniques make all the difference in your baking. Experiment with flavors and make this recipe your own. Happy baking!

Lemon Blueberry Greek Yogurt Loaf Flavorful Delight

Get ready to enjoy a slice of Lemon Blueberry Greek Yogurt Loaf! This tasty treat blends zesty lemon and sweet

- 4 boneless, skinless chicken breasts - 3 tablespoons olive oil - Zest of 2 lemons - 1/4 cup fresh lemon juice - 3 cloves garlic, minced - 1 tablespoon fresh rosemary, chopped - 1 tablespoon fresh thyme, chopped - 1 tablespoon fresh parsley, chopped - Salt and pepper to taste - Lemon slices, for garnish You need good quality chicken for this dish. Boneless, skinless breasts work best. The marinade is what makes this dish burst with flavor. Olive oil adds richness. Fresh lemon juice brightens the taste. Lemon zest gives it an extra punch. Garlic adds warmth. Rosemary, thyme, and parsley bring fresh herb notes. Salt and pepper help balance all the flavors. - 1 teaspoon red pepper flakes for heat - 1 teaspoon honey for sweetness - 1 tablespoon Dijon mustard for tang If you like a kick, add red pepper flakes. Honey can balance the tartness of the lemon. Want a bit of a tang? A touch of Dijon mustard works great. - Mixing bowl - Plastic wrap - Grill or grill pan - Meat thermometer - Tongs You need a mixing bowl to make the marinade. Plastic wrap keeps everything fresh while marinating. A grill or grill pan is key for that delicious char. A meat thermometer helps ensure your chicken is safe to eat. Tongs make flipping the chicken easy and safe on the hot grill. {{ingredient_image_1}} First, grab a large mixing bowl. Add 3 tablespoons of olive oil. Next, add the zest of 2 lemons. Then, pour in 1/4 cup of fresh lemon juice. Now, add 3 cloves of minced garlic. Toss in 1 tablespoon each of chopped rosemary, thyme, and parsley. Finally, season with salt and pepper to taste. Mix this all together well. You want a smooth blend that coats the chicken nicely. Take your chicken breasts and add them to the marinade. Make sure each piece is well coated. Cover the bowl with plastic wrap. Place it in the fridge for at least 30 minutes. If you have more time, let it marinate for up to 2 hours. This step adds great flavor to the chicken. Start by preheating your grill to medium-high heat, about 400°F. Once hot, remove the chicken from the marinade. Let any extra marinade drip off. Discard the leftover marinade to keep things safe. Place the chicken on the grill and cook for 6-7 minutes on each side. You want the inside to reach 165°F. Look for nice grill marks as a sign it's done. After grilling, let the chicken rest for 5 minutes. This helps the juices stay inside. Serve garnished with lemon slices and fresh herbs. Enjoy your meal! Grilling chicken can seem tough, but it is simple with the right steps. First, always start with fresh chicken. It tastes better and stays juicy. Next, use a good marinade. Our lemon herb mix packs flavor. Remember to let your chicken sit in it for at least 30 minutes. This helps the flavors soak in. Keep your grill hot, around 400°F. This keeps the chicken from sticking. To get those perfect grill marks, place the chicken on the grill in a diagonal line. Let it cook without moving it for about 6-7 minutes. When you flip it, turn it 90 degrees to create a crosshatch pattern. This not only looks great but also gives a nice sear. You can take our lemon herb marinade to the next level. Try adding some honey for sweetness. A touch of Dijon mustard gives it a nice kick. For a spicy twist, mix in some crushed red pepper flakes. These small changes can make a big difference in flavor. Pro Tips Marinate Longer for Flavor: Allow the chicken to marinate for up to 2 hours to enhance the flavor. The longer it marinates, the more infused the chicken will be with the lemon and herb goodness. Perfect Grill Marks: To achieve those beautiful grill marks, avoid moving the chicken around too much while it cooks. Let it sit undisturbed for the first 6-7 minutes on each side. Check for Doneness: Use a meat thermometer to ensure the chicken reaches an internal temperature of 165°F (75°C). This guarantees it's safely cooked while remaining juicy. Rest Before Serving: Always let the grilled chicken rest for at least 5 minutes after cooking. This helps retain the juices, making each bite tender and flavorful. {{image_2}} You can easily change the herbs in this recipe. Instead of rosemary, thyme, and parsley, try using basil, oregano, or dill. Each herb gives a new taste. Basil adds a sweet, fresh flavor. Oregano gives a warm touch. Dill brings a light, bright taste. Mix and match to find your favorite combo! If you like heat, add some spice to the chicken. Try adding red pepper flakes to the marinade. You can also use minced jalapeños or hot sauce. Start with a small amount. You can always add more if you want extra heat. This way, you control how spicy your dish gets. You can also cook this chicken in the oven or on the stovetop. For the oven, preheat to 400°F (200°C). Place the chicken on a baking sheet and bake for 20-25 minutes. For stovetop cooking, heat a skillet over medium-high heat. Add a bit of olive oil and cook the chicken for about 6-7 minutes per side. Both methods give great flavor! You can store leftover grilled chicken in the fridge. Place it in an airtight container. It will stay good for up to four days. Make sure the chicken is cool before sealing it. This helps keep it fresh and tasty. If you want to freeze grilled chicken, wrap it well. Use plastic wrap or aluminum foil. Then, place it in a freezer bag. This method protects the chicken from freezer burn. It can last up to three months in the freezer. When ready to eat, thaw it in the fridge overnight. When reheating grilled chicken, keep it moist. Place it in a pan with a splash of water. Cover it with a lid to trap steam. Heat it on low until warm, about 10 minutes. This keeps the chicken juicy and tender. Avoid using high heat, as it can dry out the meat. You should marinate the chicken for at least 30 minutes. For more flavor, try marinating up to 2 hours. This time lets the chicken soak up all the tasty herbs and lemon juice. A longer marinate gives a deeper flavor. However, don't exceed 2 hours. The acid in the lemon juice can make the chicken tough. Yes, you can use chicken thighs! Thighs are juicy and full of flavor. They cook well on the grill and stay moist. Just adjust the cooking time. Thighs may need a few extra minutes to reach 165°F. Use the same marinade for a tasty dish. Lemon Herb Grilled Chicken pairs great with many sides. Here are some ideas: - Grilled vegetables like zucchini and bell peppers - A fresh green salad with lemon vinaigrette - Roasted potatoes or sweet potatoes - Rice or quinoa for a hearty side These sides balance the bright flavors of the chicken well. In this post, we covered how to create delicious lemon herb grilled chicken. We discussed key ingredients, marinating tips, and grilling techniques. You learned about variations to make the dish your own. We also included storage tips to keep your chicken fresh. Finally, I answered common questions to clear up doubts. Perfecting this dish is easy with practice. Enjoy making it your go-to recipe for any meal!

Lemon Herb Grilled Chicken Flavorful and Easy Recipe

If you want a tasty meal that’s easy to make, you’re in the right place. This Lemon Herb Grilled Chicken

- 4 salmon fillets (6 oz each) - 2 tablespoons honey - 1-2 fresh jalapeños, finely chopped - 2 tablespoons soy sauce - 1 tablespoon olive oil - 2 cloves garlic, minced - 1 teaspoon ginger, grated - Salt and pepper to taste - Fresh cilantro or green onions for garnish - Lemon wedges for serving To make Jalapeño Honey Salmon, gather these simple ingredients. Start with four salmon fillets. Each should weigh about six ounces. You want fresh fish for the best taste. Next, grab two tablespoons of honey. This will add a sweet touch. Then, find one or two fresh jalapeños. Chop them finely. You can adjust the heat level by choosing how many to use. Next, you need two tablespoons of soy sauce. It brings a rich, salty flavor. Add one tablespoon of olive oil. This helps to keep the fish moist. Get two cloves of garlic and mince them finely. Garlic adds a nice aroma. You’ll also need one teaspoon of grated ginger for a hint of spice. Don’t forget salt and pepper to taste. These will enhance all the flavors. For garnishing, pick fresh cilantro or green onions. They add color and freshness. Lastly, prepare lemon wedges for serving. Lemon complements fish perfectly and adds brightness. With these ingredients ready, you are well on your way to a tasty meal. Enjoy the process of making this dish! {{ingredient_image_1}} First, grab a small bowl. In it, whisk together these items: - 2 tablespoons honey - 1-2 fresh jalapeños, finely chopped - 2 tablespoons soy sauce - 1 tablespoon olive oil - 2 cloves garlic, minced - 1 teaspoon ginger, grated - Salt and pepper to taste Mix until everything combines well. This marinade brings sweet and spicy flavors that make the salmon shine. Now, take your salmon fillets and place them in a shallow dish or a resealable bag. Pour the marinade over the salmon. Make sure each piece is well coated. Cover the dish or seal the bag. Let it sit in the fridge for 30 minutes. This step helps the fish absorb all the great flavors. Preheat your grill or broiler to medium-high heat. If you’re using a grill, lightly oil the grates to stop sticking. After 30 minutes, take the salmon out of the marinade, but save the marinade for later. Place the fillets on the grill or under the broiler. Cook for about 5-6 minutes on each side. Brush the salmon with the reserved marinade while it cooks. It’s done when the salmon flakes easily with a fork. Cooking times may change depending on thickness. After cooking, let the salmon rest for a couple of minutes. Serve it with fresh cilantro or green onions and lemon wedges on the side. Enjoy your flavorful grilled delight! To cook salmon just right, aim for a medium-high heat. This helps to keep it juicy. Cook each side for 5-6 minutes. The salmon is ready when it flakes easily with a fork. To avoid sticking, oil the grill grates lightly before cooking. This simple step makes a big difference. If you like spice, use two jalapeños. For a milder flavor, start with one. Always taste your marinade before adding it to the salmon. This way, you can adjust the heat to your liking. Remember, you can always add more spice later, but you can't take it out! Want to jazz up your salmon? Try adding herbs like dill or parsley. A pinch of smoked paprika can add depth. You can also mix in lime juice for a zesty twist. Experiment with flavors that you love. Cooking is all about making it personal and fun! Pro Tips Marination Time Matters: Allowing the salmon to marinate for at least 30 minutes enhances the flavor absorption, but if you have more time, letting it sit for up to 2 hours will deepen the taste even further. Heat Control: Ensure your grill or broiler is preheated to the right temperature. Medium-high heat is ideal for achieving that perfect sear while keeping the salmon moist. Check for Doneness: Salmon should be cooked until it flakes easily with a fork. Use a meat thermometer to check for an internal temperature of 145°F for optimal doneness. Garnish for Freshness: Adding fresh herbs like cilantro or green onions not only enhances the presentation but also adds a burst of freshness that complements the spicy-sweet flavor of the dish. {{image_2}} You can swap salmon for other fish or chicken. Try tilapia, trout, or even shrimp. Each protein offers a unique taste. Chicken works well too, especially thighs for extra juiciness. Just keep the marinade the same. Adjust the cooking time based on your choice. Fish usually takes less time, while chicken may need longer. You can change the marinade for new flavors. Use citrus juices like lime or orange instead of honey. They add a bright zest that pairs well with fish. If you want a different sweetener, try maple syrup or agave nectar. Each option gives a distinct taste and complements the heat of jalapeños. Pair your jalapeño honey salmon with fresh sides. A simple salad with mixed greens works great. You could also serve it with grilled vegetables or rice. Quinoa adds a nice nutty flavor and is healthy too. For a creamy touch, try a side of avocado or a light yogurt sauce. These sides enhance the dish and balance the heat nicely. To store leftovers, use an airtight container. Glass or plastic containers work well. Make sure the salmon is cool before sealing. This keeps the fish fresh longer. Store the container in the fridge. Leftover salmon stays good for up to three days. When reheating, aim to keep the salmon moist. The best method is using an oven. Preheat your oven to 275°F (135°C). Place the salmon on a baking sheet. Cover it with foil to trap moisture. Heat for about 15 minutes. You can also use a microwave but be careful. Heat it in short bursts to prevent drying out. To freeze salmon, wrap it tightly in plastic wrap. Then, place it in a freezer bag. Remove as much air as possible. This helps prevent freezer burn. When you’re ready to eat it, thaw in the fridge overnight. This method keeps the salmon juicy and tasty. Never thaw salmon at room temperature, as this can harm its quality. Jalapeño Honey Salmon is a tasty dish that combines sweet and spicy flavors. It features salmon fillets marinated in a mix of honey, jalapeños, soy sauce, garlic, and ginger. The honey gives a nice sweetness, while the jalapeños add heat. This dish offers a perfect balance that makes it a crowd-pleaser. When grilled, the salmon becomes flaky and tender, with a beautiful caramelized exterior. You should marinate salmon for about 30 minutes. This time allows the flavors to soak in without overpowering the fish. If you leave it longer, the texture may change. Just place salmon in the marinade and let it chill in the fridge. Make sure each piece is well-coated for the best flavor. Yes, you can use frozen salmon. Just thaw it in the fridge overnight before cooking. Pat it dry to remove excess moisture. This helps the marinade stick better and ensures even cooking. If you cook frozen salmon, adjust the cooking time to ensure it cooks through. Always check that it flakes easily with a fork before serving. This blog covered making Jalapeño Honey Salmon step-by-step. You learned about the ingredients, marinade, cooking tips, and variations. Remember, marinating enhances flavor and adjusts spice levels to your taste. Explore different proteins and side dishes to mix things up. Storing and reheating tips ensure you enjoy leftovers too. With these easy steps, you can cook a delicious meal that impresses everyone. Enjoy your cooking adventure with this vibrant dish!

Jalapeño Honey Salmon Flavorful Grilled Delight

Are you ready to spice up your dinner routine? Jalapeño Honey Salmon is a game-changer. This dish combines the sweet

- 2 lbs chicken wings - 1/2 cup pure maple syrup - 1/4 cup Sriracha sauce - 2 tablespoons soy sauce (or tamari for gluten-free) - 2 teaspoons garlic powder - 1 teaspoon onion powder - 1 teaspoon smoked paprika - Salt and pepper to taste - 1 tablespoon sesame seeds (optional) - 2 green onions, chopped When I create Maple Sriracha Chicken Wings, I rely on a few key ingredients. The star is always the chicken wings; they soak up all the flavors. I use pure maple syrup for sweetness. This syrup balances the heat from Sriracha sauce. The Sriracha gives the wings their signature kick. Next, I add soy sauce for depth. Garlic powder and onion powder enhance the flavor base. Smoked paprika adds a subtle richness. I always adjust salt and pepper to taste. For garnishes, sesame seeds add a nice crunch. Chopped green onions bring freshness and color to the dish. Together, these ingredients make a flavor-packed experience. {{ingredient_image_1}} - Preheat the oven to 400°F (200°C). - Line a baking sheet with foil and place a wire rack on top. I always start with the oven. Preheating it is key to crispy wings. The wire rack helps the hot air flow around the wings. This makes them cook evenly. - Combine all marinade ingredients in a mixing bowl. - Whisk until completely smooth. Now, let’s make the marinade. In a big bowl, mix the maple syrup, Sriracha sauce, soy sauce, garlic powder, onion powder, and smoked paprika. Add salt and pepper to taste. Whisk it all together until smooth. This sweet and spicy sauce gives great flavor to the wings. - Coat wings in marinade and let sit for at least 30 minutes. - Arrange wings on wire rack and bake for 40-45 minutes. Next, add the chicken wings to the bowl. Toss them well in the marinade. Make sure they are fully coated. Let them marinate for at least 30 minutes. If you have more time, letting them sit overnight adds even more flavor. After marinating, take the wings and arrange them on the wire rack. Keep them in a single layer. This helps them get crispy. Bake for 40-45 minutes. Flip them halfway through for even cooking. You can broil them for the last few minutes for extra crispiness. Enjoy the wonderful aroma as they cook! To get crispy wings, use a wire rack. This helps air flow all around the wings. It keeps them from sitting in their own juices. Place the wings on the rack, so they cook evenly. Broiling them for 2-3 minutes at the end adds extra crunch. Just watch them closely to avoid burning. Marinating chicken wings is key for flavor. I recommend at least 30 minutes. For deeper taste, let them marinate overnight. The longer they sit, the more they soak up the marinade. You will taste the maple and Sriracha in every bite. Feel free to change the seasoning. You can add more spices to fit your taste. If you like heat, toss in chili powder or cayenne. For a sweeter touch, mix in extra maple syrup. Personalizing your wings makes them even more special. Enjoy the fun of creating your own flavor! Pro Tips Marinate Longer for Flavor: For the best flavor, marinate the chicken wings for at least 1 hour or overnight. This allows the marinade to penetrate the meat for a richer taste. Crispy Skin Trick: To achieve extra crispy skin, pat the wings dry with paper towels before marinating. Removing moisture helps them crisp up better in the oven. Broil for Finishing Touch: Broil the wings for the last 2-3 minutes of cooking. This will give them a beautiful char and enhance the flavors of the marinade. Garnish to Impress: Don’t skip the garnish! A sprinkle of sesame seeds and fresh green onions not only adds flavor but also makes your dish visually appealing. {{image_2}} You can switch up the flavor by using different hot sauces. Try using a smoky chipotle sauce for a deeper heat. If you want more sweetness, add honey to the marinade. This gives wings a nice glaze and sweet taste. For a quicker option, use an air fryer. Set it to 375°F (190°C) and cook the wings for 25-30 minutes. They will still be crispy and delicious. If you love grilling, summer is perfect for it. Just marinate the wings and grill them over medium heat. Flip them until they are cooked through and charred. Want a fresh twist? Add citrus zest like lemon or lime to the marinade. This adds brightness and balances the heat. You can also mix in fresh herbs like cilantro or parsley. This gives the wings a nice herbal note and makes them even tastier. To store leftover wings, let them cool first. Place the wings in an airtight container. If you have sauce left, store it separately to keep the wings crispy. They can last up to three days in the fridge. For longer storage, freeze the wings. Use a freezer-safe bag or container. Make sure to remove as much air as possible to prevent freezer burn. You can freeze them for up to three months. When ready to eat, thaw them in the fridge overnight. To reheat wings, use the oven for the best results. Preheat the oven to 350°F (175°C). Place the wings on a baking sheet and cover them with foil. Heat for about 15-20 minutes. Remove the foil for the last 5 minutes to crisp them up. You can also use an air fryer for quick reheating. Set it to 350°F (175°C) and heat for about 5-10 minutes. Enjoy those wings just like they were fresh! Yes, you can use frozen chicken wings. Just remember to thaw them first. Thawing helps the wings absorb the marinade better. You can thaw them in the fridge overnight or use the microwave. Avoid cooking frozen wings directly; they won’t cook evenly. I suggest marinating your chicken wings for at least 30 minutes. This gives the flavors time to soak in. For richer taste, marinate them overnight in the fridge. The longer they sit, the more flavor they’ll have. Just don’t go over 24 hours, as the meat can break down too much. You can serve many tasty sides with these wings. Consider carrot and celery sticks for crunch. A creamy ranch or blue cheese dip pairs well too. You might also enjoy some sweet potato fries or a fresh salad. These sides add balance to the spicy wings. In this article, we explored how to make Maple Sriracha Chicken Wings. We discussed key ingredients, from chicken wings to flavor boosters like garlic and smoked paprika. I shared preparation steps, including marinating and baking tips for crispy results. You learned about variations, storage, and reheating methods. Now, enjoy crafting your own wings. Mix flavors and find your favorite twist. With these tips in hand, you’ll create wings everyone loves. Happy cooking!

Maple Sriracha Chicken Wings Flavorful Firecracker Dish

Get ready to spice up your game day with Maple Sriracha Chicken Wings! This dish combines sweet maple syrup with

- 1 cup cream cheese, softened - 1/2 cup powdered sugar - 1 teaspoon vanilla extract - 1/4 cup sour cream - 1 1/2 cups fresh strawberries, hulled and finely chopped - 1/4 cup strawberry jam - Fresh mint leaves for garnish (optional) - Graham crackers or vanilla wafer cookies for dipping When I pick strawberries, I look for bright red ones. They should feel firm and smell sweet. Avoid any that are dull or mushy. For cream cheese, you can use Greek yogurt or a dairy-free version if needed. Sour cream can be swapped with plain yogurt for a lighter touch. These swaps still keep the dip tasty! {{ingredient_image_1}} To start, take 1 cup of softened cream cheese and put it in a mixing bowl. Next, add 1/2 cup of powdered sugar. Use an electric mixer to blend them together. Mix until it is smooth and creamy. This is the base of our dip. Now it's time to add flavor. Pour in 1 teaspoon of vanilla extract. Then add 1/4 cup of sour cream. Mix this well to make sure everything combines perfectly. The mixture should feel light and fluffy, adding a nice taste to the dip. Next, we will fold in the fun parts. Take 1 1/2 cups of fresh strawberries. Make sure they are hulled and finely chopped. Add them to the bowl. Then, pour in 1/4 cup of strawberry jam. Gently stir these into the cream cheese mix. You want to see a beautiful swirl of red and pink. Finally, taste the dip. If you want it sweeter, add more powdered sugar or jam. After that, transfer the dip to a nice serving bowl. For a lovely touch, you can garnish the dip with whole strawberries and fresh mint leaves. This will make your dip look extra special. When serving, pair it with graham crackers or vanilla wafer cookies. They are perfect for dipping! Enjoy your delicious creation! To taste and adjust sweetness, start with a small spoonful of the dip. If it feels too tangy, add more powdered sugar or a bit of strawberry jam. Mix well after each addition. This keeps the dip creamy and smooth. For alternative sweeteners, try honey or maple syrup. Both bring unique flavors and work well. Just remember, these may change the dip’s texture slightly. For creative serving suggestions, use a bright and colorful bowl. Place it on a platter with whole strawberries and edible flowers around it. This makes the dip look fresh and inviting. You can also use small cups for individual servings. Add a graham cracker or vanilla wafer on the side for easy dipping. For garnishes, fresh mint leaves brighten the dish. You can sprinkle some crushed graham crackers on top for crunch. This adds a nice texture contrast. Have fun with your plating, and let your creativity shine! Pro Tips Use Room Temperature Ingredients: Ensure your cream cheese is at room temperature for a smoother blend with the powdered sugar. Fresh Strawberries Matter: Use ripe, fresh strawberries for the best flavor and texture in your dip. Adjust Sweetness to Taste: Feel free to modify the amount of powdered sugar or jam based on your sweetness preference. Chill Before Serving: For a firmer texture, refrigerate the dip for about 30 minutes before serving. {{image_2}} You can make this dip even more fun by adding different flavors. Try mixing in other fruits like blueberries or raspberries. These fruits add a nice twist and taste great! You can also use chocolate or nut butters. A little melted chocolate mixed in creates a delightful chocolate strawberry flavor. Nut butters like almond or peanut can add creaminess and a rich taste. If you want gluten-free options, use rice crackers or fresh fruit slices for dipping. These choices are easy to find and tasty. For a vegan dip, swap out the cream cheese with a vegan cream cheese made from nuts. You can also use coconut cream as a base. Just make sure to check labels for added sugars. With these simple changes, everyone can enjoy this delicious treat! To store your leftover dip, place it in an airtight container. This helps keep it fresh. You can keep it in the fridge for up to three days. If you notice any change in texture or smell, it’s best to toss it out. Always check for freshness before enjoying it again. Yes, you can freeze Strawberry Cheesecake Dip! However, the texture may change slightly. To freeze, use an airtight container and fill it only two-thirds full. This allows room for expansion. When you're ready to eat, move it to the fridge to thaw overnight. Stir well before serving to bring back its creamy texture. Can I make this dip in advance? Yes, you can make this dip ahead of time. Just store it in the fridge. It stays fresh for about three days. Cover it tightly to keep the flavors strong. When you're ready to serve, give it a quick stir. How do I make it less sweet? To reduce the sweetness, cut back on the powdered sugar. You can also use less strawberry jam. Taste the dip as you go. This way, you can find the perfect level of sweetness for you. What can I use instead of cream cheese? If you need a substitute for cream cheese, try Greek yogurt or silken tofu. Both options add creaminess without the same flavor. They will change the taste slightly, but they work well. What are the best dippers for this dip? Graham crackers and vanilla wafer cookies are classic dippers. You can also use fresh fruit like apple slices or banana pieces. Pretzels add a nice salty crunch, too. Feel free to get creative! Can I use other flavors of jam? Absolutely! You can try other fruit jams like raspberry or blueberry. Each flavor will give the dip a new twist. Just remember to adjust the amount for taste. Enjoy experimenting with different flavors! This blog post covered how to make a tasty Strawberry Cheesecake Dip. We explored the ingredients, including cream cheese, strawberries, and sweeteners. I shared step-by-step instructions to help you prepare it easily. You can also find tips for adjusting sweetness and creative serving ideas. Remember, variations let you make this dip your own. Enjoy this treat fresh, or store it correctly for later. Making this dip is fun and simple, perfect for sharing with friends or family. You’ll love the sweet flavor and easy preparation!

Strawberry Cheesecake Dip Simple and Delicious Treat

Craving a sweet treat that’s easy to make? Look no further! This Strawberry Cheesecake Dip is a delightful mix of

To make a creamy mushroom stroganoff, you need these key ingredients: - 2 tablespoons olive oil - 1 large onion, finely chopped - 3 cloves garlic, minced - 500g assorted mushrooms (like cremini, shiitake, and button), sliced - 1 teaspoon dried thyme - 1 teaspoon smoked paprika - Salt and pepper to taste - 2 tablespoons all-purpose flour - 1 cup vegetable broth - 1 cup dairy-free sour cream (or regular sour cream) - 1 tablespoon soy sauce or tamari - 300g egg noodles or gluten-free pasta - Fresh parsley, chopped, for garnish These ingredients bring rich flavors and creamy textures to the dish. The mushrooms provide a hearty base, while the sour cream adds creaminess. The spices enhance the dish’s depth. You can swap some ingredients based on your needs: - Use any olive oil for canola or avocado oil. - For onion, shallots work well too. - If you can’t find these mushrooms, use any variety you like. - Replace dairy-free sour cream with Greek yogurt for a tangy flavor. - You can also use coconut cream for a non-dairy option. - If you don’t have soy sauce, try liquid aminos for a similar taste. - Substitute egg noodles with zucchini noodles for a low-carb option. These substitutions keep the dish delicious while catering to your preferences. Each serving of creamy mushroom stroganoff contains: - Calories: 400 - Protein: 12g - Fat: 15g - Carbohydrates: 56g - Fiber: 4g - Sugar: 3g This meal is balanced and filling. It offers a good mix of nutrients, making it great for a cozy dinner. Enjoy this rich and flavorful dish guilt-free! {{ingredient_image_1}} To make creamy mushroom stroganoff, start with a large skillet. Heat 2 tablespoons of olive oil over medium heat. Add 1 large, finely chopped onion and sauté for 3-4 minutes until it turns translucent. Next, stir in 3 minced garlic cloves and cook for another minute. This will fill your kitchen with a lovely aroma. Now, add 500g of sliced assorted mushrooms to the skillet. You can use cremini, shiitake, or button mushrooms. Cook them for about 5-7 minutes until they release moisture and brown nicely. This step brings out their rich flavor. Sprinkle in 1 teaspoon of dried thyme, 1 teaspoon of smoked paprika, and salt and pepper to taste. Stir well to mix everything. Then, add 2 tablespoons of all-purpose flour. This will help thicken the sauce. Mix thoroughly to coat the mushrooms with the flour. Gradually pour in 1 cup of vegetable broth while stirring constantly. This helps to avoid lumps. Bring the mixture to a simmer and let it cook for about 5 minutes until it thickens slightly. Lower the heat and stir in 1 cup of dairy-free sour cream (or regular sour cream) and 1 tablespoon of soy sauce. Mix until creamy and adjust seasoning as needed. For the best mushrooms, choose fresh ones. Check for firmness and avoid any slimy spots. To cook mushrooms well, avoid crowding the pan. This helps them brown instead of steam. Always cook them over medium to high heat. Stir occasionally for even cooking. For a deeper flavor, try adding a splash of white wine while they cook. Cooking egg noodles is simple. Just follow the package instructions. Usually, you will boil them in salted water. Cook until they are al dente, which means they should still have a slight bite. Once cooked, drain the noodles and set them aside. Combine them with the creamy mushroom sauce, making sure every noodle gets coated. Serve hot for a delicious meal! To make your stroganoff extra creamy, use dairy-free sour cream or regular sour cream. The secret is in how you mix it in. Add it at a low heat. This keeps it smooth and prevents curdling. Stir well after adding the sour cream to ensure it blends perfectly. If you want even more creaminess, you can add a splash of plant-based milk. This will create a richer sauce. One common mistake is overcooking the mushrooms. Mushrooms should be tender but not mushy. Cook them just until they brown and release their juices. Another mistake is not seasoning enough. Taste your sauce as you cook. Adjust the salt and pepper to your liking. Lastly, don’t rush the sauce thickening. Let it simmer to develop flavors and reach the right consistency. Creamy mushroom stroganoff pairs well with egg noodles, as they soak up the sauce nicely. You can also serve it over rice or quinoa for a hearty meal. For a fresh touch, add a side salad with mixed greens. Roasted vegetables also complement the dish well, adding color and nutrition. If you want a little crunch, garlic bread is a tasty option too. Pro Tips Choose Fresh Mushrooms: Use a variety of fresh mushrooms for a deeper flavor profile and better texture in your stroganoff. Don’t Skip the Browning: Allow the mushrooms to brown well; this caramelization adds depth and richness to the sauce. Adjust Consistency: If the sauce is too thick, add a splash more vegetable broth until you reach your desired consistency. Garnish for Flavor: Fresh parsley not only adds color but also a burst of freshness that elevates the dish. {{image_2}} You can easily make this dish vegan and dairy-free. Just use dairy-free sour cream instead of regular sour cream. This keeps the creamy texture without dairy. Also, check for vegan egg noodles or use gluten-free pasta. The flavors still shine through, making it a great meal for everyone. If you want a gluten-free version, swap all-purpose flour with cornstarch. Mix cornstarch with a little water to create a slurry. Add this to the sauce to thicken it. Use gluten-free pasta instead of egg noodles. This way, you still enjoy the rich taste without any gluten. To make this stroganoff heartier, you can add protein. Cooked chicken or beef works well. Simply slice the meat and stir it in with the mushrooms. For seafood lovers, shrimp is a tasty choice. Add cooked shrimp at the end to warm them through. These options make your meal filling and satisfying. To keep your creamy mushroom stroganoff fresh, store it in an airtight container. Make sure to let it cool down first. Place the container in the fridge. It will last about 3 to 5 days. Be sure to label it with the date so you won't forget. When you are ready to eat your leftovers, reheat them gently. Use a skillet over low heat. Stir often to prevent sticking. You can add a splash of broth or water for moisture. This will keep the sauce creamy. Avoid using the microwave if you can. It can make the noodles soggy. You can freeze creamy mushroom stroganoff, but keep in mind it may change texture. Use a freezer-safe container and leave some space for expansion. It can stay frozen for up to 2 months. When you want to eat it, thaw it in the fridge overnight. Reheat it slowly for the best taste. The best mushrooms for stroganoff are cremini, shiitake, and button mushrooms. They add great flavor and texture. Cremini mushrooms give a deep, earthy taste. Shiitake mushrooms bring a rich umami flavor. Button mushrooms are mild and tender. You can mix these types for a more complex taste. Don’t be afraid to experiment with different mushrooms, too. Each type will change the dish in unique ways. Yes, you can make creamy mushroom stroganoff ahead of time. It tastes even better after resting. Cook the dish and let it cool completely. Then, store it in an airtight container in the fridge. You can keep it for up to three days. When you're ready to eat, reheat it on the stove over low heat. Add a splash of broth or water to keep it creamy. To add spice to your stroganoff, consider several options. You can add crushed red pepper flakes to the dish. Start with a pinch and taste as you go. Another idea is to stir in some hot sauce. For more depth, add fresh jalapeños or diced chili peppers when cooking the onions. Adjust the spice level to your liking for the perfect kick. In this post, we explored how to make a rich and creamy mushroom stroganoff. We covered ingredients, cooking steps, and useful tips. You now know ingredient swaps for dietary needs and how to store leftovers well. Remember, the key to great stroganoff is texture and flavor balance. Try different mushrooms and add your favorite protein for a fun twist. With a few simple changes, you can enjoy this dish anytime!

Creamy Mushroom Stroganoff Rich and Flavorful Meal

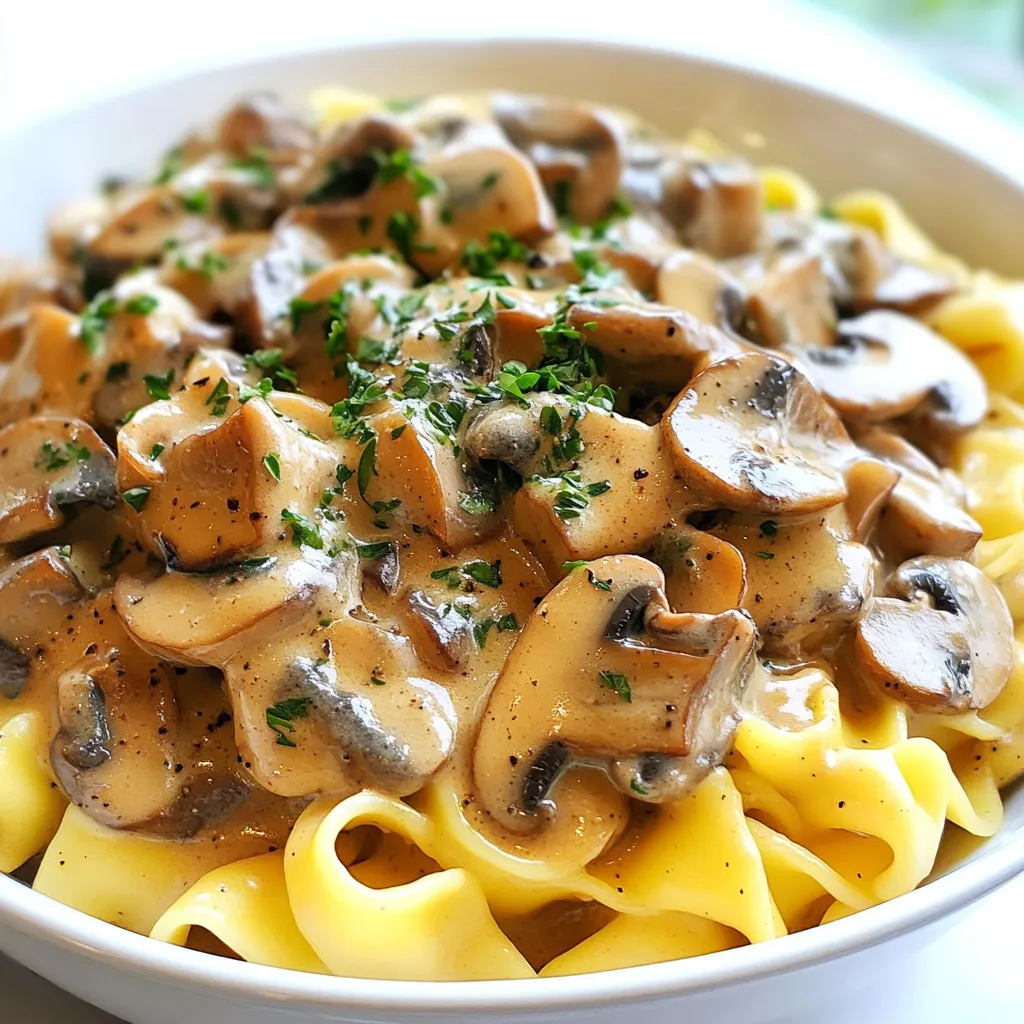
Welcome to my creamy mushroom stroganoff guide! This rich and flavorful meal is perfect for cozy dinners. You’ll discover essential

For this dish, you will need: - 14 oz firm tofu, cubed - 1 small onion, diced - 4 cups vegetable broth - 1 medium zucchini, sliced - 1 cup mushrooms, sliced (shiitake or button) - 1 cup green onions, chopped (white and green parts separated) Tofu is the star of this stew. It gives a nice texture and protein. Firm tofu holds its shape well, making it perfect for stews. Zucchini adds softness and color. Mushrooms bring umami flavor and depth. The onion adds sweetness, while the green onions give a fresh finish. You will also need: - 1 tablespoon vegetable oil - 3 cloves garlic, minced - 1-inch piece ginger, grated - 2 tablespoons gochugaru (Korean red pepper flakes) - 1 tablespoon soy sauce - 1 tablespoon sesame oil - Salt to taste - Fresh cilantro, for garnish The vegetable oil helps to sauté the aromatics. Garlic and ginger create a fragrant base. Gochugaru adds heat and a lovely red color. Soy sauce brings saltiness and depth. Sesame oil adds a nutty flavor. Lastly, cilantro is a fresh touch that brightens the dish. {{ingredient_image_1}} Sautéing the Aromatics Start by heating 1 tablespoon of vegetable oil in a large pot over medium heat. Add 1 small diced onion. Sauté until it turns translucent, which takes about 3 to 4 minutes. Then, stir in 3 cloves of minced garlic and 1-inch grated ginger. Cook for another minute until you smell the great aroma. Adding the Main Ingredients Next, add 2 tablespoons of gochugaru and 1 tablespoon of soy sauce. Mix well with the onion, garlic, and ginger. Let it cook for 1 to 2 minutes. This step helps toast the spices and brings out their flavors. Now, pour in 4 cups of vegetable broth and bring the mix to a boil. Once it boils, add 14 oz of cubed firm tofu, 1 sliced medium zucchini, and 1 cup of sliced mushrooms. Reduce the heat to low and let it simmer for 15 to 20 minutes. This allows all the flavors to blend nicely. Final Touches and Serving In the last few minutes, add 1 cup of chopped green onions, keeping some green parts for garnish. Drizzle in 1 tablespoon of sesame oil and season with salt to taste. Carefully ladle the stew into bowls. Garnish with fresh cilantro and the reserved green onion tops. Enjoy your delicious and spicy tofu stew! Adjusting Spice Levels You can change the spice in this stew. If you like it hot, add more gochugaru. Start with one extra teaspoon and taste. For less heat, you can reduce the gochugaru. Try adding just one tablespoon or even half. Remember, you can always add more spice later. Additional Ingredients for Customization Feel free to mix in your favorite veggies. Bell peppers or carrots work well. You might also try adding spinach for some greens. If you want protein, chickpeas or lentils are great options. They make the stew heartier and add a different flavor. You can also add a splash of lime juice for a fresh twist. Best Practices for Tofu Preparation Tofu can be watery, so press it first. Wrap the tofu in a clean towel. Place a heavy pan on top for about 15 minutes. This helps remove excess moisture. Then, cut it into cubes. This way, it absorbs more flavor and has a better texture. Techniques for Flavor Development Start with sautéing the onion, garlic, and ginger. This builds a solid flavor base. Be sure to toast the gochugaru with the aromatics. It helps release the spice's oils. When you add the broth, let it simmer. This allows all the flavors to blend beautifully. Pro Tips Adjust the Spice Level: If you prefer a milder stew, reduce the amount of gochugaru or omit it altogether. You can always add more spice later if desired. Use High-Quality Tofu: Opt for extra-firm or firm tofu to ensure it holds its shape during cooking. Pressing the tofu before use can also enhance its texture. Add More Vegetables: Feel free to include other vegetables like carrots, bell peppers, or spinach to add more color and nutrition to your stew. Let It Rest: Allowing the stew to sit for a few minutes after cooking can enhance the flavors as they continue to meld together. {{image_2}} Alternative Protein Sources If you want to switch things up, try using tempeh or seitan. Both add great texture and protein. You can cut them into cubes, just like the tofu. They soak up flavors well, too. Different Vegetable Combinations Feel free to mix in your favorite veggies. Bell peppers, carrots, or broccoli can add color and crunch. Just remember to adjust cook times. Softer veggies need less time than firmer ones. Adjusting Gochugaru Amounts If you love heat, add more gochugaru. For a milder taste, use less. Start with one tablespoon and increase it slowly. Taste as you go to find your perfect spice level. Adding Creamy Elements To make the stew creamy, add coconut milk or a splash of cream. This balances the spice and adds richness. You can also serve it with a dollop of sour cream or yogurt on top. - Refrigeration Guidelines: Place your leftover stew in an airtight container. It will stay fresh in the fridge for up to 4 days. Make sure to cool it first before sealing. This helps keep the flavors intact. - Freezing Tips: If you want to keep it longer, freeze the stew. Use a freezer-safe container or bag. It can last for up to 3 months. To thaw, place it in the fridge overnight. - Best Methods to Reheat While Preserving Flavor: To reheat, use the stove for the best taste. Pour the stew into a pot. Heat it on low, stirring often, until hot. If it seems thick, add a splash of vegetable broth. You can also use the microwave. Place it in a microwave-safe bowl. Heat in short bursts, stirring between each. Enjoy your warm and tasty stew! What is the origin of Korean Spicy Tofu Stew? Korean Spicy Tofu Stew, also known as Sundubu Jjigae, comes from Korea. It began as a comfort food. People often enjoyed it in homes and restaurants. The dish features soft tofu and spicy broth. It has roots in Korean traditions and flavors. Can I use different types of tofu? Yes, you can use different types of tofu. Firm tofu works best for this stew. Silken tofu is softer and can break apart easily. If you want a different texture, try using extra-firm tofu. Each type adds a unique feel to your dish. How do I make the stew less spicy? To make the stew less spicy, you can reduce the gochugaru. Start with one tablespoon instead of two. You can also add more broth or vegetables. Coconut milk can help cool the heat, too. Adjust to your taste for a milder stew. Korean Spicy Tofu Stew combines rich flavors and textures with simple steps. We learned about the main ingredients, like tofu and spices, and how to cook them. I shared tips to adjust spice levels and customize your own dish. You can even store leftovers for later enjoyment. Cooking this stew is fun and rewarding, plus it allows for personal twists. I hope you dive in and make it your own. Enjoy the vibrant taste of this dish!

Korean Spicy Tofu Stew Flavorful and Simple Recipe

Are you ready to spice up your dinner routine? Korean Spicy Tofu Stew is simple, tasty, and packed with flavor.

Here is what you need to make Mediterranean quinoa stuffed tomatoes: - 4 large ripe tomatoes - 1 cup quinoa, rinsed - 2 cups vegetable broth (or water) - 1 small red onion, finely chopped - 1 bell pepper (any color), diced - 1 cup cucumber, diced - ½ cup Kalamata olives, pitted and chopped - 1 cup feta cheese, crumbled - ¼ cup fresh parsley, chopped - 2 tablespoons olive oil - 1 tablespoon lemon juice - Salt and pepper to taste Each ingredient brings its own flavor. The ripe tomatoes make perfect cups for the filling. Quinoa adds protein and texture. Use vegetable broth to boost flavor. Fresh veggies like onion, bell pepper, and cucumber add crunch. Kalamata olives and feta cheese give a salty kick. Finally, parsley, olive oil, and lemon juice brighten the dish. This dish is not just tasty; it is also colorful and healthy. Enjoy gathering these ingredients. They set the stage for a delightful meal. {{ingredient_image_1}} - Preheat the oven to 375°F (190°C). - Slice off the tops of the tomatoes and scoop out the insides. - Reserve the insides for later use. - Cook quinoa in vegetable broth until fluffy. - Sauté red onion and bell pepper until soft. - Combine cooked quinoa with vegetables and other ingredients. - Fill tomatoes with the quinoa mixture. - Drizzle with olive oil and bake for 20-25 minutes. Making Mediterranean quinoa stuffed tomatoes is simple and fun. Start by preheating your oven. Set it to 375°F (190°C). This step gets the oven ready for baking. Next, grab your tomatoes. Slice off the tops carefully. Use a spoon to scoop out the insides. Be gentle, as you want to keep the tomato shell intact. Put the insides aside for later use. We will mix them into the filling. Now it's time to cook the quinoa. Rinse it under cold water first. Then, put it in a pot with vegetable broth. Bring it to a boil, then lower the heat. Cover the pot and let it simmer. In about 15 minutes, it will be fluffy and ready. While the quinoa cooks, heat some olive oil in a skillet. Add the chopped red onion and diced bell pepper. Sauté them over medium heat until soft. This usually takes about five minutes. Once the quinoa is fluffy, combine it with the sautéed veggies in a bowl. Add the reserved tomato insides, diced cucumber, and chopped Kalamata olives. Toss in crumbled feta, parsley, lemon juice, salt, and pepper. Mix well to combine all the flavors. Now comes the fun part: stuffing the tomatoes! Spoon the quinoa mixture into each hollowed tomato. Pack it down lightly to fit as much filling as possible. Place the stuffed tomatoes in a baking dish. Drizzle some olive oil on top for extra flavor. Bake them in the preheated oven for 20 to 25 minutes. The tomatoes should be tender but still hold their shape. Let them cool for a few minutes before serving. Enjoy your delicious, colorful dish! - Rinse quinoa thoroughly before cooking. This removes bitter saponins. - Use vegetable broth for added flavor. It enhances the dish's taste. - Choose large, ripe tomatoes for best flavor. They are sweet and juicy. - Use firm tomatoes to hold shape during baking. This helps them stay intact. - Add spices like oregano or basil for extra taste. They add depth and aroma. - Serve with a drizzle of balsamic reduction. It adds sweetness and tang. Pro Tips Choose Ripe Tomatoes: Select tomatoes that are firm yet slightly soft to the touch. This ensures they will hold their shape during baking while being flavorful and juicy. Enhance Flavor with Herbs: Feel free to add other herbs like oregano or basil to the quinoa mixture for an extra layer of Mediterranean flavor. Customize Fillings: Get creative with the stuffing! Add ingredients like artichokes, spinach, or chickpeas for added nutrition and variety. Serve with a Drizzle: For an elegant touch, drizzle a balsamic reduction over the stuffed tomatoes just before serving for added flavor and presentation. {{image_2}} You can change the cheese in your stuffed tomatoes for great taste. Swap feta for goat cheese or even a dairy-free cheese. This gives you new flavors and options. If you want more protein, add cooked ground meat. Ground turkey or beef works well. It makes the dish heartier and more filling. Using seasonal ingredients can make your dish fresh and bright. In place of bell peppers, try using zucchini or eggplant. They add texture and flavor. Fresh herbs can also change the dish's taste. Use basil or mint instead of parsley for a different twist. These herbs add a refreshing touch to your meal. To make your meal complete, pair your stuffed tomatoes with a side salad. A crisp green salad complements the flavors of the tomatoes. You can also serve them with pita bread or olives. This adds to the Mediterranean feel and enhances the overall experience. You can store leftovers in an airtight container. They will stay fresh for up to 3 days. If you have extra stuffed tomatoes, make sure to keep them sealed tight. This helps keep the flavors vibrant. When it's time to enjoy leftovers, reheat them simply. You can use the microwave or the oven. Heat until warmed through, but don’t overcook. This way, the tomatoes stay tender and delicious. If you want to prepare ahead, freeze uncooked stuffed tomatoes. They can stay good for up to a month. Just make sure to wrap them well. When you’re ready to cook, thaw them overnight in the fridge before baking. Yes, you can prepare the filling and stuff the tomatoes. Just refrigerate them until you are ready to bake. This makes meal prep easy and saves time. If you don’t have quinoa, you can use couscous, rice, or bulgur wheat. All these options work well. Each brings a unique taste and texture to the dish. Yes, this recipe is naturally gluten-free. Just ensure you use gluten-free ingredients. Enjoy this dish without worry if you follow these tips. You learned how to make Mediterranean quinoa stuffed tomatoes. The recipe features fresh ingredients like tomatoes, quinoa, and feta cheese. We covered preparation, cooking, and tips for the best flavor. You can try different fillings and pair the dish with sides for variety. In the end, experimenting with this recipe can lead to a fun and tasty meal. Enjoy your cooking and have fun sharing these delicious stuffed tomatoes.

Mediterranean Quinoa Stuffed Tomatoes Flavorful Dish

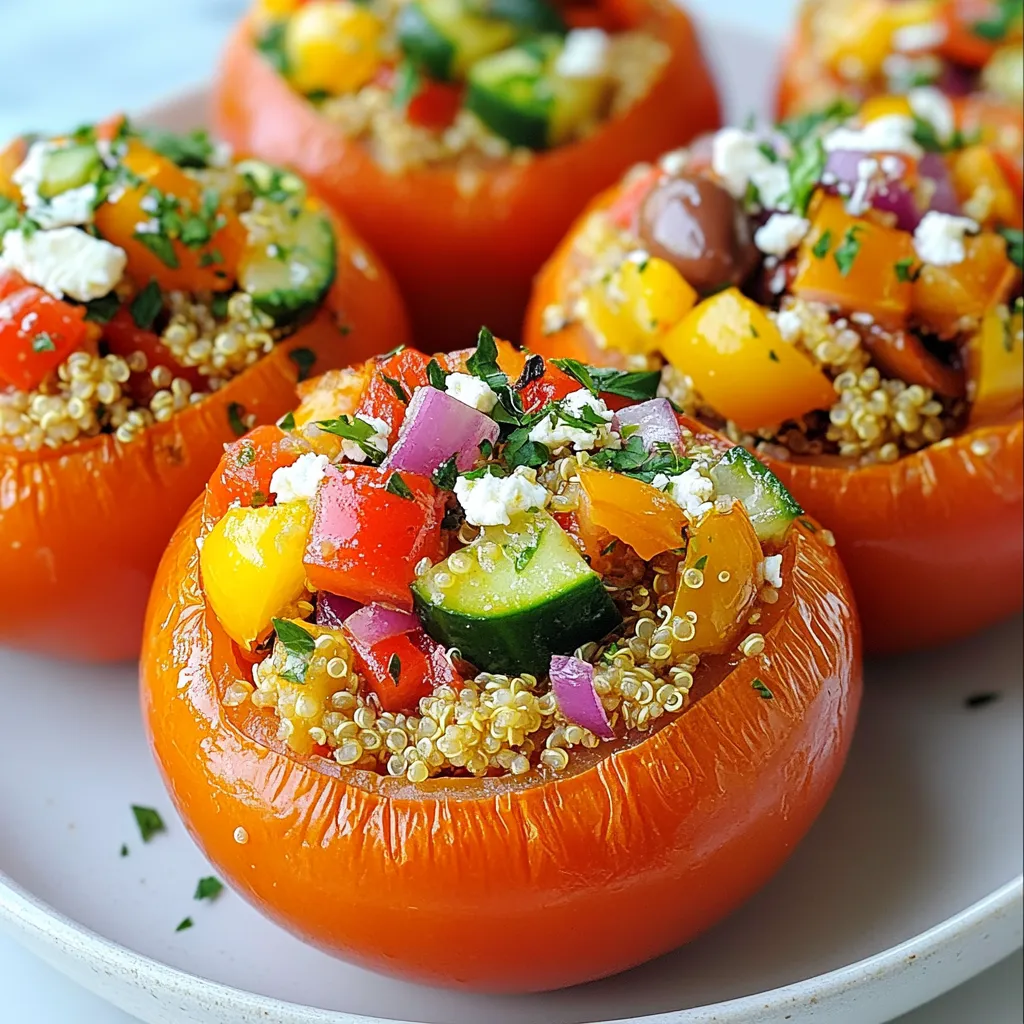
Are you looking for a fresh and tasty meal? Mediterranean Quinoa Stuffed Tomatoes offer bold flavors and a healthy boost.

Older posts
Newer posts
← Previous Page1 … Page124 Page125 Page126 … Page132 Next →

dsad

© 2025 pureeatsnow • Built with GeneratePress

Our Policies

  • Copyright Policy
  • Cookie Policy
  • GDPR Policy
  • Privacy Policy
  • Disclaimer
  • Terms Of Use

More Information

  • Home
  • About
  • Contact
  • Appetizers
  • Dessert
  • Dinner
  • Drinks
©2025, pureeatsnow About Back To Top