Skip to content
DisclaimerTerms Of UseGDPR PolicyCookie Policy

pureeatsnow

  • Home
  • Drinks
  • Appetizers
  • Dinner
  • Dessert
  • About
  • Contact
  • Privacy Policy
DisclaimerTerms Of UseGDPR PolicyCookie Policy

Rachel

- 1 cup fresh strawberries, hulled and chopped - 1 cup cream cheese, softened - 1 tablespoon coconut oil (optional) Fresh strawberries are the star of this recipe. They add a sweet and fruity flavor. Choose ripe, juicy strawberries for the best taste. Cream cheese gives the truffles a rich, creamy texture. If you want a smoother chocolate coating, use coconut oil. It helps the chocolate melt better. - 1 cup graham cracker crumbs - 1 cup powdered sugar Graham cracker crumbs provide a nice crunch and flavor. They help bind the truffles together. Powdered sugar adds sweetness and helps create a smooth mixture. Mix these dry ingredients well before adding the wet ones. This ensures an even taste in every bite. - 1 cup semi-sweet chocolate chips - Sea salt for garnish For the chocolate coating, semi-sweet chocolate chips work best. They melt smoothly and create a rich layer. Adding a sprinkle of sea salt on top brings out the chocolate flavor. It gives a nice contrast to the sweetness of the truffles. To make the base, start by combining the fresh strawberries with graham cracker crumbs, cream cheese, powdered sugar, and vanilla extract in a medium mixing bowl. Use a spatula or spoon to mix these ingredients well. You want a thick, sticky dough. If you like a smoother texture, a hand mixer works great. Just mix until everything is blended and creamy. Now, take the strawberry mixture and use your hands to form small balls, about one inch wide. This is where the fun begins! Place each ball on a parchment-lined baking sheet. Make sure they are spaced out. You do not want them to stick together. Once you shape them, it's time to freeze. Place the baking sheet in the freezer for about 30 minutes. This step helps the truffles hold their shape when you coat them in chocolate. While the truffles freeze, prepare the chocolate coating. In a microwave-safe bowl, melt the semi-sweet chocolate chips and coconut oil, if you use it. Heat in 30-second bursts. Stir between each round until the chocolate is fully melted and smooth. Once your truffles are firm, take them out of the freezer. Dip each truffle into the melted chocolate, making sure to coat it completely. Use a fork to lift them out and tap gently to remove excess chocolate. Place the chocolate-covered truffles back on the parchment-lined baking sheet. While the chocolate is still wet, add a sprinkle of sea salt on top of each one. This adds a nice flavor kick! Finally, refrigerate the truffles until the chocolate sets, which takes about 15 to 20 minutes. Enjoy the process and look forward to the delicious treat you just made! Using a hand mixer helps create a smooth truffle mix. It blends the strawberries and cream cheese well. If you prefer, you can mix by hand, but it may take longer. Freezing time is key. After shaping your truffles, freeze them for 30 minutes. This step firms them up, making them easier to coat in chocolate. If you skip this, they may lose their shape. To achieve the right consistency, melt your chocolate chips carefully. Use a microwave in 30-second bursts. Stir between each burst to avoid burning. If you want a smooth finish, add coconut oil. It helps thin the chocolate and gives it a nice sheen. Prevent the chocolate from hardening too quickly by working fast. Dip each truffle and let excess chocolate drip off. If the chocolate cools too much, it will not coat well. Serving your truffles can be fun and creative. Place them on a decorative plate for a pop of color. You can also use a small box for a gift. Garnish with chopped strawberries or mint leaves. This adds a fresh touch and makes your truffles look fancy. A sprinkle of sea salt on top enhances the flavor and adds visual appeal. {{image_2}} You can change the fruit for new tastes. Try using raspberries or blueberries instead of strawberries. Each fruit gives a unique flavor and feel. You can also add fun flavors like mint or orange zest. A splash of mint extract or a sprinkle of zest can really wake up the taste! Feel free to switch up the chocolate choice. White chocolate gives a sweet twist, while dark chocolate adds a rich touch. If you want a vegan option, use dairy-free chocolate. There are many brands out there that melt just right! Want to jazz up your truffles? You can roll them in crushed nuts. Almonds or hazelnuts add a nice crunch. You can also sprinkle on toppings like coconut flakes or more crushed nuts. These toppings not only add flavor but make the truffles look fancy too! To store your truffles in the fridge, place them in an airtight container. This helps keep them fresh. Line the container with parchment paper to avoid sticking. You can also use a glass jar with a lid. Keep them away from strong smells. They will stay fresh for several days this way. Yes, you can freeze chocolate truffles! To do this, place them in a single layer on a baking sheet. Freeze them for about an hour. Once firm, transfer them to a freezer-safe bag. Remove as much air as possible before sealing. For thawing, leave them in the fridge overnight. This helps them stay soft and tasty. These truffles last about one week in the fridge. If you freeze them, they can last up to three months. Signs of spoilage include an off smell or discoloration. If they look or smell strange, toss them out. Enjoy your truffles while fresh for the best taste! Yes, you can use frozen strawberries, but the texture will change. Frozen strawberries are softer and have more water than fresh ones. This can make your truffles a bit mushy. If you choose frozen, thaw them first and drain excess liquid. Fresh strawberries give a firmer bite and better flavor. To get a shiny chocolate coating, use a few simple tricks. First, add a bit of coconut oil to your melted chocolate. This helps it shine. Second, make sure to melt the chocolate slowly and gently. Heat it in short bursts, stirring often. This keeps the chocolate smooth and glossy. You can serve these truffles in many fun ways. For parties, place them on a pretty plate. You can also use small boxes as gifts. Add some chopped strawberries or mint leaves for a nice touch. They look great and taste even better! Making No-Bake Chocolate Covered Strawberry Truffles is fun and simple. You learned how to combine fresh and dry ingredients, coat them in rich chocolate, and explore tasty variations. Remember, practice makes perfect, especially when shaping and coating. Store your truffles properly to enjoy them longer. These treats are great for sharing or gifting. Trust me; you’ll impress everyone with these delicious delights. Enjoy your truffle-making journey!

No-Bake Chocolate Covered Strawberry Truffles Delight

Get ready to indulge in a sweet treat that requires no baking—just pure delight! In this post, I’ll show you

- 2 ripe green plantains - 1 tablespoon olive oil (or coconut oil) - ½ teaspoon sea salt - ¼ teaspoon paprika (optional for a smoky flavor) - ¼ teaspoon garlic powder (optional for extra flavor) 1. Peeling plantains: Start by cutting off both ends of the plantains. Then, make a shallow cut along the skin. Carefully peel off the skin to reveal the flesh. 2. Slicing technique: Slice the plantains at an angle. Aim for thin slices, about 1/8 inch thick. Thin slices help your chips get crispy and light. When you gather these ingredients, you will create a tasty and crunchy snack. The ripe green plantains are key. They provide the right texture and flavor. Olive oil or coconut oil helps with crisping. Use your favorite seasoning to add personal flavor. Sea salt, paprika, and garlic powder work well together. Experiment with these options to find your favorite mix! Start by peeling the plantains. Cut off both ends. Next, make a shallow cut along the skin. Gently lift the skin off to reveal the flesh. Now, slice the plantains thinly. Aim for slices about 1/8 inch thick. This thickness helps them crisp up nicely. Once you have your slices, place them in a mixing bowl. Drizzle 1 tablespoon of olive oil over the slices. Toss them gently to coat each slice with oil. Now, sprinkle ½ teaspoon of sea salt, ¼ teaspoon of paprika, and ¼ teaspoon of garlic powder over the plantains. Toss again to spread the seasonings evenly. Preheat your air fryer to 350°F (175°C). This step is key for crispiness. After preheating, add the plantain slices to the fryer basket. Lay them in a single layer. Avoid overlapping to ensure even cooking. Air fry the plantains for 12-15 minutes. Shake the basket halfway through to ensure all sides cook evenly. Watch for a golden color. They should be crispy but not too brown. Once done, take them out and let them cool slightly. They will get crispier as they cool. To get crispy plantain chips, slice them thin. Aim for about 1/8 inch thick. Thin slices cook better and get crispier. If you cut them too thick, they may turn out chewy. Arrange the slices in a single layer in the air fryer basket. Overlapping them can lead to uneven cooking. If you have many slices, cook them in batches. This way, every chip has a chance to crisp up. Watch your chips closely as they cook. Look for a golden color as a sign they are done. The chips should be firm and break easily. If you see browning, take them out. They can go from golden to burnt fast. Let the chips cool slightly after cooking. Cooling helps them crisp up even more. If you skip this step, they may not be as crunchy. Place them in a single layer on a wire rack to cool. This allows air to circulate and keeps them crispy. {{image_2}} You can make plantain chips more exciting with different flavors. Try a spicy mix by adding chili powder or cayenne pepper. If you prefer herbs, use dried rosemary or thyme. Just sprinkle your chosen spices after adding oil. Toss the plantains well to coat them evenly. This way, every chip has bold flavor. If you don’t have an air fryer, you can use your oven. Slice the plantains as you would for the air fryer. Lay them flat on a baking sheet. Drizzle with oil and season as desired. Bake at 425°F (220°C) for about 20-25 minutes. Flip them halfway through for even cooking. The chips won’t be as crispy as air-fried ones, but they will still be tasty. Plantain chips taste great with dips. Serve them with guacamole for a creamy contrast. Salsa adds a fresh kick to the crunch. You can also try them with hummus or a zesty yogurt dip. Place the chips in a colorful basket. This makes for a fun and inviting snack display. Enjoy your crispy chips with friends or family! To keep your plantain chips crispy, store them in an airtight container. This method keeps moisture out, which helps maintain that crunch. You can also add a piece of parchment paper in the container to absorb any extra moisture. Avoid stacking the chips; this can lead to sogginess. If your chips lose their crunch, you can revive them easily. Preheat your air fryer to 350°F (175°C). Place the chips in the basket in a single layer. Air fry them for about 3 to 5 minutes. This will help restore their crispiness without burning them. You can store air fryer plantain chips for about 1 week. After that, they might lose their crunch. If you notice any signs of spoilage, it’s best to discard them. For the best taste and texture, enjoy them within the first few days. You can use ripe plantains, but they will taste sweeter. Ripe plantains have a yellow or black skin. They are softer and sweeter than green ones. If you want a crunchy snack, stick with green plantains. They give a more savory flavor and crisp texture. To keep your chips crispy, use the right amount of oil. Just one tablespoon will do. Too much oil can make them soggy. Also, slice the plantains thinly. Aim for about 1/8 inch thick. This helps them cook evenly. Arrange the slices in a single layer in the air fryer. Avoid stacking them. Shake the basket halfway through cooking. This helps them crisp up all around. These chips pair well with many dips! Guacamole is a great choice. Salsa also goes nicely with them. You can serve them with a spicy dip or even a creamy ranch dressing. For a fun twist, try adding cheese dips or hummus. Enjoy these chips as a snack or with a meal! In this post, I outlined how to make crispy air fryer plantain chips using ripe green plantains, olive oil, and simple spices. I shared steps for preparation, cooking tips, and variations to enhance flavor. Remember, slice thickness and oil make a big difference in crispiness. Experiment with different seasonings and enjoy with your favorite dips. With the right storage, your chips can stay fresh and crunchy for days. Now, you can confidently whip up these tasty snacks anytime!

Crispy Air Fryer Plantain Chips Simple and Tasty Snack

Looking for a quick, tasty snack that’s also healthy? Let me introduce you to crispy air fryer plantain chips! With

- 6 large egg whites - 1/2 cup cottage cheese - 1/4 cup shredded cheese (like mozzarella or cheddar) - 1/4 cup diced bell peppers - 1/4 cup fresh spinach, chopped - 1/4 teaspoon garlic powder - 1/4 teaspoon onion powder - Salt and pepper to taste - Cooking spray or silicone molds for baking - Muffin tin or baking sheet When I prepare Copycat Starbucks Egg White Bites, I rely on simple, fresh ingredients. The base is egg whites, which provide protein without fat. Cottage cheese adds creaminess and a bit of tang. I like to use mozzarella or cheddar for a melty touch. Bell peppers bring color and crunch. I prefer both red and green for a vibrant mix. Fresh spinach adds a nice green flavor, too. The right spices make a big difference. Garlic powder and onion powder add depth. A sprinkle of salt and pepper helps balance everything. For cooking, I use cooking spray or silicone molds. These options help the bites release easily after baking. A muffin tin works perfectly for shaping these bites. Using these ingredients and tools, you can create a tasty breakfast or snack that is simple and healthy. - Preheat your oven to 350°F (175°C). - In a large bowl, whisk together 6 egg whites and 1/2 cup of cottage cheese. Mix until it looks smooth and creamy. - Next, stir in 1/4 cup of shredded cheese, like mozzarella or cheddar. - Add in 1/4 cup of diced bell peppers and 1/4 cup of chopped spinach for color and flavor. - Sprinkle in 1/4 teaspoon of garlic powder and 1/4 teaspoon of onion powder. - Don't forget to add salt and pepper to taste. Mix all the ingredients well until they are evenly combined. - Lightly grease a muffin tin with cooking spray, or use silicone molds on a baking sheet. - Pour the egg mixture into the muffin tin or molds, filling each about three-quarters full. - Bake in the preheated oven for about 20-25 minutes. They are done when they look set and start to pull away from the sides. - Once baked, remove them from the oven and let them cool for a few minutes. Carefully pop the bites out of the mold. - Serve warm and enjoy your tasty egg white bites! To make great egg white bites, blend the egg whites and cottage cheese well. A smooth mix helps them cook evenly. Use a whisk to break up any lumps. This simple step makes a big difference in texture. To avoid sticking, use silicone molds or spray muffin tins. Silicone molds are easy to pop out. If you use metal, grease them well. This helps keep your bites intact when you take them out. You can add more flavor to your egg white bites. Try diced tomatoes or mushrooms for extra taste. Fresh herbs like basil or chives can also boost flavor. For seasoning, think outside the box! Add a pinch of cayenne for heat or smoked paprika for depth. You can even mix in some feta cheese for a tangy twist. Each change can make your dish unique! Cooking time may change based on your oven type. If you have a convection oven, reduce the time by a few minutes. The fan cooks food faster. Also, if you live at a high altitude, you might need more time. The air is thinner, so food takes longer to cook. Keep an eye on your bites to get the perfect texture. Adjust as needed for the best results! {{image_2}} If you need dairy-free egg white bites, use plant-based cheese instead of regular cheese. You can find many brands that taste great. Also, if you want low-carb bites, skip the shredded cheese. You can add more veggies for flavor and texture. You can change up the taste by adding different vegetables. Try mushrooms, zucchini, or tomatoes for a new twist. For a kick, add fresh herbs like basil or parsley. You can also use spices like paprika or chili powder. This will spice things up and make your bites stand out. These egg white bites pair well with many sauces. Try salsa, hot sauce, or a dollop of guacamole. They are perfect for breakfast or a snack. Serve them at brunch or as a tasty appetizer at parties. Enjoy them warm, or pack them for a lunch on the go! To keep your egg white bites fresh, store them in the fridge. Place them in an airtight container. This helps keep moisture out and flavor in. When stored this way, they stay tasty for up to five days. If you want to save them longer, freezing is the way to go! Freezing egg white bites is simple. After they cool, place them in a single layer on a baking sheet. Freeze them for about two hours. Once frozen, transfer them to a freezer-safe bag or container. This stops them from sticking together. To reheat, microwave them for one to two minutes, or until hot. You can also bake them at 350°F (175°C) for about 10-15 minutes. In the fridge, your egg white bites last for about five days. If you freeze them, they can last for up to three months. Just remember to label the bags with the date. This way, you know when to use them. Keeping track ensures you enjoy them at their best! You can make these bites without cheese. Here are some options: - Use mashed avocado for creaminess. - Add more diced veggies for flavor. - Try silken tofu for a soft texture. - Add nutritional yeast for a cheesy taste without dairy. These swaps keep the bites tasty and nutritious. Yes, you can use whole eggs. This change affects both texture and flavor: - Whole eggs make bites richer and fluffier. - They add more fat, which increases calories. - The taste becomes more eggy and less light. If you like richer bites, whole eggs are a good choice. Absolutely, these bites are great for meal prep. Here are some tips: - Make a big batch and store in the fridge. - Use an airtight container to keep them fresh. - Reheat in the microwave for a quick meal. These bites are perfect for busy mornings or snacks. In this blog post, we covered a simple, tasty recipe for egg white bites. You learned about the main ingredients, cooking gear, and easy steps to create them. I shared tips on enhancing flavor and making variations. Storing your bites properly ensures they stay fresh. This dish is not just quick to make; it also offers flexible options for different diets. Enjoy making these bites for breakfast or snacks, as they fit neatly into meal prep. They’re delicious, nutritious, and very versatile!

Copycat Starbucks Egg White Bites Simple and Tasty

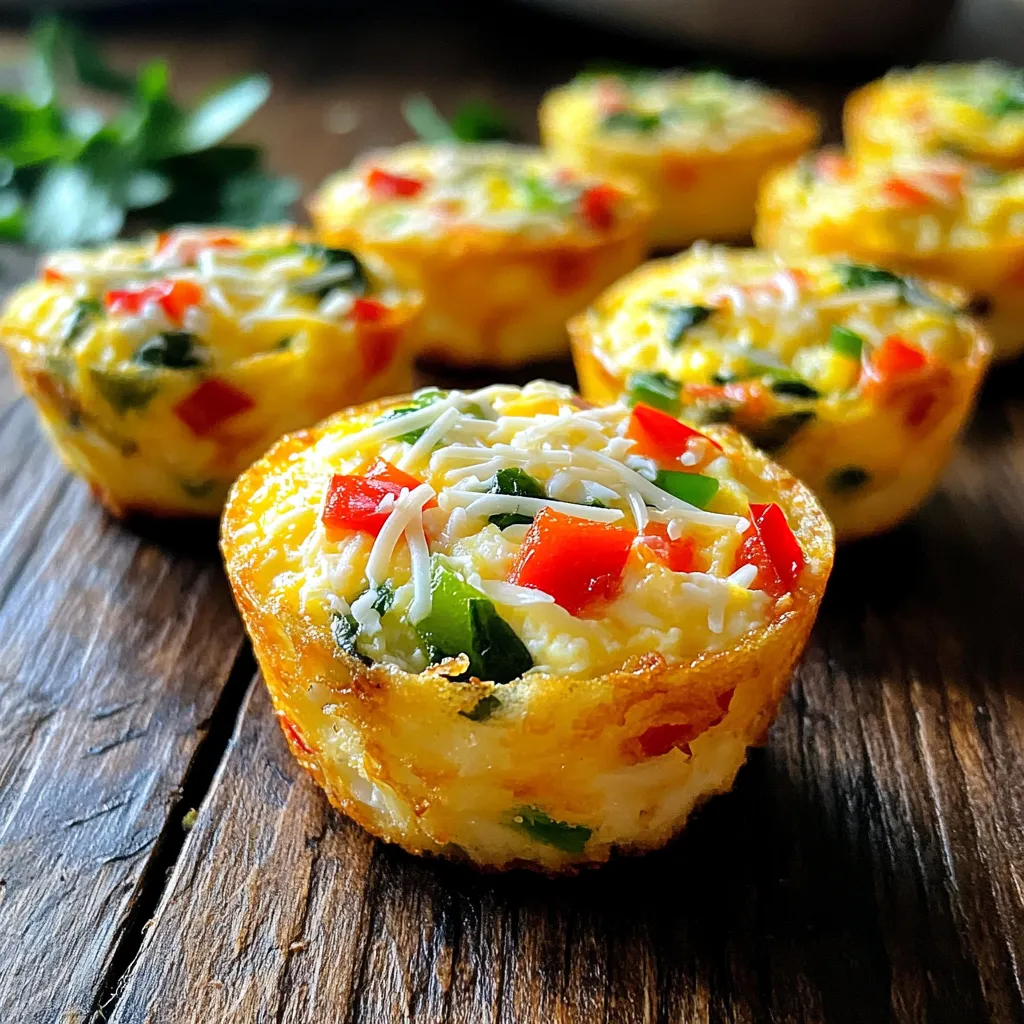
Are you craving those delicious Starbucks Egg White Bites but don’t want to leave home? You’re in luck! This simple

- 1 lb large shrimp, peeled and deveined - 1 ripe mango, diced - 1 small red onion, finely chopped - 1 red bell pepper, diced - 1 jalapeño, deseeded and minced - 2 tablespoons olive oil - 1 tablespoon lime juice - 1 teaspoon chili powder - 1/2 teaspoon cumin - Salt and pepper to taste - 8 small corn tortillas - Fresh cilantro, for garnish - Lime wedges, for serving To make these tacos, I focus on fresh, vibrant ingredients. Large shrimp are key. They soak up flavors well and cook quickly. A ripe mango adds sweetness and bright color. I always pick a mango that feels slightly soft to the touch. Red onion gives a nice crunch. I chop it finely to ensure it blends well. A red bell pepper adds more sweetness and color. The jalapeño gives a spicy kick. I remove the seeds to control the heat. For seasonings, olive oil keeps everything moist. Lime juice brightens the dish. Chili powder and cumin add warmth and depth. I season with salt and pepper to taste, bringing all the flavors together. Don't forget the corn tortillas. They are the base for the tacos. I like to warm them up for better flavor. Fresh cilantro makes a great garnish, adding a fresh note. Lime wedges on the side enhance the taste with each bite. To start, we marinate the shrimp. In a bowl, mix the shrimp with 1 tablespoon of olive oil, lime juice, chili powder, cumin, salt, and pepper. Toss the shrimp to coat evenly. Let the shrimp sit for 15 minutes. This lets the spices soak in. Next, we cook the shrimp. Heat a skillet over medium-high heat. Once hot, add the marinated shrimp. Cook them for about 2-3 minutes on each side. They should turn pink and opaque. This means they’re ready to eat! While the shrimp marinates, we make the mango salsa. In a separate bowl, combine the diced mango, chopped red onion, diced bell pepper, and minced jalapeño. Add the remaining tablespoon of olive oil to the mix. Season with a pinch of salt. This salsa adds a fresh and fruity taste to the tacos. Set it aside for later. Now it’s time to assemble the tacos. First, warm the corn tortillas. You can do this in a dry skillet or microwave until they’re soft. Next, layer the shrimp on each tortilla. Add a generous spoonful of mango salsa on top. Finish with fresh cilantro for a pop of flavor. Serve with lime wedges on the side. Squeeze the lime over the tacos for extra zest! Enjoy your tasty creation! To choose fresh shrimp, look for firm and shiny shells. They should smell like the ocean, not fishy. When cooking, keep the shrimp on medium-high heat. This gives them a nice sear and keeps them juicy. Cook them for about 2-3 minutes on each side. They should turn pink and opaque when done. This will give you the best texture. You can add extra ingredients to your salsa for more flavor. Diced avocado adds creaminess. You can also mix in some lime zest for zing! If you want more heat, try adding more jalapeño or a pinch of cayenne pepper. Adjust the spice level to what you like best. This makes the tacos perfect for your taste. These tacos go well with simple side dishes. Try serving them with a fresh salad or corn on the cob. For drinks, cold beer or a light margarita pairs nicely. You can also serve iced tea or sparkling water with lime. These drinks will balance the spicy shrimp and sweet mango. {{image_2}} You can swap shrimp for other proteins. Fish works great in tacos. Try tilapia or mahi-mahi for a mild taste. Chicken is another good option. Use grilled or shredded chicken for a hearty bite. Tofu offers a nice, plant-based choice. It soaks up flavors well, making it tasty. For a plant-based taco filling, use black beans or lentils. They add protein and fiber. You can also try grilled vegetables. Bell peppers, zucchini, and corn work well together. For a vegan version, skip the shrimp and use tofu. Season it like the shrimp for a similar flavor. This way, everyone can enjoy the tacos. Customizing the spice level is easy. Add more jalapeño for heat or use a milder pepper if desired. You can also adjust the chili powder to suit your taste. If you want to try different fruit salsas, mango is not the only option. Pineapple or peach salsa adds a sweet twist. Each fruit brings its own unique flavor, making your tacos fun and fresh. To keep your shrimp and salsa fresh, follow these steps: - Place leftover shrimp in an airtight container. - Store the mango salsa in a separate container. - Keep both in the fridge. They will stay fresh for up to two days. - Avoid storing assembled tacos. The tortillas will get soggy. When you're ready to enjoy your leftovers, here’s how to reheat them: - Heat shrimp in a skillet over medium heat. Cook for about two minutes until warm. - For tortillas, warm them in a dry skillet for about 30 seconds on each side. - You can also microwave the tortillas in a damp paper towel for about 15 seconds. You can freeze the shrimp, but not the tacos. Here’s how: - Place cooked shrimp in a freezer-safe bag. - Remove as much air as possible before sealing. - Freeze for up to three months. - To use, thaw shrimp in the fridge overnight. Reheat before serving. To pick the best shrimp, look for a few key signs. Fresh shrimp should smell like the ocean, not fishy. The shells should be shiny and firm. Avoid shrimp with black spots or a slimy touch. If you buy frozen shrimp, choose ones that are well-packaged with no ice crystals. Always ask the fishmonger about the source and when it arrived. Yes, you can prep parts in advance. Marinate the shrimp and make the mango salsa a few hours before serving. Store them separately in the fridge. Warm the shrimp and tortillas right before you eat. This keeps the flavors fresh and bright. You can also set out toppings like cilantro and lime for guests to add. Avoid overcooking shrimp. It cooks fast, usually in 2-3 minutes per side. If they turn rubbery, you’ve cooked too long. Also, don’t skip the marinade. It adds flavor and helps with cooking. Lastly, ensure your skillet is hot before adding shrimp. This helps them sear nicely and get that great texture. Spicy Mango Shrimp Tacos are a bright, flavorful dish that's easy to make. We covered the best ingredients, step-by-step prep, and tips for success. You can try different proteins and customize your flavor too. Storing leftovers is simple, and reheating keeps them tasty. With these skills, you can enjoy delicious tacos any time. Remember, cooking should be fun, so don’t hesitate to experiment. Enjoy your taco-making journey!

Spicy Mango Shrimp Tacos Flavorful and Simple Recipe

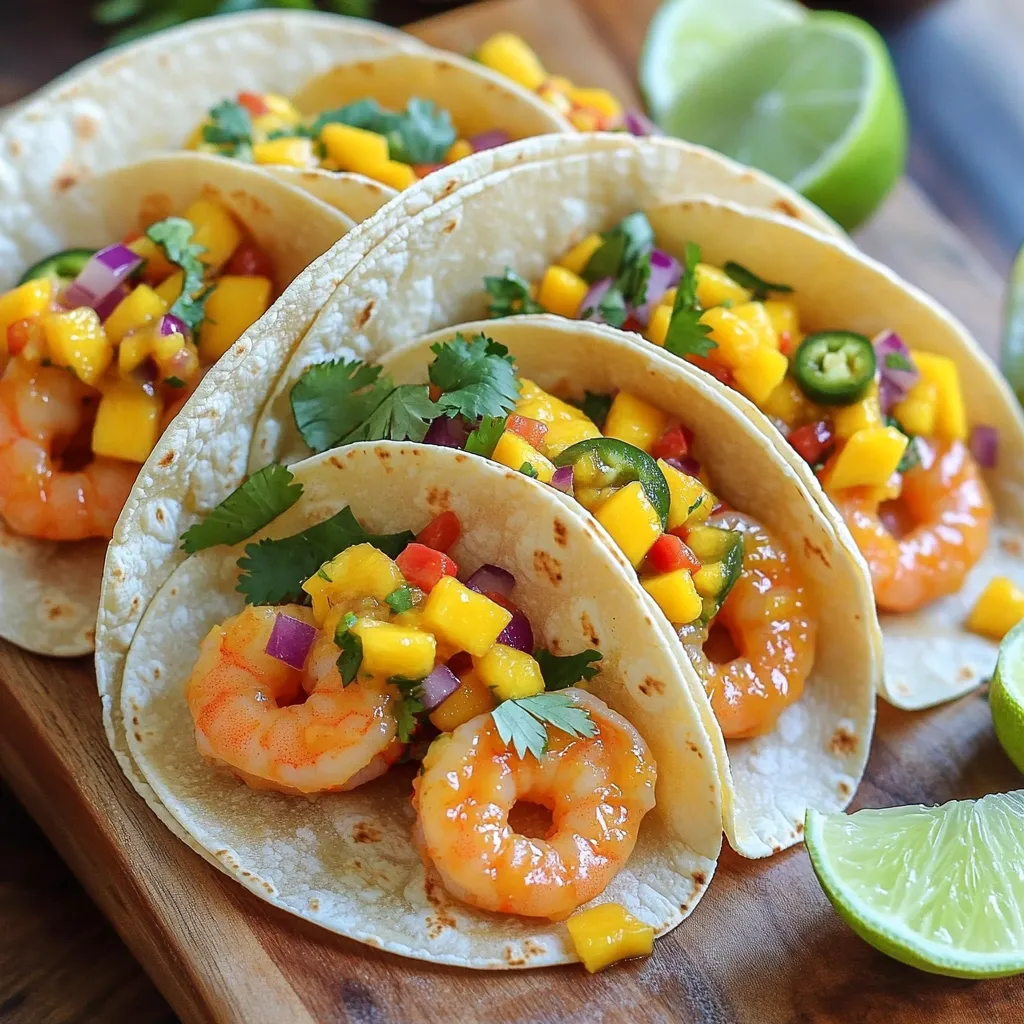
Are you ready to spice up your taco night? These Spicy Mango Shrimp Tacos are both tasty and easy to

To make this tasty pumpkin spice hot chocolate mix, gather these main ingredients: - 1 cup unsweetened cocoa powder - 2 cups powdered sugar - 1 cup powdered milk - 1 tablespoon pumpkin pie spice - 1 teaspoon ground cinnamon These ingredients mix together to create a rich, sweet, and spicy base. The cocoa powder gives it that deep chocolate flavor. The powdered milk adds creaminess without needing fresh milk. The spices bring warmth and a cozy fall vibe. You can add a few optional ingredients to enhance your mix: - 1 teaspoon vanilla extract Adding vanilla gives an extra layer of flavor. It makes your mix taste more complex and delicious. Feel free to skip it if you prefer a simpler taste. When serving your pumpkin spice hot chocolate, consider these fun garnishes: - Mini marshmallows - Dark chocolate shavings - Pumpkin seeds Mini marshmallows create a soft, fluffy top. Dark chocolate shavings add a touch of elegance. Pumpkin seeds give a nice crunch and a pop of color. These garnishes make your drink look great and taste even better! To start, gather your ingredients: - 1 cup unsweetened cocoa powder - 2 cups powdered sugar - 1 cup powdered milk - 1 tablespoon pumpkin pie spice - 1 teaspoon ground cinnamon - 1 teaspoon vanilla extract (optional) 1. Take a large mixing bowl. 2. Add the cocoa powder, powdered sugar, powdered milk, pumpkin pie spice, and cinnamon. 3. Whisk these ingredients well until they blend nicely. 4. If you like, add the vanilla extract. Stir it in until even. 5. Now, transfer your mix into an airtight container. 6. Store this mix in a cool, dry spot. It lasts up to 3 months! When you want a warm cup, grab your mix. 1. Measure out 1/4 cup of the hot chocolate mix into a mug. 2. Heat 1 cup of milk in a small pan. Warm it up, but don't let it boil. 3. Pour the hot milk over the mix in your mug. 4. Stir it well until everything is mixed and creamy. To make it extra special, add toppings! - Top with mini marshmallows. - Sprinkle dark chocolate shavings or pumpkin seeds on top. These small touches give your drink a lovely look and taste. Enjoy your cozy cup of pumpkin spice hot chocolate! To make your pumpkin spice hot chocolate mix shine, follow these tips. First, use high-quality cocoa powder. This choice enhances the chocolate flavor. Next, ensure you whisk all dry ingredients well. This step helps blend the spices and cocoa evenly. If you want a richer taste, add more pumpkin pie spice. Just a little can go a long way! Store your hot chocolate mix in an airtight container. A glass jar works great and looks nice on your counter. Keep it in a cool, dry place. Your mix can last up to three months. However, I recommend using it within a month for the best taste. Always check for clumps before using it. Sweetness is key in hot chocolate. If you prefer a less sweet drink, cut back on the powdered sugar. You can also add a pinch of salt to balance flavors. For spice, try adding more cinnamon or a dash of nutmeg. This mix is flexible, so adjust it to fit your taste. Enjoy experimenting until you find your perfect blend! {{image_2}} You can easily make this hot chocolate mix dairy-free. Just swap powdered milk with a plant-based milk powder. Many brands offer great options. When making your drink, use almond milk, oat milk, or coconut milk instead of regular milk. These choices still give a creamy texture. They also add unique flavors. This way, everyone can enjoy this warm treat. Want to change things up? Try adding more spices! You can mix in nutmeg or ginger for a warm kick. For a chocolate boost, add some dark cocoa powder. You might even enjoy a hint of peppermint. Just add a few drops of peppermint extract. It adds a fun twist to your drink. Get creative and find your favorite blend! Serving your hot chocolate mix can be fun! Use cute mugs or even mason jars. Add a dollop of whipped cream on top for a special touch. You can also drizzle some caramel or chocolate syrup over the marshmallows. For an extra crunch, sprinkle in some crushed graham crackers. This makes your drink look fancy and taste even better. The ingredients in pumpkin spice hot chocolate mix offer great benefits. Cocoa powder is rich in antioxidants. These can help reduce inflammation and improve heart health. It also contains flavonoids that may boost mood. Powdered milk adds protein and calcium. Protein helps build strong muscles, while calcium supports bones. Pumpkin pie spice is a blend of spices with health perks. Cinnamon can help control blood sugar levels. Ginger may aid digestion. Nutmeg can even help with sleep. A typical serving of this hot chocolate mix has about 150 calories. This comes mainly from the sugar and powdered milk. Here’s a quick breakdown: - 1 cup of unsweetened cocoa powder: 100 calories - 2 cups of powdered sugar: 960 calories - 1 cup of powdered milk: 150 calories - 1 tablespoon of pumpkin pie spice: 20 calories - 1 teaspoon of ground cinnamon: 6 calories When you mix it with milk, the calories will change based on the type of milk you use. Whole milk adds more calories, while almond milk has fewer. This mix is easy to modify for different diets. You can use non-dairy milk or a vegan powdered milk. This makes it suitable for those who are lactose intolerant. If you want to lower calories, try using less sugar. You can substitute with stevia or another sweetener. Always check labels for allergens like nuts or gluten. Enjoying pumpkin spice hot chocolate can fit into many diets. It’s perfect for a cozy fall treat! Store your pumpkin spice hot chocolate mix in an airtight container. A jar works well. Keep it in a cool, dry place. This helps keep the flavors fresh. Avoid sunlight or moisture, as they can spoil the mix. Yes! You can use this mix in many drinks. Try it in coffee for a tasty twist. You can mix it with warm milk for a latte too. Be creative! The pumpkin spice flavor adds warmth to any hot drink. This homemade hot chocolate mix lasts up to three months. Store it well to keep it fresh. After three months, check for any changes in smell or taste. If it smells off, it's best to toss it out. You can add pumpkin puree to your drink for extra flavor. Start with one tablespoon per cup. Stir it in after adding hot milk. This makes your hot chocolate richer and creamier. Plus, it boosts the pumpkin flavor! You learned how to make a tasty pumpkin spice hot chocolate mix. We covered the main ingredients, step-by-step instructions, and tips for perfecting your drink. I shared ideas for different flavors and the health benefits of each ingredient. Remember, you can adjust sweetness and spice to suit your taste. Enjoy this cozy drink any time of year. It brings warmth and joy. Make it your own with fun garnishes and variations!

Pumpkin Spice Hot Chocolate Mix Perfect for Fall

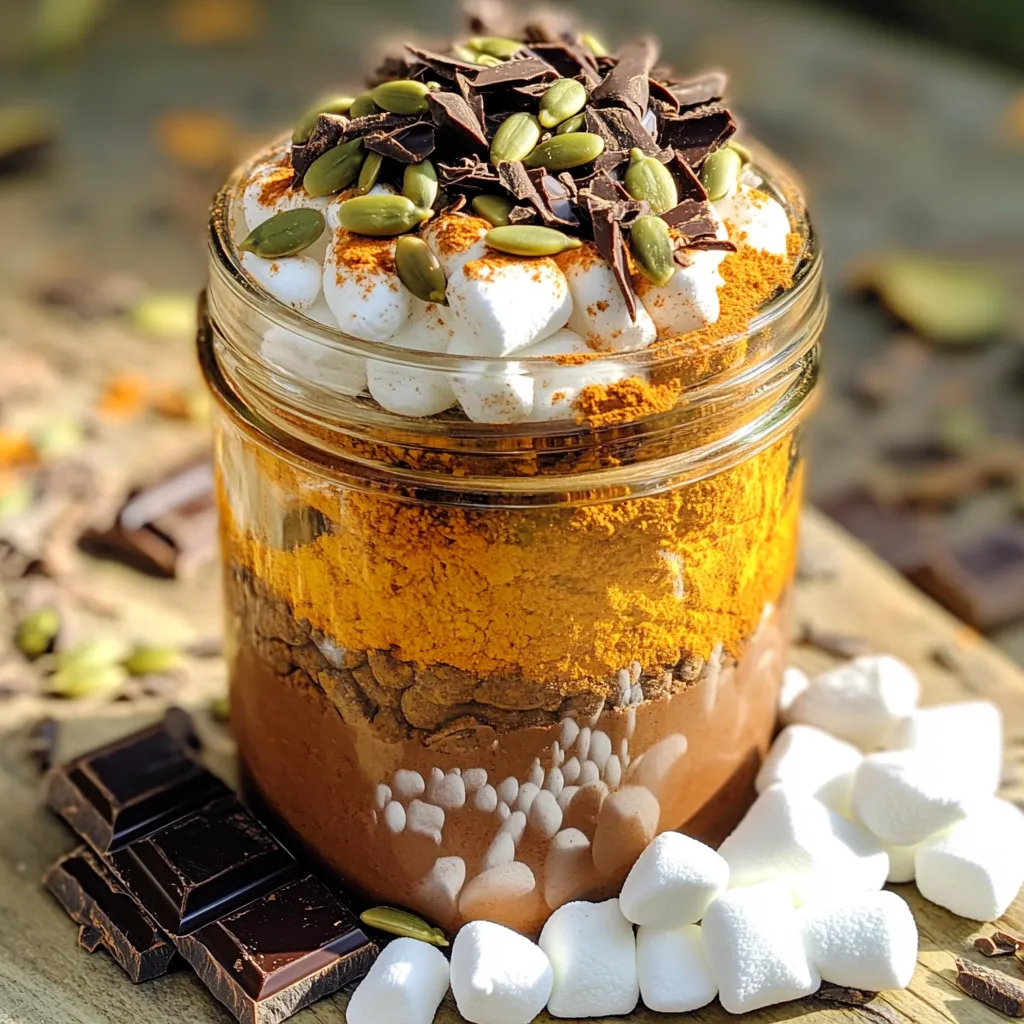
When fall arrives, cozy up with a warm mug of Pumpkin Spice Hot Chocolate Mix. This sweet blend combines rich

To make this dish, you will need: - 1 cup quinoa, rinsed - 2 tablespoons olive oil - 4 cloves garlic, minced - 1 small onion, finely chopped - 4 cups vegetable broth - 1 cup heavy cream (or coconut cream for a dairy-free option) - 1 cup grated Parmesan cheese (or nutritional yeast for a vegan alternative) - 1 cup spinach leaves, roughly chopped - Salt and black pepper to taste - Fresh parsley, chopped for garnish If you have dietary needs, you can swap some items. For a dairy-free meal, use coconut cream and nutritional yeast instead of heavy cream and Parmesan cheese. If you are gluten-free, know that quinoa is a safe choice. You can also add other vegetables, like kale or zucchini, to boost nutrients. Measuring ingredients accurately helps the dish turn out right. Use a dry measuring cup for quinoa and a liquid measuring cup for broth. When measuring olive oil and cream, pour slowly and fill to the line. For garlic and onion, chop them finely for even cooking. A kitchen scale can help too, especially for cheese. Start by heating the olive oil in a large pot over medium heat. Once the oil is warm, add the minced garlic and finely chopped onion. Sauté them for about 3 to 4 minutes. You want the onion to become soft and clear, while the garlic fills the kitchen with a lovely aroma. This step is key. It builds flavor for the whole dish. After the garlic and onion are ready, it's time for the quinoa. Add 1 cup of rinsed quinoa to the pot. Stir it for about a minute. This slight toasting adds a nice nuttiness. Next, pour in the 4 cups of vegetable broth. Bring the mix to a boil. Once it boils, reduce the heat to low. Cover the pot and let it simmer for about 15 minutes. The quinoa will become fluffy and soak up most of the broth. Now comes the creamy part! Remove the pot from heat and stir in 1 cup of heavy cream and 1 cup of grated Parmesan cheese. If you want a dairy-free version, use coconut cream and nutritional yeast instead. Add 1 cup of roughly chopped spinach too. Stir until the spinach wilts and the cheese melts. This makes the dish rich and smooth. Finally, season with salt and black pepper. Cook for another 2 to 3 minutes to heat everything through. Enjoy your creamy garlic Parmesan quinoa! To get the best texture, rinse the quinoa well. This removes the bitter coating. Toast it briefly in the pot before adding broth. This step adds a nice nutty flavor. Cook it until fluffy but not mushy. A good cook time is about 15 minutes. Let it sit covered for a few minutes after cooking. This helps it firm up. Fresh parsley makes a bright and fresh garnish. It adds color and flavor. You can also add a sprinkle of extra Parmesan on top. If you like heat, try red pepper flakes. For a twist, add lemon zest for brightness. Each of these garnishes can elevate the dish. One common mistake is not rinsing the quinoa. This can make the dish taste bitter. Another mistake is overcooking the quinoa. This leads to a mushy texture. Make sure to add cream and cheese after the quinoa cooks. This keeps the flavors fresh and creamy. Lastly, taste before seasoning. You may not need extra salt. {{image_2}} You can make this dish dairy-free by swapping heavy cream for coconut cream. Coconut cream adds a rich flavor without the dairy. To use it, simply replace the heavy cream with one cup of coconut cream. The creamy texture stays, and the taste shifts to a tropical note. This variation is perfect for those avoiding dairy but still craving creamy comfort. For a vegan twist, use nutritional yeast instead of Parmesan cheese. Nutritional yeast gives a cheesy flavor without any animal products. Just add one cup of nutritional yeast when you mix in the coconut cream. This change keeps the dish flavorful and full of nutrients. You will still enjoy that creamy texture while sticking to a plant-based diet. You can boost the protein in your dish by adding chicken, shrimp, or tofu. If you prefer chicken, cook it in the pot before adding the garlic and onion. For shrimp, toss it in during the last few minutes of cooking to keep it tender. If you choose tofu, use firm tofu and cube it before adding it with the quinoa. These additions make the meal heartier and more filling. To store your One-Pot Creamy Garlic Parmesan Quinoa, let it cool first. You don’t want steam to build up in your container. Place it in an airtight container. This keeps the dish fresh. Make sure to eat it within three to four days. If you want to keep it longer, consider freezing it. When reheating, use a pot or microwave. If using a pot, add a splash of water or broth. This helps to bring back moisture. Heat over medium until warm, stirring often. If using a microwave, heat in short bursts. Stir in between to ensure even heating. Check that it’s hot all the way through before serving. To freeze One-Pot Creamy Garlic Parmesan Quinoa, use a freezer-safe container. Portion it out for easy meals later. Label the container with the date. This helps you keep track of how long it’s been in the freezer. It can last up to three months. When ready to eat, thaw it overnight in the fridge. Reheat as mentioned above. Enjoy your creamy delight anytime! You can use rice as a substitute for quinoa. White or brown rice works well. You can also try farro or barley for a different texture. Remember, cooking times may change. Adjust the liquid based on the grain you choose. One-Pot Creamy Garlic Parmesan Quinoa lasts about 3 to 5 days in the fridge. Store it in an airtight container. Make sure it cools down before sealing. This helps keep it fresh and tasty. Yes, you can make this recipe ahead of time. Cook it, let it cool, and then store it. It’s great for meal prep. Just reheat it when ready to eat. Add a splash of broth for creaminess when warming up. This article covered a delicious one-pot creamy garlic parmesan quinoa recipe. We explored key ingredients, including alternatives for different diets. I guided you through each step, from cooking the base to adding cream and cheese. You learned tips to perfect texture and flavor, plus common mistakes to avoid. I shared variations like dairy-free and vegan options. Lastly, I provided storage techniques and answered FAQs for extra help. Enjoy making this dish! It’s easy, tasty, and fits many diets. Don’t hesitate to try your own twists.

One-Pot Creamy Garlic Parmesan Quinoa Delight

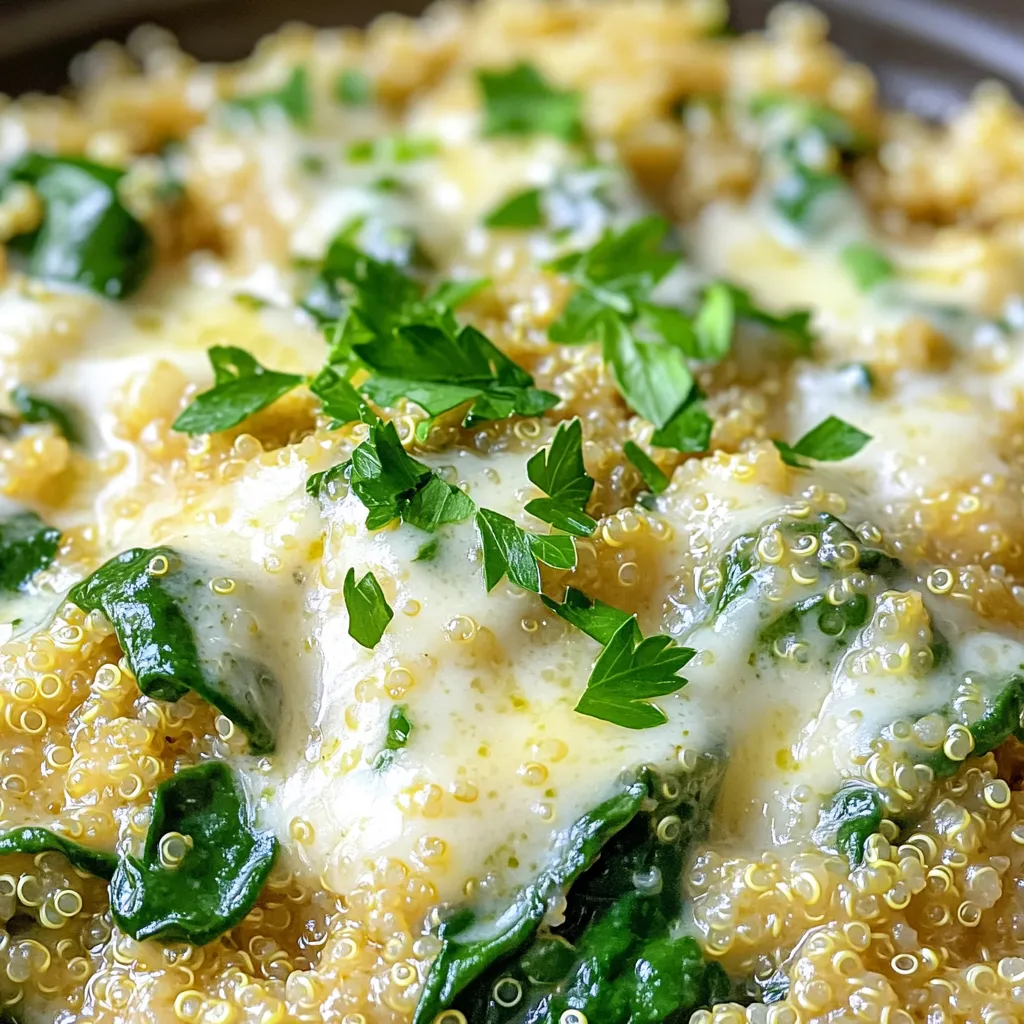
Are you ready to transform your dinner routine? My One-Pot Creamy Garlic Parmesan Quinoa is here to impress! Packed with

- 500g chicken breast, thinly sliced - 1 tablespoon olive oil - 4 garlic cloves, minced - 1 red chili, sliced (adjust to taste) - 1 bell pepper (red or green), sliced - 1 cup snap peas - 3 tablespoons soy sauce (low sodium) - 1 teaspoon sesame oil - 1 tablespoon honey - Salt and pepper to taste - Cooked rice or noodles (for serving) To make this dish, you need a few tools: - A large frying pan or wok - A sharp knife - A cutting board - Measuring spoons - A small bowl for mixing You can swap some ingredients if needed. Here are a few ideas: - For chicken, try tofu or shrimp. - Use vegetable oil if you don’t have olive oil. - If you can't find snap peas, green beans work well. - Honey can be replaced with maple syrup for a vegan option. - Soy sauce can be swapped with tamari for a gluten-free option. These swaps keep the dish tasty and fun! 1. Gather your ingredients. You need chicken, garlic, chili, bell pepper, snap peas, soy sauce, sesame oil, honey, salt, and pepper. 2. Slice the chicken. Cut the chicken breast into thin strips. This helps it cook quickly. 3. Mince the garlic. Chop the garlic cloves finely. This adds great flavor. 4. Slice the chili and bell pepper. Cut the red chili and bell pepper into thin slices. Adjust the chili based on your spice level. 5. Prep snap peas. Rinse them and set them aside. 1. Heat the pan. Use a large frying pan or wok. Add olive oil and warm it over medium-high heat. 2. Add garlic and chili. Stir them in the hot oil for about 30 seconds. This brings out their aroma. 3. Cook the chicken. Turn the heat to high. Add the chicken strips and stir-fry for 4-5 minutes. Look for a golden-brown color. 4. Add veggies. Toss in the bell pepper and snap peas. Stir-fry for another 2-3 minutes. The vegetables should be bright and tender. 5. Prepare the sauce. In a small bowl, mix soy sauce, sesame oil, and honey. 6. Combine everything. Pour the sauce over the chicken and veggies. Stir well and cook for an extra 1-2 minutes. 7. Season it. Add salt and pepper to taste. - Serve hot. Place the stir fry over cooked rice or noodles. - Add garnishes. Top it with sesame seeds and sliced green onions. This adds a fresh touch. - Enjoy! This meal is quick, tasty, and colorful. Perfect for any night! To enhance the taste of your Garlic Chili Chicken Stir Fry, consider these tips: - Use fresh garlic: Fresh garlic gives a strong flavor. Avoid pre-minced garlic. - Adjust the chili: Add more red chili for extra heat or use milder peppers for a gentle taste. - Add herbs: Fresh cilantro or basil can add a fresh twist at the end. - Incorporate citrus: A squeeze of lime or lemon can brighten the dish. Here are some common pitfalls to watch out for: - Overcrowding the pan: Cook in batches if necessary. This keeps the chicken juicy. - Cooking on low heat: High heat helps to sear the chicken quickly. This keeps it tender. - Not seasoning properly: Taste as you go and adjust salt and pepper carefully. Use these methods for the best results: - Stir-frying: Keep the food moving in the pan. This ensures even cooking. - Preheat the pan: Make sure your pan or wok is hot before adding oil. This helps to prevent sticking. - Cut ingredients evenly: Slice chicken and veggies in similar sizes for uniform cooking. {{image_2}} You can make a tasty vegetarian version of this dish. Replace chicken with tofu or tempeh. Use 500g of firm tofu, cut into cubes. Cook it until golden brown. This swap keeps the stir fry filling and delicious. You can follow the same steps in the recipe, just use the tofu. It absorbs the flavors well. Adjust the heat to fit your taste. For a spicy dish, add more chili. Use two or three red chilies for a nice kick. If you prefer mild food, skip the chili or use a pinch of red pepper flakes. You can also add sweet bell peppers for flavor without the heat. This way, everyone can enjoy it. You can mix in other veggies for more color and texture. Try adding broccoli, carrots, or zucchini. Chop them into small pieces to cook evenly. Green beans or baby corn are great options too. Feel free to get creative with your favorite vegetables! Just remember to keep the cooking time short to keep them crisp. To keep your Garlic Chili Chicken Stir Fry fresh, use an airtight container. Allow the dish to cool before storing. Place it in the fridge within two hours of cooking. It stays good for about three days. Make sure to separate rice or noodles if you have leftovers. This helps keep everything fresh and tasty. When you're ready to enjoy leftovers, reheat the stir fry on the stovetop. Use medium heat in a skillet. Stir often to heat it evenly. This usually takes about 5 to 7 minutes. If you prefer the microwave, heat it in a bowl for 1 to 2 minutes. Stir halfway through to avoid cold spots. If you want to save some for later, freezing is a great option. Store the stir fry in a freezer-safe container. Make sure to remove as much air as possible to prevent freezer burn. It will last up to three months in the freezer. When you’re ready to eat, thaw it in the fridge overnight before reheating. This keeps the flavors intact and makes it easy to enjoy again. It takes only 15 minutes to make Garlic Chili Chicken Stir Fry. You can prepare and cook this dish in just five minutes. The stir-frying process takes about 10 minutes. So, if you're in a hurry, this dish is perfect for you. Yes, you can use other proteins. Try beef, shrimp, or tofu for a tasty twist. Each protein may need different cooking times. For beef, cut it thinly and cook for about 3-4 minutes. For shrimp, cook until they turn pink, around 2-3 minutes. Tofu should be crispy and golden for the best flavor. Garlic Chili Chicken Stir Fry tastes great with rice or noodles. You can serve it over white or brown rice. For a lighter option, use zucchini noodles or whole grain noodles. A side salad or steamed broccoli also makes a good match. These sides balance the spicy and savory flavors of the stir fry. This blog post covered all you need for Garlic Chili Chicken Stir Fry. We discussed the key ingredients, tools, and substitutions to simplify your cooking. I shared step-by-step instructions to guide you through preparation and cooking. Useful tips helped avoid common mistakes and added flavor. Variations let you adapt the dish for different diets. Lastly, I provided storage techniques, reheating info, and answers to your frequently asked questions. You now have everything to create a delicious stir fry. Enjoy experimenting in the kitchen!

Garlic Chili Chicken Stir Fry 15 Minutes Delight

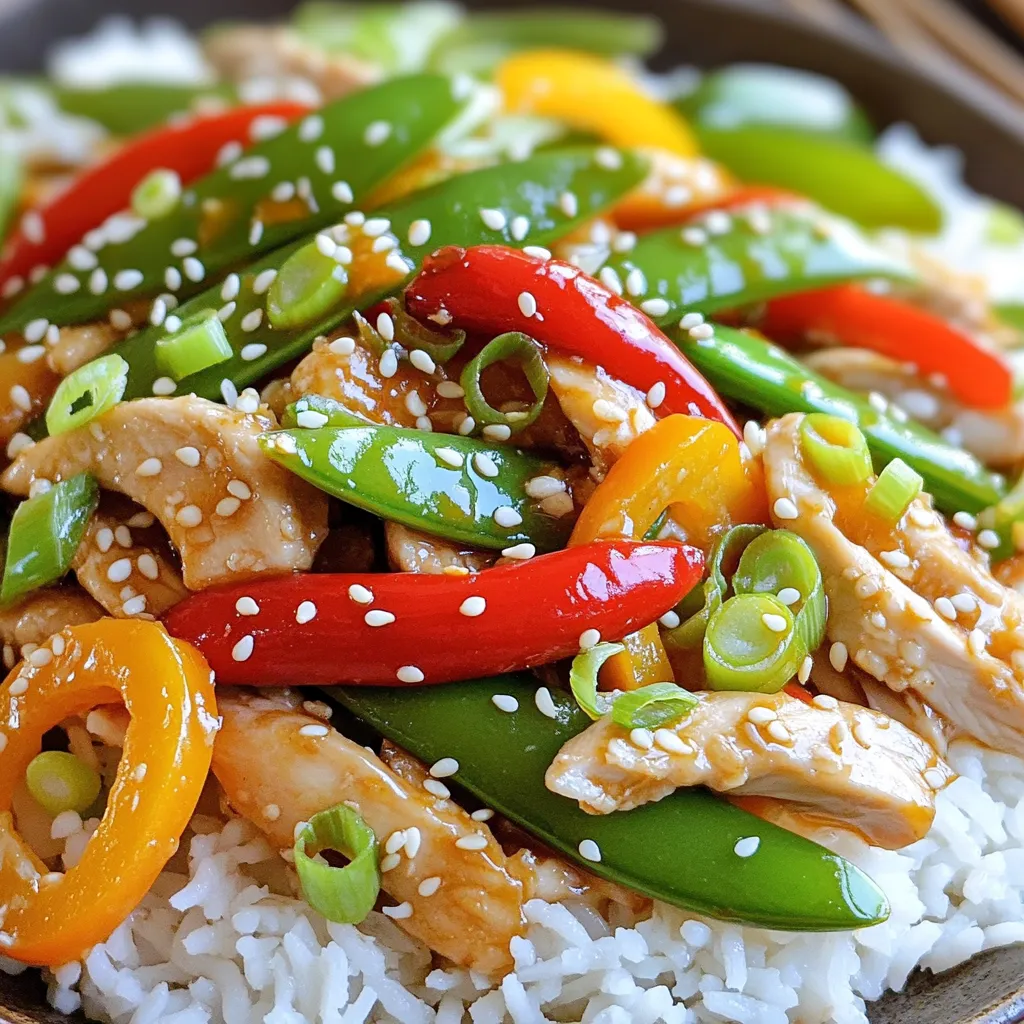
Are you craving an easy, tasty meal? Look no further! My Garlic Chili Chicken Stir Fry takes just 15 minutes

- 1 ½ cups all-purpose flour - 1 tsp baking powder - 1 tsp baking soda - 1 tsp ground cinnamon - 1 tsp ground nutmeg - ½ tsp ground ginger - ¼ tsp ground cloves - ½ tsp salt - ½ cup unsalted butter, softened - 1 cup granulated sugar - 2 large eggs - ½ cup canned pumpkin puree - ½ cup brewed espresso, cooled - 1 tsp vanilla extract - ½ cup buttermilk - 8 oz cream cheese, softened - ¼ cup unsalted butter, softened - 1 ½ cups powdered sugar - 1 tsp vanilla extract - 1-2 tbsp brewed espresso (optional for coffee flavor) - Ground cinnamon and nutmeg for garnish In this recipe, I mix flavors and textures to create a delightful treat. The dry ingredients give the cupcakes structure. The flour, baking powder, and baking soda help them rise nicely. The spices add warmth and a lovely aroma. The wet ingredients bring everything together. The butter and sugar create a sweet base. Eggs add richness, while pumpkin puree adds moisture and flavor. The cooled espresso provides a coffee kick that makes these cupcakes special. For the cream cheese frosting, I combine softened cream cheese and butter. This mix creates a smooth and creamy topping. The powdered sugar sweetens it up. Adding espresso gives the frosting an extra layer of flavor. Garnishing with ground cinnamon and nutmeg makes these cupcakes look even better. These ingredients not only enhance the taste but also create a festive feel. Enjoy each bite as a perfect fall treat! - Preheat your oven to 350°F (175°C) and line a muffin tin with cupcake liners. - In a medium bowl, whisk together 1 ½ cups of all-purpose flour, 1 tsp baking powder, 1 tsp baking soda, 1 tsp ground cinnamon, 1 tsp ground nutmeg, ½ tsp ground ginger, ¼ tsp ground cloves, and ½ tsp salt. Set this aside. - In a large mixing bowl, cream ½ cup of softened unsalted butter and 1 cup of granulated sugar together until light and fluffy. - Beat in 2 large eggs, one at a time. Make sure to mix well after each egg. - Next, stir in ½ cup of canned pumpkin puree, ½ cup of cooled brewed espresso, and 1 tsp of vanilla extract until everything is well combined. - Gradually mix in the dry ingredients and ½ cup of buttermilk until just combined. Do not overmix or your cupcakes may turn out dense. - Divide the batter evenly among the cupcake liners, filling each about 2/3 full. - Bake for 18-20 minutes. Check for doneness by inserting a toothpick into the center. If it comes out clean, they’re ready! - Allow the cupcakes to cool in the tin for 5 minutes. After that, transfer them to a wire rack to cool completely. - In a bowl, beat together 8 oz of softened cream cheese and ¼ cup of softened unsalted butter until smooth. - Gradually add 1 ½ cups of powdered sugar, mixing well. Then add 1 tsp of vanilla extract and 1-2 tbsp of brewed espresso, if you want coffee flavor. Mix until you reach your desired consistency. - Once the cupcakes have cooled completely, frost them generously with the cream cheese frosting. Sprinkle ground cinnamon and nutmeg on top for a festive touch! To get the best cupcakes, start with room temperature ingredients. This helps them mix well. You want a smooth batter with no lumps. When you add dry ingredients, mix gently. Overmixing can make your cupcakes dense and dry. Just stir until you see no more flour. For a pretty finish, use a piping bag. It gives you control over how you frost. If your frosting is too soft, chill it first. This makes it easier to spread. You can also use a spatula for a simple look. Sprinkle fresh nutmeg or cinnamon on top. This adds a nice flavor boost. If you want extra sweetness, drizzle caramel on top. It makes your cupcakes look fancy and taste divine. {{image_2}} You can add chocolate chips or nuts to your cupcake batter. This addition gives a nice texture and extra flavor. Try walnuts for a crunch or dark chocolate chips for sweetness. You can also infuse your cupcakes with vanilla or almond extract. Both flavors blend well with pumpkin spice. A teaspoon of either extract can enhance the taste. If you want a gluten-free option, swap all-purpose flour for gluten-free flour. Many brands work well in baking. You can also use vegetable oil instead of butter. This choice makes your cupcakes dairy-free and keeps them moist. Just use the same amount of oil as butter. You can swap cream cheese frosting for buttercream or whipped cream. Buttercream is sweet and smooth, while whipped cream is light and fluffy. You might also experiment with flavored frostings. Maple or mocha frostings can add a fun twist to your cupcakes. These flavors pair well with the pumpkin spice. To keep your pumpkin spice latte cupcakes fresh, use an airtight container. They stay good at room temperature for up to three days. If you want them to last longer, refrigerate them. This way, they can stay fresh for up to a week. If you have leftover cupcakes, freezing is a great option. Wrap cooled cupcakes tightly in plastic wrap. This helps keep them from getting freezer burn. When you're ready to eat them, thaw at room temperature. This method keeps the flavor and texture just right. If you have extra cream cheese frosting, store it in the refrigerator. It will stay fresh for up to one week. If the frosting becomes too stiff, just re-whip it before using. This ensures it is smooth and easy to spread on your cupcakes. To make pumpkin spice latte cupcakes, you start by mixing your dry ingredients. Whisk flour, baking powder, baking soda, and spices in a bowl. Next, cream softened butter and sugar in another bowl until light and fluffy. Add eggs one at a time. Then stir in pumpkin puree, cooled espresso, and vanilla. Gradually mix in the dry ingredients with buttermilk. Fill cupcake liners and bake at 350°F for 18-20 minutes. Yes, you can use fresh pumpkin. First, cook the pumpkin until soft, then let it cool. Next, puree it well to remove any lumps. Measure the pumpkin puree to ensure you have the right amount for your cupcakes. To achieve moist cupcakes, use buttermilk in your batter. It adds richness and moisture. Be careful not to overmix the batter. Overmixing can make your cupcakes dense and dry. Brewed espresso is the best choice for these cupcakes. It adds a rich coffee flavor. However, any strong coffee will work well if you don’t have espresso on hand. Just make sure it's cooled before adding it to the batter. You can decorate the cupcakes with a sprinkle of ground cinnamon and nutmeg. These spices enhance the fall flavors. For a fun touch, use fall-themed sprinkles. A drizzle of caramel can also add sweetness and a festive look. Making pumpkin spice latte cupcakes is simple and fun. We explored the key ingredients, detailed each step, and shared tips to perfect your baking. These cupcakes are more than a treat; they bring warmth and festive flavors to any occasion. Remember, you can adjust the recipe to suit your taste, whether through add-ins or frosting types. Enjoy these delicious cupcakes, and share them with friends and family for a delightful experience. Happy baking!

Pumpkin Spice Latte Cupcakes Delightful Fall Treat

Do you crave the cozy flavors of fall? Then you’ll love these Pumpkin Spice Latte Cupcakes! Combining the warm spices

- 1 lb Italian sausage, casing removed - 4 medium-sized potatoes, peeled and diced - 1 large onion, chopped - 2 carrots, diced - 2 celery stalks, chopped - 4 cloves garlic, minced - 4 cups chicken broth - 1 cup heavy cream or coconut milk (for a dairy-free option) - 1 teaspoon dried thyme - 1 teaspoon smoked paprika - Salt and pepper to taste - Fresh parsley for garnish (optional) Fresh ingredients make a big difference in flavor. Using fresh potatoes, onions, and herbs boosts taste. They add depth and brightness to the soup. When you choose fresh, you get more nutrients too. Fresh garlic gives a strong, rich flavor compared to dried. Always opt for fresh when you can. It turns a simple soup into something special. You can easily swap out some ingredients. If you want a different meat, try ground turkey or chicken. For a vegetarian option, use lentils or beans. Instead of heavy cream, use yogurt or plant-based milk. If you lack thyme, oregano or basil work well. Feel free to get creative with your choices. Each swap can give you a unique taste. First, you need to brown the Italian sausage. Heat a skillet over medium heat. Add the sausage and break it into smaller pieces using a spatula. Cook until it turns brown and fragrant. If there's too much fat, drain it. Then, transfer the sausage to your slow cooker. This step adds a rich flavor to the soup. Next, add the vegetables. Peel and dice the potatoes into small cubes. Chop the onion, dice the carrots, and chop the celery. Place all these veggies into the slow cooker with the sausage. Now, it’s time to add the minced garlic. Pour in the chicken broth and sprinkle the dried thyme and smoked paprika. Season with salt and pepper to taste. Stir everything well to mix the flavors. Cover the slow cooker with its lid. Set it to low for 6-8 hours, or high for 3-4 hours. This slow cooking helps the flavors blend and makes the veggies tender. About 30 minutes before serving, stir in the heavy cream or coconut milk. This adds a nice creaminess to your soup. Adjust the seasoning if needed. Once done, ladle the soup into bowls and enjoy! To boost the flavor of your Rustic Sausage Potato Soup, consider these tips. First, use fresh herbs like thyme or parsley. Fresh herbs add a bright taste. You can also add a splash of white wine. This adds depth and richness. Don’t skip the smoked paprika; it brings a nice warmth. If you love garlic, add more cloves for a stronger flavor. Lastly, a pinch of red pepper flakes can give a gentle kick. Many home cooks make the same mistakes. One common error is not browning the sausage well. Browning adds flavor, so take your time. Another mistake is skipping the seasoning. Always taste your soup and adjust salt and pepper. Also, avoid overcooking the vegetables. They should be soft but still hold some shape. Lastly, don’t forget to stir in the cream before serving. It makes the soup rich and creamy. If you like a thicker soup, there are easy ways to do this. One method is to mash some potatoes in the soup. This adds body without using extra ingredients. You can also mix a cornstarch slurry. Just mix equal parts cornstarch and water, then stir it in. Let it cook for a few minutes to thicken. If you want a creamier soup, add more heavy cream or coconut milk. This will enhance both texture and taste. {{image_2}} You can make this soup vegetarian or vegan with simple swaps. Instead of Italian sausage, use a plant-based sausage or lentils. For broth, choose vegetable broth instead of chicken broth. Swap heavy cream with coconut milk or a cashew cream. These changes keep the soup rich and tasty while meeting dietary needs. Feel free to get creative with your veggies. You can add corn, green beans, or bell peppers. Just chop them up and toss them in the slow cooker with the other ingredients. Adding spinach or kale near the end of cooking adds color and nutrients. Experiment with your favorite vegetables to make it your own! If you like heat, add red pepper flakes or diced jalapeños. Start with a small amount and taste as you go. For a milder soup, skip spicy ingredients altogether. You can also use smoked paprika for warmth without the heat. Adjust spices to match your taste and enjoy the perfect bowl! To keep your rustic sausage potato soup fresh, let it cool first. Use airtight containers to store it. Place the soup in the fridge if you plan to eat it soon. It stays good for about 3-4 days. For longer storage, consider freezing it. When you're ready to enjoy the soup, reheat it on the stove. Pour the soup into a pot over medium heat. Stir it often to avoid sticking. If the soup is too thick, add a splash of broth or water. You can also use the microwave. Place it in a microwave-safe bowl and heat in short bursts, stirring in between. To freeze the soup, let it cool completely. Pour it into freezer-safe bags or containers. Make sure to leave some space at the top, as liquids expand when frozen. Label the bags with the date. The soup can last for about 3 months in the freezer. To thaw, move it to the fridge overnight before reheating. Yes, you can use frozen vegetables. They save time and add convenience. Just remember to adjust cooking times. Frozen veggies may cook faster than fresh ones. I suggest adding them during the last hour of cooking. This keeps them crisp and bright. You can use vegetable broth or even water. Both options work well in this soup. If you want more flavor, add herbs or spices. You can also use homemade stock for a richer taste. Adjust the salt since some broths are saltier than others. To spice up the soup, add crushed red pepper flakes. Start with a small amount and taste. You can also use hot sausage instead of mild. Another option is to add diced jalapeños or hot sauce. Adjust to your preferred heat level for the best results. In this post, we covered the key ingredients and their freshness. We explored step-by-step cooking in a slow cooker. Tips on enhancing flavors and avoiding mistakes were included. I shared variations for vegan options and spice levels. Finally, we discussed storage practices for your soup. Remember, using fresh ingredients makes a big difference. Enjoy experimenting with flavors and variations. Make your soup your own!

Rustic Sausage Potato Soup Slow Cooker Delight

Welcome to my kitchen! Today, I’ll share a cozy recipe: Rustic Sausage Potato Soup. This slow cooker meal not only

- 12 oz pasta (penne or fusilli) - 2 tablespoons olive oil - 3 cloves garlic, minced - 1 (14.5 oz) can diced tomatoes - 4 cups fresh spinach - 1 cup heavy cream (or coconut cream) - 1 teaspoon Italian seasoning - ½ teaspoon red pepper flakes (optional) - Salt and pepper to taste - ½ cup grated Parmesan cheese (or nutritional yeast) - Fresh basil leaves for garnish To make creamy tomato spinach pasta, gather all the ingredients first. Choose your pasta, like penne or fusilli. I prefer penne for its perfect bites. Grab a can of diced tomatoes. The juices will help create a rich sauce. Fresh spinach adds color and nutrients. Heavy cream makes the dish creamy, but coconut cream works too for a dairy-free option. Italian seasoning blends herbs well, giving a lovely aroma. Red pepper flakes add spice, but they are optional. Always season with salt and pepper to taste. Finally, sprinkle grated Parmesan cheese for a savory finish. If you're vegan, try nutritional yeast instead. Don't forget fresh basil leaves! They are the perfect garnish, adding a touch of freshness. Each ingredient plays a role in making this dish delightful. To start, heat 2 tablespoons of olive oil in a large pot over medium heat. Next, add 3 cloves of minced garlic and sauté for about 1 minute. This step brings out the garlic's nice aroma. After that, pour in 1 can of diced tomatoes with their juices. Stir in 1 teaspoon of Italian seasoning and ½ teaspoon of red pepper flakes if you want some heat. Let this mixture simmer for about 5 minutes. This helps the flavors blend nicely. Now, add 12 ounces of your chosen pasta to the pot along with 4 cups of water. Stir it well to mix everything. Bring the pot to a boil. Once it boils, reduce the heat to a simmer and cover the pot. Cook the pasta according to the package instructions, usually about 8 to 10 minutes. Stir occasionally so the pasta does not stick together. Once the pasta is cooked, stir in 4 cups of fresh spinach and 1 cup of heavy cream. Cook this mixture for an extra 2 to 3 minutes. You want the spinach to wilt and the sauce to become creamy. After that, remove the pot from heat. Stir in ½ cup of grated Parmesan cheese. Adjust the flavor with salt and pepper to your liking. Serve this dish in bowls, adding fresh basil leaves on top for a nice finish. To get that rich, creamy texture, you can use different types of cream. Heavy cream gives the best results, but coconut cream works great for dairy-free options. It adds a slight sweetness, making your dish unique. When cooking, save some pasta water. This starchy water helps to thicken your sauce. Just add a little at a time until you reach your desired creaminess. To make your dish pop, try adding spices and herbs. Fresh basil or oregano adds bright flavors. If you use dried herbs, remember they are more potent. Start with less, and add more as needed. Red pepper flakes add a nice kick if you like heat. You can also try adding garlic powder for extra flavor. Cooking time can change based on the type of pasta you choose. For penne, it usually takes 8-10 minutes. Fusilli might need a minute or two more. If you prefer, you can use a multi-pot method. This means cooking the pasta in one pot and the sauce in another. However, the one-pot method is easier and saves time on cleanup. Choose the method that fits your style best! {{image_2}} For a nut-free and vegan dish, swap heavy cream for coconut cream. This adds creaminess without dairy. Use nutritional yeast instead of Parmesan cheese for a cheesy flavor. You can also add more veggies like mushrooms or zucchini for extra nutrients. These add-ins keep the dish fresh and vibrant. You can easily add protein to this dish. Try cooked chicken, shrimp, or sausage for a meaty twist. For a plant-based option, add cooked lentils or chickpeas. If using meat, cook it separately and stir it in during the last few minutes. This lets the flavors blend well without overcooking. Using seasonal veggies enhances flavor and freshness. In spring, add asparagus or peas. In summer, try fresh tomatoes or zucchini. In fall, butternut squash or kale works great. Just chop them small and add them when you stir in the spinach. This keeps the dish colorful and tasty all year round. To store your creamy tomato spinach pasta, let it cool first. Place leftovers in an airtight container. This keeps flavors fresh and prevents spills. Use glass or high-quality plastic containers. They help maintain taste and texture. When reheating, use a stovetop or microwave. For stovetop, add a splash of water or cream. Stir over low heat until warm. This keeps the creaminess intact. If using a microwave, cover your bowl loosely. Heat in short bursts to avoid overheating. To refresh flavors, add a pinch of salt and pepper. Toss in a bit of fresh spinach or basil after heating. This adds brightness and freshness to your dish. To freeze creamy pasta, let it cool completely. Use freezer-safe containers or bags. Remove excess air to prevent freezer burn. Label with the date for easy tracking. When you're ready to enjoy, thaw in the fridge overnight. Reheat on the stovetop with a little water or cream. Stir well to restore the creamy texture. Enjoy your meal without the fuss! Yes, you can use gluten-free pasta. I recommend using types like rice or corn pasta. These hold up well in this dish. When using gluten-free pasta, cook it according to the package. It may need a few extra minutes. Always check for doneness before serving. You can safely store this creamy dish in the fridge for about 3 days. Make sure to use an airtight container. If you see any changes in color or smell, it's best to throw it away. Reheat it on the stove for best results. Absolutely! To add heat, you can use more red pepper flakes. Start with a pinch and taste as you go. You can also add diced jalapeños or a splash of hot sauce. These options will give your dish a nice kick without overpowering it. This blog post detailed a rich creamy pasta dish that anyone can make. We covered essential ingredients, step-by-step cooking, and various tips to enhance flavor. You can also customize the dish with nut-free or vegan options. Remember to store leftovers properly to keep them fresh and tasty. With easy adjustments, this recipe adapts to your taste. I hope you enjoy trying it out, experimenting with your own flavors, and making it your recipe masterpiece. Happy cooking!

Creamy Tomato Spinach Pasta One Pot Delight

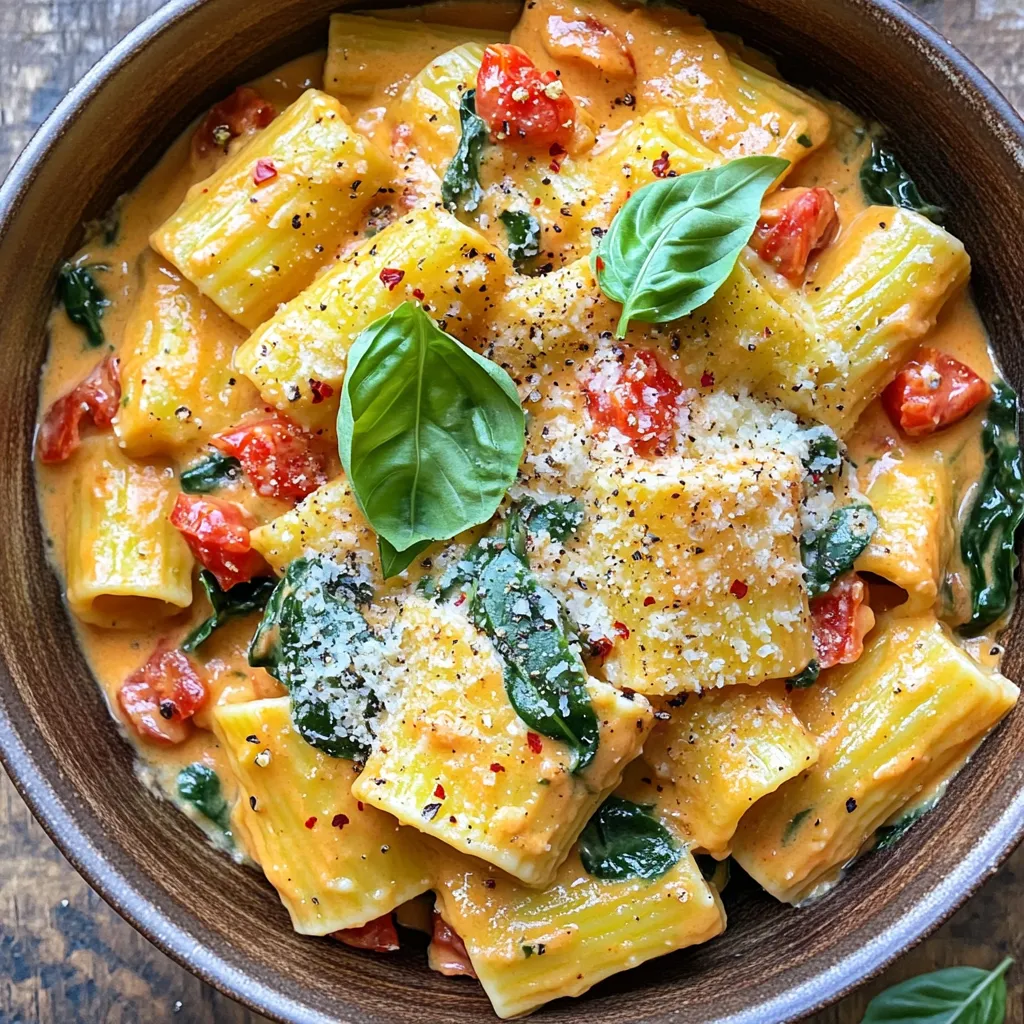
Welcome to a world of flavor with my Creamy Tomato Spinach Pasta One Pot Delight! If you’re looking for an

Older posts
Newer posts
← Previous Page1 … Page12 Page13 Page14 … Page132 Next →

dsad

© 2025 pureeatsnow • Built with GeneratePress

Our Policies

  • Copyright Policy
  • Cookie Policy
  • GDPR Policy
  • Privacy Policy
  • Disclaimer
  • Terms Of Use

More Information

  • Home
  • About
  • Contact
  • Appetizers
  • Dessert
  • Dinner
  • Drinks
©2025, pureeatsnow About Back To Top