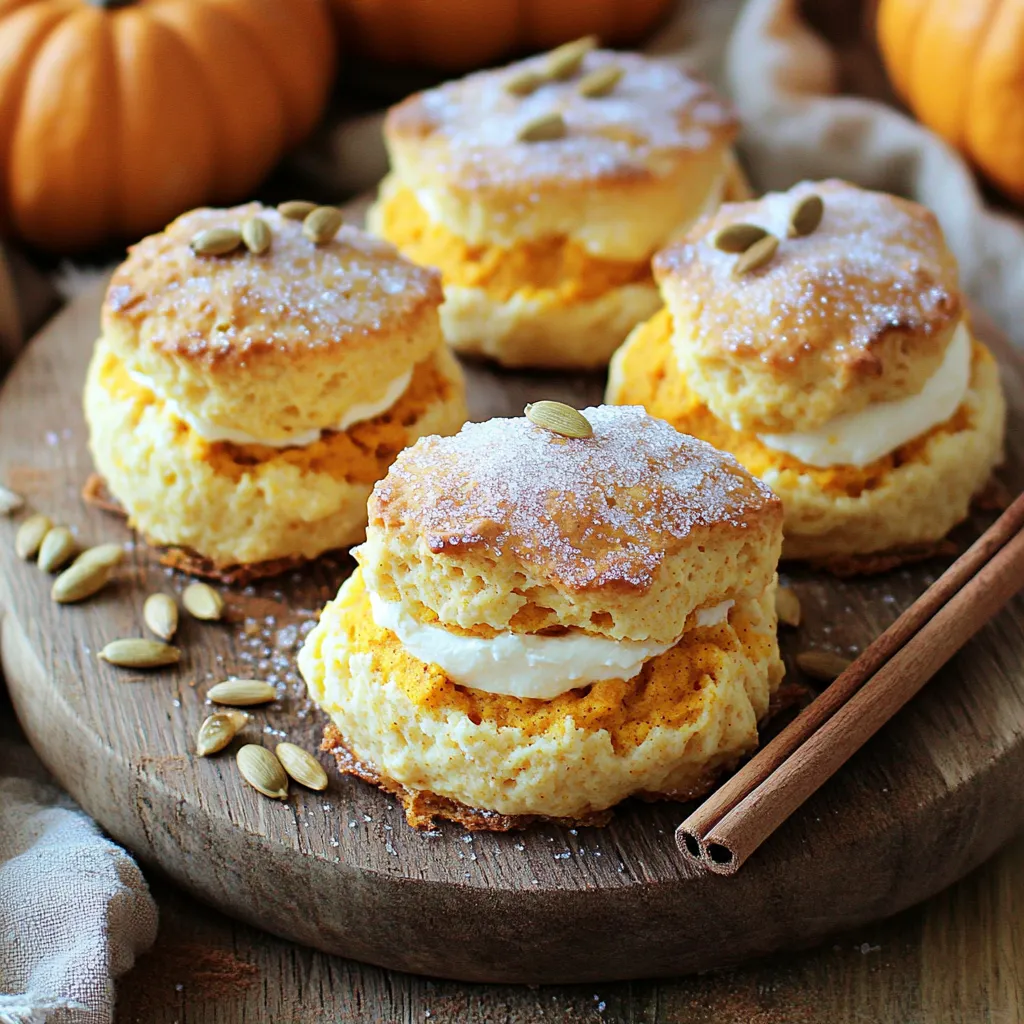
Pumpkin Cream Cheese Scones Bakery Style Delight
Fall is here, and it’s the perfect time to bake warm, soft Pumpkin Cream Cheese Scones. Imagine sweet, spiced pumpkin
Fall is here, and it’s the perfect time to bake warm, soft Pumpkin Cream Cheese Scones. Imagine sweet, spiced pumpkin
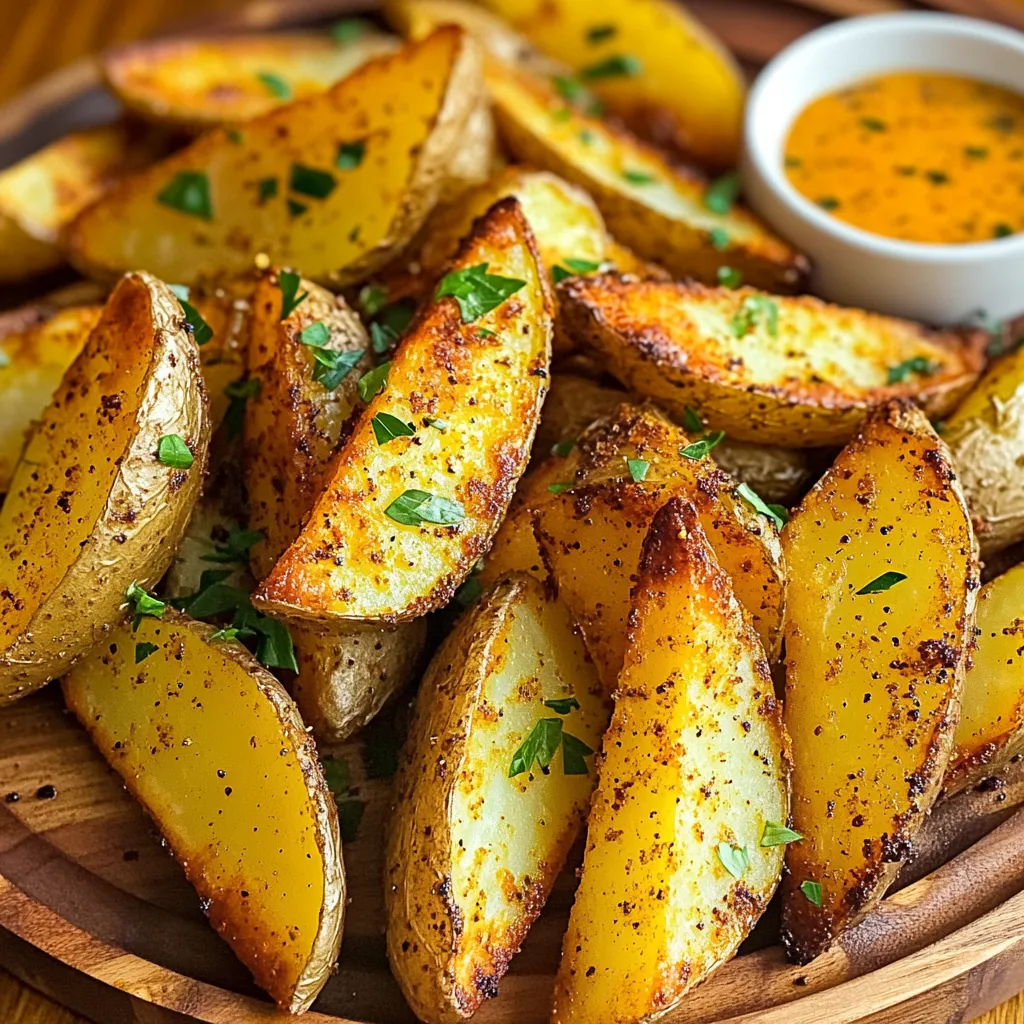
Looking for a delicious side dish that packs a spicy punch? Try my Air Fryer Cajun Potato Wedges! These crispy
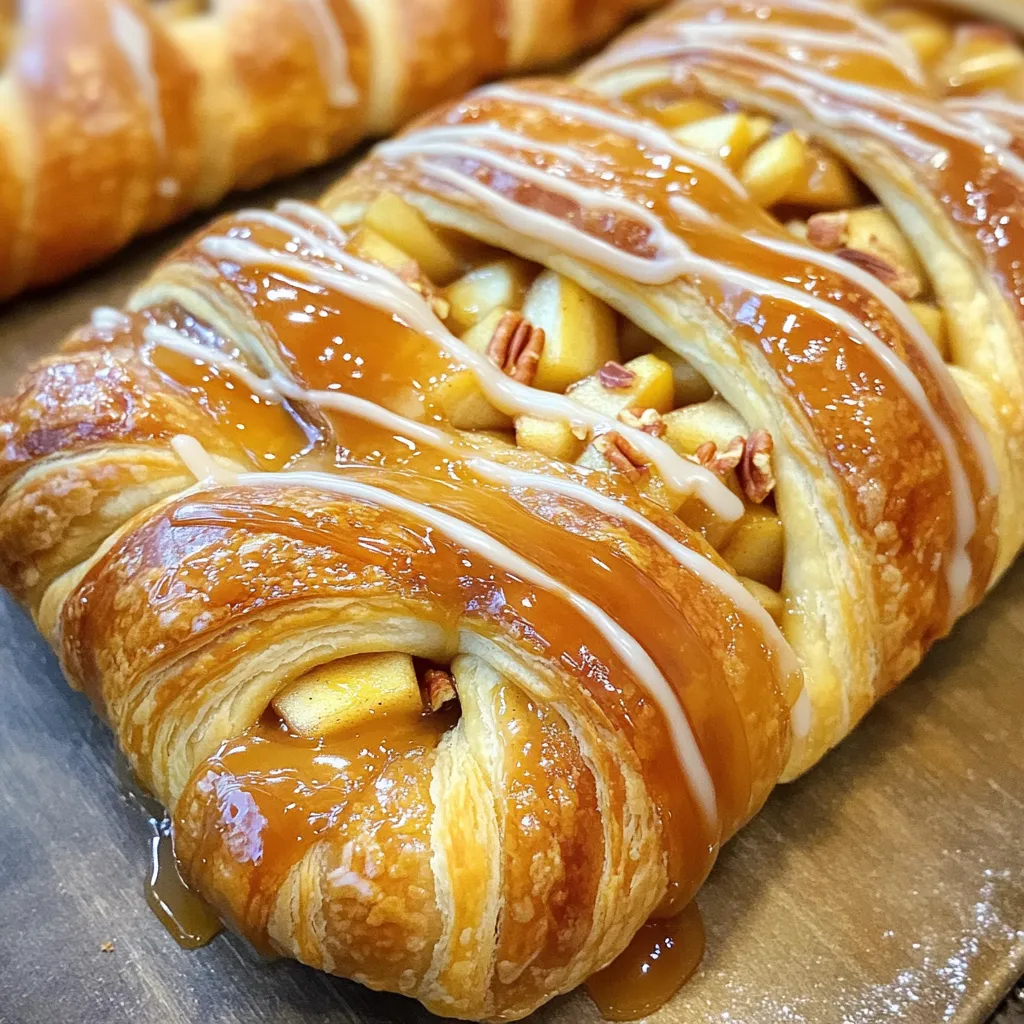
Welcome to my kitchen! Today, I’m excited to share a delightful and simple recipe for Caramel Apple Danish Braid. This
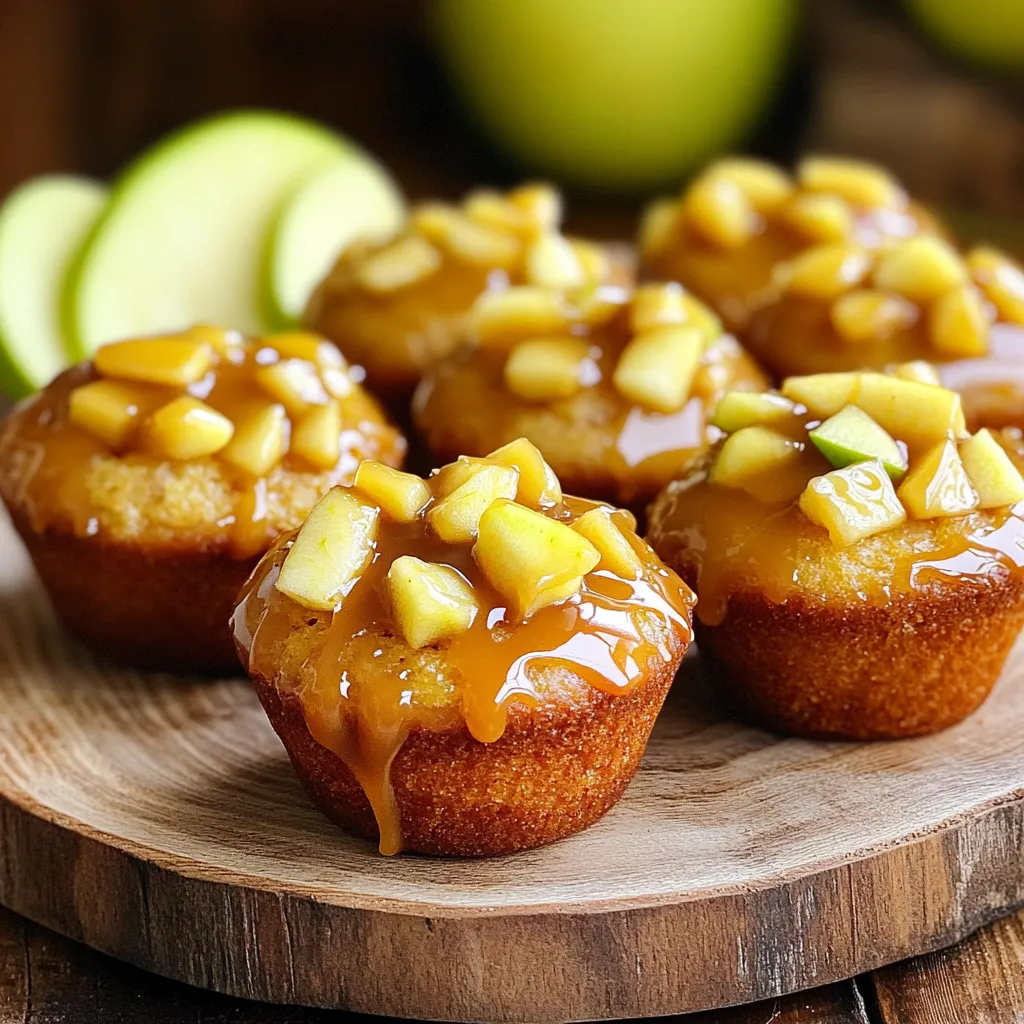
Get ready to treat your taste buds with my Caramel Apple Cider Donut Muffins! This recipe blends the sweet, tangy
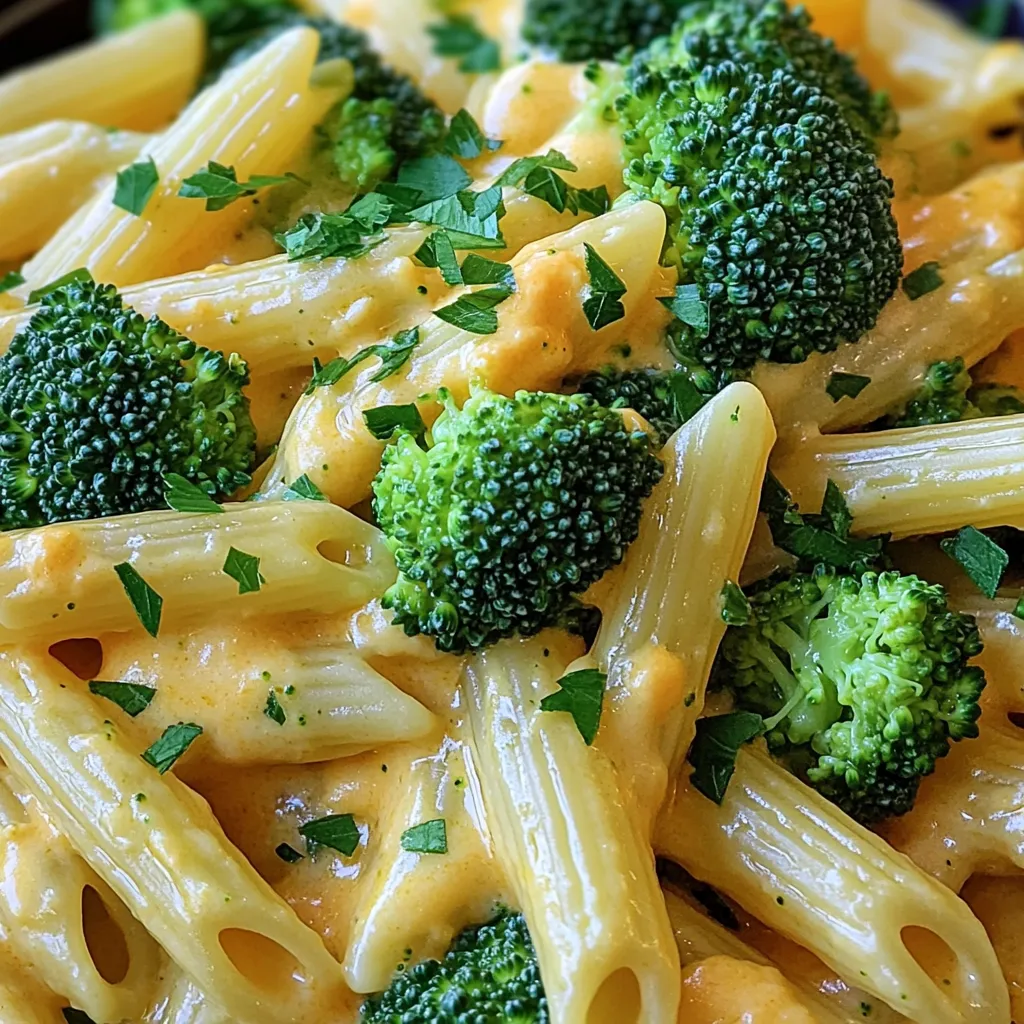
Get ready to impress your taste buds with my One-Pot Creamy Broccoli Cheddar Pasta Delight! This dish combines creamy cheese
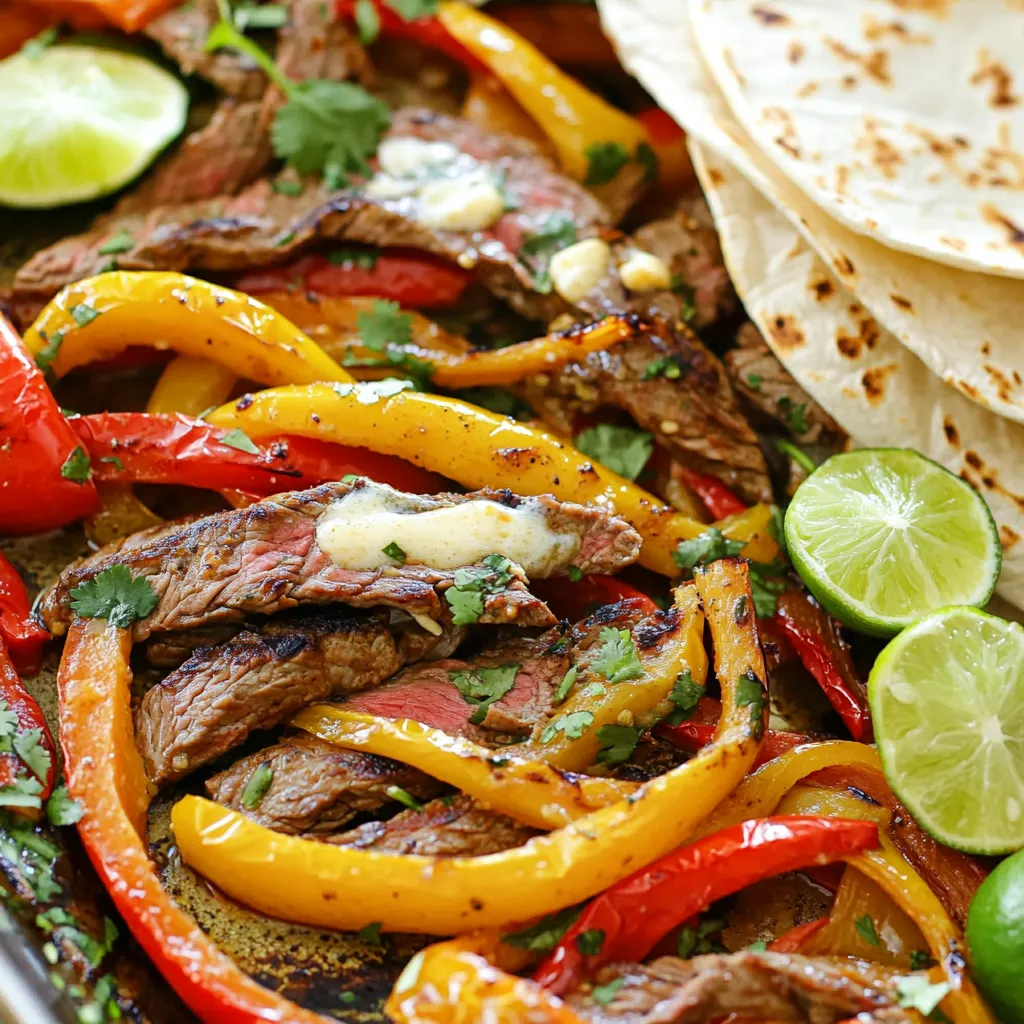
Get ready for a flavor explosion with my Sheet-Pan Garlic Butter Steak Fajitas! This easy, one-pan meal brings together tender
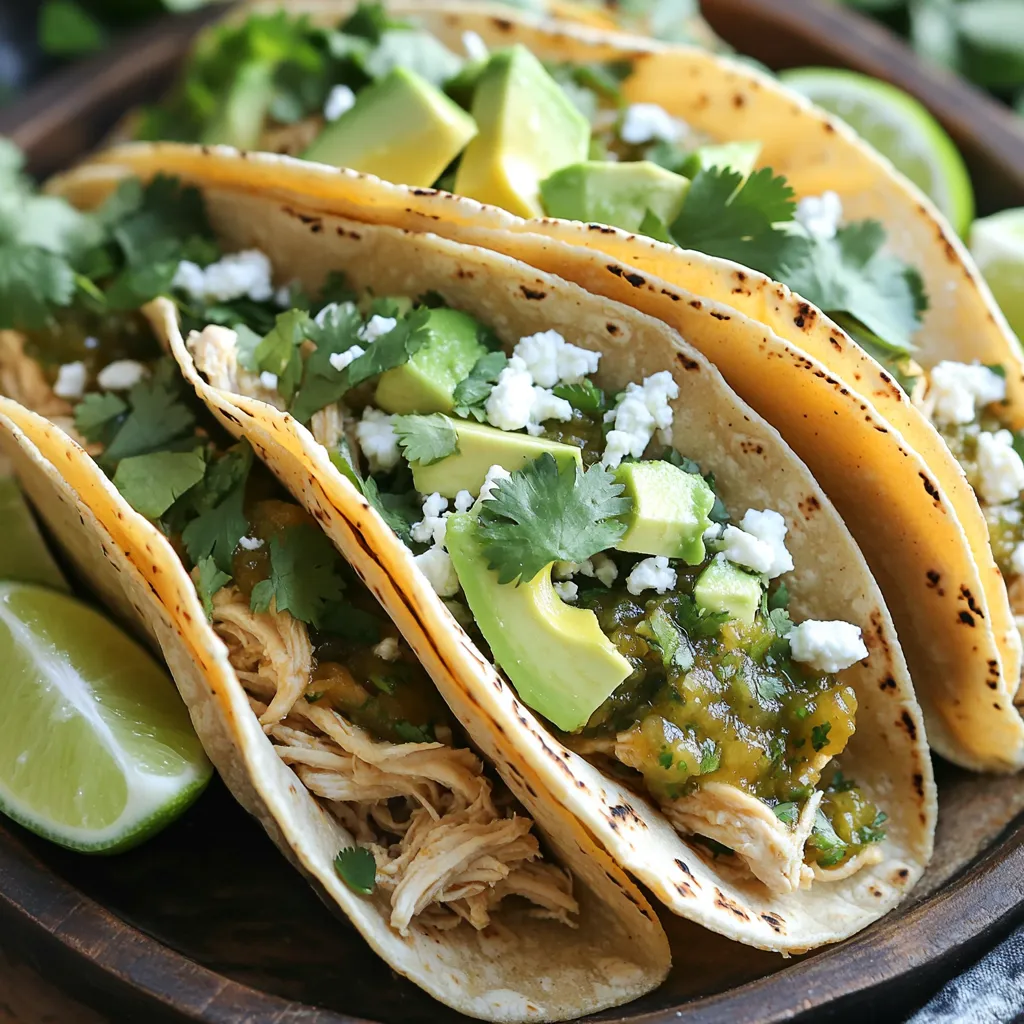
Are you ready for a simple and tasty dinner? Your slow cooker can help! With my Savory Slow Cooker Salsa
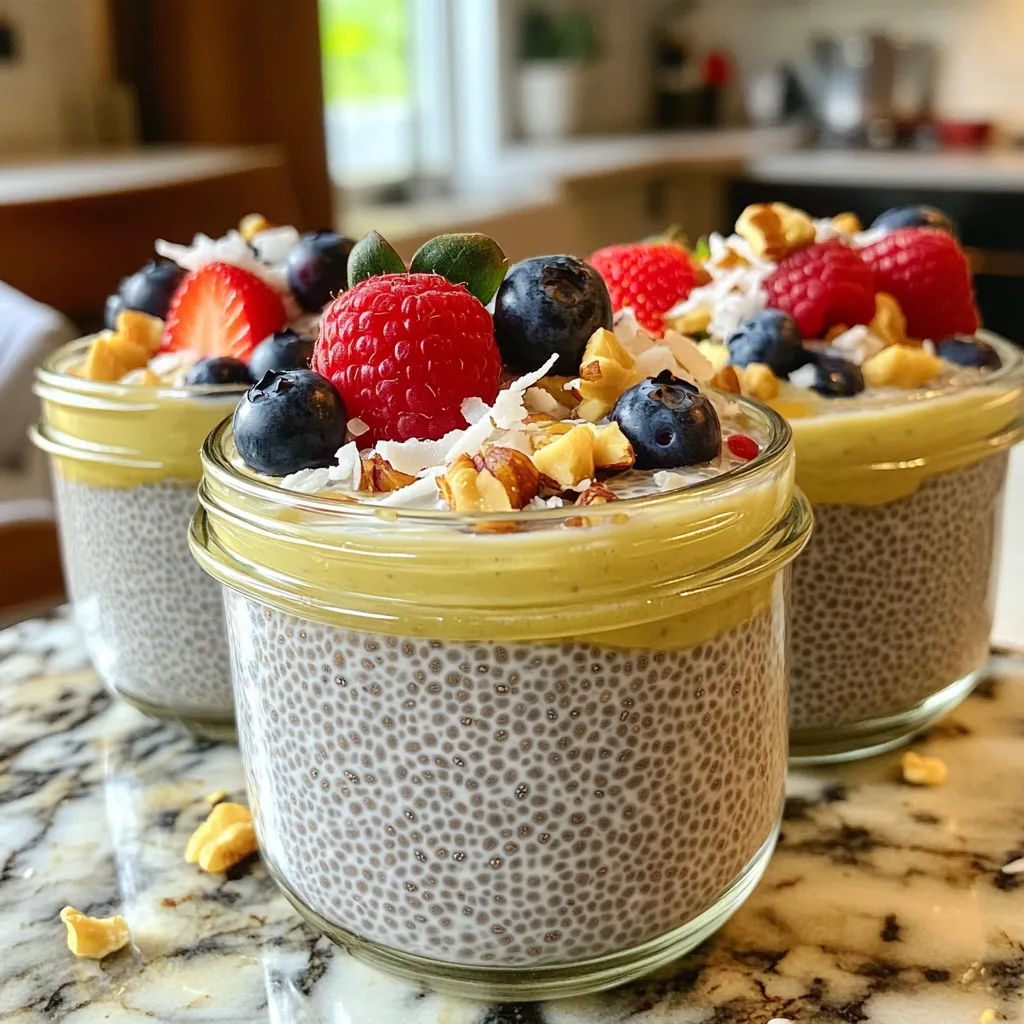
If you’re craving a tasty and healthy treat, you’ve come to the right place! My Maple Vanilla Chia Seed Pudding
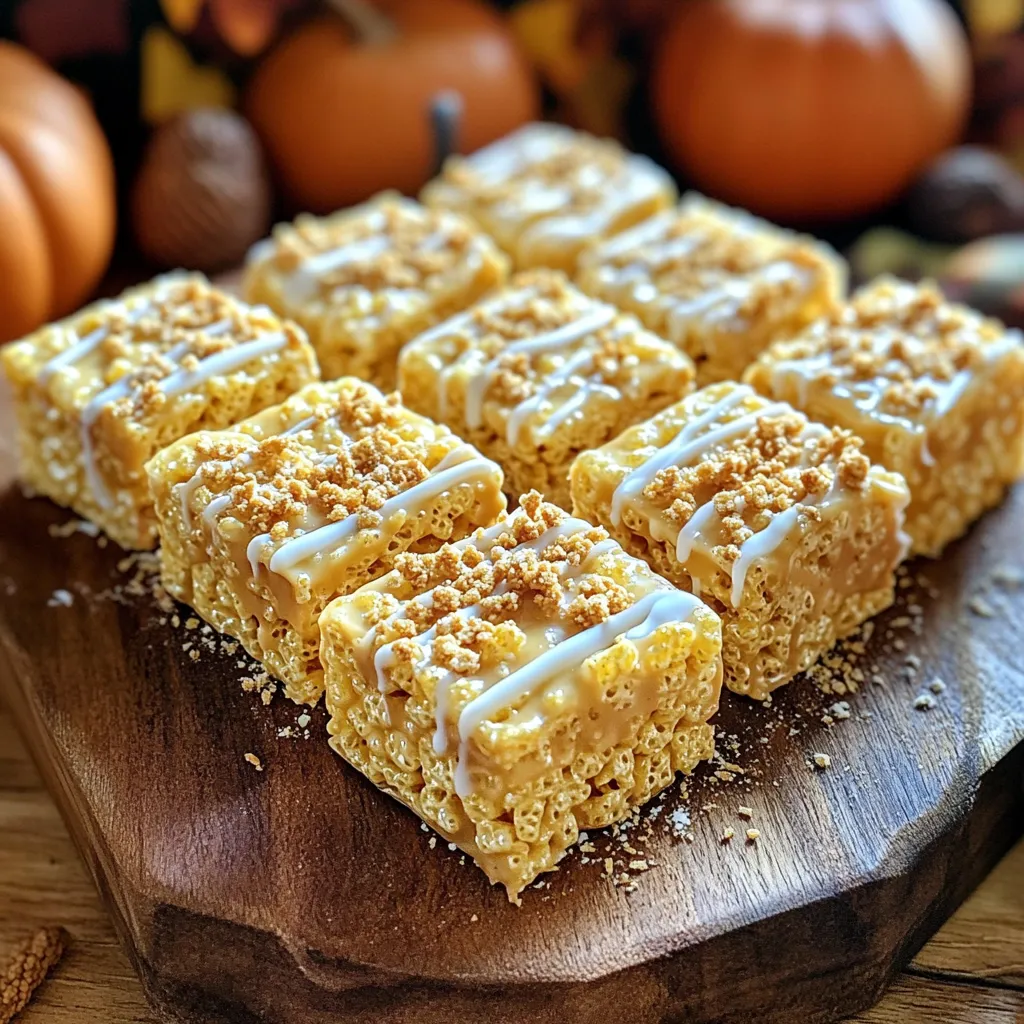
Get ready to embrace fall with my Brown Butter Pumpkin Spice Rice Krispie Treats. This delicious twist on a classic

If you’re craving a tasty snack that’s both easy to make and delicious, you’re in for a treat. Crispy Air
