Skip to content
DisclaimerTerms Of UseGDPR PolicyCookie Policy

pureeatsnow

  • Home
  • Drinks
  • Appetizers
  • Dinner
  • Dessert
  • About
  • Contact
  • Privacy Policy
DisclaimerTerms Of UseGDPR PolicyCookie Policy

Rachel

To make these delicious Macadamia White Chocolate Cookies, gather these key ingredients: - 1 cup unsalted butter, softened - 3/4 cup brown sugar, packed - 3/4 cup granulated sugar - 2 large eggs - 1 teaspoon vanilla extract - 2 1/2 cups all-purpose flour - 1 teaspoon baking soda - 1/2 teaspoon salt - 1 cup white chocolate chips - 1 cup macadamia nuts, chopped These ingredients create a rich and creamy cookie that melts in your mouth. For a fun twist, add 1/2 teaspoon of coconut extract. This adds a hint of tropical flavor. It makes the cookies taste even better, like a mini vacation in each bite. If you don't have an ingredient, here are some swaps: - Use salted butter instead of unsalted; just skip the added salt. - Brown sugar can be replaced with coconut sugar for a different sweetness. - All-purpose flour can be swapped with gluten-free flour for a gluten-free treat. - If you want to avoid nuts, try using more chocolate chips or dried fruit. These substitutions keep the cookies tasty while catering to your needs. Enjoy experimenting! {{ingredient_image_1}} Start by preheating your oven to 350°F (180°C). Line two baking sheets with parchment paper. This keeps cookies from sticking. In a large mixing bowl, cream together 1 cup of softened unsalted butter, 3/4 cup of brown sugar, and 3/4 cup of granulated sugar. Mix until it looks light and fluffy. This step adds air and makes cookies soft. Next, add 2 large eggs, one at a time. Mix well after each egg. Then, stir in 1 teaspoon of vanilla extract. If you want extra flavor, add 1/2 teaspoon of coconut extract. In another bowl, whisk together 2 1/2 cups of all-purpose flour, 1 teaspoon of baking soda, and 1/2 teaspoon of salt. Slowly add this dry mix to the wet ingredients. Mix until just combined. Now, fold in 1 cup of white chocolate chips and 1 cup of chopped macadamia nuts. Make sure they are evenly mixed. This gives each cookie a tasty crunch and sweet bites. Using a cookie scoop or a spoon, drop rounded tablespoons of dough onto the prepared sheets. Leave space between each cookie; they will spread. Bake in the preheated oven for 10 to 12 minutes. Look for lightly golden edges. The centers may appear slightly underbaked but will firm up as they cool. After baking, let the cookies cool on the sheets for 5 minutes. This helps them set. Then, transfer them to a wire rack to cool completely. For presentation, stack the cookies on a nice plate. Sprinkle extra chopped macadamia nuts on top. You can even drizzle melted white chocolate over them for a fancy touch. Enjoy your delicious treats! - Use room temperature butter for a smooth mix. - Measure flour carefully. Too much flour makes cookies dry. - Chill your dough for 30 minutes before baking. This helps cookies hold their shape. - Space the dough balls well on the tray. They need room to spread. - Bake one tray at a time for even heat. Rotate trays halfway through. - Don’t skip the baking soda. It helps cookies rise and become fluffy. - Avoid overmixing the dough. It can make cookies tough. - Watch the baking time closely. Cookies should be golden on the edges but soft in the center. - Don’t cool cookies on the baking sheet for too long. This can lead to soggy bottoms. - For chewy cookies, use more brown sugar and less granulated sugar. This adds moisture. - Bake for a shorter time. Remove them when they look slightly underbaked. - For crispy cookies, use more granulated sugar and less brown sugar. This creates a crunchier texture. - Bake until golden all over for that perfect crispness. Pro Tips Use Room Temperature Butter: Softened butter incorporates better with sugars, creating a light and fluffy cookie texture. Don’t Overmix the Dough: Mix until just combined to keep the cookies tender and prevent them from becoming tough. Chill the Dough: For even thicker cookies, chill the dough for 30 minutes before baking to help them retain their shape. Check for Doneness: Cookies will continue to bake on the sheet after being removed from the oven, so take them out when the edges are golden and the centers look slightly underbaked. {{image_2}} You can change the taste of your cookies by adding different flavors. Try adding 1/2 teaspoon of almond extract. This gives a nice twist to the classic taste. You can also mix in 1/2 cup of shredded coconut for a tropical vibe. The coconut adds texture and pairs well with white chocolate. If you need gluten-free cookies, swap the all-purpose flour with a gluten-free blend. This keeps the cookies soft and chewy. For a vegan option, use plant-based butter and replace eggs with flax eggs. To make a flax egg, mix 1 tablespoon of ground flaxseed with 2.5 tablespoons of water. Let it sit for a few minutes until it thickens. These adjustments keep your cookies tasty while meeting dietary needs. You can mix up the nuts and chocolate for fun new flavors. Instead of macadamia nuts, try pecans or walnuts. They add a rich, nutty flavor. For the chocolate, use dark chocolate chips or even milk chocolate. Each combination gives you a unique cookie experience. Experiment with these changes to find your favorite mix! To keep your cookies fresh, store them in an airtight container. I recommend using a glass or plastic container with a tight lid. Place a piece of parchment paper between layers of cookies to prevent sticking. This method helps maintain their soft texture. You can freeze these cookies for later enjoyment. Once they cool completely, place them in a single layer on a baking sheet. Freeze until solid, then transfer them to a freezer bag. Remove as much air as possible. They will stay fresh for up to three months. Baked macadamia white chocolate cookies last about one week at room temperature. After that, they may dry out. If you want them to last longer, freeze them. Just remember to let them thaw before enjoying! Macadamia white chocolate cookies stand out for their rich, creamy flavor. The sweet white chocolate pairs perfectly with the buttery, nutty macadamia nuts. This combo gives each bite a delightful crunch and a melt-in-your-mouth texture. The optional coconut extract adds a tropical twist that makes these cookies feel special. This unique blend of flavors creates a cookie that is both comforting and exciting. Yes, you can use milk chocolate instead of white chocolate. This swap will change the taste and color of your cookies. Milk chocolate brings a creamier flavor and a darker hue. If you enjoy chocolate, this option provides a nice touch. Just keep in mind that it will alter the sweetness level, so taste the dough to find the right balance. If your cookies spread too much, there are several fixes you can try. First, make sure your butter is softened, not melted. Melted butter can cause cookies to spread. Chill the dough for 30 minutes before baking to help it hold its shape. You can also add a little more flour to the dough if it seems too wet. Lastly, ensure you leave enough space between cookies on the baking sheet. This space allows them to spread evenly without merging into one big cookie. In this post, we explored how to make delicious macadamia white chocolate cookies. You learned about essential ingredients, easy steps, and expert tips for the best results. We also covered variations, storage, and answered common questions. Baking can be fun and rewarding. Use this guide to create your perfect batch. Whether you want chewy or crispy cookies, you have the tools to succeed. Enjoy your baking journey!

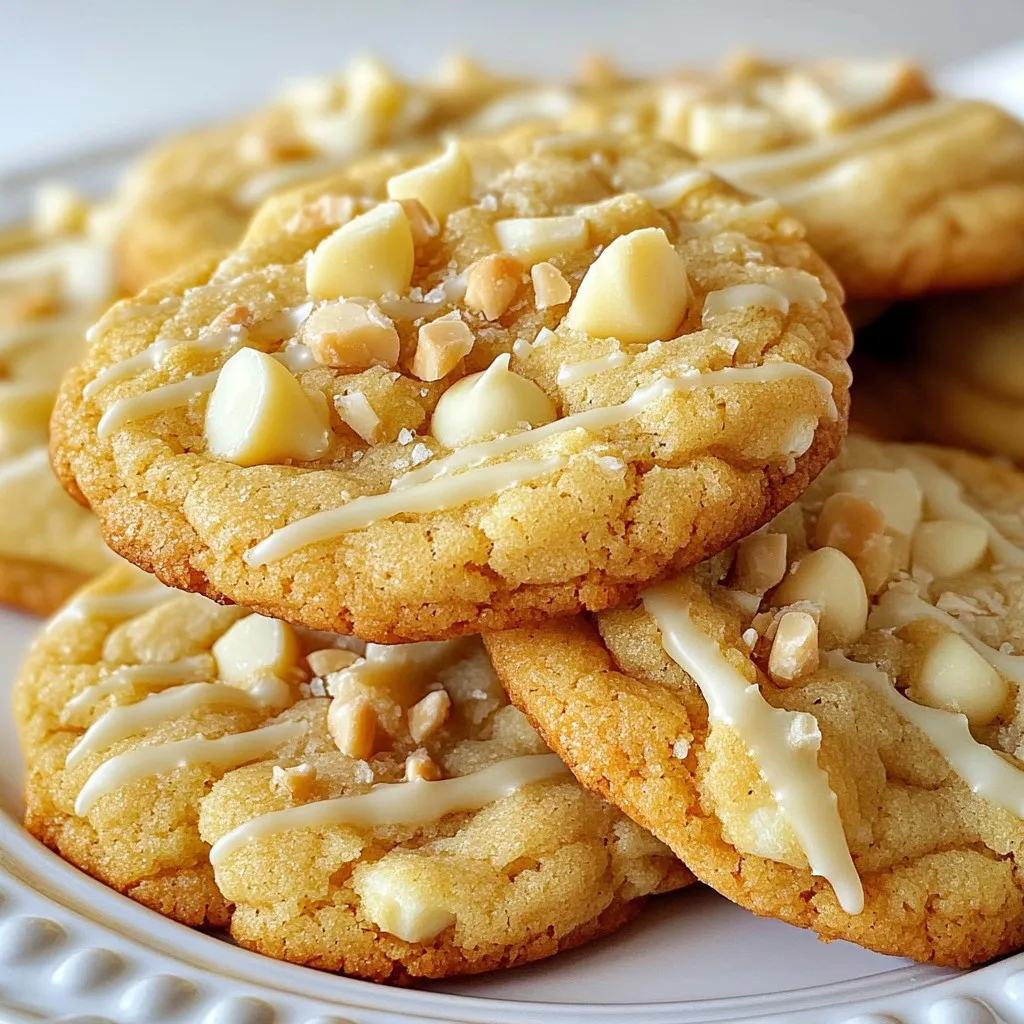
Macadamia White Chocolate Cookies Irresistible Treat

Get ready to indulge in the delicious world of Macadamia White Chocolate Cookies! These treats blend creamy white chocolate with

To make Spicy Cajun Sausage Pasta, you'll need these key items: - 8 oz penne pasta - 1 lb spicy Italian sausage, casings removed - 1 tablespoon olive oil - 1 onion, diced - 3 cloves garlic, minced - 1 bell pepper (any color), diced - 1 can (14.5 oz) diced tomatoes, undrained - 1 cup heavy cream - 2 teaspoons Cajun seasoning - 1 teaspoon smoked paprika - Salt and pepper to taste - ½ cup grated Parmesan cheese - Fresh parsley, chopped (for garnish) These ingredients create a rich and spicy dish that bursts with flavor. You can add a few more items to boost flavor and texture: - 1 teaspoon red pepper flakes for extra heat - ½ cup spinach for color and nutrients - 1 tablespoon lemon juice for brightness - Creole seasoning for a different spice blend Feel free to mix and match these optional ingredients to suit your taste. To cook this delicious pasta dish, gather these essential tools: - Large pot for boiling pasta - Large skillet for the sauce - Wooden spoon or spatula for mixing - Colander for draining pasta - Chef’s knife for chopping ingredients Having these tools ready will make cooking easier and more enjoyable. {{ingredient_image_1}} First, bring a large pot of salted water to a boil. This step is key to flavoring your pasta. Add 8 ounces of penne pasta. Cook it according to the package instructions until al dente. This usually takes about 10-12 minutes. Once done, drain the pasta and set it aside. You want it ready for the sauce. Next, grab a large skillet and heat 1 tablespoon of olive oil over medium heat. When the oil is hot, add 1 pound of spicy Italian sausage. Remove the casings first for easy cooking. Break the sausage apart with a spatula. Cook it until it’s browned, which takes around 5-7 minutes. Now, toss in 1 diced onion, 1 diced bell pepper, and 3 minced garlic cloves. Sauté these until the onion is clear and the vegetables are tender. This should take another 5-7 minutes. The smell is amazing! After that, pour in 1 can of undrained diced tomatoes. Then, add 1 cup of heavy cream, 2 teaspoons of Cajun seasoning, and 1 teaspoon of smoked paprika. Season with salt and pepper to taste. Stir everything well and let it simmer for about 5 minutes. You want the sauce to thicken slightly. Now it’s time to add the cooked penne pasta into the skillet. Toss it gently to coat the pasta with the sauce evenly. Heat everything together for an extra 2-3 minutes. Off the heat, stir in ½ cup of grated Parmesan cheese until it melts. This adds a creamy touch to your dish. Serve it hot, garnished with chopped fresh parsley for a nice pop of color! Enjoy your meal! To get the best pasta, use salted water. This adds flavor as the pasta cooks. Bring the water to a boil before adding the penne. Cook it until it is al dente, or firm to the bite. You want it to hold its shape when mixed with the sauce. Drain the pasta but don’t rinse it. Rinsing washes away the starch that helps the sauce stick. Cajun seasoning is key to this dish. It gives the pasta a bold kick. Start with two teaspoons, then taste. If you want more heat, add a bit more. Smoked paprika adds a nice depth. It enhances the rich flavor of the sausage. Don’t forget salt and pepper. They can help balance the heat and make the dish sing! You can make this dish ahead of time. Cook the sausage and veggies, then store them in the fridge. When you are ready, just heat them up. Cook the pasta fresh for the best texture. If you want, you can freeze the sauce. Just thaw it in the fridge overnight before reheating. This makes dinner quick and easy on busy nights! Pro Tips Use Fresh Ingredients: Fresh vegetables and high-quality sausage will enhance the flavor of your dish. Opt for seasonal produce for the best taste. Adjust the Spice Level: If you prefer a milder dish, use a mild Italian sausage instead of spicy. You can also reduce the Cajun seasoning to taste. Perfect Pasta: Ensure your pasta is al dente before mixing it with the sauce. It will continue to cook slightly in the sauce, absorbing flavors without becoming mushy. Garnish for Presentation: Fresh parsley not only adds color but also a fresh flavor. Consider adding a squeeze of lemon juice before serving for an extra zing. {{image_2}} You can make a tasty vegetarian version of spicy Cajun pasta. Use plant-based sausage instead of meat. These sausages bring great flavor without the meat. You can also use mushrooms for a meaty texture. Portobello mushrooms work well. They soak up the sauce nicely. Adding more vegetables boosts the flavor and nutrition. Try bell peppers, zucchini, or spinach. You can mix in diced tomatoes or corn too. These veggies add color and crunch. Cook them with the sausage or toss them in at the end. It’s a great way to get more vitamins. Different types of sausage can change the dish's flavor. You can use chicken sausage for a lighter taste. Turkey sausage is another option that keeps it lean. If you like heat, try andouille sausage for a kick. Each type adds its unique twist to the pasta. Enjoy experimenting with your choice! To store leftover spicy Cajun sausage pasta, let it cool down. Place it in an airtight container. Make sure to seal it well. Store it in the fridge. It will stay fresh for about 3 to 5 days. To reheat, you can use a microwave or a skillet. If using a microwave, place the pasta in a bowl. Add a splash of water or cream to keep it moist. Heat it for 1 to 2 minutes, stirring halfway. If using a skillet, heat on low. Add a bit of oil or water to prevent sticking. Cook until heated through. Freezing spicy Cajun sausage pasta is easy. First, let it cool completely. Then, pack it in freezer-safe bags or containers. Make sure to remove as much air as possible. Label the bags with the date. It can last for up to 3 months in the freezer. To reheat, thaw in the fridge overnight. Then, follow the reheating instructions mentioned earlier. You can use other types of sausage like chicken or turkey. If you want a meatless option, try a plant-based sausage. You can also use diced smoked sausage for a different taste. Just keep in mind that the flavor may change. Adjust seasonings to match the flavor profile you like. Yes! To make this dish gluten-free, use gluten-free penne pasta. Many brands offer tasty options. Just check the label to ensure it fits your needs. The rest of the ingredients are naturally gluten-free. Always read labels for any hidden gluten in sauces or other items. To lower the heat, use mild sausage instead of spicy. You can also reduce the Cajun seasoning. If you want more spice, add a pinch of cayenne pepper or some red pepper flakes. Always taste as you go, so you get the flavor just right for you! In this blog post, we explored how to make Spicy Cajun Sausage Pasta. We covered the key ingredients and tools to use. I shared step-by-step instructions, tips for perfect texture, and variations for everyone. Storing leftovers and reheating them was also discussed. Cooking is about creativity, so don’t hesitate to try new ideas. Enjoy your dish, and make it your own!

Spicy Cajun Sausage Pasta Flavorful and Easy Dinner

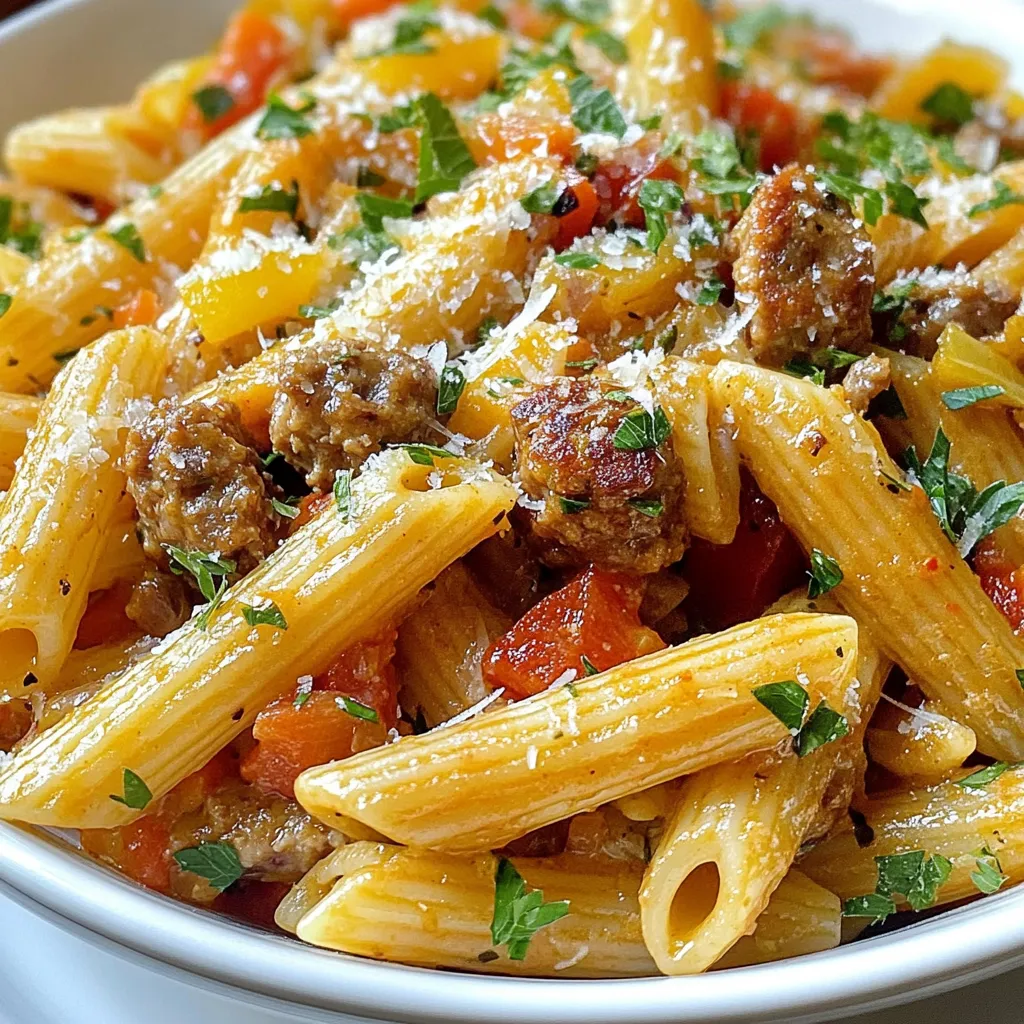
Are you craving a bold and zesty meal? Look no further than Spicy Cajun Sausage Pasta! This dish bursts with

To make Balsamic Glazed Caprese Chicken Bake, gather these items: - 4 boneless, skinless chicken breasts - 2 cups cherry tomatoes, halved - 8 oz fresh mozzarella cheese, sliced - 1/2 cup balsamic glaze - 2 tablespoons olive oil - 4 cloves garlic, minced - 1 teaspoon dried basil - 1 teaspoon dried oregano - Salt and pepper to taste - Fresh basil leaves for garnish Each ingredient plays a key role in this dish. Here’s how much you need: - Chicken breasts: Four pieces, around 6 oz each. - Cherry tomatoes: Two cups, about 12-15 tomatoes, depending on size. - Mozzarella cheese: Eight ounces, roughly one ball of cheese. - Balsamic glaze: Half a cup, which adds a sweet tang. - Olive oil: Two tablespoons for cooking and flavor. - Garlic: Four cloves for a bold taste. - Dried herbs: One teaspoon each of basil and oregano. - Salt and pepper: Use to your taste. - Fresh basil: A handful for garnish and fresh flavor. Using fresh ingredients makes a big difference in flavor. - Chicken: I recommend fresh, high-quality chicken breasts. Frozen ones can work, but they may not cook evenly. - Tomatoes: Fresh cherry tomatoes burst with flavor. Canned tomatoes won’t give the same taste. - Mozzarella: Fresh mozzarella is the best choice. It melts beautifully and adds creaminess. - Balsamic glaze: You can buy it, but making your own is simple and fun. Just reduce balsamic vinegar until thick. - Herbs: Fresh basil is ideal, but dried works if you’re in a pinch. Using fresh ingredients truly elevates this recipe. They bring vibrant flavors and textures that make every bite delightful. {{ingredient_image_1}} Start by preheating your oven to 400°F (200°C). While it heats, grab a large oven-safe baking dish. Drizzle 2 tablespoons of olive oil in the dish. Spread the oil evenly across the bottom. This will help the chicken not stick. Now, take 4 boneless, skinless chicken breasts. Season each side with salt, pepper, 1 teaspoon of dried basil, and 1 teaspoon of dried oregano. Place the chicken in the baking dish. Scatter 2 cups of halved cherry tomatoes around the chicken. This adds flavor and color. In a small bowl, mix 4 cloves of minced garlic with half of the balsamic glaze. Pour this mixture over the chicken and tomatoes. It gives the dish a rich taste. Bake in the oven for 25 minutes. After 25 minutes, carefully take the dish out of the oven. Now, top each chicken breast with slices of fresh mozzarella cheese. This makes the dish creamy and delicious. Return the dish to the oven and bake for another 10 to 15 minutes. The chicken should be cooked through, and the cheese should melt and bubble nicely. Once your chicken is done, drizzle the rest of the balsamic glaze over everything. This adds a nice shine and extra flavor. For the final touch, garnish your dish with fresh basil leaves. They give a lovely pop of color and a fresh taste. Now, your Balsamic Glazed Caprese Chicken Bake is ready to serve! To get juicy chicken, start with fresh, high-quality chicken breasts. Always season your chicken well. Use salt and pepper, along with dried herbs like basil and oregano. This adds flavor. Make sure your oven is at the right temperature. Preheat it to 400°F (200°C). This helps cook the chicken evenly. Bake it for 25 minutes before adding cheese. This way, the chicken stays moist. Using balsamic glaze can elevate your dish. Start with a good quality glaze for the best flavor. You can make it from scratch by simmering balsamic vinegar until it thickens. This gives a rich taste. When using store-bought glaze, drizzle it on at the end. This keeps the flavor bold and fresh. A little goes a long way, so don’t overdo it. Mozzarella is classic for Caprese chicken, but you can try different cheeses. Provolone adds a nice kick. Goat cheese gives a tangy flavor that pairs well. If you like sharp cheese, try aged cheddar. Each cheese changes the taste, so feel free to experiment. Just remember to keep the cheese creamy. This helps melt and blend well with the glaze and chicken. Pro Tips Marinate for More Flavor: For an extra burst of flavor, marinate the chicken breasts in balsamic glaze and olive oil for at least 30 minutes before baking. Cheese Variations: Experiment with different types of cheese such as goat cheese or feta for a unique twist on the classic Caprese flavors. Tomato Alternatives: If cherry tomatoes are unavailable, consider using sun-dried tomatoes or diced Roma tomatoes for a different texture and taste. Serve with Sides: Pair this dish with a fresh salad or garlic bread to round out the meal and complement the Caprese flavors. {{image_2}} You can add a fresh twist to your dish by adding spinach. Start by sautéing a few cups of fresh spinach in olive oil. Once wilted, spread the spinach over the chicken before adding tomatoes and cheese. This adds a burst of color and nutrients. The spinach gives it a lovely green hue. Plus, it pairs well with the creamy mozzarella and tangy balsamic glaze. For a Mediterranean flair, consider adding olives and feta cheese. Use kalamata or green olives for a nice briny flavor. Sprinkle them on top of the chicken with the tomatoes. Add crumbled feta to enhance the taste. The salty feta and olives complement the sweet balsamic glaze perfectly. This variation creates a rich, savory dish that transports you to a sunny Mediterranean kitchen. Grilling is another fun way to enjoy this meal. Start by marinating the chicken in balsamic glaze and spices for a few hours. Then, grill the chicken until it gets those nice char marks. After grilling, top with fresh mozzarella and let it melt. This method adds a smoky flavor and makes the chicken juicy. Serve it with fresh tomatoes and drizzle extra glaze on top for a delicious finish. After cooking, let the Balsamic Glazed Caprese Chicken cool down. Place it in an airtight container. Store it in the fridge for up to three days. This dish stays tasty and fresh, perfect for quick meals. You can freeze leftovers for later use. Wrap the chicken tightly in plastic wrap, then place it in a freezer bag. It will keep well for up to three months. When ready to eat, thaw it in the fridge overnight. To reheat, preheat your oven to 350°F (175°C). Place the chicken in an oven-safe dish. Cover it with foil to keep moisture in. Heat for about 20 minutes, or until warm. You can also use a microwave for quick reheating, but it may not keep the cheese as bubbly. Yes, you can use chicken thighs instead of breasts. Thighs are juicy and full of flavor. They also stay tender during cooking. Just make sure to adjust the cooking time. Thighs may need a few extra minutes to cook through. Always check that the internal temperature reaches 165°F (75°C) for safety. If you don’t have fresh mozzarella, you can use shredded mozzarella. It melts well and tastes great. You can also try provolone or even gouda for a different flavor. For a dairy-free option, use vegan cheese shreds. These options will still give you that delicious, cheesy goodness. Making balsamic glaze at home is easy and quick. You need just balsamic vinegar and a saucepan. Pour 1 cup of balsamic vinegar into the pan. Heat it on medium until it starts to simmer. Reduce the heat to low and let it cook for about 15-20 minutes. Stir it often until it thickens and coats the back of a spoon. Let it cool before using. This glaze adds a sweet and tangy flavor to your dishes. This blog post showed you how to make a tasty balsamic glazed chicken. You learned about key ingredients, steps for cooking, and helpful tips for perfect results. I shared fun variations and storage info, plus answers to your questions. By using fresh, quality ingredients and following the steps, you can make this dish special. Enjoy exploring flavors and tweaking recipes to fit your taste. Cooking can be fun and easy!

Balsamic Glazed Caprese Chicken Bake Simple and Tasty

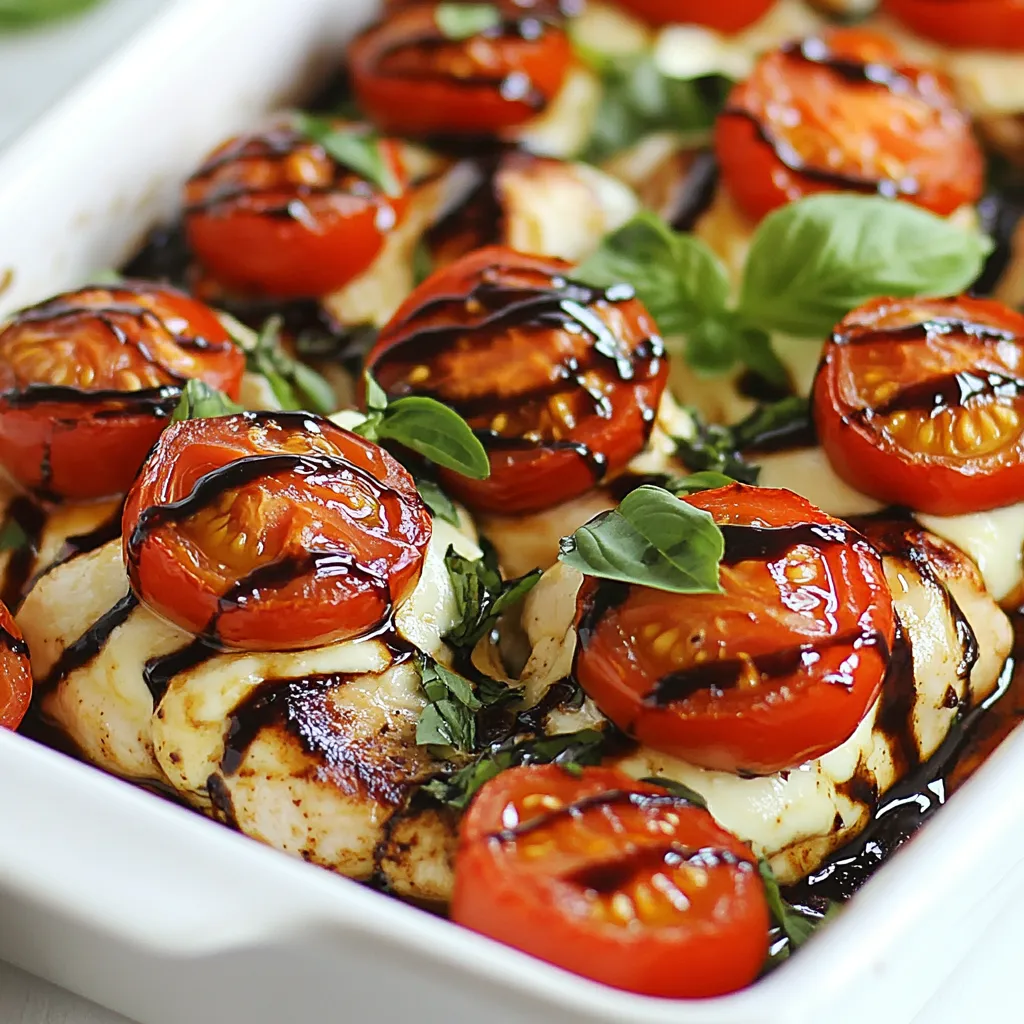
If you’re looking for a dish that’s both simple and delightful, try my Balsamic Glazed Caprese Chicken Bake. This recipe

To make creamy Cajun shrimp gnocchi, you will need: - 1 pound shrimp, peeled and deveined - 1 pound potato gnocchi - 2 tablespoons olive oil - 3 cloves garlic, minced - 1 small onion, diced - 1 green bell pepper, diced - 1 cup heavy cream - 1 cup chicken broth - 2 teaspoons Cajun seasoning - 1 teaspoon smoked paprika - Salt and pepper to taste - 1/4 cup grated Parmesan cheese - 2 tablespoons fresh parsley, chopped (for garnish) You can swap some ingredients to suit your taste or what you have. - Use shrimp alternatives like chicken or tofu. - For gnocchi, try pasta or rice. - Use vegetable broth instead of chicken broth for a vegan version. - Replace heavy cream with coconut milk for a lighter option. - If you’re out of Cajun seasoning, mix paprika, garlic powder, and cayenne. Quality matters in this dish. Here are some tips: - Choose fresh shrimp for the best flavor. Look for shrimp with a mild ocean scent. - Select gnocchi made from quality ingredients. Fresh gnocchi tastes better than dried. - Use good olive oil to enhance the dish's richness. - Fresh herbs brighten the flavor. Always use fresh parsley when possible. - Invest in high-quality Parmesan cheese. It melts beautifully and adds depth to your sauce. {{ingredient_image_1}} First, grab a pot of water. Bring it to a boil. Add salt to the water for flavor. Then, add one pound of potato gnocchi. Cook them until they float. This takes about two to three minutes. When they float, they are done. Drain the gnocchi and set them aside. Now, take a large skillet. Heat two tablespoons of olive oil over medium heat. Add one small diced onion and one diced green bell pepper. Sauté them for about four to five minutes. They should become soft. Next, add three cloves of minced garlic. Cook for one more minute. The garlic will smell great! Add one pound of peeled and deveined shrimp. Sprinkle with two teaspoons of Cajun seasoning and one teaspoon of smoked paprika. Cook the shrimp for about three to four minutes. They will turn pink and opaque. Pour in one cup of chicken broth and bring it to a simmer. Reduce the heat to low. Now, stir in one cup of heavy cream. Let it simmer for about five minutes. This allows the sauce to thicken. Next, add the cooked gnocchi to the skillet. Toss everything well to coat the gnocchi in the creamy sauce. Stir in a quarter cup of grated Parmesan cheese. Season with salt and pepper to taste. Heat everything through for another two to three minutes. Remove from heat. Garnish with two tablespoons of chopped fresh parsley. Serve warm and enjoy your creamy Cajun shrimp gnocchi! To make a great creamy sauce, start with the right base. Use heavy cream for richness. Combine it slowly with chicken broth. This adds flavor and keeps the sauce smooth. Always let it simmer to thicken. Stir in Parmesan cheese last for depth. If it seems too thick, add more broth. This keeps it light and enjoyable. When cooking shrimp, timing is key. Cook them just until they turn pink. Overcooked shrimp become tough and rubbery. Use medium heat for even cooking. Add Cajun seasoning early to let the shrimp soak it up. This gives a bold flavor. Don't crowd the pan; give shrimp space to cook. For a great presentation, use shallow bowls. Place the creamy Cajun shrimp gnocchi in the center. Garnish with parsley for color and freshness. Add a sprinkle of Parmesan on top for a touch of elegance. This not only looks good but also enhances the taste. Serve with crusty bread to soak up the sauce. Enjoy this dish with a crisp salad for balance. Pro Tips Perfectly Cooked Shrimp: To ensure your shrimp are tender and juicy, avoid overcooking them. They should only take about 3-4 minutes to turn pink and opaque. Homemade Cajun Seasoning: For a fresher flavor, consider making your own Cajun seasoning. Combine paprika, cayenne pepper, garlic powder, onion powder, thyme, and oregano for a custom spice blend. Gnocchi Cooking Tip: When cooking gnocchi, make sure to salt the water generously. This adds flavor to the gnocchi as they cook and enhances the overall dish. Garnish for Presentation: For a vibrant finish, add a squeeze of lemon juice over the dish before serving. It brightens the flavors and adds a beautiful touch to the presentation. {{image_2}} You can add many vegetables to this dish for more flavor and nutrition. Great options include spinach, kale, or cherry tomatoes. Simply toss them in when you sauté the onions and peppers. This adds color and bites of freshness. If shrimp isn't your thing, you can use chicken or sausage instead. For chicken, cut it into small pieces and cook it until brown. For sausage, slice it and add it with the shrimp. Both choices will still soak up the creamy sauce well. You can change the Cajun seasoning for other spices. Try Italian herbs for a different taste or chili powder for more heat. Each change can give the dish a new twist while keeping it creamy and delicious. To store your creamy Cajun shrimp gnocchi, place it in an airtight container. Make sure the dish cools down to room temperature before sealing. Store it in the fridge for up to three days. This way, you can enjoy it later without losing flavor or texture. When you are ready to eat, reheat the gnocchi on the stove. Place it in a skillet over low heat. Add a splash of chicken broth or cream to keep it moist. Stir gently until it warms up. You can also microwave it in a bowl. Use short bursts of heat, stirring in between to avoid uneven heating. You can freeze creamy Cajun shrimp gnocchi for up to two months. First, let it cool completely. Then, transfer it to a freezer-safe container. Make sure to leave some space at the top, as the sauce may expand. When ready to eat, thaw it in the fridge overnight before reheating. This will help keep the flavors intact. Yes, you can use frozen shrimp. Just thaw them first. Place the shrimp in cold water for quick thawing. This helps keep them fresh. Frozen shrimp work well in this dish. They absorb the Cajun flavors nicely. Absolutely! Creamy Cajun shrimp gnocchi is perfect for meal prep. You can make it ahead of time. Store it in an airtight container in the fridge. It stays good for about three days. Reheat it on the stove or in the microwave. Just add a little water or broth to keep it creamy. You can serve this dish with a simple side salad. A green salad adds a nice crunch. Garlic bread is another great choice. It pairs well with the creamy sauce. You could also add some steamed veggies for color and nutrition. This blog post covered ingredients, step-by-step cooking, tips, variations, and storage for creamy Cajun shrimp gnocchi. You learned about high-quality ingredients and substitutes. I shared cooking techniques for perfecting the sauce and shrimp. You can even explore fun variations or meal prep ideas. Remember, cooking is all about creativity and joy. Enjoy making this dish and share it with friends.

Creamy Cajun Shrimp Gnocchi Savory Dinner Delight

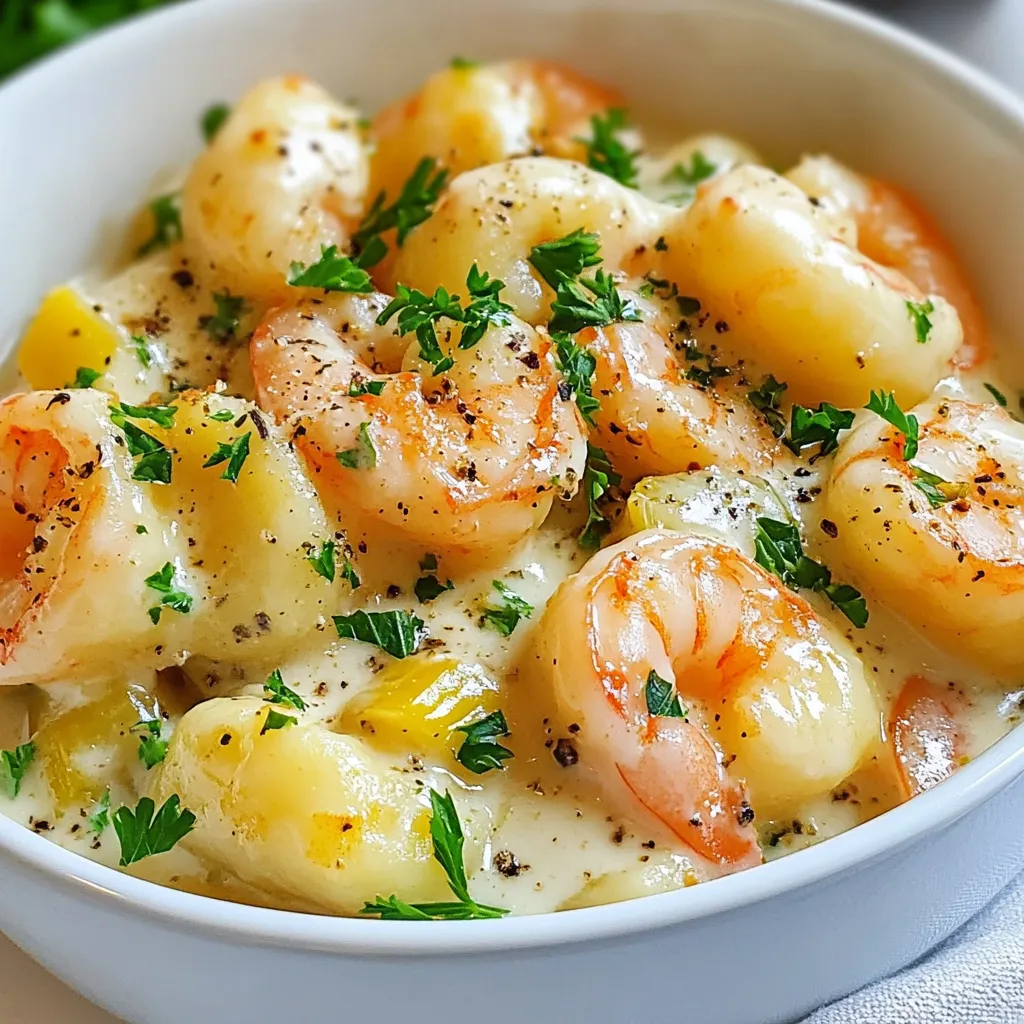
Welcome to a flavor-packed adventure with my Creamy Cajun Shrimp Gnocchi! If you’re craving a savory dinner that combines the

To make a Strawberry Lemonade Sheet Cake, you need fresh and simple ingredients. Each item brings flavor and texture to the cake. Here’s what you will need: - 1 ½ cups all-purpose flour - 1 cup granulated sugar - ½ teaspoon baking powder - ½ teaspoon baking soda - ½ teaspoon salt - ½ cup unsalted butter, softened - 2 large eggs - 1 teaspoon vanilla extract - ½ cup buttermilk - ½ cup fresh lemon juice (about 2-3 lemons) - Zest of 1 lemon - 1 cup fresh strawberries, hulled and diced These ingredients work together to create a bright and delicious cake. The flour gives structure, while the sugar adds sweetness. Baking powder and baking soda help the cake rise. Salt enhances the flavors. Butter makes the cake moist, and eggs add richness. Vanilla extract brings warmth, while buttermilk makes the cake tender. Fresh lemon juice and zest add a bright, tangy taste. Finally, strawberries offer sweetness and color. With these ingredients, you can create a cake that is not only tasty but also beautiful. Enjoy baking this delightful treat! {{ingredient_image_1}} 1. Preheat your oven to 350°F (175°C). This step warms the oven for even baking. 2. Grease a 9x13 inch baking pan. Line the bottom with parchment paper to help with removal later. 3. In a medium bowl, whisk together the flour, baking powder, baking soda, and salt. Set this bowl aside for now. 1. In a large bowl, beat the softened butter and granulated sugar together. Mix until it’s light and fluffy. This should take about 3-4 minutes. 2. Add the eggs one by one. Make sure to mix well after each egg. Then stir in the vanilla extract, fresh lemon juice, and lemon zest. These flavors will make your cake bright. 1. Gradually add the dry mixture to the butter mix. Alternate adding the buttermilk too. Start and end with the flour mixture. Mix until just combined; don’t overdo it. 2. Gently fold in the diced strawberries. Be careful not to break them down too much. 3. Pour the batter into the prepared pan. Smooth the top with a spatula. Bake for 25-30 minutes. To test for doneness, insert a toothpick in the center. If it comes out clean, the cake is ready. To ensure your cake has the right texture, follow these steps: - Measure Ingredients Accurately: Use a scale for the flour and other ingredients. This gives you the best results. - Mixing Time: When you cream the butter and sugar, mix until light and fluffy. This helps your cake rise well. - Check Oven Temperature: Always use an oven thermometer. Even slight changes can affect baking times. To prevent overmixing strawberries: - Fold Gently: When adding strawberries, use a spatula. This keeps the fruit intact and adds texture. - Add Last: Mix in the strawberries after combining the wet and dry ingredients. This limits their breaking down. For serving ideas and garnishing options: - Cut into Squares: After cooling, cut the cake into neat squares. This makes for easy serving. - Garnish: Add a strawberry and a twist of lemon zest on each slice. This adds color and flair. For the best cake serving temperature: - Serve Cool: Let the cake cool completely. This helps flavors blend and makes it easier to slice. - Pair It Right: Serve with a glass of lemonade for a refreshing treat. Pro Tips Use Room Temperature Ingredients: Make sure your butter, eggs, and buttermilk are at room temperature. This helps create a smoother batter and ensures better incorporation of ingredients. Don't Overmix the Batter: When combining the wet and dry ingredients, mix until just combined. Overmixing can lead to a dense cake texture. Fresh Strawberries for Flavor: Use fresh, ripe strawberries for the best flavor and moisture. Frozen strawberries may make the batter too watery. Cool Completely Before Glazing: Allow the cake to cool completely before adding the glaze. This prevents the glaze from melting and ensures a nice finish. {{image_2}} You can easily change the taste of your strawberry lemonade sheet cake. One fun way is to add other fruits. Raspberries or blueberries work well. They bring extra color and flavor. Just fold them in like you do with strawberries. If you want a more tart cake, add more lemon juice. This makes the cake bright and zesty. You can also add lemon zest for a stronger lemon flavor. Both options will give you a fun twist. If you need to make the cake gluten-free, use gluten-free flour. It works just like regular flour. You won't lose any taste or texture. For vegan options, swap eggs with flax eggs. Mix one tablespoon of flaxseed meal with three tablespoons of water. Let it sit for a few minutes until it thickens. Use plant-based butter instead of regular butter. These changes keep the cake delicious while fitting your diet. To keep your cake fresh, cool it completely first. Once it is cool, use the following steps to store it: - Wrap: Cover the cake with plastic wrap or aluminum foil. This prevents it from drying out. - Container: Place the wrapped cake in an airtight container. This will keep air out and maintain moisture. - Location: Store it at room temperature for up to three days. If you need it to last longer, refrigeration is best. Refrigeration can change the cake's texture. It may become a bit denser. If you choose to refrigerate, eat it within a week. Freezing your cake is a great option for later enjoyment. Here’s how to do it right: - Preparation: After cooling, cut the cake into squares or keep it whole. - Wrap: Wrap each piece tightly in plastic wrap. Then wrap it again in foil. - Label: Write the date on the foil. This helps you remember when you froze it. For the best taste, eat the cake within three months. - Refrigerate: Move the cake to the fridge for a few hours or overnight to thaw slowly. - Room Temperature: If you're in a hurry, let it sit at room temperature for about 30 minutes before serving. This method helps keep your cake moist and tasty. Enjoy your strawberry lemonade sheet cake whenever you like! Yes, you can use frozen strawberries. Just thaw them first. Pat them dry to remove excess moisture. This helps keep the cake from getting soggy. Fresh strawberries have a better taste, but frozen works if fresh is not available. The cake stays fresh for about 3 to 4 days. Store it in an airtight container at room temperature. You can also refrigerate it to prolong its life. If you want it to last longer, you can freeze it. You can make a quick buttermilk substitute. Mix ½ cup of milk with 1 tablespoon of vinegar or lemon juice. Let it sit for about 5 minutes. This will give you a similar taste and texture for your cake. Yes, you can make this cake ahead of time. Bake it and let it cool completely. Wrap it well in plastic wrap and store it. You can also freeze it for up to 3 months. Thaw it overnight in the fridge before serving. This blog post walked you through a simple and tasty strawberry cake recipe. We covered ingredients, preparation steps, and baking tips. You learned how to mix flavors and prevent overmixing with strawberries. We also explored flavor variations and storage tips for leftovers. Baking can be fun and rewarding. Try these steps and enjoy delicious results.

Strawberry Lemonade Sheet Cake Simple and Sweet Delight

Are you craving a dessert that’s both easy to make and bursting with flavor? Look no further! This Strawberry Lemonade

To make this soup, you need a few key items. Here’s what you will need: - 1 large head of cauliflower, chopped into florets - 2 tablespoons olive oil - 1 large onion, diced - 3 cloves garlic, minced - 4 cups vegetable broth - 1 cup heavy cream or coconut cream for a dairy-free option - 1 teaspoon ground cumin - 1 teaspoon smoked paprika - Salt and pepper to taste These ingredients work together to create a rich and creamy flavor. The roasted cauliflower brings a sweet taste. The spices add warmth and depth. You can enhance your soup with some simple garnishes. Here are some ideas: - Fresh parsley for a pop of color - Chives for a mild onion flavor - A drizzle of olive oil for richness - Croutons for added crunch These extras make the soup even more fun to eat. They also add visual appeal. If you have dietary needs, don't worry! You can easily swap some ingredients. Here are some options: - Use coconut cream instead of heavy cream for a dairy-free version. - Swap vegetable broth with chicken broth if you prefer. - Use garlic powder instead of fresh garlic if you’re out. These substitutions keep the soup delicious while catering to your needs. Enjoy making it your own! {{ingredient_image_1}} Start by washing the head of cauliflower. You want it clean and fresh. Next, chop it into bite-sized florets. This helps them roast evenly. Grab a large onion and dice it finely. Dice it small so it cooks fast. Mince three cloves of garlic. The garlic will add lots of flavor. Preheat your oven to 425°F (220°C). This high heat gives the cauliflower a nice brown color. Place the chopped florets on a baking sheet. Drizzle one tablespoon of olive oil over them. Sprinkle salt and pepper to taste. Toss the florets until they are well-coated. Roast the cauliflower for 25 to 30 minutes. Stir halfway through to ensure even cooking. You want it golden brown and tender. In a large pot, heat the remaining tablespoon of olive oil over medium heat. Add the diced onion and cook for about 5 to 7 minutes. You want it soft and translucent. Now, add the minced garlic, ground cumin, and smoked paprika. Sauté for about 2 minutes until it smells great. When the cauliflower is ready, add it to the pot along with 4 cups of vegetable broth. Bring the mixture to a boil. Then, lower the heat and let it simmer for about 10 minutes. This step allows the flavors to blend. Now it’s time to blend! Use an immersion blender to puree the soup until it’s smooth. If you don’t have one, transfer the soup to a blender in batches. Be careful, as it will be hot! If you used a blender, pour the soup back into the pot. Stir in one cup of heavy cream or coconut cream. Heat it through and season with salt and pepper to taste. Serve your creamy roasted cauliflower soup hot. Garnish with fresh parsley or chives for a pop of color. Enjoy! To make your soup creamy, use heavy cream or coconut cream. Both options give a rich flavor. Blend the soup until it is smooth and velvety. If you want a lighter soup, add more broth. For a thick texture, use less broth. The secret is to roast the cauliflower until golden. This caramelization adds depth to the flavor and texture. One mistake is overcooking the cauliflower. It should be tender but not mushy. If you skip roasting, you miss out on great flavor. Another common error is not seasoning enough. Always taste your soup before serving. Adjust salt and pepper as needed. Lastly, avoid blending the soup too early. Let it cool slightly to prevent splatters. Add warm spices like cumin and smoked paprika. They bring warmth and depth to the soup. You can also add a squeeze of lemon juice for brightness. Fresh herbs, like parsley or chives, make great garnishes. They add color and fresh flavor. Experiment with toppings like croutons or a drizzle of olive oil. This adds texture and makes the soup even more inviting. Pro Tips Roast for Flavor: Roasting the cauliflower brings out its natural sweetness and adds depth to the soup's flavor. Blend for Creaminess: For an ultra-smooth texture, blend the soup thoroughly. An immersion blender works great for this! Adjust Consistency: If the soup is too thick, simply add more vegetable broth or cream to reach your desired consistency. Garnish for Freshness: Fresh herbs like parsley or chives not only add color but also enhance the soup's flavor profile. {{image_2}} You can easily make this soup dairy-free or vegan. Use coconut cream instead of heavy cream. This change still gives you a rich, creamy texture. You can also use almond milk or soy milk for a lighter option. Both choices keep the soup smooth and delicious. Feel free to add other veggies to the soup. Carrots or sweet potatoes add sweetness and color. You can also toss in some celery for crunch. If you want more flavor, add spices like turmeric or coriander. These spices offer a unique twist to the classic taste. To spice things up, add crushed red pepper flakes or diced jalapeños. You can also try adding a splash of hot sauce for extra heat. For a smoky flavor, increase the smoked paprika. You could even add some chipotle peppers in adobo sauce. This adds both heat and a deep, smoky taste. Enjoy experimenting with these variations! Store leftover creamy roasted cauliflower soup in an airtight container. Make sure it is cool before sealing. Keep it in the fridge for up to three days. Always check for any signs of spoilage before eating. If you see mold or a bad smell, it’s best to throw it away. You can freeze this soup for later use. Pour it into freezer-safe containers. Leave some space at the top, as the soup will expand when it freezes. Label each container with the date. It will stay fresh for up to three months. When you're ready to eat, just thaw it in the fridge overnight. To reheat the soup, use a pot on the stove over medium heat. Stir it often to heat evenly. If the soup is too thick, add a splash of water or broth. You can also use a microwave. Place it in a microwave-safe bowl and cover it loosely. Heat in short bursts, stirring in between. This keeps it from getting too hot in one spot. Enjoy your warm bowl of comfort! Yes, you can use frozen cauliflower. It saves time and is easy to find. Just make sure to thaw it before roasting. You may need to adjust the roasting time since frozen cauliflower can release more water. It’s best to roast it until it is tender and slightly golden for great flavor. To thicken the soup without cream, use extra cauliflower. Blend more roasted cauliflower into the soup for a thick texture. You can also use cooked potatoes or white beans. Both options add creaminess without using dairy. Remember to blend well for a smooth finish. This soup pairs well with crusty bread or a fresh salad. A simple green salad adds crunch and color. You can also serve it with grilled cheese for a classic combo. If you want something special, try adding roasted nuts on top for extra flavor. This blog post covered the delicious journey of making creamy roasted cauliflower soup. You learned about essential ingredients, helpful tips, and variations to suit your taste. We discussed how to store any leftovers and answered common questions. Remember, you can make this soup your own by trying different flavors and textures. With the right steps, you’ll create a comforting bowl that everyone will love. Enjoy making this soup and share your creations!

Creamy Roasted Cauliflower Soup Comforting and Easy

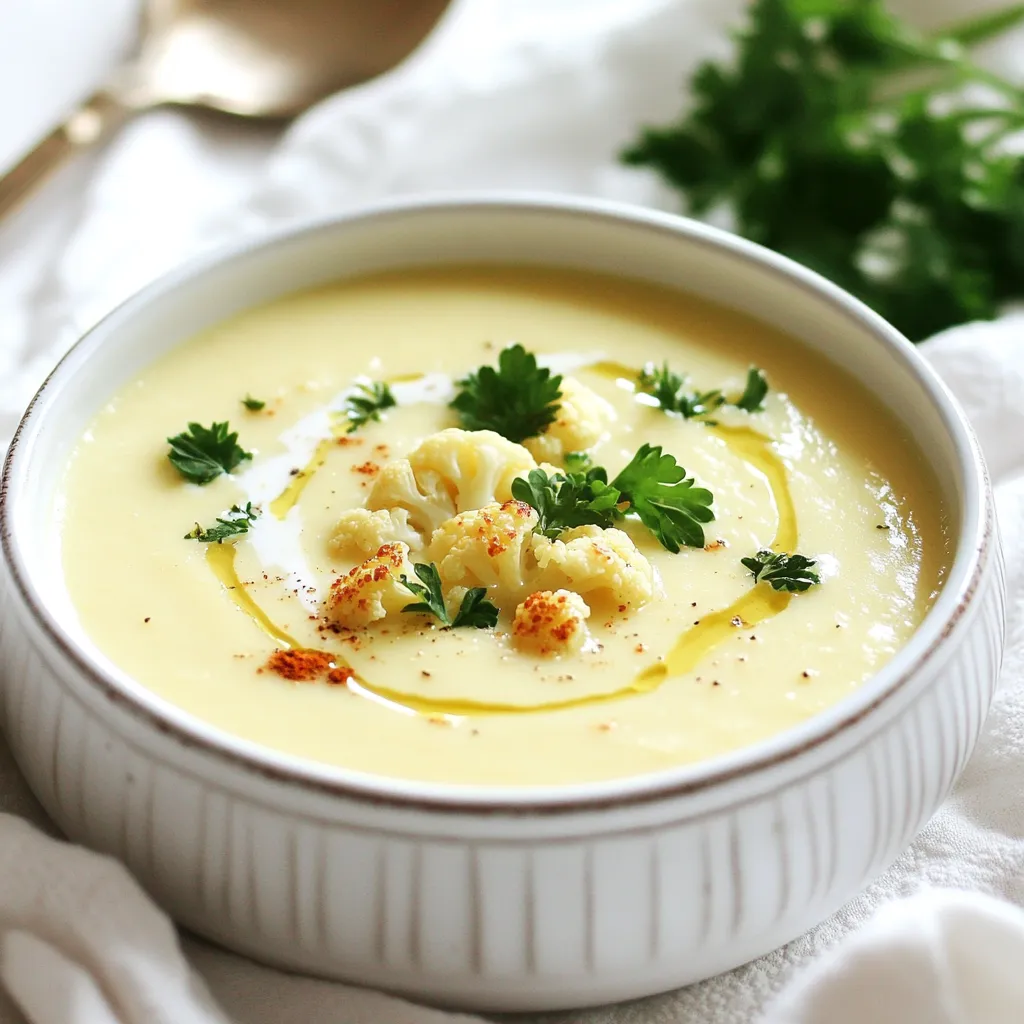
Are you ready to dive into a warm bowl of heaven? This creamy roasted cauliflower soup is not just easy

To make these delicious brownies, you need some key ingredients. Each one plays an important role in the flavor and texture. Here’s what you’ll need: - 1 cup mashed sweet potato (about 1 medium sweet potato) - 1/2 cup creamy almond butter (or peanut butter) - 1/2 cup cocoa powder - 1/2 cup maple syrup - 1 teaspoon vanilla extract - 1/4 teaspoon salt - 1/2 teaspoon baking powder - 1/2 cup chocolate chips - 1 cup mini marshmallows If you prefer measuring in grams, here are some conversions for accuracy: - 1 cup mashed sweet potato ≈ 240 grams - 1/2 cup almond butter ≈ 128 grams - 1/2 cup cocoa powder ≈ 50 grams - 1/2 cup maple syrup ≈ 120 grams - 1 teaspoon vanilla extract ≈ 5 grams - 1/4 teaspoon salt ≈ 1.5 grams - 1/2 teaspoon baking powder ≈ 2 grams - 1/2 cup chocolate chips ≈ 90 grams - 1 cup mini marshmallows ≈ 80 grams You can swap some ingredients if you need to. Here are a few options: - Use peanut butter instead of almond butter for a nutty taste. - Try agave syrup in place of maple syrup for a different sweet flavor. - Use unsweetened applesauce instead of sweet potato for a lighter brownie. - For a nut-free option, use sunflower seed butter instead of nut butter. These alternatives keep the brownies tasty while allowing for personal preferences. Enjoy experimenting! {{ingredient_image_1}} Start by peeling a medium sweet potato. Cut it into small pieces for even cooking. Boil the sweet potato in a pot of water for about 15 minutes. You want it soft enough to mash. Drain the sweet potato and mash it in a bowl until smooth. This will be about 1 cup of mashed sweet potato. In a large bowl, mix the mashed sweet potato with 1/2 cup of creamy almond butter. Stir until the two ingredients blend well. Next, add 1/2 cup cocoa powder, 1/2 cup maple syrup, 1 teaspoon vanilla extract, 1/4 teaspoon salt, and 1/2 teaspoon baking powder. Mix all these ingredients until the batter is smooth. Finally, fold in 1/2 cup of chocolate chips. Make sure they are evenly spread through the batter. Preheat your oven to 350°F (175°C). Grease an 8x8-inch baking dish or line it with parchment paper. Pour the brownie batter into the dish and spread it out evenly. Bake for 25-30 minutes. Use a toothpick to check if they are done; a few moist crumbs are okay. When they are ready, take them out and sprinkle 1 cup of mini marshmallows on top. Put them back in the oven for 5-7 minutes. You want the marshmallows to get puffy and lightly toasted. Let the brownies cool in the pan for at least 15 minutes before cutting them into squares. To mash sweet potatoes well, start with a medium sweet potato. Cook it until soft—boiling or baking works great. After cooking, let it cool slightly. Peel off the skin and cut it into chunks. Use a potato masher or fork to mash until smooth. You want it creamy, with no lumps. If it feels too thick, add a splash of water or milk to help. If you have leftover brownies, store them right. Let them cool completely first. Cut them into squares and place them in an airtight container. You can stack them with parchment paper in between layers to keep them fresh. They will last up to five days at room temperature. For longer storage, wrap them well and put them in the freezer. Thaw them overnight in the fridge before eating. Baking time affects how your brownies turn out. For chewier brownies, bake them for about 25 minutes. They should look slightly underdone in the center. For cake-like brownies, bake them a bit longer, around 30 minutes. A toothpick should come out with a few moist crumbs. Remember, the batter will continue to cook after you take it out of the oven! Pro Tips Choosing the Right Sweet Potato: Use orange-fleshed sweet potatoes for the best sweetness and texture in your brownies. Storage Tips: Keep any leftover brownies in an airtight container in the fridge for up to a week, or freeze them for longer storage. Customizing Flavors: Experiment with adding spices like cinnamon or nutmeg for a warm flavor profile that complements the sweetness. Serving Suggestions: Serve warm with a scoop of vanilla ice cream or a drizzle of chocolate sauce for an indulgent treat. {{image_2}} You can easily make sweet potato marshmallow brownies gluten-free. The main ingredient to watch is cocoa powder. Always choose a brand that is labeled gluten-free. Most cocoa powders are, but it’s good to check. The other ingredients, like almond butter and maple syrup, are naturally gluten-free. This means you can enjoy these brownies without worry. If you need nut-free brownies, swap almond butter for sunflower seed butter. This change keeps the brownies creamy and tasty. You can also use soy nut butter or pumpkin seed butter. These choices are safe for those with nut allergies. Always read labels to ensure safety. Spices can take your brownies to new heights. Try adding a pinch of cinnamon for warmth. A dash of nutmeg can add depth to the flavor. You can also mix in some espresso powder for a rich twist. Vanilla extract is a must, but you can try almond extract for a different taste. Experimenting with flavors can make each batch unique and fun! To keep your brownies fresh, store them in an airtight container. This helps them stay moist. Place parchment paper between layers to prevent sticking. Avoid direct sunlight and heat, as these can dry them out. You can freeze Sweet Potato Marshmallow Brownies for later. First, let them cool completely. Then, cut them into squares. Wrap each square tightly in plastic wrap. Place wrapped brownies in a freezer-safe bag or container. They can last up to three months in the freezer. When you're ready to eat, thaw them in the fridge or at room temperature. At room temperature, these brownies last about four to five days. Keep them in a cool, dry place. If you notice any signs of mold or a strange smell, it's best to toss them. Enjoy your sweet treats while they’re fresh! Yes, you can use different nut butters. Peanut butter works well too. It adds a nice flavor. Just ensure it is creamy for the best texture. Sunflower seed butter is also a good choice for nut-free options. Check the brownies after 25 minutes. Insert a toothpick in the center. If it comes out mostly clean, they are done. A few moist crumbs are fine. Remember, they will continue to cook a bit after you take them out. These brownies shine when served warm. You can add a scoop of vanilla ice cream on top. Drizzle some chocolate sauce for extra goodness. They also taste great with fresh berries. Yes, you can make these brownies vegan. Use maple syrup as the sweetener. Choose a nut butter that is vegan-friendly. Most dark chocolate chips are also vegan, but check the label to be sure. Sweet Potato Marshmallow Brownies are a tasty treat you can easily make. We covered key ingredients, step-by-step instructions, and helpful tips. You learned about measurements, alternative options, and how to store leftovers. Variations for gluten-free and nut-free diets expand your choices. In conclusion, these brownies are fun and easy to customize for everyone. Enjoy your baking adventure!

Sweet Potato Marshmallow Brownies Delicious Treat

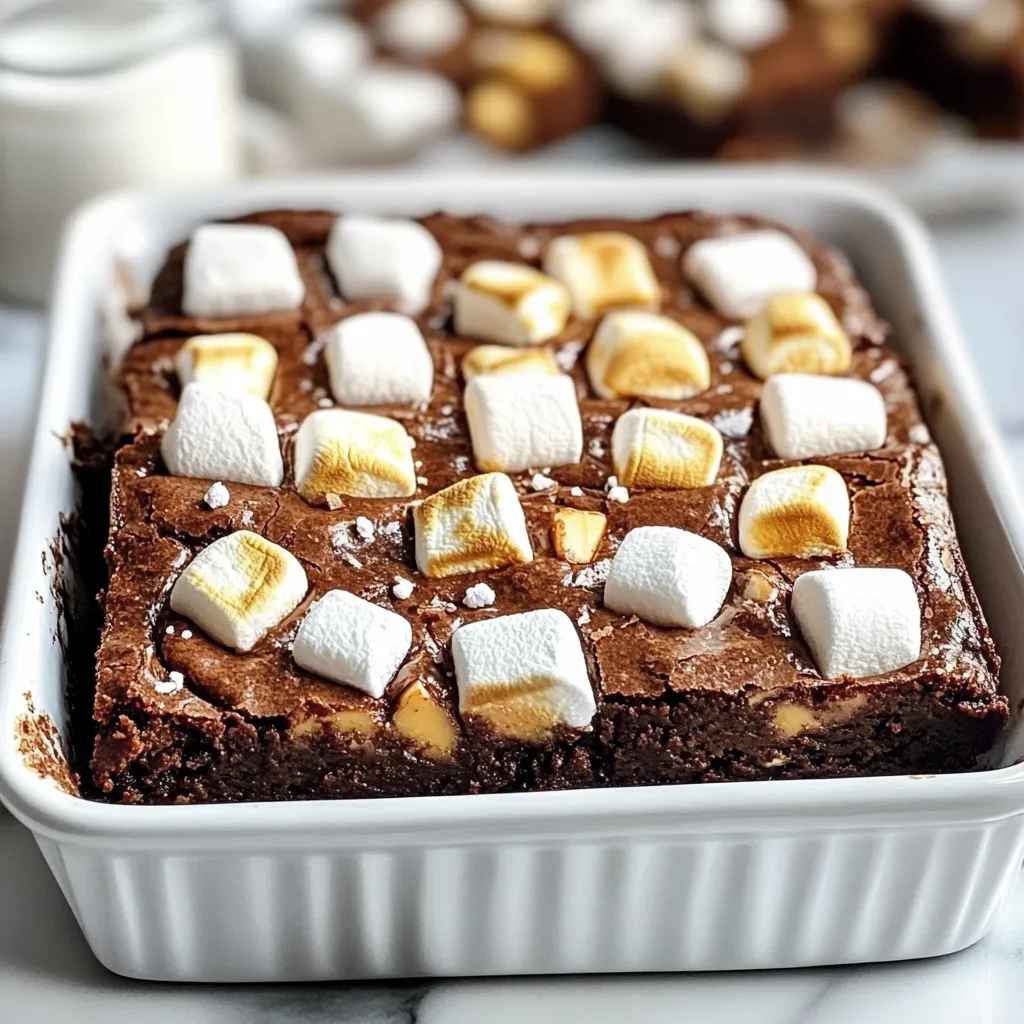
Are you ready to indulge in a delicious treat that’s both sweet and nutritious? Sweet Potato Marshmallow Brownies are a

- 1 lb ground chicken - 2 cloves garlic, minced - 1 small red onion, finely chopped - 1 red bell pepper, diced - 1 tablespoon fresh ginger, grated - 1 cup carrots, grated - 2 tablespoons soy sauce - 1 tablespoon fish sauce - 1 tablespoon lime juice - 1 tablespoon sriracha - 1/2 cup fresh cilantro, chopped - 1/4 cup green onions, sliced - 1 head of butter or iceberg lettuce Each ingredient plays a key role in the flavor of these spicy Thai chicken lettuce cups. The ground chicken gives a hearty base. Garlic and ginger add warmth and depth. Red onion and red bell pepper bring sweetness and crunch. Grated carrots not only add a sweet touch but also a nice color contrast. The sauces really make this dish pop. Soy sauce adds umami, while fish sauce gives a salty kick. Lime juice brightens the whole dish, and sriracha brings the heat. Fresh herbs like cilantro and green onions add freshness. Finally, the lettuce cups serve as a crisp and light vessel for all that tasty filling. Feel free to tweak any ingredient to suit your taste. For a kick, add more sriracha. Want it milder? Cut back on the heat. Use these ingredients as your guide to create a dish that you will love. {{ingredient_image_1}} Start by preparing your vegetables and herbs. You will need to chop the red onion finely and dice the red bell pepper. Mince the garlic and grate the ginger. Measure out your cilantro and green onions, and set them aside. This makes cooking smoother and quicker. Next, heat one tablespoon of vegetable oil in a large skillet over medium heat. Once the oil is hot, add the minced garlic, chopped red onion, and grated ginger. Sauté them for about two minutes. You want to cook until the garlic is fragrant and the onions turn translucent. This step builds a great base for your dish. Now, increase the heat to medium-high and add one pound of ground chicken. Cook it for about five to seven minutes. Use a spatula to break the chicken apart as it cooks. You want it to brown and be fully cooked. Once the chicken is browned, mix in the diced red bell pepper. Cook this for another two to three minutes until it softens. Then, add the soy sauce, fish sauce, lime juice, and sriracha to the skillet. Stir everything well to combine. Allow it to simmer for another two minutes. This will blend all the flavors together. Now it’s time to add the final ingredients. Stir in one cup of grated carrots, half a cup of chopped cilantro, and a quarter cup of sliced green onions. Season with salt and pepper to taste. Mix everything well until all the flavors meld together. Remove the skillet from heat and let it cool slightly. To serve, take a butter or iceberg lettuce leaf and spoon a generous amount of the spicy chicken mixture into it. Fold it like a taco and enjoy the fresh and flavorful bite! - Use fresh ground chicken. It cooks faster and stays juicy. - Cook over medium-high heat for even browning. - Break the chicken apart well for a nice texture. - Sauté garlic and onions until they are soft. This adds great flavor. - Add bell peppers last. They need just a few minutes to soften. - Fill each lettuce cup generously with the chicken mix. - Garnish with fresh cilantro for color and taste. - Add chopped peanuts for a crunchy texture. - Serve on a platter, arranging them in a circle. - Offer lime wedges on the side for a zesty kick. - Adjust spice by adding more sriracha. Start with one tablespoon. - Mix in fresh herbs like basil or mint for a twist. - Experiment with lime zest for an extra citrus punch. - Try a dash of sesame oil for more depth. - Use a bit of chili paste for a different heat level. Pro Tips Use High-Quality Chicken: Opt for organic or free-range ground chicken for a richer flavor and better texture. Adjust the Spice Level: Modify the amount of sriracha based on your heat preference; you can also add more fresh chilies for extra heat. Fresh Herbs Matter: Always use fresh cilantro and green onions for the best taste; dried herbs won’t have the same vibrant flavor. Serve Immediately: These lettuce cups are best enjoyed fresh; prepare the filling in advance but assemble right before serving to keep the lettuce crisp. {{image_2}} You can swap out ground chicken for other proteins. Turkey works well and is leaner. Tofu is a great vegetarian choice. Just crumble it before cooking. Both options keep the dish tasty and healthy. You can change the flavor by adding different ingredients. For a sweet twist, mix in some pineapple or mango. You can also add peanuts for crunch. If you want a more traditional Thai taste, try adding basil or mint. These herbs bring freshness to each bite. There are fun ways to serve these cups. Instead of lettuce, you can use collard greens for a sturdier wrap. Or serve the chicken on a bed of mixed greens for a salad. Pair these cups with jasmine rice or a light soup for a full meal. To keep your Spicy Thai Chicken Lettuce Cups fresh, store leftovers in the fridge. Use an airtight container. The chicken mixture stays great for up to three days. Avoid stacking the lettuce leaves on top of each other. This helps them stay crisp and not soggy. You can also wrap lettuce in damp paper towels. This keeps them crunchy longer. If you want to save the chicken mixture for later, freezing works too. Put it in a freezer bag or container. Remove as much air as possible before sealing. The chicken can last in the freezer for up to three months. When ready to eat, let it thaw overnight in the fridge. To reheat the chicken mixture, use a skillet over medium heat. Stir often until it’s heated through. You can add a splash of water or broth to keep it moist. For your lettuce, avoid the microwave. It makes them limp. Instead, enjoy the chicken warm in fresh lettuce leaves. This keeps the cups crispy and tasty, just like when you first made them. What can I substitute for fish sauce? You can use soy sauce or tamari as a fish sauce substitute. Both add saltiness and depth. If you're looking for a more unique flavor, try coconut aminos. It’s a bit sweeter but still tasty. Can I make Spicy Thai Chicken Lettuce Cups ahead of time? Yes, you can! Cook the chicken mixture and store it in the fridge. This keeps well for up to three days. When you’re ready to eat, just reheat and serve with fresh lettuce leaves. Is this dish gluten-free? This dish can be gluten-free! Use gluten-free soy sauce or tamari in place of regular soy sauce. Always check labels to ensure there are no hidden gluten ingredients. Can I make this recipe low-carb? Absolutely! Use more lettuce and fewer carrots. You can skip the sriracha if you want to cut carbs. The chicken and fresh herbs provide great flavor without extra carbs. What to serve with Spicy Thai Chicken Lettuce Cups? Pair these cups with jasmine rice or a fresh cucumber salad. Both sides balance the spicy flavors well. You can also serve them with a light dipping sauce for extra zest. Can they be served as appetizers? Yes, they make great appetizers! Just use smaller lettuce leaves and serve them on a platter. Your guests will love the fresh and spicy bites. In this blog, we explored the vibrant world of Spicy Thai Chicken Lettuce Cups. We went through key ingredients like ground chicken, fresh veggies, and zesty sauces. The step-by-step guide helped you cook and assemble these delicious cups. Remember to play with flavors and textures to suit your taste. These cups are not only fun to make but also easy to store and reheat. Enjoy experimenting with variations and make this dish your own. Your kitchen will be filled with tasty smells, and everyone will love the tasty results!

Spicy Thai Chicken Lettuce Cups Flavorful and Fresh

Are you ready to spice up your next meal? Spicy Thai Chicken Lettuce Cups bring bold flavors and crunch to

To create Baked Feta Pasta Primavera, you need the right mix of fresh ingredients. Here’s what you will need: - 200g pasta (penne or fusilli) - 200g feta cheese - 1 cup cherry tomatoes, halved - 1 zucchini, sliced into half-moons - 1 bell pepper, diced (any color) - 1 cup green beans, trimmed and cut into 1-inch pieces - 3 cloves garlic, minced - 4 tablespoons olive oil - 1 teaspoon dried oregano - Salt and pepper, to taste - Fresh basil, for garnish - Grated parmesan cheese (optional) Each ingredient plays a key role in bringing this dish to life. The pasta serves as the base, while the feta cheese adds creaminess and tang. Fresh vegetables like zucchini and bell pepper provide color and crunch. Garlic boosts the flavor, and olive oil helps everything roast nicely. The dried oregano adds a touch of warmth. You can mix and match your veggies based on what you have. Always go for the freshest ingredients to enhance taste. This dish is not only vibrant but also packed with nutrients. Enjoy the process of gathering these ingredients; it’s a big part of the fun! {{ingredient_image_1}} - Preheat the oven to 400°F (200°C). - In a large baking dish, combine 1 cup of halved cherry tomatoes, 1 sliced zucchini, 1 diced bell pepper, and 1 cup of green beans. - Drizzle the vegetables with 2 tablespoons of olive oil. Add 1 teaspoon of dried oregano, salt, and pepper. Toss well to coat. - Place 200g of feta cheese in the center of the baking dish, surrounded by the veggies. - Drizzle the feta with the remaining 2 tablespoons of olive oil. - Bake in the oven for about 25-30 minutes. The veggies should be tender, and the feta should be golden and slightly melted. - While the baking happens, cook 200g of pasta (penne or fusilli) per the package instructions. Aim for al dente. Drain the pasta and set aside. - Once the feta and veggies are done, remove the dish from the oven. Use a fork to mash the feta and mix it with the roasted vegetables. This creates a creamy sauce. - Add the cooked pasta to the dish and toss everything together. Ensure the pasta is well-coated in the feta and veggies. - Adjust the seasoning with more salt and pepper if needed. Serve hot, garnished with fresh basil and grated parmesan cheese if you like. To get perfectly roasted vegetables, follow these steps: - Cut vegetables into equal sizes. This helps them cook evenly. - Toss them with olive oil, salt, and pepper before baking. This adds flavor. - Roast them at 400°F (200°C) for 25-30 minutes. Check for tenderness. When baking feta, here’s what to do: - Place the feta in the center of the veggies. This allows it to melt nicely. - Drizzle olive oil on top. This helps it become creamy. - Bake until golden. You want it to be warm but not too runny. Garnish your dish with fresh basil. It adds color and a nice flavor. You can also use grated parmesan cheese on top for extra richness. For side dishes, consider fresh salad or crusty bread. They pair well with the pasta. Enjoy your colorful meal! Pro Tips Use High-Quality Feta: Opt for a good quality feta cheese, preferably packed in brine, for a creamier texture and richer flavor. Customize Your Veggies: Feel free to swap in your favorite vegetables or whatever is in season to make this dish your own. Don’t Overcook the Pasta: Cook the pasta just until al dente, as it will continue to soften when mixed with the hot feta and vegetables. Garnish for Freshness: Fresh basil not only adds color but also enhances the flavor, so don’t skip this step! {{image_2}} You can change up the veggies based on what is fresh. In spring, try asparagus. In winter, use broccoli or cauliflower. Summer calls for eggplant or bell peppers. Each veggie adds its own taste and color. You can also switch the cheese. If you want a lighter flavor, use goat cheese. Cream cheese can work too, giving a rich, creamy texture. Feta is salty and tangy, but other cheeses can make it special in their own way. For a vegan version, replace feta with a plant-based cheese. You can also mash silken tofu with lemon juice for a creamy texture. This keeps the dish rich and tasty. If you need gluten-free pasta, choose a brand made from rice or chickpeas. These alternatives cook well and taste great. You can enjoy this dish without gluten and still have a wonderful meal. To keep your Baked Feta Pasta Primavera fresh, store it in an airtight container. This helps prevent moisture loss and keeps flavors intact. Place it in the fridge within two hours of cooking. It stays tasty for about 3 to 4 days. If you want to keep it longer, consider freezing. For the best reheating results, use an oven or a stovetop. Preheat your oven to 350°F (175°C). Place the pasta in a baking dish, cover it with foil, and heat for about 15-20 minutes. Stir halfway through to warm evenly. If using the stovetop, add a splash of water in a pan. Heat on low, stirring gently until warm. This helps maintain the creamy texture of the feta and veggies. To boost flavor, add fresh herbs like thyme or rosemary. You can also mix in olives or capers for a salty kick. A splash of lemon juice before serving brightens the dish. Yes, you can prep this dish ahead of time. Chop your veggies and mix them with olive oil and seasoning. You can store them in the fridge for up to a day. Just bake and cook the pasta when ready to serve. Freezing is an option, but it may change the texture. Bake the dish, then let it cool. Portion it into airtight containers and freeze. To reheat, thaw overnight and bake until heated through. Penne or fusilli works great because they hold sauce well. Other pasta types like rotini or farfalle can also be good choices. The key is to use pasta that captures those tasty bits of feta and veggies. In this article, we explored a simple Baked Feta Pasta Primavera. We covered the main ingredients like pasta, feta, and fresh veggies. I shared step-by-step instructions to help you bake the dish perfectly. You also learned tips for serving, variations, and ways to store leftovers. Remember, this dish is flexible. You can swap ingredients based on what you have or enjoy. I hope you feel inspired to create this tasty meal soon. Enjoy cooking and sharing with others!

Baked Feta Pasta Primavera Colorful and Flavorful Dish

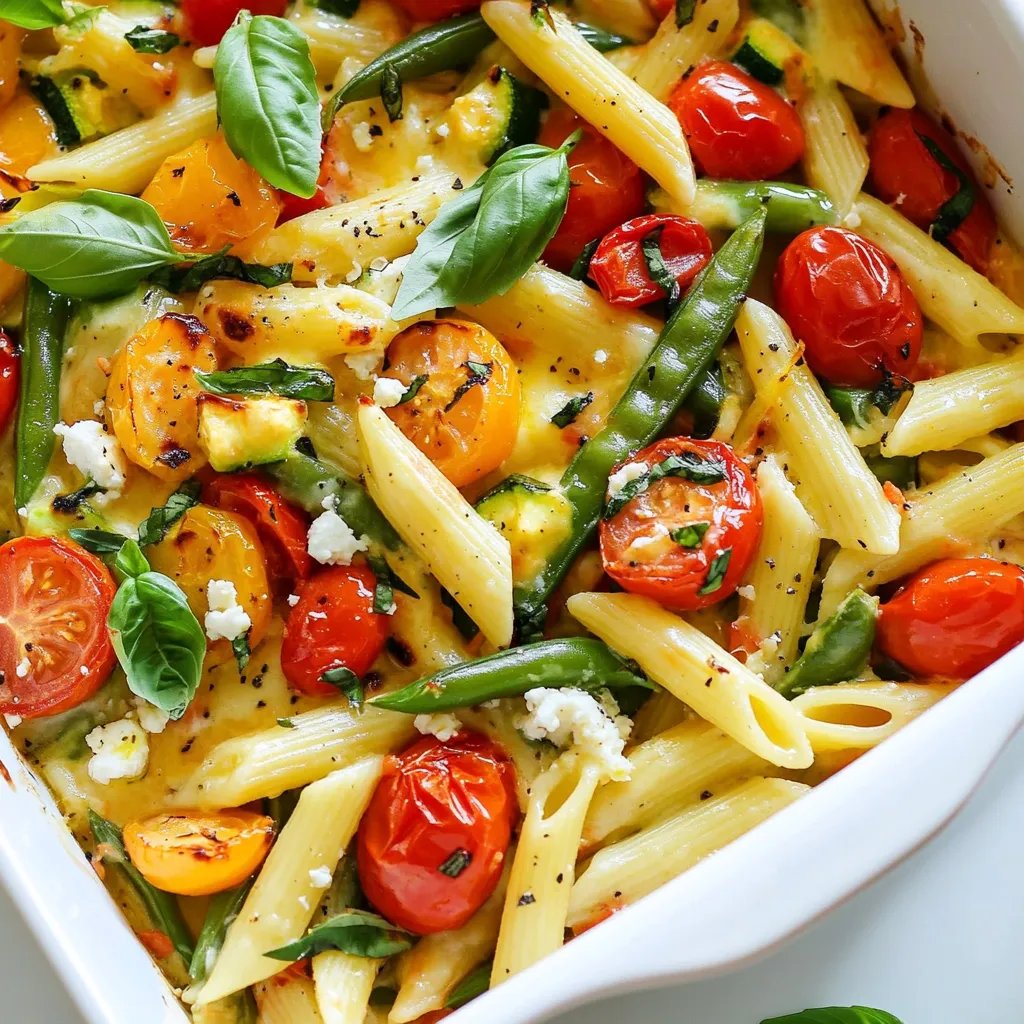
Are you ready to take your pasta night to a new level? This Baked Feta Pasta Primavera is not just

Newer posts
← Previous Page1 … Page160 Page161

dsad

© 2026 pureeatsnow • Built with GeneratePress

Our Policies

  • Copyright Policy
  • Cookie Policy
  • GDPR Policy
  • Privacy Policy
  • Disclaimer
  • Terms Of Use

More Information

  • Home
  • About
  • Contact
  • Appetizers
  • Dessert
  • Dinner
  • Drinks
©2026, pureeatsnow About Back To Top