Skip to content
DisclaimerTerms Of UseGDPR PolicyCookie Policy

pureeatsnow

  • Home
  • Drinks
  • Appetizers
  • Dinner
  • Dessert
  • About
  • Contact
  • Privacy Policy
DisclaimerTerms Of UseGDPR PolicyCookie Policy

Rachel

To make the sweet potato breakfast bowl, gather these fresh ingredients: - 1 large sweet potato, peeled and diced - 1 tablespoon olive oil - 1 teaspoon cinnamon - 1/2 teaspoon nutmeg - 1/4 teaspoon sea salt - 1/4 cup cooked quinoa - 1/4 cup Greek yogurt (or a dairy-free alternative) - 1 tablespoon maple syrup (or agave syrup) - 1/4 cup fresh blueberries - 1 tablespoon chopped walnuts (optional) - Fresh mint leaves for garnish Each serving of this sweet potato breakfast bowl is packed with nutrients. Here’s the breakdown: - Calories: 350 - Protein: 10g - Carbohydrates: 55g - Dietary Fiber: 8g - Sugars: 10g - Fat: 12g This bowl offers a good mix of carbs, healthy fats, and protein to keep you full. You can easily swap some ingredients based on your taste or diet: - Use pumpkin instead of sweet potato for a different flavor. - Substitute quinoa with oats for a heartier base. - Try coconut yogurt if you want a dairy-free option. - Use honey instead of maple syrup for sweetness. - Top with almonds instead of walnuts for a nutty crunch. These substitutions can help you tailor the bowl to your liking while keeping it delicious. If you'd like to see the complete method, check out the Full Recipe. To make a sweet potato breakfast bowl, start with a large sweet potato. Peel and dice it into small cubes. This helps it cook evenly. Next, gather your spices: cinnamon, nutmeg, and sea salt. You will also need olive oil for roasting. 1. Preheat your oven to 400°F (200°C). This ensures even cooking. 2. In a bowl, mix the diced sweet potato with olive oil, cinnamon, nutmeg, and sea salt. Toss it well until all pieces are coated. 3. Spread the sweet potato on a baking sheet in a single layer. This helps them roast evenly. 4. Roast for 25-30 minutes. Flip them halfway through to get a nice caramelization. Check if they are fork-tender when done. 5. While the sweet potatoes roast, cook quinoa if needed. Follow the package instructions for best results. 6. In a separate bowl, mix Greek yogurt with maple syrup. Stir until it's smooth and creamy. 7. To build your breakfast bowl, add quinoa as the base. 8. Top with roasted sweet potatoes, a dollop of the yogurt mixture, and fresh blueberries. 9. If you like crunch, sprinkle chopped walnuts on top. 10. Finish with fresh mint leaves for a pop of color and flavor. When serving, use a colorful bowl to make it inviting. Layer the ingredients for a beautiful look. You can also drizzle extra maple syrup on top for a sweet touch. Serve this bowl warm for the best taste. For more ideas, check out the Full Recipe for different toppings and options. To get the best roasted sweet potatoes, start with fresh ones. Choose a large sweet potato for even cooking. Peel and dice it into small cubes. This helps them cook faster. Toss the cubes in olive oil, cinnamon, nutmeg, and sea salt. Make sure every piece is well coated. Spread them in a single layer on a baking sheet. This allows hot air to circulate. Roast at 400°F (200°C) for 25 to 30 minutes. Flip them halfway through for even browning. Look for a fork-tender texture and a caramelized look. The sweet flavor will shine through. To save time, prep your sweet potatoes and quinoa ahead. Cook a big batch of quinoa early in the week. Store it in an airtight container. You can roast your sweet potatoes in advance as well. Reheat them in the oven or microwave before serving. Layer your breakfast bowls with cooked quinoa as the base. Add your roasted sweet potatoes and toppings right before eating. This keeps everything fresh. You can mix and match toppings to keep it fun. One common mistake is overcrowding the baking sheet. When sweet potatoes are too close, they steam instead of roast. This can make them soggy. Another mistake is not flipping them while cooking. This step helps them brown evenly. Also, watch the cooking time closely. Overcooked sweet potatoes can become mushy. Finally, don’t skip the seasoning. Salt, cinnamon, and nutmeg make a big difference in flavor. For the full recipe, check the link above. {{image_2}} You can easily make this dish vegan. Simply swap the Greek yogurt for a dairy-free yogurt. Almond or coconut yogurt works well. For sweetness, use agave syrup instead of maple syrup. This keeps the bowl creamy and delicious while staying plant-based. This breakfast bowl is naturally gluten-free. Quinoa is a great base, and it fits right in. If you want more options, try using brown rice or buckwheat. Both are gluten-free and add a nice texture. Get creative with spices and toppings! Here are some ideas: - Spices: Try adding ginger or cardamom for an extra kick. - Toppings: Use chopped pecans, almonds, or sunflower seeds for crunch. - Fruits: Swap blueberries for strawberries or raspberries if you like. - Sweeteners: Experiment with honey or a touch of coconut sugar. These small changes can make your sweet potato breakfast bowl unique each time you make it. For the full recipe, check out the Sweet Potato Breakfast Bowl section! To store your Sweet Potato Breakfast Bowl, place it in an airtight container. Make sure the bowl is cool before sealing. This step helps keep the flavors fresh. You can store it in the fridge for up to three days. If you want to keep it longer, freeze it for later. Just remember to thaw it before reheating. To reheat your bowl, you have a few options. The microwave is quick; just heat it for about one to two minutes. Stir halfway through to make sure it warms evenly. If you prefer the oven, preheat it to 350°F (175°C). Place the bowl in a safe dish and heat for about 10-15 minutes. This method keeps the sweet potatoes nice and crispy. The shelf life of this breakfast bowl is about three days in the fridge. To keep it fresh, always seal it tightly. Avoid leaving it out for too long. If you freeze it, it can last for about one month. When you're ready to eat, just thaw it overnight in the fridge. This method helps maintain the taste and texture. Following these tips ensures your Sweet Potato Breakfast Bowl stays delicious and ready to enjoy! You can use several options instead of Greek yogurt. Plain yogurt works well, whether it’s regular or non-dairy. You could also try cottage cheese for a different texture. For a vegan choice, use coconut yogurt or cashew yogurt. These alternatives still give you creaminess and taste. Yes, you can prepare some parts ahead of time. Roast the sweet potatoes and cook the quinoa the night before. Store them in the fridge. In the morning, just combine everything in a bowl. This saves you time and makes breakfast easy. To lower the calories, use less olive oil when roasting the sweet potatoes. You can skip the walnuts or use fewer. Choose a low-calorie yogurt as a substitute. Finally, cut back on maple syrup or use a sugar-free sweetener. This way, you keep the yummy flavors while making it lighter. In this post, we covered how to make a tasty sweet potato breakfast bowl. We discussed the key ingredients, cooking steps, and tips. You learned about nutritional values, substitutes, and flavor options. With these details, you can create a breakfast that suits your taste and diet. Remember, meal prep can save time and reduce waste. Experiment with different toppings and enjoy the bowl your way. Keep these ideas in mind, and you'll succeed in making this healthy dish time and again.

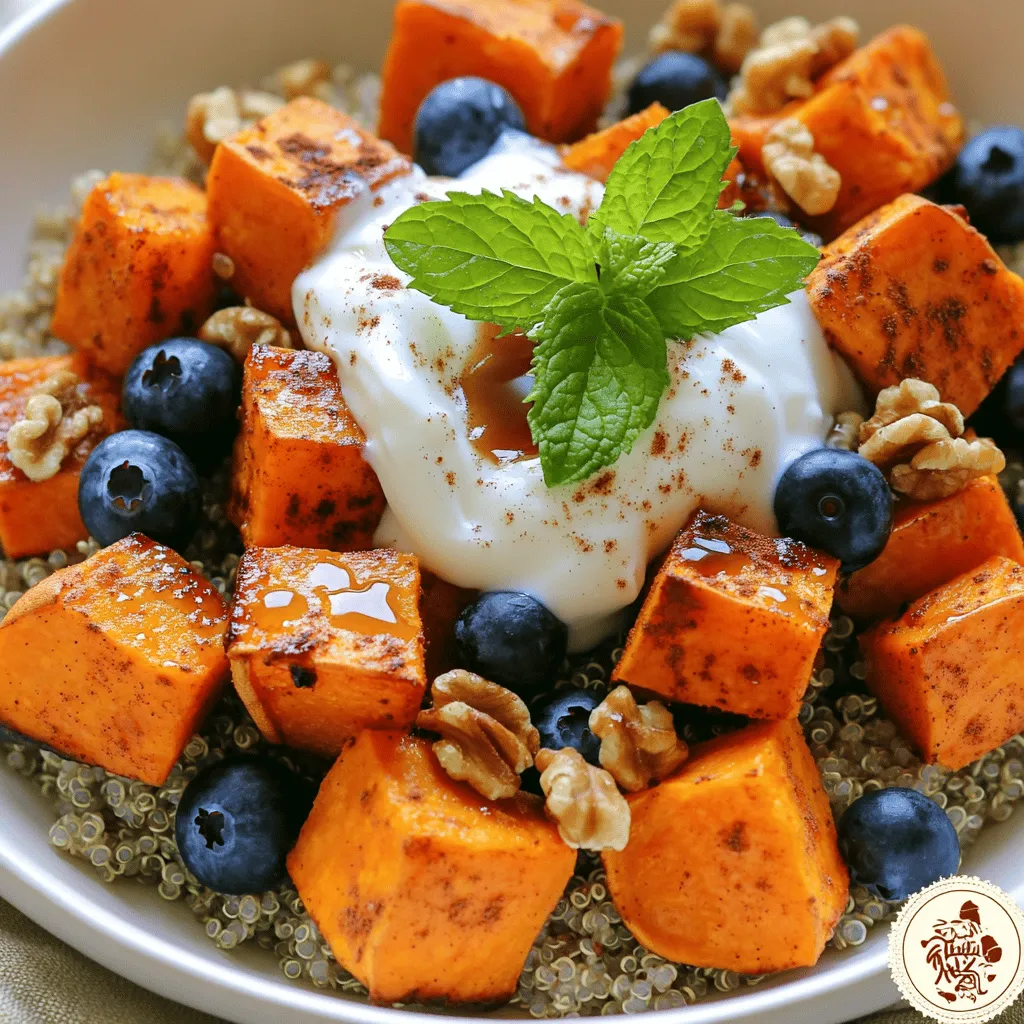
Sweet Potato Breakfast Bowl Flavor-Packed Delight

Looking for a tasty way to start your day? Discover the Sweet Potato Breakfast Bowl, a flavor-packed delight that’s as

- 4 medium zucchinis - 1 cup cooked chicken, shredded - 1 cup enchilada sauce (store-bought or homemade) - 1 cup black beans, rinsed and drained - 1 cup corn (fresh, frozen, or canned) - 1 cup shredded cheese (cheddar or a Mexican blend) For this dish, zucchini serves as a healthy and fun base. It holds the filling well and adds a nice crunch. The cooked chicken brings protein and flavor, while the enchilada sauce adds a tasty kick. Black beans and corn provide texture and nutrition, making this meal balanced. Lastly, shredded cheese melts beautifully on top, creating a delicious finish. - 1 teaspoon cumin - 1 teaspoon chili powder - 1/2 teaspoon garlic powder - Salt and pepper to taste Spices are crucial for flavor. Cumin gives warmth and earthiness. Chili powder adds heat, and garlic powder brings depth. Adjust salt and pepper to your liking, enhancing the overall taste. - Fresh cilantro - Olive oil Garnishes add brightness. Fresh cilantro gives a burst of flavor and color. A drizzle of olive oil adds richness, elevating your dish. For the full recipe, check out the details I’ve shared earlier! 1. Preheat the oven to 375°F (190°C). This step gets your oven ready for baking. 2. Cut the zucchinis in half lengthwise. Use a sharp knife for clean cuts. 3. Scoop out the center of each half using a spoon. Leave enough flesh to keep the shape. Place the zucchini halves into a baking dish, ready for stuffing. 1. Combine the chicken, black beans, corn, and spices in a mixing bowl. 2. Add half of the enchilada sauce to the mixture. This sauce adds flavor and moisture. 3. Mix well until all ingredients are blended. You want a nice, even mix for great taste. 1. Stuff the zucchinis with the chicken mixture. Press down gently to pack it in. 2. Drizzle olive oil over the stuffed zucchinis. This helps them cook nicely. 3. Pour the remaining enchilada sauce over the top. This adds more flavor and keeps everything moist. 4. Sprinkle shredded cheese on top of each zucchini boat. Cheese makes everything better! 5. Cover the dish with aluminum foil. This keeps the moisture in while baking. 6. Bake for 20 minutes, then remove the foil. 7. Bake for another 10-15 minutes until the cheese is melted and the zucchini is tender. 8. Let it cool slightly before serving. Garnish with extra chopped cilantro if you wish. For the full recipe, check out the detailed cooking guide. When picking zucchinis, size matters. Choose medium zucchinis, about 6-8 inches long. They are firm and ideal for stuffing. Avoid large zucchinis; they can be watery and less tasty. Fresh zucchinis should have smooth skin and no spots. Look for ones that feel heavy for their size. This means they are juicy and fresh. To boost flavor, try adding more spices. A pinch of smoked paprika or cayenne pepper can add depth. You can also use fresh lime juice for a zesty kick. If you want to make your dish even better, use homemade enchilada sauce. It’s easy to make and tastes great. Just blend tomatoes, chili powder, and spices. This will make your Chicken Enchilada Stuffed Zucchini pop with flavor. For sides, serve with a simple salad or rice. A fresh avocado salad with lime juice pairs well. You can also add tortilla chips for crunch. For presentation, place the stuffed zucchinis on a colorful plate. Garnish with chopped cilantro or a drizzle of sour cream for a nice touch. This will make your meal look as good as it tastes! {{image_2}} If you want a vegetarian version of Chicken Enchilada Stuffed Zucchini, it’s easy. You can swap the chicken for more beans or a mix of vegetables. Black beans are great for protein. You can also add corn, bell peppers, or spinach. This change keeps the flavor rich and satisfying. Do you like it mild? You can reduce the chili powder or skip it. Another option is to use a mild enchilada sauce. If you want more heat, add diced jalapeños or serrano peppers to the filling. This way, you can control the spice to match your taste. For cheese lovers, there are many choices! Cheddar brings a sharp flavor, while a Mexican blend adds a nice touch. If you prefer dairy-free, try vegan cheese. Nutritional yeast is another great option for extra flavor. Each cheese option gives a unique taste, so feel free to mix and match. For the complete recipe, check [Full Recipe]. To store leftovers, let the stuffed zucchini cool first. Place them in an airtight container. They will stay fresh for about 3 to 4 days in the fridge. For the best taste, eat them within this time. To keep zucchini fresh, store it whole in the fridge. Wrap it in a paper towel and place it in a plastic bag. This helps absorb moisture and keeps it crisp. Yes, you can freeze stuffed zucchini! To freeze, first cool the dish completely. Wrap each stuffed zucchini in plastic wrap or aluminum foil. Place them in a freezer-safe bag and squeeze out the air. When you’re ready to eat, thaw them overnight in the fridge. Reheat in the oven at 350°F (175°C) for 20 minutes, or until heated through. In the fridge, the Chicken Enchilada Stuffed Zucchini lasts about 3 to 4 days. In the freezer, it can last up to 3 months. Make sure to label the bag with the date. This way, you know when to enjoy it! Yes, you can use other vegetables! Bell peppers, eggplants, and even hollowed tomatoes work well. Each veggie adds a unique flavor and texture. Making enchilada sauce is simple. Here’s a quick recipe: - Ingredients: - 2 tablespoons olive oil - 2 tablespoons chili powder - 1 cup tomato sauce - 1 cup vegetable broth - 1 teaspoon cumin - Salt to taste - Instructions: 1. Heat olive oil in a pan. 2. Stir in chili powder for a minute. 3. Add tomato sauce and broth. 4. Mix in cumin and salt. 5. Simmer for 10 minutes. Enjoy your homemade sauce with Chicken Enchilada Stuffed Zucchini! Pair your stuffed zucchinis with a fresh salad or rice for a great meal. You could also serve black beans or corn on the side. These options add color and flavor to your plate. This post covered creating Chicken Enchilada Stuffed Zucchini with simple steps. We looked at key ingredients, including zucchini, chicken, and spices. You learned how to mix and bake the filling, plus tips for flavor and storage. Variations let you customize with vegetarian options or spice levels. I hope these recipes and tips inspire you to try this fun dish. Enjoy your cooking!

Chicken Enchilada Stuffed Zucchini Tasty and Healthy

Looking for a tasty and healthy twist on dinner? Chicken Enchilada Stuffed Zucchini packs bold flavors and nutritious ingredients into

To make Garlic Lemon Roasted Broccoli, you need fresh and simple ingredients. Here’s what you’ll need: - Broccoli florets - Garlic - Olive oil - Lemon zest and juice - Chili flakes (optional) - Salt and pepper - Parmesan cheese (optional) - Fresh parsley Each ingredient plays a key role. The broccoli gives you crunch and nutrition. Garlic adds a rich flavor that pairs well with lemon. Olive oil helps everything roast nicely. Lemon zest and juice brighten the dish, making it fresh. If you like a little heat, add chili flakes. Salt and pepper enhance the taste. Parmesan adds a cheesy layer, but you can skip it if needed. Finally, fresh parsley makes the dish pop with color and flavor. For the full recipe, check out the details above. Preheat Oven First, you need to preheat your oven to 425°F (220°C). This step ensures your broccoli roasts evenly and becomes nice and crispy. Prepare Broccoli Florets Next, take two heads of broccoli and cut them into florets. Ensure they are similar in size for even cooking. You can wash them well and dry them before cutting. Combine Ingredients in a Bowl In a large mixing bowl, add the broccoli florets, minced garlic, and olive oil. Then, include the lemon zest and lemon juice. This mix brings out bright flavors. Add Seasonings If you want a little heat, sprinkle in chili flakes. Don’t forget to season with salt and pepper. Toss everything together until the florets are well-coated. This step is key to flavor. Spread on Baking Sheet Now, spread the seasoned broccoli evenly on a baking sheet lined with parchment paper. This helps to avoid sticking and makes cleanup easy. Roast Time and Method Roast the broccoli in your preheated oven for 20-25 minutes. Make sure to stir halfway through. This helps the broccoli cook evenly and get those crispy edges. If you like, add grated Parmesan cheese in the last 5 minutes of roasting for a tasty finish. Enjoy the full recipe for more detailed steps! Achieving Crispy Edges To get crispy edges on your broccoli, you need high heat. Set your oven to 425°F (220°C). This high heat helps to brown the broccoli. Make sure to toss the florets halfway through roasting. This step allows all sides to crisp up nicely. Importance of Even Spacing Spread the broccoli florets out on the baking sheet. When the florets sit too close together, they steam instead of roast. Give each piece space to breathe. This way, they brown evenly and get that nice crunch. Adding Herbs and Spices You can boost the flavor of your broccoli by adding herbs. Try thyme or rosemary for a fresh taste. A pinch of cumin can also add warmth. Experiment with different spices you enjoy. This makes each batch unique and exciting. Using Lemon Variations Using lemon zest adds a bright flavor. If you want more lemon taste, try adding lemon juice at the end. You can even use flavored lemon oils for a twist. This helps to elevate the dish and makes it zingy. Presentation Tips for Serving When serving, place the broccoli on a nice platter. Drizzle any extra lemon juice over the top. A sprinkle of Parmesan cheese adds a touch of class. Finish with fresh parsley for color. This makes your dish look fancy and inviting. Pairing with Main Dishes Garlic lemon roasted broccoli pairs well with many main dishes. It goes great with grilled chicken or fish. You can also serve it alongside pasta for a hearty meal. This dish is versatile and fits well with various flavors. For the full recipe, check out the details above. {{image_2}} You can change the taste of Garlic Lemon Roasted Broccoli by adding nuts or other veggies. - Adding Nuts for Crunch Nuts like almonds or walnuts can add a nice crunch. Chop them up and sprinkle them over the broccoli before roasting. This step adds texture and flavor. You can also mix the nuts into the bowl when you combine the other ingredients. - Incorporating Different Vegetables You don't have to stick with just broccoli. You can add bell peppers, carrots, or even cauliflower. Cut them into similar sizes. This way, they roast evenly. Make sure to adjust the cooking time if you add larger pieces. You can make this dish fit your diet with some easy swaps. - Vegan Options (without Cheese) If you want a vegan dish, skip the Parmesan cheese. The garlic and lemon will still give you great flavor. You can add nutritional yeast for a cheesy taste without dairy. - Gluten-Free Considerations This dish is naturally gluten-free. Just ensure your seasonings are gluten-free. Enjoy Garlic Lemon Roasted Broccoli with your favorite gluten-free meal. For the full details on making this dish, check out the Full Recipe. After you make Garlic Lemon Roasted Broccoli, you may have some left. Store any leftovers in an airtight container. Place it in the fridge for up to three days. This keeps the broccoli fresh and tasty. If you want to save it longer, you can freeze it. - Freezing Instructions: To freeze, let the broccoli cool completely. Spread it on a baking sheet first. This helps keep pieces separate. Once frozen, transfer it to a freezer bag. It can last for about three months in the freezer. When you're ready to enjoy your leftovers, reheating is key. The best way to reheat Garlic Lemon Roasted Broccoli is in the oven. This method keeps it crispy. Preheat your oven to 350°F (175°C) and spread the broccoli on a baking sheet. Heat for about 10-15 minutes, or until hot. - Maintaining Crispiness: To keep the broccoli crisp, avoid using the microwave. If you must use it, only heat for a short time. This way, the broccoli won't turn soggy. For extra crispiness, you can broil it for a couple of minutes after microwaving. Enjoy your warm, flavorful broccoli! To enhance the flavor, add more herbs. You can use thyme or rosemary. Try adding lemon zest for an extra citrus kick. A splash of balsamic vinegar can add depth too. Mixing different spices, like smoked paprika, gives it a unique twist. Experimenting with nuts like almonds or walnuts can add crunch and taste. Yes, you can use frozen broccoli. It saves time and is convenient. However, the texture may differ from fresh broccoli. Frozen broccoli can be softer after roasting. To get the best results, thaw and drain it first. This helps keep your dish from getting soggy. If you want a dairy-free option, try nutritional yeast. It gives a cheesy flavor without the dairy. You can also use vegan cheese or a blend of nuts. Ground cashews or almonds can add richness. If you have no cheese, just skip it; the dish will still taste great! Absolutely! This recipe is flexible. Carrots, bell peppers, or cauliflower work well. Just cut them into similar sizes for even cooking. You can also mix greens like kale or spinach for added nutrients. Don't be afraid to get creative with your veggie choices! You can store leftovers in the fridge for up to three days. Use an airtight container to keep them fresh. If you want to keep them longer, consider freezing. Roasted broccoli can last up to two months in the freezer. When ready to eat, reheat in the oven for best results. This dish pairs well with many meals. It complements grilled chicken, fish, or tofu nicely. You can serve it alongside quinoa or rice for a complete meal. Try adding it to pasta dishes for extra veggies. It can also be a great side for any holiday feast! For the full recipe, check out the detailed cooking steps above. In this article, we explored how to make Garlic Lemon Roasted Broccoli. We covered all the ingredients needed, from fresh broccoli to optional Parmesan cheese. You learned step-by-step instructions for roasting it perfectly. We shared tips for flavor and presentation, plus variations to suit your taste. Finally, we discussed storing leftovers and reheating methods. Roasting broccoli enhances its flavor and texture. Enjoy making this dish your own and savor every bite!

Garlic Lemon Roasted Broccoli Simple and Healthy Dish

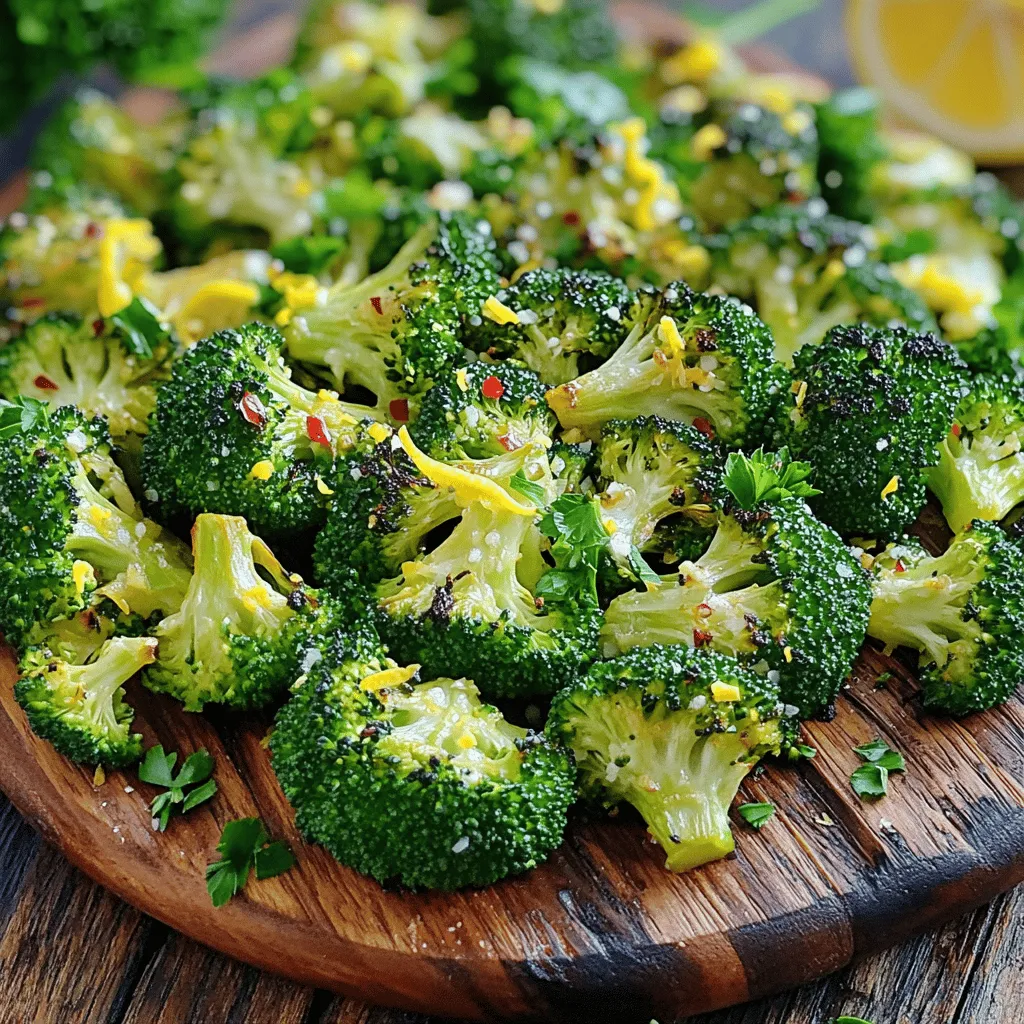
Looking for a quick, healthy side dish that bursts with flavor? Garlic Lemon Roasted Broccoli is your answer! This easy

To make this salad, you need a few key ingredients that bring bright flavors and textures. Here's what you'll need: - 1 cup quinoa, rinsed and drained - 2 cups water or vegetable broth - 1 cup cherry tomatoes, halved - 1 cucumber, diced - 1/2 red onion, finely chopped - 1 bell pepper (red or yellow), diced - 1/2 cup Kalamata olives, pitted and sliced - 1/2 cup feta cheese, crumbled (optional) - 1/4 cup fresh parsley, chopped - 1/4 cup olive oil - 2 tablespoons lemon juice - 1 teaspoon dried oregano - Salt and pepper to taste These ingredients create a colorful and tasty salad. The quinoa serves as a great base. It is light yet filling. The veggies add crunch and freshness, while olives and feta give a salty kick. You can make this salad your own by adding optional ingredients. Some ideas include: - Avocado for creaminess - Chickpeas or black beans for protein - Artichoke hearts for extra flavor - Spinach or arugula for greens Feel free to experiment with what you like. Customizing keeps the salad fresh each time you make it. Fresh herbs and spices can elevate your salad. Here are some great options: - Fresh basil for a sweet note - Mint for a refreshing twist - Dill for a unique flavor Using fresh herbs adds depth to the dish. They also make the salad look beautiful. Don't be afraid to mix and match herbs to find your favorite combination. For the full recipe, check out the Easy Mediterranean Quinoa Salad . Start by rinsing one cup of quinoa under cold water. This will help remove bitterness. Next, add the quinoa to a medium saucepan with two cups of water or vegetable broth. Bring this mixture to a boil over high heat. Once boiling, reduce the heat to low and cover the pan. Let it simmer for 15 to 20 minutes. You will know it's ready when the quinoa is fluffy and the water is absorbed. After cooking, take it off the heat and let it cool slightly. While the quinoa cooks, you can prepare your fresh vegetables. Gather your ingredients: one cup of halved cherry tomatoes, one diced cucumber, half a finely chopped red onion, and one diced bell pepper, either red or yellow. You can also add half a cup of Kalamata olives, pitted and sliced, and a quarter cup of chopped fresh parsley. Place all these vegetables in a large mixing bowl. This mix adds bright colors and crunchy textures to your salad. In a small bowl, whisk together a quarter cup of olive oil, two tablespoons of lemon juice, one teaspoon of dried oregano, and a sprinkle of salt and pepper. This dressing will bring all the flavors together. Once the quinoa has cooled, add it to the bowl with the vegetables. Pour the dressing over the quinoa salad. Toss everything gently until all the ingredients are well combined. If you like, you can sprinkle crumbled feta cheese on top before serving. This step adds a creamy touch to the dish. For the full recipe, refer to the beginning of this article. To cook quinoa perfectly, rinse it first. Rinsing removes the bitter coating called saponin. Next, use a 2:1 ratio of liquid to quinoa. I often use vegetable broth for added flavor. Bring the water or broth to a boil. Then, lower the heat and cover. Cook for about 15 to 20 minutes. The quinoa is done when it’s fluffy and the liquid is gone. Let it cool before mixing it into your salad. If you have leftovers, store them in an airtight container. Place them in the fridge right away. The salad stays fresh for up to three days. You might notice the quinoa absorbs some dressing. If it seems dry, add a splash of olive oil or lemon juice before eating. This will bring back the flavor and moisture. Taste your salad before serving. You may want to add more salt or lemon juice. If you like more spice, add crushed red pepper flakes. Personalizing the flavor makes the salad your own. Don’t be afraid to experiment! Try adding fresh herbs for extra zing. For the complete recipe, check out Full Recipe. {{image_2}} You can make this salad even heartier by adding protein. Here are some ideas: - Grilled chicken: This adds great flavor and makes it filling. - Chickpeas: These are a perfect plant-based choice. They add texture and protein. - Shrimp: Cooked shrimp gives a nice touch of seafood flavor. - Tofu: For a vegan option, cubed tofu soaks up the salad dressing well. Feel free to mix and match! Adding protein not only makes the dish more filling but also packs in more nutrients. The dressing makes a big difference in flavor. While the basic olive oil and lemon dressing is fresh and zesty, you can try others, like: - Balsamic vinaigrette: This adds a sweet and tangy twist. - Tahini dressing: This adds a rich, nutty flavor that is creamy. - Yogurt dressing: A cool yogurt-based dressing gives a nice contrast to the salad. Experiment with different dressings to suit your taste. Just remember to keep it light, so it doesn’t overwhelm the fresh ingredients. Using seasonal vegetables not only enhances flavor but also keeps the salad fresh. You can swap out ingredients based on what’s available: - Spring: Add asparagus or peas for a bright touch. - Summer: Use zucchini or corn for a sweet crunch. - Fall: Roasted sweet potatoes or butternut squash add warmth. - Winter: Kale or Brussels sprouts give a hearty feel. Using seasonal vegetables keeps your salad vibrant and interesting throughout the year. Check out the Full Recipe for more ways to customize your salad! To keep your Easy Mediterranean Quinoa Salad fresh, store it in an airtight container. This will help keep flavors intact and prevent spoilage. Place the salad in the fridge right after serving. When you are ready to eat it again, use a fork to fluff it up. If the salad seems dry, add a splash of olive oil or lemon juice to bring back its freshness. The salad can last about 3 to 5 days in the fridge. However, some ingredients have shorter shelf lives. Here’s a quick guide: - Quinoa: Lasts up to 5 days. - Fresh veggies: About 3 days. - Feta cheese: About 5 days if you keep it sealed. - Olives: Lasts well for a week or more. Always check for any changes in smell or texture before eating. If you want to keep your salad longer, you can freeze it. However, I don’t recommend freezing the salad with the fresh veggies. They can become mushy when thawed. Instead, freeze just the quinoa and dressing. When you want to eat it, thaw it in the fridge overnight. Then, mix in fresh veggies and enjoy! For the full recipe, check back to make sure you have all the steps right. You can use rice or couscous as a substitute for quinoa. Both options work well. If you want a low-carb choice, try cauliflower rice. Each substitute brings a unique flavor and texture. Make sure to adjust the cooking time based on what you choose. Yes, this salad is gluten-free! Quinoa is a great grain for those avoiding gluten. Just ensure any added ingredients, like dressings or feta, are also gluten-free. Always check labels if you buy pre-made items. This salad stays fresh for about 3 to 5 days in the fridge. Store it in an airtight container. The flavors will blend more as it sits. If you notice any change in smell or texture, it’s best to toss it out. For the full recipe, check the earlier section. This blog post shared ingredients and steps for an Easy Mediterranean Quinoa Salad. You learned about key ingredients and how to customize your dish. We covered tips for cooking quinoa and storing leftovers too. Finally, I discussed variations to make your salad shine. Embrace these ideas and create a unique salad. Enjoy fresh flavors and healthy options. Your meal will be tasty and satisfying.

Easy Mediterranean Quinoa Salad Fresh and Simple Dish

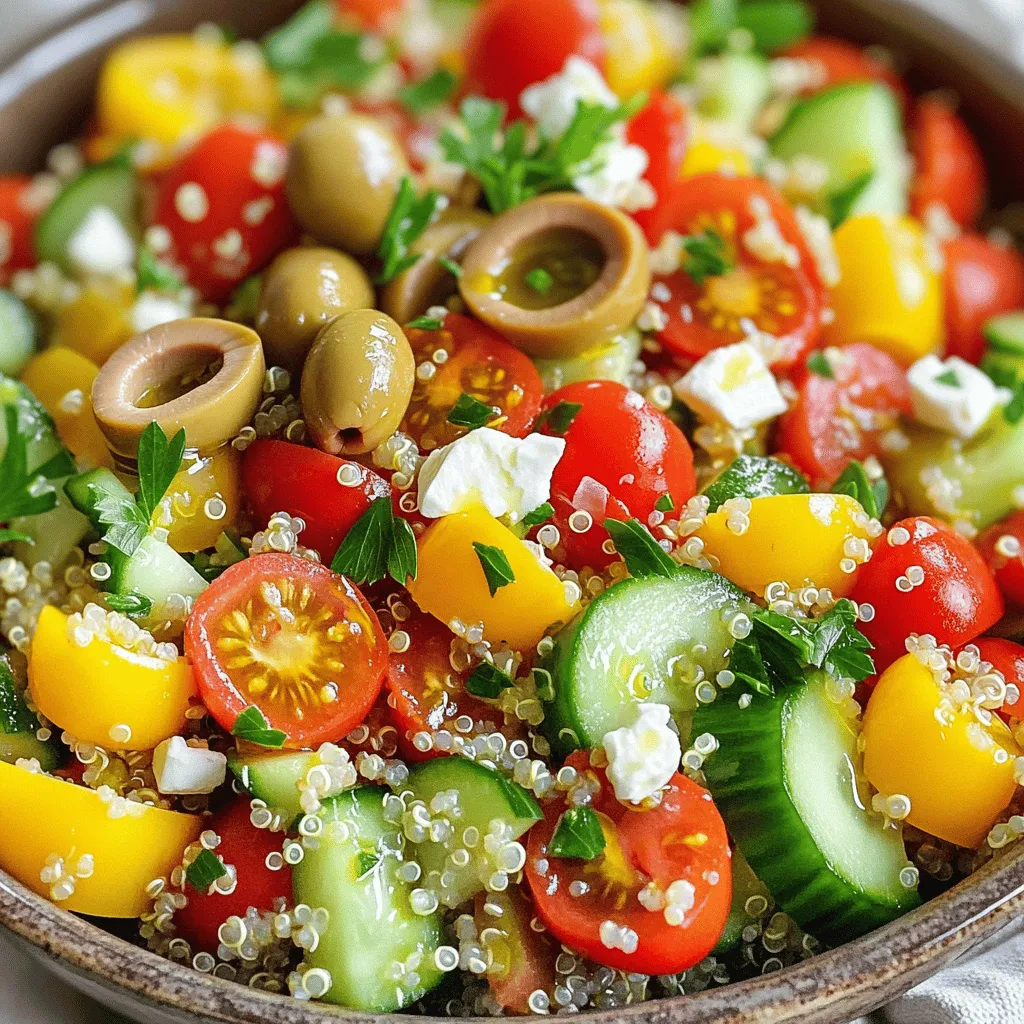
Looking for a fresh and simple dish that bursts with flavor? You’ve found it! My Easy Mediterranean Quinoa Salad is

- 1 can (15 oz) chickpeas, drained and rinsed - 1 tablespoon olive oil - 1 teaspoon ground cumin - 1 teaspoon smoked paprika - 1/2 teaspoon garlic powder - 1/2 teaspoon onion powder - Salt and pepper to taste Chickpeas are the star of this dish. They are high in protein and fiber. This makes them a healthy choice. Rinsing and draining them helps reduce sodium. Olive oil adds richness and helps the spices stick. The seasonings are key to flavor. Ground cumin gives warmth. Smoked paprika adds a nice smoky taste. Garlic and onion powders boost the overall flavor. Don't forget salt and pepper to enhance everything. - 1 avocado, sliced - 1 cup shredded red cabbage - 1/2 cup fresh cilantro, chopped - 1 lime, cut into wedges - Optional: hot sauce for serving Toppings make your tacos fun and fresh. Avocado adds creaminess and healthy fats. Red cabbage gives a nice crunch and bright color. Cilantro offers a burst of flavor that many love. Lime wedges are a must. Squeezing fresh lime juice over the tacos brightens all the flavors. If you like heat, add hot sauce. It gives the dish an extra kick. - 8 small corn or flour tortillas You can choose corn or flour tortillas. Corn tortillas are gluten-free and have a nice texture. Flour tortillas are soft and easy to fold. Either option works well for holding your tasty fillings. Warm the tortillas before serving. This makes them pliable and easy to eat. You can use a skillet or microwave for warming. Enjoy your crispy chickpea tacos with these simple yet flavorful ingredients! For the full recipe, check here [Full Recipe]. To start, you need to dry and season the chickpeas. First, drain and rinse a can of chickpeas. Use a kitchen towel to pat them dry. This step is key to getting them crispy. Next, place the chickpeas in a bowl. Drizzle one tablespoon of olive oil over them. Then, sprinkle in one teaspoon of ground cumin, one teaspoon of smoked paprika, half a teaspoon of garlic powder, half a teaspoon of onion powder, and salt and pepper to taste. Toss everything together until the chickpeas are well coated. Now, let’s prepare the oven. Preheat it to 425°F (220°C). This high temperature helps the chickpeas become nice and crispy. The ideal temperature for baking chickpeas is 425°F. This heat crisps them up quickly. Bake the chickpeas for 20-25 minutes. Halfway through, shake the pan to ensure they cook evenly. You want them golden and crunchy. While the chickpeas bake, warm your tortillas. You can do this in a dry skillet over medium heat. Heat them for about 30 seconds on each side. This makes them soft and easy to fold. Once the chickpeas are done, it’s taco time! Take a tortilla and add a generous spoonful of crispy chickpeas. Next, layer on sliced avocado, shredded red cabbage, and chopped cilantro. You can also serve lime wedges and hot sauce on the side for extra flavor. You can find the Full Recipe for more details! To get crispy chickpeas, start by drying them well. Moisture makes them soggy. Use a clean kitchen towel to pat them dry. This step is key for that perfect crunch. For baking, set your oven to 425°F (220°C). Spread the chickpeas out in a single layer on a baking sheet. This allows the heat to circulate. Bake for 20 to 25 minutes. Shake the pan halfway through to cook them evenly. Spices make a big difference in flavor. I love using ground cumin and smoked paprika. They add warmth and depth. Garlic and onion powders also bring out great taste. Feel free to adjust these spices to your liking. For sauces, try a zesty lime crema or a spicy hot sauce. They add an extra kick to your tacos. While I recommend using a skillet to heat tortillas, there are other ways. You can wrap them in foil and warm them in the oven. This method keeps them soft. If you want to store soft tortillas, keep them in a sealed bag. This keeps them fresh and prevents them from drying out. Enjoy your delicious crispy chickpea tacos! For the full recipe, visit the link. {{image_2}} You can mix up your tacos by using different proteins. Chickpeas are amazing, but you can also add other legumes like black beans or lentils. They work well and give you a nice texture. If you want a heartier option, try vegan meat alternatives. Products made from soy or pea protein can add a great taste. They soak up the taco flavors and keep your meal filling. For those who love spice, add some chili powder or jalapeños to your chickpeas. This will bring a nice kick to each bite. You can also create sweet and savory tacos. Try adding mango salsa or roasted sweet potatoes. These flavors balance the spices and bring out the chickpeas' taste. Play around with flavors to find what you love! To make your meal even better, pair your tacos with sides. A fresh corn salad or a tangy slaw works great. They add crunch and freshness to your plate. For plating, stack your tacos neatly on a colorful plate. Add lime wedges and extra cilantro for a pop of color. This makes your dish look as good as it tastes. For the full recipe, check the detailed instructions above. To keep your crispy chickpea tacos fresh, store the leftovers right. Place the chickpeas in an airtight container. Use a container that seals well to keep moisture out. I recommend glass or plastic containers with tight lids. Store the toppings separately. Keep avocado, cabbage, and cilantro in their own containers. This keeps everything fresh and prevents sogginess. When you want to enjoy your tacos again, reheating is key. First, heat the chickpeas in the oven. Set it to 350°F (175°C) and bake for about 10 minutes. This makes them crispy again. For the tortillas, use a skillet. Warm them on medium heat for 20-30 seconds on each side. This method keeps them soft and pliable. Avoid the microwave if you want to keep that crunch. Can you freeze crispy chickpeas? Yes, you can! Freezing is a good way to save them for later. Let them cool completely before putting them in a freezer bag. Squeeze out as much air as possible before sealing. This helps prevent freezer burn. For best results, try to eat them within a month. When you're ready to eat, just reheat them in the oven. You can freeze the toppings too, but only the cabbage and cilantro. Avocado doesn’t freeze well, so add it fresh when you serve. To make crispy chickpeas, start by drying them well. Many people skip this step, and it leads to soggy results. You want to remove all moisture. Once dry, coat them in olive oil and your favorite spices. I suggest cumin, smoked paprika, and garlic powder for great flavor. Spread the chickpeas on a baking sheet in a single layer. Bake them at 425°F (220°C) for 20 to 25 minutes. Remember to shake the pan halfway through. This way, they cook evenly and get crispy all around. Yes, you can use canned chickpeas! Canned chickpeas save time and are very convenient. They are already cooked, so you just need to dry and season them. Dried chickpeas need soaking and longer cooking time. Canned versions are quick and easy for a busy day. If you need a tortilla alternative, try lettuce wraps. They are fresh and low-carb. You can also use rice paper for a fun twist. Other options include gluten-free tortillas made from almond or coconut flour. You can even serve the crispy chickpeas over rice or in a bowl with toppings. The options are endless! For more ideas, check out the Full Recipe. Making chickpea tacos is simple and fun. You learned about the main ingredients, like chickpeas and olive oil. We discussed the best toppings and how to warm tortillas. I shared tips to achieve crispy chickpeas and ways to enhance flavor. You also explored variations for protein and unique serving ideas. In the end, these tacos are tasty and versatile. Enjoy making them your own with different flavors!

Crispy Chickpea Tacos Flavorful and Satisfying Meal

Looking for a quick, tasty meal that everyone will love? Crispy chickpea tacos are your answer! They’re packed with flavor,

To make this refreshing Mango Black Bean Quinoa Salad, gather these items: - 1 cup quinoa, rinsed - 2 cups vegetable broth (or water) - 1 ripe mango, diced - 1 can (15 oz) black beans, drained and rinsed - 1 red bell pepper, diced - 1 small red onion, finely chopped - 1 cup corn (fresh, frozen, or canned) - 1/4 cup fresh cilantro, chopped - Juice of 2 limes - 2 tablespoons olive oil - 1 teaspoon cumin - Salt and pepper to taste These ingredients create a colorful and tasty salad. The quinoa gives a nice base, while the mango adds a sweet touch. The black beans provide protein, and the veggies add crunch. If you don't have some ingredients, you can try these swaps: - Use brown rice instead of quinoa for a different base. - Any type of beans works; try kidney beans or pinto beans. - Swap mango for pineapple for a tropical twist. - Green onions can replace red onion for a milder taste. - If you don't like cilantro, use parsley or omit it. These substitutions keep the salad fresh while letting you work with what you have. You can customize the flavors to suit your taste buds. This salad is not just tasty; it's also good for you. Here’s what you get per serving: - Calories: 300 - Protein: 10g - Carbohydrates: 50g - Fat: 10g - Fiber: 8g - Sugar: 4g This salad is packed with nutrients. It provides protein from the quinoa and beans. The veggies add vitamins and minerals, making it a balanced meal. For the full recipe, check out the details provided earlier. Enjoy your healthy eating! Start by rinsing 1 cup of quinoa under cold water. This helps remove the bitter coating called saponin. Next, bring 2 cups of vegetable broth to a boil in a medium saucepan. Add the rinsed quinoa and reduce the heat to low. Cover the pot and let it simmer for about 15 minutes. The quinoa will absorb all the broth. After 15 minutes, remove it from heat and let it sit, covered, for 5 more minutes. Then, fluff the quinoa with a fork. This gives it a light and airy texture. In a large mixing bowl, combine the cooked quinoa with the other ingredients. Add in the diced mango, which provides a sweet burst of flavor. Then, mix in the drained and rinsed black beans for protein and fiber. Add the diced red bell pepper for crunch and color. Toss in the finely chopped red onion for a sharp taste. Include 1 cup of corn for sweetness and texture. Finally, add 1/4 cup of fresh cilantro for a bright, herbal note. Make sure everything is mixed well so each bite has a bit of everything. In a small bowl, whisk together the juice of 2 limes, 2 tablespoons of olive oil, and 1 teaspoon of cumin. This dressing will add a zesty kick to the salad. Season it with salt and pepper to taste. Once the dressing is ready, pour it over the quinoa salad. Gently toss everything together until all the ingredients are coated. Taste the salad and adjust the seasoning if needed. If you want extra heat, you can add a pinch of cayenne pepper or a dash of hot sauce. For best results, chill the salad in the fridge for 30 minutes before serving. This allows the flavors to blend beautifully. Enjoy your Mango Black Bean Quinoa Salad! For the full recipe, check the earlier section. To cook quinoa, start with rinsing it. Rinsing removes the bitter coating. This helps your salad taste great. Use two cups of vegetable broth or water for one cup of quinoa. Bring the liquid to a boil. Then, add the quinoa and reduce the heat. Cover the pot and let it simmer for about 15 minutes. After the time is up, take it off the heat. Let it sit for five minutes without lifting the lid. Finally, fluff it with a fork. This process gives you fluffy, tender grains. Chilling your salad is key to good flavor. After mixing all the ingredients, cover the bowl and place it in the fridge. Let it chill for about 30 minutes. This waiting time allows the flavors to blend well. For best results, use an airtight container. It keeps the salad fresh and helps it cool faster. This salad is refreshing, especially on a hot day. To make your salad even better, add some spices. Cumin adds a warm, earthy taste. It’s already in the recipe, but you can add more if you like. If you want some heat, try cayenne pepper or hot sauce. Fresh lime juice brightens the dish. You could also add some zest from the lime for extra flavor. Fresh herbs, like cilantro, bring a burst of freshness. Mix and match these to find your perfect taste. You can check out the Full Recipe for more ideas. {{image_2}} You can make this salad heartier by adding protein. Grilled chicken or shrimp work great. Tofu is a good choice for a plant-based option. You can also mix in some cooked lentils or chickpeas. These options boost protein and make the salad a full meal. The base of this salad is already vegetarian and vegan-friendly. If you want to add cheese, use feta or goat cheese for a twist. For a vegan option, skip the cheese or use a dairy-free alternative. This way, everyone can enjoy this tasty dish. Use seasonal fruits and veggies for fresh flavors. In summer, try adding diced cucumbers or cherry tomatoes. In fall, roasted sweet potatoes or butternut squash can add warmth. Adjust the ingredients based on what’s fresh and available. This keeps your salad exciting and full of flavor. For more tips and recipes, check out the Full Recipe for Mango Black Bean Quinoa Salad. You can store leftover mango black bean quinoa salad in an airtight container. Make sure to cool the salad to room temperature before sealing it. This helps keep the flavors fresh. Store it in the fridge for up to three days. If you notice any liquid pooling in the container, just stir it back in before serving. I don't recommend freezing this salad. The texture of the quinoa and the fresh veggies may change when thawed. However, if you want to freeze it, do so without the dressing. Place the salad in a freezer-safe bag or container. It can last for up to a month. When you’re ready to eat it, thaw in the fridge overnight before adding the dressing. If you want to reheat the salad, do it gently. Place the salad in a microwave-safe bowl. Heat in short intervals, stirring in between. This helps avoid a mushy texture. If the salad feels dry, add a splash of lime juice or olive oil to freshen it up. Enjoy it warm or cold, as it tastes great either way! For the full recipe, check out the section above. Yes, you can make this salad ahead of time. This salad tastes even better after sitting. The flavors mix well when chilled. I suggest making it a few hours before you serve it. You can store it in the fridge. Just keep it in a sealed container for freshness. This salad pairs well with many dishes. You can serve it with grilled chicken or fish for protein. It also goes great with tacos or quesadillas. If you want a light meal, serve it with a bowl of soup. You can even enjoy it on its own as a filling lunch. The salad will stay fresh for about 3 to 5 days in the fridge. Make sure to keep it in an airtight container. If the salad seems dry after a few days, add a splash of lime juice or olive oil. Always check for freshness before eating, especially if it’s been a while. For the full recipe, check the earlier sections. In this blog post, we explored the key ingredients for Mango Black Bean Quinoa Salad, along with step-by-step instructions. We discussed tips for cooking quinoa perfectly and enhancing flavor. We also talked about fun variations, how to store leftovers, and answered common questions. Mango Black Bean Quinoa Salad is versatile and easy to make. You can enjoy it fresh, chilled, or even as a meal prep option. Try new ingredients and variations to keep it exciting! Enjoy your cooking journey and share this tasty dish with others.

Mango Black Bean Quinoa Salad Fresh and Flavorful Mix

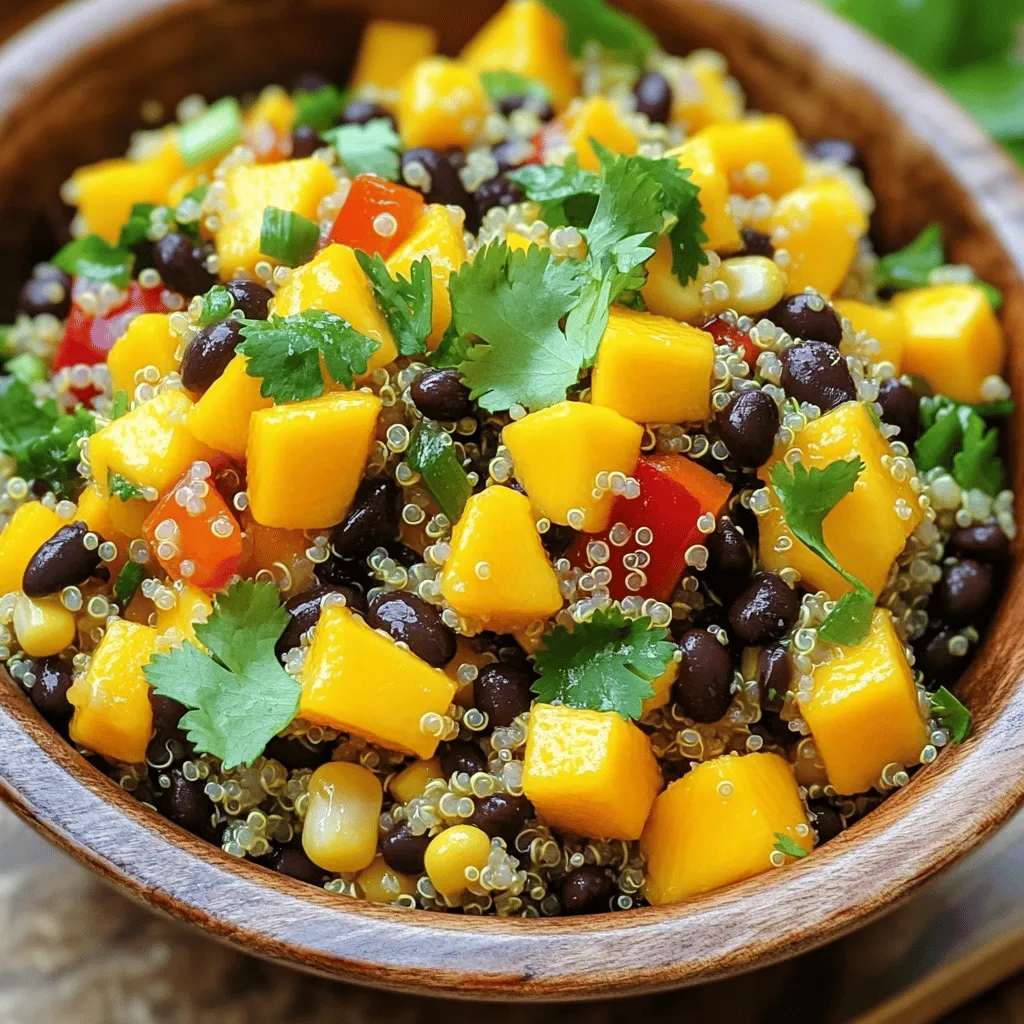
Looking for a fresh and vibrant dish? This Mango Black Bean Quinoa Salad hits the mark! Bursting with flavor, it’s

For a delicious Lemon Asparagus Pasta, you will need these key ingredients: - 8 oz (225g) spaghetti or fettuccine - 1 bunch asparagus, trimmed and cut into 1-inch pieces - 3 tablespoons olive oil - 3 cloves garlic, minced - Zest of 1 lemon - Juice of 1 lemon - 1/2 teaspoon red pepper flakes (optional) - 1/2 cup grated Parmesan cheese (plus extra for serving) - Salt and black pepper to taste - Fresh parsley, chopped for garnish Each ingredient plays a vital role in the dish. The pasta provides the base, while the asparagus adds a fresh crunch. Olive oil and garlic create a rich flavor. Lemon brings brightness, and Parmesan adds creaminess. You can enhance your Lemon Asparagus Pasta with some optional toppings or garnishes: - Toasted pine nuts for crunch - Grated lemon zest for extra zing - Fresh basil or arugula for added greens For substitutions, consider these ideas if you have allergies or dietary needs: - Use gluten-free pasta if needed. - Swap Parmesan with nutritional yeast for a vegan dish. - Omit red pepper flakes for a milder flavor. Feel free to get creative! The full recipe shows you how to combine these ingredients for a delightful meal. To make the perfect Lemon Asparagus Pasta, start by boiling water in a large pot. Add a generous pinch of salt to the water. This helps flavor the pasta. Then, add 8 ounces of spaghetti or fettuccine. Cook according to the package instructions until it is al dente. Al dente means the pasta is firm but not hard. This usually takes about 8 to 10 minutes. Remember to reserve 1 cup of pasta water before draining. This water holds starch that helps to create a creamy sauce later on. Drain the pasta and set it aside while you prepare the asparagus. For the asparagus, heat 1 tablespoon of olive oil in a large skillet over medium heat. When the oil is hot, add the trimmed and cut asparagus pieces. Sauté them for about 3 to 4 minutes. You want them to be tender but still crisp. This keeps their bright green color and fresh flavor. Keep an eye on the asparagus as it cooks. You don’t want to overcook it. Once done, take them out of the skillet and set aside. In the same skillet, add the remaining 2 tablespoons of olive oil. Then, toss in 3 minced garlic cloves and, if you like a little heat, add 1/2 teaspoon of red pepper flakes. Sauté for about 1 minute until the garlic smells good but does not burn. Now, add the drained pasta back into the skillet. Mix in the sautéed asparagus, the zest of one lemon, and the juice of that lemon. Toss everything together. If the pasta looks dry, add a bit of the reserved pasta water. This helps make the dish creamy. Finally, stir in 1/2 cup of grated Parmesan cheese. Season with salt and black pepper to taste. Mix well until the cheese melts and coats the pasta evenly. This step brings all the flavors together and creates a delightful meal. Enjoy your Lemon Asparagus Pasta! If you need the full recipe, check out the Full Recipe. To make Lemon Asparagus Pasta shine, focus on flavor balance. Start with fresh ingredients. The lemon zest and juice add brightness. Use good quality olive oil for depth. Cook your pasta in salted water. This step enhances the taste. Aim for al dente. This means the pasta should be firm yet tender. Check it a minute before the package time ends. For tools, a large pot is key. A colander helps drain the pasta well. A large skillet is perfect for sautéing. A wooden spoon or tongs makes mixing easy. Pair your Lemon Asparagus Pasta with a crisp white wine. A Sauvignon Blanc complements the dish well. For a non-alcoholic option, serve sparkling water with lemon. Presentation can elevate the dish. Use a large plate or a shallow bowl. Twirl the pasta for a nice look. Top with fresh parsley and extra cheese. This adds color and flair. A lemon wedge on the side can brighten the plate. For more delicious details, check the Full Recipe. {{image_2}} To make Lemon Asparagus Pasta vegan, swap the Parmesan cheese for a plant-based cheese or nutritional yeast. This keeps the dish creamy and flavorful. You can also use vegetable broth instead of pasta water for added taste. For a gluten-free version, choose gluten-free pasta made from rice or quinoa. This ensures everyone can enjoy this dish without worry. You can add other vegetables for more color and texture. Try cherry tomatoes, bell peppers, or spinach. These options will enhance the dish and keep it fresh. If you want protein, add cooked chicken, shrimp, or chickpeas. These will make the meal heartier and more filling. Adding fresh herbs can brighten the flavors in this dish. Try basil, thyme, or dill for a fresh twist. Mix these in at the end to keep their vibrant taste. For extra flavor, consider a splash of white wine or a squeeze of fresh lime juice. These will add depth and a zesty kick. You can also play with spices. A pinch of smoked paprika or Italian seasoning can make it unique. Mixing in sun-dried tomatoes or olives adds a tasty twist. These ingredients will give your Lemon Asparagus Pasta a Mediterranean flair. Explore these variations to keep your meals exciting and full of flavor! For the complete recipe, check the [Full Recipe]. To store leftover Lemon Asparagus Pasta, first let it cool down. Place it in an airtight container. You can keep it in the fridge for up to three days. This helps maintain freshness and flavor. When reheating, use a skillet over low heat. Add a splash of water or olive oil to help bring back moisture. Stir the pasta gently to avoid sticking. This way, the texture stays nice and the flavors shine. If you want to save it for longer, you can freeze Lemon Asparagus Pasta. First, let it cool completely. Then, place it in a freezer-safe bag or container. Make sure to remove as much air as possible. This helps prevent freezer burn. You can freeze it for up to three months. To thaw, move the pasta to the fridge one day before you want to eat it. When you’re ready to reheat, put it in a skillet over low heat. Add a splash of water or broth to help it heat evenly. Stir gently until warm. Enjoy your Lemon Asparagus Pasta just like fresh! What can I substitute for Parmesan cheese? If you want a cheese swap, use nutritional yeast for a vegan option. Feta or goat cheese also works well, adding a different flavor. Keep in mind that each cheese brings its own taste. How can I adjust the spice level of the dish? To make it milder, skip the red pepper flakes. For more heat, add extra flakes or some diced fresh chili. Just remember, start small and taste as you go. This recipe serves four and has about 400 calories per serving. * Calories: 400 * Protein: 15g * Fat: 15g * Carbohydrates: 60g * Fiber: 5g * Sugar: 4g Lemon and asparagus offer great health benefits. Asparagus provides fiber and vitamins A, C, and K. Lemon adds vitamin C, which helps boost your immune system. Olive oil is heart-healthy fat, making this dish a balanced meal. To cook Lemon Asparagus Pasta, you need: - A large pot for boiling pasta - A skillet for sautéing - A colander to drain the pasta If you want to try different cooking methods, a pressure cooker can speed up the process. You can also roast the asparagus in the oven for a different texture. Just remember to adjust your cooking times. For the full recipe, check the earlier section. In this post, we explored the ingredients, preparation, and serving of Lemon Asparagus Pasta. You learned about main and optional ingredients, cooking steps, and tips for flavor. We also discussed dietary variations, storage methods, and answered common questions. Creating this dish is simple and rewarding. With a few adjustments, you can make it your own. Enjoy the bright flavors and fresh ingredients. Make this meal your go-to for a tasty, quick option. Happy cooking!

Lemon Asparagus Pasta Fresh and Flavorful Delight

Craving something fresh and vibrant? Look no further than Lemon Asparagus Pasta! This easy dish bursts with zesty flavor and

- 2 cups canned black beans, rinsed and drained - 1 cup corn kernels (fresh or frozen) - 1 red bell pepper, diced - 1 small red onion, finely chopped - 1 avocado, diced - 1 cup cherry tomatoes, halved - 1/4 cup fresh cilantro, chopped - 3 tablespoons lime juice - 2 tablespoons olive oil - 1 teaspoon cumin - 1 teaspoon chili powder - Salt and pepper to taste This salad is colorful and full of flavor. Black beans are rich in protein and fiber. Corn adds sweetness and crunch. The red bell pepper brings color and a mild taste. Red onion gives a nice bite. Avocado adds creaminess and healthy fats. Cherry tomatoes provide a burst of juiciness. Fresh cilantro adds a hint of freshness. You can swap the avocado for mango or cucumber. Add more veggies like zucchini or carrots for extra crunch. If you want protein, try adding grilled chicken or shrimp. A serving has about 200 calories. It contains 10 grams of protein, 8 grams of fat, and 30 grams of carbs. This salad is a great choice for a healthy meal. You can find the full recipe above to help you make this dish. 1. Start by taking a large mixing bowl. In this bowl, combine 2 cups of rinsed black beans with 1 cup of corn. This mix gives the salad a hearty base. 2. Next, add 1 diced red bell pepper, 1 small finely chopped red onion, and 1 cup of halved cherry tomatoes to the bowl. These veggies add color and crunch. 3. Gently fold in 1 diced avocado and 1/4 cup of chopped cilantro. Be careful not to mash the avocado; we want nice chunks. 1. In a small bowl, whisk together 3 tablespoons of lime juice, 2 tablespoons of olive oil, 1 teaspoon of cumin, and 1 teaspoon of chili powder. This dressing brings all the flavors together. 2. Pour the dressing over the salad and gently toss everything. Make sure all the ingredients get coated evenly. 3. Taste the salad and season with salt and pepper. Adjust the flavors to your liking. 4. Cover the salad and let it chill in the fridge for at least 30 minutes. This helps the flavors blend and taste even better. 1. Serve the salad in a large glass bowl. This shows off the vibrant colors and makes it look appealing. 2. For garnishing, add extra cilantro and lime wedges on the side. This adds a fresh touch and looks great. You can find the Full Recipe linked above for all the details! To make your Southwest Black Bean Salad shine, use great spices and herbs. I recommend cumin and chili powder for a warm, earthy flavor. Fresh cilantro adds a burst of brightness. Lime juice brings a tangy kick, balancing the richness of the avocado. - Cumin: Adds warmth. - Chili Powder: Gives a nice heat. - Cilantro: Provides freshness. - Lime Juice: Balances richness. Mix the spices well in the dressing. This helps the flavors blend. Let the salad chill for at least 30 minutes. This melds the flavors and allows them to shine. If you want a vegan option, this recipe works great as is. You can replace the olive oil with avocado oil for a different taste. For gluten-free needs, this salad is already safe. For a budget-friendly swap, use canned corn instead of fresh. You can also use frozen black beans if you have them. Just make sure to rinse them well. This keeps the flavors fresh without spending much. When mixing your salad, use a large bowl. A clear glass bowl shows off the salad's bright colors. Silicone spatulas are great for gentle mixing. They help you avoid smashing the avocado. For storing leftovers, use airtight containers. This keeps the salad fresh and crisp. Glass containers are great for this. They are easy to clean and reusable. Remember, these tips can make your cooking more fun and easy. Enjoy your salad! {{image_2}} You can boost the protein in your Southwest Black Bean Salad easily. Consider adding cooked chicken or shrimp for a hearty touch. Both options add great flavor and texture. If you prefer plant-based proteins, try adding quinoa or diced tofu. These options keep the salad light while providing the protein you need. To change up the flavor, think about some fun twists. For a Southwest kick, add jalapeños for heat and flavor. You could also mix in some diced mango for sweetness. If you want to explore Mediterranean flavors, try adding feta cheese and olives. These ingredients create a tasty fusion and can surprise your taste buds. Adjust your salad based on what’s in season. In summer, use ripe tomatoes and fresh corn for extra sweetness. In fall, consider adding roasted butternut squash for a warm twist. Incorporating seasonal produce not only enhances flavor but also keeps your salad fresh and exciting. Each season brings new options, so keep it fun! To keep your Southwest Black Bean Salad fresh, store it in an airtight container. This helps lock in the flavor and keeps it from drying out. Place it in the fridge if you plan to eat it within a few days. If you want to keep it longer, you can freeze it. However, the avocado may not hold up well after freezing. To freeze, use a freezer-safe container and enjoy it within three months. In the fridge, your salad will last about three to five days. Always check for signs of spoilage before you eat it. If the salad smells off or has a strange color, it’s best to toss it. Look for changes in texture as well; slimy beans or wilted veggies mean it's time to say goodbye. If you want to warm any additions, like grilled chicken or corn, do so in a pan over low heat. This keeps the flavors intact. To freshen up the salad, add a squeeze of lime juice or a sprinkle of fresh cilantro before serving. This will brighten up the dish and make it taste as good as new. Enjoy your meal! Can I make Southwest Black Bean Salad ahead of time? Yes, you can make this salad ahead of time. It tastes even better after chilling. Prepare it a few hours in advance or the night before. Just store it in the fridge. This allows the flavors to blend well. What can I serve with this salad? You can serve this salad with grilled chicken, fish, or tacos. It works great as a side dish. You can also enjoy it with tortilla chips for a fun snack. Is this salad suitable for meal prep? Yes, this salad is great for meal prep. The ingredients hold up well in the fridge. Just keep the dressing separate until you’re ready to eat. This helps keep the salad crisp. How to avoid soggy salad? To avoid a soggy salad, use fresh ingredients. Drain and rinse the beans well. Chill the salad after mixing but before serving. This helps keep it crisp and fresh. Can I use dried black beans? Yes, you can use dried black beans. Just soak and cook them first. This adds a nice texture. Make sure they are tender before adding them to the salad. Is this recipe gluten-free? Yes, this recipe is gluten-free. All the ingredients are naturally gluten-free. You can enjoy it without worry. Can I omit certain ingredients for allergies? Yes, feel free to omit any ingredient for allergies. If you can’t have onions or peppers, leave them out. You can also add other veggies you like. The salad will still taste great! This blog post covered a delicious and easy Southwest Black Bean Salad. You learned about the main ingredients and how to prepare and store them. We explored tips for better flavor and ways to customize your salad. Remember, this dish is not just versatile; it is also packed with nutrients. Feel free to experiment with proteins and seasonal produce for variety. Enjoy this vibrant salad at home or share it with friends for a tasty meal. Make it your own, and savor every bite.

Southwest Black Bean Salad Easy and Tasty Recipe

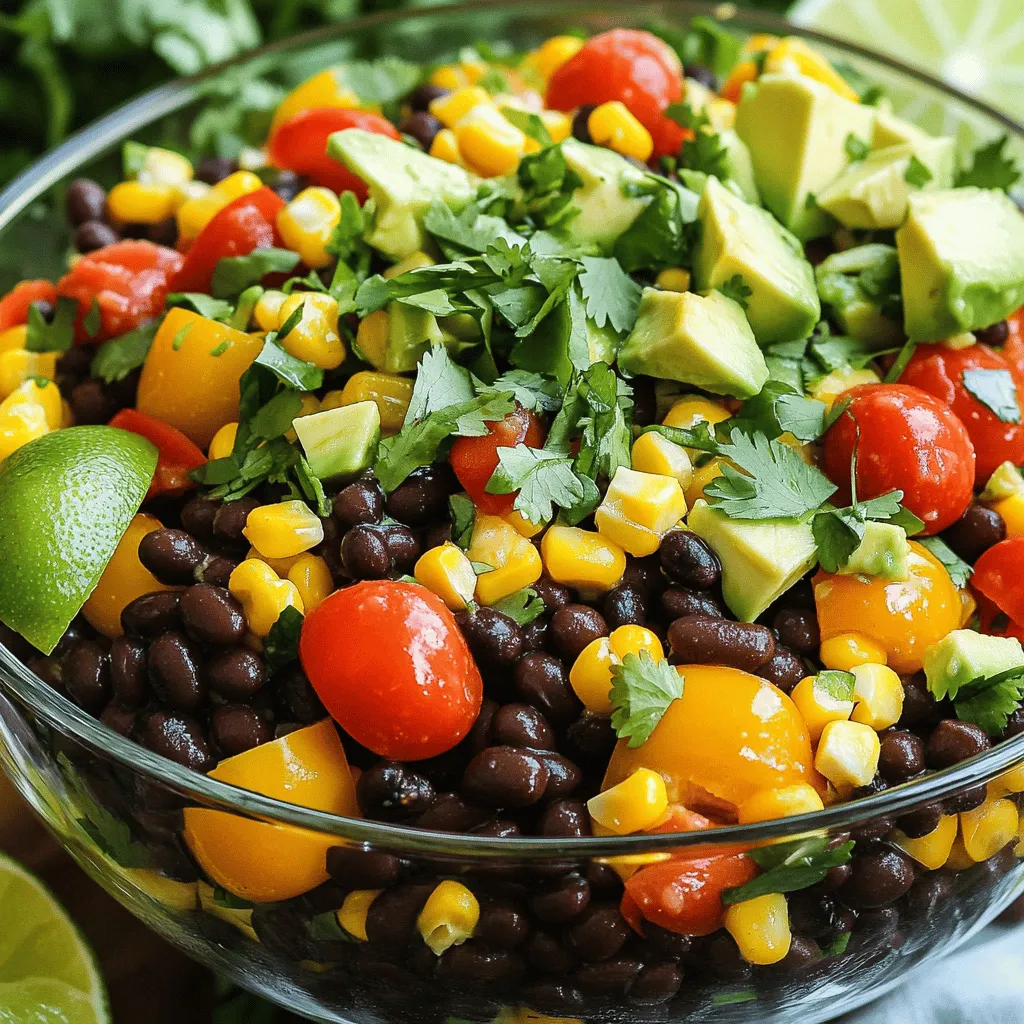
Are you ready to whip up a flavorful dish that’s easy to make? This Southwest Black Bean Salad combines healthy

- 2 cups cooked chicken breast, shredded - 1/2 cup dried cranberries - 1/2 cup walnuts, chopped - 1/2 cup celery, finely chopped - 1/4 cup red onion, finely diced - 1/2 cup Greek yogurt - 2 tablespoons honey - 1 tablespoon Dijon mustard - Salt and pepper to taste - Fresh parsley, for garnish I like to use 2 cups of cooked chicken breast. This gives a hearty base. For sweetness, 1/2 cup of dried cranberries adds a nice contrast. I use 1/2 cup of chopped walnuts for crunch. The 1/2 cup of finely chopped celery adds freshness. A 1/4 cup of diced red onion gives a slight bite. For creaminess, 1/2 cup of Greek yogurt works well. I add 2 tablespoons of honey for sweetness and 1 tablespoon of Dijon mustard for a tangy kick. Don't forget salt and pepper to taste! Finally, I use fresh parsley as a garnish. Using fresh ingredients can boost flavor. Fresh celery and red onion add crunch and zest. Dried cranberries offer a chewy texture and sweetness. I love the balance between fresh and dried. Fresh parsley brightens up the dish. Dried cranberries keep well and enhance the salad's flavor. This mix of textures makes each bite exciting. You can find the full recipe in the section above. To start, gather your ingredients. You will need: - 2 cups cooked chicken breast, shredded - 1/2 cup dried cranberries - 1/2 cup walnuts, chopped - 1/2 cup celery, finely chopped - 1/4 cup red onion, finely diced First, take a large mixing bowl. Add the shredded chicken, cranberries, walnuts, celery, and red onion. Mix them well. This blend gives you a nice crunch and sweetness. Next, we’ll make the dressing. In a small bowl, combine: - 1/2 cup Greek yogurt - 2 tablespoons honey - 1 tablespoon Dijon mustard - Salt and pepper to taste Whisk these together until smooth. Pour this creamy mix over the chicken blend. Now, gently fold the mixture. Be careful not to break the chicken too much. You want it to stay tender. Once mixed, taste your salad. Add more salt or pepper if you think it needs it. Cover your bowl with plastic wrap and chill it in the fridge for at least 30 minutes. This wait lets the flavors blend well. When you are ready to serve, scoop the salad into bowls. Garnish with fresh parsley for a bright touch. This meal is perfect for lunch or a light dinner. For a full recipe, check the details above. Enjoy your unique and flavorful meal! To get the best taste, use fresh ingredients. Fresh chicken makes a big difference. Select plump, juicy cranberries for a sweet kick. Toasting walnuts adds a nice crunch. Just place them in a dry pan over low heat. Stir for a few minutes until fragrant. This step boosts their flavor. Next, adjust the seasoning. Taste your salad after mixing. Add more salt or pepper if needed. A squeeze of lemon juice can brighten the flavors too. If you like a bit of spice, try adding a dash of cayenne. It gives a nice zing. Prep your ingredients ahead of time for easy meals. You can cook the chicken a day before. Shred it and store it in an airtight container. Chop the celery and onion ahead too. Store them in the fridge in separate containers. When you’re ready to mix, combine all the ingredients in one bowl. This salad keeps well in the fridge. It can last for up to three days. Just remember to add the garnish just before serving. If you have leftover chicken, this salad is perfect for using it up. Shredded rotisserie chicken works great. Just skip cooking and shredding. Mix your leftover chicken with the other ingredients. You’ll save time and reduce waste. This salad is also versatile. You can use it in wraps or on a bed of greens. It’s a tasty way to enjoy leftover chicken. For the full recipe, check the detailed instructions above. {{image_2}} You can make this cranberry walnut chicken salad lighter. Swap the Greek yogurt for low-fat yogurt. This change cuts calories while keeping creaminess. You can also use plain yogurt instead of flavored ones. If you want more crunch, add in more celery. Consider using apples for a fresh twist. They add sweetness and crunch too. Want to make your salad stand out? Add a splash of lemon juice for zing. Try using orange zest to bring a bright flavor. You can also mix in fresh herbs like dill or cilantro. These herbs add a fresh taste that pairs well with chicken. If you like heat, add a pinch of cayenne pepper or some chopped jalapeños. It gives your salad a fun kick. Not in the mood for chicken? Use turkey instead. It tastes great and is just as healthy. For a vegetarian option, try chickpeas or white beans. They add protein and fiber. You can even use tofu for a plant-based choice. Just make sure to season it well. Each option keeps the salad delicious and fun to eat. Check the Full Recipe for more ideas! To keep your cranberry walnut chicken salad fresh, store it in an airtight container. Make sure to cover it well to avoid drying out. This salad tastes best within three days. If you have leftovers, place them in the fridge right away. This keeps the flavors bright and fresh. You can freeze cranberry walnut chicken salad, but it may change texture. To freeze, put it in a freezer-safe container. Leave some space at the top for expansion. This salad can last up to three months in the freezer. When ready to eat, thaw it in the fridge overnight. When you reheat your chicken salad, do it gently. I suggest using the microwave. Heat it in short bursts, stirring in between. This helps keep the chicken moist. You can also enjoy it cold straight from the fridge. The flavors will still be tasty! For the complete recipe, check out the Full Recipe section. Yes, you can use other nuts. Pecans or almonds work well too. They add crunch and flavor. If you want a nut-free option, try sunflower seeds. They give a nice texture and taste without nuts. Cranberry Walnut Chicken Salad lasts about 3 to 4 days in the fridge. Make sure to store it in an airtight container. This keeps it fresh and safe to eat. Always check for signs of spoilage before eating. Yes, this recipe is gluten-free. The ingredients do not contain wheat or gluten. Just ensure that any store-bought items, like Greek yogurt or Dijon mustard, are labeled gluten-free. This way, you can enjoy your meal worry-free. For the full recipe, check the detailed instructions above. In this post, we explored key ingredients for chicken salad, from fresh to dried. We walked through preparation, mixing, and serving, highlighting tips to enhance flavor and make the most of leftovers. We also discussed healthy substitutions and variations to suit your taste. Finally, I shared important storage info to keep your meal fresh and tasty. Embrace creativity in the kitchen! You can make this dish your own. Enjoy experimenting and sharing it with friends and family.

Cranberry Walnut Chicken Salad Unique and Flavorful Meal

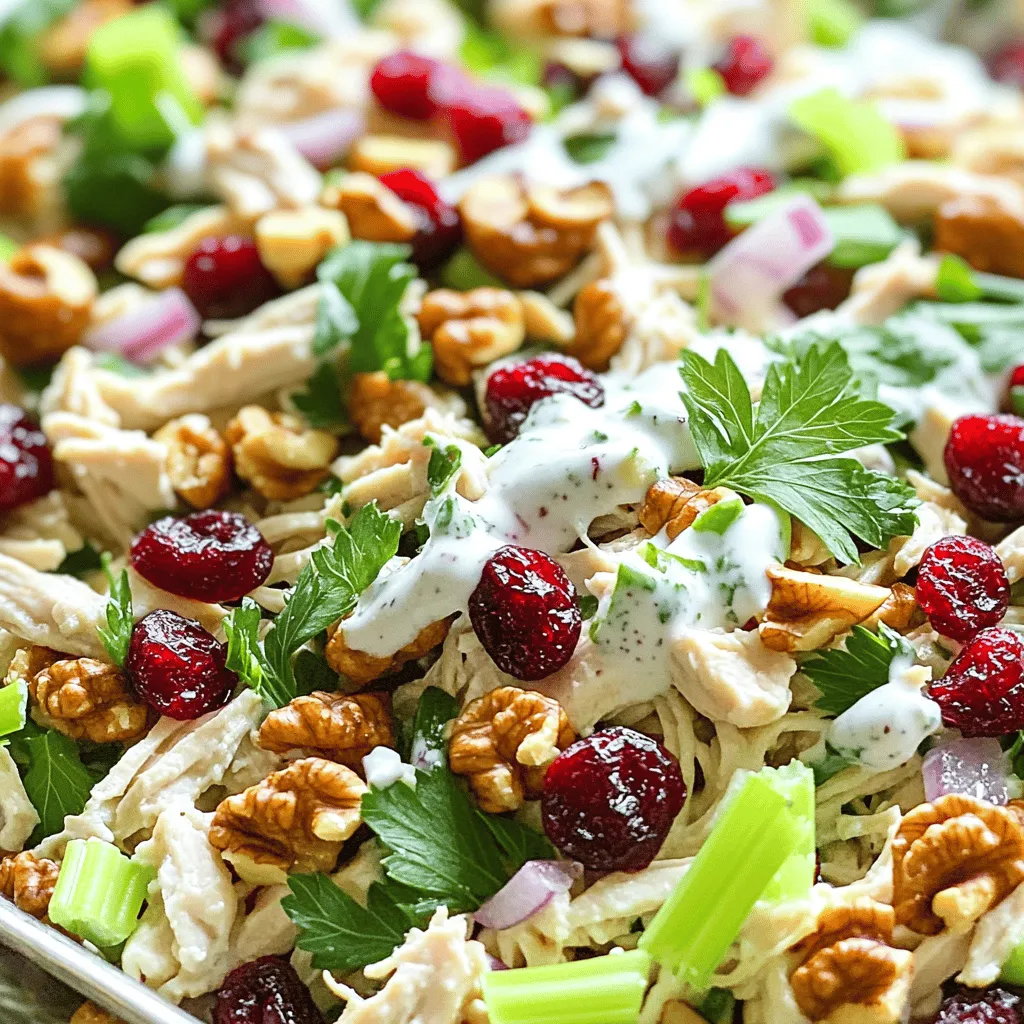
Looking for a unique meal that bursts with flavor? Let me introduce you to my Cranberry Walnut Chicken Salad. This

- 1 block of firm tofu - 1 cup of jasmine or brown rice - 1 tablespoon sesame oil - 2 tablespoons soy sauce (low-sodium preferred) - 2 tablespoons teriyaki sauce - 1 tablespoon maple syrup (or honey) - 1 cup broccoli florets - 1 red bell pepper, sliced - 1 carrot, julienned For a quick, tasty meal, you need these ingredients. Firm tofu gives protein and texture. Jasmine rice adds a light, fluffy base. Sesame oil offers a nutty flavor. The sauce combines soy sauce, teriyaki sauce, and maple syrup for sweetness. Next, you will add colorful veggies. Broccoli adds crunch. Red bell pepper brings sweetness, and carrots add color and a slight bite. Using these fresh and healthy ingredients makes your meal not only simple but also delicious. You can find the Full Recipe at the end for detailed steps. Rinsing rice is key for a great texture. Start by rinsing the rice under cold water. Keep rinsing until the water runs clear. This step removes excess starch. Next, place the rinsed rice in a medium saucepan. Add 2 cups of water. Bring it to a boil. Then, reduce the heat and cover. Let it simmer for 15 to 20 minutes. Once the water absorbs, the rice will be tender. Fluff it with a fork and set it aside. For the tofu, you’ll need to press and cube it. Take a block of firm tofu. Wrap it in a clean towel and press it gently. This step removes extra moisture. Cut the pressed tofu into cubes. Heat sesame oil in a large skillet over medium heat. Add the cubed tofu to the skillet. Cook for about 5 to 7 minutes. Turn the tofu often until it becomes golden brown on all sides. Now, it’s time to make the teriyaki sauce. In a small bowl, combine soy sauce, teriyaki sauce, maple syrup, grated ginger, and minced garlic. Whisk these ingredients well. Once mixed, pour this sauce over the cooked tofu in the skillet. Stir gently to coat the tofu evenly. Cook for another 3 to 4 minutes, letting the sauce thicken slightly. For the veggies, add them to the skillet at the right time. Toss in the broccoli, red bell pepper, and carrot. Sauté the vegetables with the tofu. Cook for an additional 5 to 7 minutes. This keeps the veggies tender but still crisp. You want them to blend well with the flavors. Now, let’s assemble the bowls. Start by scooping rice into the bottom of each bowl. Then, add the teriyaki tofu and vegetable mixture on top. For a nice touch, garnish with sliced green onions and sesame seeds. This adds color and crunch to your dish. For a cozy look, serve in deep bowls. Drizzle any remaining sauce over the top for extra flavor. For the full recipe, check out my detailed instructions! To get the best tofu, start by pressing it. Wrap the block in a clean towel. Place a heavy object on top for 15-30 minutes. This helps remove excess water. Dry tofu absorbs flavor better and cooks evenly. Next, cut the tofu into even cubes. This ensures they cook at the same rate. Heat sesame oil in your skillet. Once hot, add the tofu. Cook it for 5-7 minutes. Turn occasionally until it turns a golden brown. This gives it a nice crust. To customize spice levels, try adding red pepper flakes or sriracha. Start with a little, then add more if needed. The key is to balance heat with sweetness. For extra flavor, mix in a splash of rice vinegar. You can also try using hoisin sauce instead of teriyaki sauce. It adds a unique twist to your dish. For a beautiful bowl, use deep dishes. This creates a cozy look. Start by adding rice to the bottom. Next, pile the tofu and veggies on top. Drizzle any extra sauce from the pan over the dish. This adds flavor and shine. Finally, garnish with sliced green onions and sesame seeds for a pop of color. Enjoy the visual feast before you dig in! {{image_2}} You can swap tofu for tempeh or chickpeas. Tempeh gives a nutty taste and firm texture. Chickpeas add protein and fiber. When you use tempeh, slice it thin. Cook it like tofu to get it golden. If you try chickpeas, use canned ones. Drain and rinse them before adding to the dish. Adjust cooking times to ensure all proteins are heated through. Feel free to change the vegetables based on what you have. Seasonal veggies work great here. Use bell peppers, zucchini, or snap peas. You can even add greens like spinach or kale. Just toss them in during the last few minutes of cooking. This keeps them vibrant and crisp. The more colors on your plate, the better! For gluten-free options, use tamari instead of soy sauce. Tamari has a similar flavor but is made without wheat. You can also make your teriyaki sauce at home. Mix coconut aminos, maple syrup, and a bit of ginger. This gives you a tasty sauce that fits your diet. Enjoy the same great flavors while keeping it gluten-free! For the full recipe, check the link provided. To keep your teriyaki tofu rice bowls fresh, let them cool first. This step helps prevent moisture buildup. Once cooled, pack them in an airtight container. Glass containers work best, as they do not retain odors. You can also use plastic containers, but ensure they seal tightly. Store in the fridge for up to three days. When reheating, choose methods that maintain texture. The microwave is quick, but you might lose some crispness. Heat the bowl for one to two minutes, stirring halfway. For the best results, use a skillet. Heat on medium for about five minutes, stirring gently. This keeps the tofu and veggies from getting mushy. If using an oven, preheat to 350°F (175°C) and heat for about 10 minutes. Adjust times based on your appliance and portion size. To add heat, you can include chili flakes or sriracha to the sauce. You can also stir in some sliced jalapeños while cooking the veggies. For a different kick, try using spicy teriyaki sauce. Yes, this recipe is already vegan! All the ingredients are plant-based, including tofu and soy sauce. You can use maple syrup instead of honey for a fully vegan option. Leftovers will stay good for about 3 to 4 days in the fridge. Make sure to cool the bowls before putting them in a container. Use airtight containers to keep them fresh and safe to eat. Yes, you can use brown rice! Brown rice has more fiber and nutrients than jasmine rice. It has a chewier texture and a nuttier flavor, which adds a nice twist to the dish. Adjust the cooking time, as brown rice usually takes longer to cook. You can find the full recipe for Teriyaki Tofu Rice Bowls [here](#). You now have a complete guide to making delicious Teriyaki Tofu Rice Bowls. We covered the key ingredients, step-by-step instructions, and helpful tips to elevate your dish. From selecting the right tofu to perfectly sautéing your veggies, every detail matters. Remember, you can customize this dish with various proteins and vegetables to keep it exciting. Store any leftovers properly for future meals. I hope you enjoy creating this tasty bowl as much as I do. Happy cooking!

Teriyaki Tofu Rice Bowls Flavorful Weeknight Meal

Looking for a quick, delicious weeknight meal? Teriyaki Tofu Rice Bowls are your answer! With firm tofu, vibrant veggies, and

Older posts
Newer posts
← Previous Page1 … Page20 Page21 Page22 … Page79 Next →

dsad

© 2025 pureeatsnow • Built with GeneratePress

Our Policies

  • Copyright Policy
  • Cookie Policy
  • GDPR Policy
  • Privacy Policy
  • Disclaimer
  • Terms Of Use

More Information

  • Home
  • About
  • Contact
  • Appetizers
  • Dessert
  • Dinner
  • Drinks
©2025, pureeatsnow About Back To Top