Skip to content
DisclaimerTerms Of UseGDPR PolicyCookie Policy

pureeatsnow

  • Home
  • Drinks
  • Appetizers
  • Dinner
  • Dessert
  • About
  • Contact
  • Privacy Policy
DisclaimerTerms Of UseGDPR PolicyCookie Policy

Rachel

To make sweet potato avocado toast, you need some key ingredients. Here’s what you’ll need: - 1 medium sweet potato - 1 ripe avocado - 1 tablespoon lemon juice - 1/4 teaspoon garlic powder - 1/4 teaspoon smoked paprika - Salt and pepper to taste - 2 slices whole grain bread These ingredients come together to create a tasty, healthy meal. The sweet potato gives a sweet, earthy flavor. The avocado adds creaminess and healthy fats. You can add extra toppings to make your toast even more exciting. Here are some tasty options: - Crushed red pepper flakes for a spicy kick - Hemp seeds for a nutty crunch - Microgreens for a fresh touch Feel free to mix and match. You can also try different bread types, like sourdough or rye, for unique flavors. Each ingredient in this recipe offers great nutrition. Sweet potatoes are high in vitamins and fiber. They help support good digestion and boost your immune system. Avocados are rich in healthy fats, which are good for your heart. They also have vitamins that help your skin and eyes. Whole grain bread provides complex carbs and fiber. This helps keep you full longer. Adding toppings like hemp seeds can boost protein and omega-3 fatty acids. Together, these ingredients create a balanced, nutritious meal. For the full recipe, check out [Full Recipe]. To start, preheat your oven to 400°F (200°C). Take your medium sweet potato and peel it. Cut it into 1/2-inch rounds. Toss these rounds with a little olive oil, salt, and pepper. Make sure they are well-coated. Spread them out on a baking sheet in one layer. Roast these sweet potato rounds for about 25 to 30 minutes. Flip them halfway through to ensure even cooking. They should turn tender and golden when done. While the sweet potatoes roast, grab your ripe avocado. Cut it in half and remove the pit carefully. Scoop the green flesh into a bowl. Use a fork to mash it until creamy. Add one tablespoon of lemon juice for flavor and to keep it fresh. Mix in 1/4 teaspoon garlic powder and 1/4 teaspoon smoked paprika. Season with a pinch of salt and pepper. Stir well until everything is combined. This mash will add a rich and tasty layer to your toast. Next, take your two slices of whole grain bread. You can toast them in a toaster or on a grill. Toast them until they are golden and crisp. This step adds a nice crunch to your dish. Once the bread is ready, you can start to assemble your toast. Once your sweet potato slices are done roasting, layer them on top of the toasted bread. Then, spread the creamy avocado mash generously over the roasted sweet potato. This combination of flavors makes each bite delicious! For the full recipe, check out the Sweet Potato Avocado Toast recipe. To get sweet potatoes just right, follow these steps: - Cut Evenly: Slice your sweet potato into 1/2-inch rounds. This way, they cook evenly. - Oil and Season Well: Drizzle olive oil over the rounds. Sprinkle salt and pepper for flavor. - Single Layer: Spread the slices on a baking sheet without crowding them. This ensures they roast, not steam. - Flip Halfway: Turn the rounds halfway through cooking for even browning. Aim for about 25-30 minutes at 400°F. Making a smooth, creamy avocado spread is easy: - Use Ripe Avocados: Pick avocados that yield slightly when pressed. They should feel soft but not mushy. - Mash Well: Scoop the flesh into a bowl and mash with a fork. Stop when it’s mostly smooth. - Add Flavor: Mix in lemon juice, garlic powder, and smoked paprika. This adds depth to the flavor. - Season to Taste: Always add salt and pepper. Adjust based on your preference for flavor. Making your toast look great enhances the experience: - Use a Nice Plate: Choose a wooden board or a colorful plate for a rustic touch. - Layer Neatly: Stack the sweet potato slices neatly before adding the avocado spread. - Add Color: Top with crushed red pepper flakes or hemp seeds. Microgreens add a fresh pop. - Lemon Wedges: Include lemon wedges on the side. It adds color and freshness, inviting a squeeze before eating. For the complete recipe, refer to the Full Recipe. {{image_2}} You can use many types of bread for your toast. Whole grain bread is a great choice for health. It adds fiber and flavor. If you want something lighter, try sourdough. The tangy taste pairs well with sweet potatoes. For a gluten-free option, use rice cakes or gluten-free bread. Each bread option changes the texture and taste. Choose what you love best. The fun part of sweet potato avocado toast is the toppings. You can add crushed red pepper flakes for spice. Hemp seeds give a nice crunch and boost nutrition. For freshness, sprinkle some microgreens on top. You might also enjoy sliced radishes or cherry tomatoes. These toppings add color and flavor. Feel free to mix and match to find your favorite. Spices can turn your toast from good to great. Try adding a dash of cumin for a warm flavor. A pinch of cinnamon can make it sweet and cozy. You can also use fresh herbs like cilantro or basil. These add a burst of freshness. Experiment with different spices to find your perfect blend. Each choice brings a new taste to your dish. For the complete experience, check the [Full Recipe]. To keep leftover sweet potatoes fresh, place them in an airtight container. You can store them in the fridge for up to three days. For the mashed avocado, add a bit of lemon juice to slow browning. Cover it tightly with plastic wrap, pressing the wrap against the surface of the mash. This helps keep it green and tasty. Assembled toast is best enjoyed right away. If you have leftovers, keep the sweet potato and avocado separate from the bread. Store each part in an airtight container. The bread can go stale if stored with the toppings. You can keep the components in the fridge for two days. When you want to enjoy leftover sweet potatoes, reheat them in the oven or a toaster. Preheat the oven to 350°F (175°C). Spread the sweet potato slices on a baking sheet and heat for about 10 minutes. If you're in a rush, you can use the microwave. Just warm them for 30 seconds at a time, checking often. This keeps them soft and tasty. You can find the full recipe for Sweet Potato Avocado Toast to help you get started. Yes, you can make parts of it ahead of time. Roast the sweet potatoes and store them in the fridge. They’ll stay good for about three days. When you’re ready to eat, just heat them up. You can mash the avocado too, but it may turn brown. To prevent this, add lemon juice and cover it tightly with plastic wrap. The toast itself is best made fresh. You can get creative with toppings! Here are some ideas: - Crushed red pepper flakes for spice - Chopped herbs like cilantro or parsley for freshness - Sliced radishes for crunch - Feta cheese for a salty bite - A drizzle of balsamic glaze for sweetness - Pumpkin seeds for extra nutrients Mix and match to find your favorite combo! Absolutely! This recipe is great for meal prep. The sweet potatoes can be roasted and stored in the fridge. You can prep the avocado mash too, just remember to add lemon juice. Toast the bread fresh when you're ready to eat. This way, you keep the crunch and flavor. For the full recipe, check out [Full Recipe]. Sweet potato avocado toast is a tasty and healthy choice. We covered key ingredients and nutritional benefits, along with step-by-step instructions. I shared tips for perfect roasting, creamy avocado, and great presentations. You can play with different breads, toppings, and spices to change it up. Plus, I gave advice on storing leftovers and reheating. Simple variations keep this toast fresh. Enjoy making your delicious sweet potato avocado toast!

Sweet Potato Avocado Toast Healthy and Tasty Recipe

Looking for a fun and healthy breakfast or snack? Sweet potato avocado toast is your answer! This tasty recipe combines

For the perfect Strawberry Feta Spinach Salad, gather these items: - 4 cups fresh spinach leaves, washed and dried - 1 cup strawberries, hulled and sliced - 1/2 cup crumbled feta cheese - 1/4 cup red onion, thinly sliced - 1/4 cup walnuts, toasted and roughly chopped - 2 tablespoons balsamic vinegar - 1 tablespoon honey - 2 tablespoons olive oil - Salt and pepper to taste When choosing feta cheese, I recommend brands like Athenos or Harris Teeter for their rich flavor. For spinach, look for organic options in your local market for the freshest taste. Feel free to swap strawberries with seasonal fruits like peaches or blueberries. You can also use goat cheese instead of feta for a tangy twist. If you want a nut-free option, sunflower seeds work well in place of walnuts. This dish combines fresh ingredients, making it a delight for your taste buds. For the full recipe and more tips, check the [Full Recipe]. 1. Wash Your Spinach: Start with 4 cups of fresh spinach. Rinse it well under cold water. Dry it using a salad spinner or a clean kitchen towel. This keeps the leaves crisp. 2. Slice Strawberries: Take 1 cup of strawberries. Remove the green tops, then cut them into thin slices. This adds sweetness and color to your salad. 3. Cut Red Onion: Use 1/4 cup of red onion. Slice it thinly to keep the flavor strong but not overwhelming. 4. Toast the Walnuts: Heat a small skillet over medium heat. Add 1/4 cup of walnuts. Stir them for about 3-4 minutes. When they smell nutty and turn golden, remove them from the heat and set aside to cool. 5. Mix Ingredients: In a large salad bowl, combine the spinach, strawberries, feta, and red onion. Toss them gently to mix. 6. Add Walnuts: After the walnuts cool, roughly chop them and sprinkle over the salad for a nice crunch. To make the dressing, you'll need: - 2 tablespoons balsamic vinegar - 1 tablespoon honey - 2 tablespoons olive oil - Salt and pepper to taste 1. Whisk the Dressing: In a small bowl, combine the balsamic vinegar, honey, and olive oil. Use a whisk to blend until smooth. Add salt and pepper to taste. 2. Store the Dressing: If you have leftover dressing, store it in an airtight container in the fridge. It will stay fresh for up to a week. 3. Substitutes: You can use lemon juice instead of balsamic vinegar for a tangy twist. Maple syrup can replace honey for a vegan option. Following these steps will help you create a fresh and tasty Strawberry Feta Spinach Salad. Enjoy the burst of flavors! You can find the Full Recipe for complete details. To make the best Strawberry Feta Spinach Salad, start with fresh ingredients. Look for bright green spinach, ripe strawberries, and creamy feta cheese. Freshness makes a big difference in taste. Always wash your spinach well and dry it before mixing. This keeps the salad crisp and vibrant. The order in which you combine your ingredients matters. Add the spinach first, then layer the strawberries and feta. This way, the flavors mix better. For the dressing, whisk together balsamic vinegar, honey, and olive oil. Drizzle it over the salad last. Texture is key for a great salad. You want a mix of crunchy and soft bites. Toast the walnuts until they are fragrant. This adds a nice crunch and enhances their flavor. When you toss the salad, do it gently. This prevents the spinach from bruising and keeps it fresh. Pair this salad with grilled chicken or salmon for a complete meal. The sweet strawberries and salty feta complement many main dishes. You can also serve it as a side for barbecues or picnics. For presentation, use a large, shallow bowl. This makes the salad look inviting. Garnish with extra sliced strawberries and a sprinkle of feta on top. Arrange a few spinach leaves around the edge of the bowl. This adds color and makes your dish pop. For a detailed recipe, check out the Full Recipe. {{image_2}} You can mix things up with the cheese in this salad. Try goat cheese for a tangy twist. You can also use blue cheese if you enjoy a stronger flavor. If you want a nut-free version, swap walnuts for sunflower seeds. These add a nice crunch too! You can also leave out nuts entirely for a lighter feel. Seasonal fruits can make your salad unique. In summer, add peaches or blueberries. In fall, consider apples or pears. Each fruit brings its own taste and color. To make this salad gluten-free, just check your balsamic vinegar. Most are gluten-free, but it’s good to confirm. For a vegan option, use a plant-based feta or skip the cheese. You can also replace honey with maple syrup for sweetness. Looking for low-calorie dressing? Use lemon juice and a little mustard instead of oil and honey. This gives you flavor without extra calories. You can find the full recipe for this fresh and flavorful dish to try these variations! To keep leftover salad fresh, store it in an airtight container. This helps prevent wilting. Place the salad in the fridge right away. For best taste, eat it within two days. Store the dressing separately. This keeps the salad crisp. Use a small jar with a tight lid for the dressing. Shake it well before serving. Can salad be frozen? It is not the best choice. Freezing can change the texture of the spinach and strawberries. They may become mushy. So, I do not recommend it. For meal prep, you can chop all ingredients a day ahead. Keep them in separate containers. Mix them when you are ready to eat. This way, the salad stays fresh and tasty. How to prevent spinach from wilting quickly? To keep spinach fresh, wash it gently and dry it well. Store it in a sealed bag with a paper towel. The towel absorbs excess moisture. Use the spinach within a few days for the best taste and texture. Can I make this salad ahead of time? Yes, you can prepare it ahead. But I recommend adding the dressing just before serving. This keeps the spinach and strawberries fresh. If you mix it early, the salad may become soggy. What’s the best way to add protein to this salad? You can add grilled chicken or shrimp for protein. Tofu or chickpeas are great for plant-based options. Just make sure to chop them into bite-sized pieces. This way, they mix well with the salad. Nutritional benefits of the ingredients This salad is packed with nutrients. Spinach provides iron and vitamins A and C. Strawberries are rich in antioxidants and vitamin C. Feta cheese adds calcium and protein, while walnuts offer healthy fats. Together, they create a balanced dish. Differences between balsamic vinegar and other vinegars in this recipe Balsamic vinegar has a sweet and tangy flavor. It pairs well with fruits like strawberries. Other vinegars, like red wine or apple cider, are more sharp. They might not bring out the sweetness of the salad as well as balsamic. If you want a different taste, feel free to experiment with these options! In this blog post, we explored the art of making strawberry feta spinach salad. You learned about the key ingredients and their best brands. I shared simple steps for preparing and storing the salad and dressing. We discussed tips for freshness and ideal texture. I offered seasonal variations and dietary adjustments too. Overall, this salad is a delightful dish for any occasion. Keep experimenting with ingredients to make it your own!

Strawberry Feta Spinach Salad Fresh and Flavorful Dish

Are you ready to try a dish that’s as vibrant as it is tasty? The Strawberry Feta Spinach Salad combines

- 4 large bell peppers (red, yellow, or green) - 1 lb boneless, skinless chicken breasts, diced - 1 tablespoon olive oil - 1 small onion, finely chopped - 1 red bell pepper, finely chopped (for extra flavor) - 2 cloves garlic, minced - 1 teaspoon chili powder - 1 teaspoon cumin - 1/2 teaspoon paprika - Salt and pepper to taste - 1 cup corn (fresh or frozen) - 1 can (15 oz) black beans, rinsed and drained - 1 cup shredded cheese (cheddar or Monterey Jack) - 2 tablespoons fresh cilantro, chopped (for garnish) - Optional: sour cream or Greek yogurt for serving You can choose any color of bell pepper. Each one provides a unique taste. Chicken breast is my go-to, but you can swap it for turkey or tofu for a different flavor. Olive oil keeps it healthy, but any oil works. If you lack fresh corn, use frozen corn instead. Black beans add protein and fiber. You can use kidney beans if you prefer. Cheese options include mozzarella or pepper jack for a kick. Fresh cilantro adds a burst of flavor, but you can skip it if you're not a fan. These stuffed peppers are not only tasty but also healthy. Each serving has about: - Calories: 350 - Protein: 30g - Carbohydrates: 40g - Fiber: 10g - Fat: 12g These numbers can change based on your ingredient choices. For a lighter meal, use less cheese or more veggies. For more energy, add a side of brown rice. This combination makes the dish balanced and filling. You can find the full recipe here: [Full Recipe]. First, gather all your ingredients. You will need four large bell peppers, one pound of chicken, and some spices. Start by preheating your oven to 375°F (190°C). Next, slice the tops off the bell peppers. Remove the seeds and membranes inside. Brush the outside of each pepper with a bit of olive oil. Place them cut side up in a baking dish. Heat a large skillet over medium heat. Add a tablespoon of olive oil. Once it's hot, add the diced chicken. Cook it for about 5 to 7 minutes until it turns brown and is fully cooked. Then, add the chopped onion, another red bell pepper, and minced garlic. Sauté all of this for 3 to 4 minutes until the veggies soften. Now, sprinkle in chili powder, cumin, paprika, salt, and pepper. Mix well to coat the chicken and veggies. After that, stir in one cup of corn and one can of rinsed black beans. Heat it for another 2 to 3 minutes until everything is warm. Remove the skillet from heat. Mix in half of the shredded cheese. Now, fill each bell pepper with the chicken fajita mixture. Pack it in firmly. Top each pepper with the remaining cheese. Cover the baking dish with aluminum foil and bake for 25 minutes. After that, take off the foil and bake for an extra 10 to 15 minutes. You want the cheese to be bubbly and the peppers tender. Once done, take them out of the oven. Let them cool for a few minutes. Garnish your peppers with fresh cilantro before serving. For a nice touch, serve with sour cream or Greek yogurt on the side. Enjoy this delicious meal! Check the Full Recipe for more details. To get soft and tasty peppers, pick large, thick ones. Red, yellow, or green all work great. Cut the tops off, remove seeds, and brush with olive oil. Bake them at 375°F for 25 minutes covered and 10-15 minutes uncovered. This helps the cheese melt and the peppers become tender. Love heat? Add more chili powder or diced jalapeños to the filling. For a milder taste, use less spice or skip the chili powder. You can also serve with hot sauce on the side. This lets everyone choose their heat level. Make your dish pop! Serve the stuffed peppers on a large platter. Drizzle with sour cream or Greek yogurt for creaminess. Top with fresh cilantro for color. This not only looks good but makes it more fun to eat. Check out the Full Recipe for more details on how to make these peppers shine! {{image_2}} You can easily make these stuffed peppers vegetarian. Simply swap the chicken for a mix of beans and veggies. Use lentils, mushrooms, or tofu for protein. You can also add more colorful veggies like zucchini or carrots. This keeps the dish filling and tasty without meat. The spices will still give it that fajita flair. If you want to change up the protein, consider ground turkey, beef, or shrimp. Each option gives a unique taste. To keep it light, you can use grilled chicken thighs or even shredded rotisserie chicken. Just make sure to adjust the cooking time based on the protein you choose. You want everything to be cooked perfectly and stay juicy. Add some fun with extra flavors! You can mix in diced tomatoes or jalapeños for heat. Black olives or corn add a nice crunch. For toppings, try avocado slices or fresh salsa. You can never go wrong with a dollop of sour cream or Greek yogurt. These add creaminess and balance the spices. The Full Recipe will guide you through the basics, but feel free to get creative! To store leftovers of your chicken fajita stuffed peppers, let them cool down first. Place them in an airtight container. You can keep them in the fridge for up to four days. Make sure to separate the stuffed peppers if you have a lot. This helps them cool faster and stay fresh longer. Reheat your stuffed peppers in the oven for the best results. Preheat your oven to 350°F (175°C). Place the peppers in a baking dish and cover with foil. Heat for about 15-20 minutes or until warm. You can also use the microwave if you are in a hurry. Just put one pepper on a plate and heat for 2-3 minutes. Check to see if it is hot all the way through. If you want to freeze your stuffed peppers, make sure they are cool first. Wrap each pepper in plastic wrap or foil. Place them in a freezer-safe bag or container. They can last in the freezer for up to three months. When ready to eat, thaw them in the fridge overnight. Then, reheat as mentioned above. Enjoy your meal anytime! Yes, you can use other peppers. Bell peppers are common, but poblano or Anaheim peppers work well too. Each type offers a unique flavor. For a little heat, try jalapeños. Just make sure to adjust the cooking time if the peppers are larger or smaller. Stuffed peppers last about 3 to 5 days in the fridge. Store them in an airtight container. If you want to keep them longer, consider freezing. They may lose some texture but will still taste good. Yes, you can prepare them in advance. You can stuff the peppers and store them in the fridge for up to a day before baking. This saves time on busy nights. Just remember to cover them well to keep them fresh. For the full recipe, check above. This dish is fun and colorful. Chicken fajita stuffed peppers mix great taste with health. You need some simple ingredients to make this flavorful dinner idea. Here’s what you will need: - 4 large bell peppers (red, yellow, or green) - 1 lb boneless, skinless chicken breasts, diced - 1 tablespoon olive oil - 1 small onion, finely chopped - 1 red bell pepper, finely chopped (for extra flavor) - 2 cloves garlic, minced - 1 teaspoon chili powder - 1 teaspoon cumin - 1/2 teaspoon paprika - Salt and pepper to taste - 1 cup corn (fresh or frozen) - 1 can (15 oz) black beans, rinsed and drained - 1 cup shredded cheese (cheddar or Monterey Jack) - 2 tablespoons fresh cilantro, chopped (for garnish) - Optional: sour cream or Greek yogurt for serving To cook chicken fajita stuffed peppers, start by preheating your oven to 375°F. Slice the tops off the bell peppers and remove the seeds. Lightly brush the outsides with olive oil and place them in a baking dish. Next, heat olive oil in a large skillet. Add the diced chicken and cook until it’s browned. This should take about 5 to 7 minutes. Then, add the chopped onion, red bell pepper, and minced garlic. Cook these for 3 to 4 minutes until the vegetables soften. Now, add your spices: chili powder, cumin, paprika, salt, and pepper. Mix well so everything is coated. After that, add corn and black beans to the skillet. Stir until it all combines and heats for another 2 to 3 minutes. Remove the skillet from heat and fold half of the shredded cheese into the mixture. Fill each bell pepper with this tasty mix. Top each pepper with the rest of the cheese. Cover the dish with foil and bake for 25 minutes. Remove the foil and bake for another 10 to 15 minutes until the cheese is bubbly. Once done, let them cool and garnish with cilantro. Enjoy your chicken fajita stuffed peppers! For the full recipe, check out the details above. This blog post covered ingredients, cooking steps, and tips for stuffed peppers. You learned how to customize flavors and store leftovers. You now have ideas for vegetarian options and different proteins. Remember, the key to perfect stuffed peppers lies in cooking them correctly. Get creative and enjoy! Your meal can be as unique as you are. Happy cooking!

Chicken Fajita Stuffed Peppers Flavorful Dinner Idea

Looking for a dinner that’s both fun and tasty? Try my Chicken Fajita Stuffed Peppers! These colorful peppers are packed

For a tasty veggie stir fry, gather these main ingredients: - 1 cup broccoli florets - 1 bell pepper (any color), sliced - 1 medium carrot, julienned - 1 cup snap peas, trimmed - 1 cup mushrooms, sliced - 1 small onion, sliced - 3 cloves garlic, minced - 1 tablespoon fresh ginger, grated - 3 tablespoons soy sauce (low-sodium) - 1 tablespoon sesame oil - 1 tablespoon olive oil - 1 tablespoon sesame seeds (for garnish) - Cooked rice or noodles (for serving) These simple veggies make your stir fry bright and full of flavor. You can boost your stir fry with optional ingredients: - Red pepper flakes for heat - Green onions for a fresh touch - Baby corn for crunch - Water chestnuts for extra texture - Tofu for protein Feel free to mix and match these extras to suit your taste. Serve your stir fry over: - Steamed rice for a classic base - Noodles for a hearty meal - Quinoa for a healthy twist Pair your dish with a side of spring rolls or a light salad for more fun! For the full recipe, check out the Vibrant Veggie Stir Fry. Start by washing your veggies well. Clean each one to remove dirt. Chop the broccoli into small florets. Slice the bell pepper into thin strips. Julienne the carrot into long, thin pieces. Trim the snap peas by removing the ends. Slice the mushrooms into even pieces. Finally, slice the onion and mince the garlic. Grate the ginger for a fresh kick. Keep all these chopped veggies in one place for easy access. This makes cooking faster and fun. Heat a large skillet or wok over medium-high heat. Add the olive oil and let it warm up. Once hot, toss in the garlic and ginger. Sauté them for about 30 seconds. They should smell amazing but be careful not to burn them. Next, add the sliced onion, mushrooms, and carrots. Stir-fry these for about 2-3 minutes. You want them to soften a bit. Then, add the broccoli, bell pepper, and snap peas. Stir-fry these for another 4-5 minutes. Mix them continuously until they look bright and feel slightly tender, but still crisp. This keeps the veggies colorful and tasty. When your veggies are ready, pour in the soy sauce and sesame oil. Toss everything together to coat the veggies evenly. Cook for one more minute. This step brings all the flavors together. Once done, remove the pan from the heat. Sprinkle sesame seeds on top for a nice crunch. Serve your stir fry on a bed of rice or noodles. You can find the full recipe in the main article. Enjoy your vibrant veggie stir fry! When you pick veggies for your stir fry, go for fresh ones. Look for bright colors and firm textures. Some great choices include: - Broccoli - Bell peppers - Carrots - Snap peas - Mushrooms These veggies give a nice balance of crunch and flavor. You can mix and match based on what you like. Overcooked veggies lose their crunch and color. To keep them vibrant, cook on high heat. Stir them quickly in the pan. Start with harder vegetables, like carrots and broccoli, since they need longer to cook. Add softer ones, like bell peppers and snap peas, later. This ensures everything cooks evenly. To make a great stir fry, you need a few key tools. A large skillet or wok is best for even cooking. A spatula helps you stir and toss the veggies. A sharp knife makes chopping easier. Having a cutting board is also important. These tools help you create a tasty stir fry with ease. For the full recipe, check out the vibrant veggie stir fry. {{image_2}} To make your veggie stir fry more filling, add protein. You can use tofu, chicken, shrimp, or beef. Tofu is a great choice if you're vegan or vegetarian. It absorbs flavors well. Simply cube the tofu and sauté it with the garlic and ginger. For chicken or beef, slice it thinly. Cook it in the hot oil before adding vegetables. Shrimp cooks quickly and adds a nice touch. Just toss it in after the veggies are almost done. This gives a tasty mix of flavors. If you need a gluten-free option, swap regular soy sauce for tamari. Tamari has a similar taste but is made without wheat. You can also use coconut aminos. They add a sweet and savory flavor. Check the labels on other sauces too. Some may contain gluten. Serving your stir fry over rice or gluten-free noodles keeps your meal safe and delicious. Want to turn up the heat? Add chili flakes, sriracha, or fresh chili peppers. Start with a small amount. You can always add more if needed. Mix the spices into the oil before adding garlic. This releases the flavors better. If you want a milder kick, try sweet chili sauce. It adds sweetness and just a touch of heat. Experiment with these options to find your favorite level of spice. For the full recipe, check out the details above. After making your veggie stir fry, let it cool. Place the leftovers in an airtight container. Store it in the fridge for up to three days. This keeps the veggies fresh and tasty. When you’re ready to eat, reheat your stir fry on the stove. Use medium heat to warm it gently. Add a splash of water or soy sauce to keep it moist. Stir often to avoid burning. This method makes the flavors pop again. You can freeze your veggie stir fry too. Let it cool completely before freezing. Use a freezer-safe container or bag. It will last for up to three months. When you're ready to enjoy it, thaw in the fridge overnight. Then, reheat on the stove for a quick meal. For full details, check out the Full Recipe. Yes, you can use frozen vegetables for stir fry. They save time and are easy to find. Just make sure to thaw them first. Pat them dry to avoid excess water in the pan. This helps keep your stir fry crispy and bright. Cut vegetables into uniform pieces. This ensures even cooking. Aim for bite-sized pieces, about 1-inch thick. For long veggies like carrots, julienne them into thin strips. This helps them cook quickly and blend well with other ingredients. Remember to chop your veggies just before cooking to keep them fresh. To make a simple vegetarian stir fry sauce, mix soy sauce, sesame oil, and a bit of sugar. You can add garlic and ginger for more flavor. Combine these ingredients in a bowl. Stir well and pour it over your stir fry near the end of cooking. This creates a tasty coating for your veggies. For the full recipe, check the section above on vibrant veggie stir fry. In this post, we explored easy veggie stir fry recipes. We covered key ingredients, cooking steps, and helpful tips to make the process smooth. I shared variations to suit your taste, plus storage tips for leftovers. Now, you have all you need to create a tasty meal. Enjoy experimenting with flavors and techniques. Cooking can be fun and rewarding—happy stir frying!

Easy Veggie Stir Fry Quick and Healthy Meal Guide

Looking for a quick and healthy meal? My Easy Veggie Stir Fry is just the answer! Packed with fresh vegetables

For a Healthy Cobb Salad, I love using mixed greens. You can choose spinach, arugula, or romaine. These greens add fiber and vitamins. They help keep your body healthy and strong. Using organic greens is also a great choice. Organic ingredients have fewer chemicals, and they taste better too. You get more nutrients when you choose organic. Next, let’s talk protein. Cooked chicken breast is a fantastic option. It is low in fat and high in protein. This helps build muscle and keep you full. If you prefer plant-based options, try tofu or chickpeas. Tofu is a great source of protein and is very versatile. Chickpeas add fiber and are very filling as well. Toppings make your salad fun and tasty. Avocado is creamy and packed with healthy fats. It helps your body absorb vitamins from the greens. Feta cheese adds a nice salty flavor and is also nutritious. When it comes to dressings, I suggest using olive oil and lemon juice. They are lighter than heavy dressings but still full of flavor. You can whisk them together for a fresh taste. For the full recipe, see the detailed instructions above. Start by washing your greens. Rinse the mixed greens under cold water. Pat them dry with a clean towel or use a salad spinner. Chopping is easy with a sharp knife. Cut the avocado and tomatoes into small pieces. Dice the chicken into bite-size cubes. For quinoa, cook it in a pot with water. Use a ratio of 1 part quinoa to 2 parts water. Bring it to a boil, then simmer for about 15 minutes. Fluff it with a fork when done. Now it's time to layer your salad. In a large bowl, place the mixed greens first. Next, add the chicken, avocado, and cherry tomatoes. Then sprinkle the chopped red onion and quinoa on top. Finally, add the chopped hard-boiled eggs. If you love cheese, sprinkle some feta over everything. This makes it look nice and colorful. When mixing, be gentle. Toss the salad lightly to combine. Avoid mashing the avocado. You want to keep its nice shape and texture. For the dressing, grab a small bowl. Combine olive oil, lemon juice, and Dijon mustard. Use a whisk to mix well. This helps blend everything smoothly. Taste the dressing and adjust as needed. Add salt and pepper to suit your taste. Drizzle the dressing over the salad. Toss it again gently. Now your Healthy Cobb Salad is ready to enjoy. For the full recipe, you can always refer back to the instructions earlier. You can easily swap ingredients based on what you have at home. If you don’t have chicken, try chickpeas or tofu. They add great protein. You can also change the greens. Use kale or mixed sprouts for different flavors. Seasonal veggies add freshness. In summer, switch in ripe tomatoes and cucumbers. In fall, try roasted squash or beets. This keeps your Cobb salad exciting. Pair your salad with whole-grain bread for a filling meal. A light white wine can enhance the flavors, too. Keep portion sizes in check. A serving should fit in two cupped hands. This helps you enjoy your salad while staying balanced. Meal prep makes weeknight dinners easier. Cook chicken and quinoa ahead. You can store them in the fridge for up to four days. Chop veggies and keep them in separate containers. This keeps them fresh and crisp. When you’re ready to eat, just mix everything together. Enjoy your Healthy Cobb Salad with ease! For a complete guide on making this dish, check the Full Recipe. {{image_2}} For a vegan Cobb salad, you can use tofu or chickpeas as your protein. Both options offer great flavor and texture. Tofu is versatile; you can marinate it to add taste. Chickpeas provide a nice crunch and are filling. You can also add nuts or seeds for extra protein. For plant-based fats, use avocado, nuts, or tahini. These add creaminess and richness to your salad without any animal products. If you want a low-carb Cobb salad, skip the quinoa. Instead, use more leafy greens like romaine or spinach. These greens are low in carbs but high in nutrients. For the dressing, use olive oil and vinegar or lemon juice. This keeps it light and fresh. You can also add more protein, like chicken or eggs, to keep you full without the carbs. To make a Mediterranean-style Cobb salad, swap in kalamata olives and artichoke hearts. These add a tasty twist. Use feta cheese for flavor, or skip it for a vegan option. Fresh herbs, like parsley and oregano, will enhance the taste. Drizzle your salad with olive oil and lemon juice to capture that bright Mediterranean vibe. This combination brings a whole new flavor profile to your Cobb salad. For the full recipe, check out the vibrant Healthy Cobb Salad section above. To keep your salad fresh, store it in an airtight container. This helps lock in moisture and prevent wilting. If you have toppings like avocado or egg, store them separately. This keeps them fresh longer. Wrap avocados in plastic wrap to limit air exposure. For greens, wash and dry them before storing. This removes excess moisture that can cause sogginess. Refrigerating your salad is the best option. It keeps the ingredients fresh without losing texture. Freezing is not a good idea for salads. The greens turn mushy when thawed. You can refrigerate the salad for up to three days. Just remember to eat it before it wilts. If you notice any browning, that means it’s time to toss it. You can get creative with leftover ingredients from your Cobb salad. Mix leftover chicken and quinoa in a wrap for a quick lunch. Toss any remaining veggies into a stir-fry for dinner. You can even make a frittata with the extra eggs. This way, you avoid waste and enjoy new meals. Use your imagination to turn leftovers into tasty dishes! For the full recipe, refer to the earlier section. If you want to skip the chicken, there are great options. Here are some alternatives: - Tofu: Firm or baked tofu adds protein and is plant-based. - Chickpeas: These add fiber and protein. Use them whole or mashed. - Hard-boiled eggs: You can use more eggs for protein and richness. - Grilled shrimp: This adds a nice seafood flavor and protein. - Tempeh: This fermented soy product offers a nutty taste and firm texture. - Lentils: Cooked lentils bring a hearty feel and plenty of nutrients. - Turkey: Diced turkey is a lean option and easy to find. Yes, Cobb salad is packed with nutrients. Here’s what makes it healthy: - Mixed greens provide vitamins A, C, and K. They help your body stay strong. - Avocado adds healthy fats that are good for your heart. - Chicken offers lean protein to keep you full and build muscles. - Eggs are rich in protein and contain essential nutrients. - Quinoa is a whole grain that gives fiber and keeps you energized. - Feta cheese, if used, adds flavor and calcium, but use it in moderation. Overall, this salad is colorful, filling, and full of good stuff for your body. To keep your salad fresh and crisp, follow these tips: - Wash greens thoroughly and dry them well. Use a salad spinner if you have one. - Store dressings separately until you are ready to eat. - Add watery toppings, like tomatoes, just before serving. - Layer ingredients carefully. Place heavier items at the bottom and lighter ones on top. - Keep chopped ingredients in airtight containers in the fridge. This helps them stay fresh longer. By following these steps, your salad will stay bright and crunchy. Enjoy every bite! For the full recipe, check out the Vibrant Healthy Cobb Salad! In this blog post, we explored how to create a fresh and healthy Cobb salad. We covered key ingredients like greens, protein options, and tasty dressings. Step-by-step instructions showed how to prepare, assemble, and dress your salad. Tips for customization and storage helped enhance your meal. In the end, a Cobb salad is not only tasty but also lets you get creative. Enjoy making your own versions based on what you love!

Healthy Cobb Salad Simple and Nutritious Delight

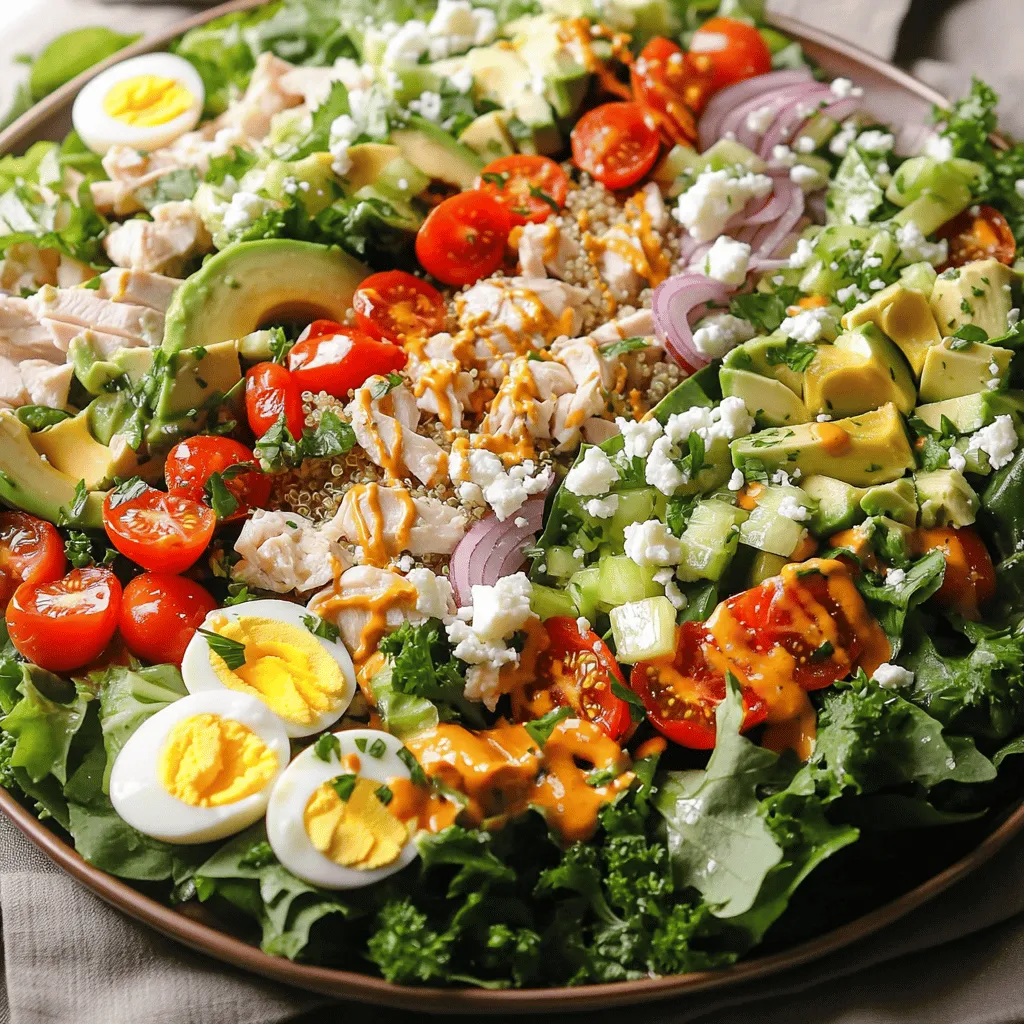
Are you ready to enjoy a delicious and healthy Cobb salad? This simple dish is packed with fresh greens, protein,

This dish centers around a few key ingredients. Here’s what you need: - 1 block (14 oz) firm tofu, drained and pressed - 2 tablespoons cornstarch - 2 tablespoons vegetable oil - 1 cup bell peppers (red, yellow, or green), sliced - 1 cup broccoli florets - 1 cup snap peas - 2 cloves garlic, minced - 1 tablespoon fresh ginger, minced - 1/4 cup low-sodium soy sauce - 2 tablespoons brown sugar - 1 tablespoon rice vinegar - 1 tablespoon sesame oil - 1 tablespoon sesame seeds (for garnish) - Green onions, sliced (for garnish) These ingredients come together to create a flavorful and satisfying meal. The tofu provides protein while the vegetables add color and crunch. Each ingredient plays a part in making this dish tasty and healthy. You can elevate your Easy Teriyaki Tofu Stir Fry with some simple garnishes. Here are a few ideas: - Sesame seeds: Adds a nice crunch and nutty flavor. - Sliced green onions: Provides fresh taste and bright color. - Chopped cilantro: Brings a fresh herbaceous note to the dish. - Crushed red pepper flakes: Adds heat for those who like spice. These garnishes not only make your meal look better but also add layers of flavor. Feel free to modify the ingredients based on your needs. Here are some substitutions: - Tofu: Use tempeh or chickpeas for a different protein. - Soy sauce: Tamari works well for a gluten-free option. - Brown sugar: Maple syrup or agave syrup can replace it. - Vegetable oil: You can use olive oil or coconut oil instead. These swaps allow you to enjoy the dish while catering to your dietary preferences. For the complete recipe, check out the Full Recipe. 1. Start by cutting the pressed tofu into bite-sized cubes. Make sure it's dry with paper towels. 2. Toss the tofu cubes in cornstarch. This helps create a crispy layer. 3. Heat vegetable oil in a large skillet or wok over medium-high heat. 4. Once hot, add the tofu cubes in a single layer. Cook them for 6-8 minutes. Turn them occasionally until they are golden and crispy. 5. Remove the tofu from the skillet and set it aside. 6. In the same skillet, add sliced bell peppers, broccoli florets, and snap peas. Stir-fry for about 4-5 minutes. You want the veggies to be tender-crisp. 7. Add minced garlic and ginger to the skillet. Cook for an additional 1-2 minutes until fragrant. 8. In a small bowl, whisk together soy sauce, brown sugar, rice vinegar, and sesame oil. 9. Pour this sauce over the vegetables in the skillet. 10. Return the crispy tofu to the skillet. Gently mix it with the veggies and sauce. 11. Cook for another 2-3 minutes. This allows all the flavors to meld. 12. Remove from heat and garnish with sesame seeds and sliced green onions. - Always press your tofu to remove excess moisture. - Coat tofu in cornstarch evenly. This helps it crisp up nicely. - Cook the tofu in a single layer. Avoid overcrowding the pan. - Use high heat for frying. This creates a nice golden crust. - A large skillet or wok works best for stir-frying. - Use a sharp knife for cutting tofu and vegetables. - A cutting board is essential for safe chopping. - Having a whisk for mixing sauces makes it easier. - Keep measuring spoons handy for accurate ingredient amounts. For the full recipe, check the Easy Teriyaki Tofu Stir Fry section. Enjoy your cooking! When making Easy Teriyaki Tofu Stir Fry, avoid these common mistakes: - Not pressing the tofu: Pressing removes extra water. This helps tofu get crispy. - Skipping cornstarch: Coat tofu in cornstarch. This gives it a nice crunch. - Overcrowding the pan: Cook in batches. This prevents steaming and keeps food crisp. - Not heating the oil enough: Ensure the oil is hot before adding tofu. This creates a golden crust. To make your stir fry even tastier, try these tips: - Add fresh herbs: Basil or cilantro can add a fresh taste. - Use citrus juice: A splash of lime or lemon juice brightens flavors. - Include nuts or seeds: Add cashews or peanuts for a crunchy texture. - Experiment with sauces: Try hoisin or sriracha for a unique twist. Adjusting spice levels is easy with these methods: - Add more ginger: Fresh ginger can give a nice kick. - Use chili flakes: Sprinkle in chili flakes for heat. - Serve with hot sauce: Offer hot sauce on the side for extra spice. - Try spicy oil: Drizzle chili oil over the dish for added flavor. For more ideas, check out the Full Recipe. {{image_2}} If you want to switch things up, try different proteins. Tempeh is a great choice. It has a nutty taste and firm texture. Seitan is another option. It mimics meat well and absorbs flavors nicely. You can also use chickpeas for a hearty bite. Just toss them in cornstarch like you would with tofu. Seasonal veggies can change your stir fry. In spring, use asparagus and snap peas. Summer is perfect for zucchini and bell peppers. In fall, add butternut squash or kale. Winter calls for hearty greens like bok choy or Brussels sprouts. These swaps keep your dish fresh and exciting. While teriyaki sauce shines here, other sauces can work too. A sweet and sour sauce adds a tangy kick. Peanut sauce offers creaminess and depth. If you like heat, try a spicy chili sauce. Each sauce brings a unique flavor, so feel free to experiment. Check out the Full Recipe for more ideas! After making your Easy Teriyaki Tofu Stir Fry, let it cool down. Place it in an airtight container. This helps keep the flavors fresh. Store it in the fridge for up to three days. Make sure to separate the tofu and veggies if possible. This keeps them from getting too soggy. When you are ready to eat your leftovers, reheat them gently. Use a skillet over medium heat. Add a splash of water to steam the veggies slightly. This keeps them crisp. Stir often to avoid burning. You can also use a microwave. Heat in 30-second bursts and stir in between. This warms up the dish evenly. If you want to save your stir fry for later, freezing is a great option. Cool the dish completely before freezing. Use a freezer-safe container or bag. Make sure to remove as much air as you can. The stir fry can last for up to three months in the freezer. When you're ready to eat, thaw it overnight in the fridge. Then, reheat it as mentioned above. For the full recipe, check out the Easy Teriyaki Tofu Stir Fry section. Yes, you can prepare Easy Teriyaki Tofu Stir Fry ahead of time. Cook the tofu and veggies, then store them in the fridge. Keep the sauce separate. This helps keep the tofu crispy. When ready to eat, just heat it all up and mix in the sauce. This method saves time on busy days. Tofu stir fry pairs well with many sides. Here are some ideas: - Steamed rice: White or brown rice works great. - Quinoa: A healthy, nutty option. - Noodles: Try rice noodles or soba for a twist. - Salad: A fresh green salad adds crunch. These sides enhance your meal and make it more filling. To make Easy Teriyaki Tofu Stir Fry gluten-free, swap the soy sauce. Use tamari or a gluten-free soy sauce. Check other ingredients too, like rice vinegar and cornstarch, to ensure they are gluten-free. With these changes, everyone can enjoy this tasty dish without worry. For the full recipe, check the details provided earlier. In this article, we explored how to make Easy Teriyaki Tofu Stir Fry. We covered key ingredients, cooking steps, and tips for perfect texture. You learned how to avoid common mistakes and enhance flavors. We also discussed tasty variations and smart storage tips. Remember, cooking is fun. Feel free to experiment with ingredients and spices. With practice, your stir fry will impress everyone. Enjoy creating your own unique dish!

Easy Teriyaki Tofu Stir Fry Flavorful and Simple Meal

Are you ready to whip up a delicious dish in no time? My Easy Teriyaki Tofu Stir Fry is both

To make Lemon Blueberry Chia Pudding, you need just a few simple items. Here’s what you will need: - 1/4 cup chia seeds - 1 cup almond milk (or any milk of choice) - 2 tablespoons maple syrup (adjust for sweetness) - Zest of 1 lemon - 2 tablespoons fresh lemon juice - 1/2 cup fresh blueberries - A pinch of salt - Optional: Fresh mint leaves for garnish These ingredients work together to create a creamy and flavorful pudding. Chia seeds are the star here. They soak up the liquid and become soft, making the pudding thick and rich. The lemon juice and zest add a bright, zesty taste. Blueberries bring a sweet burst of flavor that pairs perfectly with the lemon. You can adjust the sweetness by adding more or less maple syrup. If you like it sweeter, go for an extra tablespoon. If you prefer it less sweet, use just one tablespoon. This recipe is perfect for breakfast, a snack, or even dessert. For the milk, almond milk is great, but you can use any milk you like. Coconut milk gives a nice tropical twist. These ingredients show how easy it is to make a healthy treat. You don’t need many items, just fresh and simple ones. You can find the full recipe in the article. - Combine Ingredients First, grab a mixing bowl. Add the chia seeds, almond milk, maple syrup, lemon zest, lemon juice, and a pinch of salt. Mix everything well. You want the chia seeds to spread out in the liquid. - Initial Stirring After mixing, let it sit for about 5 minutes. Then, give it another good stir. This step helps stop the chia seeds from clumping together. You want a smooth pudding. - Refrigerate and Set Cover your bowl and place it in the fridge. Let it chill for at least 2 hours. If you can, leave it overnight. The longer it sits, the better the texture will be. The chia seeds will soak up the liquid and turn into pudding. - Layering the Pudding Once the pudding is ready, stir it again. Now, take small bowls or glass cups. Layer the chia pudding with fresh blueberries. This makes it look pretty and adds flavor. - Garnishing the Dish To finish, add a few more blueberries on top. If you like, toss on some fresh mint leaves. This adds a nice pop of color and taste. Enjoy your Lemon Blueberry Chia Pudding! For a complete guide, refer to the Full Recipe. Avoiding Chia Seed Clumps When making Lemon Blueberry Chia Pudding, you want a smooth texture. To avoid clumps, stir the chia seeds well after mixing. After five minutes, give it another stir. This helps keep the seeds evenly spread in the liquid. The more you stir, the better the pudding will turn out. Adjusting Sweetness Not everyone likes the same level of sweetness. If you like it sweeter, add more maple syrup. Start with a small amount, then taste it. This way, you can get it just right for your taste buds. Creative Presentation Ideas How you serve your pudding matters. Use clear bowls or glass cups to show off those vibrant layers. You can even create a parfait style. Alternate layers of pudding and blueberries for a stunning look. Don’t forget to top it off with mint leaves for a fresh touch. Pairing with Other Fruits While blueberries shine in this recipe, you can mix in other fruits too. Try adding sliced strawberries or raspberries for a colorful twist. You can also add some diced mango for a tropical vibe. The options are endless, so have fun with it! For the full recipe, check out the Lemon Blueberry Chia Pudding section. {{image_2}} Other Fruit Options You can switch up the blueberries for other fruits. Strawberries, raspberries, or mangoes work great. Just chop them small. This allows their flavors to mix well with the pudding. Each fruit adds a new twist. You can even use mixed berries for a fun blend! Dairy-Free Alternatives If you want a different base, use coconut milk or oat milk. Both give a creamy texture. Almond milk is great, but don't limit yourself. Each milk type changes the taste, making it unique. Try experimenting with what you have at home! Adding Nuts or Seeds Boost the nutrition by adding nuts or seeds. Chopped almonds or walnuts add a satisfying crunch. You can also sprinkle pumpkin seeds on top. These options add good fats and proteins. They make the pudding heartier and more filling. Incorporating Superfoods Want to make your pudding even healthier? Add superfoods like hemp seeds or spirulina. Hemp seeds are rich in omega-3s. Spirulina adds a nutrient punch and a bright color. Just a spoonful can change the game. These additions make your treat not just tasty but also super healthy! For the full recipe, check the [Full Recipe]. To keep your lemon blueberry chia pudding fresh, store it in an airtight container. This helps avoid unwanted flavors. You can place it in the fridge for a quick snack or breakfast. How long does it last? If you store it properly, it stays good for up to five days. If you notice any changes in smell or texture, it’s best to toss it. Can you freeze chia pudding? Yes, you can freeze this tasty treat! Freezing helps if you want to make a batch ahead of time. Best practices for freezing include using a freezer-safe container. Leave some space at the top for expansion. To enjoy, just thaw it in the fridge overnight. For the full recipe, check out the Lemon Blueberry Chia Pudding details. How to make Lemon Blueberry Chia Pudding? To make this pudding, follow these steps: 1. In a mixing bowl, mix the chia seeds and almond milk. 2. Add maple syrup, lemon zest, lemon juice, and salt. Stir well. 3. Let it sit for 5 minutes, then stir again to avoid clumping. 4. Cover and refrigerate for at least 2 hours, or overnight for best results. 5. Once set, stir again and layer it in bowls with fresh blueberries. 6. Garnish with blueberries and mint if you'd like. Check the Full Recipe for more details. What are the health benefits of chia seeds? Chia seeds are small but mighty. They are high in fiber, which helps with digestion. They also provide protein and omega-3 fatty acids, good for heart health. Plus, chia seeds can keep you full longer, making them great for weight management. Their antioxidants help reduce inflammation too. Can I use other types of milk for this recipe? Yes, you can use any milk you like! Almond milk works well, but coconut, soy, or oat milk are great alternatives too. Just remember that each type of milk may change the flavor slightly. Is this recipe vegan-friendly? Absolutely! This recipe is vegan-friendly. It uses plant-based milk and maple syrup, which are both great for a vegan diet. You can enjoy this treat without any animal products. How can I make it sugar-free? To make this pudding sugar-free, skip the maple syrup and use a sugar-free sweetener. You can use stevia or erythritol, depending on your taste. Just make sure to adjust the amount to match your sweetness preference. This blog post covered how to make Lemon Blueberry Chia Pudding. We explored the ingredients and their roles. You learned the preparation steps and assembly method to create a tasty dish. I shared tips to avoid clumps and ways to adjust sweetness. Finally, we looked at variations and storage options for your pudding. This simple recipe is a healthy treat, easy to customize, and great for any meal. Enjoy your chia pudding adventure!

Lemon Blueberry Chia Pudding Healthy and Simple Treat

Looking for a delicious yet healthy treat? Lemon Blueberry Chia Pudding is your answer! This simple recipe combines zesty lemon,

To make tasty Greek salad wraps, you'll need a few key ingredients. These ingredients create fresh flavors and a colorful dish. Here’s what you’ll need: - 4 large whole wheat tortillas - 1 cup cherry tomatoes, halved - 1 cucumber, diced - 1/2 red onion, thinly sliced - 1 bell pepper (any color), diced - 1 cup Kalamata olives, pitted and sliced - 1 cup feta cheese, crumbled - 1/4 cup fresh parsley, chopped - 1 lemon, juiced - 3 tablespoons olive oil - 1 teaspoon dried oregano - Salt and pepper to taste These ingredients bring the taste of Greece right to your kitchen. The whole wheat tortillas provide a healthy base. The veggies add crunch and color, while the olives and feta give it a salty kick. Using fresh ingredients is key to making the best wraps. Fresh veggies not only taste better, but they also make your meal healthier. I recommend using: - Ripe cherry tomatoes for sweetness - Crisp cucumbers for crunch - Bright, colorful bell peppers for added flavor Always look for the freshest produce at your local market. It makes a big difference in taste. Feel free to get creative with your wraps! Here are some optional add-ins that can enhance the flavor: - Avocado for creaminess - Spinach or arugula for added greens - Grilled chicken or chickpeas for protein These add-ins can make your wraps even more filling and fun. Experiment with different combinations to find your favorite flavors. For the full recipe, check out the detailed instructions provided. Start by gathering all your ingredients. You will need large whole wheat tortillas, cherry tomatoes, cucumber, red onion, bell pepper, Kalamata olives, feta cheese, parsley, lemon, olive oil, and dried oregano. Rinse the cherry tomatoes and cucumber under cold water. Halve the tomatoes and dice the cucumber. Thinly slice the red onion and bell pepper. Slice the olives and chop the parsley. This step is all about preparing fresh and vibrant ingredients. Once you have everything ready, place a large bowl on your counter. Add the halved cherry tomatoes, diced cucumber, sliced red onion, diced bell pepper, sliced olives, and chopped parsley. In a small bowl, mix the lemon juice, olive oil, dried oregano, salt, and pepper. Whisk it well until combined. Pour this dressing over your veggie mix and toss gently to coat everything. Now, take one tortilla and lay it flat. Spoon about a quarter of the salad mixture onto the center. Crumble feta cheese on top. Fold the sides of the tortilla over the filling, then roll it tightly from the bottom. Repeat this with the rest of the tortillas and salad mixture. To make perfect wraps, don’t overfill them. A quarter of the salad mixture works well. Make sure to tuck in the sides as you roll them. This keeps all the goodness inside. If the tortillas feel stiff, warm them slightly in the microwave for ten seconds. This makes them easier to roll. For a nice touch, cut each wrap in half diagonally before serving. This way, they look great and are easy to eat. You can find the full recipe for these wraps to help you along the way! To make your Greek salad wraps burst with flavor, use fresh herbs. Fresh parsley adds a bright taste. You can also try adding dill for a unique twist. The dressing is key. Use high-quality olive oil for depth. Fresh lemon juice brightens each bite. Don’t skip the oregano; it ties the flavors together. Let your salad mix sit for a few minutes before serving. This helps all the flavors meld. Start by gathering all your ingredients. This saves time and keeps things tidy. Use a sharp knife for clean cuts. Cut cherry tomatoes in half and dice the cucumber last. This keeps the cucumber from getting too watery. Slice the red onion thinly; this makes it easier to mix. For the bell pepper, cut it into strips first, then dice. Keep your workspace organized! Place each ingredient in a separate bowl. You can prepare the salad mix a few hours before serving. Just keep it covered in the fridge to stay fresh. If you want to make it a day ahead, that works too! Store the dressing separately to keep the veggies crisp. When ready to serve, assemble the wraps. This way, your wraps won't get soggy. Serve with extra lemon wedges or olives for added fun. For the full recipe, check out the details above. {{image_2}} You can make these wraps vegetarian by skipping the feta cheese. Replace it with avocado for creaminess. This keeps the texture rich, and it’s packed with healthy fats. For a vegan twist, use a plant-based cheese or tofu. You can also add more veggies like shredded carrots or zucchini for a fresh crunch. These swaps make the meal colorful and even more nutritious. If you want a protein boost, grilled chicken or shrimp works great. Just cook them simply with olive oil and some herbs. You can also use chickpeas or lentils for a filling option. Just toss them in with the salad mix. This will keep your wraps hearty and satisfying. Plus, it adds a nice texture contrast to the fresh veggies. Dressings can change the whole flavor of your wrap. A tangy balsamic vinaigrette adds a sweet touch. Try a spicy yogurt sauce for a kick. You can even mix in some pesto for an herbaceous twist. Just whisk your choice of dressing into the salad before wrapping. This ensures every bite is packed with flavor. For more ideas, check out the Full Recipe for different dressing options. To keep your wraps fresh, store them in an airtight container. If you have leftover filling, keep it separate from the tortillas. This prevents the tortillas from getting soggy. Wrap the tortillas in plastic wrap or foil if you want to store them whole. For meal prep, you can make the salad mix a day in advance. Just store it in the fridge. If you want to freeze the wraps, assemble them without the dressing. Wrap each one tightly in plastic wrap and then place them in a freezer bag. They can last up to three months in the freezer. The fresh ingredients in your Greek salad wraps have different shelf lives. Here’s a quick guide: - Cherry tomatoes: 5 to 7 days in the fridge. - Cucumbers: 1 week in the fridge. - Red onion: 2 to 4 weeks in a cool, dark place. - Bell peppers: 1 week in the fridge. - Kalamata olives: up to a year if kept in brine. - Feta cheese: about 5 days once opened. Keeping track of these times helps you enjoy fresh and tasty Greek salad wraps anytime. For the full recipe, check out the details above. To make Greek Salad Wraps more filling, add protein. You can use grilled chicken or chickpeas for a hearty boost. Try adding some quinoa or brown rice for extra texture and fiber. Adding avocado or hummus can also add creaminess and make the wraps more satisfying. Mix and match these ingredients to find your favorite combo! Yes, you can use different types of tortillas. Whole wheat tortillas are great, but you can choose spinach, tomato, or even gluten-free wraps. Each type will add unique flavor and color. Experiment with various tortillas to find the one that suits your taste best! If you need a substitute for feta cheese, try crumbled goat cheese or ricotta. You can also use dairy-free cheese for a vegan option. For a salty kick, try olives or capers. These alternatives will keep your wraps tasty while catering to your dietary needs. In this post, we covered how to make Greek salad wraps. We discussed key ingredients, from fresh veggies to tasty add-ins. I shared step-by-step instructions for wrapping them perfectly. Tips for enhancing flavor and preparing ingredients made the process easier. We also explored variations, storage tips, and answered common questions. Greek salad wraps are fun to make and very tasty. You can customize them to your liking. Enjoy your culinary adventure with these wraps!

Simple Greek Salad Wraps Tasty and Fresh Meal Idea

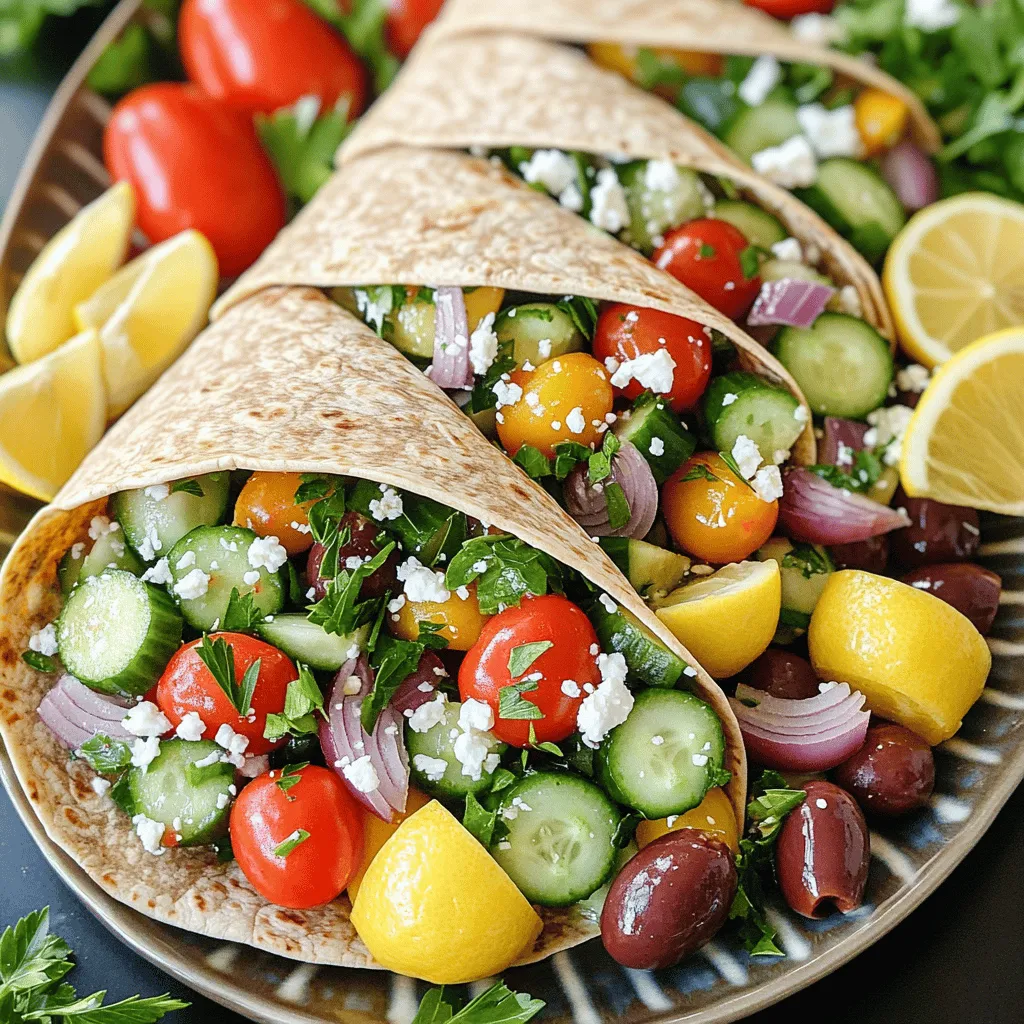
Looking for a fresh and tasty meal? Simple Greek Salad Wraps are the perfect choice! These wraps are easy to

To make pesto chicken stuffed peppers, gather these main ingredients: - 4 large bell peppers (red, yellow, or green) - 2 cups cooked chicken, shredded (rotisserie chicken works great) - 1/2 cup pesto sauce (store-bought or homemade) - 1 cup cooked quinoa (or rice for a different texture) - 1/2 cup cherry tomatoes, halved - 1/2 cup mozzarella cheese, shredded - 1/4 cup grated Parmesan cheese - Salt and pepper to taste - 2 tablespoons olive oil - Fresh basil leaves for garnish These ingredients blend well together. The pesto gives a fresh taste. The chicken adds protein, while the peppers provide crunch. Each bite is a mix of flavors. If you don’t have some items, here are good swaps: - For bell peppers, use zucchini or eggplant. - Swap cooked chicken for ground turkey or tofu for a vegetarian option. - Use store-bought pesto if you lack time to make your own. - Brown rice or couscous can replace quinoa. - Other cheeses like cheddar or feta can give a new taste. These swaps help you make this dish work with what you have on hand. Be creative! Pesto chicken stuffed peppers are not only tasty but also healthy. Here’s a quick look at the nutrition for one serving: - Calories: 350 - Protein: 30g - Carbohydrates: 25g - Fiber: 5g - Fat: 15g These peppers are a great choice for a balanced meal. They provide protein, healthy fats, and fiber. For the full recipe, check the link. Start by preheating your oven to 375°F (190°C). Choose four large bell peppers. You can use red, yellow, or green. Cut the tops off each pepper. Remove the seeds and membranes carefully. Set aside the tops for later, if you like. Drizzle a little olive oil inside each pepper. Lightly season with salt, too. This step adds flavor and helps the peppers cook well. In a big mixing bowl, add two cups of shredded cooked chicken. Rotisserie chicken works great and saves time. Pour in half a cup of pesto sauce. Then, add one cup of cooked quinoa or rice for a nice texture. Toss in half a cup of halved cherry tomatoes. Next, mix in half a cup of shredded mozzarella cheese and a quarter cup of grated Parmesan cheese. Season the mixture with salt and pepper to taste. Stir well until everything is coated in the pesto. This mixture brings all the flavors together. Carefully spoon the pesto chicken mixture into each bell pepper. Pack it in gently so it fits well. Place the stuffed peppers upright in a baking dish. If they tip over, slice a thin layer off the bottom to help them stand. Top each pepper with the rest of the mozzarella cheese. Cover the dish with foil and bake for 25 minutes. After that, remove the foil. Bake for another 10 to 15 minutes. Look for tender peppers and bubbly, golden cheese. Once done, let them cool for a few minutes. Garnish with fresh basil leaves before serving. Enjoy the tasty and colorful meal! For the complete process, check the Full Recipe. To make sure your peppers turn out great, choose fresh ones. Look for firm, bright colors. Cut the tops off carefully and remove all seeds. This helps the peppers cook evenly. Drizzle olive oil inside to add flavor. Season them lightly with salt. This simple step enhances the taste. When serving your pesto chicken stuffed peppers, presentation matters. Place them on a nice platter. Drizzle extra pesto on top for a burst of flavor. Add freshly chopped basil for color. You can slice the peppers in half for easy serving. This also helps guests enjoy every bite. These stuffed peppers pair well with a side salad. A light green salad adds freshness. You might also enjoy some crusty bread. A glass of white wine complements the dish nicely. If you want more heat, serve with a spicy sauce on the side. For the full recipe, check out the details above. {{image_2}} You can easily make this dish vegetarian. Replace the chicken with cooked lentils or chickpeas. Both options add protein and texture. Use the same pesto sauce for flavor. You can also mix in some spinach or kale for extra nutrients. These greens blend well with the other flavors in the dish. If you're not a fan of chicken, consider using turkey or tofu. Shredded turkey works well and has a mild taste. Tofu can be crumbled and mixed with the pesto. Both options keep the meal light yet filling. Just ensure to season your protein choice well to enhance the flavor. Boost the taste of your stuffed peppers with herbs and spices. Try adding garlic powder or Italian seasoning to the chicken mix. A squeeze of lemon juice brightens the flavors, too. You can also top the peppers with a bit of balsamic glaze before serving. This adds a sweet and tangy twist. For those who love a kick, sprinkle some red pepper flakes on top. After cooking your pesto chicken stuffed peppers, let them cool down. Place them in an airtight container. This will keep them fresh for up to three days in the fridge. If you want to keep them longer, consider freezing. Just ensure they are fully cooled before wrapping. To reheat, preheat your oven to 350°F (175°C). Place the stuffed peppers in a baking dish. Cover them with foil to keep them moist. Heat for about 20-25 minutes or until warm. You can also use a microwave. Heat on medium power for about 3-4 minutes, checking often. To freeze, wrap each stuffed pepper in plastic wrap, then place them in a freezer bag. They can last up to three months in the freezer. When ready to eat, thaw them overnight in the fridge. Then, follow the reheating instructions mentioned above. This method keeps your meal prep easy and tasty! For the full recipe, check out the details provided above. Making pesto sauce is simple and fun. Start with fresh basil leaves. Use about 2 cups. Add 1/2 cup of grated Parmesan cheese. Next, add 1/3 cup of pine nuts. You can also use walnuts if you prefer. Then, add 2-3 cloves of garlic for flavor. Blend these ingredients in a food processor. While blending, slowly drizzle in 1/2 cup of olive oil. Season with salt and pepper to taste. This gives you a fresh and tasty sauce. Absolutely! You can get creative with your stuffed peppers. Zucchini, eggplant, or even tomatoes work great. They all have shapes that hold filling well. Just make sure to adjust the cooking time. Softer vegetables may need less time in the oven, while sturdier ones may need more. Experimenting can lead to exciting new flavors. For the best flavor, I recommend using mozzarella cheese. It melts beautifully and adds creaminess. You can also mix in some goat cheese for tanginess. If you want a stronger flavor, use aged cheddar or fontina. Feel free to combine different cheeses for a unique taste. This blog post guides you through making pesto chicken stuffed peppers. We covered ingredients, step-by-step instructions, and helpful tips. You learned about variations, storage, and even some FAQs. Pesto chicken stuffed peppers are easy to make and full of flavor. With a few swaps, you can change the dish to fit your taste. Enjoy trying new ideas and flavors!

Pesto Chicken Stuffed Peppers Flavorful Dinner Idea

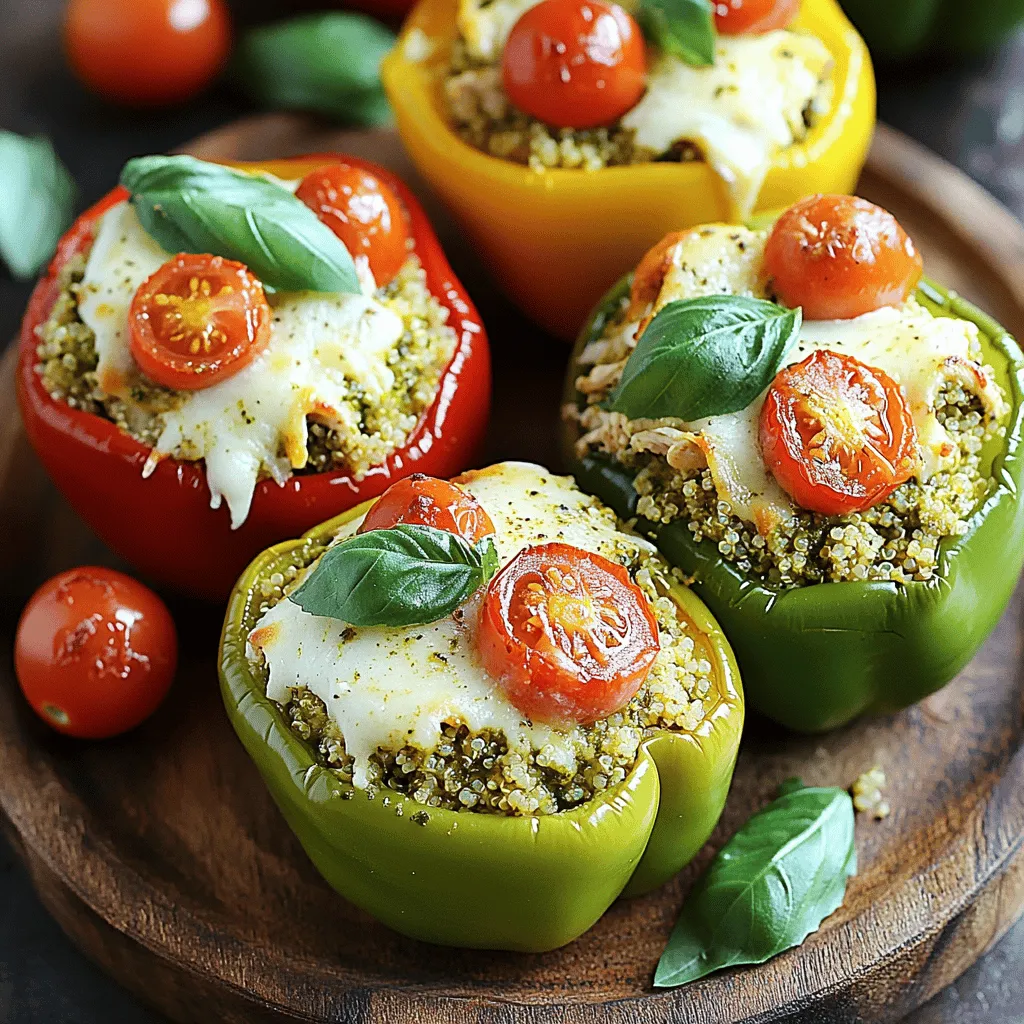
Are you looking for a quick, tasty dinner? Pesto Chicken Stuffed Peppers are just the dish for you! They’re packed

- 2 medium sweet potatoes, peeled and diced - 1 red bell pepper, diced - 1 green bell pepper, diced - 1 small red onion, diced - 2 cloves garlic, minced - 1 teaspoon smoked paprika - 1/2 teaspoon ground cumin - Salt and pepper to taste - 4 large eggs - 2 tablespoons olive oil - Fresh cilantro or parsley, for garnish (optional) Sweet potatoes are the star here. They add natural sweetness and good nutrition. The red and green bell peppers bring color and crunch. Red onion adds zest, while garlic gives depth. The spices, smoked paprika, and cumin add warmth and flavor. Don't forget the eggs! They make the dish hearty and satisfying. Each serving has around 300 calories. You get about 12 grams of protein, 35 grams of carbs, and 12 grams of fat. This meal is balanced and keeps you full. It’s great for breakfast or brunch! For the full recipe, check out the link provided. Enjoy your cooking! 1. Heat a large skillet over medium heat. Add two tablespoons of olive oil. 2. Peel and dice the sweet potatoes into small cubes. Add them to the skillet. 3. Season the sweet potatoes with salt, pepper, smoked paprika, and ground cumin. 4. Cook the sweet potatoes for about 10 to 12 minutes. Stir them occasionally. You want them tender with crispy edges. 5. While the sweet potatoes cook, dice the red and green bell peppers and the red onion. 6. After the sweet potatoes are ready, add the diced peppers and onion to the skillet. 7. Cook the veggies for an additional 5 to 7 minutes. They should be soft and fragrant. 8. Mince the garlic and stir it in. Cook for one more minute until you smell the garlic. 1. Use a spoon to make four small wells in the hash. 2. Crack one egg into each well. 3. Cover the skillet with a lid. 4. Cook for about 5 minutes. The egg whites should be set, but the yolks can stay runny. 5. If you like firmer yolks, cook them a bit longer. 1. Once cooked, remove the skillet from heat. 2. For a fresh touch, chop some cilantro or parsley and sprinkle it on top. 3. Serve your sweet potato breakfast hash right away. Enjoy the colors and flavors! For complete instructions, check out the Full Recipe. To make the best sweet potato breakfast hash, start with firm sweet potatoes. They hold up well when cooked. Cut them into small, even pieces. This helps them cook evenly. Use medium heat to avoid burning. Cook them until they are tender, which takes about 10-12 minutes. To achieve crispy edges, let the sweet potatoes cook without too much stirring at first. This allows them to brown. After a few minutes, you can stir them gently. This method gives you that nice crunch. Spices make your hash exciting. Besides smoked paprika and cumin, try adding chili powder for heat. You can also use thyme or oregano for a fresh taste. If you like it spicy, add cayenne pepper. Start with a small amount and adjust to your taste. You can change the heat level by adding more or less spice. If you want a mild flavor, stick to smoked paprika and cumin. For a kick, go for the chili powder or cayenne. Eggs are a great addition to your hash. You can choose how you like your eggs cooked. For runny yolks, cook them for about 5 minutes. If you prefer firmer yolks, give them a bit more time. Just cover the skillet with a lid. This helps the eggs cook evenly and quickly. Feel free to experiment with egg styles. Scrambled eggs can also work well if you prefer them that way. Just scramble them in a bowl and mix them into the hash before serving. For the full recipe, check out Sweet Potato Breakfast Hash. {{image_2}} To make this dish vegan, swap the eggs for tofu. Press and cube firm tofu, then add it to the pan. Cook it until golden brown. This adds protein without eggs. For gluten-free needs, all the ingredients are naturally gluten-free. Just ensure your spices are certified gluten-free. If you want to switch up the veggies, try using zucchini or mushrooms. Both add great flavor and texture. You can also add spinach for a pop of color. For protein options, consider black beans or chickpeas. They work well and add a hearty touch. To give it a Southwest style, add some jalapeños and corn. You can also sprinkle some chili powder for extra heat. If you prefer a Mediterranean twist, add olives and feta cheese. A splash of lemon juice brightens the dish. These variations keep your breakfast exciting! Try them as you make this sweet potato breakfast hash. After enjoying your sweet potato breakfast hash, let it cool down. Transfer leftovers to an airtight container. This keeps flavors fresh and prevents spills. Store it in the fridge for up to 4 days. When you're ready to eat, just reheat it in a skillet or microwave. Yes, you can freeze sweet potato breakfast hash! Portion it into freezer-safe bags or containers. Squeeze out air to avoid freezer burn. It stays good for up to 3 months. To reheat, thaw it overnight in the fridge. Heat in a skillet over medium heat until hot or microwave on low power, stirring often. When stored properly, this dish lasts well. In the fridge, expect it to stay fresh for about 4 days. If frozen, it can last up to 3 months. Always check for signs of spoilage, like off smells or changes in color. Enjoy your meals safe and delicious! You can cook sweet potatoes in a few ways. The best method for the hash is to dice them and sauté them in a skillet. This gives them a nice texture. Start by peeling and dicing the sweet potatoes. Heat olive oil in the skillet over medium heat. Add the sweet potatoes and season them with salt and spices. Cook them for about 10-12 minutes. Stir them often so they cook evenly. You want them tender and a little crispy. You can also bake or steam sweet potatoes, but sautéing is quick and easy. Yes, meal prepping sweet potato breakfast hash is simple. Cook the hash as directed and let it cool. Divide it into meal prep containers. You can store it in the fridge for up to four days. To reheat, just warm it up in the microwave or on the stove. If you want to add eggs, you can cook them fresh on the day you eat the hash. This keeps the eggs from becoming overcooked. Meal prepping makes breakfast easy and quick. Sweet potatoes are very versatile. You can make many dishes with them. Here are a few ideas: - Sweet Potato Fries: Cut sweet potatoes into sticks, toss with oil, and bake until crispy. - Sweet Potato Soup: Blend cooked sweet potatoes with broth and spices for a creamy soup. - Mashed Sweet Potatoes: Boil or steam them, then mash with butter and seasonings. - Sweet Potato Salad: Combine roasted sweet potatoes with greens, nuts, and a simple dressing. - Sweet Potato Pancakes: Mix mashed sweet potatoes into your pancake batter for a tasty twist. For an amazing sweet potato breakfast hash, check out the Full Recipe. This recipe for sweet potato breakfast hash is simple and tasty. You learned about key ingredients, step-by-step cooking, and tips to make it better. I shared ideas for variations and how to store it for later. Sweet potatoes bring flavor and nutrition to your meals. Try this dish for breakfast or lunch. You can adjust it to suit your taste. Get creative and enjoy!

Sweet Potato Breakfast Hash Delicious and Hearty Meal

Looking for a hearty breakfast that fills you up and tastes amazing? Try my Sweet Potato Breakfast Hash, a perfect

Older posts
Newer posts
← Previous Page1 … Page21 Page22 Page23 … Page79 Next →

dsad

© 2025 pureeatsnow • Built with GeneratePress

Our Policies

  • Copyright Policy
  • Cookie Policy
  • GDPR Policy
  • Privacy Policy
  • Disclaimer
  • Terms Of Use

More Information

  • Home
  • About
  • Contact
  • Appetizers
  • Dessert
  • Dinner
  • Drinks
©2025, pureeatsnow About Back To Top