Skip to content
DisclaimerTerms Of UseGDPR PolicyCookie Policy

pureeatsnow

  • Home
  • Drinks
  • Appetizers
  • Dinner
  • Dessert
  • About
  • Contact
  • Privacy Policy
DisclaimerTerms Of UseGDPR PolicyCookie Policy

Rachel

- 1 can (15 oz) chickpeas, drained and rinsed - 2 tablespoons olive oil - 1 teaspoon chili powder - 1/2 teaspoon cayenne pepper (adjust to taste) - 1 teaspoon garlic powder - 1 teaspoon cumin - Zest of 1 lime - Juice of 2 limes - Salt and pepper to taste - Fresh cilantro, chopped (for garnish) - Lime wedges (for serving) To make Spicy Chili Lime Chickpeas, you need simple ingredients that pack a punch. Start with a can of chickpeas. They are high in protein and fiber, making them a healthy snack. Rinse and drain them well, as this helps them become crispy. Next, add olive oil. It helps the spices stick and adds great flavor. Chili powder gives your chickpeas a nice kick. If you want more heat, use cayenne pepper. Adjust it to your taste. Garlic powder and cumin add depth to the flavor. Don’t forget the lime zest and juice! The zest gives a bright aroma, while the juice adds tang. Season with salt and pepper to enhance all the flavors. For garnish, fresh cilantro adds a pop of color and freshness. Serve with lime wedges for extra zing. This recipe makes a tasty, crunchy snack that you can enjoy anytime. For the full recipe, check the details above. 1. Preheat your oven to 400°F (200°C). This step is key for crispy chickpeas. 2. In a mixing bowl, combine the drained chickpeas, olive oil, chili powder, cayenne pepper, garlic powder, cumin, lime zest, and lime juice. 3. Season with salt and pepper. Toss everything together until the chickpeas are coated well. 1. Spread the chickpeas out in a single layer on a baking sheet. Use parchment paper for easy cleanup. 2. Bake them in the preheated oven for 25-30 minutes. 3. Shake the pan halfway through. This helps ensure even cooking and crispiness throughout. 1. Remove the chickpeas from the oven and let them cool for a few minutes. This cooling time helps them get even crunchier. 2. Taste the chickpeas and adjust the seasonings if needed. You can add more lime juice or spices for a stronger flavor. 3. Garnish with fresh cilantro and serve with lime wedges on the side. You can find the full recipe above for all the details. Enjoy your spicy, crispy snack! To get that perfect crunch, start with dry chickpeas. After rinsing, pat them with a towel. This step removes extra moisture. Moisture leads to soggy snacks, which we want to avoid. Next, bake them on a parchment-lined sheet. Spread them in a single layer for even heat. Bake at 400°F for about 25-30 minutes. Shake the pan halfway through for even crispiness. Want to kick up the flavor? Add more spices! Try smoked paprika for a smoky taste. You can also mix in onion powder for extra depth. If you like it spicy, adjust the cayenne pepper. Start with less and add more if you want heat. Taste as you go to find your perfect spice level. These chickpeas are great on their own, but you can pair them too! Serve with hummus or guacamole for a tasty dip. They also work well in salads. Toss them with greens, tomatoes, and a light dressing. Want a healthy snack? Enjoy them with fresh veggies or as a crunchy topping on soups. You can find the full recipe online to make this fun dish today! {{image_2}} For those who crave a kick, try a spicy chipotle version. Just mix in some chipotle powder or sauce. This adds a deep, smoky flavor that pairs well with the lime. You can also make herb-infused chickpeas. Add fresh herbs like rosemary or thyme to the mix. This gives your snack a garden-fresh taste that is delightful. Want to save time? Use an air fryer! Set it to 400°F (200°C) and cook for about 15-20 minutes. Shake the basket halfway through for even cooking. If you prefer, you can also cook them on the stovetop. Heat oil in a pan, add the seasoned chickpeas, and stir-fry until golden and crispy. This method gives you a quick and tasty option. You can switch chickpeas for other beans. Black beans or white beans work well too! They bring their own taste and texture. For spices, feel free to swap chili powder for smoked paprika. This gives a different flavor profile while still keeping it spicy. Experiment with what you have on hand and make it your own! For the full recipe, check out the detailed instructions above. To store leftovers, let the chickpeas cool first. Place them in an airtight container. This keeps them fresh for up to three days in the fridge. I recommend using glass containers for better preservation. They are easy to clean and don’t hold odors. Yes, you can freeze Spicy Chili Lime Chickpeas! To do this, spread them out on a baking sheet first. Freeze them until solid, then transfer to a freezer bag. This helps keep them from sticking together. They can last up to three months in the freezer. When ready to eat, just remember to label your bags with the date! For reheating, I suggest using an oven or air fryer. Preheat your oven to 350°F (175°C) and bake for about 10 minutes. This method helps to keep them crunchy. If using an air fryer, heat them at 300°F (150°C) for about 5 minutes. This way, they stay crispy and delicious! Avoid microwaving, as this can make them soft and chewy. Chickpeas are small but mighty. They are high in protein and fiber. A 15 oz can has about 15 grams of protein. This makes them a great meat substitute. They also help keep you full longer, which is great for weight control. Chickpeas contain many vitamins and minerals. They are rich in folate, iron, and magnesium. These nutrients help our bodies work well. Eating chickpeas can lower cholesterol too. This can lead to better heart health. Adding chickpeas to your diet can support overall wellness. Yes, you can! Making Spicy Chili Lime Chickpeas ahead is smart. They are perfect for meal prep. You can bake them in advance and store them. Just keep them in an airtight container. Store them in the fridge for a few days. To keep them fresh, avoid adding too much lime juice before storing. This can make them soggy. Instead, add extra lime juice just before serving. This keeps their crunchiness intact. You can find pre-made Spicy Chili Lime Chickpeas in many stores. Look in health food stores or snack aisles. Brands like Biena and Hippeas offer ready-to-eat options. If you prefer online shopping, sites like Amazon have great choices. You can also check local grocery delivery services. This way, you can get these tasty snacks without leaving home. For the full recipe, you can create your own at home! We explored a tasty recipe for Spicy Chili Lime Chickpeas. This dish is simple and healthy. You learned about the key ingredients, preparation steps, and baking tips. I shared ways to enhance flavor and offered variations to try. You now have storage tips and reheating advice to keep your chickpeas fresh. Enjoy making this snack or side dish! It’s a tasty treat that can boost your meals. Remember, chickpeas are not just good for you, they also bring fun flavors to your kitchen!

Spicy Chili Lime Chickpeas Crunchy and Flavorful Snack

Are you ready for a snack that packs a punch? Spicy Chili Lime Chickpeas are the perfect blend of crunchy

For my One Pan Chicken Fajitas, you will need: - 2 boneless, skinless chicken breasts, sliced into thin strips - 1 red bell pepper, sliced - 1 yellow bell pepper, sliced - 1 green bell pepper, sliced - 1 medium onion, sliced - 3 cloves garlic, minced - 2 tablespoons olive oil - 2 teaspoons chili powder - 1 teaspoon cumin - 1 teaspoon smoked paprika - ½ teaspoon salt - ½ teaspoon black pepper - 1 lime, juiced - Fresh cilantro, for garnish - Tortillas, for serving When selecting fresh vegetables, look for bright colors and firm textures. The peppers should have smooth skin and no soft spots. For onions, choose ones that feel heavy for their size. These small details make a big impact on flavor. For the tortillas, I recommend using soft flour or corn tortillas. They add a nice touch to the fajitas. Warm them up before serving for extra softness. With these ingredients ready, you are set to create a delicious meal. Check out the Full Recipe for more details on cooking! Marinating the chicken Start by slicing the chicken breasts into thin strips. In a medium bowl, mix the chicken with olive oil, chili powder, cumin, smoked paprika, salt, pepper, and lime juice. Make sure every piece is coated well. Let it marinate for about 15 minutes. This step adds great flavor. Sautéing the vegetables While the chicken marinates, slice your bell peppers and onion. Heat a large skillet over medium-high heat. Add a splash of olive oil. Once it's hot, toss in the onion and bell peppers. Sauté for 5-7 minutes. You want them tender and slightly charred. This char gives a nice smoky flavor to your fajitas. Combining chicken and vegetables After the veggies are ready, push them to one side of the skillet. Add the marinated chicken to the center. Cook for about 5-7 minutes. Stir occasionally until the chicken is cooked through. It should no longer be pink inside. This is key for a safe and tasty meal. How to get the perfect char on vegetables To achieve that perfect char, avoid overcrowding the pan. Give each piece room to breathe. This helps them cook evenly. If they sit too close, they will steam instead of char. Cooking time for chicken and ensuring tenderness For tender chicken, cook it just until it's no longer pink. Overcooking makes it dry. Use a meat thermometer if you have one. The chicken should reach 165°F for safety. Adding garlic and adjusting seasoning In the last minute of cooking, add the minced garlic. Stir everything together. This will make your kitchen smell amazing! After mixing, taste the dish. Adjust the seasoning if needed. Sometimes a little more salt or lime can enhance the flavor. Garnishing the dish with cilantro and lime Once off the heat, it’s time to garnish. Sprinkle fresh cilantro on top. Serve with lime wedges on the side. This adds a burst of freshness. You can now enjoy your delicious One Pan Chicken Fajitas with warm tortillas! One-pan cooking is all about ease and speed. Here are a few best practices: - Prep your ingredients first. This saves time during cooking. - Use a large skillet. This helps the chicken and veggies cook evenly. - Don’t overcrowd the pan. This keeps everything from steaming. To save time during meal prep, try these tips: - Marinate chicken overnight. This deepens the flavor and cuts prep time. - Chop veggies in advance. Keep them in the fridge for quick access. - Use pre-sliced or frozen veggies. They can save you a lot of time. To boost flavor, consider adding these spices: - Cayenne pepper for more heat. - Oregano for a fresh, earthy taste. - Lemon zest for a bright kick. For deeper flavor, marinating is key. Here’s how: - Use citrus juice. Lime juice in the marinade adds zest. - Let it sit longer. An hour in the fridge makes a big difference. - Add yogurt or buttermilk. This can make the chicken tender and juicy. For serving, try these methods: - Serve in the skillet. This keeps everything warm and looks great. - Use colorful tortillas. Choose blue or yellow corn for a vibrant touch. - Layer the tortillas. Serve them warm in a basket with a cloth. Seasonal garnishes can enhance visual appeal: - Fresh herbs like cilantro add color and aroma. - Sliced radishes offer a nice crunch and bright color. - Avocado slices add creaminess and a pop of green. For the full recipe, you can refer to the One Pan Chicken Fajitas Fiesta . {{image_2}} You can switch up the protein in One Pan Chicken Fajitas. Shrimp works great. Just cook it for a shorter time. Beef is another tasty choice. Slice it thin and marinate it like chicken. For a meat-free version, use firm tofu or black beans. Both options add protein and flavor. To spice things up, try different flavor profiles. Add lime zest for a zesty kick. You can also use smoked chipotle peppers for heat. For a sweet touch, toss in some pineapple. This gives a sweet and spicy contrast. Experiment with spices like coriander or oregano for more depth. Fajitas are fun to serve in many ways. Try them in a salad for a fresh twist. Use the chicken and veggies over rice for a filling bowl. For sides, serve with fresh guacamole and salsa. These add creaminess and zing. Don’t forget tortilla chips for crunch. For a unique touch, serve with a side of sweet corn salad. You can find the full recipe above for all the details! To keep your One Pan Chicken Fajitas fresh, store them in airtight containers. Place any leftover chicken and veggies in the fridge. They will stay good for about 3 to 4 days. For longer storage, you can freeze them. Just pack the fajitas in freezer-safe bags. They can last for up to 3 months in the freezer. Remember to remove excess air from the bags to prevent freezer burn. When it’s time to enjoy your leftovers, reheating properly is key. You can use a skillet on low heat for the best results. Add a splash of water or broth to keep the chicken moist. Stir often to heat evenly. If you prefer the microwave, place the fajitas in a microwave-safe dish. Cover it with a damp paper towel. Heat in short bursts, stirring in between, until warm. This helps maintain the flavor and texture of your dish. Enjoy your delicious One Pan Chicken Fajitas again! How to make One Pan Chicken Fajitas gluten-free? To make One Pan Chicken Fajitas gluten-free, simply use corn tortillas instead of flour ones. Check the spices to ensure they are gluten-free. Most spices are safe, but some blends may contain gluten. Can I prep the ingredients in advance? Yes, you can prep the ingredients ahead of time. Slice the chicken and vegetables and store them in the fridge. Marinate the chicken the night before for deeper flavor. Just remember to keep everything in airtight containers. What are the best toppings for chicken fajitas? Some great toppings for chicken fajitas include: - Sliced avocado - Shredded cheese - Sour cream - Fresh salsa - Chopped green onions - Lime wedges Feel free to mix and match based on your taste! What to do if the chicken is overcooked? If your chicken is overcooked, try adding a little chicken broth or water to the skillet. This will help moisten the chicken. You can also shred it and mix it into a sauce to keep it juicy. How to fix soggy fajitas? If your fajitas are soggy, check the cooking time. Cook the chicken and veggies until they are just done. You can also add a bit of corn starch to the pan to absorb extra moisture. Serve everything hot to keep it crisp! One Pan Chicken Fajitas are fun, tasty, and easy to make. We covered the best ingredients, from fresh vegetables to tortillas. I shared step-by-step instructions for marinating, cooking, and seasoning chicken and veggies. You learned tips to speed up prep time while enhancing flavor. Also, we explored variations with different proteins and serving ideas. Finally, I provided storage tips to keep leftovers fresh. Enjoy making this dish your own! It's a crowd-pleaser that brings flavor and joy to your table.

One Pan Chicken Fajitas Quick and Flavorful Recipe

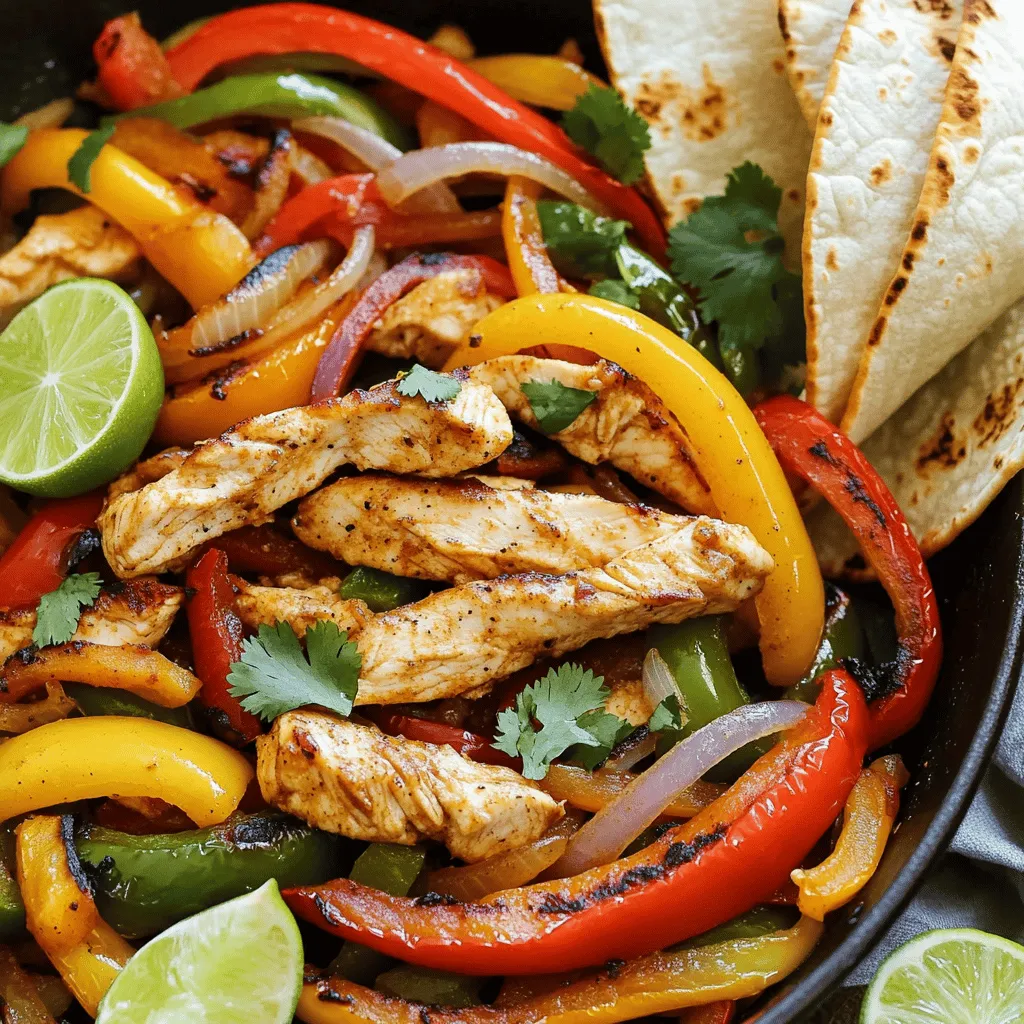
Are you ready to create a dinner that’s quick, tasty, and hassle-free? My One Pan Chicken Fajitas recipe is perfect

The main ingredients for this dish are simple and fresh. Here’s what you need: - 1 large head of cauliflower, cut into florets - 3 tablespoons olive oil - 4 cloves of garlic, minced - 1 teaspoon smoked paprika - 1/2 teaspoon salt - 1/4 teaspoon black pepper - 1/2 cup grated Parmesan cheese - 2 tablespoons fresh parsley, chopped (for garnish) These ingredients combine to create a tasty side dish. The cauliflower soaks up the olive oil and garlic flavors well. The Parmesan adds a rich, salty finish. You can take this dish to the next level with a few extras. Consider adding: - A squeeze of lemon juice for brightness - A pinch of red pepper flakes for heat - Fresh herbs like thyme or rosemary for depth These optional ingredients help to enhance the taste. They can make this dish even more fun and exciting. If you're missing an ingredient, don't worry! Here are some easy swaps: - Use butter instead of olive oil for a richer flavor. - Try nutritional yeast in place of Parmesan for a vegan option. - Any fresh herbs can replace parsley for a unique twist. These substitutions can keep your meal fresh and interesting. You can still enjoy Garlic Parmesan Roasted Cauliflower with what you have on hand. For the full recipe, check out the detailed instructions above. First, you need to wash the cauliflower. Remove the leaves and core. Cut the head into bite-sized florets. Make sure they are even in size. This helps them cook uniformly. In a large bowl, mix the cauliflower with olive oil, minced garlic, smoked paprika, salt, and black pepper. Toss it well, so every piece is coated. This is where the magic begins. The oil and spices will give the cauliflower great flavor. Next, preheat your oven to 425°F (220°C). Line a baking sheet with parchment paper. Spread the cauliflower in a single layer on the sheet. Make sure they are not crowded. If they are too close, they won’t roast well. Roast the cauliflower for about 20 to 25 minutes. Halfway through, give the pan a shake. This ensures even cooking. You want the cauliflower to be tender and slightly golden. It should smell amazing! When the cauliflower is roasted, take it out of the oven. Immediately sprinkle the grated Parmesan cheese over the hot florets. The heat will help the cheese melt. Return the baking sheet to the oven for another 5 minutes. This step makes the cheese crispy and delicious. Once done, remove it from the oven. Garnish with chopped parsley for a pop of color. If you like, add a squeeze of lemon juice for brightness. This simple touch really lifts the flavors. For the complete details, check the Full Recipe. To get the best texture for your Garlic Parmesan Roasted Cauliflower, start with fresh florets. Cut them into even-sized pieces. This helps them cook evenly. Make sure your oven is preheated to 425°F (220°C). High heat gives the cauliflower a nice crisp outside. Spread the florets out on the baking sheet. Don’t overcrowd them, or they will steam instead of roast. Give them space to brown and caramelize. You can boost the flavor with a few simple tweaks. Try adding red pepper flakes for some heat. A sprinkle of lemon zest adds a bright touch. You might also add herbs like thyme or rosemary for extra depth. If you love cheese, mix in some grated Pecorino Romano with the Parmesan. This adds a sharp flavor that pairs well with garlic. Serving Garlic Parmesan Roasted Cauliflower is fun! Use a large platter to show it off. Sprinkle extra parsley on top for a fresh look. Add lemon wedges around the edge for color. This makes it more inviting. You can also serve it in small bowls for individual portions. It looks great and makes it easy for guests to enjoy. For a touch of elegance, drizzle a bit of balsamic glaze on top before serving. {{image_2}} You can make Garlic Parmesan Roasted Cauliflower even more exciting with spices. Try adding crushed red pepper flakes for heat. A pinch of cayenne pepper gives it a nice kick. You can also use Italian seasoning for a herbier flavor. Each spice adds a new layer of taste. Experiment to find what you like best. This dish is easy to adapt for different diets. For a vegan version, skip the Parmesan cheese or use nutritional yeast instead. Nutritional yeast gives a cheesy taste without dairy. You can also add nutritional yeast to the spice mix for extra flavor. It keeps the dish tasty while meeting dietary needs. You can mix in other veggies for a colorful side. Carrots, broccoli, or bell peppers work well. Cut them into similar sizes for even cooking. Toss them in the same bowl with the cauliflower. Roasting a mix adds more flavor and nutrients. It’s a great way to use up leftover veggies too. For the full recipe, check out the Garlic Parmesan Roasted Cauliflower! After enjoying Garlic Parmesan Roasted Cauliflower, you may have some leftovers. To store them, let the cauliflower cool down first. Place it in an airtight container. This keeps the flavors and moisture in. Store it in the fridge for up to three days. If you want to save space, use a flat container. This makes stacking easier. When you're ready to eat the leftovers, you can reheat them. The best way is to use your oven. Preheat it to 350°F (175°C). Spread the cauliflower on a baking sheet. Heat it for about 10-15 minutes. This keeps the texture crispy. You can also use a microwave if you're in a hurry. Heat it for about 1-2 minutes, but it may not be as crispy. Freezing Garlic Parmesan Roasted Cauliflower is also an option. If you want to freeze it, do this right after cooking. Allow it to cool completely before packing. Place it in a freezer-safe bag or container. Remove as much air as possible. This helps keep the taste fresh. You can freeze it for up to three months. When ready to eat, thaw it in the fridge overnight. Then, reheat it in the oven for the best results. Check the full recipe for more tips! To make Garlic Parmesan Roasted Cauliflower crispy, you can try a few tricks: - Cut the cauliflower into smaller florets. This helps them roast better. - Make sure to coat the florets well with oil. This aids in crispiness. - Roast at a high temperature, around 425°F (220°C), for a good caramelization. - Flip the florets halfway through cooking for even browning. - For extra crunch, broil the cauliflower for a couple of minutes at the end. Yes, you can use frozen cauliflower. However, there are a few things to keep in mind: - Thaw the cauliflower first and drain any excess water. - Pat the florets dry with a towel to remove moisture. - This will help the cauliflower roast evenly and get that crispy texture. - The cooking time may vary slightly, so keep an eye on them while roasting. Garlic Parmesan Roasted Cauliflower works well with many dishes, such as: - Grilled chicken or fish for a healthy protein option. - Pasta dishes, especially those with cream or tomato sauces. - Quinoa or rice bowls for a wholesome meal. - It also complements salads or can be served as a snack. Garlic Parmesan Roasted Cauliflower stays fresh in the fridge for about 3-4 days. - Store it in an airtight container to keep it from drying out. - When ready to eat, you can reheat it in the oven or microwave. - Enjoy it warm for the best flavor! For the full recipe, check out the details above. We explored the key ingredients for Garlic Parmesan Roasted Cauliflower and how to prepare them. You learned step-by-step instructions for roasting and adding cheese. Tips helped you achieve great texture and flavor. I shared fun variations to make this dish your own, along with storage methods for leftovers. In closing, this versatile recipe will surely impress your taste buds and guests alike. Embrace your creativity and enjoy each delicious bite!

Garlic Parmesan Roasted Cauliflower Tasty Side Dish

Are you ready to elevate your side dish game? My Garlic Parmesan Roasted Cauliflower is an easy, tasty way to

- 2 boneless, skinless chicken breasts - 1 ripe mango, diced - 1 cup cooked brown rice - 1 red bell pepper, sliced - 1 small red onion, chopped - 1 jalapeño, deseeded and minced - 2 tablespoons olive oil - 2 tablespoons lime juice - 1 tablespoon honey - 1 teaspoon ground cumin - 1 teaspoon smoked paprika - Salt and pepper to taste - Fresh cilantro for garnish When I create my Spicy Mango Chicken Bowls, I focus on fresh, vibrant ingredients. The chicken provides a great base. I love using ripe mango for its sweet and tangy flavor. The brown rice adds a hearty touch. I choose a red bell pepper for its color and crunch. The small red onion brings sweetness, while the jalapeño adds heat. For the marinade, I mix olive oil, lime juice, honey, cumin, and smoked paprika. This combo enhances the chicken's flavor. The salt and pepper round out the taste. Don't forget the fresh cilantro. It gives the dish a lovely finish. For the full recipe, check out Spicy Mango Chicken Bowls. To make the marinade, mix together 2 tablespoons of olive oil, 2 tablespoons of lime juice, and 1 tablespoon of honey in a bowl. Add in 1 teaspoon of ground cumin, 1 teaspoon of smoked paprika, and a pinch of salt and pepper. This mix gives the chicken a kick. I recommend marinating the chicken for at least 30 minutes. This helps the flavors soak in well. If you have time, letting it marinate longer makes it even better. Before cooking, preheat your grill or skillet over medium heat. This step ensures your chicken cooks evenly. Cook the chicken for about 6-7 minutes on each side. You want the chicken to reach an internal temperature of 165°F. After cooking, let the chicken rest for a few minutes. This keeps it juicy. While the chicken rests, heat a bit of olive oil in a pan over medium heat. Add in the chopped red onion, sliced red bell pepper, and minced jalapeño. Sauté these for 5-7 minutes until they become soft and slightly caramelized. Make sure not to overcook them. You want the veggies to be tender, but still have a nice bite. Start by adding a scoop of cooked brown rice to each bowl. This base brings a nice texture. Next, layer the sliced grilled chicken on top. Then, add the sautéed vegetables and diced mango. The mango adds a sweet contrast to the spicy chicken. Lastly, sprinkle fresh cilantro over the top for a burst of flavor. Serve the bowls warm for a delicious meal. Enjoy your spicy mango chicken bowls! For the complete recipe, check the Full Recipe section. To avoid overcooking the chicken, use a meat thermometer. The chicken should reach 165°F. If you cook it too long, the meat gets dry. I recommend letting the chicken rest after grilling. This keeps it juicy and tender. For great grill marks, make sure your grill is hot. Place the chicken on the grill at an angle. Leave it for about 3-4 minutes before flipping. This way, you get those beautiful lines. You can add spices to boost the flavor. Consider using garlic powder, onion powder, or even a pinch of cayenne. These spices can make the dish pop. If you like it spicy, leave the seeds in the jalapeño. For a milder dish, remove all the seeds. You can also mix in fresh herbs like basil or mint. They add freshness and a new taste. Just chop them fine and sprinkle them on before serving. Plating your dish nicely makes it more appealing. Start with brown rice as a base. Then arrange the chicken slices over the rice. Add the sautéed veggies on top. Finally, place the mango chunks in a bright spot. Garnishing with cilantro adds color and flavor. It brightens up the dish and gives it a fresh taste. Just sprinkle some leaves on top before serving. The contrast of colors makes your meal look gourmet. For the full recipe, check the recipe section above. {{image_2}} You can swap chicken for shrimp or tofu in this dish. Shrimp cooks fast and adds a nice flavor. Just grill or sauté it for about 3-4 minutes until it turns pink. Tofu is a great plant-based option. Press and cube it, then marinate like the chicken. Cook it in a pan until golden brown. Both options keep the meal tasty and fun. If you need a gluten-free option, use quinoa instead of brown rice. Quinoa cooks quickly and adds a nutty taste. For those who want a vegan dish, replace honey with maple syrup or agave. Both give sweetness without using animal products. These swaps make the meal fit for everyone. To add extra sweetness, toss in tropical fruits like pineapple or kiwi. They pair well with mango and bring new flavors to the bowl. You could also try different sauces. A spicy sriracha or a tangy yogurt sauce can change the whole taste. These simple changes keep this dish exciting and fresh. For the full recipe, check out [Full Recipe]. To store leftovers properly, let the bowls cool to room temperature. Then, place them in airtight containers. This helps keep the meal fresh. I recommend eating them within three days. You can freeze the spicy mango chicken bowls. Freeze them in single servings or as a whole. This way, you can enjoy them later. For best quality, thaw them overnight in the fridge before reheating. To reheat chicken and rice, use the microwave or stovetop. If you use the microwave, heat in short bursts. Stir in between to avoid cold spots. On the stovetop, add a splash of water to keep things moist. This helps maintain flavors and textures. Enjoy your tasty meal again! You can use many grains in place of brown rice. Quinoa is a great choice. It cooks quickly and is packed with protein. Another option is white rice, which cooks faster and has a softer texture. You can also try cauliflower rice for a low-carb option. It adds a nice crunch and absorbs flavors well. Yes, you can prepare this dish ahead of time. This meal works well for meal prep. You can marinate the chicken the night before. Cook the chicken and veggies, then store them separately. When ready to eat, just heat and assemble. This makes for an easy and quick meal any day of the week. This dish has a nice kick from the jalapeño. If you remove the seeds, it becomes milder. The heat level is adjustable based on your taste. If you prefer less spice, consider using bell peppers instead. You can also use a mild chili powder or omit the jalapeño altogether. Enjoy a tasty dish that fits your spice level! This article covered a delicious chicken bowl with mango, rice, and fresh veggies. You learned about key ingredients, easy marinating, and cooking tips. We also explored fun variations and storage ideas to keep your meals fresh. Remember, cooking is about creativity and joy. Feel free to mix flavors and adapt the recipe to fit your taste. Enjoy making this vibrant dish that’s perfect for any meal!

Spicy Mango Chicken Bowls Flavorful and Easy Meal

Are you ready to savor a dish that bursts with flavor? Our Spicy Mango Chicken Bowls are the perfect blend

- 4 salmon fillets - 2 tablespoons olive oil - Juice and zest of 1 large lemon - 3 garlic cloves, minced - 1 teaspoon dried thyme - 1 teaspoon dried rosemary - Salt and pepper, to taste For this dish, I use fresh salmon fillets for the best taste. The olive oil and lemon juice create a bright flavor. Garlic and herbs add depth and richness. This combination makes the salmon juicy and full of flavor. - 1 cup cherry tomatoes, halved - 1 cup asparagus, trimmed Cherry tomatoes burst with flavor when cooked. They add sweetness and color to the dish. Asparagus brings a nice crunch and pairs well with salmon. Together, they make this meal balanced and vibrant. - Fresh parsley, chopped (for garnish) - Additional herbs Fresh parsley brightens the dish. It adds a pop of color and freshness. You can also use other herbs like dill or basil. These options let you customize the flavor to your liking. For the full recipe, check the detailed instructions provided. 1. Preheating the oven Start by preheating your oven to 400°F (200°C). This step ensures even cooking for your salmon and veggies. 2. Making the marinade In a small bowl, mix together the olive oil, lemon juice, lemon zest, minced garlic, thyme, rosemary, salt, and pepper. This marinade gives your dish a fresh and zesty taste. 1. Arranging salmon and vegetables Place the salmon fillets in a large, rimmed baking sheet or a 9x13 inch dish. Spread the halved cherry tomatoes and trimmed asparagus around the salmon. This layout helps the flavors blend as they cook. 2. Pouring marinade over the ingredients Pour the lemon herb marinade over the salmon fillets. Make sure to coat the fillets well. Drizzle a bit more olive oil over the vegetables, then season them with salt and pepper as desired. 1. Baking the salmon and veggies Bake everything in the preheated oven for 15-18 minutes. The salmon should flake easily with a fork, and the asparagus should be tender. 2. Checking for doneness Once the time is up, check the salmon and veggies. If they look and feel done, remove them from the oven. Let it rest for a couple of minutes before serving. Enjoy this easy and flavorful meal that you’ve just prepared! What should you look for in fresh fillets? First, check the color. Fresh salmon should be bright and vibrant. The flesh should be moist and shiny. Avoid fillets with dull spots or a fishy smell. Look for salmon with firm texture. When you press it, it should spring back. Choosing sustainable options is key. Look for labels like "wild-caught" or "sustainably farmed." This helps protect fish populations and the ocean. You can check resources like the Seafood Watch for guidance. How do you achieve perfectly cooked salmon? Timing and temperature are crucial. Bake it in a preheated oven at 400°F (200°C) for 15-18 minutes. This gives you a tender and juicy fillet. To test doneness, use a fork. Gently flake the salmon at the thickest part. If it flakes easily, it’s ready. The fish should be opaque and not raw in the center. What flavor pairings can enhance your dish? Try adding fresh dill or basil for a twist. These herbs add a lovely aroma and taste. You can also include a dash of red pepper flakes for spice. Adjust the seasoning based on your preference. If you love garlic, add more minced cloves. Taste the marinade before pouring it on the fish. This ensures you get the flavor just right. For the full recipe, check the details above. {{image_2}} You can mix up the herbs in this recipe. Instead of thyme and rosemary, try dill or basil. These herbs add fresh flavors. If you want some heat, add crushed red pepper or jalapeños. This kicks up the spice and gives your dish a new twist. Asparagus and cherry tomatoes are great, but you can switch them out. Consider using zucchini or bell peppers. These veggies add color and taste. You can also use seasonal options like broccoli in the winter or green beans in the summer. This keeps the meal fresh and exciting. If you need a gluten-free option, this recipe is perfect as is. For keto followers, you can skip the tomatoes. Add more green veggies like spinach instead. If you want a lighter meal, use less oil or swap salmon for tilapia. This keeps the dish tasty and helps you meet your goals. For the full recipe, check out the main article. To keep your leftover One-Pan Lemon Herb Salmon fresh, refrigerate it right away. Place it in an airtight container. This helps keep moisture in and other smells out. Ideally, consume it within two days for the best taste. When you reheat salmon, aim to keep it moist. You can use an oven or microwave. If using the oven, set it to 275°F (135°C). Cover the salmon with foil. This keeps it from drying out. Heat for about 15 minutes or until warm. In the microwave, use a low power setting. Heat in short bursts, checking often. You can freeze One-Pan Lemon Herb Salmon if you want to save leftovers. Wrap the salmon tightly in plastic wrap, then place it in a freezer bag. This helps prevent freezer burn. It will last up to three months. When you're ready to eat, thaw the salmon in the fridge overnight. This keeps it safe and tasty. After thawing, reheat as you prefer. Enjoy your delicious meal again! Yes, you can use frozen salmon for this recipe. Here are some tips to make it work: - Thaw the salmon: Place the frozen fillets in the fridge overnight. If you're short on time, put them in a sealed bag and submerge in cold water for about an hour. - Pat dry: Once thawed, pat the salmon dry with a paper towel. This helps the marinade stick better. - Increase cooking time: If you use frozen salmon, you may need to bake it for a few extra minutes. Check for doneness carefully. The total time for this dish is about 25 minutes. Here's the breakdown: - Prep time: 10 minutes to gather and prepare your ingredients. - Cooking time: 15-18 minutes in the oven. Keep an eye on the salmon for perfect results. Pair this dish with simple and fresh sides. Here are some great options: - Rice: Fluffy white rice or wild rice adds a nice base. - Quinoa: A tasty and healthy grain that goes well with the salmon. - Salad: A crisp green salad with a light vinaigrette complements the flavors. - Vegetables: Roasted or steamed veggies like broccoli or green beans work nicely. Knowing when salmon is done is key for great taste. Here are the signs to watch for: - Flakes easily: Use a fork to test. The salmon should flake apart easily. - Color change: The flesh changes from translucent to opaque. - Temperature check: If you have a food thermometer, the thickest part should reach 145°F (63°C). These tips will help you enjoy a meal that is easy and flavorful. For the full recipe, check out the details above. In this post, we explored how to make One-Pan Lemon Herb Salmon. We covered the main ingredients, preparation steps, and cooking time. I shared tips on selecting fresh salmon and enhancing flavors. I also discussed storage methods and variations for different diets. Cooking can be simple and fun with the right steps. Enjoy creating this healthy meal that your family will love!

One-Pan Lemon Herb Salmon Easy and Flavorful Meal

Looking for a quick and tasty dinner? One-Pan Lemon Herb Salmon is the answer! This dish is easy to make,

To make the garlic herb roasted chicken thighs, you will need these simple ingredients: - 4 bone-in, skin-on chicken thighs - 4 cloves garlic, minced - 2 tablespoons fresh rosemary, chopped - 2 tablespoons fresh thyme, chopped - 1 tablespoon fresh parsley, chopped - 2 tablespoons olive oil - 1 teaspoon lemon zest - Salt and pepper to taste - 1 lemon, cut into wedges (for garnish) These ingredients come together to create a wonderful flavor profile. The garlic brings a savory punch, while the herbs add freshness. The olive oil keeps the chicken juicy, and lemon zest brightens the dish. Each item plays a key role in making this meal delicious. Gather these ingredients before you start cooking. It makes the process smoother and more enjoyable. For the full recipe and all the steps, check out the complete guide above. - Preheat oven to 425°F (220°C). - Line a baking dish with parchment paper. - In a bowl, mix garlic, rosemary, thyme, parsley, olive oil, lemon zest, salt, and pepper. - This blend creates a fragrant herb paste that adds flavor. - Pat the chicken thighs dry with a paper towel. - Season both sides with salt and pepper. - Generously rub the herb mixture under and over the skin. - This step ensures all the flavors soak into the meat. - Arrange chicken in the baking dish, skin-side up. - Roast for 35-45 minutes until the skin is crispy and golden. - Use a meat thermometer to check that it reaches 165°F (75°C). - For extra crispiness, broil for 2-3 minutes at the end. - Remove the chicken from the oven. - Let it rest for 5 minutes before serving. - This helps the juices redistribute for a moist bite. For the full recipe, check the complete guide! - Ensure chicken is at room temperature before cooking. This helps it cook evenly. - Use a meat thermometer to check for doneness. The chicken should reach 165°F (75°C). These tips help you achieve juicy, tender chicken every time. Room temperature chicken cooks more evenly. A meat thermometer takes the guesswork out of cooking. It ensures your chicken thighs are safe to eat. - Serve with roasted vegetables or a fresh salad. This adds color and crunch to your meal. - Garnish with lemon wedges and additional herbs for a bright touch. The fresh herbs enhance the flavor and make the dish look pretty. Pairing garlic herb roasted chicken thighs with sides like roasted carrots or a crisp salad makes for a complete meal. The bright lemon adds a zesty finish. For the full experience, check out the Full Recipe for more tips! {{image_2}} You can switch up the herbs for new tastes. Try using basil or oregano instead of thyme and rosemary. Each herb brings its own flair to the dish. Basil offers a sweet, peppery taste. Oregano adds a warm, aromatic note. Feel free to mix and match! Grilling is a fun way to change the flavor. It gives the chicken a nice, smoky taste. You can also use an air fryer. It cooks the chicken quicker while keeping it juicy. The skin turns crispy, which makes it extra tasty. Both methods are easy and fun to try. Add vegetables to your baking dish for a full meal. Potatoes and carrots work great with the chicken. They soak up the juices and flavors, making them delicious. You can even add some bell peppers or onions for extra color and taste. This turns your dish into a feast! Try these variations to make your garlic herb roasted chicken thighs even better. For the complete recipe, check out the Full Recipe. Store leftover chicken thighs in an airtight container. Place them in the fridge. This keeps them fresh and safe to eat for up to four days. For best results, reheat your chicken in the oven. Preheat the oven to 350°F (175°C). Place the chicken on a baking sheet and cover it with foil. Heat for about 15-20 minutes. If you are short on time, you can use a microwave. Heat in short bursts to avoid overcooking. You can freeze cooked chicken thighs for up to three months. Wrap them tightly in plastic wrap or foil, then place them in a freezer bag. When ready to eat, thaw them in the fridge overnight before reheating. This keeps the meat juicy and flavorful. Enjoy this Garlic Herb Roasted Chicken Thighs with your favorite sides anytime! For the Full Recipe, check earlier in the article. - Bake for about 35-45 minutes. Check the internal temperature; it should reach 165°F (75°C). - Yes, you can. Boneless thighs may cook faster, so check them early. - Roasted vegetables, rice, or a fresh garden salad make great sides. - No, marinating is optional. However, marinating for a few hours can boost the flavor. If you want to try the full recipe, just look for Garlic Herb Roasted Chicken Thighs in the article. This blog post guides you in making garlic herb roasted chicken thighs. You learned about ingredients, step-by-step cooking, and serving suggestions. Don't forget the tips for storage and variations for flavor. Cooking can be simple and fun. With these steps, you can create a delicious meal easily. Enjoy your time in the kitchen, and share your tasty results with friends! Happy cooking!

Garlic Herb Roasted Chicken Thighs Savory Delight

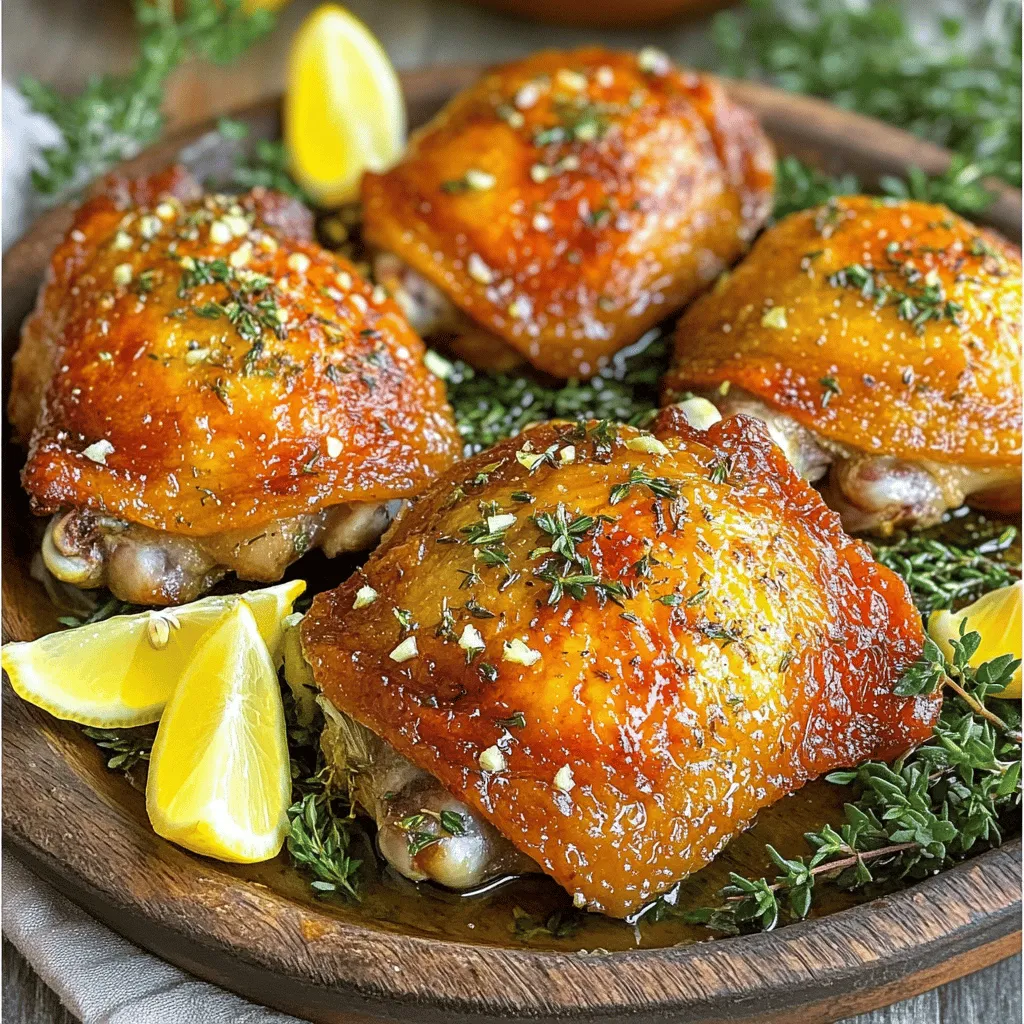
Are you ready for a mouthwatering treat? Garlic Herb Roasted Chicken Thighs offer a savory delight that transforms weeknight dinners
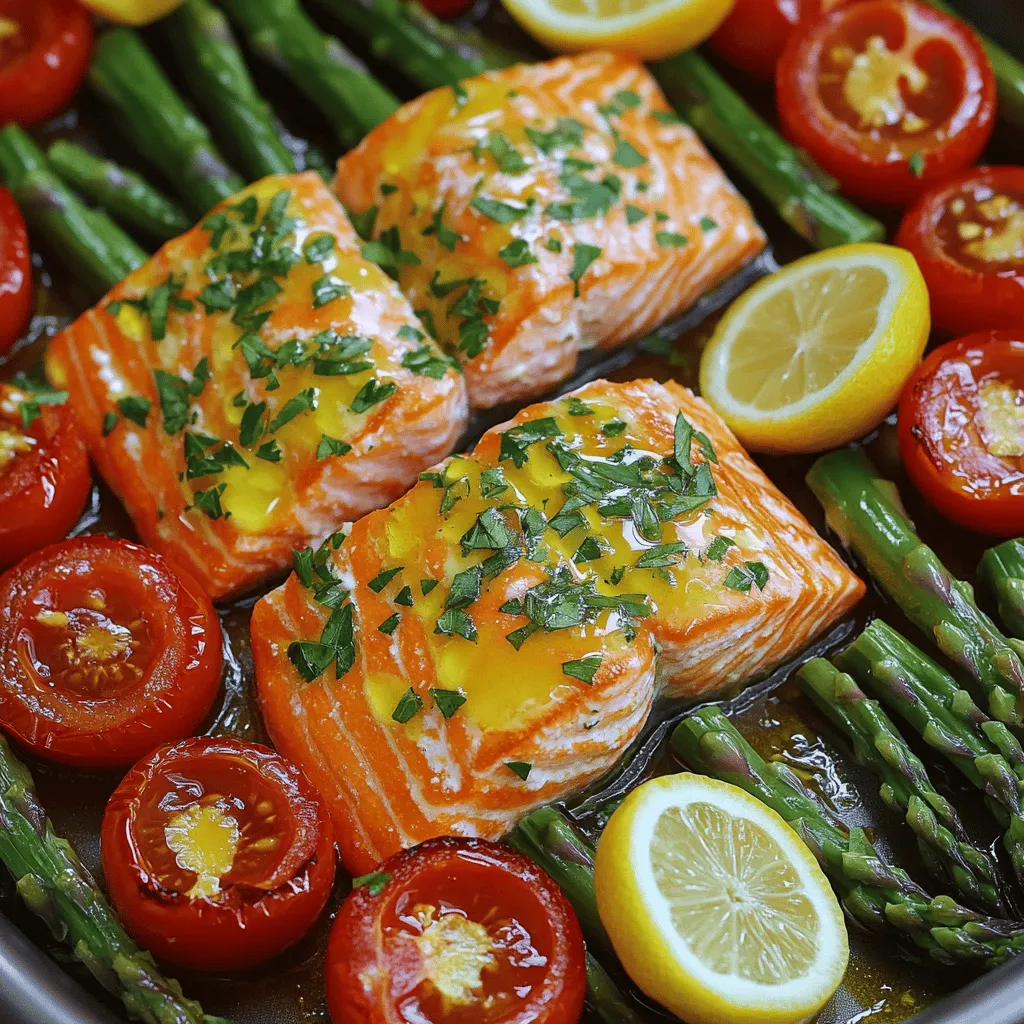
- 4 salmon fillets (6 ounces each) - 1/4 cup honey - 4 cloves garlic, minced - 2 tablespoons soy sauce Salmon is the star here. It’s rich in omega-3 fats and very tasty. Honey adds a sweet touch that balances with the garlic. Minced garlic gives a bold flavor. Soy sauce adds umami and saltiness. - 1 cup broccoli florets - 1 cup baby carrots, halved - Lemon wedges, for serving - Fresh parsley, for garnish (optional) Broccoli florets bring crunch and color. Halved baby carrots give a sweet taste. Lemon wedges add freshness when served. Fresh parsley can brighten the dish if you like. - 1 tablespoon fresh ginger, grated - 1 tablespoon olive oil - Salt and pepper to taste Grated ginger adds a warm spice that pairs well with honey. Olive oil keeps the salmon moist. A little salt and pepper is all you need for seasoning. For the full recipe, check out [Full Recipe]. Using these ingredients, you can create a meal that is both easy and delightful. 1. First, preheat your grill or oven to 375°F (190°C). This step is key to cooking your salmon evenly. 2. Next, take a small bowl and whisk together the honey, minced garlic, soy sauce, grated ginger, olive oil, salt, and pepper. Mix until well combined, and set this sauce aside. It will add a sweet and savory kick to your dish. 1. Now, cut four pieces of aluminum foil, about 12 inches long. Make sure they are big enough to hold the salmon and veggies. 2. Place a salmon fillet at the center of each piece of foil, skin side down. This helps the fish stay moist. 3. Surround each salmon fillet with equal portions of broccoli florets and halved baby carrots. The veggies add color and crunch to your meal. 4. Drizzle your honey garlic sauce generously over the salmon and vegetables. This will make everything taste amazing. 1. Fold the edges of the foil over the salmon and veggies to create a sealed packet. Ensure there are no openings for steam to escape. This keeps all the flavors locked in. 2. Place the foil packets directly on your grill or in the oven. Cook for about 15-20 minutes. The salmon should flake easily with a fork, and the veggies should be tender. 3. When time is up, carefully open the packets. Watch out for steam! Serve immediately, garnished with fresh parsley if you like, and lemon wedges on the side for a zesty touch. For the full recipe, check out the details above. Enjoy your delicious honey garlic salmon foil packets! How to tell when the salmon is done: You want the salmon to flake easily with a fork. When cooked, it turns a light pink. Use a thermometer; the inside should reach 145°F. This ensures it is safe to eat and not dry. Marinating tips for extra flavor: To boost taste, marinate the salmon for 30 minutes. Mix honey, garlic, soy sauce, ginger, and olive oil. Coat the salmon well, then let it sit. This gives the fish a deeper flavor. Avoiding leaks in the packets: To keep the packets leak-free, fold the sides tightly. Make sure there are no holes. This traps steam and flavor inside. Check the corners carefully; they can be tricky! Recommended grill vs. oven settings: For the best results, set your grill or oven to 375°F (190°C). Both methods work well. If using a grill, place packets directly on the grates. In the oven, use a baking sheet for easy transfer. Pairing sides with honey garlic salmon: Serve with steamed rice or quinoa for a filling meal. Roasted potatoes also work great. Add fresh salad for crunch. These sides balance the sweet and savory flavors of the salmon. Wine or beverage recommendations: A crisp white wine pairs nicely. Try Sauvignon Blanc or a light Pinot Grigio. For non-alcoholic options, lemonade or sparkling water with lime works well. These drinks enhance the dish's taste without overpowering it. {{image_2}} You can switch up the veggies in your honey garlic salmon foil packets. Broccoli and baby carrots are great, but why not try asparagus or bell peppers? Both add a nice crunch and flavor. You can also use seasonal vegetables. Think zucchini in summer or Brussels sprouts in fall. This keeps your meal fresh and exciting. To amp up the taste, add some spices or herbs. A pinch of red pepper flakes gives a nice kick. Fresh herbs like dill or cilantro can add brightness. You can also experiment with different marinades. Try a teriyaki or orange glaze instead of honey garlic. Each change can make a new dish. If you need gluten-free options, switch soy sauce for tamari. This keeps the flavor without gluten. For low-carb diets, skip the honey and use a sugar substitute. You can still enjoy a sweet taste without the carbs. These small changes let everyone enjoy this tasty meal. After enjoying your honey garlic salmon foil packets, store any leftovers in the fridge. Place them in an airtight container to keep them fresh. This way, they will stay tasty for up to three days. If you want to keep them longer, consider freezing them. Wrap each packet tightly in plastic wrap, then place them in a freezer bag. They can last up to three months in the freezer. When it is time to enjoy your leftovers, you can reheat them easily. The oven works best for reheating salmon. Preheat your oven to 350°F (175°C). Place the foil packet on a baking sheet and heat for about 10-15 minutes. If you prefer using the microwave, remove the salmon from the foil. Place it in a microwave-safe dish. Heat for 1-2 minutes or until warm. Be careful not to overheat, as this can dry out the salmon. To keep the flavor and texture, add a splash of water before reheating. You can keep your honey garlic salmon leftovers in the fridge for three days. In the freezer, they can last up to three months. Look for signs of spoilage such as a sour smell or discoloration. If you notice any of these signs, it is best to throw the leftovers away. Enjoy your meals, but always stay safe! Cooking salmon in foil is easy. Foil keeps the fish moist and tender. It locks in flavors and helps with even cooking. You can use a grill or an oven. Both methods work well. Using foil also makes clean-up simple. Just throw the foil away after. Plus, you can add veggies right in the packet. You get a full meal with no extra dishes. This method is perfect for busy nights. Yes, you can customize your foil packets! Feel free to mix in your favorite veggies. Asparagus, bell peppers, or zucchini work great. You can even add sliced onions or tomatoes for extra flavor. If you want more texture, try adding nuts or seeds. Chopped almonds or sesame seeds give a nice crunch. For a spicy kick, sprinkle red pepper flakes on top. The options are endless, and you can make it your own! When grilling salmon in foil, cook it for 15-20 minutes. The grill should be at 375°F (190°C). Check the salmon at 15 minutes. It should flake easily with a fork. If it’s not done, close the packet and grill a bit longer. Cooking times may change based on the thickness of your fillet. Always keep an eye on it to avoid overcooking. Enjoy your meal while it's fresh! This blog post covered how to make honey garlic salmon packets. We discussed main ingredients and steps, including salmon, honey, garlic, and vegetables. I shared tips for cooking and serving, plus variations to try. You can easily store and reheat leftovers too. In the end, cooking salmon in foil is simple and rewarding. It offers great flavor and easy cleanup. Enjoy trying different combinations to make this dish your own. Happy cooking!

Honey Garlic Salmon Foil Packets Easy and Tasty Meal

Looking for an easy and tasty meal? Honey Garlic Salmon Foil Packets are the answer! This dish is quick to

- 1 cup coconut milk (or almond milk) - 1/4 cup chia seeds - 2 tablespoons maple syrup (or honey) - 1 teaspoon vanilla extract - 1/2 cup mixed berries (strawberries, blueberries, raspberries) - A pinch of salt - Fresh mint leaves for garnish What are the health benefits of chia seeds? Chia seeds are packed with fiber, protein, and healthy fats. They help keep you full and support digestion. When you soak them, they expand, making them great for pudding. These tiny seeds also supply omega-3 fatty acids, which are good for your heart. What are the antioxidant properties of mixed berries? Mixed berries like strawberries, blueberries, and raspberries are full of antioxidants. Antioxidants fight free radicals in your body. This helps reduce inflammation and supports overall health. Plus, they add a burst of flavor that makes this pudding delightful. What is the nutritional breakdown of coconut milk vs. almond milk? Coconut milk is creamier and richer in flavor. It has more fat, which can keep you full longer. Almond milk is lighter and lower in calories. It has some vitamins and minerals but less fat. Both options work well, so pick what you like best for your pudding. You can find the full recipe to create this nutrient-rich dish at the end of this section. Start by grabbing a medium bowl. In this bowl, whisk together the coconut milk, chia seeds, maple syrup, vanilla extract, and a pinch of salt. Mix until everything blends well. Let the mixture sit for about 10 minutes. This allows the chia seeds to soak up some liquid. After 10 minutes, give it another good whisk. This step helps keep the chia seeds from clumping together. Now, cover the bowl and refrigerate it. Let it chill for at least 4 hours, or even overnight. This time allows the chia seeds to absorb all the liquid and thicken the pudding. Once it has set, take the pudding out of the fridge. Gently fold in your mixed berries. These berries add color and flavor. Finally, serve the pudding in individual cups or bowls. You can top it with extra berries and mint leaves for a fresh touch. For a fun and appealing look, serve the pudding in clear glasses. This way, everyone can see the beautiful layers of pudding and berries. You can also drizzle a little extra coconut milk on top. This adds richness and makes it look even better. If you want to impress your guests, this simple touch can elevate your dish! - Preventing clumping of chia seeds: After mixing your ingredients, let them sit for about 10 minutes. Then whisk it again. This step stops the seeds from clumping. If you skip this, you may end up with a lumpy pudding. - Ensuring proper thickness of pudding: The chia seeds need enough time to soak. If you don't let it sit long enough, the texture won't be right. Aim for at least 4 hours or overnight in the fridge for the best results. - Suggestions for flavor variations: You can add cocoa powder for a chocolate twist. Nut butters also work great for a creamy taste. Try almond or peanut butter for a rich flavor. - Textural enhancements: Adding granola or nuts can bring a nice crunch. This contrast makes each bite exciting. Consider topping your pudding with sliced almonds or a sprinkle of granola. - Optimal serving sizes: A serving of chia pudding is about half a cup. This size is filling and gives you a good mix of nutrients. - Customization for dietary preferences: This recipe is naturally vegan and gluten-free. You can use almond or coconut milk to suit your taste. Feel free to swap ingredients based on your needs. {{image_2}} You can easily mix up your berry chia pudding. Try a tropical version by adding mango or pineapple. The sweet, juicy fruit pairs well with the creamy texture. You can also make a chocolate berry chia pudding. Just mix in some cocoa powder. It adds a rich, decadent taste that chocolate lovers will enjoy. If you want to switch things up, you can use different milk. Oat or soy milk works great as a base. They both give a nice flavor and creaminess. You can also change the sweetener. Instead of maple syrup, try agave or stevia. These options can help cut down on sugar while keeping it sweet. Using seasonal fruits adds a fun twist. In summer, peaches are juicy and sweet. They make a lovely addition to your pudding. In fall, try adding chopped apples. They add a nice crunch and warmth to the dish. This way, you can enjoy berry chia pudding all year round. You can store berry chia pudding in the fridge for up to five days. Use a sealed container to keep it fresh. If you have extra pudding, you can freeze it. Pour it into an ice cube tray for easy portions. Just remember to thaw it overnight in the fridge when you want to eat it. Leftover chia pudding can be fun! You can blend it into smoothies for a creamy texture. It adds nutrition and flavor. Try mixing it into desserts like parfaits or yogurt bowls. You can also use it in breakfast dishes. Spread it on toast or mix it with oatmeal for a tasty twist. Labeling your containers is key. Write the date on each one so you know how long it's been stored. It helps avoid any guessing games about freshness. Use a simple marker or tape for clear notes. This way, you can enjoy your berry chia pudding at its best! Berry chia pudding stays fresh for about 5 days in the fridge. Store it in an airtight container. After this time, the texture may change, and it may not taste as good. Yes, you can use frozen berries! They are convenient and often cheaper. Frozen berries are picked at peak ripeness, so they still taste great. Just remember to thaw them first. This helps avoid extra liquid in your pudding. You can serve chia pudding in clear cups to show off its layers. Add fresh berries on top for color. A drizzle of extra coconut milk makes it look fancy. You can even add some granola for crunch. This gives great texture and flavor. Chia seeds are packed with nutrients. They have fiber, protein, and omega-3 fatty acids. These help with digestion and heart health. Adding them to your diet can be very beneficial. Aim for 1-2 tablespoons a day to enjoy their health benefits. To make your chia pudding thicker, adjust the chia seed-to-liquid ratio. Use more chia seeds or less liquid. A good starting point is 1/4 cup chia seeds to 1 cup of liquid. This will give you a nice, thick texture. Chia pudding is easy and fun to make. You learned about key ingredients like chia seeds and mixed berries. Each serves a great health purpose. I shared steps for preparing and serving the pudding. Plus, I offered tips to avoid mistakes and ideas for tasty variations. Remember, you can mix things up with flavors and seasonal fruits. Store your leftovers well and use them later. Enjoy creating your own chia pudding masterpiece, and feel free to experiment!

Berry Chia Pudding Rich in Nutrients and Flavor

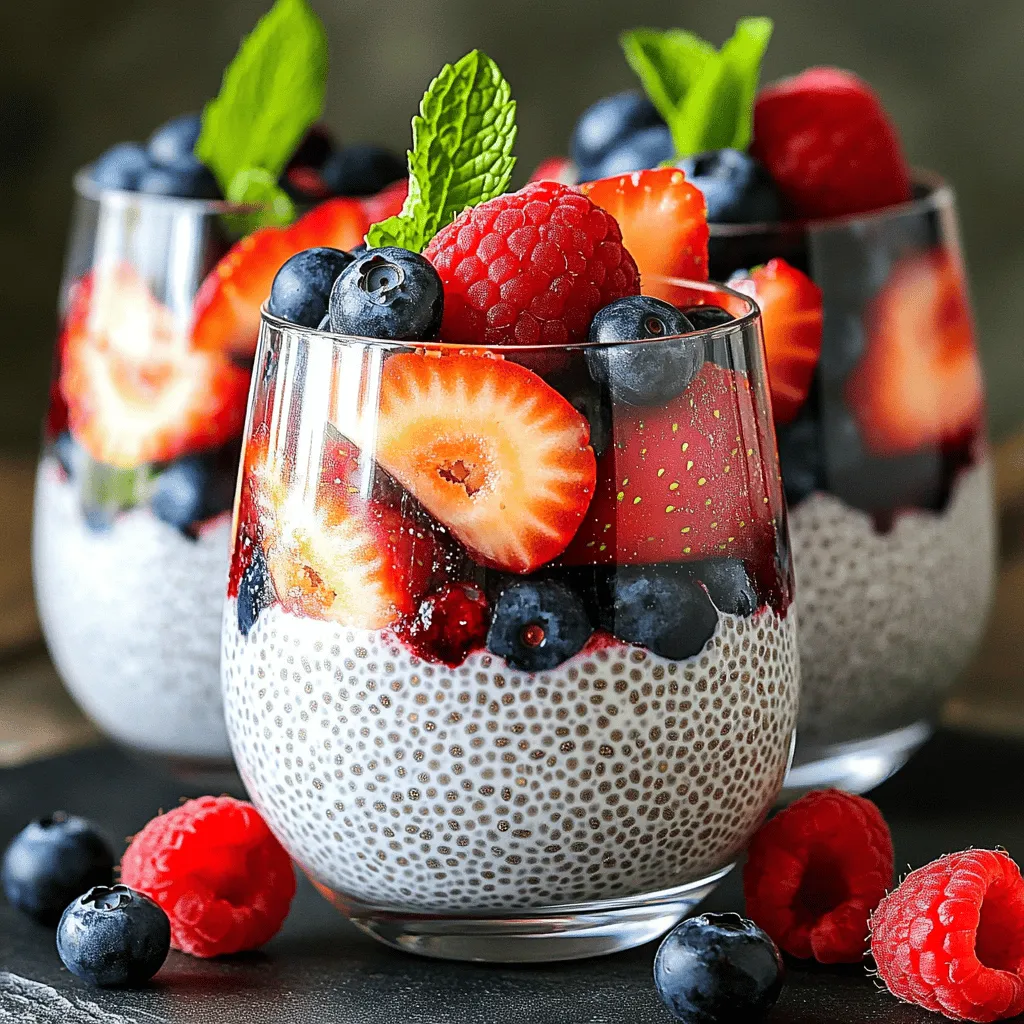
Are you ready to indulge in a treat that’s both delicious and packed with nutrients? Berry Chia Pudding is an

- 3 large eggs - 1 cup fresh spinach, chopped - 1/4 cup feta cheese, crumbled - 1 tablespoon olive oil I love starting with the main ingredients. They are simple yet packed with flavor. The eggs form the base and give the omelette its fluffy texture. Fresh spinach adds a nice pop of color and nutrients. Feta cheese gives that salty, creamy touch that pairs well with spinach. Olive oil is perfect for cooking, adding richness to the dish. - 1/4 cup cherry tomatoes, halved - 1 tablespoon milk (for creaminess) - Salt and pepper to taste - Fresh herbs (parsley or dill for garnish) Optional ingredients can elevate your omelette. Cherry tomatoes add sweetness and bursts of flavor. If you want creaminess, a touch of milk works wonders. Don’t forget salt and pepper; they bring out all the flavors. Fresh herbs, like parsley or dill, make a beautiful garnish and add freshness on top. For the full recipe, you can check out the detailed instructions above. 1. Start by cracking 3 large eggs into a medium bowl. 2. Add 1 tablespoon of milk for extra creaminess, if you like. 3. Whisk the eggs and milk together until they blend well. 4. Season with salt and pepper to taste. 1. Heat 1 tablespoon of olive oil in a non-stick skillet over medium heat. 2. Add 1 cup of chopped spinach to the skillet. Sauté the spinach for 1-2 minutes until it wilts. 3. If you want, add 1/4 cup of halved cherry tomatoes and cook for another minute. 4. Pour the egg mixture evenly over the spinach and tomatoes. Let it set for about 2 minutes without stirring. 1. Sprinkle 1/4 cup of crumbled feta cheese over one half of the omelette. 2. Use a spatula to carefully fold the other half over the filling. 3. Cook for another 1-2 minutes until the eggs are fully set but still moist. 4. Slide the omelette onto a plate. You can garnish it with fresh herbs if you want. For the full recipe, check the section above. - Use a non-stick skillet for easy flipping. This will help your omelette slide out smoothly. - Let the eggs set for the right texture. This means not stirring them too much at the start. - Add spices or herbs for additional flavor. A pinch of paprika or some fresh basil can make a big difference. - Experiment with different types of cheese. Try goat cheese or cheddar for a new twist on flavor. - Serve with toast or a side salad. The crunch of toast pairs well with the soft omelette. - Pair with a glass of fresh juice. Orange juice or a smoothie can brighten your meal. For the complete cooking process, check the Full Recipe. {{image_2}} You can easily switch out ingredients to fit your taste. If you don't have spinach, try using kale or arugula. Both greens add great flavor and nutrition. If you want a different cheese, goat cheese or cheddar works well too. Each choice brings a unique taste to your omelette. Want to add some crunch? Bell peppers or onions are perfect. Just chop them and toss them in while you sauté the spinach. For a creamy twist, mix in avocado. It adds a nice richness that complements the feta. For a vegan option, use chickpea flour instead of eggs. Just mix it with water to create a batter. If you're watching carbs, zucchini or cauliflower can be great substitutes. Grate them and add them to your egg mix. Each variation keeps the dish tasty and fun. Explore these ideas for your own Spinach Feta Omelette. If you want the full recipe, check out the detailed instructions above. To keep your omelette fresh, refrigerate any leftovers within 2 hours. This helps prevent bacteria growth. Use an airtight container to store it. This keeps the omelette soft and tasty for later. When it's time to enjoy your leftovers, reheat them in a skillet over low heat. This method warms them evenly without drying them out. If you need a quick option, you can microwave the omelette. Heat it for about 30 seconds, checking to avoid overcooking. You can freeze the unprepared egg mixture for future use. Just mix the eggs and other ingredients, then pour them into a freezer-safe container. Keep in mind that freezing may change the texture of the eggs when you cook them later. They might not be as fluffy, but they will still taste good. Yes, you can prepare some parts in advance. Here are a few tips: - Prep the Ingredients: Chop the spinach and slice the tomatoes the night before. Store them in the fridge in a sealed bag or container. - Whisk the Eggs: You can whisk the eggs and milk ahead of time. Keep the mixture in the fridge until you are ready to cook. - Cook and Store: If you cook the omelette, let it cool, then wrap it tightly. Store it in an airtight container in the fridge for up to two days. If you do not have feta cheese, there are great alternatives: - Goat Cheese: It has a similar tangy flavor and creamy texture. - Ricotta Cheese: This makes for a milder taste. It will add creaminess to your omelette. - Cheddar Cheese: For a different flavor, try sharp cheddar. It melts well and adds a nice kick. - Cottage Cheese: Use this for a low-fat option. It gives a nice texture without the strong flavor of feta. Cooking time is key for the perfect omelette. - Initial Cooking: Cook the omelette for about 2 minutes on medium heat. This allows the edges to set. - Folding: Once you add the feta, fold and cook for another 1-2 minutes. Aim for a soft but fully cooked center. - Check for Doneness: You want the eggs firm but not dry. Cook until they are just set for the best texture. For the full recipe, refer to the [Full Recipe]. This blog post covers how to make a delicious spinach feta omelette. You learned about key ingredients like eggs, spinach, and feta. I shared step-by-step cooking instructions, helpful tips, and tasty serving ideas. Personalize your omelette with different flavors or ingredients, and remember to store leftovers properly. Making this dish can be quick and simple, with many variations to explore. Enjoy experimenting in your kitchen for a satisfying meal that fits your taste!

Spinach Feta Omelette Tasty and Simple Recipe

Are you looking for a quick and healthy breakfast option? Try my Spinach Feta Omelette! This tasty recipe is simple

To make baked pesto chicken, gather these ingredients: - 4 boneless, skinless chicken breasts - 1 cup basil pesto (store-bought or homemade) - 1 cup cherry tomatoes, halved - 1 cup mozzarella cheese, shredded - ½ cup grated Parmesan cheese - 2 tablespoons olive oil - Salt and pepper to taste - Fresh basil leaves for garnish If you need to make swaps, here are some tips: - For chicken, you can use thighs instead of breasts. They stay juicy. - Use any pesto you love, like sun-dried tomato or spinach. - If you don’t have mozzarella, try provolone or gouda. - Cherry tomatoes can be replaced with diced bell peppers or zucchini. These tools will help you make this dish: - A large baking dish to hold your chicken and toppings. - A sharp knife for cutting the chicken and tomatoes. - A cutting board for easy prep. - Measuring cups for precise ingredient amounts. - A spoon for spreading the pesto nicely. For baking, choose a dish that fits your oven well. Glass or ceramic works great. These materials help with even cooking. If you want a crispy top, use a metal pan. It can give you that nice golden finish. Don't forget to check the size; it should not be too small! First, let’s prep the chicken and pesto. You need four boneless, skinless chicken breasts. Rinse them under cold water and pat them dry with paper towels. Season each side with salt and pepper. Next, grab your basil pesto. You can use store-bought or make your own. If you’re feeling adventurous, blending fresh basil, garlic, olive oil, and nuts creates a tasty homemade version. Now, let's preheat the oven to 400°F (200°C). This temperature ensures that your chicken cooks evenly and the cheese melts perfectly. Time to layer the ingredients in the baking dish. Start by drizzling two tablespoons of olive oil in the bottom of a large baking dish. Spread it evenly to help with cooking. Place the seasoned chicken breasts in the dish. Now, cover each breast with a generous layer of pesto. Scatter the halved cherry tomatoes around the chicken. This adds flavor and color to the dish. Next, sprinkle one cup of shredded mozzarella cheese and half a cup of grated Parmesan cheese over the chicken and tomatoes. This cheesy goodness is key to making the dish rich and tasty. Now, it's time to bake. Place the dish in the preheated oven and cook for 25-30 minutes. Make sure the chicken reaches an internal temperature of 165°F (75°C). This ensures it is safe to eat and juicy. Once the chicken is done baking, remove the dish from the oven. Let it cool for a few minutes. This resting time allows the juices to settle. Garnishing adds a nice touch. Top the baked pesto chicken with fresh basil leaves for a pop of color. For a great presentation, serve the chicken on a platter. Add extra cherry tomatoes and fresh basil around it. This makes the dish look vibrant and inviting. You can pair it with crispy garlic bread or a light salad for a complete meal. Enjoy your delicious creation! For the complete recipe, check out the Full Recipe section. To ensure juicy chicken, start with fresh chicken breasts. Pat them dry with a paper towel. Season them with salt and pepper before cooking. This simple step enhances flavor and keeps moisture in. For doneness, use a meat thermometer. Insert it into the thickest part of the chicken. The internal temperature should reach 165°F (75°C). This ensures the chicken is safe to eat and not dry. If you don’t have a thermometer, cut into the chicken. The juices should run clear, not pink. When it comes to pesto, you have choices. You can use homemade or store-bought pesto. Homemade pesto often has fresher flavors. If you opt for store-bought, find one made with high-quality ingredients. Adjusting the flavor intensity is easy. If you want a stronger taste, add more pesto. Combine it with olive oil and lemon juice for a fresh kick. You can also mix in nuts or cheese to enhance the flavor. Remember, you can find the full recipe linked above. Enjoy cooking! {{image_2}} You can easily switch up the proteins in this dish. Try turkey breasts for a leaner option. If you're plant-based, use tofu. Just make sure to press the tofu to remove excess water. This way, it absorbs the pesto flavor better. Adding vegetables can also change the dish. Bell peppers and zucchini add great color and taste. You can slice them and place them around the chicken. They will roast perfectly in the oven. Other tasty options include spinach, broccoli, or asparagus. Just add them alongside the chicken before baking. Don’t hesitate to change the cheeses for a new twist. Instead of mozzarella, try provolone or gouda. Each cheese brings a unique flavor. You can even mix cheeses for extra depth. Adding spices and herbs can create different flavor profiles. A pinch of red pepper flakes brings heat. You might also add garlic powder for richness. Fresh herbs like thyme or rosemary can elevate the dish's taste. Just sprinkle them on top before baking. For the full recipe, check out the detailed steps and tips to create your own version of this baked pesto chicken. To keep your baked pesto chicken fresh, store leftovers in an airtight container. Place it in the fridge within two hours of cooking. This chicken stays good for up to three days. If you want to keep it longer, freeze the chicken. Wrap each piece tightly in plastic wrap, then put it in a freezer bag. This way, it can last up to three months. Just label the bag with the date. To enjoy your leftovers, reheating is key. The oven is the best choice for keeping the chicken juicy. Preheat the oven to 350°F (175°C), and place the chicken in a baking dish. Cover it with foil to keep moisture in. Heat for about 20 minutes or until warm. If you use a microwave, place the chicken on a microwave-safe plate. Cover it with a damp paper towel and heat for 2-3 minutes. This method helps avoid dryness, but the chicken may not be as crispy. For the best taste, I suggest using the oven method. For the full recipe, feel free to check the earlier section! Can I use chicken thighs instead of breasts? Yes, you can use chicken thighs. They stay juicy and add rich flavor. Adjust the cooking time. Thighs may take a bit longer than breasts. Check for an internal temperature of 165°F (75°C). How long should I bake the chicken for? Bake the chicken for 25-30 minutes at 400°F (200°C). Always use a meat thermometer for safety. This ensures your chicken is cooked through and perfectly juicy. Is this dish healthy? Yes, baked pesto chicken is healthy. It is high in protein and contains good fats from the pesto. The cherry tomatoes add vitamins and antioxidants. Can I make it low-carb or keto-friendly? Yes, you can make it low-carb. Use less pesto or choose a low-carb pesto. Pair it with low-carb veggies like zucchini or cauliflower instead of pasta or bread. What to serve with baked pesto chicken? Serve baked pesto chicken with a side salad or garlic bread. Roasted vegetables are great, too. They add color and extra nutrients to your meal. Wine pairings and side dishes to complement the meal A light white wine, like Sauvignon Blanc, pairs well. You can also serve with a crisp green salad. This balances the rich flavors of the chicken and pesto. For sides, consider roasted asparagus or a quinoa salad for a fresh touch. For the complete recipe, check the Full Recipe. Baked pesto chicken is a simple dish with great flavor. We explored the key ingredients, tools, and steps needed for success. Remember, you can modify recipes with different proteins and veggies to suit your taste. Storing leftovers properly helps keep them fresh. When reheating, choose methods that retain texture and flavor. Enjoy this dish as a tasty main course or try the variations we discussed. Your cooking journey starts here, and I hope you make great meals ahead!

Baked Pesto Chicken Juicy and Flavorful Recipe

If you crave juicy, flavorful chicken, you need to try my Baked Pesto Chicken recipe! This simple dish is perfect

Older posts
Newer posts
← Previous Page1 … Page22 Page23 Page24 … Page79 Next →

dsad

© 2025 pureeatsnow • Built with GeneratePress

Our Policies

  • Copyright Policy
  • Cookie Policy
  • GDPR Policy
  • Privacy Policy
  • Disclaimer
  • Terms Of Use

More Information

  • Home
  • About
  • Contact
  • Appetizers
  • Dessert
  • Dinner
  • Drinks
©2025, pureeatsnow About Back To Top