Skip to content
DisclaimerTerms Of UseGDPR PolicyCookie Policy

pureeatsnow

  • Home
  • Drinks
  • Appetizers
  • Dinner
  • Dessert
  • About
  • Contact
  • Privacy Policy
DisclaimerTerms Of UseGDPR PolicyCookie Policy

Rachel

To make roasted cauliflower tacos, you need a few key items. Here’s what you’ll need: - 1 medium head of cauliflower, cut into florets - 2 tablespoons olive oil - 1 teaspoon smoked paprika - 1 teaspoon cumin - 1 teaspoon garlic powder - 1 teaspoon chili powder - Salt and pepper to taste - 8 small corn tortillas These ingredients create a delicious base for your tacos. The cauliflower gets crispy and flavorful when roasted. You can add toppings to make your tacos even better. Here are some great options: - 1 cup red cabbage, shredded - 1 ripe avocado, sliced - 1/4 cup fresh cilantro, chopped - Lime wedges for serving - Optional: hot sauce for added spice These toppings add color, texture, and taste. The avocado brings creaminess, while the cabbage adds crunch. Seasoning is key to tasty tacos. Here are the best choices: - Smoked paprika for a warm, smoky flavor - Cumin for earthy notes - Garlic powder for depth - Chili powder for a bit of heat - Salt and pepper to enhance all the flavors These seasonings work well together to make each bite burst with flavor. For the full recipe, you can check the complete instructions to bring your tacos to life! Start by cutting your cauliflower into small florets. This helps them cook evenly. Place the florets in a large bowl. Drizzle them with olive oil. Add smoked paprika, cumin, garlic powder, chili powder, salt, and pepper. Toss the florets well until they are fully coated. This mix adds a lot of flavor. Preheat your oven to 425°F (220°C). Line your baking sheet with parchment paper to prevent sticking. Spread the seasoned cauliflower on the sheet. Make sure they are in a single layer. This helps them roast nicely. Roast for 25-30 minutes. Stir them halfway through cooking. They should become golden brown and tender when done. While the cauliflower roasts, warm your corn tortillas. Use a dry skillet over medium heat. Heat each tortilla for about 30 seconds on each side. This makes them soft and easy to fold. Once the cauliflower is ready, it's time to build your tacos. Place a good amount of roasted cauliflower on each tortilla. Top them with shredded red cabbage, avocado slices, and fresh cilantro. Serve your tacos with lime wedges on the side. If you like heat, add some hot sauce. Enjoy this tasty meal! For more details, check the Full Recipe. To get the best flavor from your cauliflower, cut it into small florets. This helps them roast evenly. When you mix them with olive oil and spices, make sure every piece gets coated. Spread them out on the baking sheet. Crowding causes steaming, which makes them soggy. Roast at 425°F (220°C) for 25-30 minutes. Stir halfway through to get that nice golden color. Serve your tacos on a bright platter to make them pop. You can add a sprinkle of extra cilantro for color. A few lime wedges on the side offer a fresh squeeze of juice. If you want a crunch, shredded cabbage works well. Pair with a cold drink, like iced tea or a refreshing soda. Sauces can make your tacos even tastier. Try a simple lime crema made by mixing sour cream with lime juice. For spice lovers, a drizzle of hot sauce adds a kick. You can also use salsa for freshness. Feel free to experiment! Each sauce gives a new twist to the same taco base. For the full recipe, check out the detailed steps above. {{image_2}} You can easily make Roasted Cauliflower Tacos vegan. The base recipe is already plant-based. Simply use corn tortillas, which are often vegan-friendly. Skip the cheese or sour cream, and load up on fresh veggies. I love adding extra avocado or even a vegan crema for creaminess. You can use cashews blended with lime juice and garlic for a tasty sauce. If you want a change from corn tortillas, try flour or whole wheat tortillas. They add a different flavor and texture. You can also use lettuce wraps for a low-carb option. Just take large lettuce leaves and fill them with roasted cauliflower and toppings. It’s fresh and fun! Toppings make these tacos even better. You can add diced tomatoes, pickled onions, or even mango salsa. Each topping brings a new taste. I suggest mixing in different herbs like mint or basil to change it up. Hot sauce or a squeeze of lime can add a nice kick. Each bite can be a new adventure! For the full recipe, check out the recipe section above. To store your leftover roasted cauliflower tacos, place them in an airtight container. Keep them in the fridge for up to three days. Make sure to separate the tortillas from the filling. This keeps the tortillas from getting soggy. You can also store the roasted cauliflower on its own. It will stay fresh and tasty for the same time. When you’re ready to eat your leftovers, reheat them in a skillet. Heat the skillet over medium heat. Add the cauliflower and warm it for about five minutes. You can reheat the tortillas in the same skillet for a minute on each side. This will make them warm and soft again. If you prefer, you can use a microwave. Just make sure to cover the tacos with a damp paper towel. This helps keep them from drying out. If you want to save some tacos for later, freezing is a great option. Place the roasted cauliflower in a freezer-safe bag. Remove as much air as you can before sealing it. You can freeze the cauliflower for up to three months. When you’re ready to use it, thaw it overnight in the fridge. Reheat it as described above. Just remember, the tortillas do not freeze well. It’s best to use fresh tortillas when you’re ready to eat. For the best taste, make the tacos fresh after reheating the cauliflower. You can find the full recipe for roasted cauliflower tacos to prepare more whenever you want! Yes, you can prepare roasted cauliflower tacos ahead of time. Roast the cauliflower and store it in an airtight container. You can keep it in the fridge for up to three days. When ready to eat, warm the cauliflower in the oven. This keeps it crispy. If you want a change, you can use other veggies. Try roasted sweet potatoes or mushrooms. Zucchini or bell peppers also work well. Each veggie will give a new taste and texture to the tacos. Feel free to mix and match! Roasted cauliflower tacos have about 250 calories per serving. This includes the tortillas and toppings. The exact number may change based on the toppings you choose. You can make them lighter or richer based on what you add. For a full breakdown, check the Full Recipe. Roasted cauliflower tacos are tasty and easy to make. We covered main ingredients, optional toppings, and seasonings. You learned how to prep, roast, and assemble the tacos. I shared tips for perfect roasting and serving ideas. We explored vegan options and different tortillas too. Storage pointers help keep leftovers fresh. With all this, you can enjoy these tacos any time. Get creative with flavors and toppings for a fun meal. Enjoy making and sharing them!

Roasted Cauliflower Tacos Flavorful and Simple Meal

If you’re looking for a tasty and easy meal, you’ve come to the right place! Roasted Cauliflower Tacos are packed

- 4 boneless, skinless chicken thighs - 1/4 cup honey - 4 cloves garlic, minced - 2 tablespoons soy sauce (low sodium) - 1 tablespoon olive oil - 1 teaspoon ginger, freshly grated - Salt and pepper to taste The main ingredients for this dish are simple but full of flavor. I use boneless, skinless chicken thighs because they stay juicy and tender. The honey gives a sweet touch, while the garlic and soy sauce add depth. Olive oil helps the chicken cook evenly, and ginger brings a nice zing. - 1 tablespoon sesame seeds (optional for garnish) - 2 green onions, sliced (for garnish) - Steamed rice or vegetables (for serving) Garnishing adds a special touch. I like to sprinkle sesame seeds for crunch. Sliced green onions give a fresh taste. Serve the chicken over steamed rice or with mixed vegetables for a balanced meal. For the full recipe, check out the details above. First, make the marinade. In a medium bowl, whisk together the honey, minced garlic, soy sauce, olive oil, and grated ginger. This mix gives the chicken a sweet and savory flavor. Next, take your chicken thighs and place them in a large resealable bag or a shallow dish. Pour the marinade over the chicken. Make sure each piece is well coated. Seal the bag or cover the dish. Marinate the chicken in the fridge for at least 30 minutes. For more flavor, marinate up to 4 hours. Now, it’s time to bake. Preheat your oven to 400°F (200°C). Line a baking sheet with parchment paper. This helps with cleanup later. After marinating, remove the chicken from the marinade. Reserve any extra marinade for later. Place the chicken on the baking sheet in a single layer. Season with salt and pepper to taste. Bake the chicken for 20-25 minutes. It should be cooked through and reach an internal temperature of 165°F (75°C). While the chicken bakes, prepare the sauce. Pour the reserved marinade into a small saucepan. Bring it to a boil over medium heat. Then, reduce the heat and let it simmer until it thickens, about 5 minutes. Once the chicken is ready, drizzle the thickened sauce over the chicken thighs. For a nice touch, sprinkle sesame seeds and sliced green onions on top. Serve your honey garlic chicken warm over steamed rice or with your favorite vegetables. For the full recipe, check out the details above. To get the best flavor, marinate your chicken thighs for at least 30 minutes. If you have time, let them sit for up to 4 hours. This longer marination makes the chicken even tastier. Choose boneless, skinless chicken thighs for this recipe. They stay moist and absorb flavors well. You can use chicken breasts too, but they're leaner and may dry out faster. You can cook your honey garlic chicken in the oven or on the stovetop. I prefer baking because it cooks evenly. Preheat your oven to 400°F (200°C) for best results. For stovetop cooking, use a skillet over medium heat. No matter which method you choose, check that your chicken reaches an internal temperature of 165°F (75°C). This ensures it is safe to eat. If you want to adjust sweetness, add more honey for a sweeter taste. For saltiness, add a bit more soy sauce. You can also try using low-sodium soy sauce for a healthier option. I recommend serving honey garlic chicken with steamed rice or fresh vegetables. These sides balance the flavors and add color to your plate. For an extra touch, sprinkle sesame seeds and sliced green onions on top before serving. This gives your dish a nice crunch and beautiful look. For the full recipe, check out the detailed instructions provided earlier. {{image_2}} You can switch out ingredients in the honey garlic chicken recipe. For sweeteners, try maple syrup or agave instead of honey. Both add a unique twist without losing flavor. If you want a different protein, chicken breasts work well. Shrimp also makes a great choice and cooks quickly. To enhance flavors, add herbs and spices. Paprika brings a smoky taste, while red pepper flakes add heat. Both can elevate your dish. You can also include vegetables. Bell peppers, broccoli, or snap peas add crunch and color. Toss them in the marinade or bake them alongside the chicken for added flavor. You have options for cooking methods. Grilling gives the chicken a nice char and smoky flavor. Baking is easy and keeps the chicken juicy. If you prefer slow cooking, just put the marinated chicken in a slow cooker. Cook on low for about 6 hours. This method allows the flavors to deepen and makes the chicken tender. For the full recipe, check out the complete guide. To keep your honey garlic chicken fresh, follow these tips: - Refrigeration: Place leftovers in an airtight container. They stay good for 3 to 4 days. Make sure to cool the chicken before sealing it. - Freezing: You can freeze honey garlic chicken too. Wrap it tightly in plastic wrap, then in foil. This helps prevent freezer burn. It lasts up to 3 months. When ready to eat, thaw it in the fridge overnight. Reheating your honey garlic chicken properly keeps it tasty and juicy. Here are some methods: - Microwave: Place the chicken on a microwave-safe plate. Cover it with a damp paper towel to keep moisture. Heat for 1-2 minutes, checking often. - Stovetop: Heat a pan over medium heat. Add a splash of water or broth. Cook the chicken for 5-7 minutes, turning until warm. - Oven: Preheat your oven to 350°F (175°C). Place the chicken in a baking dish. Cover it with foil to keep it from drying out. Heat for about 15-20 minutes. By using these methods, you maintain both flavor and texture. Enjoy your delicious honey garlic chicken even after the first meal! I suggest marinating chicken for at least 30 minutes. This allows the flavors to soak in. For the best taste, marinate for up to 4 hours. Longer marination creates a more intense flavor. Just remember not to go overboard; too long can make the chicken too soft. Yes, you can use chicken breasts. They are leaner than thighs. This means they have less fat. However, they can dry out faster when cooked. Thighs tend to stay juicy and tender. If you use breasts, watch the cooking time closely. Honey garlic chicken goes well with many sides. Here are some great options: - Steamed rice - Roasted vegetables - Mashed potatoes - Salad with a light dressing Try to choose sides that balance the sweetness of the chicken. To check if chicken is cooked right, use a meat thermometer. The chicken should reach 165°F (75°C). This ensures it is safe to eat. You can also cut into the chicken. The juices should run clear, not pink. If you're unsure, cooking a little longer is safer. In this blog post, we dove into making simple honey garlic chicken. You learned about key ingredients like chicken thighs, honey, and garlic. The steps included marinating, baking, and adding garnishes. I shared tips for flavor, cooking methods, and variations. You also found storage info and FAQs for perfect results. Enjoy your cooking journey! With these instructions, you can make a tasty meal easily. Always remember, cooking is fun and rewarding. Happy eating!

Simple Honey Garlic Chicken Easy and Flavorful Recipe

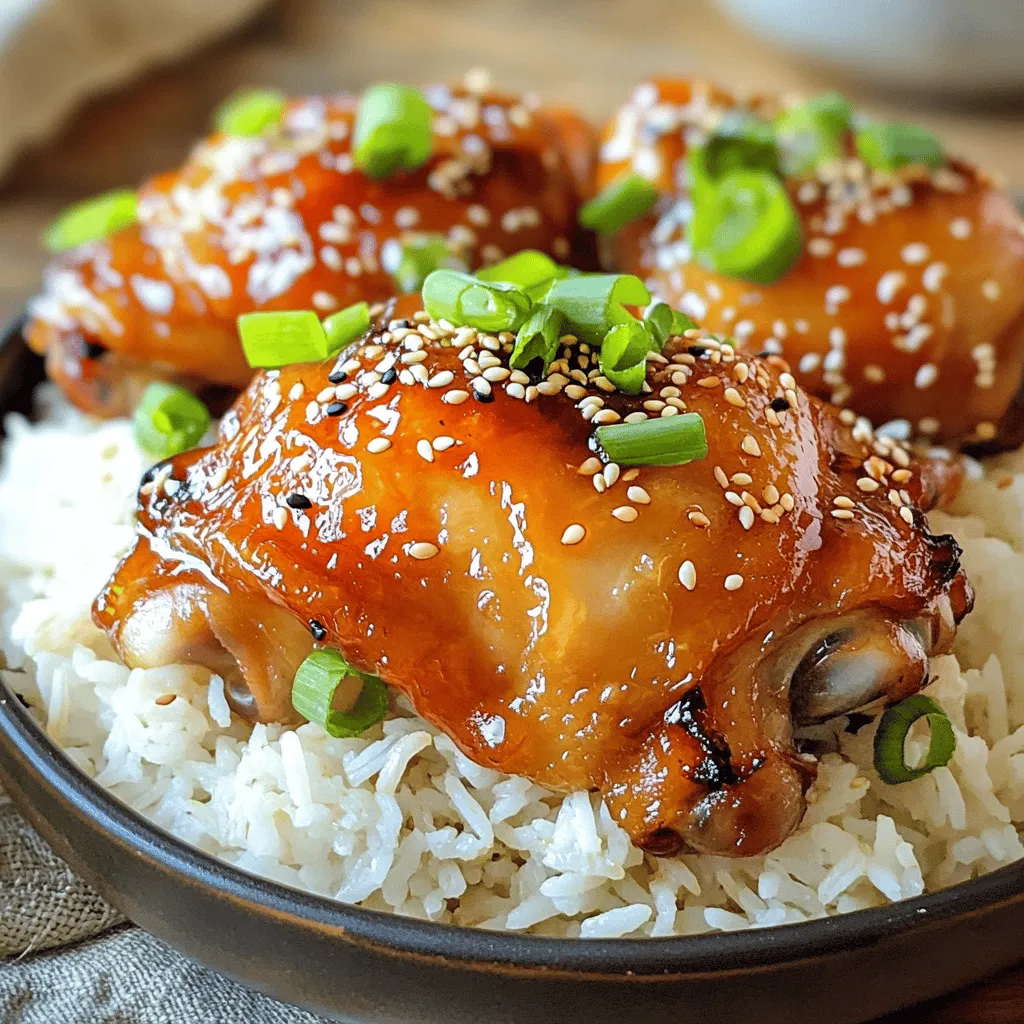
Looking for a quick dinner that bursts with flavor? You’ve found it! This Simple Honey Garlic Chicken recipe uses easy-to-find

To make these delightful lemon ricotta cheesecake bars, gather the following ingredients: - 1 ½ cups ricotta cheese - 1 cup cream cheese, softened - 1 cup granulated sugar - 3 large eggs - Zest of 2 large lemons - ⅓ cup freshly squeezed lemon juice - 1 teaspoon vanilla extract - ½ cup all-purpose flour - ½ teaspoon baking powder - A pinch of salt - 1 tablespoon butter (for greasing the pan) These simple ingredients come together to create a creamy, zesty treat. If you need alternatives, consider these: - Replace ricotta with cottage cheese for a lighter version. - Use Greek yogurt instead of cream cheese for a tangy twist. - If you want it sweeter, add a bit more sugar. - For a gluten-free option, swap all-purpose flour with almond flour or a gluten-free blend. These swaps can change the taste and texture, so choose based on your needs. Using high-quality ingredients makes a big difference. Fresh ricotta and cream cheese provide the best flavor. Fresh lemons give a bright, zesty taste that bottled juice can't match. When you pick quality, you ensure each bite is rich and flavorful. Good ingredients lead to a more enjoyable dessert. For the best results, don’t skimp on quality. Begin by gathering all your ingredients. Preheat your oven to 325°F (163°C). This is a key step; it helps the bars cook evenly. Grease a 9x9 inch baking pan with butter. Now, line it with parchment paper, leaving some paper hanging over the sides. This makes it easy to lift the bars out later. In a large bowl, add the ricotta cheese and cream cheese. Use an electric mixer to beat them together until smooth. This mix needs to be creamy for the best texture. Gradually add the granulated sugar. Keep mixing until the sugar blends in well. Next, add the eggs, one by one. Mix on low speed after each egg until just combined. Now, stir in the lemon zest, lemon juice, and vanilla extract. This adds a bright flavor to your bars. In another bowl, whisk together the flour, baking powder, and a pinch of salt. Gradually fold this dry mix into the wet mixture. Be careful not to over mix; this can make the bars tough. Pour the cheesecake batter into your prepared pan. Spread it evenly across the surface. Place it in the oven and bake for 35-40 minutes. The edges should be set, and the center should jiggle a bit. The top will turn lightly golden. Once baked, take it out of the oven. Let it cool in the pan for about 1 hour. After that, pop it into the fridge for at least 4 hours or overnight for the best taste and texture. When you are ready, lift the cheesecake out using the parchment paper. Cut into bars and enjoy this delightful treat! For the full recipe, refer to the ingredients section above. To get that creamy texture, make sure your ricotta and cream cheese are soft. I suggest leaving them out for about 30 minutes before you start. This helps them blend easily. When mixing, use a medium speed. Beat until the mixture is smooth and free of lumps. Do not over mix after adding the flour. This keeps your bars light and fluffy. One big mistake is using cold ingredients. Cold cheese won’t mix well, and your bars may turn out lumpy. Another mistake is baking too long. Overbaking dries out the bars. Look for the edges to set with a slight jiggle in the center. Always let your bars cool before cutting. This helps them hold their shape. To make your cheesecake bars look great, dust them with powdered sugar right before serving. This adds a nice touch and a bit of sweetness. You can also add a thin slice of lemon and a sprig of mint on top. These little details make your bars not just tasty but beautiful too. For the full recipe, refer to the recipe section above. {{image_2}} You can easily change the flavor of these Lemon Ricotta Cheesecake Bars. Try adding fresh berries like blueberries or raspberries. This gives a fruity twist. You can also mix in a bit of almond extract for a nutty flavor. Another fun option is to swirl in some chocolate or caramel before baking. Each change brings new taste and joy. If you need a gluten-free version, swap the all-purpose flour with almond flour or gluten-free flour mix. This keeps the bars tasty and light. For a dairy-free option, use dairy-free cream cheese and ricotta. They work well and maintain the creamy texture. These swaps ensure everyone can enjoy this treat. Change the lemon for other fruits to match the seasons! In summer, try strawberries or peaches for a refreshing taste. In fall, use pumpkin puree with spices for a cozy vibe. During winter, citrus like blood oranges can add a unique flair. These seasonal changes let you celebrate with flavors all year round. For the full recipe, you can refer to the [Full Recipe]. To keep your Lemon Ricotta Cheesecake Bars fresh, place them in an airtight container. Line the container with parchment paper for easy removal. Store them in the fridge for up to five days. This helps maintain their creamy texture and bright flavor. If you want to save some bars for later, freezing is a great option. First, cut the bars into pieces. Wrap each piece tightly with plastic wrap to prevent freezer burn. Then, place the wrapped bars in a freezer-safe container. They can last in the freezer for up to three months. When you're ready to enjoy your frozen bars, take them out of the freezer. Let them thaw in the fridge overnight. If you want to serve them warm, you can microwave each bar for about 10-15 seconds. This will give you a soft, delightful treat again. For the complete recipe, check the Full Recipe section! To make Lemon Ricotta Cheesecake Bars gluten-free, simply swap the all-purpose flour. Use almond flour or coconut flour instead. These options work well and keep the bars light. You may need to adjust the amount slightly. Almond flour is denser, so use less than the recipe calls for. Coconut flour is very absorbent, so use more liquid if you choose this. Yes, you can use other cheeses. Cream cheese works nicely on its own. Mascarpone is another great choice for smoothness. Both add a rich flavor but keep the texture creamy. If you want a lighter option, try cottage cheese. Blend it well to avoid lumps. Each cheese will change the taste, so choose what you like best! These cheesecake bars pair well with fresh fruits. Strawberries, blueberries, or raspberries make great choices. You can also add a dollop of whipped cream on top. A drizzle of honey or a berry sauce adds sweetness, too. For a crunchy touch, serve with crushed nuts or granola on the side. This adds texture and complements the creamy bars perfectly. You learned about the key ingredients, substitutes, and the importance of quality. We discussed easy steps for mixing, baking, and cooling your treats. I shared tips to help you avoid errors and make your dessert shine. You can also explore fun variations and proper storage methods for leftovers. Always remember, good cooking starts with the right ingredients and knowledge. Enjoy your baking journey and the tasty results!

Lemon Ricotta Cheesecake Bars Delightful and Easy Treat

If you crave a sweet treat that’s easy to make, I have just the recipe for you: Lemon Ricotta Cheesecake

- 4 plain rice cakes - 1 cup dark chocolate chips - 2 tablespoons coconut oil Plain rice cakes serve as a perfect base. They are light and crunchy. Dark chocolate chips bring rich flavor and sweetness. Coconut oil adds smoothness and helps chocolate melt well. - 1/4 cup almond butter - 1/4 cup chopped nuts (almonds, walnuts, or pecans) - 1/4 cup dried fruit (cranberries, raisins, or apricots) Almond butter gives a nutty taste and creamy texture. Chopped nuts add crunch and nutrition. Dried fruit offers sweetness and color. - Sea salt - Sprinkles or coconut flakes Sea salt enhances flavors and balances sweetness. Sprinkles or coconut flakes add fun and extra texture. For the full recipe, check the complete instructions. To melt chocolate chips and coconut oil, you will need a microwave-safe bowl. Start by adding one cup of dark chocolate chips and two tablespoons of coconut oil into the bowl. Heat them in the microwave in 30-second intervals. Stir the mix after each interval until it becomes smooth. This method helps prevent burning. You want a silky texture for easy drizzling. Next, lay out four plain rice cakes on a baking sheet. It’s best to use parchment paper for easy cleanup. Once the rice cakes are arranged, take about a tablespoon of almond butter. Spread it evenly over each rice cake. Make sure to cover as much surface as possible for a tasty bite. Now, it’s time to drizzle! Use a spoon to pour the melted chocolate over the almond butter in a fun zigzag pattern. This makes it look appealing and adds flavor. While the chocolate is still warm, sprinkle your choice of chopped nuts and dried fruit over the top. This adds crunch and sweetness. Finally, sprinkle a pinch of sea salt on each rice cake. This step enhances the sweetness and makes the flavors pop. Once you’re done, place the baking sheet in the fridge for 15-20 minutes. This allows the chocolate to set perfectly. For the full recipe, check out the section above. Enjoy your delicious snacks! You can switch almond butter for peanut butter. Peanut butter adds a rich, nutty taste. It also pairs well with chocolate. If you prefer a different flavor, try sunflower seed butter. This option is nut-free and still creamy. You can also change the type of chocolate. Use milk chocolate for a sweeter treat. White chocolate adds a fun twist with its creamy taste. Dark chocolate gives a richer flavor. Choose what you like best for your rice cakes. For special occasions, serve these snacks on a fancy plate. Add some colorful fruit or edible flowers for a pop of color. You can even stack the rice cakes for height. This looks great and makes them easy to grab. Garnish with a drizzle of extra chocolate. You can also sprinkle some chopped nuts on top. Another idea is to add a small bowl of extra almond butter for dipping. This makes the snack feel even more special. To store leftover snacks, keep them in an airtight container. This helps them stay fresh. Place parchment paper between layers to avoid sticking. You can store them in the fridge for up to a week. For the best containers, use glass or plastic with tight lids. These keep your rice cakes safe and tasty. Avoid metal containers, as they can change the flavor. Enjoy your snacks later without worry! {{image_2}} You can change the nut butter for fun. Try peanut butter or cashew butter. Each nut butter adds its own taste. You can also sprinkle in spices. A dash of cinnamon gives warmth. A pinch of cayenne adds a kick. These flavors make your rice cakes unique and tasty. Seasonal toppings keep your snacks fresh. In fall, use pumpkin seeds and dried figs. They bring a cozy vibe. For summer, think light and fruity. Fresh berries or mini marshmallows work well. These toppings make each season special and fun to eat. Looking for healthier options? Use low-sugar chocolate. It cuts back on sweetness but keeps the taste. Whole grain rice cakes are another great choice. They add fiber and nutrients. These swaps help you enjoy your snack while staying healthy. For the full recipe, check out the detailed instructions and enjoy making these delicious treats! Rice cake snacks are light and crunchy treats made from puffed rice. They come in many flavors but plain rice cakes are the most common base. Their mild taste makes them a great canvas for toppings. You can add sweet or savory spreads, making them fun for all ages. This flexibility is why they appeal to many snack lovers. You can enjoy them as a quick bite or a more fancy treat, like the chocolate drizzle rice cake snacks. Chocolate drizzle rice cake snacks stay fresh for about 5 to 7 days when stored correctly. Keep them in an airtight container to lock in their crunch. If you stack them, place parchment paper between layers to prevent sticking. Store them in a cool, dry place. Avoid leaving them out in warm areas, as the chocolate can melt and become messy. Yes, you can freeze chocolate drizzle rice cake snacks! To freeze, wrap each snack in plastic wrap. Place them in a freezer-safe bag or container. They can last for up to two months in the freezer. When ready to eat, take them out and let them thaw at room temperature. This method keeps the snacks fresh while preserving their flavors. You can find many brands making rice cake snacks with chocolate drizzle. Some top brands include: - Quaker: Known for its rice cakes, Quaker offers a chocolate drizzle flavor that many love. - Lundberg: This brand has organic rice cakes topped with chocolate. They focus on quality. - Rice Works: They make tasty rice cakes with a crunchy texture and a chocolate topping. These brands are popular for their great taste and quality ingredients. Buying chocolate drizzle rice cake snacks online is easy. Check these sites: - Amazon: A wide selection of rice cake snacks is available here. You can find different brands and flavors. - Walmart: Their website often has good deals on snacks, including rice cakes with chocolate drizzle. - Target: They offer both in-store and online options for purchasing snacks. Shopping online is convenient and often lets you compare prices. If you prefer shopping in person, many stores carry these snacks. Here are some good places to check: - Grocery Stores: Major grocery chains like Kroger and Safeway usually stock popular brands. - Health Food Stores: Stores like Whole Foods often have organic options and specialty brands. - Discount Stores: Places like Aldi or Lidl may offer rice cakes at a lower price. Finding chocolate drizzle rice cake snacks is simple, whether online or in-store. We've explored how to create delicious chocolate drizzle rice cake snacks. You learned about key ingredients, easy steps to make them, and helpful tips for prep and storage. Remember, you can customize these snacks to fit your taste and special occasions. Don't hesitate to experiment with flavors and toppings. Enjoy making these fun treats! They are a great blend of taste, texture, and health. Now, it’s time to gather your ingredients and start creating your own tasty masterpiece.

Chocolate Drizzle Rice Cake Snacks Simple and Tasty

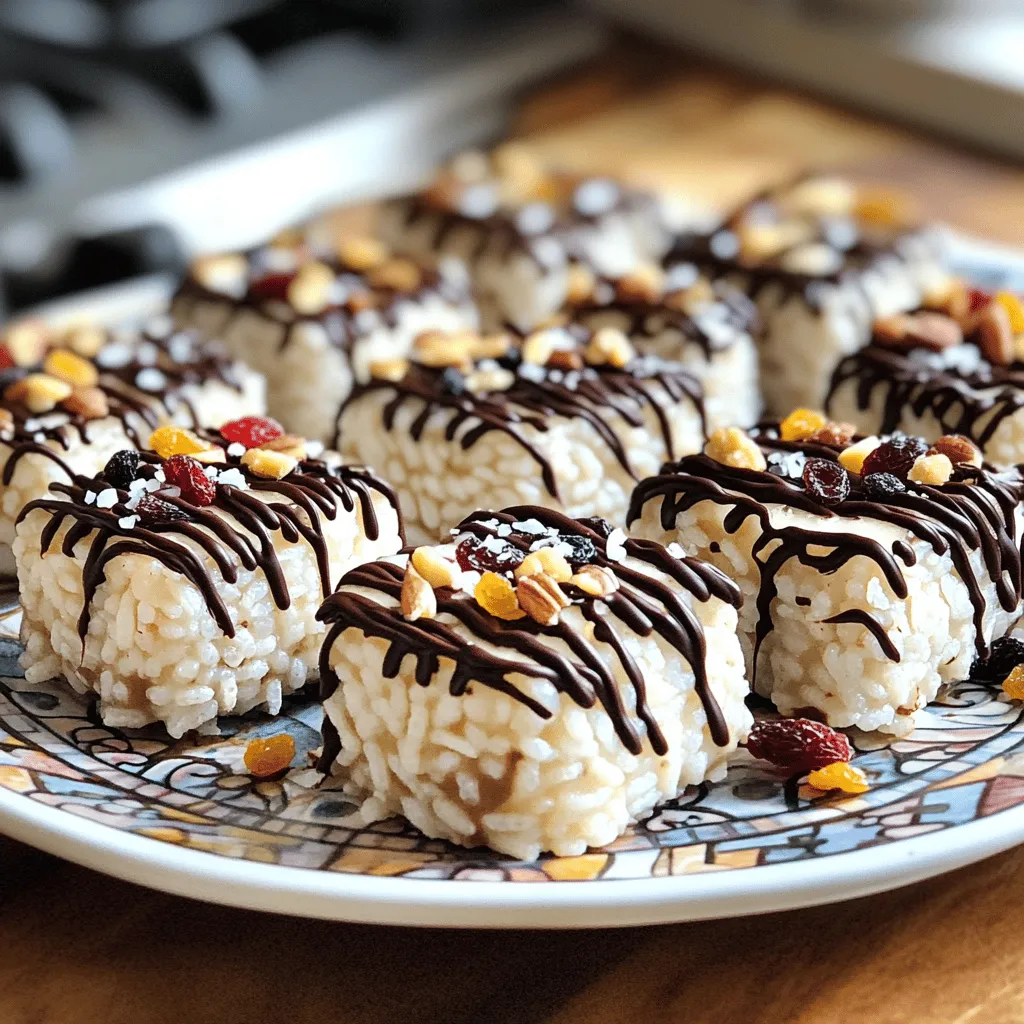
Are you looking for a quick and tasty snack? Chocolate drizzle rice cake snacks are a simple answer! With just

To make easy baked turkey meatballs, gather these key items: - 1 pound ground turkey - 1/2 cup breadcrumbs (preferably whole wheat) - 1/4 cup grated Parmesan cheese - 1/4 cup fresh parsley, chopped - 1 clove garlic, minced - 1 egg, beaten - 1 teaspoon onion powder - 1 teaspoon Italian seasoning - 1 teaspoon salt - 1/2 teaspoon black pepper - 1/2 cup marinara sauce (for serving) - Fresh basil leaves (for garnish) These ingredients give the meatballs their tasty flavor and great texture. Ground turkey is lean and healthy. The breadcrumbs help bind the meatballs together. Parmesan adds a nice salty touch. Fresh parsley and garlic bring bright flavors. You can swap some ingredients for a healthier twist. Use ground chicken instead of turkey for a lighter option. Try oats instead of breadcrumbs for more fiber. You can also use nutritional yeast instead of Parmesan for a dairy-free choice. Want to kick your meatballs up a notch? Consider adding: - Chopped spinach for extra nutrients - Diced bell peppers for crunch - Red pepper flakes for heat - Feta cheese for a tangy twist Adding these extras can change the flavor profile. It makes your meatballs even more exciting. Feel free to mix and match based on your taste. For the full recipe, check out the instructions above! To start, gather all your ingredients. You need ground turkey, breadcrumbs, Parmesan cheese, fresh parsley, garlic, egg, onion powder, Italian seasoning, salt, and black pepper. In a large bowl, mix the ground turkey with the breadcrumbs. Add in the grated Parmesan cheese and chopped parsley. Then, toss in the minced garlic, beaten egg, onion powder, Italian seasoning, salt, and pepper. Use your hands to mix everything well. This helps all the flavors blend together. Now it's time to shape your meatballs. Take a small amount of the mixture and roll it into a ball. Aim for about 1.5 inches in size, like a golf ball. This size cooks evenly and stays moist. Place each meatball on a baking sheet lined with parchment paper. Make sure there is space between each ball. This helps them cook well and not stick together. Preheat your oven to 400°F (200°C). Once ready, bake the meatballs for 20 to 25 minutes. Keep an eye on them until they turn golden brown. Use a meat thermometer to check. They should reach an internal temperature of 165°F (74°C). After baking, let the meatballs rest for five minutes. This helps keep them juicy. While they rest, warm up your marinara sauce. Serve the meatballs with the sauce and garnish with fresh basil leaves. You can find the full recipe above for more details. To keep your meatballs moist, use a few simple tricks. First, do not overmix your meat mixture. This can make them tough. Use your hands to gently mix. Second, add breadcrumbs and a beaten egg. These help keep moisture in the meatballs. Lastly, do not bake them too long. Check for an internal temperature of 165°F. This ensures they are cooked but still juicy. To enhance flavor, try adding fresh herbs. Fresh parsley adds brightness. You can also use basil or oregano. These herbs bring depth to your dish. Mixing in grated cheese, like Parmesan, adds richness. Onion powder and garlic give a savory kick. Don’t forget to season well with salt and pepper. This step is key for tasty meatballs. For a fun twist, add a splash of Worcestershire sauce. This gives the meatballs an umami boost. Baking is a great method for turkey meatballs, but avoid drying them out. One trick is to use parchment paper on the baking sheet. This prevents sticking and helps keep moisture in. Another tip is to bake them at a steady 400°F. This temperature cooks them evenly without losing moisture. If you find your meatballs are still dry, try adding a touch of water to the mix. This can help keep them juicy. For serving, warm marinara sauce can add extra moisture and flavor. Check out the Full Recipe for more details! {{image_2}} You can tweak your turkey meatballs to suit your taste. Add different herbs, like oregano or thyme, for unique flavors. You might try using ground chicken or beef instead of turkey. Mixing in chopped veggies, like spinach or bell peppers, adds nutrition and taste. For an extra kick, consider adding red pepper flakes or hot sauce to the mix. While marinara is a classic, many sauces can work well. Try BBQ sauce for a sweet and smoky flavor. A creamy garlic sauce can also pair nicely with turkey meatballs. Consider a sweet chili sauce for a zesty twist. You can even serve them with a tangy mustard sauce for a fun change. If you need gluten-free meatballs, substitute breadcrumbs with ground oats or almond flour. For low-carb options, use grated cauliflower instead of breadcrumbs. You can also skip the egg and use a flaxseed meal mix to bind the meatballs. These tweaks help you enjoy turkey meatballs while sticking to your diet. For the full recipe, check out Easy Baked Turkey Meatballs! After enjoying your meal, store leftover meatballs in an airtight container. Make sure to let them cool first. This keeps them fresh longer. Place a piece of parchment paper between layers to avoid sticking. They will last in the fridge for up to four days. If you want to keep them longer, consider freezing. To reheat, you have a few options. The oven is the best choice for keeping that nice texture. Preheat it to 350°F (175°C). Place the meatballs on a baking sheet and heat for 10-15 minutes. You can also use a microwave, but this may make them a bit soggy. If you choose the microwave, heat them in short bursts, checking often. Freezing meatballs makes meal prep easy. After they cool, place them in a freezer-safe bag. Squeeze out as much air as you can before sealing. You can freeze them for up to three months. When you're ready to eat, thaw them in the fridge overnight. Then, reheat as mentioned above. For a quick meal, try the Full Recipe and enjoy these tasty meatballs anytime. The cooking time for turkey meatballs is about 20-25 minutes. You should bake them at 400°F (200°C). Check them after 20 minutes. They should be golden brown and cooked all the way through. Yes, you can use ground turkey breast instead of regular ground turkey. Ground turkey breast has less fat. This choice makes your meatballs leaner. Just remember, leaner meat can be drier. You may need to add a bit more moisture, like an extra egg or some olive oil. To know when turkey meatballs are done, use a meat thermometer. The internal temperature should reach 165°F (74°C). If you don't have a thermometer, cut one open. The meat should be brown and not pink inside. They should feel firm to the touch and hold their shape well. For a full recipe, check out the details above! In this post, we explored how to make easy baked turkey meatballs. We covered key ingredients, substitutes, and ways to add flavor. You learned step-by-step instructions for mixing, forming, and baking meatballs. Tips helped ensure moisture and flavor, with options for different diets. Remember to store leftovers properly and reheat them carefully. Your homemade meatballs can be a tasty and healthy meal. Enjoy experimenting with flavors and variations to make them your own!

Easy Baked Turkey Meatballs Flavorful and Simple Recipe

Looking for an easy dinner that packs in flavor? You’ll love these Easy Baked Turkey Meatballs. This simple recipe uses

To make the Spicy Southwest Veggie Bowl, gather these ingredients: - 1 cup quinoa, rinsed and drained - 2 cups vegetable broth - 1 can black beans, drained and rinsed - 1 cup corn kernels (fresh or frozen) - 1 red bell pepper, diced - 1 jalapeño pepper, diced (seeds removed for less heat) - 1 avocado, diced - 1 teaspoon ground cumin - 1 teaspoon smoked paprika - 1 teaspoon chili powder - Salt and pepper to taste - 2 tablespoons olive oil - Juice of 1 lime - Fresh cilantro leaves for garnish This bowl is packed with nutrients. Each serving offers a good balance of protein, fiber, and healthy fats. Quinoa gives you complete protein, while black beans add more fiber and protein. Avocado provides healthy fats. Here’s a simple breakdown per serving: - Calories: 350 - Protein: 12g - Carbohydrates: 55g - Fiber: 15g - Fat: 12g This recipe is perfect for many diets. It is vegan since it contains no animal products. It is also gluten-free. Quinoa is a great grain choice for those avoiding gluten. Feel free to adjust toppings to fit your needs. You can add or swap veggies as you like. Enjoy the flavors while keeping it healthy! For the full recipe, check the instructions above. To start, rinse the quinoa under cool water. This removes any bitter taste. In a medium saucepan, combine 1 cup of quinoa and 2 cups of vegetable broth. Bring the mix to a boil over high heat. Once it boils, lower the heat to a gentle simmer. Cover the pot and let it cook for about 15 minutes. The quinoa will absorb the broth and become fluffy. After 15 minutes, take it off the heat and let it sit for 5 more minutes, still covered. This step helps it finish cooking perfectly. While the quinoa cooks, grab a large skillet. Heat 2 tablespoons of olive oil over medium heat. Once hot, add 1 diced red bell pepper and 1 diced jalapeño pepper (remove the seeds for less heat). Sauté these for about 5 minutes. You want them to soften but not brown. Next, stir in 1 cup of corn kernels and 1 can of black beans (drained and rinsed). Add 1 teaspoon of ground cumin, 1 teaspoon of smoked paprika, 1 teaspoon of chili powder, and salt and pepper to taste. Cook this mixture for another 5 minutes. This will blend all the flavors together. Now it’s time to put everything together. Fluff the cooked quinoa with a fork and transfer it to a large serving bowl. Layer the sautéed veggie mix over the quinoa. Top it off with 1 diced avocado and a squeeze of lime juice. For a finishing touch, garnish with fresh cilantro leaves. You can also add extra lime wedges on the side for those who want more zing. This colorful and tasty dish is now ready to enjoy! For the complete recipe, check the Full Recipe section. To cook quinoa perfectly, I always use a ratio of 1 cup of quinoa to 2 cups of vegetable broth. Rinse the quinoa well before cooking to remove any bitterness. Bring the broth to a boil, then lower the heat to simmer. Cover the pot and cook for about 15 minutes. After cooking, let it sit for 5 minutes. This step makes the quinoa fluffy. Fluff it with a fork before serving. This simple method ensures great texture every time. Spices can change the flavor of your Spicy Southwest Veggie Bowl. If you want more heat, add extra jalapeños or a pinch of cayenne pepper. For a smoky taste, use more smoked paprika. You can also try different herbs like oregano or thyme. Experiment with your favorite spices to find what you love best. Each change adds a new twist to your bowl. For sautéing, I heat olive oil in a large skillet first. Medium heat works well to avoid burning. Add the bell pepper and jalapeño, cooking them until soft. Stir often for even cooking. After that, mix in the corn and black beans with spices. This method keeps the veggies crisp and full of flavor. The goal is to get them tender but not mushy. Enjoy the bright colors and fresh taste in every bite. {{image_2}} To boost your Spicy Southwest Veggie Bowl, try adding protein. Tofu and tempeh work great. Tofu is soft and absorbs flavors well. Tempeh has a firm texture and nutty taste. - Tofu: Cut it into cubes and sauté it with the veggies. This adds creaminess and protein. - Tempeh: Crumble it and cook it with spices. It adds a hearty bite to your meal. Both options are healthy and make your bowl filling. You can also marinate them in lime juice for extra flavor. While quinoa is fantastic, other grains can add variety. Brown rice and farro are excellent choices. - Brown Rice: It is chewy and has a nutty flavor. Cook it in vegetable broth for added taste. - Farro: This ancient grain is hearty and nutritious. It takes a bit longer to cook but is worth it. These grains can change the texture and taste of your bowl. Mixing grains can also add fun colors and flavors. To make your bowl pop, try different salsas and dressings. They can elevate your meal. - Salsas: Fresh salsa or mango salsa can add sweetness and zest. You can also use corn salsa for a crunch. - Dressings: A lime vinaigrette or chipotle dressing can give it a spicy kick. Drizzle it over the top for a burst of flavor. Experiment with these to find your favorite combo. Each addition brings a new taste to the Spicy Southwest Veggie Bowl, making it more fun to eat. Enjoy exploring these variations! To store your Spicy Southwest Veggie Bowl leftovers, let them cool first. Use an airtight container. Place the leftovers in the container and seal it tight. Store in the fridge for up to three days. This dish keeps well and tastes great the next day. If you want to freeze your veggie bowl, portion it into smaller servings. Use freezer-safe containers or bags. Make sure to remove as much air as possible. You can freeze the leftovers for up to three months. Keep in mind that the texture of the avocado may change once thawed. When it's time to eat, take the bowl out of the fridge or freezer. If frozen, thaw it in the fridge overnight. To reheat, you can use a microwave. Heat on medium power for about two minutes, stirring halfway. You can also reheat it in a skillet on low heat. Add a splash of water to keep it moist. Enjoy your meal as if it was fresh! For the full recipe, check out the earlier section. You can use brown rice instead of quinoa. It has a similar texture. Another option is farro, which adds a nice chew. Couscous works well, too, if you want a quick cook time. Just remember to adjust the liquid based on the grain you choose. To pump up the heat, add more jalapeño. You can also toss in some diced serrano peppers. If you like it really hot, use a dash of cayenne pepper. A sprinkle of hot sauce before serving is another great way to spice it up. Absolutely! Use what you have on hand. Zucchini and mushrooms are great options. Spinach or kale can add a nice green touch. Just remember to keep the cooking time in mind so everything cooks evenly. Yes, you can prepare the quinoa and veggies ahead of time. Store them separately in airtight containers. When you’re ready to eat, just warm them up and assemble your bowl. This makes it a great meal prep option! Your Spicy Southwest Veggie Bowl can last in the fridge for up to four days. Be sure to check for freshness before eating. If you notice any off smells or changes in texture, it's best to discard it. Yes! This bowl is perfect for meal prep. You can make a big batch and portion it out. Just keep the avocado separate until serving to prevent browning. You can also add fresh lime juice to help keep it looking fresh. Yes, frozen vegetables work well in this recipe. They are convenient and can save you time. Just make sure to thaw and drain them to avoid excess water. This keeps your bowl from becoming soggy. Of course! Adding a sprinkle of cheese can enhance the flavor. Feta or cotija cheese are great choices to complement the spices. Just be mindful of the added calories if you are watching your intake. A light salad pairs nicely with this bowl. You can also serve it with tortilla chips for crunch. If you want something warm, roasted sweet potatoes make a good side. They add a nice sweetness that balances the spices. This blog post covered all you need for a tasty veggie bowl. We looked at key ingredients and their nutrition. You learned how to cook quinoa and sauté veggies. We shared tips for perfect cooking and spice choices. Plus, I gave you tasty variations and storage advice. Remember, cooking is fun and allows creativity. Enjoy making your own healthy meals!

Spicy Southwest Veggie Bowl Flavorful and Simple Meal

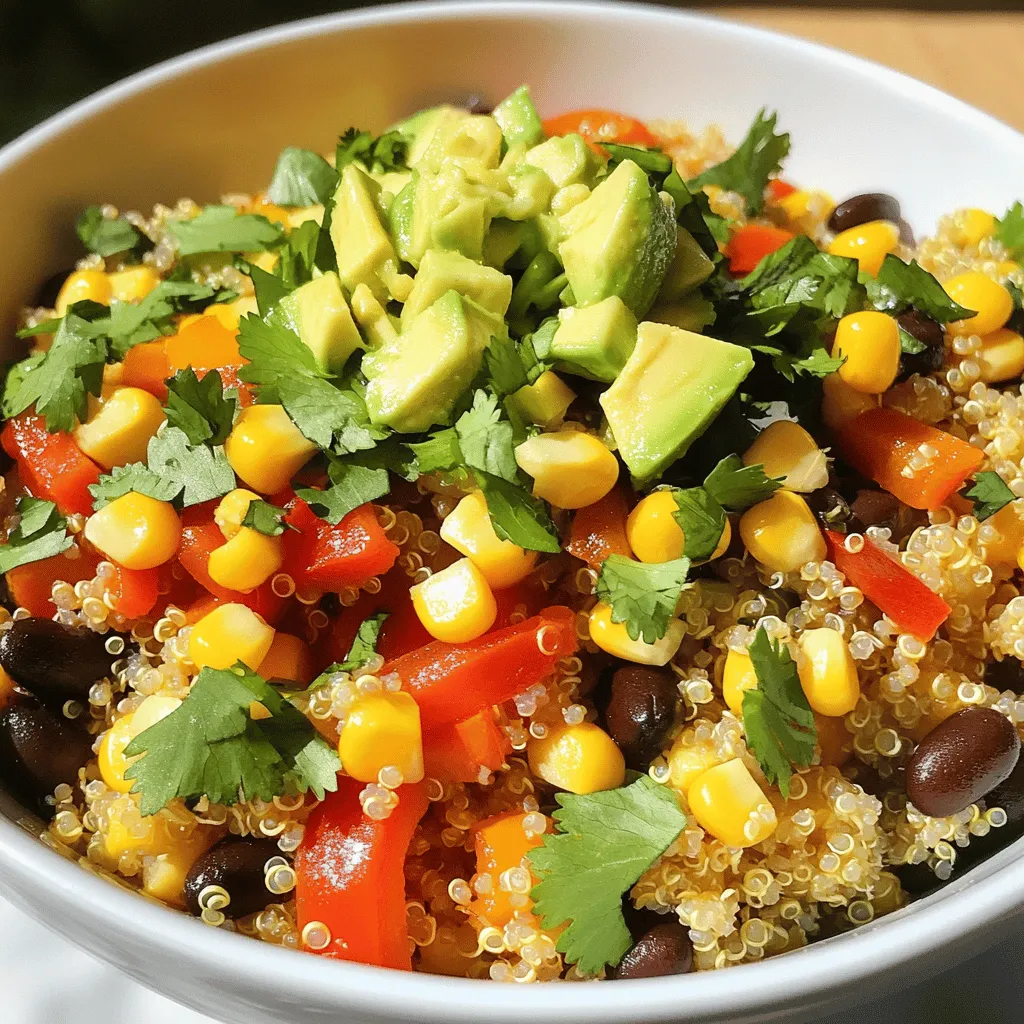
Looking for a quick, tasty dish that packs a punch? My Spicy Southwest Veggie Bowl is the perfect blend of

- 1 loaf of French or Italian bread - 4 tablespoons unsalted butter, softened - 3 cloves garlic, minced - 1 teaspoon dried parsley - 1 teaspoon Italian seasoning - 1 cup shredded mozzarella cheese - 1/2 cup grated Parmesan cheese - Salt and pepper to taste You can switch up the bread if you like. Sourdough or ciabatta also work well. Each offers a unique flavor and texture. For cheese, consider using cheddar or gouda. They add a nice twist to the taste. Always choose fresh garlic for the best flavor. Fresh garlic packs a punch compared to pre-minced options. When it comes to cheese, pick quality brands. The better the cheese, the richer the flavor in your garlic bread. For the full recipe, check out the Easy Cheesy Garlic Bread section. First, preheat your oven to 375°F (190°C). This step warms the oven, so the bread bakes evenly. While it heats, prepare a baking sheet. Line it with parchment paper for easy cleanup. Next, slice the loaf of bread in half lengthwise. Use a serrated knife for a clean cut. Make sure to expose the soft inside of the bread. This helps the garlic butter soak in and adds flavor. In a mixing bowl, combine the softened butter, minced garlic, dried parsley, Italian seasoning, salt, and pepper. Mix these ingredients until they blend well. This garlic butter spread is key to flavor. For even distribution, use a spatula to spread the garlic butter on the cut sides of the bread. Make sure every inch gets covered. This helps each bite be tasty and full of garlic goodness. Now, place the bread halves on the baking sheet, cut side up. Bake them in the preheated oven for about 12-15 minutes. You want the cheese to be bubbly and golden. For an extra crispy top, you can broil the bread for 2-3 minutes. Keep an eye on it, as it can burn quickly. This step adds a nice crunch and makes the bread even more delicious. Follow the [Full Recipe] for all the steps, and enjoy your Easy Cheesy Garlic Bread! To achieve a golden crust on your garlic bread, follow these steps: - Use the right oven temperature: Bake at 375°F (190°C). This heat will melt the cheese and toast the bread evenly. - Broil for a finish: After baking, broil the bread for 2-3 minutes. Stay close to watch for burning. To prevent sogginess, keep these tips in mind: - Use less butter: Spread just enough garlic butter to coat the bread lightly. - Choose the right bread: A crusty loaf, like French or Italian, helps resist sogginess. For a beautiful presentation, serve your garlic bread warm: - Garnish with fresh parsley: A sprinkle adds color and freshness. - Serve with sauce: A small bowl of marinara or pesto pairs well for dipping. Watch out for these common missteps in making garlic bread: - Too much butter: Using too much can lead to a greasy outcome. Stick to the recipe's amount. - Over-baking: Keep an eye on the time. Burning can happen fast, ruining your bread. By following these tips, you can make easy cheesy garlic bread that impresses every time. For the full recipe, check out the Easy Cheesy Garlic Bread recipe above! {{image_2}} You can boost the taste of your garlic bread easily. Adding fresh herbs, like basil or oregano, gives a nice touch. Just chop the herbs finely and mix them into your garlic butter. If you like spice, sprinkle red pepper flakes on top. This adds warmth and a little kick to the dish. Adjust the amount to your taste. You can play with cheese in this recipe. Try a blend of mozzarella, cheddar, and gouda for a rich flavor. Mixing cheeses adds depth and creaminess. For those who prefer plant-based options, vegan cheese works too. Look for a good melting vegan cheese to keep the gooey texture. Switching the bread can change your garlic bread game. Use gluten-free bread if you have dietary needs. It still tastes great with the garlic butter and cheese. If you have leftover bread, like stale baguette or ciabatta, use that too. Slice it up and enjoy a delicious garlic bread makeover. For even more ideas, check out the Full Recipe to explore all the tasty variations! To keep your garlic bread fresh, wrap it tightly in aluminum foil or plastic wrap. Place it in the fridge. This helps it stay soft and tasty. Garlic bread can last up to 3 days in the fridge. After that, it may start to dry out. If you want to freeze garlic bread, prepare it but don’t bake it. Wrap the unbaked bread in plastic wrap. Then, put it in a freezer bag. This way, it stays fresh for up to 3 months. When you’re ready to cook it, no need to thaw. Just bake from frozen at 375°F (190°C) for about 15-20 minutes. Check if the cheese is bubbly and golden. To reheat garlic bread, use the oven. Preheat it to 350°F (175°C). Place the bread on a baking sheet and heat for about 10 minutes. This helps keep the bread crispy. If you want it softer, cover it with foil. If you notice it’s still soggy, try letting it cool on a rack for a few minutes. This helps the steam escape. The best bread for garlic bread is French or Italian. These breads have a soft center and a sturdy crust. A crusty bread holds the garlic butter well. It gives a nice crunch when baked. Sourdough or ciabatta can also work. They add unique flavors and textures. Yes, you can make garlic bread ahead of time. Prepare the garlic butter mixture and spread it on the bread. Wrap the bread tightly in plastic wrap. Store it in the fridge for up to 24 hours. When ready to bake, take it out, sprinkle cheese, and bake as usual. Just remember to let it sit at room temperature for a few minutes before baking. To make garlic bread without butter, you can use olive oil. It adds a rich flavor while keeping it moist. You can also try vegan butter or a nut butter like almond. Just mix it with garlic and herbs. This way, you keep the essence of garlic bread. If your garlic bread is too soggy, you can fix it. First, bake it longer at a higher temperature. This helps the moisture evaporate. Next time, avoid adding too much butter or garlic. Use less of both to keep it dry. You can also try to toast the bread before adding the butter mix. This creates a barrier and keeps the bread crisp. This guide covers everything you need to make perfect garlic bread. We discussed the right ingredients, preparation steps, and baking tips. You learned many ways to customize your garlic bread, from using different cheeses to trying various breads. Proper storage and reheating methods help keep leftovers delicious. Keep these tips in mind, and you can avoid common mistakes. Now, you have the tools to impress everyone with your garlic bread skills! Enjoy your cooking journey and savor every bite.

Easy Cheesy Garlic Bread Flavorful and Simple Recipe

Are you ready to turn a simple loaf of bread into a tasty treat? My Easy Cheesy Garlic Bread recipe

To make your crispy air fryer Brussels sprouts, gather these simple ingredients: - 1 pound Brussels sprouts, trimmed and halved - 2 tablespoons olive oil - 1 teaspoon garlic powder - 1/2 teaspoon smoked paprika - 1/4 teaspoon black pepper - 1/2 teaspoon salt - 2 tablespoons balsamic glaze (optional for drizzling) - 1/4 cup shaved Parmesan cheese (optional for topping) You can swap ingredients to fit your taste. Here are some ideas: - Olive oil: Use avocado oil or melted coconut oil for a different flavor. - Garlic powder: Fresh minced garlic works well if you prefer fresh over dried. - Smoked paprika: Try regular paprika for a milder taste. - Balsamic glaze: Honey or maple syrup can add sweetness if you don’t have glaze. - Parmesan cheese: Nutritional yeast can work as a vegan option. Crispy air fryer Brussels sprouts are not only tasty but also healthy. Here’s a quick look at the nutrition you can expect per serving: - Calories: About 150 - Protein: 4g - Fat: 10g - Carbohydrates: 12g - Fiber: 4g This dish is rich in vitamins and minerals and fits well in many diets. Enjoy these tasty sprouts while knowing they are good for you! For the full recipe, check the instructions above. Start with fresh Brussels sprouts. Trim off the tough ends and cut each sprout in half. This helps them cook evenly. Place them in a large bowl. Add 2 tablespoons of olive oil to the bowl. Then, mix in 1 teaspoon of garlic powder, 1/2 teaspoon of smoked paprika, 1/4 teaspoon of black pepper, and 1/2 teaspoon of salt. Toss the sprouts well until they are coated. Preheat your air fryer to 375°F (190°C) for about 5 minutes. This step is key for crispiness. Next, place the seasoned Brussels sprouts in the air fryer basket. Make sure to arrange them in a single layer. If they are too crowded, they will not crisp up. Air fry the sprouts for 15-18 minutes. Shake the basket halfway through to ensure they cook evenly. When they are golden brown and crispy, they are ready. For the best results, avoid overcrowding the basket. This allows hot air to circulate and crisp each sprout. If needed, cook them in batches. Another tip is to make sure the sprouts are dry before adding oil. Wet Brussels sprouts can steam instead of crisp. Finally, if you like, drizzle balsamic glaze and sprinkle shaved Parmesan cheese on top after cooking. This adds flavor and makes them even more delightful. Enjoy your crispy air fryer Brussels sprouts! For more details, check out the Full Recipe. For crispy Brussels sprouts, I recommend cooking at 375°F (190°C). This temperature helps them cook through while getting that perfect crunch. The cooking time should be between 15 to 18 minutes. You should shake the basket halfway to ensure even cooking. If you like them extra crispy, you can add a few more minutes. Keep an eye on them to avoid burning. One common mistake is overcrowding the air fryer. This can lead to uneven cooking and soggy sprouts. Always place the Brussels sprouts in a single layer. Another mistake is not preheating your air fryer. Preheating helps start the cooking process right away, ensuring that they crisp up nicely. Lastly, don’t skip the oil. It’s key for achieving that crunchy texture. You can serve crispy Brussels sprouts as a side dish or a snack. Drizzle them with balsamic glaze for a sweet touch. For a savory kick, sprinkle shaved Parmesan cheese on top just after cooking. They also pair well with roasted meats or can be tossed into salads. Feel free to get creative with your sauces and toppings! {{image_2}} To make your Brussels sprouts even tastier, try adding spices or glazes. Here are some ideas: - Cayenne pepper for a spicy kick. - Lemon zest for a bright, fresh flavor. - Honey can add a sweet touch. - Soy sauce provides a savory umami boost. Combining these flavors can elevate your dish. Mix flavors to find your favorite blend. You can also drizzle balsamic glaze for a tangy finish. It adds a nice sweetness. If you want a different diet, you can still enjoy Brussels sprouts. Here are some ideas: - Vegan: Skip the Parmesan cheese. Use nutritional yeast for a cheesy flavor. - Gluten-free: All the ingredients are gluten-free. Just check labels for any sauces. - Low-carb: This dish is naturally low in carbs. Enjoy without worry! These options let everyone enjoy this dish. Adapt it to fit your needs and tastes. Brussels sprouts can be more than a side dish. Here are fun ways to serve them: - Add them to a salad with nuts and fruits. - Serve as a tasty appetizer. Use toothpicks for easy eating. - Toss them with pasta for a hearty meal. Get creative! Serve Brussels sprouts in a way that excites you. Each new idea brings out different flavors. Enjoy experimenting with this versatile veggie! To store leftover crispy Brussels sprouts, let them cool first. Place them in an airtight container. You can keep them in the fridge for up to three days. If you want to keep them longer, freezing is a great option. When you reheat Brussels sprouts, aim for crispiness. Preheat your air fryer to 350°F (175°C). Place the sprouts in the basket and reheat for about 5-7 minutes. This method brings back their crunch. You can also use an oven, but the air fryer works best. To freeze Brussels sprouts, follow these steps. First, blanch them in boiling water for 3 minutes. Then, cool them in ice water. Drain and dry them well. Next, place them in a single layer on a baking sheet and freeze until solid. Once frozen, transfer them to a freezer bag. They can last up to three months. When you’re ready to use them, simply air fry from frozen. For a full recipe, check out the Crispy Air Fryer Brussels Sprouts section. The best temperature to cook Brussels sprouts in an air fryer is 375°F (190°C). This heat helps the sprouts become crispy. Cooking at this temperature allows for even cooking without burning the outside. You should cook Brussels sprouts in an air fryer for about 15 to 18 minutes. Shake the basket halfway through. This ensures that all the sprouts get crispy and golden brown. Yes, you can make Crispy Air Fryer Brussels Sprouts in advance. Cook them and let them cool. Store in an airtight container in the fridge for up to three days. When ready to eat, just reheat in the air fryer for a few minutes. This keeps them crispy. You can use frozen Brussels sprouts, but fresh ones taste better. If using frozen, cook them a bit longer. Make sure to thaw and dry them before cooking for the best results. These Brussels sprouts pair well with many dishes. Try them with grilled chicken, steak, or fish. They also work great in salads or as a crunchy side with pasta. Brussels sprouts are done cooking when they are golden brown and crispy. You can also check with a fork. They should be tender inside but still have a nice crunch outside. Yes! Brussels sprouts are very healthy. They are low in calories and high in fiber. They also provide vitamins C and K. Air frying uses less oil than frying, making them a great choice for a healthy side dish. Crispy air fryer Brussels sprouts are simple to make and delicious. We covered the best ingredients, cooking steps, and helpful tips for flavor. Knowing how to store leftovers and reheat them will keep the taste fresh. Remember, you can add your own flavors and adjust the recipe to fit your needs. With practice, you’ll avoid common mistakes and create a perfect dish every time. Enjoy these tasty sprouts as a snack or side. The air fryer makes this healthy treat easy and fun!

Crispy Air Fryer Brussels Sprouts Delightful and Easy

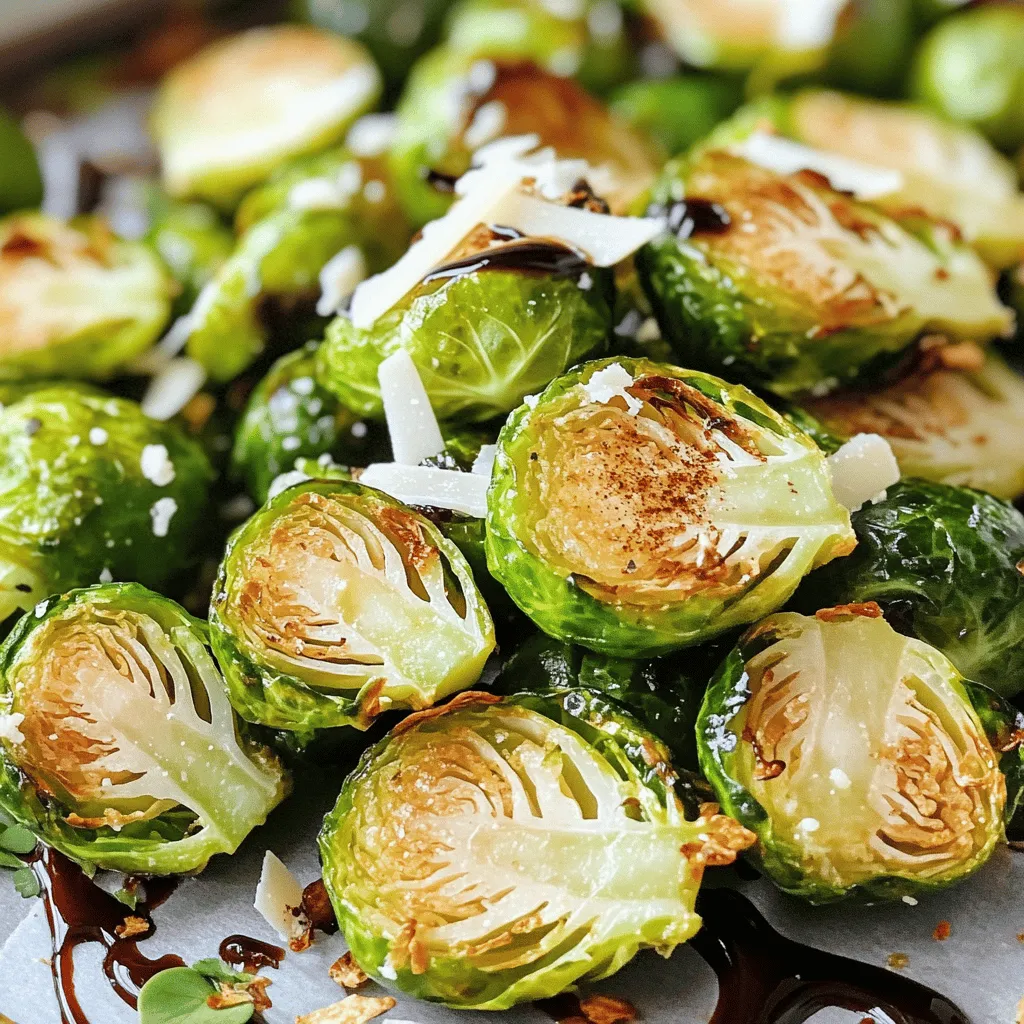
If you love bold flavors and crispy textures, you must try my Crispy Air Fryer Brussels Sprouts! These little green

- 2 medium sweet potatoes, peeled and diced - 1 can (15 oz) black beans, rinsed and drained - 1 can (15 oz) kidney beans, rinsed and drained - 1 can (14.5 oz) diced tomatoes (with juices) - 1 cup vegetable broth - 1 medium onion, chopped - 3 cloves garlic, minced - 1 bell pepper (any color), chopped - 1 tablespoon chili powder - 1 teaspoon cumin - 1 teaspoon smoked paprika - 1/2 teaspoon cayenne pepper (adjust to taste) - Salt and pepper to taste - 1 tablespoon olive oil - Fresh cilantro, for garnish Sweet potatoes are the star here. They give a nice, sweet flavor. Their texture also adds heartiness to the dish. Beans provide protein and fiber, making the chili filling. The canned tomatoes add a juicy base, while the vegetable broth keeps everything moist. For spices, I use chili powder for heat and cumin for warmth. Smoked paprika adds depth. Cayenne pepper gives that extra kick, but you can lower it if you prefer a milder taste. Salt and pepper enhance all the flavors. - Fresh cilantro - Lime wedges - Avocado slices Now, let’s talk garnishes. Fresh cilantro adds a burst of flavor. Lime wedges give a zesty touch that brightens the chili. Sliced avocado brings creaminess and healthy fats. You can mix and match these garnishes to make your bowl even better. Check out the Full Recipe for all the steps to create this delightful Vegan Sweet Potato Chili. Enjoy cooking! Cooking the Aromatics To start, heat one tablespoon of olive oil in a large pot over medium heat. Add one chopped onion and one chopped bell pepper. Cook these for about five minutes until they soften. Next, stir in three minced garlic cloves. Cook for one more minute until you smell the garlic's nice aroma. This step builds the flavor base for your chili. Adding the Sweet Potatoes Now, peel and dice two medium sweet potatoes. Toss them into the pot with the onions and peppers. Stir well to mix everything. Cook for about five to seven minutes. This helps the sweet potatoes soak in the flavors. After that, sprinkle in one tablespoon of chili powder, one teaspoon of cumin, one teaspoon of smoked paprika, and half a teaspoon of cayenne pepper. Mix well so the sweet potatoes get coated with those spices. Simmering the Chili Pour in one can of diced tomatoes with their juices and one cup of vegetable broth. Bring the mixture to a boil over high heat. Once it starts boiling, lower the heat to low and cover the pot. Let it simmer for twenty to twenty-five minutes. This gives the sweet potatoes time to become tender and flavorful. Adding Beans and Finalizing the Dish After simmering, it’s time to add the protein. Stir in one can of black beans and one can of kidney beans, both rinsed and drained. Let this simmer uncovered for another ten minutes to heat everything through. Taste the chili and adjust the seasoning if needed. Now, your Vegan Sweet Potato Chili is ready to enjoy. Serve it hot, topped with fresh cilantro for a nice touch. For the full recipe, check out the details above. Adjusting Spice Levels You can change the heat level in your chili. If you like it spicier, add more cayenne pepper. Start with 1/2 teaspoon and taste as you cook. For milder chili, skip the cayenne or use less. You can also add a bit of sugar to balance the heat. Achieving the Right Texture To get a thick and hearty chili, let it simmer until the sweet potatoes are soft. This makes the chili creamy. If you want it thicker, mash some sweet potatoes in the pot. If it is too thick, add vegetable broth to loosen it. Pairing with Sides Serve your chili with cornbread or tortilla chips. They add a nice crunch. You can also pair it with a simple salad for freshness. A dollop of vegan sour cream on top adds creaminess and flavor. Meal Prep Suggestions This chili is great for meal prep. Make a big batch and store it in the fridge. It keeps well for up to a week. You can also freeze it in portions. Just thaw and reheat when you want a quick meal. This makes weeknight dinners easy and delicious. For the complete recipe, check out the Full Recipe. {{image_2}} Using Different Beans You can switch the beans in this chili. Black beans and kidney beans are classic choices. Try using pinto beans or chickpeas for a new flavor. Each type of bean has its own texture and taste. This can change the feel of the chili. Mix and match based on what you love or have on hand. Adding Vegetables or Grains Feel free to add more vegetables. Corn, zucchini, or carrots all work well. They add color and extra nutrients. You can also mix in grains like quinoa or brown rice. This makes your chili heartier and more filling. Adding grains boosts your fiber intake too. Gluten-Free Options This chili is naturally gluten-free. All the ingredients are safe for those avoiding gluten. Check your vegetable broth to ensure it’s gluten-free. This way, you can enjoy the chili without worry. Low-Calorie Variants To lower the calories, reduce the amount of olive oil. You can also cut back on the sweet potatoes. Use more vegetables instead. This keeps the chili tasty while making it lighter. You can enjoy a big bowl without feeling guilty. For the full recipe, check out the [Full Recipe](#). Refrigeration Tips After cooking your chili, let it cool down first. Then, store it in an airtight container. It will stay fresh in the fridge for up to 4 days. Make sure to label it with the date. This way, you’ll know when to eat it. Freezing Guidelines For longer storage, freeze your chili. Use freezer-safe containers or bags. Leave some space in the container, as the chili will expand when frozen. It can last up to 3 months in the freezer. When ready to eat, just thaw it in the fridge overnight. Best Methods for Reheating The best way to reheat chili is on the stove. Pour it into a pot over medium heat. Stir often until it is hot. You can also use a microwave. Put it in a microwave-safe bowl. Heat in 1-minute intervals, stirring in between, until warm. Safety Tips Always check the temperature before eating. It should be at least 165°F. If it has been in the fridge for a few days, give it a good sniff. If it smells off, don’t eat it. Safety first! How spicy is this chili? The spice level of this chili can change. It usually has a mild to medium spice. If you want more heat, add more cayenne pepper. You can also use fresh jalapeños for a kick. Can I make this chili ahead of time? Yes, you can make this chili ahead. It tastes even better the next day. Just store it in the fridge for up to five days. What are the health benefits of sweet potatoes? Sweet potatoes are great for health. They are high in fiber, vitamins, and minerals. They can help with digestion and keep your skin healthy. Their bright color means they are full of antioxidants, too. How many calories are in Vegan Sweet Potato Chili? One serving of this chili has about 300 calories. This can vary based on the specific ingredients you use. It is a filling, low-calorie meal. Can I use canned sweet potatoes? You can use canned sweet potatoes if you want. Just drain and rinse them before adding. They will cook faster, so reduce the simmer time. What can be used instead of kidney beans? If you want to swap kidney beans, use black beans or pinto beans instead. They will still give your chili a tasty and hearty texture. This blog post covers how to make Vegan Sweet Potato Chili. We explored key ingredients, like sweet potatoes, beans, and spices. I shared step-by-step cooking instructions and tips to boost flavor. You learned some fun variations and how to store or reheat leftovers. Vegan Sweet Potato Chili is easy, tasty, and great for meal prep. Experiment with your flavors and enjoy every bowl!

Vegan Sweet Potato Chili Hearty and Flavorful Meal

Are you ready to warm your soul with a bowl of hearty Vegan Sweet Potato Chili? Packed with flavor, this

- Fresh corn details: Use 4 ears of fresh corn. The corn should be husked and clean. Fresh corn adds sweet taste and crunch to the dish. - Butter and spices: You will need 3 tablespoons of unsalted butter, melted. Add 4 cloves of minced garlic, 1/2 teaspoon of paprika, and 1/4 teaspoon of cayenne pepper for heat. Adjust the cayenne if you prefer less spice. Finish with salt and pepper to taste. - Garnishes: Use 1/2 cup of grated Parmesan cheese for that rich flavor. Top with 2 tablespoons of freshly chopped parsley for color. Serve with lemon wedges to squeeze over the corn, adding brightness to the taste. For the full recipe, check out the Garlic Parmesan Roasted Corn dish. 1. First, preheat your oven to 425°F (220°C). This step warms up your oven for the corn. 2. Next, mix the garlic butter. In a small bowl, combine the melted butter, minced garlic, paprika, and cayenne pepper. Add salt and pepper to taste. Stir until well mixed. This garlic butter gives the corn its rich flavor. 3. Husk the corn. Remove the green leaves and silk from the corn. Rinse the ears under cool water. Place the husked corn on a large baking sheet, ready for the garlic butter. 1. Brush the corn with the garlic butter mixture. Make sure to coat all sides. This ensures every bite has flavor. 2. Next, sprinkle the grated Parmesan cheese over the corn. Press the cheese lightly onto the corn so it sticks. This gives a tasty, cheesy crust. 3. Roast the corn in the preheated oven for 20-25 minutes. Turn the corn halfway through cooking. Look for tender corn with a golden brown color. This step makes it juicy and flavorful. For the full recipe, check out [Full Recipe]. Enjoy this easy and tasty Garlic Parmesan Roasted Corn! To get the best flavor from your corn, adjust your oven temperature. I recommend roasting at 425°F. This heat gives the corn a nice char while keeping it tender. If you want a deeper roast, you can go up to 450°F. Just watch it closely to avoid burning. Choosing the right corn is key. I prefer fresh corn on the cob. Look for ears that feel firm and have bright green husks. The kernels should be plump and milky when you pierce them. Avoid corn with dry or brown husks. Fresh corn makes a world of difference in taste. You can boost the flavor with a few optional ingredients. Adding cayenne pepper gives a nice kick. If you enjoy spicy food, this is a must-try. Just sprinkle it in with the garlic butter mix. You can also experiment with different cheeses. Try using feta or goat cheese for a tangy twist. Fresh herbs like thyme or basil can add a new layer of flavor as well. They bring freshness that pairs well with the garlic and cheese. For more tips and a complete guide, check out the Full Recipe. {{image_2}} You can easily change the flavor of Garlic Parmesan Roasted Corn. One fun option is to make a spicy garlic Parmesan variation. Just add more cayenne pepper to the butter mix. You can also use chili powder or even hot sauce. This will give your corn a nice kick. Another option is to create herb-infused corn. Add fresh herbs like thyme or rosemary to the garlic butter. You can also use dried herbs for a stronger flavor. This adds a fresh and earthy taste to the dish. Pair your Garlic Parmesan Roasted Corn with many dishes. It goes great with grilled chicken or fish. You can also serve it with a fresh salad for a light meal. The bright flavors will make any main dish shine. For presentation, arrange the roasted corn on a beautiful platter. You can garnish it with extra parsley for a pop of color. Serve lemon wedges on the side. This makes it easy for guests to squeeze lemon juice over the corn. It adds a zesty finish that brightens the dish. To keep your garlic Parmesan roasted corn fresh, store it in the fridge. Place it in an airtight container. This helps keep out air and moisture. You can also wrap the corn in plastic wrap. Make sure it is tightly sealed to avoid drying out. You can reheat your corn in two ways: oven or microwave. Oven Method: - Preheat your oven to 350°F (175°C). - Place the corn on a baking sheet. - Cover it loosely with foil to keep it moist. - Heat for about 10-15 minutes or until warm. Microwave Method: - Place the corn on a microwave-safe plate. - Cover it with a damp paper towel. - Heat for about 1-2 minutes. Check it to avoid overcooking. Both methods work well. Choose what fits your time and mood. Enjoy your leftovers just as much as the first time! How long does garlic Parmesan roasted corn last? Garlic Parmesan roasted corn stays good for three to five days in the fridge. Store it in an airtight container. If you want to keep it longer, freeze it. Frozen corn can last up to six months. Just thaw it before reheating. Can I make it on the grill? Yes, you can make garlic Parmesan roasted corn on the grill. It gives the corn a nice smoky flavor. Just brush the ears with the garlic butter mix and wrap them in foil. Grill them for about 15-20 minutes, turning often. What to serve with roasted corn? Roasted corn pairs well with many dishes. You can serve it with grilled meats, salads, or pasta. It also makes a great side for summer barbecues. Try it with lemony chicken or a fresh tomato salad for a tasty meal. For more details, check the Full Recipe. This blog covered how to make delicious garlic Parmesan roasted corn. You learned about the best fresh corn and spices, step-by-step prep, and roasting tips. I shared ways to enhance flavor and different serving ideas. Plus, I offered storage tips and answered common questions. As you cook, remember to experiment with flavors and find what you love. Enjoy this simple dish that brings joy and flavor to your meals!

Flavorful Garlic Parmesan Roasted Corn Side Dish

Are you ready to elevate your dinner game? This flavorful Garlic Parmesan Roasted Corn side dish is simple to make

Older posts
Newer posts
← Previous Page1 … Page25 Page26 Page27 … Page79 Next →

dsad

© 2025 pureeatsnow • Built with GeneratePress

Our Policies

  • Copyright Policy
  • Cookie Policy
  • GDPR Policy
  • Privacy Policy
  • Disclaimer
  • Terms Of Use

More Information

  • Home
  • About
  • Contact
  • Appetizers
  • Dessert
  • Dinner
  • Drinks
©2025, pureeatsnow About Back To Top