Skip to content
DisclaimerTerms Of UseGDPR PolicyCookie Policy

pureeatsnow

  • Home
  • Drinks
  • Appetizers
  • Dinner
  • Dessert
  • About
  • Contact
  • Privacy Policy
DisclaimerTerms Of UseGDPR PolicyCookie Policy

Rachel

- Fresh corn details: Use 4 ears of fresh corn. The corn should be husked and clean. Fresh corn adds sweet taste and crunch to the dish. - Butter and spices: You will need 3 tablespoons of unsalted butter, melted. Add 4 cloves of minced garlic, 1/2 teaspoon of paprika, and 1/4 teaspoon of cayenne pepper for heat. Adjust the cayenne if you prefer less spice. Finish with salt and pepper to taste. - Garnishes: Use 1/2 cup of grated Parmesan cheese for that rich flavor. Top with 2 tablespoons of freshly chopped parsley for color. Serve with lemon wedges to squeeze over the corn, adding brightness to the taste. For the full recipe, check out the Garlic Parmesan Roasted Corn dish. 1. First, preheat your oven to 425°F (220°C). This step warms up your oven for the corn. 2. Next, mix the garlic butter. In a small bowl, combine the melted butter, minced garlic, paprika, and cayenne pepper. Add salt and pepper to taste. Stir until well mixed. This garlic butter gives the corn its rich flavor. 3. Husk the corn. Remove the green leaves and silk from the corn. Rinse the ears under cool water. Place the husked corn on a large baking sheet, ready for the garlic butter. 1. Brush the corn with the garlic butter mixture. Make sure to coat all sides. This ensures every bite has flavor. 2. Next, sprinkle the grated Parmesan cheese over the corn. Press the cheese lightly onto the corn so it sticks. This gives a tasty, cheesy crust. 3. Roast the corn in the preheated oven for 20-25 minutes. Turn the corn halfway through cooking. Look for tender corn with a golden brown color. This step makes it juicy and flavorful. For the full recipe, check out [Full Recipe]. Enjoy this easy and tasty Garlic Parmesan Roasted Corn! To get the best flavor from your corn, adjust your oven temperature. I recommend roasting at 425°F. This heat gives the corn a nice char while keeping it tender. If you want a deeper roast, you can go up to 450°F. Just watch it closely to avoid burning. Choosing the right corn is key. I prefer fresh corn on the cob. Look for ears that feel firm and have bright green husks. The kernels should be plump and milky when you pierce them. Avoid corn with dry or brown husks. Fresh corn makes a world of difference in taste. You can boost the flavor with a few optional ingredients. Adding cayenne pepper gives a nice kick. If you enjoy spicy food, this is a must-try. Just sprinkle it in with the garlic butter mix. You can also experiment with different cheeses. Try using feta or goat cheese for a tangy twist. Fresh herbs like thyme or basil can add a new layer of flavor as well. They bring freshness that pairs well with the garlic and cheese. For more tips and a complete guide, check out the Full Recipe. {{image_2}} You can easily change the flavor of Garlic Parmesan Roasted Corn. One fun option is to make a spicy garlic Parmesan variation. Just add more cayenne pepper to the butter mix. You can also use chili powder or even hot sauce. This will give your corn a nice kick. Another option is to create herb-infused corn. Add fresh herbs like thyme or rosemary to the garlic butter. You can also use dried herbs for a stronger flavor. This adds a fresh and earthy taste to the dish. Pair your Garlic Parmesan Roasted Corn with many dishes. It goes great with grilled chicken or fish. You can also serve it with a fresh salad for a light meal. The bright flavors will make any main dish shine. For presentation, arrange the roasted corn on a beautiful platter. You can garnish it with extra parsley for a pop of color. Serve lemon wedges on the side. This makes it easy for guests to squeeze lemon juice over the corn. It adds a zesty finish that brightens the dish. To keep your garlic Parmesan roasted corn fresh, store it in the fridge. Place it in an airtight container. This helps keep out air and moisture. You can also wrap the corn in plastic wrap. Make sure it is tightly sealed to avoid drying out. You can reheat your corn in two ways: oven or microwave. Oven Method: - Preheat your oven to 350°F (175°C). - Place the corn on a baking sheet. - Cover it loosely with foil to keep it moist. - Heat for about 10-15 minutes or until warm. Microwave Method: - Place the corn on a microwave-safe plate. - Cover it with a damp paper towel. - Heat for about 1-2 minutes. Check it to avoid overcooking. Both methods work well. Choose what fits your time and mood. Enjoy your leftovers just as much as the first time! How long does garlic Parmesan roasted corn last? Garlic Parmesan roasted corn stays good for three to five days in the fridge. Store it in an airtight container. If you want to keep it longer, freeze it. Frozen corn can last up to six months. Just thaw it before reheating. Can I make it on the grill? Yes, you can make garlic Parmesan roasted corn on the grill. It gives the corn a nice smoky flavor. Just brush the ears with the garlic butter mix and wrap them in foil. Grill them for about 15-20 minutes, turning often. What to serve with roasted corn? Roasted corn pairs well with many dishes. You can serve it with grilled meats, salads, or pasta. It also makes a great side for summer barbecues. Try it with lemony chicken or a fresh tomato salad for a tasty meal. For more details, check the Full Recipe. This blog covered how to make delicious garlic Parmesan roasted corn. You learned about the best fresh corn and spices, step-by-step prep, and roasting tips. I shared ways to enhance flavor and different serving ideas. Plus, I offered storage tips and answered common questions. As you cook, remember to experiment with flavors and find what you love. Enjoy this simple dish that brings joy and flavor to your meals!

Flavorful Garlic Parmesan Roasted Corn Side Dish

Are you ready to elevate your dinner game? This flavorful Garlic Parmesan Roasted Corn side dish is simple to make

To make classic blueberry muffins, you need a few key ingredients. Here’s what you will need: - 1 ½ cups all-purpose flour - ½ cup granulated sugar - ½ teaspoon baking powder - ½ teaspoon baking soda - ¼ teaspoon salt - 1 large egg - ½ cup unsalted butter, melted and slightly cooled - 1 teaspoon vanilla extract - ½ cup buttermilk (or milk with 1 teaspoon vinegar added) - 1 ½ cups fresh or frozen blueberries These ingredients create a soft and fluffy muffin with bursts of juicy blueberries. The flour gives structure, while the sugar adds sweetness. If you lack a few ingredients, don’t worry! You can swap some items with alternatives. Try these options: - Substitute all-purpose flour with whole wheat flour for a nutty taste. - Use brown sugar instead of granulated sugar for a deeper flavor. - Replace buttermilk with plain yogurt or milk and a splash of lemon juice. - For a dairy-free option, use almond or oat milk in place of buttermilk. These alternatives let you customize your muffins without losing taste or texture. Choosing the right blueberries can make a big difference. Here are some tips: - Look for firm, plump berries that have a deep blue color. - Avoid berries that are mushy or have green spots, as they are not ripe. - If using frozen blueberries, choose ones without added sugar. - Rinse fresh blueberries gently and dry them before adding to your batter. Using high-quality blueberries ensures a fresh and vibrant flavor in your muffins. For the full recipe, check out the details above. Start by gathering all your ingredients. You will need flour, sugar, baking powder, baking soda, salt, an egg, melted butter, vanilla extract, buttermilk, and blueberries. Preheat your oven to 375°F (190°C). Line your muffin pan with paper liners or spray it with non-stick cooking spray. In a medium bowl, whisk the flour, sugar, baking powder, baking soda, and salt together. Make sure it is well mixed. In another bowl, beat the egg. Then, add the melted butter, vanilla extract, and buttermilk. Stir until smooth. Next, pour the wet mix into the dry mix. Gently stir until just combined. It’s okay if there are a few lumps; do not overmix. Now, fold in the blueberries. Be gentle to keep them intact. Spoon the batter into your muffin cups. Fill each one about ¾ full. Bake the muffins in your preheated oven for 18-20 minutes. Check doneness by inserting a toothpick into the center. It should come out clean. Once baked, take them out of the oven. Let them cool in the pan for 5 minutes. After that, move the muffins to a wire rack to cool completely. To make perfect blueberry muffins, follow these tips: - Use fresh or frozen blueberries. If using frozen, do not thaw them. - Measure your flour correctly. Too much flour can make muffins dense. - Do not overmix the batter. This keeps your muffins light and fluffy. - Bake muffins on the center rack for even cooking. You can find the full recipe and more tips for success in the [Full Recipe]. Enjoy your delightful, homemade blueberry muffins! Many home cooks make a few simple mistakes. One big mistake is overmixing the batter. This can lead to tough muffins. Mix just until the dry and wet ingredients come together. Another mistake is not measuring flour correctly. Too much flour can make muffins dry. Use a spoon to fill your measuring cup, then level it off with a knife. Lastly, avoid baking muffins with old baking powder or baking soda. Always check the expiration date for best results. To keep your muffins moist, use buttermilk. It adds tang and keeps the texture soft. If you can't find buttermilk, mix milk with vinegar. Let it sit for five minutes before using. Also, do not overbake your muffins. Check for doneness at 18 minutes. A toothpick should come out clean but not dry. Letting them cool in the pan for a few minutes helps keep moisture in too. Mixing the batter properly is key to great muffins. Start by whisking the dry ingredients well. This ensures even flavor and rise. When you add the wet ingredients, fold them in gently. Use a spatula to bring the batter together without overmixing. A few lumps are fine. Finally, when adding blueberries, fold them in gently. This keeps them from breaking and adds beautiful bursts of flavor. For the full recipe, refer to the earlier section. {{image_2}} You can switch up the classic blueberry muffin recipe by using other fruits. Raspberries, strawberries, or blackberries work great. You can also try chopped peaches or apples. Each fruit gives a unique taste and texture. Just remember to use a similar amount as the blueberries. This keeps the muffins moist and sweet. Adding lemon zest makes your muffins fresh and bright. A teaspoon of lemon zest enhances the flavor without being too strong. You can also add spices like cinnamon or nutmeg for warmth. A pinch of ginger gives a nice kick. These flavors blend well with the fruit and create a delightful muffin. Muffins can be made in different sizes for fun. Mini muffins are perfect for snacks or parties. They bake for about 10-12 minutes. Jumbo muffins are great for a big breakfast treat. Just bake them for 25-30 minutes. No matter the size, the taste remains delicious. You can follow the Full Recipe for exact baking times and tips. To keep your muffins fresh, store them in an airtight container. This helps lock in moisture and keeps them soft. Place a paper towel at the bottom of the container. This will absorb any extra moisture. Store at room temperature for up to three days. If you want to keep them longer, consider freezing. Freezing blueberry muffins is easy! First, let the muffins cool completely. Then, wrap each muffin tightly in plastic wrap. Place the wrapped muffins in a freezer bag or airtight container. Label the bag with the date. You can freeze them for up to three months. This way, you can enjoy them anytime! To reheat muffins, you have a few options. For a quick method, use the microwave. Wrap a muffin in a damp paper towel and heat for about 15-20 seconds. This keeps it moist. If you prefer a crispier texture, use the oven. Preheat it to 350°F (175°C). Place the muffin on a baking sheet for about 5-10 minutes. This restores that fresh-baked taste. Enjoy your muffins warm! Yes, you can use frozen blueberries in this recipe. Just make sure not to thaw them before adding to the batter. Frozen blueberries work well and can add a nice pop of color. They may make the batter a little cooler, so bake your muffins for a couple of extra minutes. This helps them stay moist and fluffy. To make gluten-free blueberry muffins, swap the all-purpose flour for a gluten-free blend. Many blends work well, but look for one that has xanthan gum. This helps with texture and rise. You might need to adjust the liquid slightly. Start with the same amount of liquid, then add more if the batter looks too thick. The best way to serve blueberry muffins is warm. You can dust them with powdered sugar for a sweet touch. Adding a sprig of fresh mint makes them look fancy. Serve them with a side of fresh fruit for a colorful plate. Pair them with coffee or tea for a perfect breakfast or snack. Enjoy them fresh for the best taste! Blueberry muffins are a joy to make and eat. We covered key ingredients, preparation steps, and common mistakes to help you bake better. Don’t forget to experiment with different fruits and flavors for fun variations. Proper storage keeps leftovers fresh for longer. Now you can bake moist, tasty muffins with confidence. Follow these tips, and you'll impress everyone with your baking skills. Enjoy your delicious treats!

Classic Blueberry Muffins Simple and Tasty Recipe

There’s nothing like the warm, sweet smell of classic blueberry muffins baking in your kitchen. This simple and tasty recipe

- 1 cup dried chickpeas (soaked overnight) - 1 small onion, chopped - 2 cloves garlic, minced - 1/4 cup fresh parsley, finely chopped - 1/4 cup fresh cilantro, finely chopped - 1 tsp ground cumin - 1 tsp ground coriander - 1/2 tsp baking soda - 1/4 tsp cayenne pepper (optional) - Salt and pepper to taste - 3 tablespoons olive oil - 1 tablespoon lemon juice - 1/4 cup whole wheat flour (more if needed) These ingredients create a tasty mix for falafel. The dried chickpeas give the best texture. Soak them overnight to soften. This step is key, as it helps the falafel form well. Fresh herbs add a bright taste. I love using parsley and cilantro for great flavor. The spices like cumin and coriander bring warmth and depth. Baking soda helps the falafel rise, giving it a light texture. Adding olive oil and lemon juice keeps the mix moist. Whole wheat flour binds everything together. Adjust the flour if the mix seems too wet. You want to shape falafel easily. This simple list gives you all you need for crispy baked falafel. You can find the full recipe at the end of this article. Soaking dried chickpeas overnight is key. This process softens them and helps them blend well. If you skip this step, your falafel may not hold together. Dried chickpeas give the best texture. Canned chickpeas can work, but they may make your falafel too wet. If you do use canned, drain and rinse them well. A food processor is your best friend here. It helps you get the right mix without turning it into mush. First, add soaked chickpeas, onion, garlic, and herbs to the bowl. Pulse them until coarse. Then, mix in spices like cumin and coriander. This is where the flavor really comes alive. Don’t forget the baking soda; it helps with texture. Add salt and pepper to taste. Once mixed, transfer everything to a bowl. Add olive oil, lemon juice, and whole wheat flour. If the mix feels too wet, add a little more flour until it holds together. When shaping falafel, aim for small balls or patties, about 1.5 inches wide. This size helps them cook evenly. Make sure to space them nicely on the baking sheet to avoid sticking. Brush the tops lightly with olive oil. This adds crispiness that you will love. Bake at 400°F for 25-30 minutes. Remember to flip them halfway for even browning. Once golden brown, let them cool for a few minutes before serving. Check out the Full Recipe for more tips! To make your falafel crispy, first, set your oven to 400°F (200°C). This temperature helps the falafel brown nicely. Bake them for 25 to 30 minutes. Flip them halfway for even crispiness. Baking soda plays a key role in texture. It makes your falafel light and fluffy. The tiny bubbles it creates help them rise while baking. This gives you a nice crunch on the outside. One mistake is overprocessing or underprocessing the mixture. You want a coarse mix, not a paste. Pulse just enough in your food processor. Another issue is not using enough flour. If your mixture feels too wet, add more flour. This helps the falafel hold their shape. Crispy baked falafel pairs well with many sides. Try serving them with tahini sauce or yogurt sauce for a tasty dip. You can also fill pita pockets with falafel, fresh veggies, and sauce. For a lighter option, serve them on a salad. Add greens, tomatoes, and cucumbers for a fresh twist. For the full recipe, check out the complete instructions. {{image_2}} You can make crispy baked falafel fit various diets. For gluten-free options, use chickpea flour instead of whole wheat flour. This switch keeps the falafel soft and tasty. It also adds a nice nutty flavor. You can also swap in almond flour or oat flour. Both work well and keep the dish gluten-free. For vegan-friendly substitutes, this recipe is already a great choice. The main ingredients are plant-based. If you want a creamier texture, add a spoonful of tahini instead of olive oil. This adds a rich flavor while still keeping it vegan. Adding more spices can give your falafel a unique taste. You might try smoked paprika, turmeric, or even a pinch of cinnamon. Each spice brings a different flavor profile. You can also mix in diced veggies like bell peppers or spinach. These additions keep the falafel moist and add extra nutrients. Incorporating nuts or seeds is another fun way to change the texture. Chopped walnuts or sunflower seeds add a nice crunch. They also enhance the flavor without overpowering the dish. Experiment with different combinations to find what you enjoy best. For the full recipe, check out the Crispy Baked Falafel above. To keep your crispy baked falafel fresh, use airtight containers. Glass or plastic containers work well. If you have a lot, divide them into smaller portions. This way, you can grab what you need without exposing the whole batch. - In the fridge: Store falafel for up to 4 days. - In the freezer: You can store them for up to 3 months. Just remember to label the container with the date. When it’s time to enjoy leftover falafel, reheating is key. You want to keep that crispy texture. - Oven method: Preheat your oven to 375°F (190°C). Place the falafel on a baking sheet. Heat for about 10-15 minutes. This method keeps them crispy. - Skillet method: Heat a non-stick skillet over medium heat. Add a little oil. Cook the falafel for about 3-4 minutes on each side until warmed through and crispy. To prevent drying out, don’t cover them while reheating. Enjoy your delicious falafel just like when they were freshly baked! For the full recipe, check out the Crispy Baked Falafel section. Baked falafel is often healthier than fried falafel. Baking uses less oil, reducing calories and fat. You'll enjoy a lighter dish without losing flavor. Baking also keeps the texture crisp on the outside and soft inside. Yes, you can prepare falafel ahead of time. Shape the falafel balls and store them in the fridge. Use an airtight container to keep them fresh. You can also freeze them for longer storage. Just remember to bake them straight from the freezer. This way, you won't lose any taste or texture. You can tell falafel is done when it's golden brown. Look for a crispy outer layer. Gently press on a ball; it should feel firm. If it looks dry and golden, it's ready to eat! Enjoy the savory flavor in every bite. In this article, we explored how to make crispy baked falafel. We covered essential ingredients like chickpeas, herbs, and spices. You learned about soaking chickpeas and mixing textures for the perfect bite. Key tips helped you avoid common mistakes and achieve crispiness, while serving suggestions added flavor. Remember, you can adjust recipes for dietary needs and store leftovers for later. Making delicious falafel at home is simple and fun. Try it out and enjoy your culinary success!

Crispy Baked Falafel Savory Flavor in Every Bite

Craving a snack that’s both tasty and healthy? Crispy baked falafel packs rich flavors and crunchy satisfaction in every bite.

- 3 large apples (Fuji or Honeycrisp recommended) - 1 teaspoon ground cinnamon - 2 tablespoons granulated sugar - 1 tablespoon lemon juice - Pinch of salt I love using Fuji or Honeycrisp apples for their crisp texture and sweet flavor. These apples make the best chips. The ground cinnamon adds warmth and a hint of spice that pairs so well with the apples. The sugar balances the tartness, while lemon juice brightens the flavor. A pinch of salt enhances all the tastes. - Additional spices (nutmeg, allspice) - Sweeteners (honey, maple syrup) If you want to mix it up, try adding nutmeg or allspice for a unique twist. You can also swap granulated sugar with honey or maple syrup if you prefer natural sweeteners. - Baking sheet - Parchment paper - Mandolin or sharp knife To make these chips, you will need a baking sheet and parchment paper for easy cleanup. A mandolin or a sharp knife helps you slice apples thinly. Thin slices are key for achieving the perfect crunch. Set your oven to 225°F (110°C). This low temperature helps the apple chips get crispy. A slow bake means less moisture stays in the chips. Start by washing the apples. Remove the core with a knife or corer. Slice the apples into very thin rounds, about 1/8 inch thick. Thinner slices make crisper chips. In a big bowl, mix 1 tablespoon of lemon juice, 2 tablespoons of sugar, 1 teaspoon of cinnamon, and a pinch of salt. Toss the apple slices in this mix. Make sure each slice gets coated well. Spread the apple slices on a baking sheet lined with parchment paper. Arrange them in a single layer. Do not let them overlap or they won't bake evenly. Bake for 1.5 to 2 hours. Flip the chips halfway through for even crisping. Once baked, take the chips out of the oven. Let them cool completely. Cooling is key as the chips will continue to crisp up. Enjoy your homemade cinnamon apple chips! Check the Full Recipe for more details. To get those perfect cinnamon apple chips, slice the apples really thin. Aim for about 1/8 inch thick. Thinner slices make for crispier chips. It is key to watch the baking time closely. Bake them for 1.5 to 2 hours. Flip the chips halfway through. This ensures they cook evenly, and you avoid burning them. When serving, use a fun bowl to show off your apple chips. Sprinkle a bit of extra cinnamon sugar on top. It adds a nice touch! For a sweet dip, pair them with caramel sauce. This makes a tasty combo that kids and adults will love. You can also serve them with yogurt for a healthy twist. To keep leftover chips fresh, store them in an airtight container. A glass jar works great. Do not leave them out in the open; they can get soft. If you want them to last longer, keep them in the fridge. Proper storage helps maintain their crunchiness. {{image_2}} You can change up the taste of your cinnamon apple chips by using different apple types. Try Granny Smith for a tart twist, or Gala for a sweeter bite. Adding spices can also bring new flavors. For example, a dash of ginger adds warmth, while clove gives a rich aroma. You can mix and match to find your favorite! If you want less sugar, you can reduce the amount in the recipe. You can also use natural sweeteners like honey or maple syrup. These options can enhance the flavor while keeping your snack healthier. Just remember to adjust the amounts since these sweeteners can vary in strength. You don’t have to use an oven. You can make these chips in a microwave or a dehydrator. For the microwave, place the slices on a plate and cook them in short bursts, checking often. A dehydrator can take longer but keeps more nutrients. Each method gives a unique texture. It’s fun to try them all and see which you like best! For more details, check out the Full Recipe. Apples are a great snack. They are low in calories and high in fiber. A medium apple has about 95 calories. It also gives you vitamin C and potassium. Eating apples can help with heart health and weight loss. Cinnamon is more than just a spice. It has antioxidants that can boost your health. It can lower blood sugar and help with heart health. This spice adds flavor without extra calories. Each serving of cinnamon apple chips has around 100 calories. This makes them a healthy snack choice. They satisfy your sweet tooth without adding too many calories. Snacking can be healthy if you choose the right foods. Cinnamon apple chips are gluten-free and vegan. You can enjoy them even on special diets. If you want to cut sugar, use less sugar or try a natural sweetener. This way, you can still enjoy a crunchy treat without the guilt. Cinnamon apple chips can last about one week at room temperature. Store them in an airtight container to keep them crunchy. If you store them in the fridge, they can last up to two weeks. However, the fridge might make them a bit less crispy. Yes, you can use other fruits! Pears are a great choice. They have a similar texture and flavor. Bananas can work too, but they need a shorter baking time. Feel free to experiment with your favorites. Cinnamon apple chips are a healthy snack. They are lower in calories than chips or cookies. Apples provide fiber and vitamins. Cinnamon adds flavor and may have health benefits, like reducing inflammation. This makes them a smart choice for a snack. You can find pre-made cinnamon apple chips at many grocery stores. Look for brands like Bare or Simply 7. They are often in the snack aisle or near the dried fruits. You can also find them online on sites like Amazon. You now know how to make tasty cinnamon apple chips at home. You learned about the right apples, important ingredients, and helpful tips for perfect crispiness. Explore flavor changes and cooking methods to find your favorite. These chips make a great snack or treat, and they’re healthy too. Enjoy making and sharing them with friends and family!

Cinnamon Apple Chips Crunchy and Healthy Snack Idea

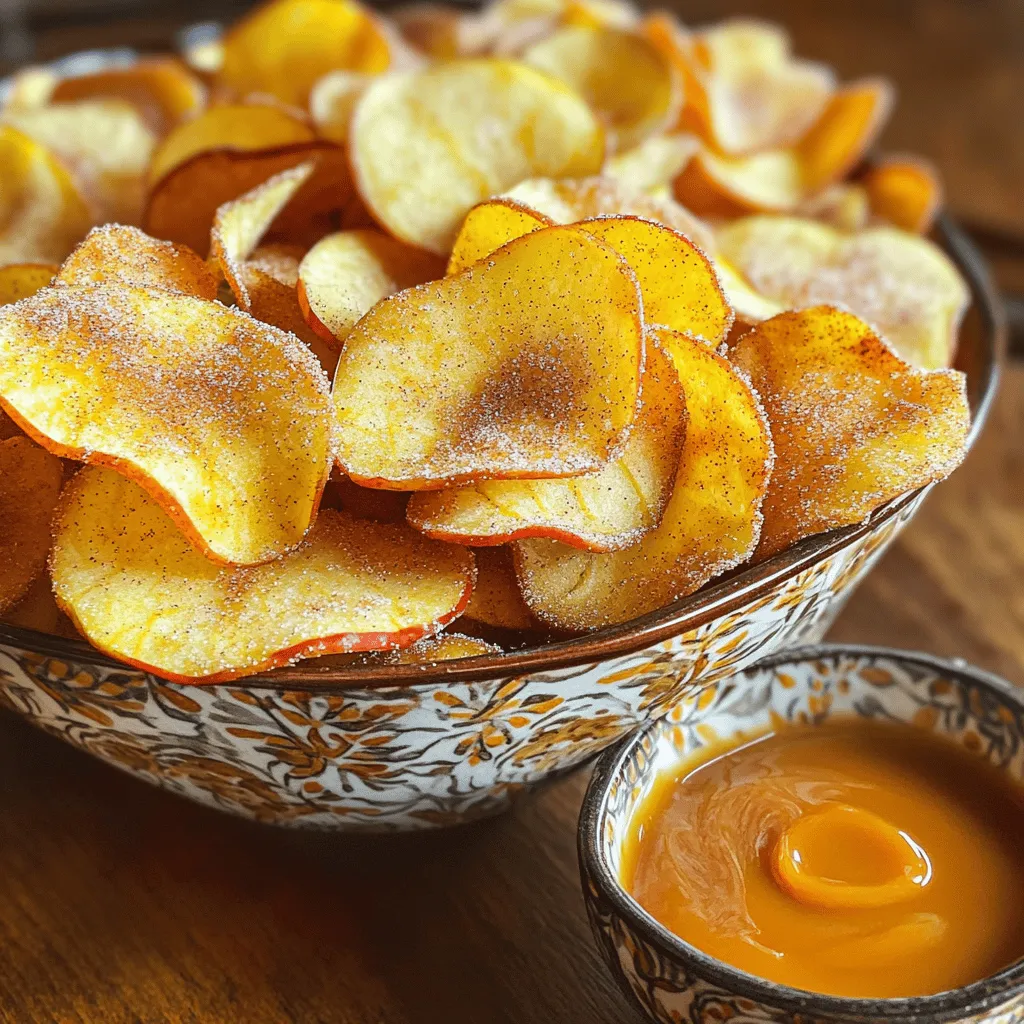
Are you ready to discover a deliciously healthy snack? Cinnamon apple chips are the perfect blend of crunch and sweetness.

- You will need 4 large fresh peaches. - Slice them and remove the pits. - Look for peaches that are firm but slightly soft when gently pressed. - Choose peaches that are fragrant and have a vibrant color. - For the topping, you will need: - 1 cup rolled oats - ½ cup all-purpose flour - ½ cup packed brown sugar - ½ teaspoon salt - ½ teaspoon vanilla extract - ½ cup unsalted butter, melted - Each ingredient adds a unique texture and flavor. - You can add ¼ cup chopped pecans for extra crunch. - Gather these kitchen tools: - A large mixing bowl - A greased 9x13-inch baking dish - A smaller bowl for the topping - A 9x13-inch baking dish works best for even cooking. - Make sure to have measuring cups and spoons handy. You can find the *Full Recipe* at the end for more details. To start, wash your peaches well. Then, slice each peach in half and remove the pit. Next, slice the peach halves into thin wedges. In a large mixing bowl, combine your peach slices with 1 tablespoon of lemon juice and ½ cup of brown sugar. The lemon juice helps keep the peaches fresh and bright. Toss gently to coat the peaches evenly. Pour this sweet mixture into a greased 9x13-inch baking dish. Now, let’s prepare the topping. In a separate bowl, mix together 1 cup of rolled oats, ½ cup of all-purpose flour, ½ cup of brown sugar, and ½ teaspoon of salt. Add in ½ teaspoon of vanilla extract and ½ cup of melted unsalted butter. Stir until the mixture becomes crumbly. If you like, fold in ¼ cup of chopped pecans for added crunch. This step adds great texture and flavor. Spread the oat mixture evenly over the peach layer in your baking dish. Make sure to cover the peaches well. Preheat your oven to 350°F (175°C). Bake the crisp for 30-35 minutes. Keep an eye on it. You want the topping to turn golden brown and the peaches to bubble. Once done, take it out of the oven and let it cool slightly before serving. Enjoy the delightful aroma and flavor of your fresh peach crisp! For the full recipe, check the details above. To get a golden crust, focus on the baking time and temperature. Bake at 350°F (175°C). This heat allows the topping to brown and the peaches to cook evenly. Stir the oat mixture well before adding it to the peaches. This helps to distribute the butter and sugar, ensuring an even crisp. For tender peaches, slice them thinly but not too thin. A half-inch slice works well. Toss them with lemon juice and sugar before baking. This step adds flavor and helps keep the peaches juicy without becoming mushy. Serve your peach crisp warm for the best taste. A scoop of vanilla ice cream on top transforms this dish into a dream. The cold ice cream and warm crisp create a delightful contrast. You can also garnish with fresh mint for a pop of color and flavor. If you prefer, drizzle some caramel sauce over the top for extra sweetness. If you want to adjust the sweetness, start with less sugar. You can always add more later. A great way to sweeten naturally is to use honey or maple syrup instead of brown sugar. These options add a unique flavor that pairs well with peaches. For a low-sugar version, try using stevia or a sugar substitute. Just remember to check how much to use, as they can be sweeter than regular sugar. For the full recipe, check out the *Full Recipe* section for all the details. {{image_2}} You can switch out peaches for other fruits. Berries, apples, or pears work well. Just adjust the sugar based on fruit sweetness. If you want a gluten-free crisp, use almond flour instead of all-purpose flour. For a vegan option, swap butter with coconut oil. Add spices to boost flavor. A dash of nutmeg or ginger can add warmth. You can also mix in nuts like walnuts or almonds for crunch. If you're a chocolate lover, try folding in chocolate chips for a sweet twist. Individual crisps are fun for gatherings. Use ramekins for serving sizes. Just reduce the baking time to about 20-25 minutes. This ensures each portion bakes evenly and stays warm. To keep your leftover peach crisp fresh, follow these steps: - Allow the peach crisp to cool completely. - Transfer it to an airtight container. - You can also cover it tightly with plastic wrap. This method helps to keep moisture in and air out. Glass or plastic containers work best for storage. When it's time to enjoy your peach crisp again, reheating is key. Here are the best methods: - Oven Method: Preheat the oven to 350°F (175°C). Place the crisp in an oven-safe dish. Cover it loosely with foil and heat for about 15-20 minutes. This keeps the topping crispy and the peaches warm. - Microwave Method: For a quicker option, use the microwave. Place a portion on a microwave-safe plate. Heat it for 30 seconds to 1 minute. Check often to avoid overheating. The texture may soften a bit using this method. Want to save some peach crisp for later? Freezing is a great option! Here’s how: - Allow the peach crisp to cool completely. - Cut it into individual portions for easy serving. - Wrap each portion tightly in plastic wrap, then place them in a freezer-safe bag or container. - Label the bag with the date. You can freeze it for up to 3 months. When you’re ready to eat, thaw it in the fridge overnight. To reheat, follow the same steps mentioned earlier for the oven or microwave. Enjoy your peach crisp anytime! Yes, you can use canned peaches. They save time and are often sweet. However, fresh peaches have better flavor and texture. Canned peaches may be mushy. If you choose canned, drain them well. This helps avoid extra liquid in your crisp. For the best taste, I recommend using fresh peaches when they are in season. If you don't have cornstarch, you can use flour. Use about twice the amount. You can also try arrowroot powder or tapioca starch as substitutes. These options will also help thicken the peach mixture. Just mix it well with the peaches to get a nice texture. You can keep peach crisp in the fridge for about three to five days. Look for signs like mold or a sour smell. If it looks or smells off, it’s best to toss it. For more details on how to make this delicious dessert, check the *Full Recipe*. In this blog post, we explored how to make a delicious peach crisp. Fresh peaches are key, and we covered how to pick the best ones. We detailed the essential topping ingredients and tools needed. I shared step-by-step instructions for prep, assembly, and baking. Finally, we looked at tips for perfecting your crisp, serving suggestions, and variations. Remember, this dessert is all about personal flavor, so feel free to play with ingredients. Enjoy your baking adventure!

Fresh Peach Crisp Delightful Summer Dessert Recipe

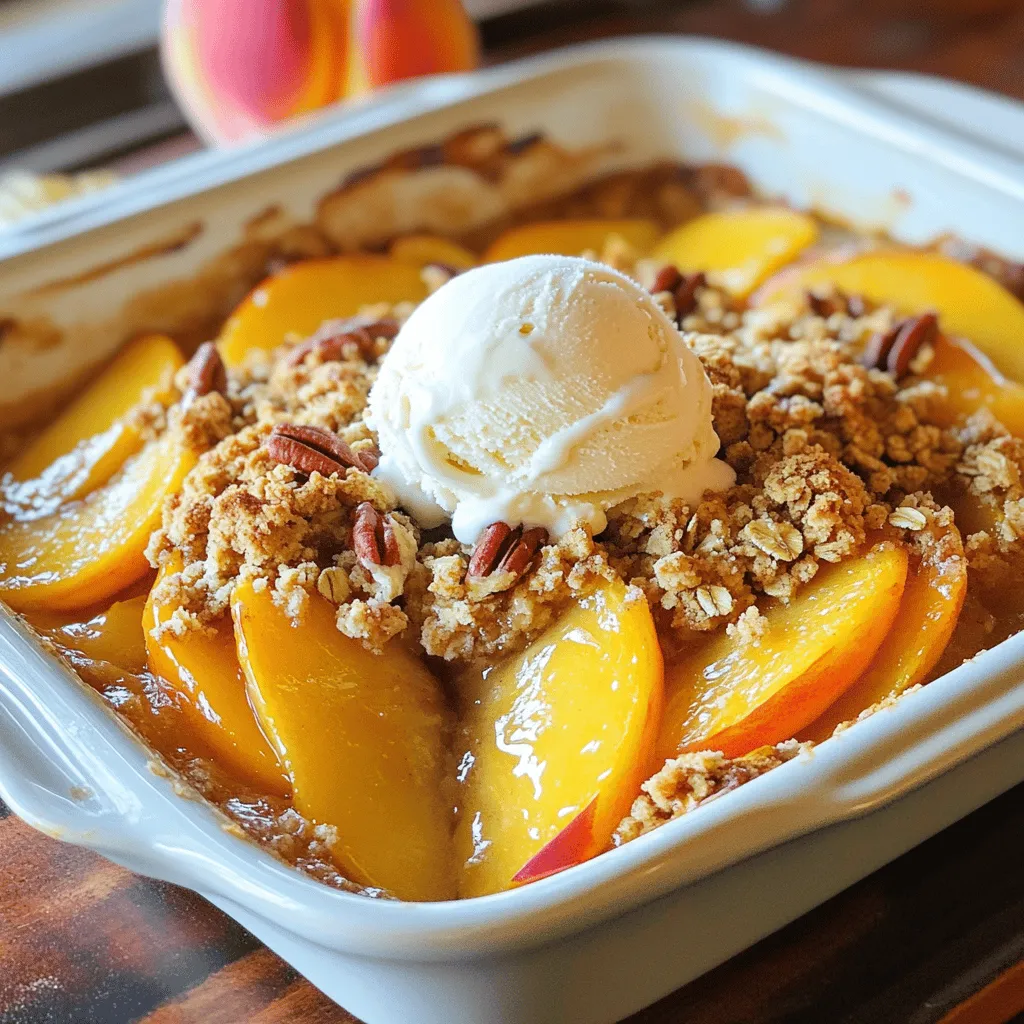
Summer is the perfect time for a fresh peach crisp that bursts with flavor! As the sun shines, juicy peaches

To make chocolate covered strawberry bites, start with fresh strawberries. I like to use one pound of ripe berries. Choose strawberries that are firm, bright, and without blemishes. Make sure to wash them gently and hull them to remove the green tops. Dry them well, as any water can make the chocolate clump. Next, you need chocolate. You can use dark, milk, or white chocolate. For this recipe, I often use eight ounces of dark chocolate chips. Dark chocolate gives a strong flavor, but milk chocolate is sweeter. White chocolate is creamy and adds a nice contrast. The choice is yours, and each type works great! Now for the fun part—toppings! You can be creative here. I suggest crushed nuts, shredded coconut, or a sprinkle of sea salt. For this recipe, you can use 1/4 cup of crushed nuts like almonds or hazelnuts. Shredded coconut adds texture, while a light touch of sea salt enhances the sweetness. Mix and match to find your favorite combination! For the full recipe, check out the details above. Start with fresh strawberries. Choose ripe, firm ones for the best taste. Wash them gently under cold water. After washing, dry them well. Any water can make the chocolate clump or seize. Pull off the green tops, called hulls. This makes it easier to hold them while dipping. Next, we melt the chocolate. Use a microwave-safe bowl. Add the 8 ounces of dark chocolate chips and 2 tablespoons of coconut oil. Heat this mix in the microwave for 30 seconds. Stir after each interval until smooth. Be careful not to overheat it. If the chocolate gets too hot, it won’t coat the strawberries well. Now, it's time to dip! Hold each strawberry by the stem. Dip it into the melted chocolate, covering about two-thirds of it. Let the extra chocolate drip off. Quickly add your toppings like crushed nuts or shredded coconut. Do this while the chocolate is still soft. Place the dipped strawberries on a parchment-lined baking sheet. Repeat until all strawberries are coated. Lastly, chill them in the fridge for about 30 minutes. This helps the chocolate set. Enjoy your tasty treats once they are ready! For more details, check the Full Recipe. Pick ripe strawberries for the best taste. Look for bright red berries. They should feel firm and have a fresh scent. Avoid berries with dark spots or soft patches. If you can, buy them from a local market. They tend to be fresher and sweeter. Wash them gently and dry them well. Water on the strawberries can cause the chocolate to clump. Chocolate can seize if it comes into contact with water. To prevent this, make sure your bowl and utensils are dry. When melting chocolate, use a microwave. Heat it in short bursts of 30 seconds. Stir it after each round. This helps the chocolate melt evenly and smoothly. Adding a bit of coconut oil helps too. It keeps the chocolate shiny and fluid. Once your strawberries are dipped, act fast! Sprinkle your toppings right away. If you wait too long, the chocolate will harden, and the toppings won’t stick. Use crushed nuts or shredded coconut for texture. You can even add a pinch of sea salt for a salty-sweet mix. This adds a fun crunch and a burst of flavor. For the full recipe, check out the detailed steps above. {{image_2}} To make these bites vegan, swap dark chocolate for dairy-free chocolate chips. Look for brands that use coconut or almond milk instead of dairy. You can also use a homemade chocolate made from cocoa powder, coconut oil, and maple syrup. This option keeps the flavor rich while being vegan-friendly. All the ingredients in this recipe are naturally gluten-free. Make sure to check that your chocolate chips and any toppings, like nuts or coconut, are certified gluten-free. This way, you can enjoy the bites without worry. You can add fun flavors to your chocolate-covered strawberry bites. Try mixing in a drop of vanilla extract or almond extract to the melted chocolate. For a spicy twist, add a pinch of cinnamon or cayenne pepper to the chocolate. These small changes can make a big difference in taste! If you want to try these variations, check out the Full Recipe for the base instructions. To keep your chocolate covered strawberry bites fresh, store them in an airtight container. Line the bottom with parchment paper to prevent sticking. Avoid adding warm strawberries to the container, as this can cause moisture. Always keep them in the refrigerator. This helps the chocolate stay firm and tasty. Chocolate covered strawberries last about 2 to 3 days in the fridge. After that, they can lose their crunch and freshness. Always check for any signs of spoilage before eating. If you notice any mold or an off smell, it’s best to discard them. You can freeze chocolate covered strawberries for longer storage. Place them on a baking sheet and freeze until solid. Then, transfer them to a freezer-safe bag. They last about 2 months in the freezer. To enjoy, thaw them in the fridge for a few hours before eating. This keeps the chocolate nice and smooth. For the full recipe, check earlier in this article. To make chocolate covered strawberries, start with fresh berries. Wash and dry them well. Melt dark chocolate chips and coconut oil together in a bowl. Dip each strawberry into the melted chocolate, covering about two-thirds. Let excess chocolate drip off. Quickly sprinkle your favorite toppings on the chocolate. Place the dipped strawberries on a baking sheet lined with parchment paper. Chill them in the fridge until the chocolate hardens. You can find the full recipe above for detailed steps. Dark chocolate works best for coating strawberries. It melts smoothly and tastes rich. You can also use milk or white chocolate if you prefer a sweeter flavor. Just make sure to choose good quality chocolate for the best results. Yes, you can buy pre-made chocolate covered strawberries at many grocery stores. They are often found in the bakery section or the dessert aisle. However, making them at home is easy and allows you to customize toppings. Plus, nothing beats the taste of fresh, homemade treats! You learned about making chocolate-covered strawberries from selecting fresh fruit to storing them. We covered chocolate types, optional toppings, and flavor twists. Following my tips will help you avoid common mistakes and perfect your treats. Remember, you can use vegan or gluten-free options too. Enjoy experimenting with different flavors and toppings. These delicious bites are perfect for gifts or parties. Happy dipping!

Chocolate Covered Strawberry Bites Tasty and Easy Treat

Looking for a fun and easy treat? You’ve found it! Chocolate covered strawberry bites are a sweet delight that anyone

- 1 can (15 oz) chickpeas, rinsed and drained - 1 cup cooked quinoa - 1 medium cucumber, diced - 1 cup cherry tomatoes, halved - 1 avocado, sliced - 2 cups mixed greens (spinach, kale, arugula) - 2 tablespoons tahini - Juice of 1 lemon The chickpeas form the heart of this bowl. They add protein and flavor. Quinoa brings a nutty taste and extra protein. Fresh veggies like cucumber, tomatoes, and avocado add crunch and creaminess. Mixed greens give a fresh touch. Tahini dressing ties it all together with its creamy texture. - 1 tablespoon olive oil - 1 teaspoon smoked paprika - 1 teaspoon cayenne pepper (adjust for spice level) - 1 teaspoon garlic powder - Salt and pepper to taste Seasonings make your chickpeas pop. Olive oil helps spices stick. Smoked paprika adds depth, while cayenne brings heat. Garlic powder adds savory notes. Don't forget salt and pepper for balance. - Fresh parsley, chopped, for garnish - Additional toppings based on taste Garnishes elevate your dish. Fresh herbs like parsley add color and freshness. You can also use seeds or nuts for crunch. Extra toppings like feta cheese or olives can enhance flavors, adding your personal twist. For the full recipe, check out the details above. 1. Preheat your oven to 400°F (200°C). This ensures even roasting of the chickpeas. 2. Gather your ingredients. You need: - 1 can (15 oz) chickpeas, rinsed and drained - 1 tablespoon olive oil - 1 teaspoon smoked paprika - 1 teaspoon cayenne pepper - 1 teaspoon garlic powder - Salt and pepper to taste - 1 cup cooked quinoa - 1 medium cucumber, diced - 1 cup cherry tomatoes, halved - 1 avocado, sliced - 2 cups mixed greens (spinach, kale, arugula) - 2 tablespoons tahini - Juice of 1 lemon - Fresh parsley, chopped, for garnish 3. In a bowl, mix the rinsed chickpeas with olive oil, smoked paprika, cayenne pepper, garlic powder, salt, and pepper. Toss them well. You want every chickpea coated in spice. 1. Spread the seasoned chickpeas on a baking sheet in a single layer. 2. Roast them for 25-30 minutes. Stir halfway through to ensure they cook evenly. They should be golden and crispy when done. 3. While the chickpeas roast, prepare your quinoa and veggies. In a large bowl, add the cooked quinoa. Top it with mixed greens. This creates a nice base. 4. Dice the cucumber and halve the cherry tomatoes. Slice the avocado. You’ll use these for your toppings. 1. Once your chickpeas are roasted, sprinkle them over the quinoa and greens. 2. Layer the diced cucumber, halved tomatoes, and avocado slices on top. 3. In a small bowl, whisk together tahini, lemon juice, and a pinch of salt. If it’s too thick, add a little water. This will be your dressing. 4. Drizzle the tahini dressing over the bowl. Garnish with fresh parsley. Enjoy your Spicy Chickpea Buddha Bowl! For complete details, you can check the Full Recipe. To roast chickpeas well, start by drying them. Use a towel to pat them dry. This step helps them get crispy. Adjust spice levels based on your taste. If you want it spicy, add more cayenne pepper. For less heat, reduce the amount. Ensure crispiness by spreading the chickpeas out. Avoid crowding them on the baking sheet. Stir them halfway through roasting for even crispiness. You’ll know they are done when they turn golden brown. If you want an alternative to quinoa, try brown rice or farro. Both add good texture and flavor. For the greens, you can use arugula or romaine lettuce. Try adding roasted sweet potatoes for a sweet touch. Other vegetables work well too. Bell peppers, shredded carrots, or even corn can add color. Mix and match based on what you like or have at home. For a stunning display, serve in a large bowl. Layer the ingredients in sections. This creates a beautiful look. Drizzle extra tahini dressing around the edges for flair. You can also use small bowls for each ingredient. This way, everyone can build their own bowl. Use fresh herbs like parsley or cilantro as a garnish. They add color and freshness to your dish. These tips will help you create a tasty and wholesome meal. You can find the full recipe [here]. {{image_2}} You can make your Spicy Chickpea Buddha Bowl even heartier. Adding tempeh or tofu gives extra protein. Both are great at soaking up flavors. Just cube them and roast or sauté until golden. You can also incorporate beans. Black beans or kidney beans add texture and taste. Mix them with chickpeas or use them alone. They make the bowl more filling and tasty. Switching up the spices adds fun to your meal. Try smoked cumin or curry powder for a new kick. You can even go sweet with a dash of cinnamon. Different dressings to try can change the whole vibe. A zesty lemon vinaigrette brightens the dish. Or, a creamy avocado dressing can add richness. Play around with flavors to find your favorite! In summer, add fresh corn and bell peppers. They bring sweetness and crunch to the bowl. You can even toss in some grilled zucchini for a smoky touch. In winter, think of comfort twists. Roasted sweet potatoes or butternut squash warm you up. They add a nice sweetness that pairs well with spices. You can also use hearty greens like collard or Swiss chard for extra nutrition. To keep your Spicy Chickpea Buddha Bowl fresh, use airtight containers. Glass or plastic containers work well. Store leftovers in the fridge for up to three days. If you want to keep it longer, freezing is an option. To reheat, use an oven or skillet. This helps keep the chickpeas crispy. If using a microwave, heat in short bursts. Be careful not to overcook the bowl. You can add fresh greens or a splash of lemon juice for a fresh taste. You can freeze the chickpeas, but not the whole bowl. Cooked chickpeas freeze well. Before freezing, let them cool. Place them in freezer bags, removing excess air. They can last up to three months in the freezer. When ready to eat, thaw them in the fridge overnight. Then reheat as needed. To make your Buddha bowl vegan, focus on the ingredients. Start with chickpeas, quinoa, and fresh veggies. The recipe already uses plant-based ingredients. You can swap tahini for a nut butter if desired. Just check all labels to avoid hidden animal products. Yes, you can meal prep this dish easily. Cook the quinoa and roast the chickpeas ahead of time. Store them in airtight containers. Keep the fresh veggies separate to stay crisp. Assemble your bowls when ready to eat. This way, you enjoy freshness throughout the week. Chickpeas offer many health benefits. They are high in protein and fiber. This helps you feel full longer. They also support digestion and heart health. Chickpeas are rich in vitamins and minerals, like iron and folate. Adding them to your diet boosts overall nutrition. The blog post detailed how to create a delicious Spicy Chickpea Buddha Bowl. We explored key ingredients like chickpeas, quinoa, and fresh veggies. You learned step-by-step instructions to prepare, cook, and assemble your bowl. Additionally, I shared tips for perfect roasting and creative variations to keep things interesting. In closing, these bowls are not just tasty; they are fun to make. Enjoy experimenting with flavors and ingredients. Your kitchen can be full of health and joy!

Spicy Chickpea Buddha Bowl Tasty and Wholesome Meal

Welcome to the world of Buddha bowls, where wholesome meets spicy! Today, I’m excited to share my favorite Spicy Chickpea

To make crispy fish tacos, you'll need the following ingredients: - 1 lb white fish fillets (such as cod or tilapia) - 1 cup all-purpose flour - 1/2 cup cornmeal - 1 teaspoon cayenne pepper - 1 teaspoon garlic powder - 1 teaspoon paprika - 1/2 teaspoon salt - 1/4 teaspoon black pepper - 2 eggs, beaten - 1 cup panko breadcrumbs - Vegetable oil for frying - 8 small corn tortillas - 1 cup cabbage, finely shredded - 1 avocado, diced - 1/4 cup fresh cilantro, chopped - Lime wedges for serving - Salsa or hot sauce (optional) When choosing fish for tacos, I recommend white fish. Cod and tilapia work well. These fish have a mild flavor and firm texture. They fry nicely and hold up in the taco. If you want to mix things up, try other fish. Salmon and mahi-mahi are great options. They add a different taste and texture. For a non-fish alternative, use shrimp or even grilled veggies. Both options still give that tasty taco experience. To start, rinse the fish fillets in cold water. This step cleans them well. Next, dry the fillets using paper towels. Drying helps the coating stick better. Cut each fillet into strips that are about 1 inch wide. This size is perfect for tacos. For a crispy texture, use three bowls. In the first bowl, mix flour, cornmeal, cayenne pepper, garlic powder, paprika, salt, and black pepper. This mix adds flavor. In the second bowl, place the beaten eggs. In the third bowl, add panko breadcrumbs. Here’s how to coat the fish: 1. Dip each fish strip into the flour mix first. 2. Shake off any extra flour. 3. Next, dip it into the beaten eggs. 4. Finally, roll it in the panko breadcrumbs. Make sure each strip is well coated. This layering is key for crunch. Now, heat about 1 inch of vegetable oil in a large skillet over medium-high heat. You want the oil to shimmer but not smoke. Carefully add the coated fish strips in batches. Fry them for about 3-4 minutes on each side. They should turn golden brown and crispy. Once done, remove the fish and let them drain on paper towels. This step helps remove excess oil. While the fish cools, warm the corn tortillas in a dry skillet for about 30 seconds on each side. This makes them soft and easy to fold. For a tasty taco, place 2-3 pieces of crispy fish on each tortilla. Top with shredded cabbage, diced avocado, and chopped cilantro. Serve them with lime wedges and optional salsa or hot sauce. Enjoy your meal! For the complete recipe, check the Full Recipe. To get that crispy texture, coat the fish well. Start with flour, then eggs, and finish with panko breadcrumbs. This triple-dip method is key. Make sure your oil is hot enough before frying. If it's not hot, the fish will soak up oil and become soggy. Aim for around 350°F (175°C) for frying. Fry in small batches to avoid crowding the pan. This helps each piece cook evenly and stay crispy. Choose a firm white fish like cod or tilapia. These types hold up well during cooking. Cut the fish into strips about 1 inch wide. This size cooks quickly and evenly. Always pat the fish dry before coating it. This removes excess moisture and helps the coating stick better. Monitor cooking time; fry each side for about 3-4 minutes until golden brown. Warm the corn tortillas before adding the fish. This makes them soft and easy to fold. Load each tortilla with 2-3 crispy fish strips. Top them with fresh cabbage, diced avocado, and chopped cilantro. These toppings add crunch and flavor. Serve with lime wedges for a zesty kick. If you like heat, add salsa or hot sauce. These simple steps make crispy fish tacos perfect for any meal! For the full recipe, check out the detailed instructions. {{image_2}} You can customize your crispy fish tacos in many fun ways. Start with the basics and then add your favorite toppings. - Creamy Sauce: A drizzle of chipotle mayo or a lime crema adds zest. - Fresh Veggies: Try adding diced tomatoes, radishes, or sliced jalapeños for crunch. - Fruits: Mango or pineapple salsa can bring a sweet touch. - Cheese: Feta or cotija cheese gives a salty contrast to the fish. Mix and match these toppings to find your perfect flavor combination. You do not need to fry your fish to get great results. Both baking and air frying work well for crispy fish tacos. - Baking: Preheat your oven to 425°F (220°C). Place your coated fish on a baking sheet. Bake for about 15-20 minutes. Flip them halfway through for even crispiness. - Air Frying: Set your air fryer to 400°F (200°C). Cook the fish for about 10-12 minutes, flipping them halfway. This method uses less oil but still gives you a crunchy texture. Both methods are healthier and easy to do. The right spices and sauces can elevate your fish tacos. Experiment with these ideas to find your favorite flavors. - Spices: Try cumin or coriander for warmth. Add chili powder for extra heat. - Herbs: Fresh dill or parsley can brighten up the dish. - Sauces: A tangy tomatillo sauce can add brightness. Alternatively, a mango salsa can bring sweetness. Feel free to mix these spices and sauces to create a unique taste for your crispy fish tacos. For the complete recipe, reference the [Full Recipe]. To keep leftover fish tacos fresh, store them separately. Place the fish in an airtight container. Wrap the tortillas in foil or plastic wrap. This keeps them soft. Store the toppings, like cabbage and avocado, in separate containers. Use them within two days for the best taste. To reheat your fish, avoid the microwave. Instead, use an oven or skillet. Preheat your oven to 375°F (190°C). Place the fish on a baking sheet. Bake for about 10-15 minutes until hot and crispy. If using a skillet, heat a little oil over medium heat. Add the fish and cook for a few minutes on each side. For the best flavor, store your ingredients properly. Keep the fish in the coldest part of your fridge. Use it within one to two days of purchase. Store tortillas at room temperature in a sealed bag. Vegetables like cabbage and avocado should go in the fridge. Use avocado quickly to avoid browning. For the full recipe, check out my cooking guide! The best fish for crispy fish tacos is white fish. Cod and tilapia are great choices. They are mild and flaky when cooked. You want fish that cooks quickly and stays tender. Other good options include haddock and snapper. These fish also hold up well to frying, giving you that perfect crunch. To make fish tacos gluten-free, swap out the all-purpose flour. Use gluten-free flour or rice flour instead. For the breadcrumbs, find gluten-free panko or crush gluten-free cornflakes. Check labels on all products to ensure they are gluten-free. This keeps your meal safe for those with gluten sensitivities. If you need a substitute for panko breadcrumbs, try regular breadcrumbs. They work, but they may not be as crispy. You can also use crushed tortilla chips for a fun twist. Crushed cornflakes or even ground nuts can add great texture and flavor. Each option gives a different taste and crunch to your fish tacos. For the complete recipe, check out the Full Recipe section! You've learned all about making amazing crispy fish tacos. We covered the best fish to use, cooking techniques for crispy texture, and tasty toppings. You now have tips on storage and reheating, so your tacos stay delicious. Remember, practice makes perfect. Try different spices and cooking methods to find your favorite. Enjoy your fish tacos with friends and family. Happy cooking!

Crispy Fish Tacos Perfect for Any Meal

If you crave something fresh and crispy, you’ve come to the right place! My Crispy Fish Tacos blend savory flavors

To make a loaded veggie pizza, you need a few key ingredients. Here’s what you should gather: - Pre-made pizza crust - Pizza sauce or marinara - Shredded mozzarella cheese - Fresh vegetables: - Bell peppers - Red onion - Spinach - Mushrooms - Black olives - Cherry tomatoes - Seasonings: - Dried oregano - Garlic powder - Red pepper flakes These ingredients create a pizza full of flavor and color. The pre-made crust saves time while still offering a crispy base. Pizza sauce or marinara adds a rich, tangy layer. Shredded mozzarella cheese gives that gooey, cheesy goodness. Fresh vegetables not only add nutrients but also texture. Bell peppers bring crunch, while spinach adds a fresh taste. Mushrooms contribute a nice earthiness, and black olives add a salty bite. Cherry tomatoes burst with sweetness. Seasonings elevate the flavors. Dried oregano and garlic powder enhance the taste, while red pepper flakes add a kick. You can find the full recipe for making this delicious pizza in the recipe section. 1. Preheat the oven to 475°F (246°C). This will help the crust get nice and crispy. 2. Prepare your baking surface by placing the pre-made pizza crust on a baking sheet or pizza stone. You can brush the crust with olive oil for extra flavor if you want. 1. Spread the pizza sauce evenly over the crust. Leave a little space around the edges to form a crust. 2. Sprinkle half of the shredded mozzarella cheese over the sauce. This helps hold the toppings in place. 3. Layer the sliced bell peppers, red onion, mushrooms, spinach, black olives, and cherry tomatoes across the pizza. Spread them out evenly. 4. Season the pizza with garlic powder, dried oregano, and red pepper flakes for a little heat if you like. 5. Add the remaining mozzarella cheese on top to cover the veggies well. 1. Place the pizza in the preheated oven. Bake for 12-15 minutes. Keep an eye on it until the cheese is bubbly and golden brown. 2. Once done, take it out and let it cool for a couple of minutes. Garnish with fresh basil leaves. 3. Slice the pizza into wedges and serve hot. Enjoy the burst of flavors! For more detailed instructions, check out the Full Recipe. To get a crispy crust, you need high heat. Preheat your oven to 475°F (246°C). This helps the crust cook fast. A pizza stone works great for heat retention. If you use a baking sheet, brush it lightly with oil. This gives the crust a nice crunch. You can choose a store-bought crust or make your own. For homemade, use flour, water, yeast, and salt. Let it rise for a fluffy texture. Mozzarella is the best cheese for loaded veggie pizza. It melts well and has a mild taste. You can also mix in provolone for extra flavor. If you want a twist, try goat cheese or feta. For a vegan option, use cashew cheese or almond-based cheese. These alternatives melt nicely and add creaminess. Herbs and spices make your pizza shine. Dried oregano and garlic powder are classic choices. You can also add fresh basil after baking. For more heat, sprinkle red pepper flakes. Want more veggies? Top your pizza with artichokes, zucchini, or eggplant. Each adds a unique taste and texture. Mix and match to find your favorite combos! {{image_2}} You can easily make a gluten-free version. Use gluten-free pizza crusts made from rice flour or almond flour. You can also try a cauliflower crust for a fun twist. When making your pizza, check the labels on sauces and cheese. They should be gluten-free as well. For cooking tips, bake the pizza on a pizza stone. This helps the crust turn crispy. Preheat your oven to 475°F (246°C) just like the regular pizza. Keep an eye on the pizza while it bakes. Gluten-free crusts can cook faster. To make a vegan loaded veggie pizza, swap out the cheese for dairy-free options. Brands like Daiya or Violife offer great choices. For the sauce, use a plant-based version or make your own with tomatoes and herbs. You can add more veggies too! Try artichokes, zucchini, or even eggplant. These add color and taste. Toss in some fresh herbs like basil or cilantro for extra flavor. Using seasonal vegetables makes your pizza fresh and tasty. In spring, add asparagus and fresh peas. Summer is perfect for ripe tomatoes and zucchini. In fall, use roasted butternut squash or Brussels sprouts. Winter calls for hearty veggies like kale or root vegetables. For a holiday-themed pizza, think about fun shapes. Use cookie cutters to create festive veggie toppings. You can also add seasonal spices like nutmeg or cinnamon for a unique twist. Check out the Full Recipe for ideas on how to mix these seasonal veggies. After enjoying your loaded veggie pizza, let it cool first. Cooling helps prevent sogginess. Place the leftovers in an airtight container. You can use a glass or plastic container. Make sure to seal it tightly. Store it in the fridge. Leftovers will stay fresh for about three to four days. To reheat your pizza, use an oven for the best results. Preheat the oven to 375°F (190°C). Place the pizza slices directly on the oven rack. This keeps the crust crispy. Heat for about 10 minutes. You can also use a skillet on the stove. Heat on low, covering the pan to warm the toppings. This method also helps keep the crust nice. To freeze loaded veggie pizza, slice it into pieces. Wrap each slice tightly in plastic wrap. Place wrapped slices in a freezer bag. Squeeze out any air before sealing. The pizza can last up to two months in the freezer. When you’re ready to eat, take out a slice. Thaw it in the fridge overnight. Reheat it in the oven or skillet as mentioned above. Enjoy your frozen pizza just like fresh! You can use several options for pizza sauce. Try using marinara sauce, pesto, or even hummus. Each gives a unique flavor. If you want to make a homemade sauce, blend canned tomatoes, garlic, and herbs. This adds a fresh taste and is easy to create. To add spice, sprinkle red pepper flakes on top. You can also use spicy toppings like jalapeños or pepperoncini. Another option is to mix hot sauce into your pizza sauce. This boosts the heat and gives a nice kick. Absolutely! You can customize the veggies on your pizza. Some great options are zucchini, artichokes, or broccoli. You want to choose firm vegetables. They hold their shape well during baking. Feel free to mix and match your favorites! You can now make your own loaded veggie pizza at home. We covered the key ingredients, step-by-step instructions, and helpful tips. You learned how to perfect your crust and choose the best cheeses. We also explored variations for gluten-free and vegan options, plus storage and reheating tricks. Making pizza allows for creativity and fun in the kitchen. Enjoy experimenting with flavors and toppings. This is a great way to share delicious meals with family and friends. Now, it’s time to gather your ingredients and start your pizza adventure!

Loaded Veggie Pizza Packed with Flavorful Goodness

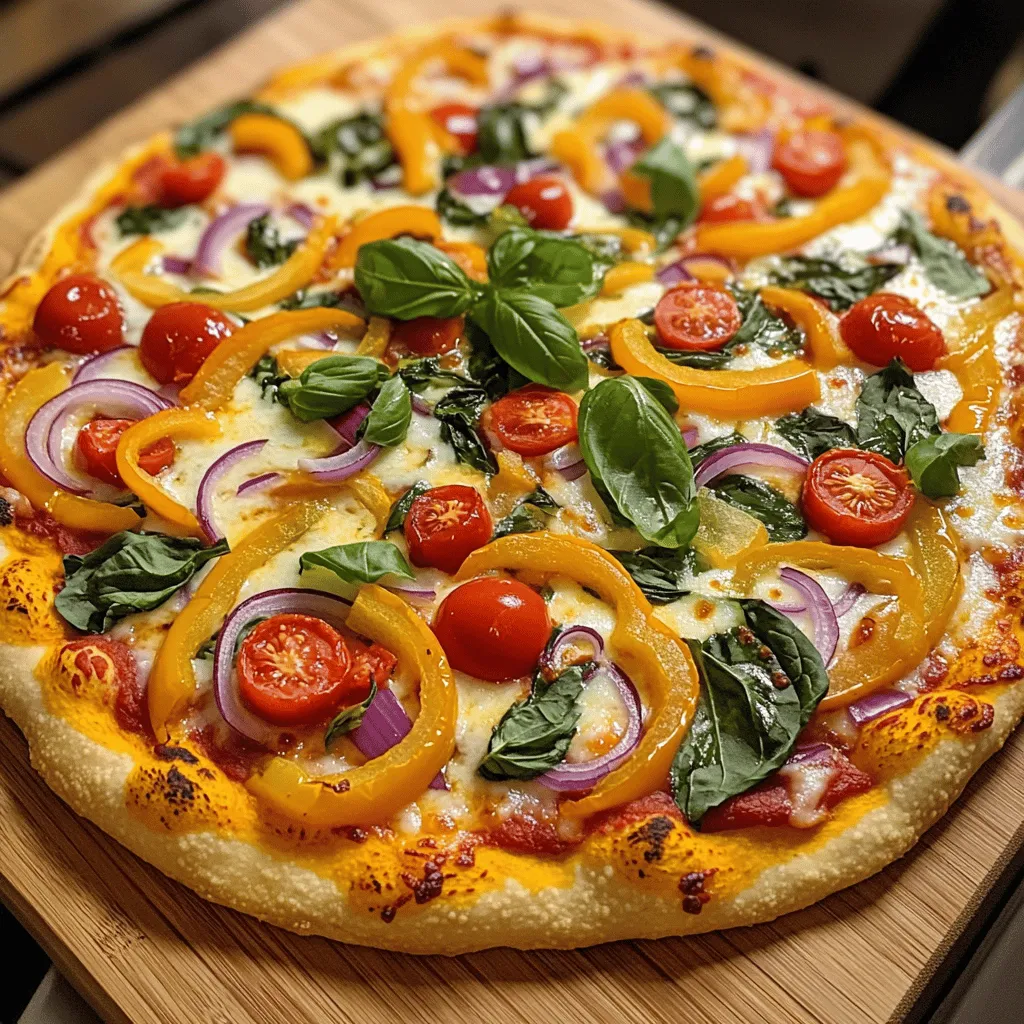
Ready to enjoy a delicious Loaded Veggie Pizza that bursts with flavor? This recipe is your perfect guide to creating

To make Zesty Cilantro Lime Rice, you need a few key items: - 1 cup long-grain white rice - 2 cups vegetable broth (or water) - 1 tablespoon olive oil - Zest of 1 lime - Juice of 1 lime - 1/2 cup fresh cilantro, chopped - 1/2 teaspoon garlic powder - 1/2 teaspoon onion powder - Salt, to taste - Black pepper, to taste These ingredients work together to create a dish that is both bright and flavorful. If you don't have an ingredient, don't worry! Here are some good swaps: - Rice: You can use brown rice or jasmine rice if you prefer. - Broth: Chicken broth can replace vegetable broth for added flavor. - Olive Oil: Any neutral oil, like canola or avocado oil, will work well. - Cilantro: If you dislike cilantro, try parsley or green onions for a fresh taste. These substitutes can keep your dish tasty while fitting your needs. Fresh ingredients make your dish shine. Here’s how to pick the best: - Rice: Choose long-grain rice with no broken pieces for even cooking. - Cilantro: Look for bright green leaves without any wilting or yellow spots. - Limes: Select limes that feel heavy for their size and have smooth skin. This means they are juicy. Using fresh ingredients ensures your Zesty Cilantro Lime Rice has the best flavor. For the full recipe, check out the link above! To make zesty cilantro lime rice, start by rinsing the long-grain rice. Run cold water over it until the water is clear. This step removes extra starch and helps keep the rice fluffy. Next, heat olive oil in a medium saucepan over medium heat. Add the rinsed rice and stir for about 2-3 minutes until the rice turns a light golden color. Now, pour in the vegetable broth or water. Add garlic powder, onion powder, salt, and black pepper. Stir everything together and bring it to a boil. Once it starts boiling, lower the heat to a simmer. Cover the pot and let it cook for about 15-18 minutes. The rice should be tender and absorb all the liquid. After cooking, take the pot off the heat. Let it sit, covered, for 5 more minutes. This resting time steams the rice, making it fluffier. Finally, use a fork to fluff the rice. Mix in the lime zest, lime juice, and chopped cilantro. Taste and adjust the seasoning if needed. - Always rinse your rice. This makes it fluffy and not sticky. - Use the right ratio of liquid to rice. Two cups of liquid per one cup of rice works well. - Stir the rice only at the start. Avoid stirring while it cooks to keep it from becoming mushy. - Let the rice rest after cooking. This step is key to perfect texture. - Rinsing rice: 2 minutes - Toasting rice: 2-3 minutes - Cooking time: 15-18 minutes on low heat - Resting time: 5 minutes - Total time: 35 minutes from start to finish By following these steps, you’ll create a dish that shines on your dinner table. For more details, check the Full Recipe for zesty cilantro lime rice. To make your Zesty Cilantro Lime Rice stand out, use fresh ingredients. Fresh cilantro adds a bright taste. Lime zest gives a sharp, citrusy punch. If you want more depth, add a pinch of cumin or a dash of chili powder. You can also mix in some diced jalapeños for heat. This adds a fun twist. One common mistake is not rinsing the rice. Rinsing removes extra starch, which keeps the rice fluffy. Another mistake is overcooking the rice. Follow the cooking time closely. If you skip the resting step, the rice can become gummy. Give it a few minutes to steam for the best texture. Finally, don’t skip the lime juice. It brightens the flavor and makes your dish pop. For this recipe, use a medium saucepan. It allows for even cooking and good heat control. A fine-mesh strainer is great for rinsing the rice. A fork is essential for fluffing the rice after it rests. These tools help you achieve perfect results. If you want to save time, a rice cooker can also work well. Just follow the manufacturer's instructions for rice-to-liquid ratios. You can find the full recipe for Zesty Cilantro Lime Rice here. {{image_2}} Zesty cilantro lime rice is already vegetarian and vegan. It uses vegetable broth, which adds flavor without meat. You can serve this rice with many plant-based dishes. Pair it with black beans, grilled veggies, or avocado slices. This makes a great meal for any day. You can change the flavor of your rice easily. For a spicy kick, add diced jalapeños or red pepper flakes. If you want more herbs, try fresh parsley or dill. You can also mix in a touch of cumin for warmth. These small changes can make a big difference. This rice pairs well with many foods. Serve it with grilled chicken, fish, or shrimp for a tasty meal. It also works great with tacos, burritos, or salads. You can even use it as a base for a rice bowl. The zesty flavor brightens up any dish! For the full recipe, check the cooking section above. To keep your Zesty Cilantro Lime Rice fresh, let it cool first. Once cooled, place it in an airtight container. Store it in the fridge for up to four days. If you have a lot, consider dividing it into smaller portions. This way, you can enjoy it easily later. When you're ready to eat the rice again, you can reheat it simply. Use a microwave-safe bowl and add a splash of water to keep it moist. Heat it in the microwave for 1-2 minutes. Stir halfway through for even warming. You can also reheat it on the stove. Add a bit of oil or water in a pan over low heat, stirring until warm. If you want to store the rice for longer, freezing is a great option. First, let the rice cool completely. Then, place it in a freezer-safe bag or container. Remove as much air as possible to prevent freezer burn. It can last up to three months in the freezer. When ready to use, thaw it in the fridge overnight before reheating. This helps keep the flavor and texture intact. For best results, use the full recipe when preparing your meals. To make rice less sticky, rinse it well before cooking. I recommend washing the long-grain rice under cold water until the water runs clear. This removes excess starch that can cause stickiness. Using the right water-to-rice ratio also helps. For this recipe, I use two cups of vegetable broth for one cup of rice. Cooking it at a low simmer and letting it rest afterward also keeps the grains fluffy. Yes, you can use brown rice instead of white rice. Brown rice has a nuttier taste and is more healthy. However, it requires more cooking time. I suggest increasing the cooking time to about 40-45 minutes. Use the same two cups of broth for one cup of brown rice. The texture will differ, but it will still be tasty. Zesty Cilantro Lime Rice pairs well with many dishes. I love serving it with grilled chicken, fish, or shrimp. It also works great with black beans for a vegetarian meal. Add a side of fresh salsa or guacamole for extra flavor. You can also top it with roasted vegetables or serve it alongside tacos or burritos. This rice is versatile and can enhance many meals, making it a fun side dish. For the complete recipe, check out the Full Recipe section. In this blog post, we explored how to make zesty cilantro lime rice. We covered key ingredients, step-by-step cooking methods, and tips to enhance flavor. You learned about common mistakes to avoid and ways to store leftovers effectively. Remember, fresh ingredients make a big difference. With these guidelines, you can enjoy tasty rice every time. Experiment with variations to suit your taste and needs. Enjoy cooking and sharing your delicious creations!

Zesty Cilantro Lime Rice Flavorful Side Dish Recipe

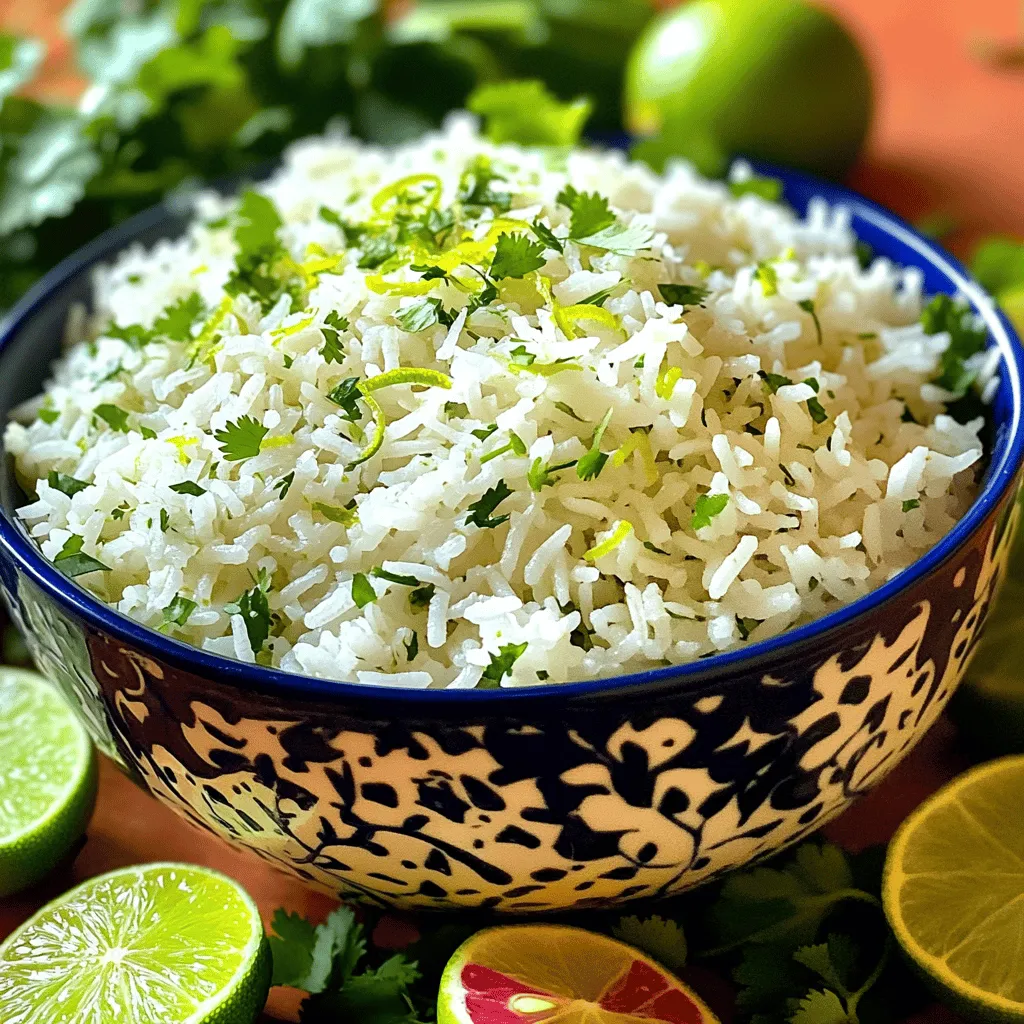
If you’re looking for a bright and tasty side dish, you’ve come to the right place. My Zesty Cilantro Lime

Older posts
Newer posts
← Previous Page1 … Page27 Page28 Page29 … Page80 Next →

dsad

© 2025 pureeatsnow • Built with GeneratePress

Our Policies

  • Copyright Policy
  • Cookie Policy
  • GDPR Policy
  • Privacy Policy
  • Disclaimer
  • Terms Of Use

More Information

  • Home
  • About
  • Contact
  • Appetizers
  • Dessert
  • Dinner
  • Drinks
©2025, pureeatsnow About Back To Top