Skip to content
DisclaimerTerms Of UseGDPR PolicyCookie Policy

pureeatsnow

  • Home
  • Drinks
  • Appetizers
  • Dinner
  • Dessert
  • About
  • Contact
  • Privacy Policy
DisclaimerTerms Of UseGDPR PolicyCookie Policy

Rachel

To create a colorful and tasty Vegan Mediterranean Bowl, gather these main ingredients: - 1 cup quinoa, rinsed - 1 can (15 oz) chickpeas, drained and rinsed - 1 cup cherry tomatoes, halved - 1 cucumber, diced - 1 red bell pepper, diced - 1/4 red onion, finely chopped - 1 avocado, sliced - 1/4 cup Kalamata olives, pitted and halved Quinoa serves as a great base. It is full of protein and fiber. Chickpeas add a nice texture and flavor. Fresh vegetables bring crunch and color. The olives add a briny touch that ties everything together. For the dressing, you will need: - 2 tablespoons olive oil - 1 tablespoon lemon juice - 1 teaspoon dried oregano - Salt and pepper to taste This dressing is simple yet full of flavor. Olive oil gives it richness, while lemon juice adds brightness. Oregano offers an earthy taste that is perfect for Mediterranean dishes. To elevate your bowl, consider these optional garnishes: - Fresh parsley, chopped, for garnish - Additional toppings like nuts or seeds Adding fresh parsley enhances the presentation. You can also customize your bowl with nuts for crunch or seeds for extra nutrition. For the full recipe, check out the details above. Enjoy creating this vibrant and healthy meal! Boiling the Vegetable Broth Start by heating 2 cups of vegetable broth in a medium saucepan. Bring it to a rolling boil. This broth gives the quinoa a rich flavor. Cooking Instructions for Quinoa Once the broth boils, add 1 cup of rinsed quinoa. Stir it gently to mix. Reduce the heat to low, cover the pot, and let it simmer for about 15 minutes. This allows the quinoa to absorb the liquid. When done, take it off the heat and fluff it with a fork. Whisking Ingredients Together In a small bowl, combine 2 tablespoons of olive oil, 1 tablespoon of lemon juice, and 1 teaspoon of dried oregano. Add salt and pepper to taste. Use a whisk to blend everything well. This dressing adds a zesty kick to your bowl. Adjusting Seasonings Taste your dressing. If it needs more flavor, add a pinch of salt or a squeeze of lemon. Adjust it until it’s just right for you. Mixing the Main Ingredients In a large mixing bowl, combine the cooked quinoa, 1 can of drained chickpeas, 1 cup of halved cherry tomatoes, 1 diced cucumber, 1 diced red bell pepper, 1 finely chopped red onion, and 1/4 cup of halved Kalamata olives. Stir gently to mix all the ingredients. Combining with Dressing Pour the dressing over the salad mixture. Toss everything carefully so that the dressing coats each ingredient. This helps to meld the flavors. Plating the Vegan Mediterranean Bowl Serve the mixture in individual bowls. Top each bowl with sliced avocado and a sprinkle of chopped fresh parsley. This adds a lovely touch and vibrant color to your dish. Enjoy your Vegan Mediterranean Bowl! For the Full Recipe, check the details above. Cooking quinoa can be simple, but a few mistakes can lead to clumpy grains. Here are tips to avoid common errors: - Rinse the Quinoa: Always rinse quinoa before cooking. This removes a natural coating called saponin, which can taste bitter. - Use the Right Water Ratio: A common ratio is 2 cups of liquid for every 1 cup of quinoa. This ensures it cooks evenly and absorbs moisture well. - Don't Overcook: Cook quinoa for about 15 minutes. Keep an eye on it. If you cook too long, it can turn mushy. - Fluff After Cooking: Once done, let it sit for a few minutes. Then, use a fork to fluff it. This keeps the grains separate and light. You can boost the taste of your Vegan Mediterranean Bowl with some extra flavors. - Adding Spices or Herbs: Fresh herbs like basil or mint can really brighten up your dish. You can also try adding garlic powder or smoked paprika for a warm flavor. - Adjusting Dressing Ingredients: Taste the dressing before adding it to your bowl. If you want it zesty, add more lemon juice. For richness, increase the olive oil. A little extra oregano can also add depth. How you serve your bowl can make a big difference. - Arranging Ingredients for Visual Appeal: Take time to arrange your ingredients. Place the quinoa at the bottom, then add veggies in sections. This creates a colorful look that is fun to eat. - Using Bowls vs. Plates: I prefer using deep bowls. They keep everything in one place and allow for easy mixing. Plates can work, too, but might make mixing harder. {{image_2}} You can change the base of your Vegan Mediterranean Bowl for more variety. Instead of quinoa, try farro or couscous. Both grains have a nice texture and flavor, making them great choices. For protein, chickpeas are a must, but you can also use tofu or tempeh. Tofu adds a soft texture, while tempeh has a chewy bite. Both options soak up flavors well. Using seasonal produce keeps your bowl fresh and exciting. In summer, add ripe tomatoes and zucchini. In fall, roast sweet potatoes or butternut squash. Each season brings unique flavors, so adjust your bowl to match what’s fresh. To make your bowl gluten-free, swap quinoa for rice or gluten-free grains. This way, you can still enjoy a tasty meal without worry. If you have nut allergies, skip the nuts in any optional toppings. You can still enjoy the bowl without losing flavor or texture. Each swap keeps the dish safe and delicious. To keep your Vegan Mediterranean Bowl fresh, use airtight containers. Glass or plastic containers work well. Make sure they are clean and dry before you store your food. This keeps out moisture and air, which can spoil your meal. Store your bowl in the fridge right away. The sooner you put it away, the better it stays. Aim to eat leftovers within a few days for the best taste. You can reheat your bowl in two ways: microwave or stovetop. - Microwave: Place your bowl in a microwave-safe dish. Heat for about 1-2 minutes. Check and stir halfway through to heat evenly. - Stovetop: Put your bowl in a pan over low heat. Stir often for about 5-7 minutes. This method keeps the flavors intact. Choose the method that suits your time and taste! Your Vegan Mediterranean Bowl lasts about 3-5 days in the fridge. Keep it covered to maintain freshness. After that, check for any off smells or changes in texture. When in doubt, throw it out! Enjoy your bowl for as long as possible but always prioritize safety. A Vegan Mediterranean Bowl is a colorful dish full of fresh ingredients. It combines grains, veggies, and protein. The main components include quinoa, chickpeas, and various fresh vegetables. You can add olives and avocado for extra flavor. The dish is healthy and tasty, making it a great choice for any meal. Yes, you can make this bowl ahead of time. It’s perfect for meal prep. Cook the quinoa and chickpeas and store them in the fridge. Chop your veggies and keep them in separate containers. When you’re ready to eat, just mix everything together. You can also prepare the dressing in advance. This makes your meal quick and easy. Yes, this recipe is gluten-free. Quinoa is a great grain choice for gluten sensitivity. If you want to switch things up, you can use farro or rice. Just check that any alternatives are also gluten-free. This way, everyone can enjoy the bowl without worry. To make a more hearty version, add more grains or protein boosters. You can include cooked lentils or brown rice. Tofu or tempeh can also provide extra protein. These additions will make your meal more filling. Try different combinations to find what you like best. For the full recipe, check below. The Vegan Mediterranean Bowl brings together healthy ingredients for tasty meals. We explored essential elements, like quinoa and chickpeas, along with simple dressing steps. I shared tips for perfect quinoa and creative enhancements for flavor. You can customize your bowl with seasonally fresh produce and dietary needs. Remember, this dish is easy to prepare and store. It fits well into meal prep for any week. Enjoy the vibrant tastes and colors of your Vegan Mediterranean Bowl. It nourishes both the body and soul.

Vegan Mediterranean Bowl Fresh and Flavorful Recipe

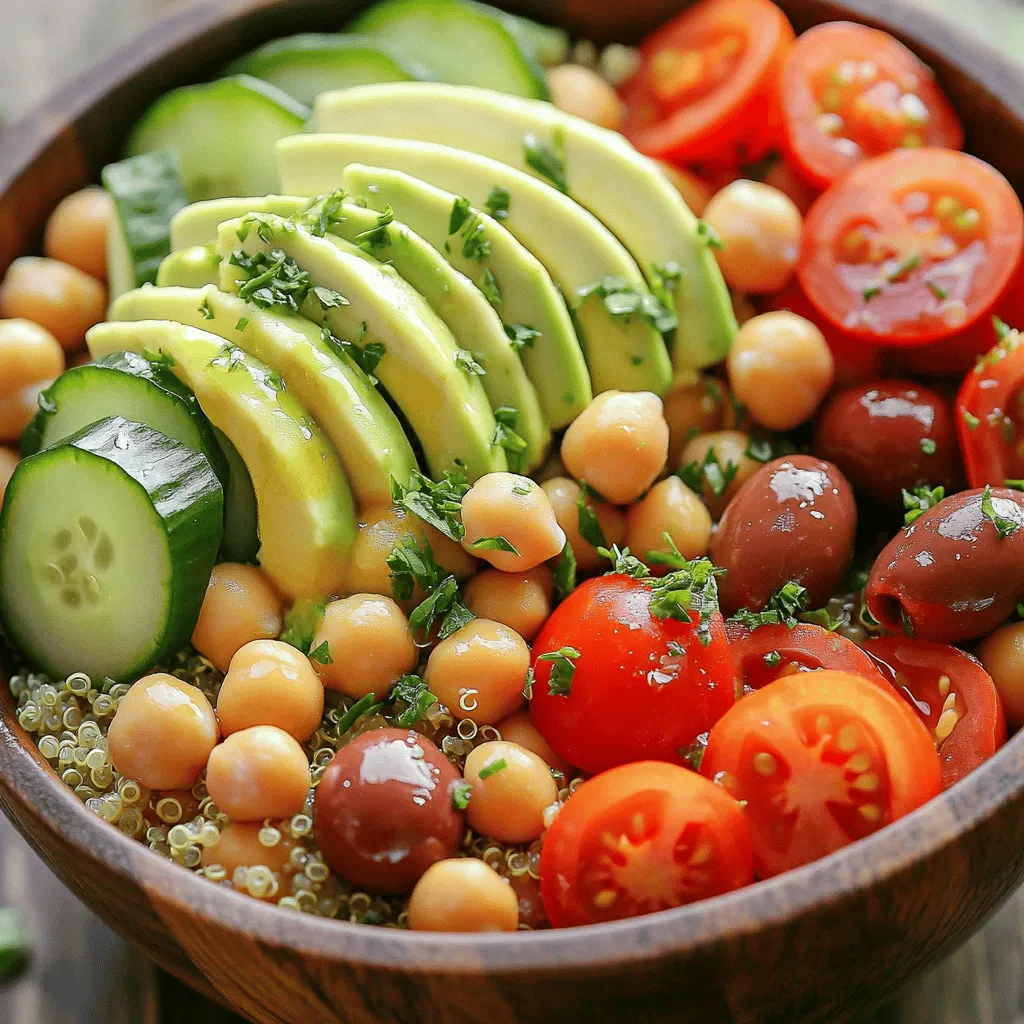
Are you ready to dive into a fresh and flavorful Vegan Mediterranean Bowl? This vibrant dish bursts with nourishing ingredients

- 1 lb boneless, skinless chicken thighs, cut into 1-inch pieces - 3 tablespoons honey - 2 tablespoons lime juice (freshly squeezed) - 1 tablespoon lime zest - 2 tablespoons olive oil - 2 cloves garlic, minced - 1 teaspoon ground cumin - 1 teaspoon chili powder - Salt and pepper to taste - Skewers (wooden or metal) The main star of this dish is the chicken thighs. They are juicy and flavorful. I love using thighs because they stay tender even when grilled. The marinade is where the magic happens. Honey adds sweetness, while lime juice and zest give a fresh kick. Olive oil helps keep the chicken moist. Garlic brings depth, and spices like cumin and chili powder add warmth. When it comes to skewers, you can use wooden or metal. If you choose wooden, soak them in water first. This step stops them from burning on the grill. With these simple ingredients, you can create delicious honey lime chicken skewers. For the full recipe, check out the details above. First, gather your ingredients for the marinade. You will need honey, lime juice, lime zest, olive oil, minced garlic, ground cumin, chili powder, salt, and pepper. In a large mixing bowl, add these ingredients together. Whisk them well until they blend smoothly. This marinade is key to adding flavor to the chicken. Now, take your chicken thighs and cut them into 1-inch pieces. Place them into the bowl with the marinade. Toss the chicken pieces gently to coat them evenly. Make sure every piece gets a good layer of the marinade. Cover the bowl and let it sit in the fridge for at least 30 minutes. For even more flavor, let it marinate for up to 2 hours. If you use wooden skewers, soak them in water for 30 minutes. This step helps prevent them from burning on the grill. If you choose metal skewers, you can skip this step. Now, take the marinated chicken out of the fridge. Start threading the chicken pieces onto the skewers. Leave a little space between each piece. This allows the heat to cook the chicken evenly. Aim for about 4 to 5 pieces per skewer. Before grilling, preheat your grill to medium-high heat. This helps create those beautiful grill marks and keeps the chicken juicy. Place the skewers on the grill. Cook them for about 10 to 12 minutes. Turn them occasionally to ensure they cook evenly. Check that the internal temperature reaches 165°F (75°C) to be safe. You want the chicken to be fully cooked and slightly charred for the best taste. Enjoy making honey lime chicken skewers! For the complete recipe, refer to the Full Recipe section. - Monitoring Cooking Temperature: A hot grill is key. Preheat your grill to medium-high heat. This helps the chicken cook evenly and get great grill marks. Use a meat thermometer to check the chicken's internal temperature. It should reach 165°F (75°C). - Achieving Flavor Balance: The honey and lime mix gives great taste. If you want more zing, add lime zest. The cumin and chili powder add warmth. Adjust these spices to fit your taste, but keep the balance. - Overcrowding Skewers: Give the chicken space on the skewers. If they are too close, they won’t cook well. This can lead to uneven cooking. Each piece needs some air for proper grilling. - Under-Marinating Chicken: Don’t rush the marination. Let the chicken soak in the marinade for at least 30 minutes. For best results, let it sit for 2 hours. This time helps the flavors really soak in. - Additional Marinade Ingredients: Want to mix it up? Try adding soy sauce for a savory kick. You can also use ginger or even a bit of sriracha for heat. Each addition can bring new life to your skewers. - Optional Garnishes: After grilling, drizzle extra honey over the skewers. A squeeze of fresh lime juice adds brightness. Chopped cilantro or green onions can also make a nice touch. These small tweaks enhance the dish's look and taste. For the complete guide to making these skewers, refer to the Full Recipe section to ensure you don’t miss a step! {{image_2}} Using Chicken Breasts You can swap chicken thighs for chicken breasts. Breasts are leaner and cook faster. Cut them into 1-inch pieces, just like thighs. Adjust cooking time to about 8-10 minutes. This keeps them juicy without drying out. Vegetarian Options For a meat-free meal, try using firm tofu or mushrooms. Marinate them just like the chicken. Skewered veggies, like bell peppers and zucchini, work well too. Grill until they are tender and slightly charred. This gives you a tasty, plant-based dish that everyone will enjoy. Adding Spice Want to kick up the heat? Add cayenne pepper or crushed red pepper to your marinade. This brings a nice warmth to the dish. You can also try adding smoked paprika for a smoky flavor. Adjust the amount to fit your taste. Citrus Variations Lime is great, but you can mix it up! Use lemon or orange juice instead. Each citrus fruit adds a unique twist. Lemon gives a tart taste, while orange adds sweetness. Experiment with different zests for even more flavor. Pairing with Sides Serve your honey lime chicken skewers with rice or a fresh salad. A side of grilled corn adds sweetness that pairs well. You can also offer warm tortillas for a fun touch. These sides make the meal complete and satisfying. Ideal Dipping Sauces A tangy yogurt sauce complements the skewers nicely. You can also serve sweet chili sauce for a bit of heat. These sauces enhance the flavors and add more variety. Try different dips to find your favorite combination. For the full recipe, check out the detailed instructions above! Refrigerating Skewers After enjoying your honey lime chicken skewers, let them cool down. Place any leftovers in an airtight container. Make sure to store them in the fridge within two hours. They will stay fresh for about three to four days. This way, you can enjoy them again soon. Reheating Instructions To reheat, you have a couple of options. You can use the oven or stovetop. If using the oven, set it to 350°F (175°C). Place the skewers on a baking sheet and cover with foil. Heat for about 10-15 minutes. If you prefer the stovetop, warm them in a skillet over medium heat for about 5-7 minutes. This will help keep them juicy. Proper Freezing Techniques If you want to keep the skewers longer, freeze them. First, let them cool completely. Wrap each skewer tightly in plastic wrap. Then, place them in a freezer-safe bag or container. Remove as much air as you can to prevent freezer burn. They can last for up to three months in the freezer. Defrosting Tips To defrost, take the skewers out of the freezer. Place them in the fridge overnight. If you’re short on time, you can defrost them in the microwave using the defrost setting. Once defrosted, you can reheat them as described above. Enjoy your tasty meal even after some time! To check if the chicken is done, use a meat thermometer. The safe internal temperature for chicken is 165°F (75°C). Insert the thermometer into the thickest part of the chicken. If it reads 165°F, your chicken is cooked. If not, grill it for a few more minutes and check again. Yes, marinating the chicken overnight is a great idea. It helps the chicken soak in all the flavors. You can mix the marinade and add the chicken in the morning. Let it sit in the fridge all day. This gives you juicy, tasty chicken. There are many great sides for your skewers. Here are some ideas: - Grilled vegetables, like bell peppers and zucchini - Rice or quinoa for a filling base - Fresh salad with lime vinaigrette for a crisp bite - Corn on the cob for a sweet complement For the full recipe, gather these ingredients: - 1 lb boneless, skinless chicken thighs, cut into 1-inch pieces - 3 tablespoons honey - 2 tablespoons lime juice (freshly squeezed) - 1 tablespoon lime zest - 2 tablespoons olive oil - 2 cloves garlic, minced - 1 teaspoon ground cumin - 1 teaspoon chili powder - Salt and pepper to taste - Skewers (wooden or metal) Follow the steps to marinate, assemble, and grill for a delightful meal. Making honey lime chicken skewers is easy and fun. We talked about key ingredients, like chicken thighs and marinade. Then, we went through mixing, marinating, and grilling. Tips helped you avoid common mistakes, like overcrowding skewers. In the end, you can take these tips and make your own dish at home. Whether you try different proteins or add spices, your skewers will impress everyone. Enjoy great meals, and don’t forget to share this recipe!

Honey Lime Chicken Skewers Flavorful Grilled Delight

Looking for a tasty and easy meal? Try Honey Lime Chicken Skewers! These skewers bring a sweet and tangy flavor

To make Cheesy Jalapeño Cornbread Muffins, you need a few key items. Here is the list: - 1 cup cornmeal - 1 cup all-purpose flour - 1 tablespoon baking powder - 1/2 teaspoon salt - 1/4 teaspoon baking soda - 1 cup milk - 2 large eggs - 1/4 cup honey - 1/4 cup vegetable oil - 1 cup shredded sharp cheddar cheese - 1/2 cup pickled jalapeños, chopped - 1/2 cup corn kernels (fresh or frozen) For the cheese, I recommend using sharp cheddar. It melts well and adds great flavor. If you want a spicier kick, consider pepper jack cheese. For jalapeños, pickled ones are easy to find and add a tangy taste. You can boost the flavor of your muffins with different add-ins. Here are some ideas: - Try adding 1/2 teaspoon of garlic powder or onion powder for an extra kick. - Fresh herbs like cilantro or green onions can add freshness. - For a sweet touch, mix in a bit of crumbled bacon. You can also swap out flours. If you want a gluten-free option, use corn flour or a gluten-free blend. If you have food allergies, there are easy swaps. For a gluten-free version, use gluten-free flour instead of all-purpose flour. If you need a dairy-free option, try almond milk and a plant-based cheese. For sweeteners, you can use agave syrup or maple syrup instead of honey. For oil, you can use melted coconut oil or any neutral oil you prefer. For the full recipe, check out the complete list of steps to make these tasty muffins! 1. Start by preheating your oven to 400°F (200°C). This step gets the oven ready for baking. 2. Grease your muffin tin with oil or butter. You can also use paper liners if you prefer. 3. In a medium bowl, combine the cornmeal, flour, baking powder, salt, and baking soda. Whisk them well to mix. 4. In a larger bowl, mix the milk, eggs, honey, and vegetable oil. Stir until the mixture is smooth. 5. Add the dry ingredients to the wet mixture gradually. Stir gently until just combined. Avoid overmixing; this keeps the muffins soft. 6. Fold in the shredded cheddar cheese, chopped jalapeños, and corn kernels. Make sure everything is evenly mixed. 7. Spoon the batter into your prepared muffin tin. Fill each cup about two-thirds full. - Bake the muffins for 15-18 minutes. Keep an eye on them as they cook. - To check for doneness, insert a toothpick into the center of a muffin. If it comes out clean, they are ready. - Different ovens may cook differently. If your oven runs hot, check the muffins a bit earlier. - Let the muffins cool in the pan for about 5 minutes. Then transfer them to a wire rack to cool completely. - Serve the muffins warm. A pat of butter on top adds a nice touch. - For extra flair, garnish with fresh cilantro or jalapeño slices. These small details make a big impact! - Consider pairing them with your favorite dips or toppings for an even better taste experience. You can find the full recipe for Cheesy Jalapeño Cornbread Muffins above. To make the best Cheesy Jalapeño Cornbread Muffins, avoid common mistakes. First, don’t overmix your batter. This can make your muffins tough. Mix until just combined. Second, check your ingredient temperature. Use room temperature eggs and milk. This helps your muffins rise evenly. For the best flavor, use sharp cheddar cheese. It adds a rich taste. Fresh jalapeños give a nice kick. If you want more heat, use more jalapeños. You can also add spices like cumin or smoked paprika for deeper flavor. The right texture is key to great muffins. Aim for moist, fluffy muffins. To avoid dryness, measure flour and cornmeal correctly. Use a spoon to scoop flour into your measuring cup. This prevents packing. Too much flour can lead to dry muffins. Remember, the batter should be slightly lumpy for the best results. For more details, check out the Full Recipe. {{image_2}} You can easily change the flavor of your Cheesy Jalapeño Cornbread Muffins. Try using different cheeses to find your favorite. Pepper jack adds a nice kick. Queso blanco will give a creamy taste. I love how varied cheese can change the muffin’s vibe. You can also add more vegetables. Corn kernels make a sweet burst of flavor. Try diced bell peppers for a crunchy texture. You can even sneak in some spinach for color and nutrients. The more colorful, the better! If you're vegan or plant-based, you can still enjoy these muffins. Replace the eggs with flaxseed meal mixed with water. Use plant-based milk instead of regular milk. You can also swap honey for maple syrup or agave. This way, you keep the sweetness while staying plant-friendly. For a low-carb or keto version, use almond flour instead of all-purpose flour. Replace the cornmeal with ground flaxseed or coconut flour. You can also add cheese to make it richer. These tweaks will keep your muffins tasty and healthy. Adding regional flair can make these muffins even better. If you love Southern cuisine, add some buttermilk for a rich taste. Use local cheeses from your area to add unique flavors. Specific types of cornmeal can also change the texture and taste. If you enjoy Tex-Mex flavors, consider adding diced green chiles. They give a smoky note to the muffins. You can also mix in some chopped cilantro for freshness. These small changes can turn your muffins into a regional delight. For the full recipe, check out the detailed steps and ingredients list! To keep your cheesy jalapeño cornbread muffins fresh, store them at room temperature. Place them in an airtight container or a zip-top bag. This helps keep them soft and moist. They stay fresh for about three days. If you want to maintain their flavor, add a slice of bread to the container. The bread helps to keep the muffins from drying out. For long-term storage, freezing muffins is a great option. Wrap each muffin in plastic wrap or foil. Then, place them in a freezer-safe bag. They can last up to three months in the freezer. When you’re ready to eat them, let them thaw in the fridge overnight. You can also reheat them in the oven at 350°F (175°C) for about 10 to 15 minutes. This will help them regain their fresh-baked taste. The type of cheese or jalapeños you use can affect how well they freeze. If your muffins lose moisture, don’t worry! You can revive them easily. Wrap the muffins in a damp paper towel. Then, microwave them for 10 to 15 seconds. This adds back some moisture. You can also cut stale muffins into small pieces and turn them into a savory bread pudding. Just mix them with eggs and milk, add some veggies, and bake. This way, you can make a new dish from your leftover muffins. For the full recipe, check back in the earlier sections! Yes, you can make these muffins ahead of time. Bake them and let them cool. Store them in an airtight container. They can stay fresh for up to three days. You can also freeze them if you want to keep them longer. Just wrap each muffin in plastic wrap, then put them in a freezer bag. When you're ready to eat, thaw them in the fridge overnight. Reheat in the oven or microwave for the best taste. To adjust spice, choose your jalapeños wisely. If you want them milder, use fewer jalapeños or remove the seeds. For more heat, add more jalapeños or use fresh ones instead of pickled. You can also mix in some cayenne pepper or hot sauce. Start with a little and taste the batter before baking. This way, you can find the perfect heat for your taste. Yes, fresh corn works great in this recipe. Cut the kernels off the cob and measure out half a cup. Fresh corn gives a sweet crunch. Make sure to cook it briefly if you want it softer. Just steam or boil it for a few minutes. Then, let it cool before adding it to the batter. These muffins pair well with many meals. Serve them with chili for a hearty dish. They also go great with soups, salads, or barbecued meats. If you want a light meal, add some avocado or salsa on the side. For breakfast, enjoy them with eggs or bacon. The muffins are versatile, making them a fun choice for any meal. For the full recipe, check the section above. In this blog post, we explored the ingredients, instructions, and helpful tips for making Cheesy Jalapeño Cornbread Muffins. You learned about essential ingredients, flavor variations, and easy storage methods. Baking these muffins can be fun and rewarding. Remember, small tweaks can enhance flavor and texture. Don’t shy away from trying new things. Your muffins will shine with the right techniques and fresh ideas. Now, get in the kitchen and enjoy every bite!

Cheesy Jalapeño Cornbread Muffins Flavorful and Easy

Get ready to spice up your baking with Cheesy Jalapeño Cornbread Muffins! These flavorful bites combine cornbread’s classic taste with

To make No-Bake Key Lime Pie, you need a few key ingredients. Here’s a list to start you off: - 1 ½ cups graham cracker crumbs - ⅓ cup granulated sugar - ½ cup unsalted butter, melted - 1 cup sweetened condensed milk - ½ cup sour cream - ½ cup fresh key lime juice (or regular lime juice) - 1 tablespoon lime zest - Whipped cream (for topping) - Lime slices and additional zest (for garnish) The most vital ingredient is fresh key lime juice. It gives the pie its bright, tangy flavor. If fresh key limes are hard to find, regular limes work too. However, fresh juice always tastes best. You can customize your pie with optional ingredients. For a sweeter taste, add more sugar to the filling. Want a richer flavor? Use more sour cream. You can also experiment with toppings. Try adding toasted coconut or different fruits. Each twist can change the pie's flavor and style. For the full recipe, please refer to the section titled Full Recipe. Start by mixing the graham cracker crumbs, sugar, and melted butter in a bowl. Use a fork to combine them well. You want it to look crumbly but hold together when pressed. Next, take this mixture and press it firmly into a 9-inch pie dish. Make sure to cover the bottom and the sides evenly. This step is key! After pressing, place the crust in the fridge for about 15 minutes. Chilling the crust helps it set and hold its shape. A cool crust will make your pie look neat and tasty. While the crust chills, let’s prepare the filling. In another bowl, whisk together sweetened condensed milk, sour cream, and fresh lime juice. Mix them until smooth. This step is important for a creamy texture. Next, add lime zest to the filling. This gives it an extra burst of flavor. For a smooth filling, mix gently but thoroughly. Avoid over-mixing, as that can introduce air bubbles. Now, pour the filling into your chilled crust. Use a spatula to spread it evenly. This ensures every slice has the same great taste. Once spread, place the pie back in the fridge. Chill it for at least 4 hours, but overnight is best. This time allows the pie to set properly. A well-chilled pie will slice beautifully. When ready, remove the pie from the fridge. Top it with whipped cream and garnish with lime slices and zest. Enjoy your delicious No-Bake Key Lime Pie! For the full recipe, check out the details above. To create the best filling, mix the sweetened condensed milk, sour cream, key lime juice, and lime zest thoroughly. This mix should be smooth and creamy. If it’s lumpy, you may need to whisk longer. A great filling has a bright flavor and a silky texture. For chilling, I recommend at least 4 hours. If you can wait overnight, the pie tastes even better. The flavors meld together, and the texture improves. This is key for the perfect no-bake key lime pie. Toppings can elevate your pie's look and taste. I love using whipped cream for a fluffy touch. Lime slices and extra zest add a pop of color. Consider mint leaves for a fresh twist. They also provide a nice contrast to the pie’s tartness. One mistake is over-mixing the filling. This can add air and create a foamy texture. Aim for smooth and creamy instead. Another issue is not chilling the pie long enough. If you cut into it too early, the filling may not hold. It’s best to be patient and let it set fully. Using stale graham crackers can ruin your crust. Always check the date on the package. Fresh crackers give a better crunch and flavor. For the best results, use high-quality ingredients. {{image_2}} You can add fun flavors to your no-bake key lime pie. Try using lemon or orange juice instead of lime juice. This gives a nice twist to the taste. You can also make flavored whipped cream. For example, add some lime zest or a little vanilla extract for extra flavor. These small changes make each pie unique and exciting. Switching up the crust can change the whole pie. Use Oreo cookies to make a chocolate crust. Just crush the cookies and mix them with melted butter. This adds a rich, chocolatey taste. If you need gluten-free options, try almond flour or coconut flour. Both work well to create a tasty base. You can enjoy the pie without worrying about gluten. These changes let you customize your pie just how you like it. For the complete recipe, check the Full Recipe section. To keep your No-Bake Key Lime Pie fresh, store it in the fridge. Use an airtight container for best results. This keeps the pie from drying out and losing flavor. If you have leftovers, cover the pie with plastic wrap. This will help maintain its taste and texture. Make sure to consume the pie within three days for the best experience. Can you freeze No-Bake Key Lime Pie? Yes, you can! Freezing is a great option if you want to save some for later. Just cut the pie into slices and wrap each piece tightly in plastic wrap. After that, place the slices in a freezer-safe container. This method keeps them fresh for up to three months. When you're ready to enjoy your pie, thaw it in the refrigerator overnight. This slow thawing helps keep the texture nice. Avoid thawing at room temperature, as it can make the pie soggy. No-Bake Key Lime Pie lasts about 3 to 5 days in the fridge. Make sure to cover it well to keep it fresh. If you freeze it, it can last for up to 2 months. However, the texture may change a bit after thawing. Always thaw it in the fridge for best results. Yes, you can use regular limes. Key limes are smaller and have a stronger flavor. They also have more acidity. If you use regular limes, your pie will taste a bit different. You may need to adjust the sugar to balance the flavor. Yes, you can make this pie vegan. Replace sweetened condensed milk with coconut cream or a dairy-free alternative. Use a vegan sour cream or cashew cream instead. For the crust, make sure the graham crackers are vegan or use crushed nuts mixed with coconut oil. Enjoy a tasty vegan treat! You learned how to make a delicious No-Bake Key Lime Pie. I covered the key ingredients, making the crust, and preparing the filling. I also shared tips to avoid common mistakes and ways to customize your pie. Remember, fresh key lime juice matters for flavor. You can try different crusts and toppings. With the right storage, your pie stays fresh for days. Enjoy your baking, and have fun experimenting with flavors! This pie is sure to impress everyone.

No-Bake Key Lime Pie Refreshing and Easy Recipe

Are you craving a dessert that’s both easy and refreshing? Look no further! This No-Bake Key Lime Pie is perfect

- 4 medium Yukon Gold potatoes, peeled and cut into wedges - 1/4 cup olive oil - 3 cloves garlic, minced - Juice and zest of 2 lemons - 1 teaspoon dried oregano - 1 teaspoon dried thyme - Salt and pepper to taste - Fresh parsley, chopped for garnish The key to great Baked Greek Lemon Potatoes lies in the essential ingredients. Yukon Gold potatoes are my favorite. They have a creamy texture and soak up flavors well. Olive oil adds richness and helps the potatoes crisp up. Fresh garlic brings a punch of flavor. Lemon juice and zest brighten the dish with a zesty kick. Dried oregano and thyme add a lovely herbal note. Be sure to season with salt and pepper to balance all the flavors. Finally, fresh parsley gives a pop of color and freshness to your dish. - Additional herbs such as rosemary or dill - Lemon slices for garnish - Grated Parmesan cheese You can play around with optional ingredients to make this dish your own. Rosemary or dill can add a unique twist. If you want more lemon flavor, add lemon slices on top before baking. A sprinkle of grated Parmesan cheese can enhance the dish's richness. These choices let you customize the recipe based on your taste. For the complete method, check the Full Recipe for step-by-step instructions. - Preheat your oven to 400°F (200°C). - Grease the baking dish with olive oil. Starting with a hot oven helps the potatoes crisp up nicely. Greasing the dish ensures the potatoes don’t stick. - Combine olive oil, minced garlic, lemon juice and zest, dried herbs, salt, and pepper. This marinade brings out bright flavors. The garlic and lemon make the dish fresh and zesty. You can adjust the herbs to fit your taste. - Toss potato wedges in the marinade. - Arrange in a single layer in the baking dish. Make sure each wedge gets coated well. This ensures every bite is full of flavor. Lay them flat so they cook evenly. - Bake for 45-50 minutes, turning halfway. - Check for doneness and golden color. Turning the potatoes helps them brown on all sides. Look for a golden hue and a fork that goes in easily. This means they’re ready to eat! Feel free to find the full recipe for detailed steps and more tips. - Use Yukon Gold potatoes for creaminess. Their texture makes every bite delightful. - Marinate potatoes longer for better flavor absorption. A few hours can make a big difference. - Serve on a platter with drizzled marinade. This adds a glossy finish and boosts appeal. - Add lemon wedges for a fresh touch. They brighten the plate and enhance flavor. - Top with grated Parmesan before serving. This adds richness and depth to the dish. - Consider adding a sprinkle of chili flakes for heat. It brings warmth without overpowering the lemon. {{image_2}} You can change up the herbs in this dish. Substitute dried oregano with rosemary or dill. Both herbs add a wonderful taste. If you have fresh herbs, use them! Fresh herbs can give a burst of flavor that dried herbs may lack. Want to add some sweetness? A touch of honey works great. It balances the tangy lemon. You can also add feta cheese. This gives a creamy, salty taste that fits the Mediterranean theme. You don’t have to bake these potatoes only. Try air frying for a crispier texture. It cooks faster and uses less oil. If you want a smoky taste, grill the potatoes instead. Grilling adds a nice char and depth of flavor. For more ideas, check out the Full Recipe for Baked Greek Lemon Potatoes! To keep your Baked Greek Lemon Potatoes fresh, allow them to cool first. Once cooled, place them in an airtight container. Store this container in the fridge. Proper storage will help maintain their flavor and texture. When it’s time to enjoy your leftovers, consider reheating them in the oven. This method keeps the potatoes crispy. Preheat your oven to 350°F (175°C) and heat for about 10-15 minutes. If you need a quick option, use a microwave. Just remember, the potatoes might lose some crispiness this way. Can baked potatoes be frozen? Yes, they can! However, the texture may change after freezing. For the best taste, eat them within 1-2 months. Label your container with the date before freezing. This helps you keep track of how long they’ve been stored. Baked Greek lemon potatoes are a simple yet tasty dish. They feature Yukon Gold potatoes, coated in a lemony marinade. The mix includes garlic, olive oil, and herbs. As they bake, the potatoes turn golden and tender. The bright lemon flavor shines through, making every bite fresh and zesty. Yes, you can use other types of potatoes. Red potatoes work well due to their waxy texture. Russet potatoes are also a good choice, giving a fluffier inside. Just remember, each type will give a unique taste and texture. Making this dish vegan is easy! Simply use plant-based oil instead of olive oil. You can also replace any butter with a vegan option. The marinade remains flavorful with lemon, garlic, and herbs, keeping the essence of the dish intact. These potatoes pair perfectly with many dishes. Grilled chicken or lamb adds a nice protein contrast. A fresh Greek salad can brighten up the meal. You can also serve them with roasted vegetables for a healthy side. For the complete recipe, check out the Zesty Baked Greek Lemon Potatoes. Baked Greek Lemon Potatoes offer a tasty blend of flavors and easy prep. We started with key ingredients, like Yukon Gold potatoes, olive oil, and garlic. Then, I shared clear steps to make this dish, along with useful tips for perfect taste. You can also explore recipe variations and learn how to store leftovers. Enjoy trying new herbs or serving with different foods. With this guide, you can make a delicious side dish that brightens any meal. Happy cooking!

Baked Greek Lemon Potatoes Flavorful and Simple Dish

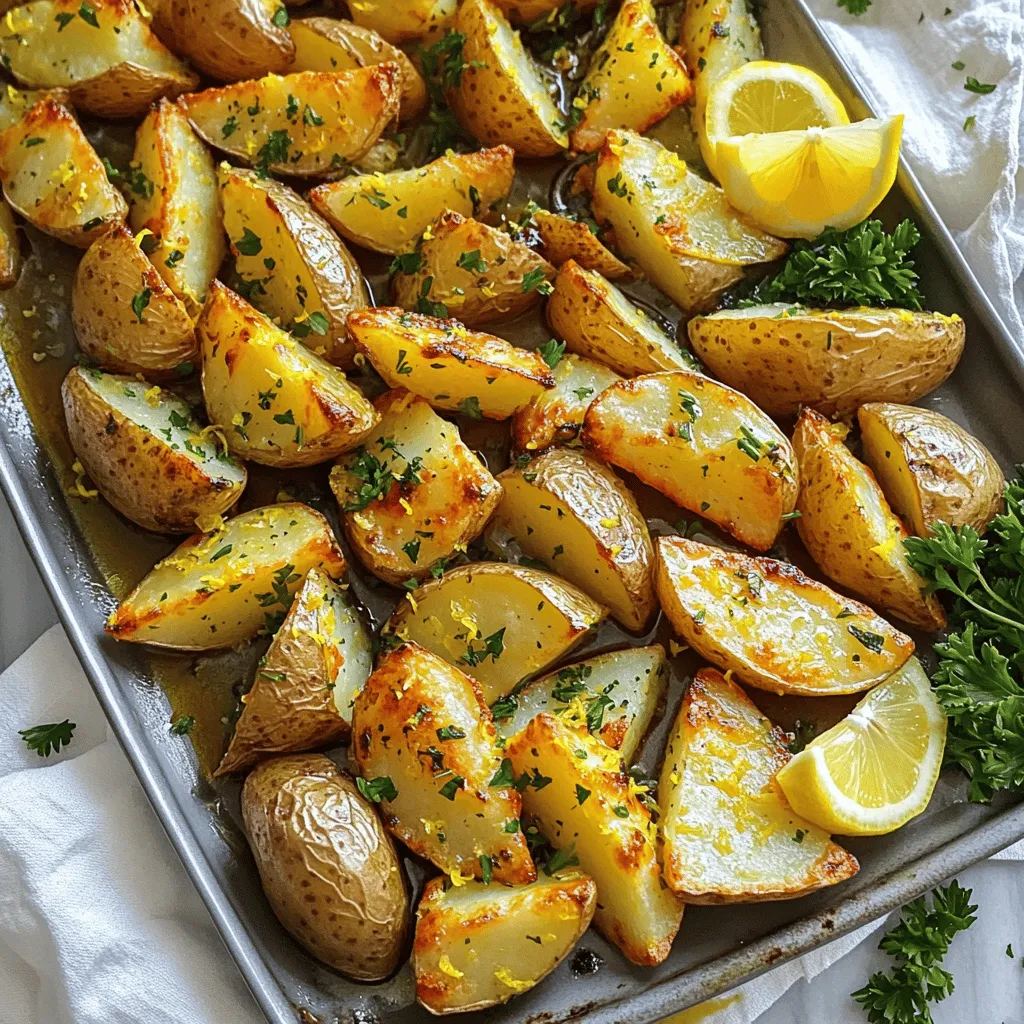
Are you ready to elevate your side dish game? Baked Greek Lemon Potatoes are simple yet bursting with flavor. This

To make Broccoli Cheddar Quinoa Bites, you need simple ingredients. You can find the full recipe above. This dish is both tasty and nutritious. It combines quinoa, broccoli, and cheese in a fun way. Here are the key ingredients you will need: - 1 cup quinoa, rinsed and drained - 2 cups vegetable broth (or water) - 1 cup broccoli florets, finely chopped - 1 cup shredded sharp cheddar cheese - 1/2 cup grated Parmesan cheese - 2 large eggs - 1/4 cup all-purpose flour (or gluten-free flour) - 1/2 teaspoon garlic powder - 1/2 teaspoon onion powder - Salt and pepper to taste - 2 tablespoons olive oil (for greasing) These ingredients work together to create a flavorful snack. The quinoa gives it a nice texture, while the cheese adds creaminess. You can swap some ingredients if needed. Here are some easy swaps: - Use chicken broth instead of vegetable broth for a richer flavor. - If you want a vegan option, replace eggs with flaxseed meal or chia seeds. - Try using a different cheese, like mozzarella or feta, for a unique twist. - If you need a gluten-free version, use gluten-free flour instead of all-purpose flour. These substitutions keep the dish tasty while catering to your needs. Enjoy creating your own version of this snack! To make Broccoli Cheddar Quinoa Bites, start by gathering your ingredients. You will need quinoa, vegetable broth, broccoli, cheeses, eggs, flour, and spices. First, preheat your oven to 375°F (190°C). Lightly grease a muffin tin with olive oil. This helps the bites come out easily after baking. Next, rinse and drain 1 cup of quinoa. In a medium saucepan, combine the quinoa with 2 cups of vegetable broth. Bring it to a boil. Once it boils, lower the heat, cover, and let it simmer for about 15 minutes. The quinoa will absorb all the liquid and become fluffy. While the quinoa cooks, steam 1 cup of broccoli florets until they are tender. This should take about 3-4 minutes. After steaming, let the broccoli cool a bit, then chop it finely. This will mix well with the quinoa. In a large bowl, mix the cooked quinoa, chopped broccoli, 1 cup of shredded sharp cheddar, and 1/2 cup of grated Parmesan cheese. Add 2 large eggs, 1/4 cup of flour, 1/2 teaspoon of garlic powder, and 1/2 teaspoon of onion powder. Season with salt and pepper to taste. Stir everything until well combined. Now, spoon the mixture into the prepared muffin tin. Fill each cup about ¾ full. Bake the bites in the preheated oven for 20-25 minutes. They should turn golden brown and feel firm to the touch when done. Once baked, take them out of the oven. Let them cool for about 5 minutes. Gently remove the bites from the muffin tin. They will hold their shape well if you let them cool a little. For a great presentation, arrange the quinoa bites on a serving platter. You can garnish them with fresh parsley or a sprinkle of extra cheddar cheese. This adds color and a nice touch. Serve them with a zesty sauce or yogurt-based sauce for a tasty dip. Enjoy every bite of your delicious snack! To get a great texture in your quinoa bites, make sure to cook the quinoa properly. Use two cups of vegetable broth for one cup of rinsed quinoa. This adds flavor while keeping it moist. When the quinoa is done, let it cool before mixing in the other ingredients. This helps bind the bites together better. One common mistake is overcooking the quinoa. If you cook it too long, it can turn mushy. Make sure to check it at 15 minutes. Another mistake is not chopping the broccoli finely. Large pieces can make the bites fall apart. Aim for tiny bits to mix in well. Also, don’t skip the eggs. They help hold everything together. For this recipe, you’ll need a few key tools. A medium saucepan works best for cooking quinoa. A large bowl is great for mixing your ingredients. Use a muffin tin to bake the bites evenly. Silicone muffin pans are handy because they make it easy to pop out the bites without sticking. You can find the full recipe [here](#). {{image_2}} You can make your broccoli cheddar quinoa bites even tastier with some add-ins! Try adding cooked bacon bits for a smoky flavor. Chopped sun-dried tomatoes can bring a sweet, tangy taste. You could also mix in some diced bell peppers or jalapeños for a bit of heat. Fresh herbs like parsley or basil can add a fresh touch. Experiment with different cheeses, too! Feta or gouda can add a unique twist. You can easily adapt this recipe to fit your diet. To make it vegan, replace the eggs with flax eggs. Mix one tablespoon of ground flaxseed with three tablespoons of water and let it sit for five minutes. For gluten-free bites, swap all-purpose flour for almond or chickpea flour. Both options work well and keep the bites moist. These quinoa bites are great as a snack or meal. I love serving them warm with a side of marinara sauce. You can also pair them with a creamy ranch dip. For a light meal, serve with a fresh salad. Arrange the bites on a platter and sprinkle some extra cheese on top. A quick squeeze of lemon juice can brighten up the flavors. Try these ideas to make your bites shine! For the full recipe, check out the Broccoli Cheddar Quinoa Bites. To keep your Broccoli Cheddar Quinoa Bites fresh, store them in an airtight container. Let them cool completely before sealing. This helps prevent moisture buildup. Place the container in the fridge. They can last up to four days. If you notice any moisture, use a paper towel to absorb it. Reheating is easy. You can use the oven or microwave. For the oven, set it to 350°F (175°C). Place the bites on a baking sheet. Heat for about 10-15 minutes, until warm. If you use the microwave, heat for 30 seconds at a time. Check often to avoid overcooking. You can freeze Broccoli Cheddar Quinoa Bites for longer storage. After baking, let them cool completely. Then, wrap each bite in plastic wrap. Place the wrapped bites in a freezer bag. They can last for up to three months in the freezer. When you're ready to eat, thaw them in the fridge overnight before reheating. This keeps them tasty and fresh. For full details, check the Full Recipe. Yes, you can use frozen broccoli. Just thaw it first. Chop it finely after thawing. This saves time and still gives great flavor in your broccoli cheddar quinoa bites. These bites last about 4 days in the fridge. Store them in an airtight container. Make sure they cool down before you put them in. This keeps them fresh and tasty for your snack cravings. You can serve these bites with a simple salad or a yogurt dip. A zesty dipping sauce pairs well too. They are great as a snack or a light meal. Enjoy them warm for the best flavor! If you want the full recipe, check out the Full Recipe section above. This blog post covered every aspect of making Broccoli Cheddar Quinoa Bites. We explored the essential ingredients and substitutions. I provided clear, step-by-step cooking instructions for ease. Tips and tricks helped you avoid mistakes and improve texture. We also looked at fun variations and smart storage info. In short, these bites are simple and tasty. You have everything you need to enjoy them! Now, it's your turn to try this easy recipe. Happy cooking!

Broccoli Cheddar Quinoa Bites Simple and Tasty Snack

Looking for a quick snack that’s both delicious and healthy? Try my Broccoli Cheddar Quinoa Bites! These tasty treats pack

To make spicy roasted chickpeas, gather these main ingredients: - 1 can (15 ounces) chickpeas, drained and rinsed - 2 tablespoons olive oil - 1 teaspoon smoked paprika - 1 teaspoon ground cumin - 1/2 teaspoon cayenne pepper (adjust for spice level) - 1/2 teaspoon garlic powder - Salt to taste These ingredients help create a deep flavor. The smoked paprika adds a nice, warm taste. Cumin gives the dish a rich, earthy flavor. Cayenne pepper brings the heat, which you can adjust. The olive oil helps the spices stick and adds richness. You can also add some fun garnishes or extras: - Fresh cilantro for garnish - A squeeze of lime juice - Chopped green onions Fresh cilantro adds color and a fresh taste. Lime juice brightens the flavor, making it zingy. Green onions can add a nice crunch too. Feel free to get creative with your add-ins. Chickpeas are more than just tasty; they offer many health benefits: - High in protein - Good source of fiber - Rich in vitamins and minerals Eating chickpeas can help keep you full and satisfied. They are great for digestion because of the fiber. Plus, they provide important nutrients like iron and magnesium. Choosing chickpeas as a snack is a smart and healthy choice. If you want the full recipe, check it out [here](Full Recipe). Start with a can of chickpeas. Drain them well and rinse them under cold water. This helps remove any extra sodium. After rinsing, dry them with paper towels. It is very important to get them dry. Moisture will make them soft, not crispy. Preheat your oven to 400°F (200°C). Line a baking sheet with parchment paper. In a bowl, mix olive oil, smoked paprika, ground cumin, cayenne pepper, garlic powder, and salt. Toss the dried chickpeas in this spice mix until they are well coated. Spread the chickpeas out in a single layer on the baking sheet. Roast them for 30 to 35 minutes. Halfway through, shake the baking sheet to help them cook evenly. They should be golden and crunchy when done. To get the best crunch, make sure your chickpeas are super dry. The hot oven helps too. If you want extra crispiness, you can roast them a bit longer. Just keep an eye on them so they don’t burn. Let them cool for a few minutes after roasting. They will continue to crisp up as they cool. For a fresh touch, add chopped cilantro right before serving. Enjoy your spicy roasted chickpeas! [Full Recipe] You can change the heat in your spicy roasted chickpeas. If you like it mild, cut the cayenne pepper in half. Add more cayenne for a kick. You can also use chili powder for a different flavor. Taste the spice mix before you coat the chickpeas. This way, you know if it's just right for you. If you have leftover chickpeas, store them in an airtight container. Keep them in a cool, dry place. They stay fresh for about three days. For longer storage, put them in the fridge. Just remember, they may lose some crunch over time. To bring back the crunch, reheat them in the oven at 350°F (175°C) for about 10 minutes. Spicy roasted chickpeas make a great snack. You can serve them on their own or add them to salads. They add a nice crunch to any dish. Try them with hummus or yogurt dip for extra flavor. You can even sprinkle them on soups for texture. These chickpeas are versatile and tasty! For the full recipe, check out the recipe section. {{image_2}} You can change the flavor of your spicy roasted chickpeas easily. Try adding different spices. For a sweet twist, use cinnamon and brown sugar. For a tangy taste, mix in lemon zest and smoked paprika. Experiment with curry powder for a warm flavor. You can also try Italian herbs like oregano and basil. Mix and match to find your favorite blend! This recipe is already vegan and gluten-free, making it great for everyone. Check your spice labels to ensure they are gluten-free. You can use other oils like coconut or avocado oil if you wish. These oils add their own unique flavors while keeping the snack healthy and tasty! Serve your roasted chickpeas in many fun ways. They make a great topping for salads or soups. You can also mix them into grain bowls for a crunchy boost. Try them as a snack with your favorite dip, like hummus or guacamole. You can even use them as a crunchy topping for popcorn! The options are endless. For the full recipe, check out the previous section! To keep your roasted chickpeas fresh, store them in an airtight container. Use a glass jar or a plastic container with a tight lid. Make sure the chickpeas are completely cool before sealing the container. This helps prevent moisture from building up inside. Keep them in a cool, dark place like a pantry. Avoid placing them near heat sources. This keeps them crunchy and tasty for longer. If you have leftover chickpeas, you can reheat them to restore their crunch. Preheat your oven to 350°F (175°C). Spread the chickpeas on a baking sheet in a single layer. Heat them for about 10 minutes. Check them often to avoid burning. They should come out crispy and warm, just like when you first made them. Roasted chickpeas can last up to a week when stored correctly. If you notice any soft or chewy texture, they may be spoiled. Also, watch for any strange smells or colors. These are clear signs it’s time to toss them. Enjoy your flavorful snack while they are fresh! For the full recipe, check out the detailed steps above. Yes, you can use dried chickpeas. First, soak them overnight. After soaking, boil them until tender. This step is key for perfect texture. Drain the chickpeas and follow the rest of the recipe. Using dried chickpeas may take more time, but the taste is fresh and rewarding. Spicy roasted chickpeas are healthy and packed with nutrients. Here’s a quick breakdown per serving: - Calories: 120 - Protein: 6 grams - Carbohydrates: 18 grams - Dietary Fiber: 5 grams - Fat: 4 grams Chickpeas are a great source of protein and fiber. They may help keep you full and satisfied. To make spicy roasted chickpeas in an air fryer, start by following the recipe steps. After coating the chickpeas with spices, place them in the air fryer basket. Set the air fryer to 400°F (200°C) and cook for about 15-20 minutes. Shake the basket halfway through for even cooking. They will turn out crispy and delicious! For the full recipe, refer to the earlier section. Spicy roasted chickpeas are easy to make and full of flavor. We discussed key ingredients, cooking steps, and clever tips for perfect results. Remember to adjust spice levels and store leftovers well. You can experiment with different seasonings and enjoy chickpeas in many ways. Keep these ideas in mind for your next snack. Roasted chickpeas can be tasty and healthy, making them a winner every time. Enjoy your culinary adventure!

Spicy Roasted Chickpeas Crunchy and Flavorful Snack

Looking for a snack that’s both crunchy and full of flavor? You’ve come to the right place! Spicy roasted chickpeas

- 4 large whole grain or spinach tortillas - 1 cup hummus (store-bought or homemade) - 1 cup shredded purple cabbage - 1 cup grated carrots - 1 cup diced cucumber - 1 red bell pepper, thinly sliced - 1 yellow bell pepper, thinly sliced - 1 avocado, sliced - 1 cup baby spinach - 2 tablespoons sesame seeds (optional) - Salt and pepper to taste - Fresh cilantro or mint leaves for garnish (optional) I love using fresh, colorful ingredients for these wraps. You can choose whole grain or spinach tortillas, which add a healthy touch. Hummus is the perfect spread. It adds creaminess and flavor. You can buy it or make your own! Next, I like to fill my wraps with a mix of veggies. Shredded purple cabbage gives a nice crunch. Grated carrots add sweetness. Diced cucumber brings a refreshing bite. The red and yellow bell peppers add vibrant colors and taste. Don't forget the avocado! It adds a creamy texture and healthy fats. Baby spinach is a great green option. You can also sprinkle sesame seeds on top for an extra crunch. A pinch of salt and pepper can boost the flavors. If you want to make it pretty, garnish with fresh herbs like cilantro or mint. These simple, fresh ingredients make your rainbow veggie wraps taste amazing. For the full recipe, check out the instructions on how to put it all together! 1. Lay out a tortilla on a clean surface. 2. Spread about 1/4 cup of hummus evenly across the tortilla. Leave an inch at the edges. 3. Start from one end. Place a handful of baby spinach down the center. 4. Add shredded purple cabbage, grated carrots, and diced cucumber on top of the spinach. 5. Layer thinly sliced red and yellow bell peppers. Mix the colors. 6. Top with avocado slices. Sprinkle salt and pepper for taste. 7. If you want, add sesame seeds for extra crunch. 8. Fold the sides of the tortilla over the filling. Roll tightly from the bottom to the top. 9. Repeat this with the rest of the tortillas and ingredients. 10. Slice each wrap in half diagonally. Arrange them on a platter. 11. Garnish with cilantro or mint leaves, if desired. Serve right away. - For a colorful display, arrange the wraps on a bright plate. - Pair these wraps with side dishes like fresh fruit or a light salad. - Try dipping sauces like tzatziki or a simple vinaigrette for added flavor. I enjoy making these rainbow veggie wraps because they are fresh and fun. You can find the full recipe above. To keep your veggies fresh and crisp, store them in a sealed bag. This helps them stay crunchy. Use fresh produce from local markets. Buy only what you need to reduce waste. Choosing the right tortillas is key. Whole grain or spinach tortillas add flavor and nutrition. They also hold up well when filled. For fillings, mix colors and textures. Use a range of veggies to create a rainbow effect. You can enhance flavor by adding spices or dressings. Try a sprinkle of chili powder for heat. A drizzle of balsamic glaze adds tang. You can also mix herbs into your hummus for extra zest. For toppings, consider adding nuts or seeds. They add crunch and healthy fats. You could also use sliced olives or pickled onions for a bold taste. These options bring new life to your wraps. {{image_2}} You can make these wraps your own. Start by adding protein. Chickpeas, beans, and tofu work great. They add flavor and make the wraps filling. You can mash chickpeas or use black beans. Tofu can be cubed or crumbled. Each option brings a unique taste to your meal. Now, think about vegetables. Use seasonal picks to keep things fresh. In spring, try asparagus or radishes. In summer, add zucchini or tomatoes. Autumn brings squash and kale. Winter calls for hearty greens like collards. You can also toss in herbs like basil or dill for extra flavor. These wraps fit many diets. If you need gluten-free options, choose rice or corn tortillas. They are easy to find and taste great. For a vegan twist, skip the hummus with dairy. Instead, blend your own using tahini and lemon juice. Low-carb folks can swap tortillas for lettuce leaves. Romaine or butter lettuce works well. They hold fillings nicely and add a crispy bite. This way, you enjoy all the flavors without the carbs. Try the full recipe for more ideas on making your wraps vibrant and tasty! To keep leftover wraps fresh, wrap them tightly in plastic wrap or foil. This helps to seal in moisture and flavor. Store the wrapped veggie wraps in the fridge. They will stay good for about 2 to 3 days. If you notice any sogginess, it's best to eat them soon. If you want to save them for later, you can freeze the wraps. First, wrap each one in plastic wrap. Then place them in a freezer-safe bag. They can last up to 2 months in the freezer. When you are ready to eat, remove a wrap from the freezer. Let it thaw in the fridge overnight. To reheat, you can use a microwave or a skillet. If using a microwave, heat it on low power for about 1 minute. For a skillet, heat on medium for about 5 minutes, turning occasionally. This will help keep the wrap warm and tasty. Enjoy your Rainbow Veggie Wraps from the [Full Recipe] anytime! How to make rainbow veggie wraps healthier? You can make rainbow veggie wraps healthier by adding more greens and using less hummus. Try using a whole grain or spinach tortilla. You can also swap regular hummus for a lower-fat version. Add more crunchy veggies like radishes or jicama for extra fiber. Can I prep these wraps in advance? Yes, you can prepare these wraps in advance. Wrap them tightly in plastic wrap or foil. Store them in the fridge for up to 24 hours. Just remember, the veggies will lose some crunch over time, so enjoy them fresh when you can. What dipping sauces pair well with veggie wraps? Dipping sauces can add more flavor to your wraps. Try a simple tzatziki sauce made with yogurt, cucumber, and garlic. A spicy sriracha mayo also works well. You can use balsamic glaze for a sweet touch or a soy-based sauce for a savory kick. Are rainbow veggie wraps nutritious? Yes, rainbow veggie wraps are very nutritious. They are packed with vitamins and minerals from fresh vegetables. The hummus adds protein and healthy fats, making these wraps balanced and satisfying. How many calories are in one veggie wrap? One rainbow veggie wrap has about 250 to 300 calories. This can vary based on the ingredients you choose. If you add extra toppings or sauces, the calorie count may increase. What are the health benefits of the ingredients? Each ingredient in the rainbow veggie wraps offers health benefits: - Cabbage is rich in vitamins K and C. - Carrots provide beta-carotene, good for vision. - Cucumbers are hydrating and low in calories. - Bell peppers are high in vitamin C. - Avocado offers healthy fats for heart health. - Spinach is loaded with iron and calcium. This mix makes a colorful and nutritious meal! You learned how to make tasty veggie wraps using simple ingredients. With fresh veggies and hummus, you can create colorful meals for any time. Use the tips to keep your wraps crisp and flavorful. Experiment with proteins and toppings to suit your taste. Store leftovers properly, so nothing goes to waste. Whether for lunch or a snack, these wraps are healthy and versatile. Now, you can enjoy your delicious creations anytime!

Rainbow Veggie Wraps Packed with Fresh Flavor

Are you ready to brighten up your meals? These Rainbow Veggie Wraps are filled with fresh flavors and vibrant colors!

- 2 boneless, skinless chicken breasts - 2 tablespoons olive oil - 1 teaspoon dried oregano - 1 teaspoon garlic powder - Salt and pepper to taste - 1 cup cooked quinoa - 1 cup cherry tomatoes, halved - 1 cucumber, diced - ½ red onion, thinly sliced - ½ cup Kalamata olives, pitted and sliced - 1 cup crumbled feta cheese - ¼ cup fresh parsley, chopped - 2 tablespoons lemon juice When I create Easy Greek Chicken Bowls, I focus on fresh, tasty ingredients. Each item brings something special to the mix. The chicken is the star. I use boneless, skinless breasts for a lean option. Olive oil adds richness and flavor. Dried oregano and garlic powder give it that classic Greek taste. Seasoning with salt and pepper is key. You want to enhance the natural flavors without overpowering them. Quinoa serves as a hearty base. It’s packed with protein and good for your health. Cherry tomatoes and cucumber add a fresh crunch. The red onion gives a nice bite. Kalamata olives bring a salty, briny flavor that balances the dish. Feta cheese adds creaminess and tang. I love using crumbled feta for its rich taste. It makes the bowls more filling and nutritious. Fresh parsley brightens the dish with a pop of color and flavor. The lemon juice at the end ties everything together. It adds a zesty finish that wakes up the taste buds. For the full recipe, check out the link provided. To start, preheat your grill or grill pan over medium-high heat. This step is key to getting nice grill marks and a great flavor. While it heats, prepare the chicken. In a small bowl, mix 2 tablespoons of olive oil, 1 teaspoon of dried oregano, 1 teaspoon of garlic powder, and some salt and pepper. Rub this mixture all over the chicken breasts. Make sure they are well coated. This will add a lot of flavor. Once your grill is hot, place the chicken on it. Grill for about 6-7 minutes on each side. You want the internal temperature to reach 165°F (75°C) to ensure it’s fully cooked. After grilling, remove the chicken and let it rest for 5 minutes. This helps keep it juicy and tender. While the chicken rests, it’s time to mix the vegetables with the quinoa. In a large bowl, combine 1 cup of cooked quinoa, halved cherry tomatoes, diced cucumber, thinly sliced red onion, Kalamata olives, crumbled feta cheese, chopped parsley, and lemon juice. Toss gently to combine all the ingredients. Now, slice the grilled chicken into thin strips. To build your bowls, start with a base of the quinoa mixture. Then, top it with the sliced chicken. For a beautiful presentation, serve in wide bowls and sprinkle extra parsley on top. A lemon wedge on the side adds brightness and flavor. For the full recipe, refer to the earlier section. To grill chicken well, start with even pieces. Cut the chicken breasts into uniform sizes. This helps them cook at the same rate. Always preheat your grill to medium-high. This step ensures a nice sear. For juicy chicken, marinate it for at least 30 minutes. The olive oil and spices in the marinade help keep the chicken moist. Grill it for about 6-7 minutes on each side. Use a meat thermometer to check for doneness. The chicken should reach 165°F (75°C). Let it rest for 5 minutes before slicing. This lets the juices redistribute. Cooking quinoa is simple. Rinse it well before cooking to remove any bitterness. Use two cups of water for every cup of quinoa. Bring it to a boil, then reduce to low heat. Cover and let it simmer for about 15 minutes. Once the water absorbs, fluff it with a fork. If you want to swap quinoa, try brown rice or couscous. Both make great bases for your bowls. They cook similarly and have a nice texture. For extra flavor, add herbs and spices. Fresh oregano or dill can elevate your dish. You can also mix in cumin for a warm taste. Homemade dressings make a big difference. A simple lemon vinaigrette works well. Just mix lemon juice, olive oil, salt, and pepper. You can also try a yogurt-based dressing for creaminess. This adds a nice contrast to the fresh veggies. For the complete recipe, check out the [Full Recipe]. {{image_2}} You can swap chicken for shrimp or tofu in these bowls. Shrimp cooks fast and adds a nice flavor. Just grill or sauté it for a few minutes. Tofu is great for a vegetarian option. Press it to remove water, then marinate it like chicken. It will soak up all the tasty flavors. Feel free to use different vegetables based on what you have. Bell peppers, zucchini, or spinach can add color and taste. You can also switch feta with other cheeses like goat cheese or ricotta. Each cheese brings a unique touch to your dish. Homemade Greek dressings are easy to make and tasty. Mix olive oil, lemon juice, and herbs for a fresh flavor. You can also try yogurt-based dressings. They are creamy and add a nice tang. Just mix plain yogurt with herbs and garlic for a quick dip. For the full recipe, check out the Easy Greek Chicken Bowls. To store leftover Greek chicken bowls, let them cool first. Place them in an airtight container. This keeps the flavors fresh. I recommend using glass or BPA-free plastic containers. These materials are safe and easy to clean. If you want to freeze your Greek chicken bowls, follow these steps: 1. Cool Down: Ensure the bowls are completely cool. 2. Portion Out: Divide into single servings for easy meals later. 3. Wrap Well: Use freezer-safe bags or containers to prevent freezer burn. For thawing, move the bowls to the fridge overnight. Reheat them in the microwave or on the stove until hot. In the fridge, your Greek chicken bowls last about 3-4 days. If you freeze them, they stay good for about 2-3 months. Always check for any changes in smell or color before eating. Keeping track of your food helps reduce waste and makes meal prep easy. You can find the Full Recipe above for step-by-step instructions. Yes, you can make these bowls ahead. Meal prep helps save time. Cook the chicken and quinoa in advance. Store them in separate containers. Mix the veggies and cheese just before serving. This keeps everything fresh. You can enjoy your Greek chicken bowls all week. Meal prep tips: - Grill extra chicken for future meals. - Cook a big batch of quinoa. - Chop veggies and store them in the fridge. - Use airtight containers to keep everything fresh. Making this recipe gluten-free is easy! Quinoa is already gluten-free. Just avoid any gluten-containing ingredients. For the dressing, check labels on the olive oil and lemon juice. Most are gluten-free, but it’s good to verify. Gluten-free ingredient alternatives: - Use gluten-free grains like brown rice if you prefer. - Substitute regular feta with a gluten-free brand. - Check that your olives are gluten-free as well. Pairing sides with Greek chicken bowls enhances the meal. Fresh salads work great. A simple Greek salad adds crunch and flavor. You can also serve roasted veggies on the side. They add color and nutrition. Suggestions for complementary side dishes: - Tzatziki sauce for a refreshing dip. - Pita bread, if you're not avoiding gluten. - A simple cucumber salad with olive oil and vinegar. - Roasted red peppers for extra flavor. For the Full Recipe, you can refer back to the ingredients and steps for a delicious meal. You’ve learned how to make Easy Greek Chicken Bowls from scratch. We covered the ingredients, cooking steps, and helpful tips. You can adjust flavors, swap ingredients, and store leftovers with ease. Enjoy experimenting with variations and making this dish your own. Remember, cooking should be fun and simple. Take these tips to create your perfect meal!

Easy Greek Chicken Bowls Flavorful and Nutritious Meal

Are you looking for a quick, tasty meal that’s also good for you? Look no further! These Easy Greek Chicken

- 1 cup rolled oats - 1/2 cup almond butter (or any nut butter) - 1/4 cup honey or maple syrup - Zest of 1 lemon - 2 tablespoons lemon juice - 2 tablespoons poppy seeds - 1/4 teaspoon vanilla extract - 1/4 teaspoon salt - 1/4 cup shredded coconut (optional) - Extra poppy seeds for rolling (optional) When I create Lemon Poppy Seed Energy Bites, I focus on fresh, simple ingredients. The rolled oats give a hearty base. I love using almond butter, but any nut butter works great. Honey or maple syrup acts as a sweet touch. Lemon zest and juice brighten the flavor, making these bites refreshing. Poppy seeds add a unique crunch. A splash of vanilla extract rounds out the taste. A pinch of salt balances the sweetness. You can include shredded coconut for extra texture if you like. For a fun finish, rolling the bites in extra poppy seeds or coconut adds a nice look. You can find the full recipe above to guide you through each step. Start by combining rolled oats and nut butter in a large mixing bowl. I love using almond butter, but you can pick any nut butter you like. Next, add honey or maple syrup along with the lemon zest. This will give your bites a fresh flavor. Then, mix in lemon juice, poppy seeds, vanilla, and salt. Stir everything until the mixture looks like dough. If it feels too sticky, add a bit more oats. If it’s too dry, add a little more nut butter or honey. After mixing, cover the bowl with a cloth or plastic wrap. Place it in the fridge for about 30 minutes. This step is key. Chilling makes the dough easier to handle. If you find the mixture still isn’t right after chilling, adjust the consistency as needed. Now it’s time to form the bites! Take the chilled dough and roll it into small balls, about one inch wide. You can coat them with extra poppy seeds or shredded coconut if you want a fun twist. Once rolled, place the energy bites on a parchment-lined tray. Put the tray back in the refrigerator for about 15 minutes to firm them up. You can find the full recipe in the article, which includes all the steps and tips you need. To get the best texture for your Lemon Poppy Seed Energy Bites, pay attention to stickiness. If your mixture is too sticky, add more oats. This simple fix helps shape the bites easily. If the mix feels dry, add a bit more almond butter or honey. This will help bind everything together perfectly. Chilling the dough is key. After mixing, cover the bowl and chill it for 30 minutes. This step makes the dough firmer and easier to handle. You will notice a big difference when rolling the bites. These energy bites pair well with fresh fruit, yogurt, or nuts. They make a great snack on the go or a quick breakfast. You can serve them at picnics, parties, or just enjoy them at home. They are perfect for kids and adults alike! The ingredients in these bites pack a punch of health benefits. Rolled oats provide fiber, which aids digestion. Almond butter is rich in healthy fats and protein, giving you energy. The lemon adds vitamin C, which boosts your immune system. Poppy seeds contain minerals like calcium and iron, essential for your body. These energy bites offer a great boost. They are perfect for a pre-workout snack or a midday pick-me-up. Try them before your next workout or whenever you need extra energy! For the full recipe, check out the detailed instructions above. {{image_2}} You can switch up flavors by using different nut butters. Peanut or cashew butter works well. They each add a unique taste to the bites. You can also try other citrus. Lime or orange juice brings a fresh twist. Want to boost nutrition? Add superfoods like chia seeds or hemp seeds. These tiny seeds pack a punch of protein and fiber. You can also mix in dried fruits. Raisins, cranberries, or apricots add sweetness and chewiness. Make your energy bites seasonal. In the spring, add fresh herbs like mint or basil. They give a lovely green color and fresh taste. For fall, mix in pumpkin spice. This will make the bites warm and cozy. Explore these variations to keep your Lemon Poppy Seed Energy Bites exciting! Check out the Full Recipe for ideas to inspire your snack journey. To keep your Lemon Poppy Seed Energy Bites fresh, store them in the fridge. Use an airtight container to prevent them from drying out. This method keeps them tasty for up to a week. When you store them properly, the flavors stay bright, and the bites remain chewy. For long-term storage, you can freeze these energy bites. Place them in a freezer-safe container or a zip-top bag. Make sure to remove as much air as possible. They can last up to three months in the freezer. When you're ready to enjoy them, take out the desired amount. Let them thaw in the fridge for a few hours or at room temperature for about 30 minutes. This way, they stay tasty and ready to eat. For the full recipe of Lemon Poppy Seed Energy Bites, check the earlier section. Lemon Poppy Seed Energy Bites can last up to one week in the fridge. Store them in an airtight container to keep them fresh. I find that they taste best when enjoyed within the first few days. Yes, you can easily make these bites vegan! Just swap honey for maple syrup. This keeps the sweetness but makes it plant-based. If you need a substitute for almond butter, try peanut butter or sunflower seed butter. Both options work well and give a nice flavor. Absolutely! Use sunflower seed butter or tahini as nut-free options. They provide a similar texture and taste without any nuts. Yes, they can! Just ensure you use certified gluten-free oats. This way, you can enjoy these bites without worrying about gluten. To adjust sweetness, add more or less honey or maple syrup. You can also mix in some dried fruit for extra natural sweetness. You learned how to make tasty Lemon Poppy Seed Energy Bites. We covered the main ingredients and how to mix them. I shared tips to get the right texture and great serving ideas. You can try fun variations to suit your taste. Remember, these bites are packed with nutrients and energy. They are simple to make and store well too. Enjoy creating your own healthy snacks!

Lemon Poppy Seed Energy Bites Nutritious Snack Boost

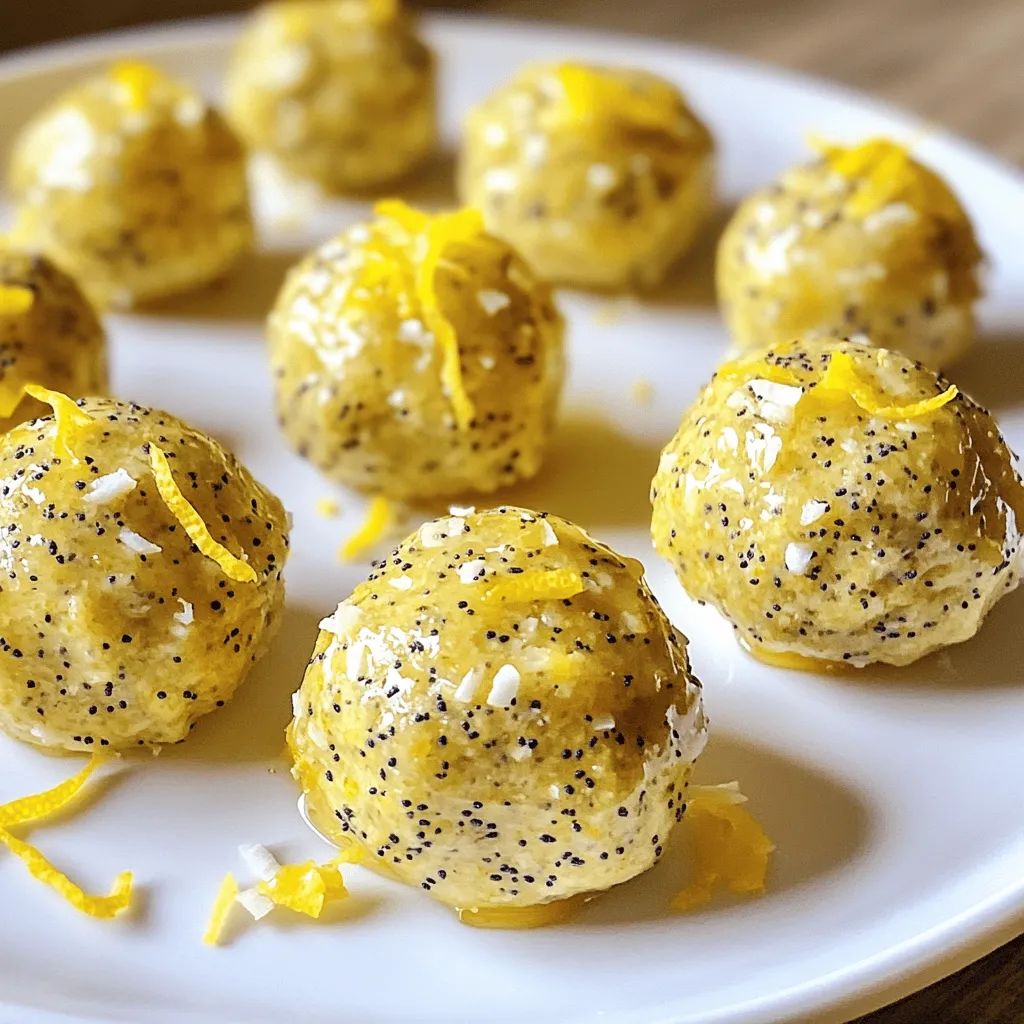
Looking for a quick and tasty snack? These Lemon Poppy Seed Energy Bites are perfect! Packed with nut butter, oats,

Older posts
Newer posts
← Previous Page1 … Page28 Page29 Page30 … Page80 Next →

dsad

© 2025 pureeatsnow • Built with GeneratePress

Our Policies

  • Copyright Policy
  • Cookie Policy
  • GDPR Policy
  • Privacy Policy
  • Disclaimer
  • Terms Of Use

More Information

  • Home
  • About
  • Contact
  • Appetizers
  • Dessert
  • Dinner
  • Drinks
©2025, pureeatsnow About Back To Top