Skip to content
DisclaimerTerms Of UseGDPR PolicyCookie Policy

pureeatsnow

  • Home
  • Drinks
  • Appetizers
  • Dinner
  • Dessert
  • About
  • Contact
  • Privacy Policy
DisclaimerTerms Of UseGDPR PolicyCookie Policy

Rachel

- 1 cup fresh lemon juice (about 4-6 lemons) - 1/2 cup fresh ginger, peeled and sliced - 1 cup honey or agave syrup (adjust to taste) - 4 cups cold water - 1/2 teaspoon turmeric powder (optional, for extra health benefits) - Lemon slices and fresh mint leaves for garnish - Use 1 cup of lemon juice for a bright, tangy flavor. This comes from about 4 to 6 lemons. - For ginger, slice 1/2 cup of fresh roots. This gives a nice bite and warmth. - Sweeten with 1 cup of honey or agave syrup. Adjust based on your taste. - Use 4 cups of cold water to balance the flavors. This keeps the drink refreshing. - If you want a boost, add 1/2 teaspoon of turmeric powder. It adds health benefits. - For a lovely touch, garnish with lemon slices and fresh mint leaves. - Consider adding a pinch of cayenne pepper for a spicy kick. - Fresh herbs like basil or rosemary can add an interesting twist. - You can use sparkling water instead of still water for fizziness. - If you want more fruit flavor, try adding strawberries or raspberries. This recipe is simple and fun to make. You can find the full recipe linked above. Enjoy your refreshing summer drink! To start, you need fresh ginger. Take about half a cup and slice it. Place the slices in a small saucepan. Add two cups of cold water. Heat it over medium heat until it boils. Once it starts boiling, lower the heat. Let it simmer for ten minutes. This will create a strong ginger infusion. After ten minutes, take it off the heat. Strain the mixture into a pitcher. Discard the ginger slices. Now, it's time to mix everything. Add one cup of fresh lemon juice to the pitcher. This is about four to six lemons. Next, add one cup of honey or agave syrup. Adjust this to your taste. If you want a health boost, add half a teaspoon of turmeric powder. Then, pour in the remaining two cups of cold water. Stir everything well until the sweetener dissolves. Taste it, and if it needs more sweetness, add more honey or agave. Chill the ginger lemonade in the fridge for at least 30 minutes. If you cannot wait, serve it over ice right away. For a nice touch, garnish each glass with a lemon slice. Add a few fresh mint leaves for color and flavor. This makes your drink look great and taste even better. Enjoy your refreshing Ginger Lemonade Refresher! You can find the full recipe for more details. To get the best flavor from ginger, always use fresh ginger. Choose firm pieces with smooth skin. Peel the ginger with a spoon to avoid wasting any. Slice it thinly to release more oils and flavor. For a stronger infusion, let it simmer longer. Ten minutes works well, but you can adjust based on your taste. Remember, the more you infuse, the spicier it gets! Sweetness is key in balancing the zing of ginger and lemon. Start with one cup of honey or agave syrup as the recipe suggests. After mixing, taste it. If it’s too tart, add more sweetener a little at a time. Stir well and taste again. You want it to feel refreshing, not overly sweet. You can also use other sweeteners, like maple syrup, if you want to try something new. Want to turn your Ginger Lemonade Refresher into a cocktail? It’s easy! Add a shot of vodka or gin. These spirits mix well with lemonade. For a fun twist, try a splash of rum. It adds a tropical flair. Mix your alcohol with lemonade in a glass before adding ice. Garnish with a lemon slice and mint leaves for a pretty look. Enjoy the drink responsibly! For the full recipe, check out the details included above! {{image_2}} Ginger adds a warm kick to drinks. It helps with digestion and can ease nausea. I love using ginger in my lemonade because it gives a fresh taste. Ginger also has anti-inflammatory properties, which can help reduce soreness in your body. Drinking ginger lemonade can boost your immune system, keeping you healthy during hot days. Lemons are packed with vitamin C. This vitamin helps your body fight off germs. Lemons also have potassium, which is good for your heart. Their natural acidity can make food taste better and aid digestion. Plus, lemons help balance your body’s pH, which can improve your overall health. Turmeric is a golden spice with many perks. It can lower inflammation in your body. This spice also has antioxidants that protect your cells from damage. If you add turmeric to your ginger lemonade, you get even more health benefits. It makes the drink not only tasty but also a great health booster. For the complete recipe, check out the Full Recipe. You can easily add fun flavors to your Ginger Lemonade Refresher. Try these ideas: - Berry Burst: Add fresh strawberries or blueberries for a fruity twist. - Herbal Kick: Mix in fresh basil or rosemary for an herbal touch. - Tropical Delight: Toss in some pineapple or mango for a tropical vibe. These flavors will make your drink even more refreshing! If you love fizz, swap still water for sparkling water. It adds a nice bubbly texture. Here’s how to do it: 1. Follow the full recipe but use sparkling water in place of still water. 2. Be careful when mixing. Stir gently to keep the bubbles intact. 3. Serve it over ice for a cool, refreshing drink. This twist makes your Ginger Lemonade Refresher feel like a special treat. Seasonal fruits can really change your drink. Here are a few ideas based on the time of year: - Summer: Use ripe peaches or watermelon for a juicy blend. - Fall: Add slices of apple or pear for a warm flavor. - Winter: Incorporate citrus fruits like blood oranges for a colorful drink. Using seasonal fruits not only tastes great but also supports local farmers. You can enjoy your Ginger Lemonade Refresher all year round! To keep your Ginger Lemonade Refresher fresh, store it in a pitcher. Use a sealed container for best results. This keeps the flavors intact and prevents spills. If you have leftovers, make sure to chill it in the fridge. Ginger Lemonade Refresher lasts about three to five days in the fridge. For the best taste, enjoy it within two days. Always serve it cold. To chill it faster, add ice cubes or put it in the freezer for a short time. Just remember to watch it closely! Serve this drink in large pitchers for easy access at parties. Add ice and garnish each glass with lemon slices and mint leaves. You can also create a fun drink station. Provide different garnishes like berries or herbs. This way, guests can customize their drinks. It makes the Ginger Lemonade Refresher even more special! For the full recipe, check out the earlier sections. Yes, you can make Ginger Lemonade Refresher ahead of time. I suggest making it up to two days in advance. This way, the flavors have time to mix. Store it in the fridge in a sealed container. Just give it a good stir before serving. You can also add ice to keep it chilled. If you prefer not to use honey or agave syrup, try maple syrup or simple syrup. You can also use stevia or monk fruit for a low-calorie option. Just adjust the amount based on your taste. Keep in mind that different sweeteners can change the drink's flavor. To tone down the spice of Ginger Lemonade Refresher, use less ginger. Start with just a few slices instead of half a cup. You can also add more cold water or lemon juice to balance the heat. Taste as you go to find the right mix for your palate. Ginger Lemonade Refresher is simple and tasty to make. We covered its key ingredients, how to prepare it, and tips to enhance its flavor. It's also good for your health thanks to ginger and lemon. You learned about fun variations and how to store it well. Now, you can enjoy this drink anytime or share it at gatherings. Keep experimenting to find your perfect mix of flavors. Enjoy your refreshing drink!

Ginger Lemonade Refresher Refreshing Summer Drink

Looking for a cool drink to beat the heat? The Ginger Lemonade Refresher is your perfect summer sip! This simple

This Lemon Mint Iced Tea is a perfect drink for hot days. The sweet and tangy flavors blend well. You can sip it by the pool or enjoy it at a picnic. It’s refreshing, healthy, and easy to make. To make this drink, you will need: - 4 cups water - 4 black tea bags (or green tea for a lighter flavor) - 1/2 cup fresh mint leaves, plus extra for garnish - 1/2 cup freshly squeezed lemon juice - 1/2 cup honey or agave syrup (adjust for sweetness) - Lemon slices for garnish - Ice cubes Prepare to make this drink with these tools: - Medium saucepan - Pitcher for the iced tea - Strainer for the mint leaves - Measuring cups - Glasses for serving - Spoon for stirring This Lemon Mint Iced Tea recipe is simple and fun to make. Grab your tools and ingredients, and let’s get started! Start by boiling 4 cups of water in a medium saucepan. This is the base of your tea. Once the water boils, remove the pan from heat. Add 4 black tea bags for a richer flavor or green tea bags for a lighter taste. Let the tea steep for about 5 minutes. If you use green tea, steep it for just 3 minutes. After steeping, take out the tea bags and move to the next step. Now, add 1/2 cup of fresh mint leaves to your tea. This step is key for a refreshing taste. Allow the mint to steep for 10 more minutes. The longer it steeps, the stronger the mint flavor will be. Once the steeping time is up, strain the tea into a pitcher. Discard the mint leaves. Your tea base is ready! Next, stir in 1/2 cup of freshly squeezed lemon juice. This adds a zesty kick. Then, mix in 1/2 cup of honey or agave syrup. Stir it well while the tea is still warm. This helps the sweetener dissolve completely. Let the tea cool to room temperature. Then refrigerate it until chilled, which takes about 1 hour. When you're ready to serve, fill glasses with ice cubes. Pour the chilled tea over the ice. For a lovely touch, garnish with a lemon slice and a sprig of fresh mint. Enjoy your Lemon Mint Iced Tea! Choosing the right tea makes a big difference in your Lemon Mint Iced Tea. I like to use black tea for a bold taste. It gives a nice contrast to the lemon and mint. Green tea is also great if you want something lighter. Herbal teas can add a fun twist too. Mint tea pairs well for a refreshing touch. Experiment with different types to find your favorite mix. Sweetness is key to balance the flavors. I usually start with half a cup of honey or agave syrup. This gives a nice sweetness without overpowering the tea. You can always taste and add more if needed. If you prefer less sugar, try using less syrup. You can also use stevia or another sweetener if that fits your diet better. The goal is to get a flavor that you love. You can make this drink even more special with extra ingredients. Adding fresh fruit is one of my favorite tricks. Slices of strawberries or peaches add a lovely flavor and color. You could also try adding a pinch of ginger for some zing. For a tropical twist, a splash of pineapple juice works great. Don't be afraid to get creative and mix in what you love. For the full recipe, check out the complete instructions above. {{image_2}} You can easily add fresh fruit to your lemon mint iced tea. Berries, peaches, or pineapple work well. Just chop them into small pieces and add them to the pitcher. The fruit adds a sweet and fruity taste. It also makes the drink look colorful and fun. Try using a mix of fruits for a tasty twist. If you don’t have fresh mint, use other herbs. Basil or lemon balm can be great substitutes. They give a different but nice flavor. Simply replace the mint with an equal amount of your chosen herb. This way, you can still enjoy a refreshing drink. Each herb adds its own unique twist to your iced tea! Cold brewing is a simple way to make this tea. It takes longer but gives a smooth taste. To cold brew, place the tea bags in cold water. Use 4 cups of water and let it steep in the fridge for about 6 to 12 hours. After steeping, remove the bags and add the mint. Then, stir in lemon juice and sweetener. This method keeps the flavors bright and fresh. For the complete recipe, check out the Full Recipe section. To keep your Lemon Mint Iced Tea fresh, store it in a pitcher with a lid. Make sure the tea is fully cooled before you put it in the fridge. If you don’t have a lid, cover it tightly with plastic wrap. This helps to keep out other smells from the fridge. Iced tea is best served cold, but if you want to warm it up, you can do so. Pour the tea into a pot and heat it gently on the stove. Stir it well to mix. Avoid boiling, as this can make the flavor bitter. Serve it warm if you prefer, but remember, it's best when chilled! Your Lemon Mint Iced Tea can last about 3-5 days in the fridge. After this time, it may not taste good. Watch for changes in smell or color. If it smells off or has a strange taste, it’s time to toss it out. Always check before serving, especially if it's been in the fridge for a while. You can make Lemon Mint Iced Tea without caffeine by using herbal tea bags. Look for brands that offer herbal blends. You can also use rooibos tea, which is naturally caffeine-free. Follow the same steps in the Full Recipe, just swap the tea bags. This way, you will still enjoy the fresh taste of lemon and mint. Yes, you can use dried mint. However, fresh mint gives a stronger flavor and aroma. If you choose dried mint, use about one tablespoon per cup of water. Dried mint is more concentrated, so you need less. Add it at the same time as the fresh mint in the Full Recipe. Let it steep longer to extract more flavor. Lemon and mint both offer great health perks. Lemons are high in vitamin C, boosting your immune system. They also help with digestion and can freshen your breath. Mint aids digestion and can soothe an upset stomach. It also has antioxidants that protect your body. Together, they make a refreshing drink that is healthy and tasty. This blog post shared a full guide on making Lemon Mint Iced Tea. We covered the ingredients, kitchen tools, and step-by-step instructions. You learned how to prepare the tea base, infuse mint, and serve it perfectly. We also explored tips for the best tea types, sweetness levels, and tasty variations. Plus, we discussed proper storage and answered common questions. Now you have the tools to create delicious iced tea at home. Enjoy your refreshing drink and share the joy with friends!

Lemon Mint Iced Tea Refreshing Summer Drink Recipe

Looking for a cool drink to beat the summer heat? Look no further! My Lemon Mint Iced Tea recipe combines

To make a delicious Chocolate Coconut Frappe, you need these key ingredients: - 1 cup brewed coffee, cooled - 1 cup coconut milk (or almond milk for a lighter option) - 2 tablespoons unsweetened cocoa powder - 2 tablespoons sweetened shredded coconut - 2 tablespoons chocolate syrup (and extra for drizzling) - 1 tablespoon honey or maple syrup (adjust for sweetness) - 1 cup ice cubes - Whipped cream (for topping) - Toasted coconut flakes (for garnish) - Chocolate shavings (for garnish) Each ingredient brings its own unique flavor. The coffee adds a rich taste, while coconut milk gives it a creamy texture. The cocoa powder makes it chocolatey and the shredded coconut adds a nice chew. Sweeteners like honey or maple syrup balance the flavors, and the ice makes it refreshingly cold. You can switch things up with optional ingredients: - A pinch of sea salt for depth - A splash of vanilla extract for warmth - A scoop of protein powder for a boost - Fresh fruit like banana for added sweetness These options can make your frappe even more exciting. Try adding a pinch of salt to enhance the chocolate flavor. Vanilla extract brings warmth, while fruit can add natural sweetness and nutrition. If you have allergies or preferences, here are some substitutions: - Use oat milk or soy milk instead of coconut milk if you're allergic to coconut. - Replace honey with agave syrup for a vegan option. - Omit chocolate syrup for a lower-sugar version. - Use carob powder instead of cocoa for a caffeine-free option. These substitutions will keep your frappe tasty while meeting your dietary needs. Always remember to taste as you go. This way, you can make sure your drink is just right. Enjoy making your Chocolate Coconut Frappe! For the full recipe, check out the detailed instructions above. To start, gather your ingredients. You will need: - 1 cup brewed coffee, cooled - 1 cup coconut milk (or almond milk) - 2 tablespoons unsweetened cocoa powder - 2 tablespoons sweetened shredded coconut - 2 tablespoons chocolate syrup - 1 tablespoon honey or maple syrup - 1 cup ice cubes In a blender, combine the cooled coffee and coconut milk. Add the cocoa powder and shredded coconut. Pour in the chocolate syrup and honey or maple syrup. Finally, toss in the ice cubes. This mix forms a rich base for your frappe. Blend on high speed. Watch as the ingredients mix into a smooth, frothy drink. This takes about 30 seconds. Before you stop, taste the mixture. If you want it sweeter, add more honey or syrup. Blend again briefly to mix. For a fun presentation, drizzle chocolate syrup inside your serving glasses. Pour the blended frappe into each glass. Top with whipped cream for a creamy finish. Sprinkle toasted coconut flakes and chocolate shavings on top. Serve this tasty treat right away. Enjoy sipping through a straw or using a spoon. This frappe is a delightful way to cool off! To get the best texture for your Chocolate Coconut Frappe, ice is key. Use fresh ice cubes to make sure it blends well. If you want it thicker, add more ice. If you prefer it smoother, blend longer. The right balance gives you that creamy feel. You can boost the flavor of your frappe easily. Add a pinch of salt to enhance the chocolate taste. For extra coconut flavor, mix in more shredded coconut. If you love sweetness, try adding more honey or maple syrup. You can also explore flavored syrups like vanilla or caramel for new twists. If you have leftover frappe, store it in the fridge. Use an airtight container to keep it fresh. It’s best to consume it within one day. When you are ready to enjoy it again, give it a quick stir or blend to restore its frothiness. For the full recipe, see above. {{image_2}} You can easily make a vegan version of the Chocolate Coconut Frappe. Just swap the honey with maple syrup. Use coconut milk, and you’re all set! This drink will still taste rich and creamy. The cocoa and coconut flavors shine through. You’ll enjoy a sweet treat without any animal products. Want to add a twist? Try a mocha variation! Just mix in a bit of your favorite chocolate espresso. It adds a bold coffee flavor. For mint lovers, toss in some mint extract. A few drops will give you that cool taste. Each sip feels refreshing and unique. If you want to have some fun, try an adult version! Add a splash of coffee liqueur. It brings depth and warmth. You can also mix in a bit of coconut rum. This adds a tropical vibe to your drink. Remember to enjoy responsibly. For the full recipe, you can refer to the [Full Recipe]. A Chocolate Coconut Frappe has about 300 calories per serving. The macros break down like this: - Fat: 15g - Carbohydrates: 40g - Protein: 3g These numbers can change based on your choices. If you use almond milk, you can lower the calories. Adding whipped cream or more chocolate syrup will raise the calories. The ingredients in this frappe offer some great benefits: - Coconut milk: It's rich in healthy fats and can boost your energy. - Cocoa powder: This adds antioxidants, which help fight free radicals. - Coffee: It may improve focus and give you a nice energy lift. - Honey or maple syrup: These natural sweeteners provide vitamins and minerals. Using these ingredients makes the frappe not just tasty but also a bit healthy! Store-bought frappes can have lots of added sugar and fake flavors. A homemade Chocolate Coconut Frappe is fresher and more natural. You can control the sweetness. You also avoid preservatives found in many ready-made options. Making your own is cheaper and often tastier. You can find the full recipe above to enjoy this refreshing treat! You can easily make a Chocolate Coconut Frappe without coffee. Just replace the brewed coffee with one cup of coconut milk. Use the same other ingredients from the Full Recipe. Blend them as usual. The drink will still be rich and tasty. You can add a bit of vanilla extract for extra flavor. This version is great for kids or anyone avoiding caffeine. Yes, you can use regular milk in place of coconut milk. However, it will change the taste. Coconut milk gives a unique, creamy flavor. If you want a lighter version, almond milk works well too. Just remember that each milk type adds its own flavor and texture. Experiment to see which one you like best! You can find all the ingredients for Chocolate Coconut Frappe at local grocery stores. Most stores carry coconut milk, cocoa powder, and shredded coconut. Chocolate syrup is also easy to find. If you prefer online shopping, websites like Amazon or specialty food sites offer these items too. Look for fresh ingredients to get the best taste! In this blog post, we explored how to make a Chocolate Coconut Frappe. We covered key ingredients, fun variations, and easy recipes. You learned how to blend the perfect texture and enhance flavors. Storage tips help keep your frappe fresh. Enjoy trying different recipes, from vegan options to fun alcoholic mixes. Making your own frappe allows you to control ingredients and enjoy a tasty treat. Now, gather your ingredients and start blending!

Chocolate Coconut Frappe Tasty and Refreshing Treat

If you crave a cool drink that bursts with flavor, you’ve got to try the Chocolate Coconut Frappe! This tasty

- 1 cup fresh spinach - 1 ripe banana - 1/2 ripe avocado - 1/2 cup pineapple chunks (fresh or frozen) - 1/2 cup coconut water (or almond milk) When I make my Tropical Green Smoothie, I start with fresh spinach. Spinach is rich in iron and vitamins. Next, I add a ripe banana. It gives the smoothie natural sweetness and creaminess. Then, I include half a ripe avocado. This adds healthy fats and makes the drink smooth. Pineapple chunks come next. They bring a bright tropical flavor. Finally, I pour in coconut water or almond milk. This helps blend everything well and adds hydration. - 1 tablespoon chia seeds - Juice of 1 lime - 1 teaspoon honey or agave syrup (optional) For extra nutrients, I like to add chia seeds. They are full of fiber and omega-3s. Lime juice gives a zesty kick that brightens the taste. If you want it sweeter, you can use honey or agave syrup. This is all about your taste! - Health advantages of spinach - Benefits of avocado - Importance of coconut water Spinach is a powerhouse of vitamins. It supports healthy skin and boosts energy. Avocado is great for heart health. It helps lower bad cholesterol. Coconut water is not just tasty; it hydrates and replenishes electrolytes. All these ingredients make this smoothie a healthy choice. You can find the Full Recipe in the section above for a delicious and nutritious drink. - Wash 1 cup of fresh spinach under cold water. - Peel 1 ripe banana and 1/2 ripe avocado. - Cut 1/2 cup of pineapple into chunks if fresh. - Measure 1/2 cup of coconut water or almond milk. - Gather 1 tablespoon of chia seeds and juice of 1 lime. - If you want sweetness, have 1 teaspoon of honey or agave syrup ready. - Start by adding the spinach to the blender. - Next, add the banana, avocado, and pineapple chunks. - Pour in the coconut water or almond milk. - Add chia seeds, lime juice, and optional sweetener. - Blend on high speed for 30-60 seconds. - If the smoothie is too thick, add more coconut water or almond milk. - Pour the smoothie into your favorite glass. - For a fun touch, garnish with a few chia seeds. - Add a slice of lime on the glass rim for extra flair. This refreshing drink is not just good for you; it looks great too! To get the right texture, adjust the liquid amounts. If your smoothie is too thick, add more coconut water or almond milk. Each splash makes a difference. If you want it thicker, add less liquid. Now, about ice: using ice can make your smoothie colder and thicker. But, it might dilute the flavors. If you prefer a creamier drink, skip the ice. Use frozen fruits instead for a chill without losing taste. To change the sweetness, taste your smoothie before serving. If it’s not sweet enough, add a little honey or agave syrup. Start with a teaspoon. Blend again and taste. You can add more if needed. You can also use natural sweeteners like ripe bananas or sweet pineapple chunks. They add flavor and sweetness without extra sugar. To save time, prep your ingredients ahead of time. Wash and chop spinach, banana, and avocado. Store them in the fridge for quick access. This makes your smoothie-making fast and easy. Freezing fruits is another great trick. Freeze banana slices or pineapple chunks in advance. They’ll blend well and keep your smoothie cold. Plus, frozen fruits can last longer, reducing waste. For the full recipe, be sure to check out the detailed steps! {{image_2}} You can make your Tropical Green Smoothie even better! Here are two fun ways to change the flavor. - Adding mango for extra sweetness: Mango makes the smoothie creamy and adds natural sugar. Just toss in half a ripe mango. It blends well with the other fruits. - Incorporating kiwi for a tangy twist: Kiwi gives a nice zing. Slice one kiwi and add it to the mix. The bright green color is also eye-catching! Want to boost your smoothie’s nutrition? Try these add-ins. - Protein powder options: Add a scoop of your favorite protein powder. It gives a nice kick and keeps you full longer. Whey, pea, or hemp powder are great choices. - Incorporating superfoods (e.g., spirulina): Spirulina is a green powder full of nutrients. Just a teaspoon can add vitamins and minerals. It also gives a fun color! You can easily tweak this recipe to fit your needs. - Vegan-friendly modifications: The Tropical Green Smoothie is already mostly vegan. Just skip the honey or use agave syrup. It’s sweet and plant-based! - Low-sugar alternatives: If you want less sugar, skip the banana. Use more spinach or avocado instead. They add creaminess without the extra sugar. Explore these variations to create your perfect Tropical Green Smoothie! Check the Full Recipe for the basic mix. To keep your Tropical Green Smoothie fresh, use a clean glass or BPA-free plastic container. Make sure it has a tight seal to prevent air from getting in. Air can change the taste and nutrients. If you have leftovers, fill the container to the top. This reduces the air inside. Store your smoothie in the fridge for best results. Freezing smoothies is a great way to save them for later. Pour your smoothie into ice cube trays or freezer-safe bags. Each cube can be a quick snack or addition to another drink. To thaw, place the cubes in the fridge overnight. You can also use a microwave on low for a few seconds. Blend again if the texture changes after thawing. In the fridge, your Tropical Green Smoothie can last about 1 to 2 days. Signs of spoilage include a sour smell or change in color. If it looks or smells off, it is best to toss it out. Fresh is always best for taste and health. Enjoy your smoothie soon after making it for maximum freshness and flavor. To make your Tropical Green Smoothie less thick, simply adjust the liquid. Here are some tips: - Add more coconut water or almond milk: Start with a splash and blend again. - Include ice cubes: Ice can help thin out the smoothie while keeping it cold. - Use more fruit juice: Adding a bit of juice can lighten the texture. Adjusting the amount of liquid can change the smoothie’s thickness to your liking. Absolutely! Customizing your smoothie is fun and easy. Here are some suggestions: - Swap spinach for kale: Use kale for a different flavor and texture. - Change the fruit: Use mango or papaya instead of banana for a tropical twist. - Try different liquids: Almond milk or oat milk can replace coconut water. Feel free to mix and match to fit your taste. Green smoothies offer many health benefits. Here are some key nutrients: - Spinach: Rich in vitamins A and C, good for skin and eyes. - Avocado: Provides healthy fats that support heart health. - Chia seeds: Packed with fiber and omega-3 fatty acids, great for digestion. These nutrients work together to boost your energy and overall health. Adding this smoothie to your daily routine is simple. Here are some tips: - Make it a breakfast staple: Enjoy it every morning for a nutrient boost. - Post-workout drink: Ideal for refueling after exercise. - Snack option: Sip it as a healthy snack between meals. Plan to have it a few times a week for the best health benefits. For the full recipe, check out the details above! You now have all you need to make a delicious Tropical Green Smoothie. We covered the essential ingredients, preparation steps, and storage tips. You learned how to tweak the texture and sweetness to fit your taste. Feel free to explore different flavors and dietary needs. This smoothie is easy to prep and packed with nutrients. It’s a great way to start your day or boost your energy. Enjoy your healthy drink and make it a regular part of your routine!

Tropical Green Smoothie Refreshing and Healthy Drink

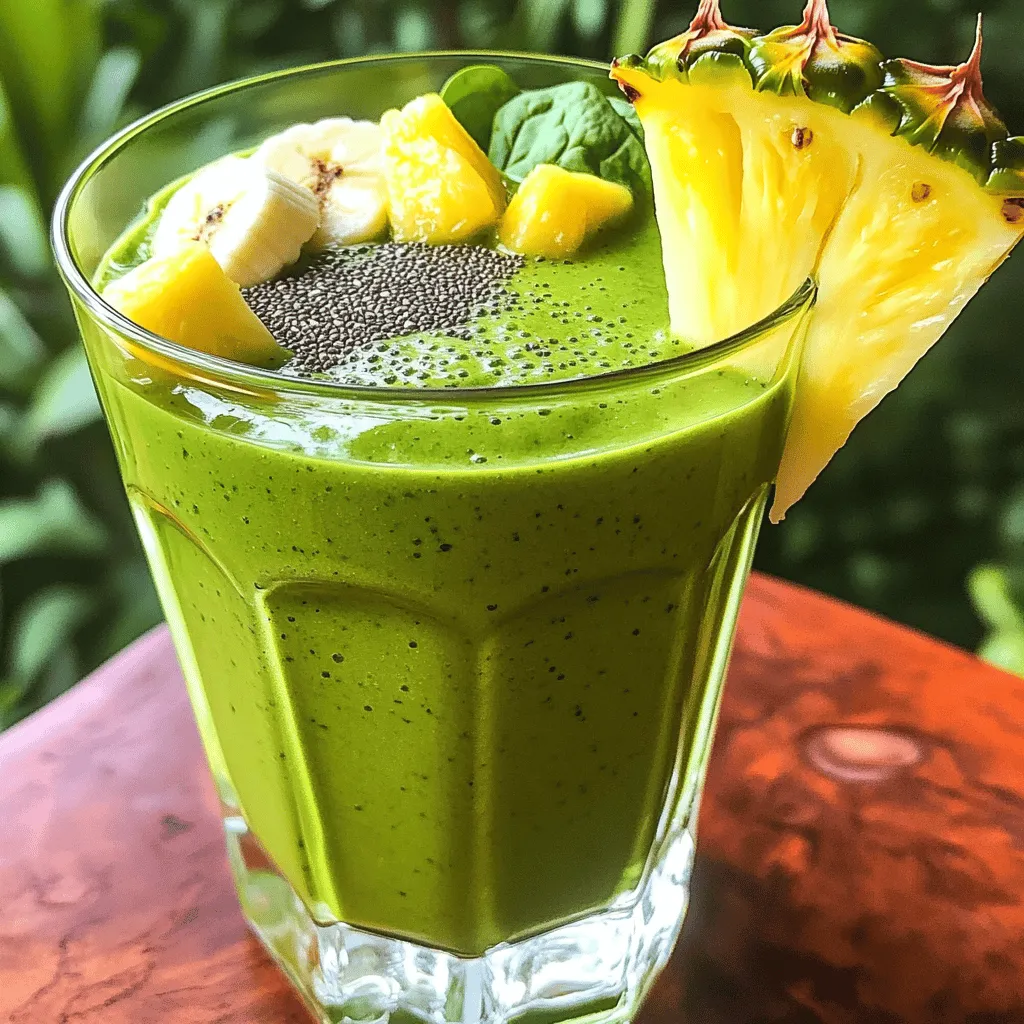
Are you ready to sip on something delicious and good for you? A Tropical Green Smoothie is not just tasty;

- 1 ripe banana - 1 scoop vanilla protein powder - 1 cup unsweetened almond milk - 1 tablespoon peanut butter - 1 tablespoon chocolate syrup (or cacao) - 1 tablespoon crushed nuts (walnuts or almonds) - Whipped cream for topping (optional) - Fresh cherries for garnish To make the Banana Split Protein Shake, you need simple ingredients. The banana adds natural sweetness and creaminess. The vanilla protein powder gives a healthy boost. Unsweetened almond milk keeps it light and adds flavor. Peanut butter adds richness and healthy fats. Chocolate syrup or cacao gives that classic banana split taste. Crushed nuts add crunch and extra nutrition. You can top it with whipped cream for fun, too! - Protein content: Each shake offers about 20 grams of protein. - Calories per serving: This shake has roughly 350 calories. - Macros breakdown: - Carbohydrates: 40 grams - Fats: 12 grams - Protein: 20 grams This shake is a great way to fuel your day. It has a good balance of protein, carbs, and fats. The nutritional value makes it a satisfying treat. Enjoy this energizing shake any time! - Peel and chop the banana. - Measure and add ingredients to the blender. - Blend until creamy. Start by peeling the ripe banana. Cut it into small chunks. This helps the blender mix everything smoothly. Next, gather your other ingredients. You will need vanilla protein powder, almond milk, peanut butter, and chocolate syrup. This combination gives the shake its rich flavor. Add all the ingredients to the blender with the banana chunks. Blend on high until it is creamy and smooth. You want a nice texture for your shake. - How to thicken or thin the shake. - Importance of blending time. If you want a thicker shake, try adding a few ice cubes. Blend again until you get your desired thickness. If the shake is too thick, add a little more almond milk. Blend for a few more seconds to mix it well. Remember, blending time matters. Too little time can leave lumps, while too much can make it too thin. - Best glassware for presentation. - Garnishing tips (whipped cream, nuts, cherries). When you pour the shake, use a tall glass. This makes the shake look fancy. For a special touch, add whipped cream on top. Sprinkle some crushed nuts for crunch. Finally, place a fresh cherry on top. This gives a classic banana split look. For the full recipe, check the earlier section. Enjoy your delicious, energizing treat! To make your banana split protein shake even more tasty, try changing the nut butter. You can use almond butter or cashew butter instead of peanut butter. This gives a new twist to the flavor. You can also add a dash of cinnamon or a splash of vanilla extract. These spices will add warmth and depth to your shake. Looking to cut some sugar? Use alternative sweeteners like stevia or monk fruit. These options taste sweet without the extra calories. For toppings, consider low-calorie options like sugar-free whipped cream or fresh fruit. They keep the shake fun and light. A good blender makes a big difference. Look for a high-speed blender that can crush ice and blend ingredients smoothly. Brands like Vitamix or NutriBullet are great choices. When serving, use a tall glass or a mason jar. They make your shake look good and are easy to hold. {{image_2}} You can change your banana split protein shake to fit your taste. Here are two fun options: - Chocolate banana split protein shake: Swap the vanilla protein powder for chocolate. Add more chocolate syrup for a richer taste. This shake will satisfy your sweet tooth while still being healthy. - Strawberry banana split protein shake: Use strawberry protein powder instead of vanilla. Toss in a handful of fresh strawberries or strawberry syrup. This version adds a nice fruity twist that pairs well with banana. You can easily adjust this shake for different diets. Here are some ideas: - Vegan and dairy-free options: Use plant-based protein powder and almond milk. You can also swap peanut butter with almond or cashew butter. Make sure any syrups are vegan-friendly too. - Keto-friendly modifications: To fit a keto diet, choose a low-carb protein powder. Replace banana with avocado for creaminess. Use sugar-free chocolate syrup to keep carbs low. Boost the nutrition of your shake with some add-ins: - Adding spinach or kale for nutrients: Toss in a handful of spinach or kale. You won't taste it, but you'll get extra vitamins and minerals. This simple trick adds a healthy punch. - Incorporating superfoods like chia seeds: Add a tablespoon of chia seeds. They are high in fiber and omega-3s. These tiny seeds help keep you full and satisfied longer. Experiment with these variations and adjustments to find your perfect banana split protein shake recipe. You can also check the Full Recipe for all the details. Store leftover banana split protein shake in a sealed container. This helps keep it fresh. Place it in the fridge. It stays good for up to 24 hours. After that, it may lose its taste and texture. Always give it a good shake before drinking. The ingredients may separate over time. To freeze portions, pour the shake into ice cube trays. This way, you can blend small amounts later. Once frozen, transfer the cubes to a zip-top bag. They can last for up to three months in the freezer. To defrost, just leave them in the fridge overnight. You can also blend the cubes with a bit of liquid for a quick shake. It is best to make a fresh shake if you want the best taste. However, if you have leftovers, they can work well too. Just remember to mix it well before drinking. If it seems too thin, add some ice to thicken it up. Enjoy your banana split protein shake anytime! To make your shake thicker, add ice cubes. Blend them with the other ingredients. You can also use frozen banana chunks. They create a creamy texture. Another option is to add less almond milk. Start with half a cup and adjust as needed. Yes, you can make this shake ahead of time. Store it in the fridge for up to 24 hours. Just remember to stir before drinking. The shake may separate a bit, but it will still taste great. This shake can work as a meal replacement. It has protein, healthy fats, and carbohydrates. However, make sure to add more ingredients if needed. You could include spinach or oats for extra nutrients. The best protein powder depends on your taste. I recommend using a high-quality vanilla protein powder. Look for one with low sugar and no artificial ingredients. You can also try plant-based options if you prefer. A banana split protein shake has around 400 calories. This can vary based on the ingredients you use. For example, adding whipped cream will increase the calorie count. Check the nutritional info for your specific protein powder too. For the full recipe, you can refer to the earlier section. This blog covers how to make a tasty banana split protein shake. You learned about the key ingredients and their nutrition. I walked you through step-by-step instructions to blend it right. The tips for flavor and healthier options will help you adapt to your needs. Don't forget to explore fun variations and best storage practices. Now, grab your blender and start creating your own delicious shake! You can always adjust the recipe to suit your taste and health goals. Enjoy every sip!

Banana Split Protein Shake Energizing and Healthy Treat

Are you seeking a delicious yet healthy treat? Look no further! The Banana Split Protein Shake combines all your favorite

- 2 cups vanilla ice cream - 1 cup milk (whole or your choice) - 1/4 cup caramel sauce (plus extra for drizzling) - 1/4 cup toffee bits - 1 tsp vanilla extract - Whipped cream, for topping - Pinch of sea salt (optional) The beauty of the Caramel Toffee Crunch Shake lies in its simple yet rich ingredients. You start with creamy vanilla ice cream. This gives the shake its smooth base. Next, you add milk. Whole milk works best, but any type will do. Then comes the star: caramel sauce. This sweet syrup adds depth and a lovely flavor. I always add a bit more for drizzling on top. Toffee bits are next. These little crunchy pieces bring a delightful texture that makes each sip exciting. Vanilla extract is a must. It boosts the overall flavor without overpowering it. Whipped cream on top makes for a perfect finish. It adds lightness and sweetness. You can even add a pinch of sea salt if you want to enhance the sweet and salty combo. These ingredients work together to create an irresistible shake. You can find the full recipe for a detailed guide on how to bring it all together. - Combining the Ingredients Start by gathering all your ingredients. You need 2 cups of vanilla ice cream, 1 cup of milk, 1/4 cup of caramel sauce, 1/4 cup of toffee bits, and 1 teaspoon of vanilla extract. In a blender, add these ingredients. Make sure to pour in the caramel sauce last for better mixing. - Blending the Mixture Blend the ingredients on medium speed. You want a smooth and creamy texture. This step usually takes about 30 seconds. Stop the blender and check if everything is well mixed. If not, blend again briefly. - Adjusting Thickness of Shake If you like a thicker shake, add more ice cream. For a thinner shake, pour in more milk. Blend it again after adjusting. You can also add a pinch of sea salt to enhance the flavor. Blend briefly to mix the salt. - Preparing Serving Glasses Take your serving glasses and drizzle some caramel sauce inside. This adds a nice touch and makes the shake look fancy. You can use a spoon or a squeeze bottle for this. - Pouring and Topping the Shake Pour the shake into the prepared glasses. Fill them about three-quarters full. This leaves space for toppings. Now, top each shake generously with whipped cream. Sprinkle some toffee bits on top for crunch. - Final Touches with Caramel Drizzle more caramel sauce over the whipped cream. This makes it even more tempting. Now your Caramel Toffee Crunch Shake is ready to enjoy! For the full recipe, refer back to the beginning. To make a great shake, blending is key. Here’s how to do it right: - Avoiding Ice Crystals: Start with soft vanilla ice cream. Let it sit out for a few minutes. This helps it blend smoothly. If your shake feels icy, you may have blended it too long. Stop blending once it’s just mixed. - Tips for a Creamy Texture: Use whole milk for a rich taste. If you want it creamier, add more ice cream. Blend on low first, then increase the speed. This helps mix everything well without making it too airy. You can easily make your shake even better! Here are some fun ideas: - Adding Extra Ingredients: Try adding crushed cookies or a scoop of peanut butter. Chocolate syrup also makes a tasty twist. Each addition can give your shake a personal touch. - Customizing for Dietary Preferences: If you want a dairy-free shake, use almond or oat milk. Swap the ice cream for a non-dairy option too. For a lighter shake, use lower-fat ice cream or milk. Adjust the sweetness with honey or agave for a healthier choice. For the full recipe, you can refer to the details above. Enjoy your delicious shake! {{image_2}} You can easily switch up your Caramel Toffee Crunch Shake. To make a chocolate version, simply substitute some vanilla ice cream with chocolate ice cream. This small change adds a rich layer of flavor. You can also add chocolate syrup for an extra treat. Just drizzle it inside your glass before pouring in the shake. This will make every sip a delightful mix of chocolate and caramel. If you want a dairy-free shake, there are great options. You can use coconut milk or almond milk instead of regular milk. For the ice cream, choose a dairy-free vanilla ice cream. Many brands now offer creamy, tasty alternatives. Make sure to check the labels for added sugars. You might need to adjust the sweetener when using these substitutes. Taste your shake and add more sweetener if it needs it. To keep your shake fresh, store it in the fridge. Use an airtight container. This helps prevent it from absorbing other flavors. Consume the shake within two days for the best taste. If you want to save it longer, consider freezing it. Pour the shake into freezer-safe containers. Leave a little space at the top, as it will expand. When ready to enjoy, move it to the fridge overnight to thaw. You may have extra caramel and toffee after making your shake. Use leftover caramel as a topping for desserts like brownies or ice cream. It adds a sweet touch and makes treats feel fancy. Toffee bits can find a home in cookies or cakes. Mix them into your favorite chocolate chip cookie recipe for a crunchy surprise. You can also sprinkle them on top of yogurt or oatmeal for added crunch and flavor. To make a thicker shake, adjust your ingredient ratios. Use more ice cream and less milk. This creates a creamier texture. You can add one extra scoop of ice cream. Blend until smooth. If it’s still thin, add more ice cream until you reach your desired thickness. Yes, you can use sugar-free ingredients. Look for sugar-free ice cream and caramel sauce. These options work well in the shake. You may find sugar-free toffee bits, too. Just make sure to check the label for taste. Sugar-free ingredients can still be tasty. You can find this shake at many coffee shops and restaurants. Look for places with a good dessert menu. Chains like Starbucks or local ice cream shops often have it. Call ahead to make sure they have it available. Also, some diners offer unique shakes and may feature this one. If you lack toffee bits, consider alternatives. You can use crushed cookies or chocolate chips. Chopped nuts can add a nice crunch, too. For a fun twist, try adding caramel candies. Just crush them up before adding to the shake. These options keep the flavor exciting! For the complete recipe, check out the Full Recipe above. We covered everything you need to make a great Caramel Toffee Crunch Shake. From the ingredients list to preparation steps, each part plays a vital role. You learned tips for better blending and serving, plus tasty variations to try. Don't forget to store your leftovers properly to enjoy later. This shake is fun to make and customize, so get creative! With these easy steps, you can impress anyone with your homemade treat. Enjoy your shake journey and savor every sip!

Caramel Toffee Crunch Shake Irresistible Flavor Treat

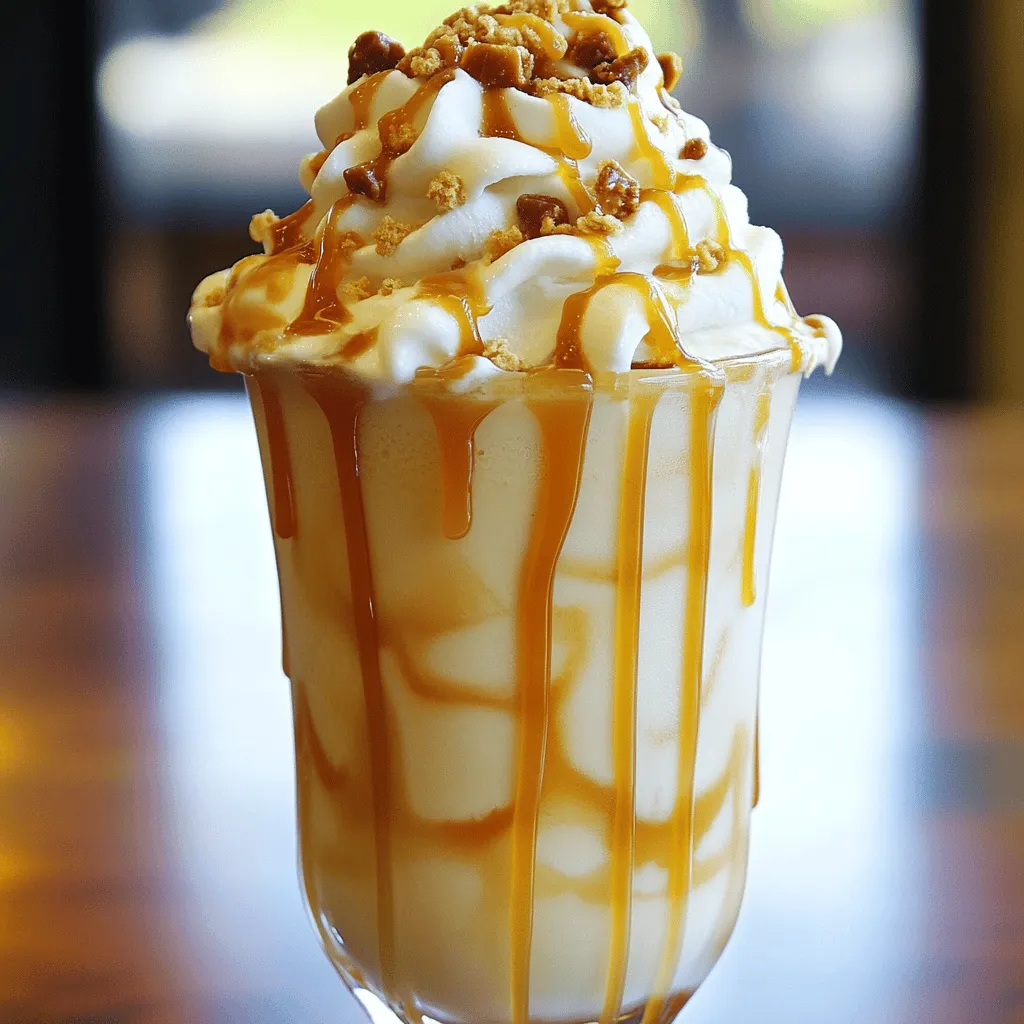
Looking for a sweet treat that packs a punch? Get ready for the Caramel Toffee Crunch Shake! This tasty drink

To make a Peach Melba Smoothie, you need fresh and tasty ingredients. Here’s what you should gather: - 2 ripe peaches, pitted and diced - 1 cup fresh raspberries (or frozen) - 1 banana, sliced - 1 cup Greek yogurt - 1 cup almond milk (or milk of choice) - 2 tablespoons honey or maple syrup (adjust to taste) - 1 teaspoon vanilla extract - Ice cubes (optional, for a thicker texture) Each ingredient plays a key role in creating a smooth and fruity drink. Peaches give it sweetness and a nice texture. Raspberries add a tangy kick that balances the flavors. Bananas offer creaminess and natural sweetness. Greek yogurt provides protein and makes the smoothie thick. Almond milk keeps it light and smooth. Honey or maple syrup lets you adjust the sweetness. Vanilla extract adds depth. If you like your smoothie icy, add some ice cubes. You can find the full recipe with instructions to guide you through the process. This drink is not just delicious but also refreshing and energizing, perfect for any time of the day. Start by washing your fruits well. Rinse the peaches and raspberries under cool water. Use your hands to rub off any dirt. If you use frozen raspberries, skip this step. Next, let's slice and dice the fruits. For peaches, cut them in half and remove the pit. Then, slice the peach into smaller pieces. For the banana, simply peel it and slice it into rounds. Now, it's time to blend! Add the diced peaches first. Next, follow with the raspberries and banana. This order helps everything mix well. Pour in the Greek yogurt and almond milk next. Then, add honey and vanilla extract. For a thicker smoothie, toss in a few ice cubes. Blend on high speed until smooth. Check the texture and blend longer if needed. Once blended, taste the smoothie. If you want it sweeter, add more honey or syrup. Blend again to mix it in. Pour your smoothie into chilled glasses. For a nice touch, add whole raspberries and a peach slice on the rim. Drizzle some honey on top for extra sweetness. Enjoy your refreshing Peach Melba Smoothie! 1. Over-blending or under-blending: Finding the right blend time is key. Over-blending makes the smoothie too thin. Under-blending leaves chunks. Aim for a smooth, creamy mix. 2. Choosing the right type of yogurt: Not all yogurts are equal. Greek yogurt adds creaminess and protein. Regular yogurt can make it runny, so stick to Greek for the best texture. - Swapping out fruits for different flavors: Want a twist? You can replace peaches with mango or strawberries. Each fruit brings its own taste and sweetness. Experiment until you find your favorite mix! - Adjusting thickness with ice or liquid: If your smoothie is too thin, add ice cubes. For a thinner drink, pour in more almond milk. Adjust until you get the perfect consistency. - Nutritional advantages of peaches and raspberries: Peaches are rich in vitamins A and C. They boost your skin health and immune system. Raspberries add fiber and antioxidants, helping digestion and fighting free radicals. - Benefits of Greek yogurt and almond milk: Greek yogurt is high in protein, keeping you full longer. Almond milk is low in calories and often fortified with vitamins. Together, they make a healthy, delicious base for this smoothie. For a full recipe, check the Peach Melba Smoothie section! {{image_2}} You can make this smoothie even more exciting. Adding pineapple gives a tropical twist. The sweet and tangy taste of pineapple pairs well with peaches. You can also use coconut milk instead of almond milk. It adds a creamy texture and a hint of coconut flavor. This change makes the smoothie rich and smooth. If you want a vegan option, simply substitute Greek yogurt with plant-based yogurt. This keeps the smoothie creamy while making it dairy-free. You can also change the honey. Use maple syrup or agave nectar for sweetness. Both options keep your smoothie sweet without animal products. Want to boost the nutrition? Try adding protein powder. It makes the smoothie filling and great for a post-workout snack. You can also mix in spinach or kale. These greens add vitamins and minerals without changing the taste much. They blend in smoothly and make your smoothie even healthier. For the full recipe, check the earlier section. Enjoy experimenting with these variations! Your Peach Melba smoothie stays fresh in the fridge for about 1 to 2 days. Make sure to store it in a tight container. Glass jars or BPA-free plastic bottles work great. These containers keep air out and help maintain the flavor. If you have extra smoothie, you can freeze it for later. Pour the smoothie into ice cube trays or freezer-safe bags. Leave a little space at the top, as it expands when frozen. To thaw, place the smoothie in the fridge overnight or set it on the counter for a few hours. When ready, re-blend it for a smooth texture. Enjoy your delicious Peach Melba smoothie anytime! You can find the *Full Recipe* above. Yes, you can use frozen fruits. Frozen fruits can make your smoothie cold and thick. They also save time since you don’t need to wash or cut them. Fresh fruits can taste great too, but they may require more prep work. Frozen fruits keep their nutrients well, so you won't miss out on health benefits. I often use frozen raspberries for convenience and flavor. Yes, this smoothie is great for kids! It has fruit, yogurt, and milk, which provide vitamins and minerals. Peaches and raspberries are tasty and packed with nutrients. Greek yogurt adds protein, which helps kids feel full. Just be mindful of added sweeteners like honey. You can adjust the sweetness to what your kids enjoy. You can make this smoothie more filling by adding a few things. Consider adding oats, which are high in fiber and keep you full longer. Nut butter adds healthy fats and protein. You can also add chia seeds or flaxseeds for extra nutrients. These options turn your smoothie into a meal replacement. For the full recipe, check out the Peach Melba Smoothie details above. This blog post covered how to make a delicious peach melba smoothie. We explored key ingredients, tips for preparation, blending, and serving. I shared common mistakes to avoid and ways to customize your smoothie. You learned about its health benefits and how to store it properly. This smoothie is not just tasty; it’s a great way to boost your nutrition. Enjoy making it your own, and drink to your health!

Peach Melba Smoothie Energizing and Refreshing Blend

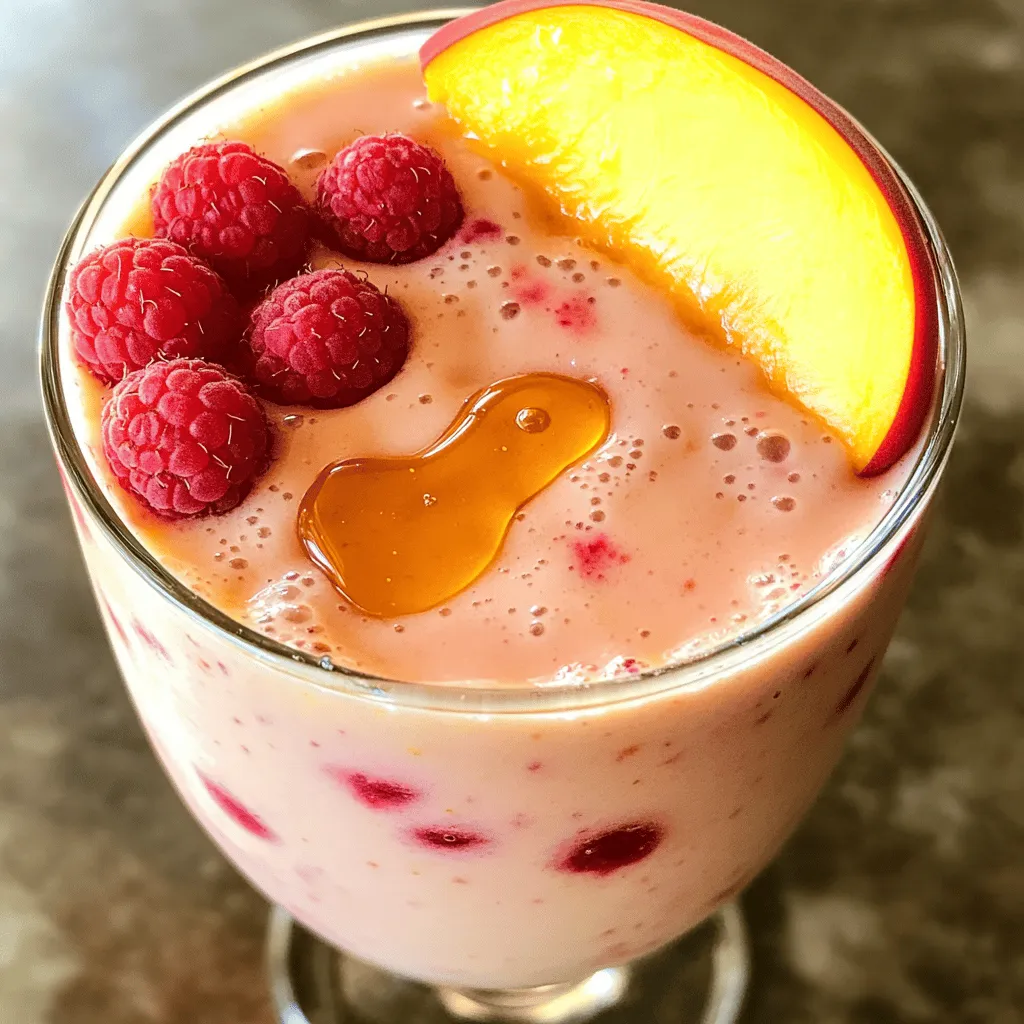
Ready for a delicious treat that’s both energizing and refreshing? The Peach Melba Smoothie is a delightful blend of ripe

- Dried hibiscus flowers - Fresh raspberries - Honey or agave syrup - Lemon juice - Ice cubes - Fresh mint leaves (optional) Choosing good ingredients makes your tea special. Start with dried hibiscus flowers. Look for bright, deep red flowers. This color means they are fresh. Store them in a cool, dry place. Fresh raspberries are key too. They should be firm and plump. Check for any mold or soft spots. If you want to switch out honey or agave, there are options. You can try maple syrup or fruit juice. Both add a nice sweetness. For a low-calorie choice, consider stevia or erythritol. These sweeteners blend well and keep the taste great. To start, boil 6 cups of water in a medium saucepan. Once the water is boiling, remove it from heat. This is when you add the dried hibiscus flowers. Let them steep for about 15 to 20 minutes. You will see the water turn a deep red color. After steeping, strain the hibiscus tea into a large pitcher. Discard the used flowers. This tea is packed with flavor. While the tea is still warm, it's time to sweeten it. Stir in 1/2 cup of honey or agave syrup. Mix until it fully dissolves. You can adjust the sweetness to your taste. Next, add in the fresh raspberries and 2 tablespoons of lemon juice. Stir gently to combine. The raspberries add a nice fruity touch. Let the tea cool to room temperature. Once it’s cool, place it in the fridge. Chill for about 1 to 2 hours. When you are ready to serve, fill glasses with ice cubes. Pour the raspberry hibiscus tea over the ice. For a lovely finish, garnish each glass with extra raspberries and fresh mint leaves. This adds a pop of color and freshness to your drink. To make your raspberry hibiscus iced tea just right, you can adjust the sweetness. Start with half a cup of honey or agave syrup. Taste it after mixing. If you want it sweeter, add more. Remember, you can always add more, but you can't take it out! Next, enhance the berry flavors. Use fresh raspberries for the best taste. Mashing some raspberries before adding them to the tea releases more juice. This will give your drink a richer berry flavor. Choosing the right glass can make your drink look even better. I like using tall, clear glasses. This way, you can see the vibrant red color of the tea. It adds to the experience! Pair your iced tea with snacks. Light foods work well. Try it with cucumber sandwiches, cheese, or fruit skewers. These snacks will balance the tartness of the tea. You can infuse other fruits or herbs to mix it up. Try adding sliced strawberries or peach pieces. Fresh herbs like basil or rosemary can add a unique twist. Just remember to add them while the tea is warm to help release their flavors. Experimenting with different tea combinations is also fun. Mixing hibiscus with green tea or black tea can create new flavors. Each blend offers a different taste experience. Enjoy the process of finding your favorite mix! For the full recipe, check out the details above. {{image_2}} You can make fun twists on raspberry hibiscus iced tea by adding other flavors. For a refreshing hibiscus and citrus drink, try adding orange or lime juice. The bright citrus will balance the tartness of the hibiscus. You can also mix in some slices of lemon for extra zing. Tropical berry blends are another tasty option. Combine raspberries with strawberries, blueberries, or even pineapple. This mix brings a tropical vibe to your drink. Just toss in the fruits while you prepare the tea. Your guests will love the burst of flavors! Adjusting sweetness is key to making the perfect iced tea. If you want a low-sugar option, use less honey or agave syrup. You can also try sweetening with stevia or monk fruit. These natural sweeteners add flavor without extra calories. Infused sweeteners are another great choice. Consider using flavored syrups, like vanilla or almond. These can add a nice twist. You can also steep the tea with a few mint leaves. This adds sweetness and a fresh taste. Making cold brew raspberry hibiscus tea is simple and rewarding. Start by adding the dried hibiscus flowers and raspberries to cold water. Let it steep in the fridge overnight. This method makes a smoother, less acidic drink. Timing and steeping can change the flavor. If you want a stronger taste, steep for 12-24 hours. For a lighter flavor, steep for just 6-8 hours. Experiment to find your perfect flavor! To keep your raspberry hibiscus iced tea fresh, always refrigerate it. Use a clean, airtight container. Glass jars or pitchers work well. Avoid letting it sit out at room temperature. This helps prevent bacteria growth and keeps flavors bright. Your raspberry hibiscus iced tea lasts about 5 to 7 days in the fridge. Store it tightly sealed to keep it fresh. Watch for signs of spoilage, like changes in smell or color. If it smells sour or looks cloudy, it’s best to toss it. Don't waste those leftover hibiscus flowers! You can use them in smoothies or oatmeal. For the extra raspberries, mash them into a sauce or mix them into yogurt. They add a nice touch and minimize waste while keeping your meals exciting. Raspberry hibiscus iced tea has a sweet and tart flavor. The hibiscus gives a deep, floral note. Raspberries add a bright, fruity taste. Together, they create a refreshing drink perfect for hot days. The color is a vibrant red, which makes it even more appealing. The aroma is fruity and floral, inviting you to take a sip. Hibiscus is rich in antioxidants, which help fight free radicals. It may lower blood pressure and support heart health. Hibiscus is also good for digestion. It has vitamins like C and minerals like calcium. Drinking hibiscus tea can boost your immune system and keep you hydrated. This makes it a great choice for a healthy drink. Yes, you can use fresh hibiscus. Fresh hibiscus has a lighter flavor compared to dried. You will need to adjust the steeping time. Fresh flowers may not need as long to infuse. Check out the Full Recipe for detailed steps on using fresh hibiscus in your tea. Raspberry hibiscus iced tea is a delight, easy to make and refreshing. You’ve learned about key ingredients like dried hibiscus flowers and fresh raspberries. Quality matters, so choose fresh items for the best flavor. I shared step-by-step instructions for brewing and combining ingredients. Don’t forget to experiment with sweeteners and different fruits. As you try this drink, remember to have fun with flavors. I hope you enjoy making your own iced tea, and feel free to get creative!

Raspberry Hibiscus Iced Tea Refreshing Summer Drink

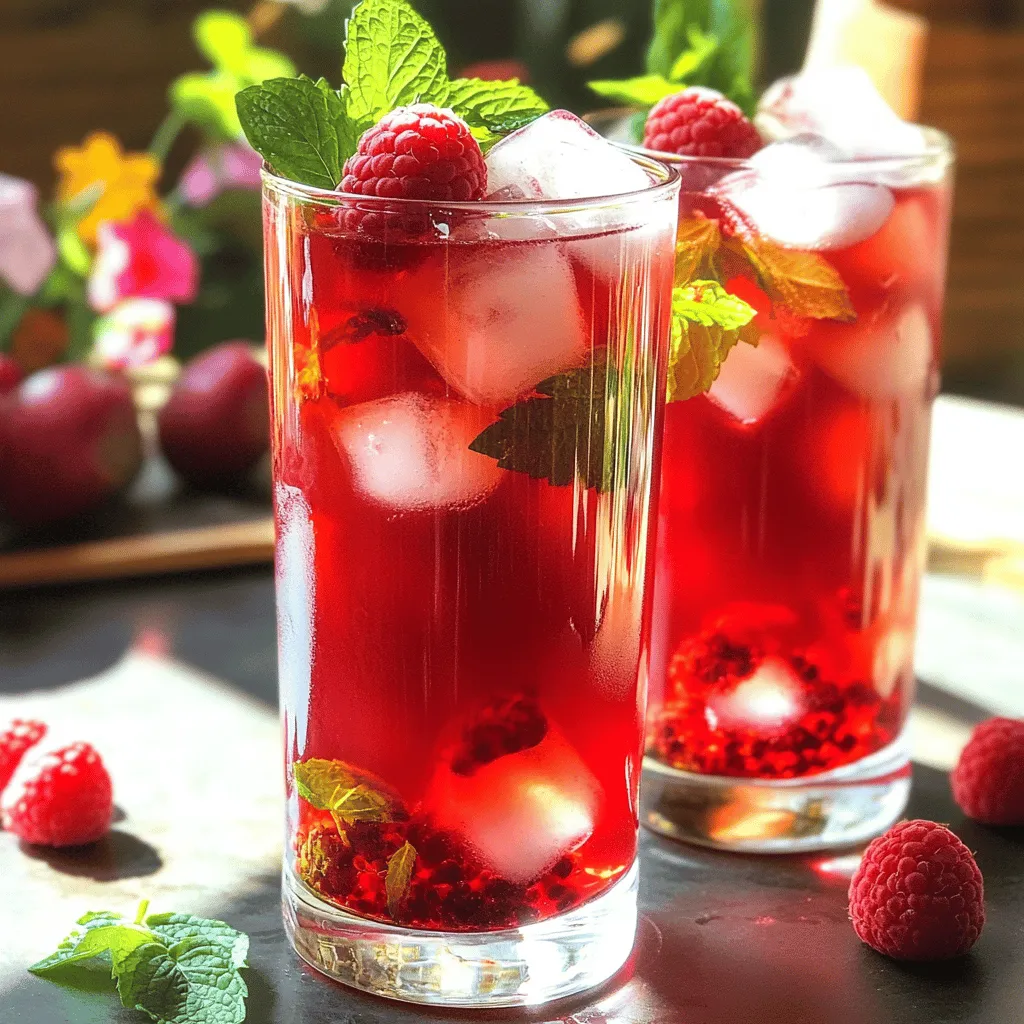
Looking for the perfect drink to cool you down this summer? Meet Raspberry Hibiscus Iced Tea, your new favorite refreshment!

To make chocolate drizzled rice cakes, you need a few simple items. Here’s what you’ll need: - 4 plain rice cakes - 1/2 cup dark chocolate chips (or any preferred variety) - 1 tablespoon coconut oil These main ingredients create a tasty base for your snack. You can make your rice cakes even better with fun toppings. Here are some ideas: - 1/4 cup shredded coconut (unsweetened) - 1/4 cup mixed nuts (chopped; almonds, walnuts, hazelnuts) - Sea salt for sprinkling Feel free to get creative! Add your favorite nuts or seeds. Having the right tools makes cooking easier. Here’s what you’ll need: - Microwave-safe bowl - Spoon or piping bag for drizzling - Parchment paper or silicone baking mat These tools help you create a neat and tasty treat. For more details, check out the Full Recipe. To melt chocolate, start with a microwave-safe bowl. Add the dark chocolate chips and one tablespoon of coconut oil. The oil helps the chocolate flow better. Microwave this mix in 30-second bursts. After each round, stir the chocolate well. Keep doing this until the chocolate is smooth and shiny. Watch closely! Overheating can burn the chocolate. Next, lay your rice cakes flat. Use parchment paper or a silicone mat for easy cleanup. This step will help keep your workspace tidy. Make sure the rice cakes have enough space between them. This way, each cake gets its fair share of chocolate and toppings. Now it's time to drizzle! Use a spoon or a piping bag for this part. Drizzle the melted chocolate over each rice cake in a zigzag pattern. Let the extra chocolate drip back into the bowl. While the chocolate is still warm, sprinkle on the shredded coconut and chopped nuts. Ensure they are spread evenly. Lastly, add a tiny pinch of sea salt on top. It really makes the flavors pop! Allow the chocolate to set for about 10-15 minutes. For faster results, place the rice cakes in the fridge for 5 minutes. Once set, you can enjoy these chocolate drizzled rice cakes. For the complete process, see the Full Recipe. When picking chocolate, I love dark chocolate chips. They melt well and add rich flavor. You can also use milk chocolate or white chocolate if you prefer. Each type gives a different taste. For a fun twist, try flavored chocolate like mint or orange. Just ensure it's good quality for the best results. To get nice drizzles, use a spoon or a piping bag. A piping bag lets you control the flow better. Practice makes perfect! Start with small drizzles on each rice cake. Drizzle in a zigzag pattern for a fun look. Add toppings while the chocolate is still wet. This helps them stick better. Use a mix of shredded coconut and chopped nuts for added crunch. If you have leftovers, store them in an airtight container. Keep them in a cool, dry place. They can last up to a week. If it's warm, the chocolate may melt. You can also refrigerate them for longer freshness. Just remember to let them come to room temperature before eating. Enjoy your tasty treat! {{image_2}} You can mix flavors to make your rice cakes even better. Try adding peanut butter to the melted chocolate for a nutty twist. You can also use milk chocolate for a sweeter touch. Want something fruity? Add crushed freeze-dried strawberries on top for a burst of flavor. Mix and match to find your favorite! The toppings can change how your rice cakes taste. Use crushed pretzels for a salty crunch. You can also try adding dried fruit like raisins or cranberries for sweetness. If you love spice, sprinkle a bit of cinnamon or cayenne pepper on top. These options can make each rice cake unique! You can turn these rice cakes into a fun dessert parfait. Start by breaking the rice cakes into small pieces. Layer them with yogurt and fresh fruit in a cup. Drizzle melted chocolate between the layers for extra sweetness. This makes a great treat for parties or a fun snack at home. The Full Recipe has all the steps to create this tasty treat! To keep your rice cakes fresh, store them in a cool, dry place. Avoid direct sunlight, as it can make them stale. If you have leftovers, make sure they cool fully before storing. This helps keep the texture nice and crisp. Use an airtight container for the best results. This will help keep moisture out. If you want to stack the rice cakes, place parchment paper between them. This prevents sticking and keeps them looking great. You can freeze chocolate drizzled rice cakes for longer storage. First, let the chocolate set completely. Then, place them in a single layer in a container. Make sure to cover them tightly. They can last for about two months in the freezer. When ready to eat, thaw them in the fridge. Enjoy them cold or let them warm up to room temperature. Yes, you can use white chocolate. It melts easily and tastes sweet. You can follow the same steps as with dark chocolate. Just melt it with a little coconut oil. This helps it stay smooth and easy to drizzle. White chocolate will give your rice cakes a different flavor. It pairs well with nuts and fruits. Chocolate drizzled rice cakes can last for about a week. Store them in an airtight container to keep them fresh. If you live in a warm place, keep them in the fridge. This helps the chocolate stay firm and tasty. Just make sure to separate layers with parchment paper. This prevents sticking. You can find pre-made chocolate drizzled rice cakes at some grocery stores. Look in the snack aisle or near the health foods. Some stores may have them in the bakery section too. You can also check online grocery shops. They may have them ready to ship. If you want more options, try looking for the Full Recipe and make your own! You learned how to make chocolate-drizzled rice cakes easily. We covered the main ingredients and tools needed. I shared step-by-step instructions for melting chocolate and decorating rice cakes. Tips and tricks help you achieve the best results. You can explore fun variations and safe storage options. Enjoy making these tasty snacks with your favorite flavors. They are simple and fun to create.

Chocolate Drizzled Rice Cakes Simple Sweet Snack

Looking for a quick and tasty snack? Chocolate Drizzled Rice Cakes are your answer! They’re simple to make and satisfy

The Roasted Veggie Quinoa Power Bowl is both healthy and filling. It uses fresh veggies and protein-rich quinoa. This bowl combines flavors and textures in a fun way. You can enjoy it at lunch or dinner. For the full recipe, check below. - Quinoa Use 1 cup of rinsed quinoa. It serves as a great base and is rich in protein. - Vegetables Choose colorful veggies: - 1 red bell pepper, diced - 1 zucchini, sliced - 1 cup cherry tomatoes, halved - 1 cup broccoli florets - Chickpeas Add 1 can (15 oz) of chickpeas, drained and rinsed. They add protein and fiber. - Seasonings Season with simple spices: - 2 tablespoons olive oil - 1 teaspoon garlic powder - 1 teaspoon smoked paprika - Salt and pepper to taste - Garnishes Top with fresh ingredients: - 1 avocado, sliced - Fresh parsley or cilantro for garnish - Lemon wedges for serving This blend of ingredients makes the dish tasty and satisfying. Enjoy making your Roasted Veggie Quinoa Power Bowl! To start, gather all your ingredients. You will need: - 1 cup quinoa, rinsed - 2 cups vegetable broth - 1 red bell pepper, diced - 1 zucchini, sliced - 1 cup cherry tomatoes, halved - 1 cup broccoli florets - 2 tablespoons olive oil - 1 teaspoon garlic powder - 1 teaspoon smoked paprika - Salt and pepper to taste - 1 can (15 oz) chickpeas, drained and rinsed - 1 avocado, sliced - Fresh parsley or cilantro for garnish - Lemon wedges for serving Preheat your oven to 400°F (200°C). This step helps the veggies roast well. Next, prepare a large baking sheet. Spread out the diced red bell pepper, zucchini, cherry tomatoes, and broccoli florets. Now, drizzle the vegetables with olive oil. Add garlic powder, smoked paprika, salt, and pepper. Toss everything to coat evenly. This step adds great flavor to your veggies. While the veggies roast, bring the vegetable broth to a boil in a medium saucepan. Stir in the rinsed quinoa. This is where the magic happens! Reduce the heat to low, cover it, and let it simmer for about 15 minutes. Your quinoa will become fluffy and absorb the broth. In the last few minutes of cooking, add the chickpeas to the baking sheet with the veggies. Toss to combine, and return to the oven. This warms the chickpeas and melds the flavors together. Roast for another 5 minutes until everything is nice and hot. Once done, remove the baking sheet from the oven. Let the vegetables and chickpeas cool slightly. Now, it’s time to build your power bowl! Start by scooping some quinoa as a base into bowls. Top it with the roasted veggies and chickpeas. Now comes the fun part—add sliced avocado on top for creaminess. Garnish with fresh parsley or cilantro for a pop of color. Serve with lemon wedges for an added zing. This bowl is not just healthy; it’s also filling and bursting with flavor. For the full recipe, check out the detailed instructions above. Enjoy your meal! To roast veggies perfectly, start with even cuts. Aim for slices about the same size. This helps them cook evenly. Use a large baking sheet, so veggies have room to breathe. Overcrowding can lead to steaming instead of roasting. I suggest a hot oven at 400°F (200°C). This gives veggies a nice char. Toss them halfway through cooking for even browning. Check for tenderness with a fork. They should be soft but not mushy. Cooking quinoa is simple. First, rinse it under cold water. This removes bitter saponins. Use a 2:1 ratio of broth to quinoa for flavor. Bring the broth to a boil before adding quinoa. Once added, lower the heat and cover. Let it simmer for about 15 minutes. After cooking, let it sit for five minutes. Fluff it gently with a fork for that light, airy texture. This is key for a great power bowl. Presentation makes a power bowl pop. Start with a base of fluffy quinoa. Then, artfully arrange your roasted veggies on top. Add chickpeas for protein and crunch. A slice of avocado adds creaminess and color. Finish with fresh herbs for brightness. Serve with lemon wedges for a refreshing squeeze. This elevates the dish and adds zing. Use colorful veggies for a feast for the eyes. Remember, we eat with our eyes first! For the full recipe, check the details above. {{image_2}} You can switch up the veggies in your power bowl. Try carrots, sweet potatoes, or spinach. Roasting brings out their natural sweetness. Use what you have at home for a unique twist. Mix colors and textures for a fun look. This keeps your meals interesting and tasty. Chickpeas are a great protein source, but you have options. Use black beans for a different flavor. Tofu is another good choice; it soaks up all the spices. Cooked chicken or shrimp can add extra protein for meat lovers. Each option makes your bowl filling and satisfying. This power bowl is already gluten-free and vegan with simple swaps. Quinoa is gluten-free and a great grain choice. For a vegan protein boost, stick with chickpeas or black beans. Make sure to check your vegetable broth for gluten. This makes it easy to enjoy for everyone. Check out the Full Recipe for more ideas on making this dish your own! To keep your Roasted Veggie Quinoa Power Bowl fresh, store it in an airtight container. This helps to keep flavors in and air out. You can refrigerate it for up to four days. Make sure to let the bowl cool down before putting it in the fridge. This prevents moisture build-up, which can make it soggy. When it’s time to enjoy your leftovers, reheat them carefully. You can use a microwave or a skillet. For the microwave, place the bowl in for about 1-2 minutes. Stir halfway through to heat evenly. If you use a skillet, add a splash of water. Cover it and heat on low for about 5 minutes. This keeps the veggies from drying out. Meal prep makes cooking easy and saves time. You can prepare the quinoa and veggies ahead of time. Store each in separate containers. This way, you can mix and match throughout the week. If you want, chop the veggies a day before cooking. Just keep them in the fridge in a sealed bag. For a quick meal, assemble your bowl right before eating. This keeps everything fresh and tasty. For the full recipe, check out the Roasted Veggie Quinoa Power Bowl. Yes, you can make this recipe ahead of time. Cook the quinoa and roast the veggies. Store them separately in the fridge. They stay fresh for about three to four days. When you’re ready to eat, just heat them up together. This makes a quick meal or lunch. If you want to switch it up, try brown rice or farro. These grains have a similar texture. You can also use couscous for a lighter option. Each substitute offers a unique flavor. Adjust the cooking time based on the grain you choose. For storing leftovers, keep them in an airtight container. Make sure they cool down first. You can refrigerate them for up to four days. If you want to enjoy them later, you can freeze them. Just label your container with the date. To reheat, warm it in the microwave or on the stove. Enjoy your tasty meal again! This blog post covers how to make a tasty Roasted Veggie Quinoa Power Bowl. You learned about essential ingredients like quinoa, veggies, and chickpeas. I shared steps for preparing and cooking your meal. Tips on roasting and serving can help improve your bowl. I also provided variations and storage info to suit your needs. Enjoy your cooking adventure, and remember to have fun with each step!

Roasted Veggie Quinoa Power Bowl Healthy and Filling

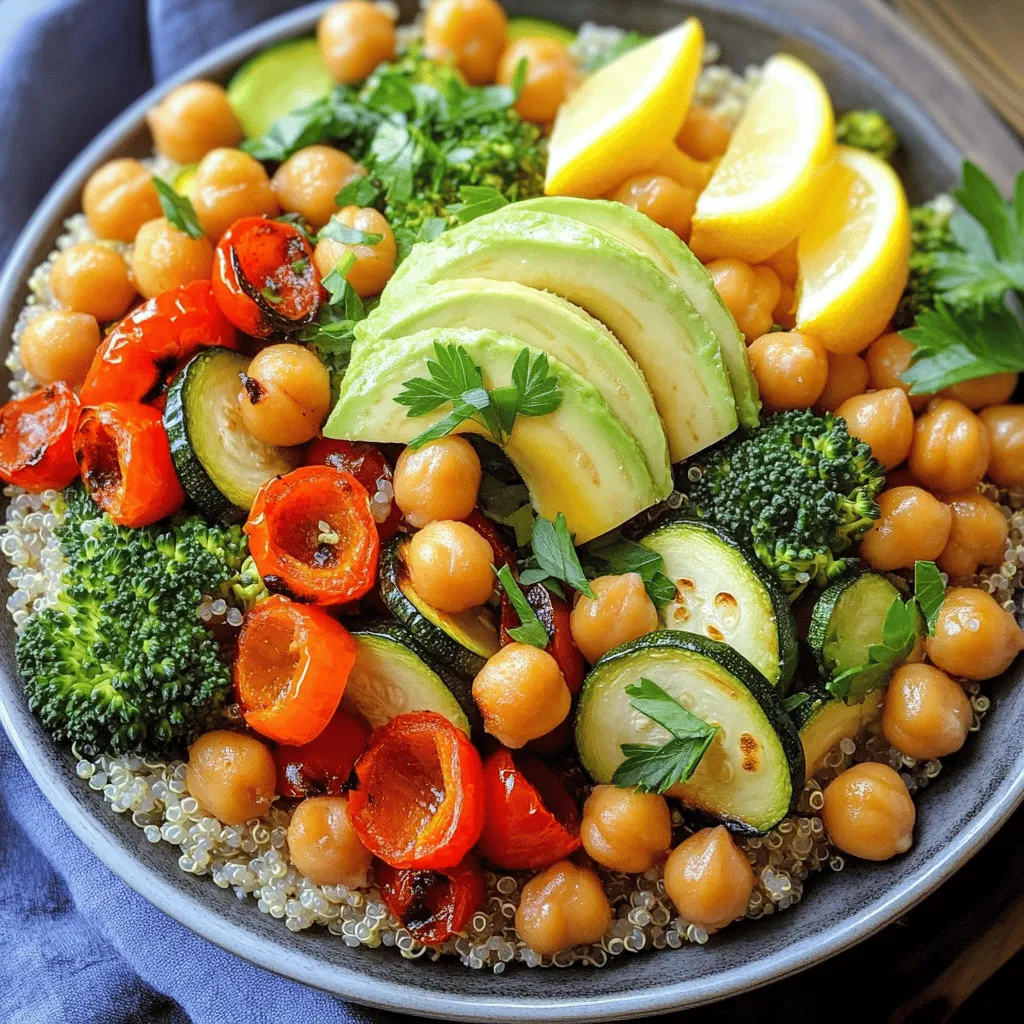
If you’re searching for a meal that’s both healthy and filling, the Roasted Veggie Quinoa Power Bowl is your answer!

Older posts
Newer posts
← Previous Page1 … Page30 Page31 Page32 … Page80 Next →

dsad

© 2025 pureeatsnow • Built with GeneratePress

Our Policies

  • Copyright Policy
  • Cookie Policy
  • GDPR Policy
  • Privacy Policy
  • Disclaimer
  • Terms Of Use

More Information

  • Home
  • About
  • Contact
  • Appetizers
  • Dessert
  • Dinner
  • Drinks
©2025, pureeatsnow About Back To Top