Skip to content
DisclaimerTerms Of UseGDPR PolicyCookie Policy

pureeatsnow

  • Home
  • Drinks
  • Appetizers
  • Dinner
  • Dessert
  • About
  • Contact
  • Privacy Policy
DisclaimerTerms Of UseGDPR PolicyCookie Policy

Rachel

To make the Slow Cooker Cinnamon Roll Casserole, you will need: - 2 cans of refrigerated cinnamon rolls (8 rolls each) - 4 large eggs - 1 cup milk - 1/4 cup maple syrup - 1 teaspoon vanilla extract - 1 teaspoon ground cinnamon - 1/2 teaspoon nutmeg - Icing from cinnamon roll cans (for drizzling) These ingredients create a rich and creamy base. The cinnamon rolls give it a sweet and fluffy texture. The eggs and milk add a nice custard-like feel. You can enhance this dish with some fun add-ins: - 1/2 cup chopped pecans - 1/2 cup raisins Adding nuts gives a nice crunch. Raisins add a bit of sweetness, making every bite exciting. Feel free to mix and match your favorites! If you want to change things up, consider these substitutes: - Use almond milk instead of regular milk for a nutty flavor. - Swap maple syrup for honey or agave syrup for a different sweetness. - Try gluten-free cinnamon rolls to make it gluten-free. These options keep the recipe flexible and fun while still tasting great! Start by greasing your slow cooker with cooking spray. This step helps the casserole come out easily later. Make sure to coat the bottom and sides well. Set the slow cooker aside while you prepare the other ingredients. Next, open the cans of refrigerated cinnamon rolls. Cut each roll into quarters. Place the pieces in a large mixing bowl. In a separate bowl, whisk together four large eggs, one cup of milk, and a quarter cup of maple syrup. Add one teaspoon of vanilla extract, one teaspoon of ground cinnamon, and half a teaspoon of nutmeg. Mix well until everything is combined. Pour this egg mixture over the cinnamon roll pieces. Stir gently to coat all the pieces evenly. If you want, add half a cup of chopped pecans and half a cup of raisins. Fold them gently into the mixture. Now, transfer the mixture into the greased slow cooker. Spread it out evenly with a spatula. Cover the slow cooker and set it to cook on low for two and a half to three hours. You will know it’s done when the center is set and the edges are golden brown. After cooking, turn off the slow cooker and let it sit for about ten minutes. Drizzle the icing from the cinnamon roll cans over the warm casserole. The icing will melt slightly, adding a sweet touch. Serve it warm for a delicious breakfast or dessert. To get the best results, always grease your slow cooker well. This step helps the casserole come out easily. Use cooking spray for this task. Cook your casserole on low heat, as it allows the flavors to blend well. Avoid cooking on high heat; it can lead to uneven cooking. For a soft and fluffy texture, ensure you cut the cinnamon rolls into quarters. This will help them soak up the egg mixture better. You can also gently stir the mixture without crushing the rolls. Letting it sit for 10 minutes after cooking helps set the texture. Serve the casserole warm for the best taste. Drizzle the icing on top while it is still warm. This makes the icing melt slightly and adds flavor. You can also sprinkle some chopped pecans or raisins on top for a nice look. A scoop of vanilla ice cream on the side can make it even more delightful! {{image_2}} You can change the flavor of your casserole easily. Try adding chocolate chips for a sweet touch. You might like adding fresh fruits, like blueberries or strawberries. If you want a twist, use caramel sauce instead of maple syrup. Each choice brings a new taste to your dish. To make this recipe gluten-free, use gluten-free cinnamon rolls. Many brands offer great options. For a vegan version, swap the eggs with flax eggs. Mix one tablespoon of flaxseed with three tablespoons of water. Let it sit until it thickens. Use almond milk or oat milk instead of regular milk. Get creative with your toppings! Add nuts like walnuts or almonds for crunch. Consider drizzling a berry sauce for added sweetness. Instead of the icing, drizzle a simple glaze made of powdered sugar and milk. You could even sprinkle some shredded coconut on top for extra flavor. To keep your cinnamon roll casserole fresh, store it in an airtight container. Make sure it cools down before you seal it. This helps prevent sogginess. You can keep it in the fridge for up to three days. If you want to enjoy it later, freezing is a good option too. When it’s time to eat leftovers, you can reheat them easily. Place a slice in the microwave. Heat it for 20 to 30 seconds at a time. Check if it's warm enough. You can also use the oven. Preheat it to 350°F (175°C) and bake for about 10 minutes. This will help keep the texture nice. If you want to store it longer, freezing works well. Cut the casserole into slices. Wrap each slice tightly in plastic wrap. Then, place them in a freezer-safe bag. This keeps air out and prevents freezer burn. You can freeze it for up to three months. When ready to eat, thaw it in the fridge overnight. Then, reheat as mentioned before. Yes, you can make this casserole ahead. Prepare it the night before. Just mix the cinnamon rolls and egg mixture. Cover the bowl and store it in the fridge. In the morning, pour it into the slow cooker. Cook it as usual. This saves time for busy mornings! The casserole is done when the center is set. The edges should be golden brown. You can check it with a toothpick. Insert it into the center. If it comes out clean, it is ready. If it has liquid, cook it longer. Absolutely! You can use any cinnamon rolls you like. Try flavored rolls like caramel or apple. You can even use gluten-free rolls if needed. Just ensure they fit well in the slow cooker. The flavors mix well with the egg mixture. This casserole pairs well with fresh fruit. Sliced strawberries or bananas add color and taste. You can also serve it with yogurt for creaminess. A drizzle of maple syrup on top gives extra sweetness. It works great as breakfast or dessert! This blog post covered how to make a tasty slow cooker cinnamon roll casserole. We explored key ingredients, helpful cooking steps, and tips to ensure perfect results. You learned about flavor variations and how to store leftovers for later. Remember, you can get creative with ingredients and toppings to suit your taste. Enjoy experimenting with this dish! Simple changes can lead to new favorites. Happy cooking!

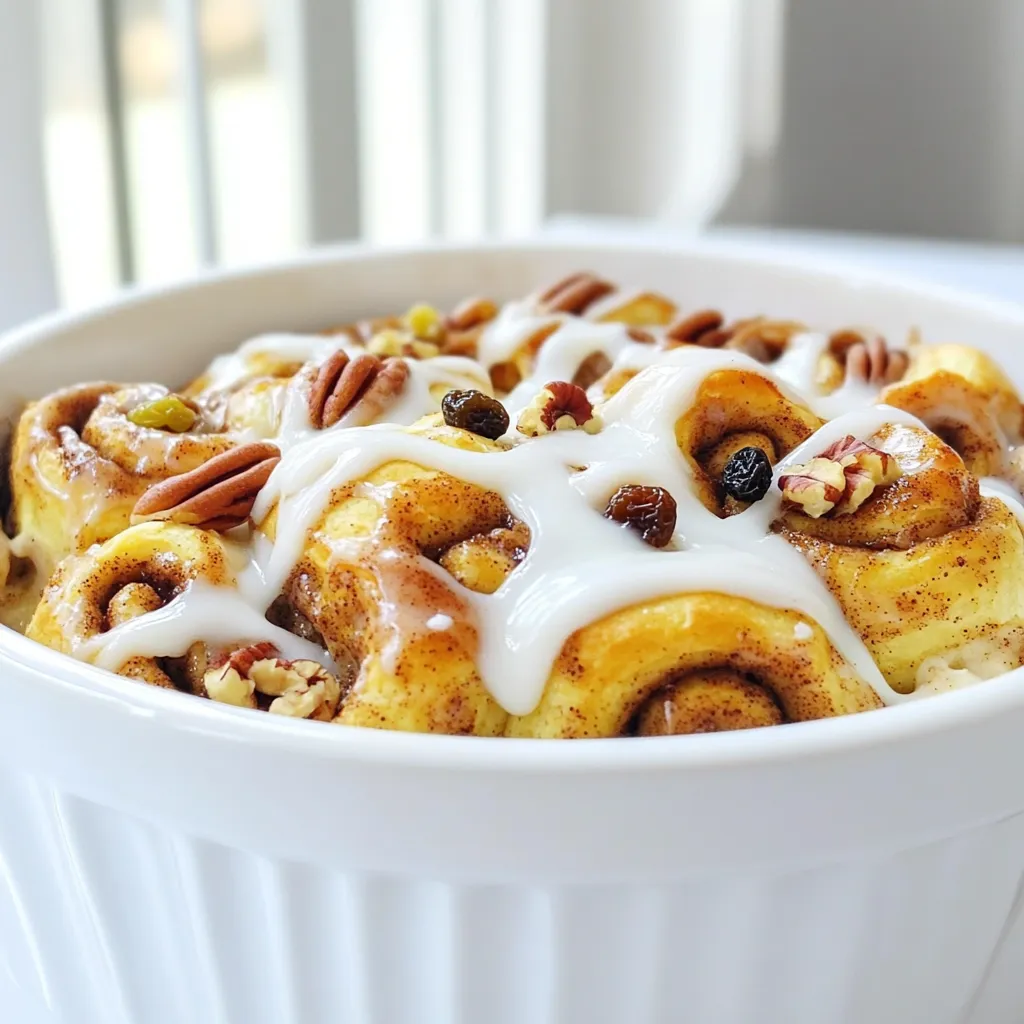
Slow Cooker Cinnamon Roll Casserole Delight Recipe

Get ready for a brunch treat that will impress everyone: Slow Cooker Cinnamon Roll Casserole! This warm, gooey dish combines

- 1 block (14 oz) firm tofu, pressed and diced - 2 tablespoons vegetable oil - 1 cup bell peppers, diced (red and yellow) - 1/2 cup carrot, grated - 3 green onions, sliced - 1/4 cup teriyaki sauce - 1 tablespoon sesame seeds - 1 head of butter lettuce or romaine, leaves separated - Avocado slices - Fresh cilantro - Spicy mayo Gathering fresh ingredients makes this dish shine. Start with firm tofu. Press it first to get rid of moisture. This step is key for a great texture. Use vegetable oil for cooking. It helps get that nice, golden brown color on the tofu. Next, grab your colorful veggies. Diced bell peppers add crunch and sweetness. Grated carrot brings a fresh taste. Sliced green onions give a mild onion flavor. They also look nice on top of the wraps. Don't forget the teriyaki sauce. This sauce gives a sweet and savory kick to the dish. Finally, sprinkle sesame seeds for a nutty crunch. For a little extra, add optional toppings. Slices of avocado add creaminess. Fresh cilantro brings a burst of flavor. Spicy mayo gives a tasty kick if you like heat. With these simple ingredients, you’re ready to make delicious Teriyaki Tofu Lettuce Wraps! Pressing tofu to remove moisture To start, you need to press the tofu. This step is key to a great texture. Take a block of firm tofu and wrap it in a clean towel. Place a heavy object on top, like a cast iron pan. Let it sit for about 15 minutes. This process helps to squeeze out excess moisture. Dicing tofu into cubes Once the tofu is pressed, it’s time to cut it. Take the block and slice it into small cubes. Aim for about half an inch per side. This size helps the tofu cook evenly and soak up the teriyaki sauce well. Heating oil and sautéing tofu Now, heat a large skillet over medium-high heat. Add two tablespoons of vegetable oil. Once the oil is hot, add your diced tofu. Sauté the tofu until it turns golden brown on all sides. This usually takes about 8 to 10 minutes. Keep it moving to avoid sticking. Adding and cooking vegetables After the tofu is golden, it’s time to add some color. Stir in one cup of diced bell peppers and half a cup of grated carrot. Also, add half of your sliced green onions. Cook this mix for about 3 to 5 minutes. You want the veggies to soften a bit but still have some crunch. Incorporating teriyaki sauce Now for the star of the show: teriyaki sauce. Pour a quarter cup of teriyaki sauce over the tofu and veggies. Mix it well to coat everything evenly. Cook for another 2 to 3 minutes to heat it through. You’ll love the smell! Garnishing with sesame seeds and green onions Once cooked, remove the skillet from heat. Sprinkle a tablespoon of sesame seeds and the rest of the green onions on top. This adds a nice crunch and flavor. Filling and wrapping the lettuce To serve, take a leaf of butter lettuce or romaine. Place a generous spoonful of the tofu mixture in the center. If you like, add avocado slices or fresh cilantro on top. Fold the lettuce around the filling and enjoy! Each bite bursts with flavor. Pressing tofu is key. It removes extra moisture. This helps the tofu absorb flavors better. Wrap the tofu in a clean towel. Put a weight on it for about 15 minutes. After that, cut it into small cubes. For cooking, use a large skillet. Heat vegetable oil over medium-high heat. Add the tofu cubes and cook until golden. This takes about 8-10 minutes. Make sure to turn them often for even cooking. Choose a quality teriyaki sauce. Look for one with a rich, balanced taste. This can make a big difference in flavor. You can also try making your own sauce for a fresh twist. For seasoning variations, think about adding garlic or ginger. These ingredients can enhance the taste. A pinch of red pepper flakes adds heat. Pair your lettuce wraps with a side of rice. This adds heartiness to the meal. You can also serve them with a light salad. For a fun touch, add avocado slices or fresh cilantro. These toppings brighten up the wraps. If you like spice, drizzle some spicy mayo on top. {{image_2}} You can easily make this dish vegan and gluten-free. Tofu is already a great plant-based protein. Just choose a gluten-free teriyaki sauce. If you want a different protein, try chickpeas or tempeh. Both offer a tasty alternative. Feel free to switch up the veggies in your wraps. You can use cucumbers, shredded cabbage, or snap peas. Each adds a unique crunch. For sauces, experiment with hoisin or peanut sauce. This makes the dish even more fun. Lettuce wraps are great, but don’t stop there! You can use other lettuce types like iceberg or green leaf. They add different tastes and textures. If you want something heartier, turn it into a rice bowl. Just add cooked rice to the base and top with your tofu mix. Enjoy it however you like! Store your leftover wraps in an airtight container. This helps keep them fresh. You can refrigerate them for up to three days. If you don’t finish them, don’t worry. Just make sure to check for any signs of spoilage before eating. You can freeze the cooked tofu mixture if you want to save it. Let it cool before you pack it away. Use a freezer-safe container or bag. The tofu mix can last for up to three months in the freezer. When you're ready to eat, thaw it overnight in the fridge. Reheat the mix in a pan over medium heat until warm. Meal prep is super easy with these wraps. You can cook the tofu mix ahead of time. Store it in separate containers for quick meals. Make sure to portion it out for easy serving. Use smaller containers for the tofu mix and larger ones for the lettuce leaves. This way, you're ready to enjoy a tasty meal in no time! To press tofu, wrap it in a clean kitchen towel. Place a heavy object on top, like a pan. Let it sit for about 15 minutes. This step removes excess moisture. Dry tofu absorbs flavors better and cooks well. Yes, you can prepare the filling ahead of time. Cook the tofu and veggies, then store them in the fridge. When ready to eat, just warm the filling. Assemble the wraps with fresh lettuce and toppings. This keeps them crisp and tasty. Most teriyaki sauces contain soy sauce, which has gluten. Check the label for gluten-free options. Some brands offer gluten-free teriyaki sauce made with tamari. Always read the ingredients before buying. Teriyaki Tofu Lettuce Wraps are packed with nutrition. Tofu is high in protein and low in fat. Bell peppers add vitamins A and C. Carrots boost your fiber intake. Lettuce is low in calories, making it a great wrap base. This dish supports a balanced diet and is great for you! In this blog post, I shared a simple recipe for Teriyaki Tofu Lettuce Wraps. We covered key ingredients like tofu, bell peppers, and teriyaki sauce. I outlined steps for preparing, cooking, and assembling the wraps. Tips helped to perfect the tofu and enhance flavors. You can easily adapt this dish to fit your diet and storage needs. These wraps are fun, tasty, and healthy. You'll enjoy making and sharing them with others. Happy cooking!

Teriyaki Tofu Lettuce Wraps Flavorful and Simple Dish

Looking for a fresh and tasty meal? These Teriyaki Tofu Lettuce Wraps are both simple and packed with flavor. You

For the Five Minute Peanut Butter Mug Cake, you will need: - 4 tablespoons all-purpose flour - 2 tablespoons sugar - 1/2 teaspoon baking powder - 1/8 teaspoon salt - 3 tablespoons milk (dairy or non-dairy) - 2 tablespoons peanut butter - 1 tablespoon vegetable oil - 1/4 teaspoon vanilla extract - Optional: chocolate chips or crushed peanuts for topping These ingredients create a soft and tasty mug cake. Each one plays a key role in the final treat. When picking your ingredients, look for: - Fresh Flour: Check the date on the package. Fresh flour gives better rise. - Pure Sugar: Use granulated sugar for sweetness. Avoid any blends. - Baking Powder: Make sure it’s not expired. Old baking powder won't help your cake rise. - Good Peanut Butter: Choose a smooth or crunchy peanut butter with no added sugar. Natural options taste best. - Milk Choices: Use whole, skim, or plant-based milk. Each will work well. - Vanilla Extract: Opt for pure vanilla extract for the best flavor. Selecting quality ingredients makes a big difference in taste and texture. You can add fun toppings and mix-ins to make your mug cake special. Here are some ideas: - Chocolate Chips: Fold in a few for sweetness. - Crushed Peanuts: Add for extra crunch. - Extra Peanut Butter: Drizzle on top for a rich taste. - Powdered Sugar: Sprinkle over the top for a sweet finish. - Whipped Cream: Top with a dollop for creaminess. - Banana Slices: Add for a fruity twist. These toppings and mix-ins let you customize your mug cake to your taste! Start with a microwave-safe mug. This is key for cooking. Add 4 tablespoons of all-purpose flour to the mug. Next, mix in 2 tablespoons of sugar. Then, add 1/2 teaspoon of baking powder and 1/8 teaspoon of salt. Stir these dry ingredients together well. This step is simple but very important for even baking. Now, it’s time for the wet ingredients. Pour in 3 tablespoons of milk. You can use dairy or non-dairy milk. Next, add 2 tablespoons of peanut butter. This gives the cake its rich flavor. Then, pour in 1 tablespoon of vegetable oil. Finally, add 1/4 teaspoon of vanilla extract. Use a fork to whisk everything together. Make sure it is smooth and free of lumps. If you want, you can fold in some chocolate chips or crushed peanuts for extra fun. Place the mug in the microwave. Cook it on high for 30 to 40 seconds. Watch closely as it cooks. The cake should rise and look set in the middle. Be careful not to overcook it, or it may get tough. Once done, let the mug cake cool for about one minute. Then, enjoy it right from the mug. You can add more peanut butter or a sprinkle of powdered sugar on top. This treat is quick, easy, and oh so tasty! To get the best texture for your mug cake, follow these tips: - Use a microwave-safe mug. Choose one that holds at least 12 ounces. - Mix your dry ingredients well before adding wet ones. This helps avoid lumps. - Stir the batter until smooth, but don’t over-mix. A few lumps are okay. - Microwave in short bursts. Start with 30 seconds, then check it. If needed, add 10 seconds. - Let it sit for a minute after cooking. This lets the cake firm up a bit. Here are some common mistakes people make: - Using too much flour. Measure carefully to keep your cake from being dry. - Not mixing well enough. This can lead to a lumpy texture. - Cooking for too long. Keep an eye on it to prevent a rubbery cake. - Forgetting to adjust for your microwave's power. Not all microwaves cook the same. - Skipping the toppings. They add extra flavor and fun to your treat. Want to take your mug cake to the next level? Try these ideas: - Add chocolate chips for a sweet burst. They melt and create pockets of gooey goodness. - Fold in crushed peanuts for a nice crunch. This adds texture and flavor. - Include a pinch of cinnamon for warmth. It pairs well with peanut butter. - Drizzle honey or maple syrup on top for added sweetness. - Swap peanut butter with almond or cashew butter for a new twist. These simple tips can transform your Five Minute Peanut Butter Mug Cake into a delightful treat! {{image_2}} You can switch out peanut butter for other nut butters. Almond butter offers a nice twist. Cashew butter brings a creamy richness. Sunflower seed butter is great for nut-free diets. Each nut butter adds its own flavor. You can try different types until you find your favorite. To make this mug cake vegan, use almond milk or oat milk instead of dairy. Replace the sugar with maple syrup or coconut sugar. For gluten-free options, swap all-purpose flour with a gluten-free flour blend. This way, everyone can enjoy it, regardless of their diet. Get creative with flavors! Add cocoa powder for a chocolatey treat. Mix in cinnamon for spice. You can also stir in vanilla extract or a splash of almond extract for extra flavor. Experiment with toppings too! Try using sliced bananas, berries, or even a dollop of yogurt. Each choice can change your mug cake experience. To keep your mug cake fresh, store it in an airtight container. This prevents moisture from getting in. If you made it with toppings, cover them lightly to keep them crisp. Always let the cake cool before sealing the container. This helps avoid sogginess. Yes, you can reheat your mug cake. Place it back in the microwave for about 10-15 seconds. Check it often to avoid overcooking. If it seems dry, add a splash of milk to bring back moisture. Your peanut butter mug cake can last up to two days at room temperature. If you store it in the fridge, it can last up to a week. Look for signs of spoilage like a dry texture or an off smell. If it looks or smells bad, it’s best to throw it away. Yes, you can make this mug cake without a microwave. You can bake it in a small oven. Preheat your oven to 350°F (175°C). Pour the mixture into an oven-safe mug. Bake for about 10-12 minutes. Check if it is done by inserting a toothpick. If it comes out clean, it is ready to eat. To make more than one mug cake, you can multiply the recipe. For two servings, use double the ingredients. You can mix everything in a larger bowl. Then, divide the batter into two mugs. Cook each mug separately in the microwave or bake them at the same time in the oven. Just make sure they have enough space. You can swap some ingredients if needed. For flour, you can use almond flour or oat flour. If you need a sugar substitute, try honey or maple syrup. For milk, any dairy or non-dairy milk works. You can also use sunflower butter instead of peanut butter. Each swap can change the taste a bit, so feel free to experiment! This blog post covered how to make a delicious mug cake with simple steps and tips. We discussed choosing quality ingredients, mixing them well, and using the microwave. You learned common mistakes to avoid and creative ways to vary your cake. Storing it properly helps keep it fresh longer. Remember, you can also make this cake without a microwave if needed. Enjoy trying different flavors and toppings to make it yours. With the right tools and tricks, making a mug cake can be fun and very tasty!

Five Minute Peanut Butter Mug Cake Simple Treat

Craving a warm, fluffy treat but short on time? You can whip up a delicious Five Minute Peanut Butter Mug

To make the Greek Yogurt Lemon Blueberry Loaf, gather these ingredients: - 1 cup Greek yogurt - 1/2 cup sugar - 1/4 cup honey - 3 large eggs - Zest of 1 lemon - 1/4 cup fresh lemon juice - 1 teaspoon vanilla extract - 1 1/2 cups all-purpose flour - 1 teaspoon baking powder - 1/2 teaspoon baking soda - 1/4 teaspoon salt - 1 cup fresh blueberries (or frozen, if unavailable) - 2 tablespoons melted butter (optional, for moisture) If you need to swap out any ingredients, here are some ideas: - Use plain yogurt instead of Greek yogurt for a lighter texture. - Replace sugar with coconut sugar or maple syrup for a different taste. - If you want a dairy-free option, try almond yogurt. - You can use any liquid sweetener in place of honey, like agave nectar. - Swap all-purpose flour with gluten-free flour for a gluten-free loaf. I love fresh blueberries for their flavor, but frozen work too! Here’s what to know: - Fresh blueberries give a burst of flavor and bright color. - Frozen blueberries are often picked at peak ripeness, so they are still tasty. - Do not thaw frozen blueberries before adding them to the batter. This keeps the color in the loaf. - Either option will make your loaf delicious and moist. Start by preheating your oven to 350°F (175°C). This step warms the oven for even baking. Next, take a 9x5-inch loaf pan. Grease it well or line it with parchment paper. This helps the loaf come out easily later. In a large bowl, add 1 cup of Greek yogurt, 1/2 cup of sugar, and 1/4 cup of honey. Use a whisk to mix these until smooth. Next, crack in 3 large eggs. Add the zest of 1 lemon, 1/4 cup of fresh lemon juice, and 1 teaspoon of vanilla extract. Whisk everything together until you see a nice blend of flavors. In another bowl, sift together 1 1/2 cups of all-purpose flour, 1 teaspoon of baking powder, 1/2 teaspoon of baking soda, and 1/4 teaspoon of salt. This step helps mix the dry parts well and adds air. Gradually add this mix to your wet ingredients. Stir gently. Be careful not to overmix; a few lumps are okay. Now it’s time to add the star of the show: the blueberries! If you have fresh blueberries, use 1 cup and fold them in gently. If you use frozen blueberries, don't thaw them first. This keeps the batter from turning blue. Just fold them in until they are spread throughout the batter. Once your batter is ready, pour it into the prepared loaf pan. Spread it out evenly. Place it in the oven and bake for 50-55 minutes. To check if it’s done, insert a toothpick into the center. If it comes out clean, you’re good to go! After baking, let the loaf cool in the pan for about 10 minutes. Then, transfer it to a wire rack to cool completely. Enjoy your lovely loaf warm or at room temperature! To make a soft and moist loaf, use room temperature ingredients. Cold eggs or yogurt can affect the mix. Also, be careful not to overmix your batter. This keeps the loaf light and fluffy. When folding in the blueberries, use a gentle hand. This keeps them whole and juicy. If you want a rich loaf, try adding melted butter. It adds a nice depth of flavor. Greek yogurt is key for moisture and tanginess. It also boosts protein in your loaf. Make sure to use full-fat yogurt for the best flavor. If you want a lighter cake, try low-fat yogurt. Just remember, it might change the texture a bit. Always measure your yogurt accurately. Too much can make the loaf dense. For a lovely presentation, slice your loaf evenly. A light dusting of powdered sugar adds charm. You can also serve it with fresh blueberries on the side. Drizzle a bit of honey on top for sweetness. This makes your loaf look fancy and inviting. Don't forget to serve it warm. It enhances the flavors and makes every bite enjoyable. {{image_2}} You can boost texture and flavor by adding nuts or seeds. Chopped walnuts or almonds give a nice crunch. If you like seeds, try adding sunflower or pumpkin seeds. Mix in about 1/2 cup of your choice with the blueberries. This small change makes your loaf even more satisfying. To mix up the flavor, consider using lavender or almond extracts. For lavender, add 1-2 teaspoons to the wet mix. This adds a floral note that pairs well with lemon. For almond, swap out the vanilla extract for almond extract. Use the same amount. Both options bring a unique twist to your loaf. Adding a glaze or topping can take your loaf to the next level. A simple lemon glaze is easy to make. Just mix powdered sugar with lemon juice until smooth. Drizzle it over the cooled loaf for added sweetness. You can also sprinkle powdered sugar on top for a light finish. This adds a nice touch to your presentation. To keep your Greek yogurt lemon blueberry loaf fresh, wrap it tightly in plastic wrap. You can also place it in an airtight container. Store it in the fridge for up to five days. This helps maintain its moisture and flavor. If you want to keep it longer, consider freezing. Freezing the loaf is easy and keeps it tasty. First, let the loaf cool completely. Then, slice it into pieces. Wrap each slice in plastic wrap. Place the wrapped slices in a freezer bag. Label the bag with the date. You can freeze the loaf for up to three months. When you’re ready to enjoy it, just pull out a slice or two. To reheat your loaf, take a slice from the fridge or freezer. If it's frozen, let it thaw in the fridge overnight. For a quick heat-up, use the microwave. Heat it for 15 to 30 seconds, just until warm. You can also warm it in a toaster oven. This gives it a nice crisp edge, making it even more delightful. Yes, you can use low-fat Greek yogurt. It will still give your loaf a moist texture. The flavor may be slightly less rich, but it works well in this recipe. To make this loaf gluten-free, swap the all-purpose flour for a gluten-free blend. Look for a blend that includes xanthan gum for better texture. Adjust baking time if needed, as gluten-free flours can vary. Serve the loaf warm or at room temperature. A light dusting of powdered sugar adds charm. Fresh blueberries or a drizzle of honey on top makes it even more tasty. The loaf lasts about three days at room temperature. Store it in an airtight container to keep it fresh. If you want it to last longer, consider refrigerating it. Yes, you can add other fruits! Strawberries or raspberries work great. Just chop strawberries into smaller pieces and fold them in gently. Be careful not to add too much liquid, or the loaf may turn out soggy. This blog post covers all you need to know about making a delicious blueberry loaf. We looked at key ingredients, tips for baking, and ways to store your loaf. I shared useful ideas for adding nuts or flavors, plus how to present it well. Remember, you can use frozen blueberries or substitute ingredients easily. With these steps and tricks, you can bake a tasty loaf that impresses everyone. Enjoy your baking journey and have fun experimenting with flavors!

Greek Yogurt Lemon Blueberry Loaf Simple Recipe

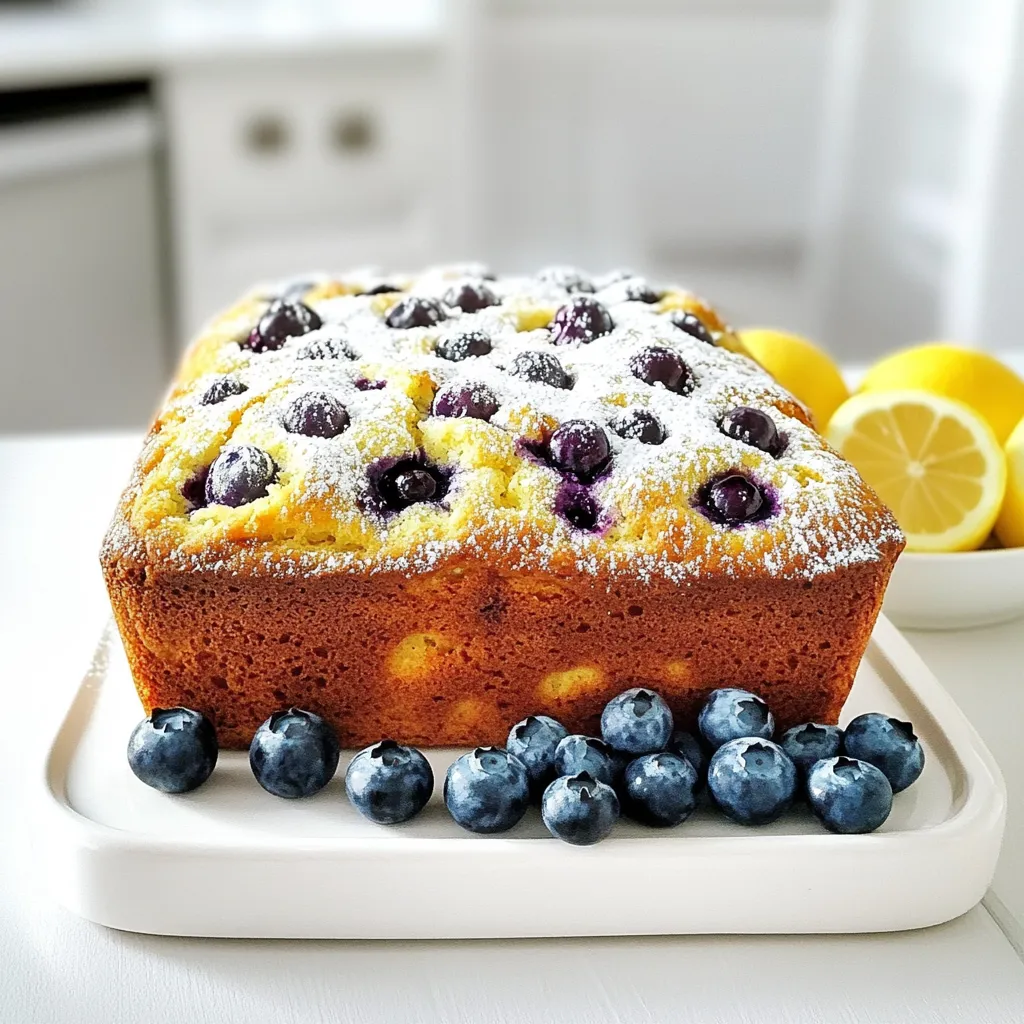
If you’re craving a deliciously moist loaf that bursts with flavor, you’ve found it! This Greek Yogurt Lemon Blueberry Loaf

- 8 lasagna noodles - 1 cup ricotta cheese - 1 cup shredded mozzarella cheese - 1/2 cup grated Parmesan cheese - 1 large egg - 2 cups marinara sauce - 1 teaspoon dried basil - 1 teaspoon garlic powder - Salt and pepper to taste - Fresh basil leaves for garnish You can swap cheeses to match your taste. Try cottage cheese for a lighter option. For gluten-free needs, look for rice or corn lasagna noodles. These work just as well in this recipe. If you want homemade marinara, blend fresh tomatoes, garlic, and herbs. This gives a fresh taste with no preservatives. You can adjust the spices to your liking. This makes the dish even more unique. To cook lasagna noodles to al dente, start by boiling a large pot of water. Add a pinch of salt to the water for flavor. Once the water is boiling, add the noodles. Cook them for 8 to 10 minutes. Stir occasionally to prevent sticking. Check the package for exact times, as it may vary. Once the noodles are tender but firm, drain them in a colander. Lay the noodles flat on a clean surface. This helps them cool slightly and makes rolling easier. For the perfect ricotta blend, grab a mixing bowl. Add 1 cup of ricotta cheese, half of the mozzarella cheese, and 1/2 cup of grated Parmesan cheese. Crack one large egg into the bowl. Now, add 1 teaspoon of dried basil and 1 teaspoon of garlic powder. Season with salt and pepper to taste. Mix everything well until smooth and creamy. Now it’s time to assemble. Start by spreading a thin layer of marinara sauce on the bottom of a large skillet. This prevents the rolls from sticking. Take a lasagna noodle and place a generous spoonful of the ricotta mixture along one edge. Carefully roll it up, tucking in the edges. Repeat this for all the noodles. Place the rolled lasagna seam-side down in the skillet over the marinara sauce. Once all the rolls are in, pour the remaining marinara sauce over the top. Sprinkle with the rest of the mozzarella cheese. Cover the skillet with a lid. Cook over medium heat for about 20 minutes. Check to see if the cheese is melted and bubbly. After cooking, let it sit for 5 minutes. This helps the rolls set. Garnish with fresh basil leaves before serving. - Always spread marinara sauce on the skillet first. This helps prevent sticking. - Use a non-stick skillet for best results. If you have cast iron, adjust your heat. - Cooking times depend on your skillet. Thicker skillets retain heat better, so watch closely. - Fresh basil leaves add color and taste. Place them on top when serving. - Consider adding a sprinkle of chili flakes for heat or a drizzle of olive oil for richness. - Don’t overstuff the rolls. A spoonful of filling is just right. - Maintain even heat on the skillet. Too high can burn the bottom, while too low may not melt the cheese. {{image_2}} You can easily make skillet lasagna roll ups vegetarian. Just add more vegetables. Spinach or mushrooms work well. Chop them finely and mix them into your cheese filling. This adds flavor and nutrients. You can also layer cooked zucchini or bell peppers in the skillet. The more veggies, the better! If you love meat, try adding ground beef or Italian sausage. Cook the meat first until brown. Then, mix it into the cheese filling. This gives your roll ups a hearty taste. You can also sprinkle some cooked sausage on top before adding sauce. It adds a tasty crunch! Want to try something different? Change up the sauce or spices. Instead of marinara, use pesto or alfredo. Each sauce gives a new flavor. You can also try adding red pepper flakes for some heat. Experiment with herbs like oregano or thyme. This makes your skillet lasagna roll ups unique and fun! To store leftovers, let them cool first. Place them in an airtight container. Make sure to cover the rolls with any leftover marinara sauce. This keeps them moist. Store in the fridge for up to three days. To freeze unbaked rolls, prepare them as usual. Instead of cooking, place them in a freezer-safe container. Separate layers with parchment paper to avoid sticking. When ready to cook, thaw them overnight in the fridge. For reheating previously cooked rolls, simply place them in a preheated oven at 350°F (175°C). Cover with foil to keep moisture in. Heat for about 20 minutes or until warm. When stored properly, cooked Skillet Lasagna Roll Ups last about three days in the fridge. If frozen, they can stay good for up to three months. For best taste, enjoy them within this time frame. Yes, you can use other cheeses! For a different taste, try these: - Ricotta Substitute: Cottage cheese works well. It gives a nice texture. - Mozzarella Alternatives: Provolone or fontina can add a unique flavor. - Parmesan Options: Grana Padano or Pecorino Romano can replace Parmesan. Experimenting with different cheeses can change the flavor profile of your dish. You can prep these roll-ups in advance! Here’s how: - Prepare the Cheese Mix: Make the cheese filling and store it in the fridge. - Cook the Noodles: Cook and cool the noodles. Lay them flat to avoid sticking. - Assemble and Store: Roll the noodles and place them in the skillet with sauce. Cover with plastic wrap and refrigerate. When ready to cook, just uncover and heat. You might need to adjust the cooking time a bit. Absolutely! Here are some tasty alternatives: - Alfredo Sauce: This creamy sauce gives a rich flavor. - Pesto: A fresh twist with basil and garlic notes. - Meat Sauce: Add some ground beef for a heartier meal. Each sauce will give a different taste. Feel free to mix and match based on your mood! This blog post explained how to make skillet lasagna roll ups. You learned about the ingredients needed and some helpful substitutions. I shared step-by-step instructions for cooking, assembling, and enhancing flavor. Tips on storage and common mistakes were also included. In your kitchen, these simple techniques can create a flavorful meal. Enjoy exploring different variations and impress your family and friends with your dish!

Skillet Lasagna Roll Ups Flavorful and Easy Recipe

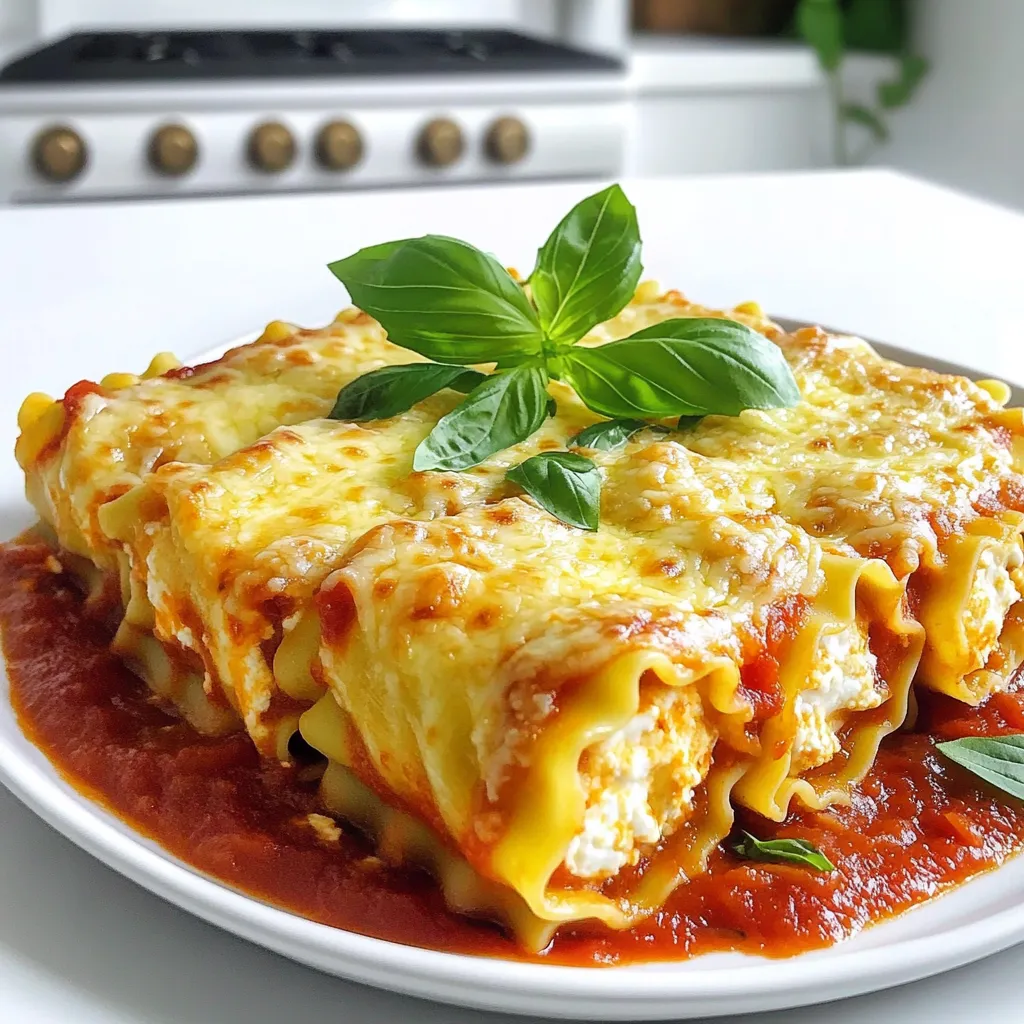
Are you ready to make a fun twist on classic lasagna? Skillet Lasagna Roll Ups are not only delicious but

- 2 medium apples (Granny Smith or Honeycrisp) - 1 cup all-purpose flour - 1/2 cup granulated sugar - 1 teaspoon baking powder - 1/2 teaspoon baking soda - 1/2 teaspoon ground cinnamon - 1/4 teaspoon nutmeg - 1/4 teaspoon salt - 1/2 cup whole milk - 1 large egg - 1 teaspoon vanilla extract - 1/4 cup maple syrup (plus extra for drizzling) - Oil for frying - Powdered sugar for dusting I love using Granny Smith or Honeycrisp apples for this recipe. They add a nice tartness that works well with the sweet maple glaze. For different serving sizes, you can easily adjust the ingredients. If you want to make more fritters, just double the amounts. Tips for measuring ingredients accurately: - Use dry measuring cups for flour and sugar. - Level off the top with a knife for precision. - For liquids, use a clear measuring cup with markings. - Mixing bowls: You'll need at least two bowls for dry and wet ingredients. - Whisk: This helps mix the dry ingredients well. - Heavy-bottomed pot or deep fryer: A good pot ensures even frying. - Slotted spoon: Use this to lift the fritters out of the oil. Having the right tools makes the cooking process easier and more fun! Preparing the apples Start by peeling, coring, and dicing the apples. I suggest using Granny Smith or Honeycrisp for their great flavor. In a medium bowl, mix the diced apples with one tablespoon of sugar. Let this sit for a bit. This helps the apples release their juices, making them sweeter and tastier. Mixing dry ingredients In a large bowl, combine the dry ingredients. Use one cup of all-purpose flour, half a cup of granulated sugar, one teaspoon of baking powder, half a teaspoon of baking soda, half a teaspoon of ground cinnamon, a quarter teaspoon of nutmeg, and a quarter teaspoon of salt. Whisk them together until they are mixed well. Whisking wet ingredients In another bowl, whisk together the wet ingredients. Use half a cup of whole milk, one large egg, one teaspoon of vanilla extract, and a quarter cup of maple syrup. Make sure everything blends well. Combining wet and dry mixtures Gradually pour the wet mixture into the dry ingredients. Stir gently until just combined. It's okay if there are a few lumps. Next, fold in the diced apples gently. This ensures the apples are evenly spread through the batter. Heating oil to the right temperature In a heavy-bottomed pot or a deep fryer, heat the oil to about 350°F (175°C). Make sure there's enough oil so the fritters can float while frying. Dropping batter in oil Using a spoon or small ice cream scoop, carefully drop spoonfuls of the batter into the hot oil. Do not overcrowd the pot. Fry in batches if you need to. Cooking times for perfect fritters Fry the fritters for about 3 to 4 minutes on each side. They should turn golden brown and crispy. Use a slotted spoon to gently flip the fritters. Once cooked, move them to a paper towel-lined plate to drain any excess oil. To keep your fritters from getting soggy, make sure the oil is hot enough. Heat your oil to 350°F (175°C) before frying. This temperature helps create a crispy outside while keeping the inside soft. If the oil is too cool, the fritters absorb more oil. For a golden-brown color, watch them closely as they fry. They usually need about 3-4 minutes on each side. Flip them gently with a slotted spoon when they look ready. When drizzling syrup on your fritters, use a spoon to control the flow. Start in the center and swirl outward. This technique ensures even coverage and adds a nice touch. For dusting with powdered sugar, choose a fine texture. A sifter helps spread it evenly. Dust right before serving to keep it fresh and beautiful. Try serving fritters on a rustic wooden board. Add extra syrup and powdered sugar on the side. This lets your guests drizzle and sprinkle as they like. For drinks, pair fritters with hot apple cider or a cold glass of milk. Both drinks enhance the flavor and make for a comforting treat. {{image_2}} You can change the apples in this recipe. Granny Smith gives a tart taste. Honeycrisp offers a sweet crunch. Try Fuji or Gala for something sweeter. Each type of apple gives a different flavor and texture. You can also use whole wheat flour. This gives your fritters a nutty flavor. If you need gluten-free, almond or oat flour works well. Just remember, the texture may change a bit. To make these fritters even better, add spices. A pinch of nutmeg or cloves adds warmth. These spices make each bite more interesting. You can also mix in chopped nuts. Walnuts or pecans add crunch. Dried fruits like raisins or cranberries work too. As the seasons change, so can your fritters. In fall, try a pumpkin spice version. Add pumpkin puree and more cinnamon for a cozy treat. In summer, make berry fritters. Use fresh blueberries or raspberries for a juicy twist. Each season brings a new way to enjoy these treats! To keep your maple glazed apple fritters fresh for 1-2 days, store them in an airtight container. Place a paper towel at the bottom to absorb moisture. This keeps the fritters from getting soggy. Avoid stacking them too high, as this can flatten the fritters. If you have leftovers, remember to drizzle extra maple syrup on top for an added treat. For long-term storage, you can freeze the fritters. First, let them cool completely. Then, wrap each fritter tightly in plastic wrap. Place the wrapped fritters in a freezer bag or container. They can stay in the freezer for up to 3 months. When you're ready to enjoy them, just take out what you need and thaw at room temperature. To reheat your fritters and keep them crispy, use an oven. Preheat the oven to 350°F (175°C). Place the fritters on a baking sheet lined with parchment paper. Heat for about 10 minutes, flipping halfway through. This method helps restore their texture and flavor. You can also microwave them for about 20-30 seconds, but they might be softer. Drizzle with maple syrup before serving for that fresh taste! Can I make apple fritters in advance? Yes, you can. Make the batter and keep it in the fridge. Use it within 24 hours for the best taste. You can also fry them and store them in an airtight container. Just reheat in the oven before serving. How do I know when the oil is hot enough? To check the oil's temperature, drop a small amount of batter in it. If it sizzles and rises, the oil is ready. A good temperature is around 350°F (175°C). Use a thermometer for accuracy. Can these fritters be made vegan? Yes, you can easily make these fritters vegan. Substitute the egg with a flax egg, which is made from ground flaxseed and water. Use plant-based milk and maple syrup as sweeteners. Are there gluten-free options available? Absolutely! You can use a gluten-free all-purpose flour blend instead of regular flour. This will keep the fritters tasty and safe for those who need gluten-free options. Why are my fritters soggy? Soggy fritters can happen if the oil is not hot enough. Make sure your oil reaches 350°F (175°C). Fry in small batches to avoid crowding, which can lower the oil temperature. How to fix overmixed batter? If you overmix the batter, it can become tough. To fix this, gently fold in a bit more flour to absorb excess moisture. Just be careful not to mix too much again. A few lumps are okay! In this blog post, we explored how to make delicious apple fritters. We covered ingredients, measurement tips, and essential tools. You learned step-by-step instructions for preparing, combining, and frying the fritters perfectly. Plus, I shared useful tips for a great texture and unique serving ideas. With variations and storage tips, you can enjoy these fritters anytime. Remember, practice makes perfect. Don't be afraid to get creative with flavors and toppings. Happy cooking!

Maple Glazed Apple Fritters Tasty and Tempting Treat

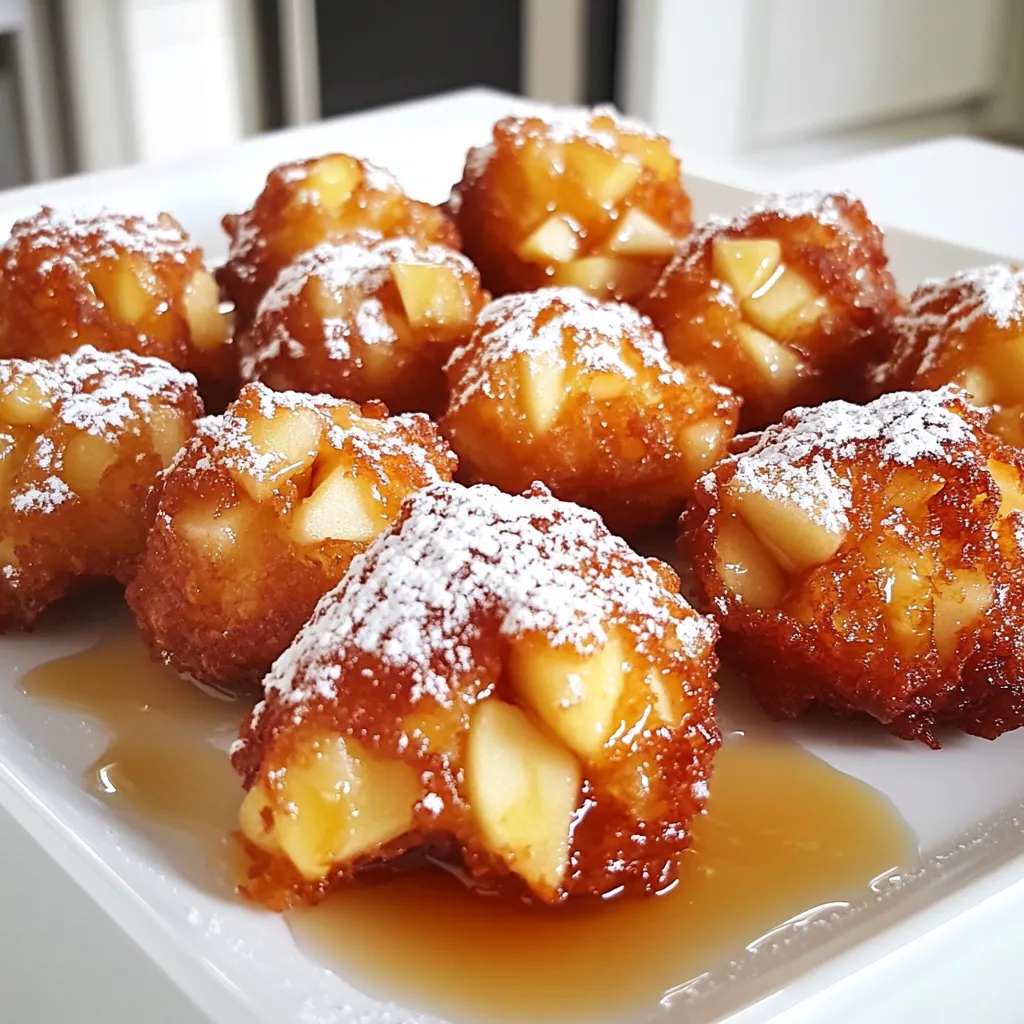
Are you ready to bite into a warm, sweet Maple Glazed Apple Fritter? These treats blend tender apples with a

- 2 boneless, skinless chicken breasts - 1 tablespoon olive oil - 1 medium onion, chopped - 3 cloves garlic, minced - 1 red bell pepper, diced - 1 yellow bell pepper, diced - 1 can (14.5 oz) diced tomatoes with green chilies - 4 cups chicken broth - 1 can (15 oz) black beans, drained and rinsed - 1 cup corn (fresh or frozen) - 1 teaspoon ground cumin - 1 teaspoon chili powder - Salt and pepper to taste - 1 cup heavy cream or coconut cream - 1 cup shredded cheese (cheddar or Mexican blend) - Tortilla chips for serving - Fresh cilantro, for garnish - Lime wedges, for serving This soup warms the heart and fills the belly. Gather these fresh ingredients before you start. The chicken gives the soup its base. The peppers and onion add color and taste. The beans and corn give it texture. The spices bring in the flavor. Heavy cream makes it rich and creamy. Cheese adds a nice finish. Don't forget the crunchy tortilla chips! They are perfect for dipping. Fresh cilantro and lime brighten the soup. Use these ingredients to create a dish that everyone will love. You will enjoy making it as much as they will enjoy eating it. First, I turn the Instant Pot to Sauté mode. This heats up the pot quickly. I add one tablespoon of olive oil. Once the oil is hot, I toss in one chopped onion. I sauté it for about three to four minutes. The onion should look clear. Next, I stir in three minced garlic cloves. I cook this for one minute until I smell a nice aroma. Then, I add one diced red bell pepper and one diced yellow bell pepper. I sauté these for an extra two to three minutes. They should soften just a bit. I season the mix with one teaspoon of ground cumin, one teaspoon of chili powder, and some salt and pepper. I stir well to blend the flavors. Now, I lay the two boneless, skinless chicken breasts on top of the veggie mix. I pour in one can of diced tomatoes with green chilies, followed by four cups of chicken broth. Next, I add one can of black beans that I drained and rinsed. Don’t forget to add one cup of corn, either fresh or frozen. I do not stir the mixture at this point. This layering keeps the chicken moist. After that, I close the lid and set the valve to Sealing. I cook on Manual high pressure for 15 minutes. When the timer goes off, I let it sit for ten minutes. This is called natural pressure release. Then, I switch to quick release for any remaining pressure. I carefully take out the chicken breasts. Using two forks, I shred the chicken into bite-sized pieces. I return the shredded chicken to the pot. Next, I stir in one cup of heavy cream or coconut cream. I also add one cup of shredded cheese, either cheddar or a Mexican blend. I mix it well until the cheese melts and the soup becomes creamy. Finally, I taste the soup and adjust the seasoning with more salt and pepper if needed. Now, it is ready to serve! To make the best Instant Pot creamy chicken tortilla soup, season well. I like to start with salt and pepper. Add spices like ground cumin and chili powder for depth. Taste the soup before serving. You can always add more seasoning to make it perfect. For the right consistency, use heavy cream or coconut cream. This gives the soup a rich texture. If your soup is too thick, add more chicken broth. If it's too thin, let it cook a bit longer. Want to kick up the flavor? Try adding more spices. Paprika or cayenne pepper brings heat. You can also add fresh herbs like cilantro for brightness. Garnishes make a big difference too. Top your soup with fresh cilantro, crushed tortilla chips, and a squeeze of lime. These add crunch and zest to every bite. Overcooking chicken can make it dry. Make sure to follow the cooking time closely. The chicken should be tender and juicy, not tough. Also, pay attention to the pressure release method. Let the Instant Pot release naturally for 10 minutes. This keeps your soup rich and full of flavor. If you rush it, the soup might splatter, and you’ll miss out on all that creamy goodness. {{image_2}} You can change the beans in your soup. Instead of black beans, try pinto or kidney beans. Each bean adds a unique flavor. You can also switch the protein. If you prefer turkey, use ground turkey instead of chicken. For a plant-based option, tofu works well too. Just ensure you use firm tofu for the best texture. If you want a dairy-free soup, swap heavy cream for coconut cream. It gives a nice flavor and keeps it creamy. For those watching sodium, choose low-sodium broth. This change makes the soup healthier without losing taste. You can also skip added salt to keep it light. Think beyond tortilla chips for serving. Try topping your soup with crunchy veggies or avocado slices. You could also serve it with warm, crusty bread. For a twist, transform your soup into a casserole. Just pour it into a baking dish, top with cheese, and bake until bubbly. This makes a great meal for gatherings. To store leftover soup, let it cool first. Pour the soup into an airtight container. Seal it tightly to keep out air. You can keep it in the fridge for up to four days. After that, the flavor and texture may change. For freezing, use freezer-safe containers. Leave some space at the top for expansion. This soup can last up to three months in the freezer. When you are ready to eat, move the soup to the fridge to thaw overnight. To reheat, use the stovetop or microwave. Stir the soup often to keep it smooth. If using the microwave, heat in short bursts. Avoid too much heat to keep the creamy texture. If you notice separation of the cream, whisk in a little extra cream while reheating. This will help bring it back together. To add heat to your soup, consider these options: - Use more chili powder or add cayenne pepper. - Try adding diced jalapeños or serrano peppers. - Mix in hot sauce for an extra kick. - Top with spicy salsa for added flavor. These tips will help you create a soup that warms you up. Remember, start with small amounts. You can always add more spice. Yes, you can use frozen chicken breasts, but adjust your cooking time. Cook for 20 minutes instead of 15. This ensures your chicken cooks through safely. Make sure to still follow the same layering method. The Instant Pot will take longer to come to pressure. This is normal when using frozen meat. Tortilla soup pairs well with: - Crushed tortilla chips for crunch. - Avocado slices for creaminess. - Fresh cilantro for a burst of flavor. - Lime wedges to brighten the taste. These toppings make your soup even more delightful. You can also serve it with a side of rice or a fresh salad. This blog post shared an easy recipe for a tasty tortilla soup. You learned about the right ingredients, cooking steps, and storage tips. I provided tricks for enhancing flavor and avoiding common mistakes. You can also explore fun variations to fit your needs. Making this soup is simple and fun. Enjoy sharing it with friends, or save some for later. Your kitchen adventures will never be dull!

Instant Pot Creamy Chicken Tortilla Soup Delight

Craving comfort food that’s quick and easy? You’ve come to the right place! My Instant Pot Creamy Chicken Tortilla Soup

- 300g pasta of your choice (penne or fettuccine works well) - 2 large red bell peppers - 2 tablespoons olive oil - 200ml heavy cream (or coconut cream for a dairy-free option) - 1 medium onion, chopped - 3 cloves garlic, minced - 1 teaspoon smoked paprika - 1/2 teaspoon crushed red pepper flakes (adjust to taste) - Salt and black pepper to taste - Fresh basil leaves for garnish - Grated Parmesan cheese for serving (optional) When I make creamy roasted red pepper pasta, I start with key ingredients. Choose your pasta. Penne and fettuccine are my favorites. They hold the sauce well. Next, I roast red bell peppers. Their sweet flavor shines in this dish. I drizzle them with olive oil before roasting. This helps them become soft and flavorful. Creaminess comes from heavy cream or coconut cream. I love using coconut cream for a dairy-free option. It gives the sauce a nice texture without losing flavor. Flavor is essential. Aromatics like onion and garlic start the base. I always sauté them until they smell great. Then, I add seasonings. Smoked paprika adds depth. Crushed red pepper flakes bring heat. Don’t forget salt and black pepper to taste. For garnishes, fresh basil leaves add color and fresh flavor. Grated Parmesan cheese can enhance the dish. It adds a salty finish to each bite. To start, preheat your oven to 400°F (200°C). This heat helps the peppers roast well. Cut the red bell peppers in half and remove the seeds. Place them cut-side down on a baking sheet. Drizzle one tablespoon of olive oil on top. Roast the peppers for 25 to 30 minutes. You want the skin to char and the peppers to feel soft. Once they finish roasting, take them out of the oven. Place them in a bowl and cover it tightly with plastic wrap. This step steams the peppers for about 10 minutes. The steam makes peeling the skin much easier. While the peppers cool, cook the pasta. You can use penne or fettuccine. Follow the package instructions for cooking time. Aim for al dente texture, which means the pasta should be firm when you bite it. Once cooked, drain the pasta and set it aside. In a large saucepan, heat the remaining tablespoon of olive oil over medium heat. Add the chopped onion and sauté it for about 5 minutes, until it turns translucent. Next, add the minced garlic and sauté for one more minute. You want the garlic to be fragrant but not burnt. Now, peel the skins off the roasted peppers and place them in a blender. Add the sautéed onion, garlic, heavy cream, smoked paprika, and crushed red pepper flakes. Blend everything until it becomes smooth. Pour the roasted red pepper sauce back into the saucepan and heat it gently. Season with salt and black pepper to taste. Add the cooked pasta to the sauce. Toss everything together until the pasta is well coated. Let it cook for another 2 to 3 minutes to heat through. This step ensures every bite is packed with flavor. To make the sauce just right, you can change the cream type. Heavy cream gives a rich taste, while coconut cream keeps it dairy-free. Each choice brings a unique flavor. Adjusting spices also helps balance the sauce. Use smoked paprika for a smoky kick. If you prefer heat, add more crushed red pepper flakes. Taste as you go to find your favorite mix. To avoid mushy pasta, always follow the package instructions. Cook it until al dente, which means it should be firm yet tender. This texture holds up well with the sauce. When the pasta is almost done, keep an eye on the sauce. Aim to combine them when both are ready. This timing keeps the pasta hot and helps the flavors meld well. Serving style makes your dish pop. Use bowls for a cozy feel, or plates for a fancy touch. Always add a sprinkle of fresh basil on top. It adds color and freshness. A generous dusting of grated Parmesan cheese enhances the look and taste. These small details make your creamy roasted red pepper pasta shine! {{image_2}} For a vegan twist, swap heavy cream with coconut cream. Coconut cream gives a rich taste. It also adds a subtle sweetness. This change keeps the dish creamy and enjoyable. You can find coconut cream in most grocery stores. Use the same amount as heavy cream. It works perfectly with roasted red peppers. You can make this dish heartier by adding protein. Options include chicken, shrimp, or tofu. For chicken, grill or sauté pieces before mixing them into the pasta. If you prefer shrimp, cook them until they turn pink. Tofu is a great choice for a plant-based option. Sauté it until golden for added flavor. Mix these proteins in right before serving. Boost the nutrition by adding vegetables. Spinach is a great choice; it wilts nicely into the sauce. Sun-dried tomatoes add a tangy kick, enhancing the flavor. You can also use broccoli or zucchini. Just sauté them briefly before mixing with the pasta. This way, you create a colorful and tasty dish. After you enjoy your creamy roasted red pepper pasta, store leftovers in an airtight container. This keeps the pasta fresh. You can keep it in the fridge for 3 to 5 days. If you want to save it longer, consider freezing it. Reheat the pasta on the stove for the best results. Place it in a saucepan over low heat. Add a splash of water or cream to help it warm evenly. Stir often and heat until it's hot. You can also use a microwave. Just cover the dish and heat in short bursts. Stir in between to avoid hot spots. To freeze the pasta, portion it into smaller containers. This makes it easy to grab just what you need. Make sure to leave some space in the container for expansion. When you’re ready to eat, defrost it in the fridge overnight. For a quick option, you can microwave it straight from the freezer. Just add a bit of cream or water to keep it creamy. Yes, you can. I often use penne or fettuccine, but any pasta works well. Bowtie, spaghetti, or even gluten-free pasta can be good choices. Just make sure to cook it until it is al dente for the best texture. To spice up the sauce, add more crushed red pepper flakes. You can also mix in a dash of cayenne pepper or some hot sauce. Start with a small amount, then taste and adjust until it’s just right for you. If you want a dairy-free option, use coconut cream. It gives a rich flavor similar to heavy cream. You can also try cashew cream or almond milk mixed with a bit of cornstarch to thicken it. Yes, you can prepare the sauce ahead of time. Just keep it in the fridge. When you are ready to eat, heat it up and cook the pasta fresh. This way, the pasta stays firm and tasty. Store leftovers in an airtight container. Keep them in the fridge for up to three days. To reheat, warm the pasta gently on the stove or in the microwave. Add a splash of water or cream if it seems dry. This dish combines simple ingredients and steps for a tasty meal. You learned about key ingredients like pasta and roasted peppers. The creamy sauce and flavor boosters create a rich taste. Remember to balance your spices and avoid overcooking the pasta. Explore the variations to fit your diet or preferences. Even the leftovers can be delicious if stored right. Enjoy your cooking adventure and impress everyone at the table!

Creamy Roasted Red Pepper Pasta Comforting Delight

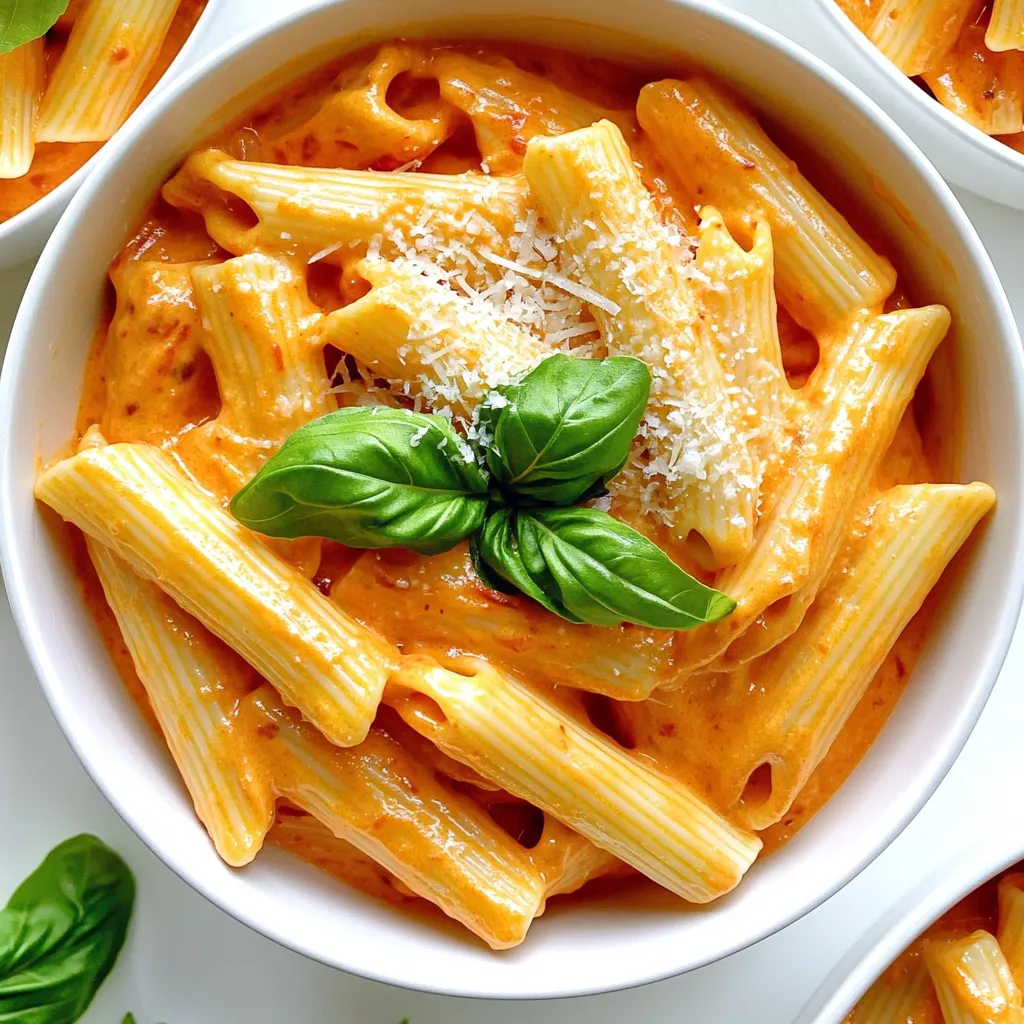
If you crave a dish that warms your heart and fills your belly, you’ve found it! This Creamy Roasted Red

- 4 large carrots, cut into fry-shaped pieces - 2 tablespoons olive oil - 3 cloves garlic, minced - 1 teaspoon smoked paprika - 1/2 teaspoon salt - 1/4 teaspoon black pepper - 1/4 cup grated parmesan cheese - 1 tablespoon chopped fresh parsley (for garnish) I love using fresh, bright carrots for this recipe. They add a nice sweetness. The olive oil helps the fries crisp up nicely in the air fryer. Minced garlic gives a bold flavor that pairs well with the carrots. Smoked paprika adds a subtle smokiness, while salt and pepper enhance the taste. Lastly, we can't forget the parmesan cheese, which adds richness. Fresh parsley serves as a colorful garnish and adds freshness. - Air Fryer - Mixing Bowl - Knife and Cutting Board - Tongs An air fryer is key for this recipe. It cooks the fries quickly and makes them crispy. You’ll need a mixing bowl to toss the carrot fries with the oil and seasonings. A sharp knife and cutting board are essential for cutting the carrots into fry shapes. Tongs help you flip and serve the fries easily. These simple tools make cooking fun and easy! First, cut the large carrots into fry-shaped pieces. Aim for uniform sizes so they cook evenly. In a large mixing bowl, add the carrot pieces. Then, pour in 2 tablespoons of olive oil. Next, add 3 cloves of minced garlic, 1 teaspoon of smoked paprika, 1/2 teaspoon of salt, and 1/4 teaspoon of black pepper. Toss the carrots well until they are completely coated with the oil and seasonings. Finally, sprinkle 1/4 cup of grated parmesan cheese over the mixture and toss again. This ensures every fry gets that delicious cheesy flavor. Now, preheat your air fryer to 400°F (200°C). This will take about 5 minutes. Once it's ready, lay the seasoned carrot fries in a single layer in the air fryer basket. Make sure not to overcrowd the basket. This helps the air circulate and makes the fries crispy. Cook the carrot fries for 15 to 18 minutes. Halfway through, shake the basket to ensure even cooking. Keep an eye on them as they cook. You want them to be golden brown and tender inside. When they reach your desired crispiness, they’re ready to serve! To get those perfect crispy carrot fries, you need to coat them in oil. Use two tablespoons of olive oil to help them crisp up nicely. Make sure each fry is covered well. This helps with both flavor and texture. Also, avoid overcrowding the basket. If you put too many fries in at once, they will steam instead of fry. Give them room to breathe! Garlic is key for flavor, so feel free to adjust the amount. If you love garlic, add more than three cloves. You can also try different spices. For a kick, add cayenne pepper or chili powder. Italian herbs like oregano or basil can also bring a nice twist. Experiment and find what you love most! These carrot fries are great with dips. Try serving them with ranch dressing or garlic aioli. They also work well as a side dish for grilled chicken or fish. Enjoy them as a snack anytime, too! They are healthy and tasty, making them a perfect addition to any meal. {{image_2}} You can change the flavor of your carrot fries easily. Try adding Italian herbs like oregano or basil for a fresh taste. These herbs pair well with garlic and cheese. For a spicy kick, add cayenne pepper. This will make your fries warm and exciting. Adjust the amount based on your taste. A little goes a long way! To make your carrot fries lighter, switch oils. You can use avocado oil or coconut oil instead of olive oil. These oils offer different flavors and health benefits. You can also try low-fat cheese options. This way, you still get that cheesy flavor without the extra fat. Nutritional yeast is another great choice if you want a cheesy taste without dairy. If you prefer baking, you can still enjoy these carrot fries. Preheat your oven to 425°F (220°C). Spread the seasoned carrot fries on a baking sheet. Make sure they are in a single layer. Bake for about 20-25 minutes, flipping halfway through. This method gives a nice crisp, but it may take a bit longer. Keep an eye on them to avoid burning. Store your leftover carrot fries in an airtight container. They stay fresh for about three days. Make sure they cool completely before sealing. This keeps them from getting soggy. Place a paper towel in the container to absorb extra moisture. This helps maintain crispiness. To reheat carrot fries, use the air fryer again. Set it to 350°F (175°C). Heat for about five to seven minutes. This will help regain their crunch. You can also use an oven. Preheat to 350°F (175°C) and bake for about ten minutes. Avoid using a microwave, as it makes them soft. You can freeze pre-cooked carrot fries for later use. Let them cool completely, then spread them on a baking sheet. Freeze them for one to two hours until solid. After that, place them in a freezer-safe bag. They last up to three months in the freezer. When ready to eat, air fry straight from frozen for a quick snack. Yes, you can use frozen carrots. However, fresh carrots yield the best flavor and texture. Frozen carrots may be softer and need extra cooking time. If using frozen, thaw and drain them first to avoid excess moisture. Cook the carrot fries for 15-18 minutes at 400°F (200°C). Shake the basket halfway for even cooking. Check their crispiness at 15 minutes. If they are not golden brown, cook for a few more minutes. You can substitute nutritional yeast for a vegan option. It adds a cheesy flavor without dairy. For a different taste, try goat cheese or feta. Both will change the dish but still taste great. Yes, air-fried carrot fries are healthier. They use less oil than deep-fried fries. Air frying keeps calories lower while still giving a crispy texture. Carrots also provide vitamins and fiber, making them a nutritious choice. In this post, I covered how to make delicious air-fried carrot fries. You learned the main ingredients, tools needed, and step-by-step instructions. I shared tips for perfect texture and flavor. You also discovered variations and storage options for leftovers. Remember, air-fried carrot fries can be a fun and healthy snack. Adjust seasonings to your taste and enjoy them with your favorite dip. Now, it’s time to try this quick recipe in your kitchen!

Garlic Parmesan Carrot Fries Air Fryer Delight

Are you ready to transform your snack game? With my Garlic Parmesan Carrot Fries Air Fryer Delight, you’ll enjoy a

- 1 cup all-purpose flour - 1/2 cup granulated sugar - 1/2 cup unsalted butter, softened - 2 large eggs - 1/2 cup milk To make these cupcakes, start with all-purpose flour. It gives the right texture. Granulated sugar adds sweetness and helps with browning. Unsalted butter adds richness and flavor. Eggs provide structure and moisture. Milk makes the batter smooth and creamy. - 1/4 cup granulated sugar (for topping) - 2 teaspoons ground cinnamon (for topping) - Optional: Chocolate sauce or dulce de leche for drizzling The topping brings fun and flavor. A mix of sugar and cinnamon gives that classic churro taste. You can drizzle chocolate sauce or dulce de leche for extra sweetness. These optional toppings can make your cupcakes even more special. First, you need to preheat your oven to 350°F (175°C). This step is very important for even baking. While your oven heats, line a cupcake pan with paper liners. This keeps the cupcakes from sticking and makes cleanup easy. In a large bowl, cream together 1/2 cup of softened butter and 1/2 cup of sugar. Beat them until light and fluffy; this should take about 2-3 minutes. Next, add the eggs one at a time, mixing well after each. Then, stir in 1/2 cup of milk and 1 teaspoon of vanilla extract until everything is mixed well. In a separate bowl, whisk together 1 cup of all-purpose flour, 1 teaspoon of baking powder, 1/2 teaspoon of ground cinnamon, and 1/4 teaspoon of salt. Slowly add this dry mix to the wet ingredients. Stir until just combined; remember, do not overmix! Now it’s time to fill the cupcake liners. Divide the batter evenly, filling each liner about 2/3 full. Place the cupcake pan in the oven and bake for 18-20 minutes. To check for doneness, insert a toothpick into the center of a cupcake. If it comes out clean, they are ready! While the cupcakes cool, mix 1/4 cup of granulated sugar with 2 teaspoons of ground cinnamon in a shallow bowl. Once the cupcakes are completely cool, brush the tops lightly with melted butter. Dip each cupcake into the cinnamon-sugar mix, making sure they are well coated. For extra fun, drizzle with chocolate sauce or dulce de leche. Enjoy your delicious treats! To bake perfect cinnamon sugar churro cupcakes, follow these tips: - Avoiding overmixing: Mix the wet and dry ingredients until just combined. Overmixing can lead to tough cupcakes. Stop mixing as soon as you no longer see dry flour. This keeps the texture light and fluffy. - Ensuring even baking: Use an oven thermometer to check your oven's temperature. It helps to know if it runs hot or cold. Rotate the cupcake pan halfway through baking for even heat distribution. This ensures each cupcake bakes evenly and rises beautifully. Decoration adds flair to your cupcakes. Here are some ideas: - Best practices for coating: Once the cupcakes cool, brush the tops with melted butter. Dip them in the cinnamon-sugar mix right after. Make sure each cupcake gets a good coat, but don’t let it soak. A light dusting works best for that sweet crunch. - Additional presentation ideas: Arrange cupcakes on a colorful plate. Sprinkle extra cinnamon-sugar around them for a pretty touch. Add mini chocolate chips or sprinkles for fun. This makes your dessert stand out at any gathering. Want to boost the flavor? Try these tips: - Experimenting with additional spices: Add nutmeg or allspice to the batter for a warm twist. These spices complement cinnamon well and add depth to the flavor. - Using flavored extracts: Swap vanilla extract for almond or even orange extract. These can give your cupcakes a unique taste that surprises your guests. Just a teaspoon can change everything! {{image_2}} You can play with flavors to make these cupcakes even more fun. - Chocolate churro cupcakes: Add cocoa powder to the batter. Use 1/4 cup of cocoa powder to replace some flour. The chocolate flavor mixes perfectly with the cinnamon-sugar topping. - Vanilla bean churro cupcakes: Use vanilla bean paste in place of vanilla extract. This gives your cupcakes a rich, sweet flavor. You can also add a hint of nutmeg for a unique twist. You can easily adjust the recipe for different diets. - Gluten-free options: Swap all-purpose flour for a gluten-free blend. Make sure the blend has xanthan gum for the best texture. - Dairy-free substitutions: Use coconut oil instead of butter and almond milk instead of regular milk. This keeps the cupcakes moist and tasty. Themed cupcakes are perfect for special occasions. - Holiday-themed churro cupcakes: Add festive sprinkles or use colored sugar for topping. You can also incorporate holiday spices like nutmeg or ginger. - Mini churro cupcakes for parties: Use a mini cupcake pan for bite-sized treats. They are perfect for sharing and easy to eat. Plus, they look adorable on any dessert table. To keep your churro cupcakes fresh, store them in an airtight container. This prevents them from drying out. Place them at room temperature for up to three days. For longer storage, use the fridge, but they may lose some fluffiness. If you top them with chocolate sauce or dulce de leche, wait until you are ready to eat. Toppings can make the cupcakes soggy if stored too long. You can freeze these cupcakes either before or after baking. If you freeze before baking, wrap the unbaked batter in plastic wrap and place it in a freezer bag. This keeps it fresh for about three months. If you freeze baked cupcakes, wait until they cool completely. Wrap each one in plastic wrap and place them in a freezer bag. They will last for about two months. To thaw, leave them in the fridge overnight. Reheat in the microwave for 10-15 seconds if you want them warm. To serve leftovers, it’s best to enjoy them the next day. If you have topped them, serve with a drizzle of extra sauce. This keeps them moist and flavorful. To maintain texture, avoid stacking them too high. A single layer on a plate works best. You can sprinkle a bit more cinnamon-sugar on top for extra flair. Enjoy them with a warm drink for a delightful treat! Can I make these cupcakes ahead of time? Yes, you can make these cupcakes ahead of time. Bake them a day before your event. Keep them in an airtight container. This way, they stay moist and fresh. What can I use instead of butter? You can use coconut oil or margarine instead of butter. Both will keep the cupcakes moist. If you want a dairy-free option, coconut oil is great. How do I know when they are done baking? Check the cupcakes with a toothpick. Insert it into the center of a cupcake. If it comes out clean, they are done. Bake them for 18-20 minutes for best results. Can I substitute other sugars? Yes, you can use brown sugar or coconut sugar. They will add a deeper flavor. Just keep the same measurements when swapping them out. Are churro cupcakes suitable for special diets? These cupcakes can fit some diets with a few changes. For gluten-free, use a gluten-free flour blend. For dairy-free, use non-dairy milk and butter substitutes. What is the best way to serve churro cupcakes? Serve churro cupcakes on a nice plate. You can drizzle chocolate or dulce de leche on top. Add a sprinkle of extra cinnamon-sugar for a beautiful touch. How do I store leftovers properly? Store leftovers in an airtight container. Keep them at room temperature for up to three days. If you want them to last longer, refrigerate them for a week. You now have a complete guide to making churro cupcakes. We covered essential ingredients, step-by-step baking methods, and fun variations. I shared tips on decoration and storage to keep your cupcakes fresh and tasty. Remember, baking is about creativity and joy. Feel free to tweak flavors and toppings to match your taste. Enjoy your baking journey and share these treats with friends or family. Happy baking!

Cinnamon Sugar Churro Cupcakes Irresistible Treat

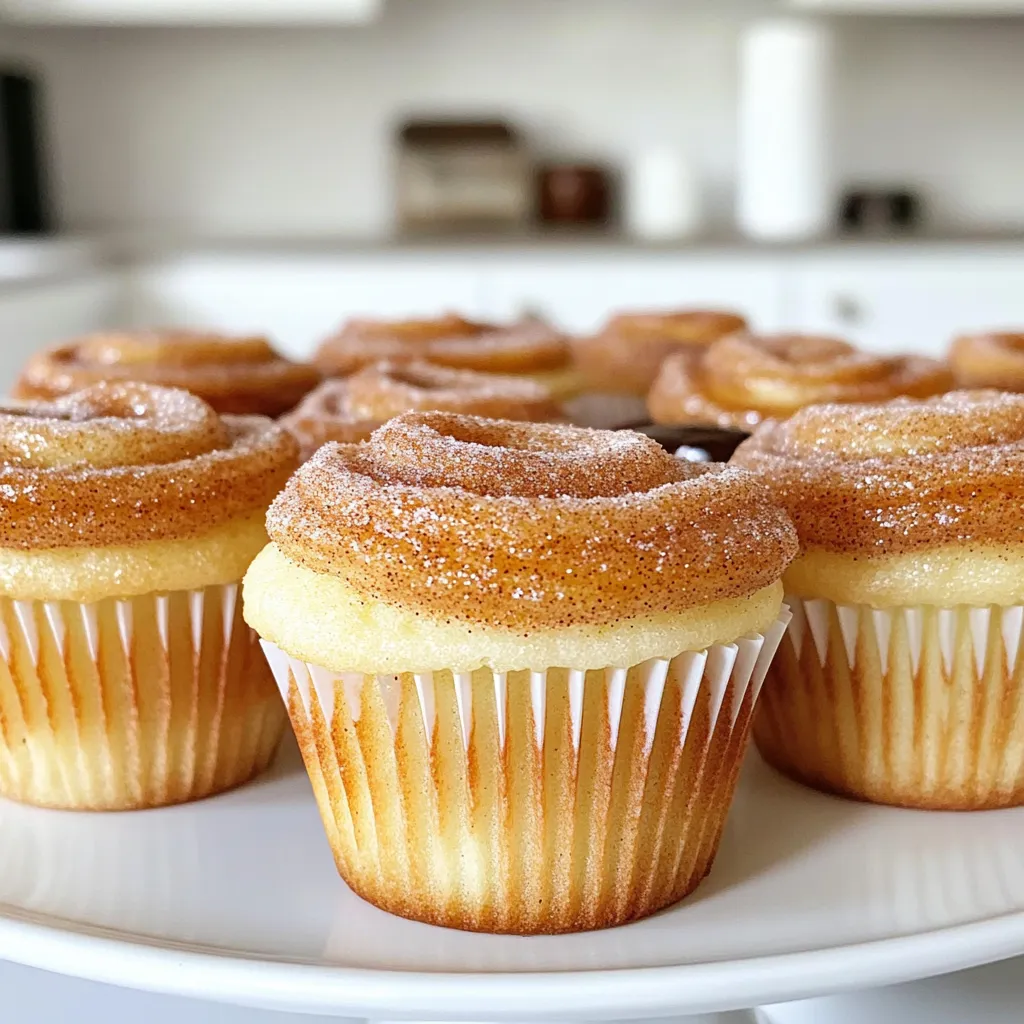
Are you ready to take your dessert game to the next level? These Cinnamon Sugar Churro Cupcakes are not just

Older posts
Newer posts
← Previous Page1 … Page3 Page4 Page5 … Page132 Next →

dsad

© 2025 pureeatsnow • Built with GeneratePress

Our Policies

  • Copyright Policy
  • Cookie Policy
  • GDPR Policy
  • Privacy Policy
  • Disclaimer
  • Terms Of Use

More Information

  • Home
  • About
  • Contact
  • Appetizers
  • Dessert
  • Dinner
  • Drinks
©2025, pureeatsnow About Back To Top