Skip to content
DisclaimerTerms Of UseGDPR PolicyCookie Policy

pureeatsnow

  • Home
  • Drinks
  • Appetizers
  • Dinner
  • Dessert
  • About
  • Contact
  • Privacy Policy
DisclaimerTerms Of UseGDPR PolicyCookie Policy

Rachel

For this dish, you will need: - 1.5 lbs lamb shoulder, cut into 1-inch cubes - 1 large onion, finely chopped - 3 cloves garlic, minced - 1 cup dried apricots, chopped - 1 can (14 oz) chickpeas, drained and rinsed - 1 cup chicken or vegetable broth - 1/4 cup honey - 2 tablespoons olive oil These ingredients give the dish its rich and warm flavor. The lamb shoulder is perfect for slow cooking. It becomes tender and flavorful after simmering. The spices create the magic in Moroccan lamb tagine. You will need: - 2 tsp ground cumin - 2 tsp ground cinnamon - 1 tsp ground ginger - 1 tsp turmeric - 1 tsp cayenne pepper (adjust to taste) - Salt and pepper, to taste Using these spices adds depth and warmth. The cinnamon and cumin stand out, giving you a taste of Morocco. For presentation, consider these garnishes: - 1/2 cup slivered almonds, toasted - Fresh cilantro or parsley, for garnish These garnishes not only look nice but also add texture and flavor. The toasted almonds give a nice crunch. Fresh herbs brighten the dish. For the full recipe, check out the details above. Enjoy making this flavorful delight! First, gather all your ingredients. You will need lamb shoulder, onion, garlic, spices, broth, apricots, chickpeas, honey, almonds, and olive oil. The prep work is quick and easy. 1. Chop the onion finely. 2. Minced the garlic to release its flavor. 3. Cut the lamb into 1-inch cubes. 4. Combine spices in a bowl: cumin, cinnamon, ginger, turmeric, cayenne, salt, and pepper. Mix the spices well. This step is key to flavor. Coat the lamb cubes with the spice mix. This ensures each piece gets tasty seasoning. Heat the olive oil in your tagine or pot over medium heat. Once hot, add the chopped onion. Cook until it turns translucent, about five minutes. Next, toss in the minced garlic. Sauté for about a minute until you can smell it. Now, add the spiced lamb to the pot. Brown the lamb on all sides for about 5 to 7 minutes. This step locks in the flavors. Once browned, pour in the chicken or vegetable broth. Stir in the chopped apricots and honey. Bring the mixture to a simmer. Cover the pot with a lid. Reduce the heat to low and let it cook for 1.5 to 2 hours. Stir occasionally. The lamb will become tender, and the flavors will blend perfectly. In the last ten minutes, add the rinsed chickpeas. Taste the dish and adjust the seasoning with salt and pepper if needed. When the cooking time is up, your tagine is ready! Sprinkle toasted slivered almonds on top. This adds a nice crunch. For a colorful finish, garnish with fresh cilantro or parsley. Serve your Moroccan Lamb Tagine with fluffy couscous or warm flatbreads. These sides are perfect for soaking up the delicious sauce. For the complete recipe, you can refer to the Full Recipe. Enjoy your flavorful delight! To make your Moroccan lamb tagine shine, focus on the spices. They are key! Use fresh spices for a bright taste. Toasting whole spices can boost flavor too. Mix them well with lamb, so every bite is full of flavor. A squeeze of lemon juice at the end adds a nice touch. Try adding pomegranate seeds for a pop of sweetness and color. This dish gets better with time. Cook it a day before serving to let the flavors meld. Store it in the fridge once it cools. When ready to serve, just reheat gently on the stove. The lamb will be even more tender and tasty. This makes it great for dinner parties or busy weeknights. Everyone has different tastes, so feel free to adjust the spices. If you like more heat, add extra cayenne pepper. For a milder flavor, cut back on the spices. Always taste as you go. This way, you can find the perfect balance for your dish. Remember, cooking is about what makes you happy. Enjoy the process! For the complete recipe, check out the Full Recipe above. {{image_2}} You can swap lamb for other meats. Beef works well in this dish. You can also use chicken for a lighter option. Each choice brings its own unique flavor. Just adjust the cooking time. Make sure the meat is tender and juicy. For a vegetarian twist, replace the lamb with hearty vegetables. Try using root vegetables like carrots and potatoes. You can also add chickpeas for protein. This keeps the dish filling and nutritious. Use vegetable broth instead of chicken broth. You can still enjoy all the spices and flavors. Feel free to change the dried apricots based on the season. In summer, fresh peaches add a nice touch. In fall, try using apples or pears. These fruits will give a new taste to your tagine. Adjust the cooking times as needed for fresh fruits. Each swap brings a fresh twist to this classic dish. For the full recipe, you can find it above. Enjoy creating your own Moroccan Lamb Tagine with Apricots! After making Moroccan Lamb Tagine with Apricots, let it cool. Transfer it to an airtight container. Store in the fridge for up to three days. This helps keep the flavors fresh and tasty. You can also freeze the tagine for later. Once cooled, put it in a freezer-safe container. It will stay good for up to three months. Make sure to label it with the date. This way, you can enjoy it later without worry. To reheat, take the tagine out of the fridge or freezer. For fridge leftovers, warm it up on the stove over low heat. If frozen, let it thaw overnight in the fridge first. You can also use the microwave. Just heat in short bursts, stirring in between. Enjoy your flavorful delight! Making Moroccan Lamb Tagine takes about 2 hours and 20 minutes. You spend 20 minutes prepping ingredients. Then, you cook the dish for 1.5 to 2 hours. This slow cooking makes the lamb tender and full of flavor. Yes, you can use fresh apricots. However, dried apricots work best. They bring a sweet flavor that blends well with the spices. Fresh apricots can spoil faster and may need less cooking time. A tagine is a special pot made from clay. It has a cone-shaped lid. This design helps keep moisture in and cooks food evenly. A regular pot does not have this shape. It may not trap steam as well, leading to different results. Moroccan Lamb Tagine can be spicy, but you control the heat. The recipe includes cayenne pepper. You can add more or less based on your taste. Most people find it flavorful, not too hot. This blog post explored making Moroccan Lamb Tagine. We covered its key ingredients, spices, and garnishes. I shared each step—from prep to cooking and final touches. You learned tips for flavor, how to make it ahead of time, and spice adjustments. I also discussed tasty variations, storage info, and answered common questions. Embrace creativity when you try this dish. Make it yours while enjoying rich flavors.

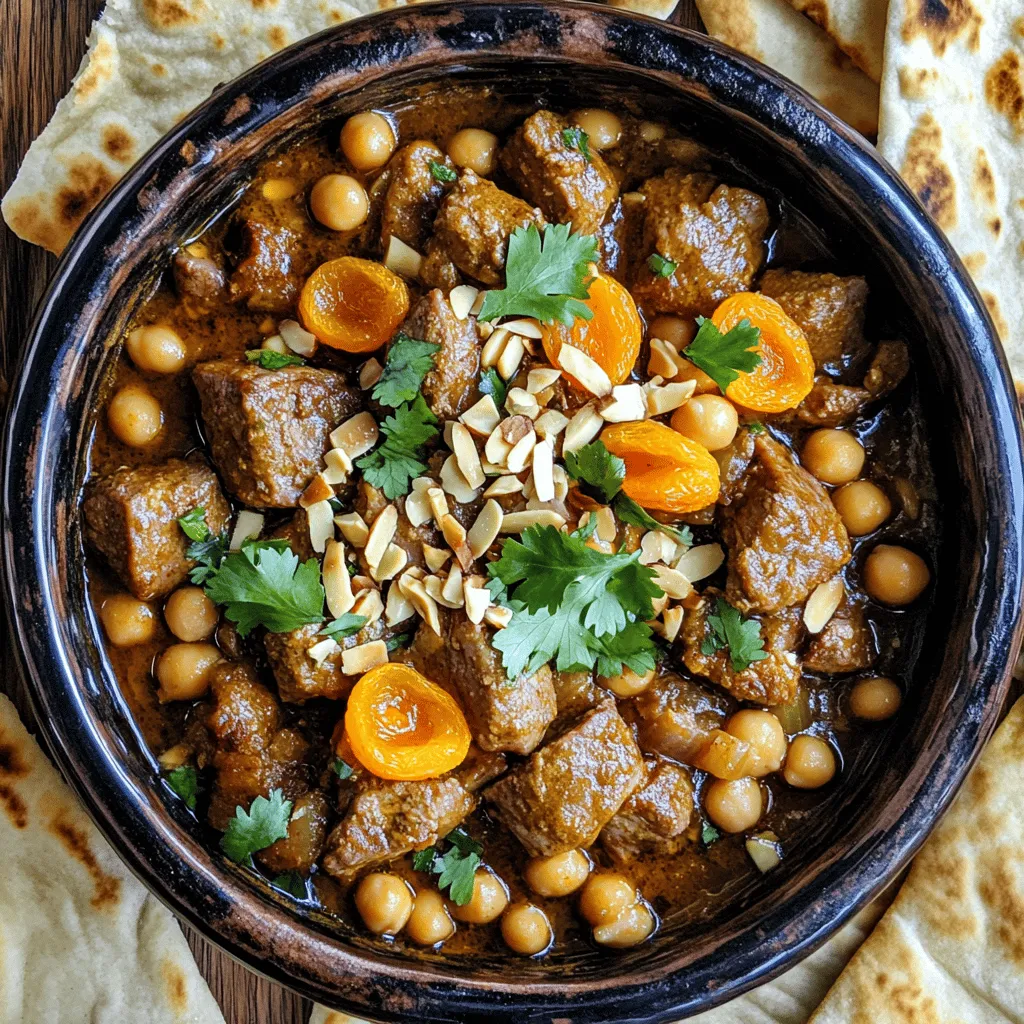
Moroccan Lamb Tagine with Apricots Flavorful Delight

Are you ready to explore a dish that combines tender lamb, sweet apricots, and rich spices? My Moroccan Lamb Tagine

- 4 bone-in, skin-on chicken thighs - 1/4 cup honey - 1/4 cup Dijon mustard - 2 tablespoons apple cider vinegar - 2 garlic cloves, minced - 1 teaspoon paprika - 1/2 teaspoon salt - 1/4 teaspoon black pepper - 1 tablespoon olive oil - Fresh parsley for garnish - You can add cayenne pepper for heat or fresh herbs for flavor. - Great sides include roasted veggies or a simple salad. The star of this dish is the honey mustard glaze. It brings a sweet and tangy flavor to the chicken. The glaze is easy to make with just a few ingredients. I love using bone-in, skin-on chicken thighs. They stay juicy and tender while cooking. The honey and Dijon mustard work perfectly together. They create a delicious sauce that caramelizes as the chicken bakes. You can also mix in spices like cayenne for some heat or fresh herbs for a brighter taste. Pair your chicken with sides like roasted potatoes or a fresh salad. This will balance the sweetness of the glaze. For the complete preparation steps, check the Full Recipe. - Preheat your oven to 400°F (200°C). - In a bowl, whisk together honey, Dijon mustard, apple cider vinegar, minced garlic, paprika, salt, and black pepper. This mixture will be your glaze. - Pat the chicken thighs dry using paper towels and place them in a large bowl. - Drizzle olive oil over the chicken, rubbing it in to coat evenly. - Pour half of the honey mustard glaze over the chicken thighs. Make sure they are well-coated on both sides. Reserve the rest of the glaze for later. - Place the chicken thighs skin-side up in a baking dish. - Bake in the preheated oven for 30 minutes. - After 30 minutes, remove the chicken from the oven. Brush the reserved honey mustard glaze over the tops. - Return the chicken to the oven. Bake for an additional 15-20 minutes, or until the chicken reaches an internal temperature of 165°F (74°C) and the skin is crispy. - Let the chicken rest for 5 minutes before serving. This helps keep it juicy. - Garnish with fresh parsley for a nice touch. You can find the full recipe for more details. - Ensure chicken is at room temperature before cooking for even cooking. - Use a meat thermometer for perfect doneness. This helps avoid undercooked or dry chicken. - Make extra glaze for serving or drizzling after cooking. It adds flavor and looks great. - Adjust honey and mustard ratios for personal taste preferences. You might like it sweeter or tangier. - Best served with roasted vegetables or mashed potatoes. The flavors blend well together. - Ideas for side salads that complement the dish include a simple green salad or coleslaw. They add freshness and crunch. For the full recipe, please check the section above. {{image_2}} You can easily change the taste of your honey mustard glazed chicken thighs. Here are a couple of ideas: - Spicy Honey Mustard: For a kick, add cayenne pepper or a dash of hot sauce. This will add heat and depth to the glaze. - Herb-Infused: Mix in fresh herbs like thyme or rosemary. These will add a lovely aroma and flavor. You can also switch up how you cook the chicken: - Grilled Honey Mustard Chicken: If you're grilling, brush the chicken with the glaze while cooking. Keep the heat medium to avoid burning the sauce. - Slow Cooker Option: For a hands-off meal, place the chicken and glaze in a slow cooker. Cook on low for 4-6 hours or high for 2-3 hours. Meal prep can make your week easier. Here are some tips: - Make-ahead tips: Prepare the chicken and glaze ahead of time. Store them in the fridge for up to two days. This makes weeknight dinners quick and easy. - Pairing ideas: Serve the chicken with rice, quinoa, or salad for meal prep lunches. These sides pair well and can be made in advance too. For the full recipe, check out [Full Recipe]. After cooking, let the chicken thighs cool to room temperature. Place them in an airtight container. This keeps the chicken fresh and safe. Store it in the fridge for up to three days. Use glass or plastic containers with tight-fitting lids. These containers help keep moisture in and air out. To freeze the chicken, wrap it tightly in plastic wrap. Then, place it in a freezer bag. Remove as much air as you can before sealing. This helps prevent freezer burn. Honey mustard glazed chicken can last up to three months in the freezer. To thaw, move it to the fridge overnight. This keeps the chicken safe and tasty. When you want to eat the leftover chicken, reheating is easy. You can use the oven, microwave, or stovetop. For the oven, heat it to 350°F (175°C). Place the chicken on a baking sheet and cover it with foil. This helps keep it moist. Bake for about 15-20 minutes. If using a microwave, place the chicken on a microwave-safe plate. Heat it in short bursts, checking often. For stovetop reheating, use a skillet over medium heat. Add a splash of water or broth to keep it juicy. To maintain the crispiness of the skin, finish in the oven for a few minutes. Enjoy your delicious honey mustard glazed chicken thighs! You can find the full recipe above. Yes, you can use boneless chicken thighs. They cook faster than bone-in thighs. For boneless thighs, reduce the baking time to about 25 minutes. Always check for doneness with a meat thermometer. The internal temperature should reach 165°F (74°C). You can use yellow mustard or whole grain mustard instead. Each type brings a different taste. Yellow mustard is milder, while whole grain adds texture. Experiment to find your favorite flavor. Absolutely! You can use pork or even chicken breast. Keep in mind that cooking times will differ. Pork should reach 145°F (63°C) for safety. Chicken breast cooks faster; check for 165°F (74°C). Always check the internal temperature. Use a meat thermometer to ensure safety. The chicken is done at 165°F (74°C). You can also look for juices running clear and firm texture. You now have a simple and delicious recipe for honey mustard chicken. We explored main and optional ingredients, and I provided step-by-step cooking instructions. Remember, a meat thermometer ensures your chicken cooks perfectly. Feel free to adjust flavors or try new side dishes to make it your own. This dish can be stored and reheated for later meals. Enjoy the ease of prepping ahead, making weeknight dinners stress-free! Cook with confidence and savor every bite.

Honey Mustard Glazed Chicken Thighs Simple Recipe

If you’re craving a delicious chicken dinner that’s quick and easy, look no further! My Honey Mustard Glazed Chicken Thighs

For the Lemon Garlic Butter Shrimp Pasta, you need: - 200g spaghetti or linguine - 250g large shrimp, peeled and deveined - 4 tablespoons unsalted butter - 4 cloves garlic, minced - 1 teaspoon red pepper flakes (optional) - Juice and zest of 1 large lemon - Salt and pepper to taste - 2 tablespoons fresh parsley, chopped - Grated Parmesan cheese for serving These ingredients create a bright dish full of flavor. The shrimp adds protein, while lemon gives it a fresh zing. You can swap ingredients if you need to. Here are some ideas: - Use fettuccine or penne instead of spaghetti or linguine. - If you don’t have large shrimp, medium shrimp work too. - Olive oil can replace butter for a lighter option. - If you don’t like garlic, try shallots for a milder taste. These swaps can help make the dish work for your tastes or what you have on hand. Stick with pasta that holds sauce well. Here are my favorites: - Spaghetti is classic and easy to find. - Linguine has a nice flat shape, catching sauce well. - Fettuccine is thick and makes every bite rich and creamy. Choosing the right pasta helps make your dish even better. For the complete recipe, check out the Full Recipe section. Start with a large pot of water. Bring it to a boil and add salt. The salt helps add flavor. Once boiling, add 200g of spaghetti or linguine. Cook it according to the package instructions until it is al dente. This usually takes about 8 to 10 minutes. Keep an eye on it. When it’s done, reserve one cup of pasta water. Drain the pasta and set it aside for later. Next, grab a large skillet. Melt 4 tablespoons of unsalted butter over medium heat. As the butter melts, add 4 minced garlic cloves. Sauté them for about 30 seconds. You want them fragrant but not burnt. Now, add 250g of large shrimp to the skillet. Cook them for 2 to 3 minutes on each side. They should turn pink and opaque when done. If you like a little heat, sprinkle in 1 teaspoon of red pepper flakes. Season the shrimp with salt and pepper to taste. Once the shrimp is cooked, it's time to bring it all together. Add the drained pasta to the skillet with the shrimp. Pour in the juice and zest of 1 large lemon. Toss everything together well. If the pasta looks dry, add some of the reserved pasta water. Do this slowly until you reach your desired consistency. Finally, stir in 2 tablespoons of chopped fresh parsley. Taste it and adjust with more salt, pepper, or lemon juice if needed. Serve immediately, topped with grated Parmesan cheese. For the full recipe, check the details above. To cook shrimp perfectly, start with fresh or thawed shrimp. Once you add them to the skillet, cook for 2-3 minutes on each side. Shrimp turn pink when done. Overcooking makes them tough. So, keep an eye on the color and texture. You can boost the flavor easily. Try adding a splash of white wine after cooking the garlic. This adds depth. Fresh herbs like basil or thyme also add a nice touch. If you want heat, sprinkle more red pepper flakes. A pinch of lemon zest gives a bright kick too! Serve your Lemon Garlic Butter Shrimp Pasta hot. Pair it with a crisp green salad and garlic bread. A chilled white wine like Sauvignon Blanc works well. This meal is great for a cozy night in or a small gathering. For a fun twist, add some lemon wedges on the side. You can find the Full Recipe if you want to dive deeper into this dish! {{image_2}} You can boost this dish by adding vegetables. Spinach, cherry tomatoes, or bell peppers work great. Simply sauté these veggies with the garlic before adding the shrimp. This adds color, flavor, and nutrition. You get tasty bites while making your meal healthier. If you want to change the seafood, try scallops or crab. They both pair well with lemon and garlic. Cook them the same way as the shrimp. This keeps the dish simple but fresh. Each seafood brings its own unique taste and texture to the pasta. To make this dish creamy, add heavy cream or cream cheese. Start by pouring in the cream after cooking the shrimp. Mix it well before adding the pasta. This creates a rich, luscious sauce that hugs every strand of pasta. You still keep the lemon and garlic flavors, just with more creaminess. For the full recipe, refer back to the original dish details. Store your leftover Lemon Garlic Butter Shrimp Pasta in an airtight container. This helps keep it fresh. Place it in the fridge if you plan to eat it within three days. Let the pasta cool down before sealing it. This step prevents moisture from creating sogginess. To reheat, use a skillet for the best flavor. Add a splash of water or broth to keep it moist. Heat the skillet over medium heat, stirring often. If you're in a hurry, the microwave works too. Use a microwave-safe dish and cover it with a lid or wrap. Heat in short bursts, stirring in between, until warm. You can freeze Lemon Garlic Butter Shrimp Pasta if you want to save some for later. Use a freezer-safe container and leave space at the top for expansion. It stays good for about three months. To thaw, place it in the fridge overnight. Reheat as mentioned above for the best taste. To enhance the flavor, add more garlic. You can also use fresh herbs like basil or thyme. A splash of white wine adds depth, too. Experiment with spices, like smoked paprika or cayenne, for extra heat. Toasted pine nuts or walnuts can give a nice crunch. Always taste as you cook and adjust seasoning. Fresh lemon zest brightens the dish. Yes, you can use frozen shrimp. Just make sure to thaw them first. Place them in cold water for about 15 minutes. This method helps maintain their texture. Once thawed, pat them dry before cooking. This keeps the shrimp from becoming watery. Follow the same cooking steps in the recipe for best results. This dish pairs well with a simple green salad. A light Caesar or arugula salad works great. You can also serve garlic bread on the side. The bread soaks up the delicious sauce. For drinks, a crisp white wine complements the flavors nicely. If you prefer non-alcoholic, try sparkling water with lemon. This blog post covered all you need to make Lemon Garlic Butter Shrimp Pasta. You have ingredient lists, cooking steps, and tips for perfect results. I shared ideas for variations, like adding veggies or using different seafood. Don’t forget safe storage practices for leftovers and reheating tips. Now, you can make a tasty dish with ease. Enjoy cooking and sharing this meal! It’s a fun way to impress family and friends.

Lemon Garlic Butter Shrimp Pasta Flavorful and Simple

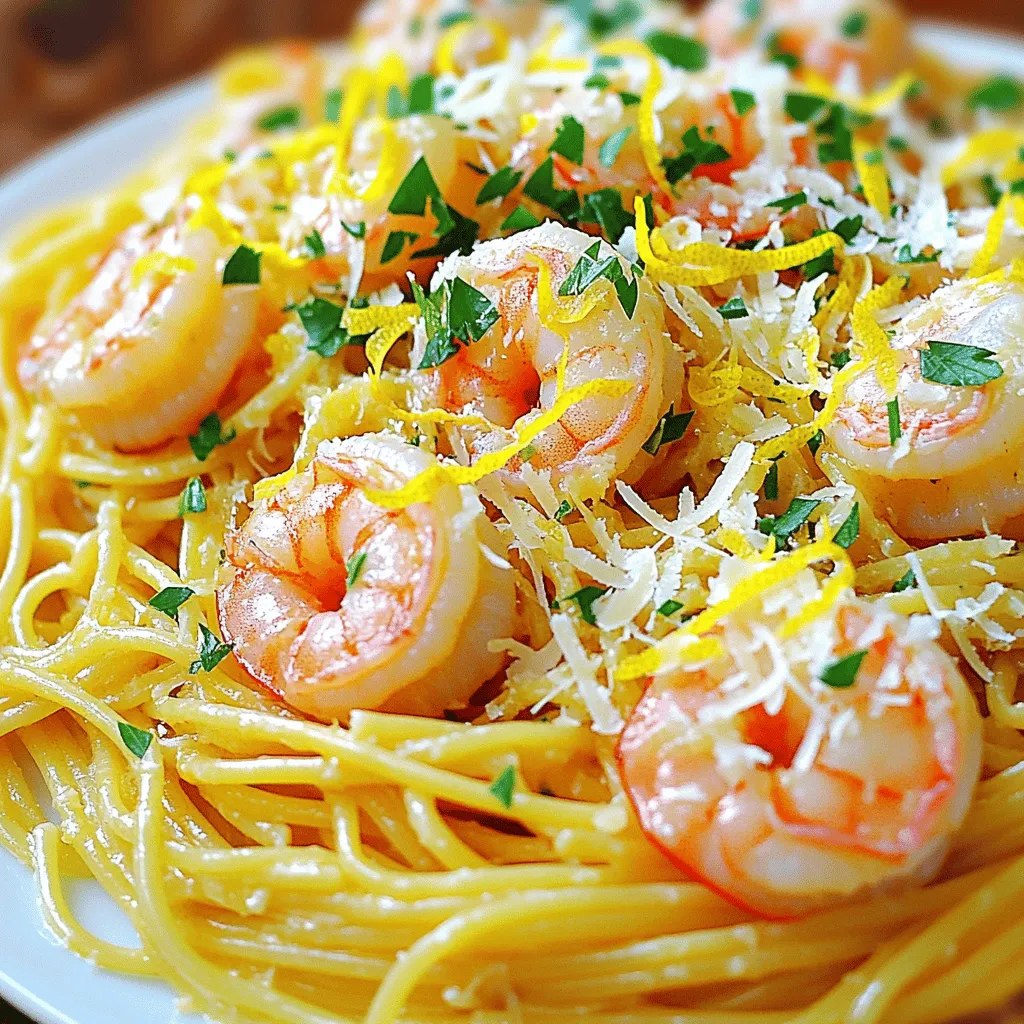
Looking for a quick and delicious meal? You’re in the right place! My Lemon Garlic Butter Shrimp Pasta is packed

To make tasty tacos, gather these main ingredients: - 1 can (15 oz) chickpeas, drained and rinsed - 2 tablespoons olive oil - 1 teaspoon smoked paprika - 1 teaspoon ground cumin - 1/2 teaspoon cayenne pepper (adjust to taste) - Salt and pepper to taste - 8 small corn or flour tortillas - 1 cup shredded red cabbage - 1/2 cup fresh cilantro, chopped - 1 lime, cut into wedges These ingredients create a flavorful base for your spicy chickpea tacos. For the creamy avocado topping, use these simple ingredients: - 1 ripe avocado - 1/4 cup Greek yogurt (or a dairy-free alternative) - 1 tablespoon lime juice - 1 clove garlic, minced - Salt to taste This avocado cream adds a rich and smooth layer to the tacos. Add these garnishes for extra flavor and color: - Sliced radishes - Diced tomatoes - Crumbled feta cheese (or a dairy-free option) Garnishes make your tacos look great and enhance their taste. For the full recipe, check the instructions in the next section. Start by gathering your chickpeas, olive oil, and spices. In a medium bowl, combine the drained chickpeas with olive oil, smoked paprika, ground cumin, cayenne pepper, salt, and pepper. Toss everything well. You want the chickpeas to be fully coated in the spices. Heat a large skillet over medium heat. Add the spiced chickpeas to the skillet. Sauté for about 5 to 7 minutes. Stir them often to keep them from sticking. You want them to be heated through and slightly crispy. While your chickpeas cook, it's time for the avocado cream. Grab a ripe avocado and cut it in half. Scoop the flesh into a small bowl. Mash the avocado with a fork until smooth. Then, mix in Greek yogurt, lime juice, minced garlic, and a pinch of salt. Blend until it’s creamy and smooth. Taste your cream and adjust the salt if needed. This creamy topping will add a nice balance to your spicy tacos. Now, let’s put it all together. Grab your tortillas and warm them in a skillet over medium heat for about 30 seconds on each side. This will make them soft and easy to fold. Take a tortilla and add a scoop of the spiced chickpeas. Top it with a handful of shredded cabbage and a drizzle of avocado cream. Finish with fresh cilantro and a squeeze of lime juice. Each bite will be a burst of flavor. For the full recipe, check the details provided earlier. To make the best chickpeas, start with rinsing them well. This removes extra salt and helps with flavor. Use a mix of spices to coat the chickpeas. Combine the olive oil, smoked paprika, cumin, cayenne, salt, and pepper in a bowl. Toss the chickpeas until they are fully coated. Sauté them on medium heat until they get crispy. This adds a nice texture and makes them more fun to eat. Keep stirring to prevent them from burning. Enjoy the aroma that fills your kitchen as they cook! For the avocado cream, use a ripe avocado for the best flavor. Mash it in a bowl and mix it with Greek yogurt. This adds creaminess and a tangy flavor. Add lime juice and minced garlic for extra zest. Adjust the salt to your taste. Blend it until smooth. If you want a thinner consistency, add a bit of water or more lime juice. This cream is perfect for drizzling over your tacos! Serve your tacos on a colorful plate to make them pop. Add fresh cilantro and lime wedges on the side. The lime adds brightness to each bite. Pair your tacos with a side of fresh salsa or pickled vegetables. These add extra crunch and flavor. You can also serve them with a simple salad for a complete meal. Try to enjoy your tacos with friends for a fun gathering! For the full recipe, check out the Spicy Chickpea Tacos with Avocado Cream . {{image_2}} You can easily make this dish vegan. Simply swap out Greek yogurt for a plant-based yogurt. Use coconut or almond yogurt for a rich texture. You can also add extra lime juice to enhance the flavor. This will keep your avocado cream creamy and delicious. If you need a gluten-free option, choose corn tortillas instead of flour. Many brands offer gluten-free tortillas that taste great. Check the label to ensure the product meets your needs. You can also use lettuce leaves as a fresh wrap. Want to change the taste? Add different spices to the chickpeas. Try chili powder or garlic powder for more zest. You can also mix in some diced tomatoes or corn for extra texture. For a kick, add jalapeños or hot sauce to your avocado cream. These small changes make a big difference! Explore these options to create your own version of Spicy Chickpea Tacos with Avocado Cream. For the complete recipe, check out the [Full Recipe]. To store leftover chickpeas, let them cool first. Place them in an airtight container. They can last up to four days in the fridge. If you want to keep them longer, freeze them. Just use a freezer-safe bag. They will stay good for about three months. When ready to use, thaw them in the fridge overnight. Avocado cream can brown quickly. To keep it fresh, transfer it to a small bowl. Press plastic wrap directly onto the cream's surface. This helps reduce air exposure. You can store it in the fridge for about two days. If it turns brown, just stir it to mix in the fresh green layer. When reheating chickpeas, use a skillet over medium heat. Add a splash of water to keep them moist. Heat for about five minutes, stirring often. For tortillas, warm them on a skillet for about 30 seconds each side. Serve your tacos fresh with avocado cream on top. This way, the flavors stay bright and tasty. You can find the Full Recipe for more details on making these delicious tacos! Yes, you can use dried chickpeas. First, soak them overnight in water. Then, cook them until they are soft before adding spices. This method takes more time but gives you fresher flavors. Make sure to drain and rinse them well before use. To add heat, increase the cayenne pepper. You could also add sliced jalapeños or a dash of hot sauce. Start with a little and taste as you go. This way, you can control the spice level to match your taste. If you need a substitute, try sour cream or a dairy-free yogurt. You can also use silken tofu for a creamy texture. Each option will change the flavor slightly but will still work well in the recipe. In this post, we explored how to make tasty tacos using spiced chickpeas and creamy avocado. We discussed the main ingredients, step-by-step instructions, and tips for perfecting the dish. Variations include vegan options and gluten-free choices to suit different diets. Lastly, we covered how to store leftovers and answered common questions. Enjoy your taco-making, and remember, the best tacos start with fresh ingredients and your creativity!

Spicy Chickpea Tacos with Avocado Cream Delight

Are you ready to spice up your taco game? My Spicy Chickpea Tacos with Avocado Cream Delight are packed with

To make a tasty Sweet Potato and Chickpea Salad, you need these key ingredients: - 2 medium sweet potatoes, peeled and cubed - 1 can (15 oz) chickpeas, drained and rinsed - 1 red bell pepper, diced - 1 cup baby spinach, chopped - 1/4 red onion, finely chopped - 3 tablespoons olive oil - 2 tablespoons balsamic vinegar - 1 tablespoon maple syrup - 1 teaspoon smoked paprika - Salt and pepper, to taste These ingredients create a mix of flavors and textures. The sweet potatoes add a soft, sweet bite. The chickpeas bring in protein and a nice chew. The bell pepper and spinach add freshness and crunch. You can customize your salad with these optional ingredients: - 1/4 cup feta cheese, crumbled - Fresh parsley, for garnish Adding feta cheese gives a creamy and salty flavor that pairs well. Fresh parsley adds a pop of color and a hint of freshness. Feel free to mix in other veggies or nuts for extra crunch! This salad is not just tasty; it's also good for you. Sweet potatoes are high in fiber and vitamins. Chickpeas provide protein and help keep you full. Spinach is packed with iron and other nutrients. Here are some benefits: - Sweet potatoes: Rich in vitamins A and C. - Chickpeas: Great source of plant-based protein. - Spinach: High in vitamins and antioxidants. This Sweet Potato and Chickpea Salad is both delicious and nutritious. With the full recipe, you can easily make this healthy delight at home! Start by preheating your oven to 400°F (200°C). While it warms, peel and chop the sweet potatoes into small cubes. In a big bowl, mix the sweet potato cubes with 2 tablespoons of olive oil, smoked paprika, salt, and pepper. Make sure each cube gets coated well. Spread them on a baking sheet in a single layer. Roast them in the oven for 25-30 minutes. Flip them halfway through to ensure even cooking. You want them tender and a bit caramelized. While your sweet potatoes roast, it's time to make the dressing. Grab a small bowl and whisk together the remaining olive oil, balsamic vinegar, maple syrup, salt, and pepper. Taste it to make sure it has the right balance. You want it tangy and sweet, which will enhance the salad's flavors. Once the sweet potatoes are done, let them cool for a few minutes. In a large mixing bowl, combine the roasted sweet potatoes, drained chickpeas, diced red bell pepper, chopped baby spinach, and finely chopped red onion. Drizzle the dressing over the salad and toss gently. If you like, sprinkle some crumbled feta cheese on top. For a fresh touch, add chopped parsley as a garnish. You can serve this salad right away or let it chill for about 20 minutes. This helps the flavors mix better. Enjoy your Sweet Potato and Chickpea Salad, a healthy delight! Check the Full Recipe for all details. To roast sweet potatoes well, cut them into even cubes. This helps them cook at the same rate. Toss the cubes with olive oil, smoked paprika, salt, and pepper. I like to use two tablespoons of olive oil for a rich flavor. Spread them out on a baking sheet in a single layer. This allows air to circulate around them and helps them roast evenly. Roast at 400°F (200°C) for 25-30 minutes. Flip them halfway through for even browning. Keep an eye on them to avoid burning. They should be tender and slightly caramelized when done. Serve this salad warm or cold. I enjoy it as a side dish, but it can be a meal on its own. Add some crumbled feta on top for a creamy touch. Fresh parsley adds a nice pop of color and flavor. You can also serve it with whole-grain pita or on a bed of greens. For a crunch, add some toasted nuts or seeds. This adds texture and makes the dish even more satisfying. Meal prep saves time during busy weeks. Roast a batch of sweet potatoes ahead of time. You can store them in the fridge for up to four days. Keep the salad components separate until you are ready to eat. This keeps everything fresh. When ready to serve, combine the ingredients and drizzle the dressing. This salad is great for lunch or dinner and is easy to grab and go. For a quick assembly, use pre-washed spinach and canned chickpeas. It makes life so much easier! You can find the full recipe to make this delicious salad. {{image_2}} You can change the flavor of your salad with different dressings. Try a lemon vinaigrette for a bright twist. A tahini dressing adds creaminess and depth. For a spicy kick, mix in sriracha with olive oil. You can also use yogurt-based dressings for a tangy touch. Each dressing brings its own vibe to the salad. To make this salad more filling, add protein. Grilled chicken or shrimp pairs well with the sweet potatoes. If you prefer plant-based options, try adding quinoa or black beans. Tofu is another great choice; it soaks up flavors nicely. With these additions, this salad becomes a full meal. Herbs and spices can elevate your salad. Fresh cilantro or mint adds freshness. You can sprinkle some cumin for an earthy flavor. A pinch of chili flakes can give it heat. Experiment with different herbs to find your favorite mix. These small changes can make your salad exciting every time you make it. Store leftover sweet potato and chickpea salad in an airtight container. Place it in the fridge. It stays fresh for about 3 to 5 days. If you notice any changes in smell or color, it’s best to discard it. Reheat the salad gently to keep its taste and texture. Use a microwave or a pan on low heat. Warm it just enough to take the chill off, but don’t overcook. This salad tastes best when fresh. You can freeze this salad, but it may change texture. Keep it in a freezer-safe container. It lasts up to 3 months. Thaw it overnight in the fridge before serving. Keep in mind that the sweet potatoes may not be as firm after freezing. For the full recipe, check [Full Recipe]. Yes, you can make this salad ahead of time. It tastes great when chilled. Just prepare the salad and store it in the fridge. The flavors will mix well overnight. However, if you add feta cheese, I suggest adding it just before serving. This keeps the cheese fresh and tasty. If you need a substitute, try using black beans or kidney beans. Both add protein and a nice texture. You could also use cooked lentils. They provide a different flavor but still work well. Just make sure they are drained and rinsed before adding them to the salad. To make this salad vegan, simply leave out the feta cheese. You can also use a vegan-friendly dressing. Look for dressings made with olive oil and vinegar without dairy. This keeps all the yummy flavors while making the salad fit for a vegan diet. You can find the full recipe for this salad and more tips in the sections above. This blog covered how to make a tasty Sweet Potato and Chickpea Salad. We looked at key ingredients and optional add-ins. I shared easy steps for prep and how to combine everything. You learned tips for roasting sweet potatoes and serving ideas. We also discussed different dressings and how to store leftovers properly. In my opinion, this salad is not just healthy; it's fun to make and enjoy. I hope you try it and share it with others!

Sweet Potato and Chickpea Salad Healthy Delight

Are you ready to whip up a dish that’s both tasty and good for you? Our Sweet Potato and Chickpea

To make crispy roasted Brussels sprouts, you need some simple ingredients. Here is what you will need: - 1 lb Brussels sprouts, trimmed and halved - 3 tablespoons olive oil - 2 tablespoons balsamic vinegar - 1 teaspoon garlic powder - 1 teaspoon smoked paprika - 1/2 teaspoon red pepper flakes - Salt and pepper to taste - Zest of 1 lemon - 1/4 cup grated Parmesan cheese (optional) - Chopped fresh parsley for garnish Using fresh Brussels sprouts is key. Look for bright green sprouts with tight leaves. These will give you the best taste and texture. Olive oil adds healthy fat and helps the sprouts crisp up. Balsamic vinegar gives a nice tang, while garlic powder and smoked paprika provide rich flavor. Feel free to adjust the red pepper flakes. If you like it spicy, add more! The lemon zest brightens the dish. If you want a cheesy twist, sprinkle on Parmesan cheese just before finishing. You can find the full recipe above to guide you through the cooking process. Enjoy your crispy roasted Brussels sprouts! Start by turning your oven to 425°F (220°C). This high heat helps the Brussels sprouts get crispy. Preheating is key because it makes sure the sprouts roast evenly. Next, take 1 pound of Brussels sprouts. Trim off the ends and cut them in half. This helps them cook faster and become crispy. In a big bowl, mix the sprouts with 3 tablespoons of olive oil, 2 tablespoons of balsamic vinegar, 1 teaspoon of garlic powder, and 1 teaspoon of smoked paprika. Add 1/2 teaspoon of red pepper flakes, plus salt and pepper to taste. Toss everything well until the sprouts are coated. This mix adds flavor and helps with crispiness. Spread the Brussels sprouts in a single layer on a lined baking sheet, cut-side down. This is important for getting that nice, crispy finish. Roast them in the oven for 20 to 25 minutes. Flip them halfway through to ensure even cooking. In the last 5 minutes, sprinkle the zest of 1 lemon and 1/4 cup of grated Parmesan cheese on top, if you want a cheesy twist. The cheese will melt and turn golden. - Use a lined baking sheet to help with easy cleanup. - Make sure to spread the sprouts out. Crowding them can cause steaming instead of roasting. - Cut the sprouts in half for quicker cooking and more surface area. - Flip them halfway to get that even browning. For the full recipe, check out the details above. Enjoy your crispy roasted Brussels sprouts! The right seasoning makes all the difference. Start with salt and pepper. They enhance the sprouts' natural taste. Use garlic powder and smoked paprika for more flavor. Adjust these spices based on your taste. If your Brussels sprouts are larger, add a bit more seasoning. Smaller sprouts need less. Choosing the right oil can change the dish. Olive oil gives a nice, fruity flavor. Avocado oil works too. It has a high smoke point and a mild taste. For a richer flavor, try melted butter. Always coat the sprouts well. This helps them get crispy while roasting. Presentation is key for any dish. Serve the crispy Brussels sprouts on a colorful plate. A rustic wooden board also works well. Drizzle extra balsamic vinegar on top for a gourmet touch. Add a sprinkle of lemon zest for brightness. Garnish with fresh parsley for a pop of color. These small steps make your dish eye-catching and appetizing. For the full recipe, check the section above. {{image_2}} You can change the flavor of your crispy roasted Brussels sprouts easily. Try adding different spices. A pinch of cumin adds warmth. For a fresh touch, use thyme or rosemary. If you like heat, cayenne works well. Mix in some onion powder for depth. Experiment with your favorite herbs and spices to find what you like best. You can make this dish vegan and gluten-free. Simply skip the Parmesan cheese. Use a plant-based oil, like avocado oil. Ensure that your balsamic vinegar is gluten-free. This way, everyone can enjoy this tasty dish without worry. Feel free to swap in seasonal veggies for variety. Carrots or sweet potatoes can add color and sweetness. In the fall, try adding butternut squash. In the summer, cherry tomatoes can brighten the dish. Seasonal swaps keep your meals fresh and exciting. For the full recipe, check the earlier section. Store leftover crispy Brussels sprouts in an airtight container. Keep them in the fridge for up to three days. Make sure they cool completely before sealing them. This helps keep them fresh and tasty. To reheat Brussels sprouts, use an oven or air fryer. Preheat the oven to 350°F (175°C). Spread the sprouts on a baking sheet. Heat them for about 10-15 minutes. This method keeps them crispy. Avoid using a microwave, as it can make them soggy. You can freeze Brussels sprouts, but they may lose some crunch. First, roast them as per the full recipe. Let them cool, then place them in a freezer bag. Remove as much air as possible. They can last up to three months in the freezer. To thaw, place them in the fridge overnight. Reheat them in the oven for best results. Yes, you can make these Brussels sprouts ahead of time. Cook them fully, then cool them down. Put them in a sealed container in the fridge. When you're ready to eat, reheat them in the oven. This helps them stay crispy. You can also roast them and serve them fresh for the best taste. Brussels sprouts are done when they are golden brown and crispy. Check them after 20 minutes of roasting. If they are still soft or pale, give them more time. They should have a nice crunch when you bite into them. The outer leaves should look dark and crispy for the best flavor. You can serve crispy roasted Brussels sprouts with many dishes. They pair well with roasted meats, like chicken or pork. They also go great with grain bowls or as a side for pasta. Add a squeeze of lemon for extra flavor. You can even top them on salads for a delicious crunch. Brussels sprouts get crispy in the oven due to a few key steps. First, use high heat, like 425°F. Second, coat them in oil to help them brown. Spread them out on the baking sheet so they don't touch. This allows hot air to circulate around each sprout. Flipping them halfway through cooking also helps them crisp evenly. In this post, we explored how to make crispy roasted Brussels sprouts. We covered the ingredients you'll need and provided step-by-step instructions for perfect roasting. Tips and tricks helped you season your sprouts and suggested variations for extra flavor. We also discussed how to store leftovers and answered common questions. These roasted Brussels sprouts are fun to make and delicious to eat. Enjoy experimenting with flavors and techniques to make this dish your own.

Crispy Roasted Brussels Sprouts Savory and Simple Dish

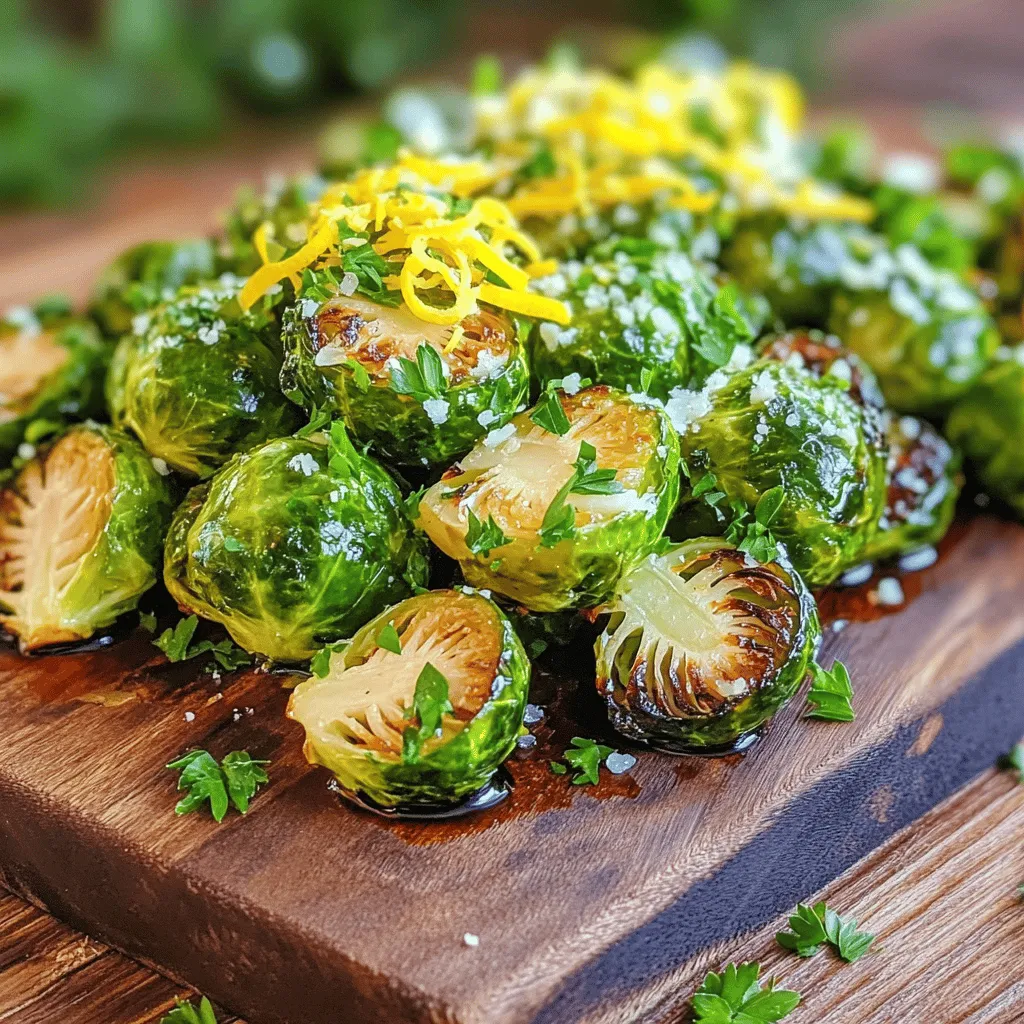
Looking for a simple yet tasty dish? Crispy Roasted Brussels Sprouts are just what you need! With just a few

- Eggs - Avocado - Greek yogurt - Dijon mustard To start, you need four large eggs. They give the salad protein and a creamy texture. Next, choose a ripe avocado. This adds richness and healthy fats. Greek yogurt is your next ingredient. It brings a tangy flavor and creaminess. Finally, add Dijon mustard for a little kick. It adds depth and pairs well with the other flavors. - Lemon juice - Red onion - Fresh dill - Salt and pepper Now, let’s make it pop! Lemon juice brightens the dish. It adds freshness and balances the creaminess. A small red onion, finely chopped, brings a sweet crunch. Fresh dill is a must for a herbaceous note. Don’t forget salt and pepper. They enhance all the flavors and tie everything together. - Lettuce leaves - Crackers or toast For serving, you can use lettuce leaves. They make a great base and add a crisp bite. You can also serve the salad on crackers or toast. This adds a fun crunch and makes it easy to enjoy. Pairing it this way makes for a delightful meal. For a full recipe, refer to the detailed steps and ingredients mentioned earlier. Boiling the eggs Start by placing the eggs in a saucepan. Cover them with cold water. Turn on the heat to medium and bring the water to a boil. Once boiling, cover the pan and take it off the heat. Let the eggs sit for about 9-12 minutes. This method gives you hard-boiled eggs with a nice, creamy yolk. Cooling and peeling Next, you need to cool the eggs. Carefully transfer them to a bowl filled with ice water. Let them sit there for about 5 minutes. This cooling step makes peeling easy. Once they are cool, tap the eggs gently on a hard surface to crack the shell. Peel them under running water to help remove any stubborn bits. Mashing the avocado Now, grab a ripe avocado. Cut it in half and remove the pit. In a large bowl, scoop out the flesh with a spoon. Use a fork to mash the avocado until creamy. You can leave a few chunks for texture. This adds a nice bite to your salad. Combining with yogurt and seasonings After mashing, it’s time to add flavor. Stir in 2 tablespoons of Greek yogurt for creaminess. Then, add 1 tablespoon of Dijon mustard for a little kick. Squeeze in 1 tablespoon of lemon juice to brighten the flavors. Toss in finely chopped red onion and fresh dill. Mix everything until it is well combined. Folding in the eggs Now it’s time to combine the eggs and avocado mixture. Take your cooled and chopped eggs and gently fold them into the avocado mix. Be careful not to mash the eggs too much. You want to keep some of that nice texture. Final seasoning adjustments Taste your mixture and season with salt and pepper. This step is key for bringing out all the flavors. Adjust to your liking. Once done, your avocado and egg salad is ready to serve! You can enjoy it on lettuce leaves or in a sandwich. For the full recipe to follow along, check the [Full Recipe]. To get the right avocado consistency, mash it well but keep some chunks. This adds texture. Use a fork to mash it until it's creamy, but don't overdo it. You want a smooth base with bits for a nice bite. When mixing in the eggs, be gentle. Overmixing can turn them into mush. Fold them in softly to keep them intact. This way, you’ll have nice pieces of egg throughout the salad. Spice up your salad by adding herbs like basil or cilantro. A pinch of paprika or cayenne can give it a nice kick. Experiment with your favorite spices to find what you love. For dressings, you can swap Greek yogurt for avocado oil or mayo. A splash of hot sauce or a drizzle of balsamic vinegar can change the flavor completely. Try different combinations to discover your favorite. Serve the salad in a large bowl lined with crisp lettuce leaves. This adds a fresh look and keeps the salad from getting soggy. You can also use small bowls for individual servings. For garnish, sprinkle fresh dill or chopped chives on top. A few slices of cherry tomatoes can also add color. Make it appealing to the eye, and it will taste even better! For the full recipe, check out the complete guide to making this delicious dish. {{image_2}} You can make this salad even healthier. Try using avocado oil instead of Greek yogurt. It adds a rich flavor and healthy fats. For low-fat options, you can swap the yogurt with low-fat versions. This keeps the creaminess while cutting calories. Get creative with your salad! Add different veggies like diced bell peppers, cucumbers, or even spinach. These veggies add crunch and color. You can also add proteins or grains. Chickpeas or quinoa can give you extra nutrition and make the meal more filling. Want to switch things up? Try a Mediterranean twist. Add olives, feta cheese, and sun-dried tomatoes. This brings a new flavor profile to your dish. For a spicy Southwestern flavor, include jalapeños and a dash of lime juice. This adds a fun kick! For the complete recipe, check out the full recipe. To keep your avocado and egg salad fresh, use an airtight container. Glass or plastic containers work well. Make sure to press plastic wrap against the salad's surface before sealing. This helps limit air exposure and keeps it from browning. Store the salad in the fridge for up to three days. Check for changes in color or smell. If it looks brown or smells sour, it's time to toss it. Freshness is key, so it's best to eat it sooner rather than later. You can freeze avocado and egg salad, but it may change texture. If you decide to freeze it, place it in a freezer-safe container. Leave some space at the top, as it will expand when frozen. To thaw, place it in the fridge overnight. Stir well before serving to help restore consistency. For best results, avoid freezing for long periods. Avocado and egg salad lasts about three days in the fridge. Store it in an airtight container. This keeps it fresh and safe to eat. Avoid leaving it out for longer than two hours to prevent spoilage. If you notice any off smell or color, toss it out. Yes, you can make this salad ahead of time. Just prepare the eggs and mix them with the other ingredients. To keep it fresh, add the avocado last. It browns quickly, so mix it in right before serving. You can also store the separate ingredients and combine them later. This will help you save time and enjoy a fresh meal. Avocado and egg salad pairs well with many sides. Here are some tasty options: - Whole grain toast - Crackers - Fresh veggies like carrots and celery - A light green salad - Fruit salad for a sweet touch For detailed steps and ingredients, check out the [Full Recipe](#). In this blog post, we explored how to make a tasty avocado and egg salad. We covered key ingredients like eggs, avocado, and Greek yogurt, along with flavor enhancers like lemon juice and dill. I shared step-by-step instructions for preparation, tips for texture and flavor, and variations to keep the dish fresh and exciting. Remember, with simple tweaks, you can make this salad truly your own! Enjoy making this dish and sharing it with friends and family.

Avocado and Egg Salad Flavorful and Healthy Dish

Looking for a quick, tasty, and healthy dish? Avocado and egg salad fits the bill! This creamy, protein-packed salad teams

To make the best Spicy Garlic Shrimp Fried Rice, you need key ingredients. Here’s a list: - 1 cup jasmine rice (uncooked) - 1 lb shrimp, peeled and deveined - 3 tablespoons vegetable oil - 4 garlic cloves, minced - 2 eggs, lightly beaten - 1 cup mixed vegetables (peas, carrots, corn) - 3 tablespoons soy sauce - 1 tablespoon sriracha (or more to taste) - 1 green onion, chopped - Salt and pepper to taste - Fresh cilantro, for garnish These ingredients work together to create a dish that bursts with flavor. You can add some optional ingredients to enhance the taste. Consider these: - Lime juice for a tangy kick - Sesame oil for richness - Bell peppers for sweetness - Fresh ginger for a warm spice - Peanuts for crunch These extras can make your dish unique and personal. If you lack some ingredients, don’t worry! Here are some substitutions: - Brown rice instead of jasmine rice for more fiber. - Chicken or tofu instead of shrimp for different protein. - Olive oil or coconut oil instead of vegetable oil for varied flavor. - Tamari sauce instead of soy sauce for a gluten-free option. These swaps keep your dish tasty while accommodating your pantry. For the full recipe, make sure to check out the instructions that follow! To make great fried rice, start with jasmine rice. Use 1 cup of uncooked rice. Cook it according to the package instructions. Once cooked, cool it completely. I like to refrigerate it for a few hours or overnight. This step helps the rice stay firm and not clump together. Next, heat 2 tablespoons of vegetable oil in a large skillet or wok over medium-high heat. Add 4 minced garlic cloves and stir for about 30 seconds. The garlic will smell amazing as it cooks. Then, add 1 pound of peeled and deveined shrimp. Stir-fry the shrimp until they turn pink and opaque, which takes about 3-4 minutes. Once done, remove the shrimp from the skillet and set them aside. This keeps them juicy and tasty. In the same skillet, add another tablespoon of vegetable oil if needed. Pour in 2 lightly beaten eggs. Scramble them until fully cooked. Then, mix in the cooked shrimp and stir well. Now it’s time for the star of the dish: the cooled jasmine rice. Add it to the skillet along with 1 cup of mixed vegetables, 3 tablespoons of soy sauce, and 1 tablespoon of sriracha. Toss everything together until well mixed and heated through. This step makes the rice slightly crispy, which adds great texture. Finally, season with salt and pepper to taste. Stir in 1 chopped green onion for a fresh kick. Serve hot and garnish with fresh cilantro. Enjoy your flavorful dish! To get that perfect fried rice texture, start with cold rice. Freshly cooked rice can be too sticky. I recommend cooking the jasmine rice and letting it cool. If you can, refrigerate it overnight. This helps the grains firm up and not clump together. When you fry the rice, use high heat. This creates that nice crispy texture you want. Make sure to stir often to avoid burning. For a great balance, use soy sauce and sriracha wisely. Start with the soy sauce; it brings out the savory taste. Then add sriracha for heat. You can always add more sriracha if you love spice. A squeeze of lime juice can also help cut the heat and add freshness. Taste as you cook to find your balance. One common mistake is overcrowding the pan. If you add too much rice or shrimp, they will steam instead of fry. Fry in batches if you need to. Another mistake is not using enough oil. Oil helps prevent sticking and adds flavor. Finally, don’t skip the garlic! It adds that essential flavor. The full recipe gives you all the steps to avoid these mistakes. {{image_2}} You can switch the shrimp with other proteins. Chicken, beef, or tofu work great. Cook chicken until it's fully done. For beef, use thin strips and stir-fry quickly. Tofu should be firm and diced small. This gives you more choices for your fried rice. If you want a meatless option, skip the shrimp. Add more veggies instead. Bell peppers, broccoli, and mushrooms add color and taste. You can also use scrambled tofu for a protein boost. This way, you keep the dish hearty and satisfying. Adjust the flavor and heat to your liking. If you want it milder, use less sriracha. You can also add sweet soy sauce for a hint of sweetness. For more heat, add chili flakes or jalapeños. Don’t be afraid to play with the flavors to find your perfect mix! To keep your spicy garlic shrimp fried rice fresh, store it in an airtight container. Let the rice cool down before sealing it. This step prevents moisture buildup, which can make it soggy. Place it in the fridge if you plan to eat it within a few days. For longer storage, consider freezing it. When reheating your fried rice, use a skillet or wok. Add a splash of water or broth to keep it moist. Heat it over medium heat, stirring often. This method helps restore the rice's texture and keeps the flavors bright. Avoid using a microwave if possible, as it may dry out the dish. When freezing fried rice, cool it completely first. Portion it into smaller containers for easy thawing. Don’t freeze it with extra sauce, as this can make the rice mushy. To reheat, thaw it in the fridge overnight. Then, follow the reheating tips above for the best results. This way, you can enjoy your spicy garlic shrimp fried rice later! To reduce spiciness, you can cut back on sriracha. Start with one teaspoon. You may also skip adding it altogether. Instead, use mild sauces like soy sauce. Adding more vegetables can also help tone down the heat. Yes, you can use frozen shrimp. Just remember to thaw them first. Place them in cold water for about 15 minutes. Pat them dry before cooking. This step ensures they cook evenly and stay juicy. I recommend using jasmine rice for fried rice. It has a nice aroma and fluffy texture. You can also use long-grain rice, which prevents clumping. Always cook the rice ahead of time and cool it before frying. To avoid soggy fried rice, always use cold, day-old rice. Freshly cooked rice holds moisture. Let it cool down completely before using. Stir-fry over high heat to keep it crisp and fluffy. You can find the full recipe for Spicy Garlic Shrimp Fried Rice in the recipe section above. Spicy garlic shrimp fried rice is a tasty dish you can easily make. We covered the key ingredients, from essential to optional ones. I shared steps to cook shrimp and rice just right. Helpful tips can help you boost flavor and avoid common errors. Don't shy away from trying different proteins or spice levels. Proper storage keeps your leftovers delicious. With the right techniques, you'll enjoy a great meal every time. Your cooking can shine with this recipe!

Spicy Garlic Shrimp Fried Rice Flavorful and Easy Dish

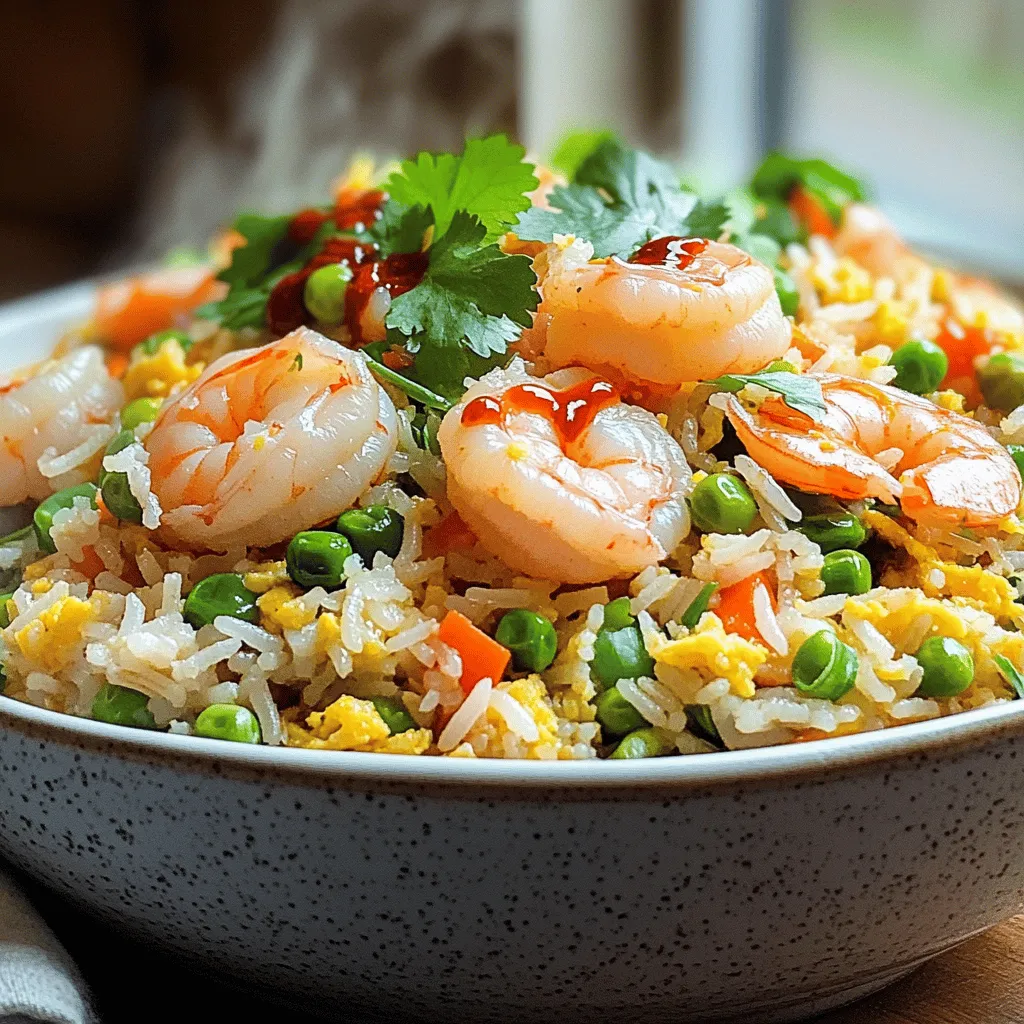
Looking for a quick and tasty meal? You’ve found it! My Spicy Garlic Shrimp Fried Rice is packed with flavor

- 1 can (15 oz) chickpeas, drained and rinsed - 1 tablespoon olive oil - 1 teaspoon ground cumin - 1 teaspoon smoked paprika - Salt and pepper to taste - 1 cup cherry tomatoes, halved - 1 cucumber, diced - ½ red onion, finely chopped - 1 cup baby spinach or mixed greens - ½ cup feta cheese, crumbled (optional) - 4 whole wheat tortillas or wraps - ¼ cup tahini sauce or hummus for spreading These ingredients create a healthy and tasty meal. The chickpeas are rich in protein and fiber. The olive oil adds healthy fats, while the spices give a nice kick. Fresh veggies like tomatoes and cucumbers add crunch and vitamins. - Fresh herbs like parsley or dill - Avocado slices for creaminess - Hot sauce for a spicy kick - Lemon juice for brightness Adding these optional ingredients can make your wraps even better. Fresh herbs bring a burst of flavor. Avocado adds a creamy texture. Hot sauce can spice things up! A squeeze of lemon juice brightens the dish. - Use black beans instead of chickpeas for a different taste. - Swap whole wheat tortillas for gluten-free wraps. - Try Greek yogurt instead of tahini sauce for a tangy twist. - Replace feta with a dairy-free cheese for vegan options. These substitutions keep your meal fresh and exciting. You can easily switch up the flavors to suit your taste. Feel free to mix and match ingredients to create your perfect wrap. For the full recipe, check out the instructions to get started! Start by draining and rinsing one can of chickpeas. In a medium bowl, mash half of the chickpeas with a fork. You want them to be slightly chunky. Keep the other half whole for texture. Next, drizzle one tablespoon of olive oil over the chickpeas. Sprinkle in one teaspoon of ground cumin, one teaspoon of smoked paprika, and salt and pepper to taste. Mix it all together until the chickpeas are well-coated. In another bowl, combine one cup of halved cherry tomatoes, one diced cucumber, and half a finely chopped red onion. Add one cup of baby spinach or mixed greens. Gently toss the vegetables together. Don’t forget to add a pinch of salt and pepper to bring out the flavors. Lay out four whole wheat tortillas on a flat surface. Spread a tablespoon of tahini sauce or hummus on each tortilla. Then, spoon an equal amount of the seasoned chickpeas onto each one. Next, add the fresh vegetable mixture on top. If you like, sprinkle half a cup of crumbled feta cheese over the filling for a tasty touch. Fold in the sides of each tortilla, then roll them tightly from the bottom up to make a wrap. If you want a crispy texture, grill the wraps on a skillet for 2-3 minutes on each side. This will give them a nice golden color. Finally, cut each wrap in half diagonally. Serve with extra tahini sauce for dipping. Enjoy your Mediterranean Chickpea Wraps! You can find the full recipe [here](#). To mash chickpeas well, start with the right tools. Use a fork or a potato masher. This gives you control over the texture. Mash half of the chickpeas until they are chunky. Leave the other half whole. This mix adds a fun bite to your wraps. Avoid using a blender; it can make the chickpeas too smooth. You can boost the flavor with simple tricks. Add fresh herbs like parsley or dill for brightness. A squeeze of lemon juice adds zing. For a kick, try a dash of hot sauce or red pepper flakes. Mixing in olives or sun-dried tomatoes gives a Mediterranean touch. Experiment with spices like coriander or garlic powder for more depth. Serving wraps well makes them look appetizing. Cut each wrap in half for easy eating. Arrange the halves on a bright platter. Add a small bowl of tahini sauce or hummus for dipping. Garnish with fresh parsley or olives. This not only looks nice but adds flavor. Enjoy your meal with a colorful salad on the side. For the full recipe, check out the detailed steps earlier in the article. {{image_2}} You can easily make this dish vegan. Instead of feta cheese, use avocado or nutritional yeast. Both give a creamy texture and rich flavor. You can also switch tahini sauce for a homemade vegan aioli. This option adds a nice twist while keeping it plant-based. If you want more protein, consider adding grilled chicken, tofu, or quinoa. Grilled chicken adds a savory touch. Tofu is a great option for a vegan protein boost. Cook it until golden for better flavor. Quinoa is also a smart choice, adding texture and nutrition. Cook it before mixing it in with the chickpeas. For a gluten-free meal, swap whole wheat tortillas for gluten-free wraps. Many brands offer tasty gluten-free options. You can also use lettuce leaves for a fresh, low-carb wrap. This keeps the meal light and healthy. Enjoy the same great flavors without the gluten! For the full recipe, check out the Mediterranean Chickpea Wraps section above! To keep your Mediterranean chickpea wraps fresh, wrap them tightly in plastic wrap or foil. This helps lock in moisture and flavor. You can also place them in an airtight container. Store them in the fridge for up to three days. If you use feta cheese, keep it separate to avoid sogginess. To reheat your wraps, use a skillet over medium heat. Cook each side for about two to three minutes until warm. This method keeps the wrap crispy. If you prefer the oven, preheat it to 350°F (175°C). Wrap each one in foil and heat for about 10 minutes. Avoid the microwave, as it can make the wraps chewy. You can freeze these wraps if you have leftovers. Wrap each one tightly in plastic wrap, then place them in a freezer bag. They can last up to three months in the freezer. To eat, thaw them in the fridge overnight. Reheat as mentioned above for the best results. Enjoy your delicious meal again! For the full recipe, check out the Mediterranean chickpea wraps section. To make Mediterranean Chickpea Wraps from scratch, gather your ingredients. You need chickpeas, olive oil, spices, veggies, and wraps. Start by mashing half the chickpeas. Mix them with olive oil, cumin, paprika, salt, and pepper. In another bowl, combine cherry tomatoes, cucumber, red onion, and spinach. Spread tahini or hummus on your wraps. Add the chickpea mix and veggie mix. Roll them up tightly, and enjoy your tasty meal. For the full recipe, check the details above. You can serve many things with Mediterranean Chickpea Wraps. A fresh salad pairs well. Consider a Greek salad with cucumbers, tomatoes, and feta. You can also serve some roasted veggies on the side. For a lighter option, try a fruit salad. Pair your wraps with a zesty tzatziki sauce for extra flavor. Yes, you can make these wraps ahead of time. Prepare the filling and store it in a sealed container. Wraps can last in the fridge for about three days. Just keep the sauce separate until you are ready to eat. When you heat them up, they will taste fresh and delicious. Chickpeas are very healthy. They are high in protein and fiber. This helps you feel full and satisfied. Chickpeas also support heart health. They contain vitamins like B6 and minerals like iron. Eating chickpeas can help with digestion and blood sugar levels. Yes, tahini sauce or hummus works great for Mediterranean wraps. They add creaminess and flavor. You can also try a lemon vinaigrette for a tangy twist. A yogurt-based dressing adds a nice touch too. Choose a dressing that you enjoy most! Mediterranean Chickpea Wraps are simple and fun to make. You learned about key ingredients and how to mix them well. The steps to prepare and wrap are easy to follow. I shared tips to boost flavor and keep wraps fresh. You can also try variations with more protein or vegan swaps. Remember, these wraps are not just tasty; they are good for you too. Enjoy making this healthy meal that fits into your lifestyle!

59. Mediterranean Chickpea Wraps Healthy and Simple Meal

If you’re looking for a healthy and simple meal, Mediterranean Chickpea Wraps are perfect for you. They burst with fresh

- 4 large russet potatoes - 1 cup shredded cheddar cheese - 1 cup black beans, drained and rinsed - 1/2 cup corn kernels (fresh or frozen) - 1/2 cup diced tomatoes - 1/4 cup sliced jalapeños (fresh or pickled) - 1/2 cup sour cream - 1/4 cup chopped green onions - Olive oil, garlic powder, chili powder, salt, and pepper When I make loaded nacho potato skins, I always choose large russet potatoes. They have a sturdy texture that holds up well. I bake them until they are just right. For extra flavor, I use sharp cheddar cheese; it melts nicely and adds a rich taste. Black beans offer great protein and a hearty feel. I also love adding corn. It gives a nice sweetness and crunch. Diced tomatoes add freshness and a splash of color. If you like heat, jalapeños are a must. You can use fresh ones or pickled for a tangy twist. For seasonings, I stick with simple ingredients. I use garlic powder and chili powder to boost flavor. Salt and pepper enhance all the tastes. The sour cream is a great topping. It adds creaminess and cools down the spice. Chopped green onions give a fresh finish. This recipe is all about balance. The creamy cheese, crunchy potatoes, and zesty toppings come together in a wonderful way. You can find the full recipe for loaded nacho potato skins to guide you through each step. - Step 1: Preheat the oven to 400°F (200°C). This helps to get the potatoes cooking right away. - Step 2: Wash and scrub the russet potatoes thoroughly. Remove any dirt, and dry them with a clean towel. - Step 3: Bake the potatoes until tender. This usually takes about 45-60 minutes. You can poke them with a fork to check. - Step 4: Cut and scoop the potatoes. After they cool, cut each potato in half lengthwise. Leave about 1/4 inch of potato inside. - Step 5: Bake the skins and add fillings. Brush the insides with olive oil, and season with garlic powder and chili powder. Bake the skins for 10-15 minutes until they are crispy. - Step 6: Top and serve your loaded nacho potato skins. Fill each skin with black beans, corn, diced tomatoes, cheese, and jalapeños. Bake again until the cheese melts. Enjoy making this delicious dish! You can find the Full Recipe above for more detailed steps and tips. To get crispy potato skins, choose large russet potatoes. They have thick skin that crisps well. Start by washing the potatoes and drying them. Prick each potato with a fork to stop them from bursting. Coat them with olive oil and sprinkle salt on top. Bake at 400°F for 45-60 minutes until tender. After baking, scoop out some flesh, leaving about a quarter inch inside. This helps them stay firm. For added flavor, consider spices like cumin and paprika. You can also mix in some minced garlic. Fresh herbs like cilantro or parsley can brighten the dish. When it comes to toppings, homemade options are best. Make your own sauces for freshness. But store-bought toppings can save time and still taste great. Just ensure they complement the dish. Prep time can be cut down by washing and poking the potatoes in advance. You can bake them ahead and store them in the fridge. When ready to serve, just add toppings and reheat. This makes assembly quick and easy. You can also make the toppings ahead of time. Just store them in airtight containers. This way, you have everything ready for a fun gathering. For more tips, check the Full Recipe for Loaded Nacho Potato Skins. {{image_2}} You can make loaded nacho potato skins your own. For a vegetarian twist, skip the meat. Load them up with extra beans or veggies. If you want a vegan version, use dairy-free cheese and sour cream. You can also add proteins like grilled chicken or beef for heartier skins. This adds flavor and makes them more filling. Cheese makes these potato skins rich and delicious. You can swap cheddar for other cheeses like Monterey Jack or pepper jack. Mixing cheese types can create a fun flavor. Try combining mozzarella for stretchiness and gorgonzola for a sharp bite. This mix can surprise your taste buds and keep things interesting. Pair your loaded nacho potato skins with tasty dips like guacamole or salsa. These enhance the flavors of the meal. For side dishes, consider a fresh salad or crunchy coleslaw. They add a nice contrast. To drink, enjoy a cold beer or sparkling water. These beverages balance the rich flavors of the skins. For the full recipe, check out the details. To keep your loaded nacho potato skins fresh, use an airtight container. Store them in the fridge. This helps prevent them from drying out. For best results, eat them within three days. To keep your potato skins crispy, place a paper towel at the bottom of the container. This will absorb any moisture and keep them crunchy. Reheat your potato skins in the oven for the best texture. Preheat your oven to 350°F (175°C). Place the potato skins on a baking sheet and heat for about 10-15 minutes. This will help them regain their crispiness. You can also use an air fryer for quick reheating. Set it to 350°F (175°C) and heat for 5-7 minutes. If you want to freeze them, wrap each skin in plastic wrap, then place them in a freezer bag. They can last up to three months in the freezer. Leftovers can last in the fridge for about three days. If they smell off or look dry, it’s best to toss them. Signs your leftovers are no longer good include a change in color or a slimy texture. Always trust your senses; if it seems wrong, don’t eat it. For the freshest taste, try to eat your loaded nacho potato skins soon after making them. For the full recipe, check out the section above. One common issue is soggy skins. To avoid this, make sure to bake the potato skins until they are crispy. After baking, let them cool slightly before adding toppings. This helps keep them firm. Another problem is uneven cooking. To ensure even cooking, use potatoes that are similar in size. Pricking the potatoes before baking also helps them cook evenly. Yes, you can prep them in advance. Bake the potatoes and scoop them out. Cover the skins and store them in the fridge. This makes assembly quick and easy. For storage, place the skins in an airtight container. You can store them in the fridge for up to two days. Just remember to bake them before serving. Get creative with your toppings! Try using pulled pork or grilled chicken for a protein boost. You can also add guacamole or pico de gallo for a fresh taste. If you want healthier options, consider using Greek yogurt instead of sour cream. You can also add more veggies like bell peppers or olives for extra crunch. Loaded nacho potato skins are an easy and fun dish. They combine simple ingredients like potatoes, cheese, and beans. Following our steps, you can bake them to perfection. Customize with your favorite toppings and spices for extra flavor. Remember, storing leftovers properly ensures they stay delicious. With these tips, you’ll impress your friends and family. Enjoy making this tasty snack, and make it your own with unique twists!

58. Loaded Nacho Potato Skins Flavorful and Easy Recipe

Ready to elevate your snacking game? Our Loaded Nacho Potato Skins recipe combines crispy potato skins with creamy cheese, zesty

Older posts
Newer posts
← Previous Page1 … Page43 Page44 Page45 … Page79 Next →

dsad

© 2025 pureeatsnow • Built with GeneratePress

Our Policies

  • Copyright Policy
  • Cookie Policy
  • GDPR Policy
  • Privacy Policy
  • Disclaimer
  • Terms Of Use

More Information

  • Home
  • About
  • Contact
  • Appetizers
  • Dessert
  • Dinner
  • Drinks
©2025, pureeatsnow About Back To Top