Skip to content
DisclaimerTerms Of UseGDPR PolicyCookie Policy

pureeatsnow

  • Home
  • Drinks
  • Appetizers
  • Dinner
  • Dessert
  • About
  • Contact
  • Privacy Policy
DisclaimerTerms Of UseGDPR PolicyCookie Policy

Rachel

- Flatbreads (store-bought or homemade) - Fresh cremini mushrooms - Olive oil and seasonings - Goat cheese and mozzarella To make a tasty mushroom and goat cheese flatbread, you need some key ingredients. Flatbreads serve as the base. You can buy them or make them at home. I love using fresh cremini mushrooms. They add deep flavor. Olive oil is essential for sautéing. Don’t forget your seasonings to enhance taste. Goat cheese adds a creamy touch, while mozzarella gives a nice melt. - Balsamic glaze for drizzling - Fresh arugula for garnish You can make this flatbread even better with a few extras. A drizzle of balsamic glaze adds sweetness. Fresh arugula brings a peppery bite. Both ingredients make your dish look beautiful and taste great. - Skillet for sautéing - Baking sheet for oven You’ll need a few kitchen tools to help prepare this dish. A skillet is perfect for sautéing the mushrooms. A baking sheet is necessary for cooking the flatbreads in the oven. These tools make the cooking process easy and smooth. For the full recipe, check the details above. Enjoy making this simple yet delicious dish! To start, heat a skillet over medium heat. Add one tablespoon of olive oil. When the oil is hot, add one cup of sliced cremini mushrooms. Sauté them for about 5-7 minutes. You want them to be golden brown and soft. Next, add two cloves of minced garlic and one teaspoon of fresh thyme leaves. Cook for another 1-2 minutes. This step fills your kitchen with a lovely aroma. Don’t forget to season with salt and pepper before removing the skillet from heat. Now, it’s time to put it all together. Grab two flatbreads and place them on a baking sheet. Evenly distribute the sautéed mushrooms over each flatbread. Make sure each flatbread gets a good amount of mushrooms. Then, sprinkle one cup of crumbled goat cheese on top. Add half a cup of shredded mozzarella cheese next. The combination of these cheeses is key to a rich flavor. Preheat your oven to 425°F (220°C). Once it’s hot, place the baking sheet in the oven. Bake the flatbreads for 10-12 minutes. Keep an eye on them. You want the cheese to be bubbly and slightly golden. When they are done, take them out and let them cool for a moment. If you like, drizzle some balsamic glaze over the top. Add fresh arugula for a nice touch. Cut the flatbreads into wedges, and they're ready to serve warm. Enjoy your delicious creation! For the full recipe, check the earlier sections. For this flatbread, I love using cremini mushrooms. They have a rich flavor that pairs well with goat cheese. You can also try other types like shiitake or button mushrooms. Each has its own taste. Shiitake adds a meaty touch, while button mushrooms bring a milder flavor. Mix and match to find what you like best. To get the best cheese melt, use a hot oven. Preheat it to 425°F (220°C). This high heat makes the cheese bubble and brown nicely. Spread the mushrooms evenly, then layer the goat cheese and mozzarella. This combo gives a great texture. Bake for 10-12 minutes, but keep an eye on it. You want a golden top, not burnt. Garnishing is key for making your flatbread look amazing. I love adding fresh arugula on top. It adds a pop of color and a fresh taste. Drizzling balsamic glaze gives it a nice sweet tang. This not only enhances flavor but also makes the dish eye-catching. The contrast of colors makes your meal more inviting. {{image_2}} You can change the cheese for great taste. Feta cheese adds a tangy kick. Parmesan brings a rich, nutty flavor. Both melt well and add depth to the flatbread. Try mixing goat cheese with feta for a unique twist. You can also use mozzarella for a creamier texture. The choice of cheese can make your flatbread special. Want more protein? Consider adding cooked chicken or prosciutto. Chicken gives a nice, savory touch. Prosciutto adds a salty, rich flavor. You can either layer it on top or mix it in with the mushrooms. This keeps the flatbread filling and satisfying. You can even try adding cooked bacon for extra crunch. Vegetarian? No problem! You can add spinach for freshness. Bell peppers add sweetness and color. Roasted zucchini or artichokes also work well. These veggies complement the mushrooms and cheese. They create a colorful and tasty flatbread. Feel free to mix and match your favorites. Enjoy your culinary creativity with this dish! For the full recipe, check out the Mushroom & Goat Cheese Flatbread section. To keep your Mushroom and Goat Cheese Flatbread fresh, store it in an airtight container. If you have a slice or two left, it’s best to leave out any fresh arugula or balsamic glaze. They can get soggy. Place a paper towel inside the container to absorb moisture. This helps keep the flatbread crispy. Store in the fridge and eat within three days for the best taste. When it’s time to reheat, aim for a crispy texture. Preheat your oven to 350°F (175°C). Place the leftover flatbread on a baking sheet. Heat for about 10 minutes. This method warms the flatbread and keeps it crunchy. You can also use a skillet. Just heat it on medium for a few minutes on each side. This method also works well. Yes, you can freeze Mushroom and Goat Cheese Flatbread! Wrap it tightly in plastic wrap or foil. This prevents freezer burn. You can freeze it for up to three months. When you want to eat it, thaw it in the fridge overnight. Then, reheat it in the oven as mentioned earlier. This way, you can enjoy your flatbread at a later time. To make homemade flatbreads, you need just a few simple ingredients. Use these: - 2 cups all-purpose flour - 1 teaspoon salt - 3/4 cup warm water - 1 tablespoon olive oil Start by mixing the flour and salt in a bowl. Slowly add warm water and olive oil. Knead the dough for 5 minutes until smooth. Let it rest for 30 minutes. Then, roll it out into thin circles. Cook each flatbread on a hot skillet for 2-3 minutes per side. You can use these flatbreads for your mushroom and goat cheese flatbread delight. Yes, you can use other cheeses! Each cheese gives a different taste. Here are some options: - Feta cheese for a tangy kick - Mozzarella for extra creaminess - Parmesan for a nutty flavor Substituting these cheeses can change the taste of your flatbread. Experimenting can lead to delightful results. To enhance the flavor, add herbs and spices. Here are some suggestions: - Add fresh basil for a sweet touch - Sprinkle red pepper flakes for heat - Use oregano for a classic Italian flavor These flavors can make your flatbread even more tasty and fun. Flatbreads are great with many sides. Here are some pairing options: - A fresh salad for crunch - Roasted vegetables for more flavor - A side of hummus for dipping These options create a complete meal that everyone will enjoy. Check the Full Recipe for more details on making this delicious flatbread! Now you know how to make delicious Mushroom and Goat Cheese Flatbread. You learned the key ingredients, like flatbreads, mushrooms, and cheese. You also explored useful kitchen tools like skillets and baking sheets. Remember, you can get creative with toppings and storage ideas. Enjoy your cooking and impress your friends with this tasty dish. Flatbread is easy to adapt, so try new flavors and ingredients. Make it your own! Happy cooking!

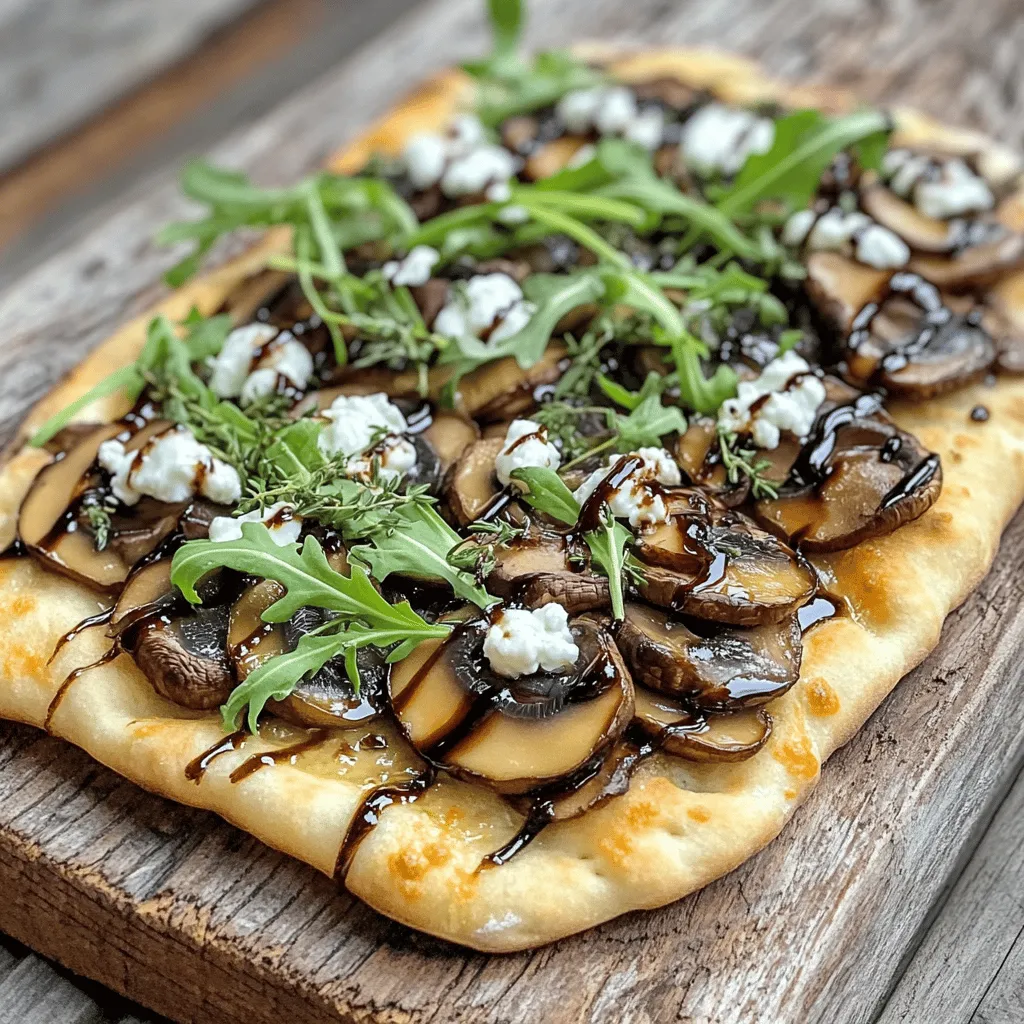
46. Mushroom and Goat Cheese Flatbread Delightfully Easy

Looking for a deliciously easy dish to impress? Try my Mushroom and Goat Cheese Flatbread! This tasty treat balances the

To make 45 Egg Fried Rice, gather these key ingredients: - 2 cups cooked jasmine rice (preferably day old) - 3 large eggs - 1 cup mixed vegetables (peas, carrots, corn) - 1 small onion, finely chopped - 2 cloves garlic, minced - 3 green onions, chopped - 3 tablespoons soy sauce - 1 tablespoon sesame oil - 1 tablespoon vegetable oil - Salt and pepper to taste - Optional: 1 teaspoon grated ginger These ingredients create a tasty and colorful dish. The day-old rice gives the best texture. It won’t stick together, which is what you want. Fresh rice can make your dish mushy. Use frozen mixed vegetables for ease. They save time and add color. Start with fresh aromatics. Onions and garlic bring deep flavor. Ginger adds a touch of spice, so try it if you want. Green onions give a fresh crunch when you add them at the end. Each ingredient plays a role in the final taste. The soy sauce adds saltiness, while the sesame oil gives a nutty essence. This meal is quick to make, and you can adjust it based on what you have. For the full recipe, check out the detailed steps. 1. Heating the oil and sautéing vegetables First, heat the vegetable oil in a large non-stick skillet over medium heat. Add the finely chopped onion and minced garlic. Sauté for about 2-3 minutes until the onion turns soft and clear. If you like ginger, add it here for extra flavor. 2. Scrambling the eggs Next, push the onion mixture to one side of the skillet. Crack the eggs into the empty side. Stir the eggs gently until they become fluffy and fully cooked. Mix the eggs with the onion once cooked. 3. Combining ingredients and seasoning Add the mixed vegetables to the pan and stir-fry for about 3-4 minutes until they are warm. Then, add the cooked jasmine rice. Break up any rice clumps as you mix. Pour in the soy sauce and drizzle the sesame oil over the top. Toss everything well to coat the rice. Season with salt and pepper. Stir-fry for another 2-3 minutes. Finally, add the chopped green onions right before serving. For the full recipe, check out the details above. Enjoy your egg fried rice! Using day-old rice makes a big difference. Fresh rice can be sticky. It clumps together and can ruin the texture. Day-old rice is drier and grains are separate. This gives your fried rice that perfect bite. Adjusting flavors with sauces is key. Soy sauce adds saltiness and umami. You can also try oyster sauce or teriyaki for more depth. Mix it up to find your favorite flavor combo. Cooking techniques enhance flavor. Use a hot skillet or wok. This helps to sear the rice, adding a nice crunch. Toss your ingredients quickly to prevent burning. Stir-frying in batches can also help keep everything fresh and crisp. For more detailed steps, you can check the Full Recipe. {{image_2}} You can easily change up your egg fried rice. Here are some fun ideas to try. - Adding protein options: You can add chicken, shrimp, or tofu. Cook your chosen protein before adding it to the rice. Chicken adds a nice bite, while shrimp gives a sweet flavor. Tofu makes it great for vegetarians. - Incorporating different vegetables: Try different veggies to keep things exciting. Bell peppers, broccoli, or snap peas work well. Just chop them small and add them when you stir-fry. This adds color and nutrition to your meal. - Spicing it up with sauces or herbs: Boost the flavor with sauces like sriracha or hoisin. A sprinkle of fresh herbs like cilantro or basil can brighten your dish. You can also add sesame seeds for a nutty finish. Feel free to get creative with your egg fried rice! You can find the full recipe to guide you through the basics. To keep your egg fried rice fresh, proper storage is key. First, let the rice cool to room temperature. Then, transfer it to an airtight container. This helps to keep moisture out and prevents strong odors from other foods. You can store it in the fridge for about 3 to 4 days. When you are ready to reheat, use a skillet or a microwave. If using a skillet, add a little oil over medium heat. Stir the rice for about 5 to 7 minutes until hot. This method helps maintain the flavor and texture. If you prefer the microwave, place the rice in a microwave-safe dish. Add a splash of water to keep it moist. Heat it on high for about 2 minutes, stirring halfway through. For the best taste, try to eat the rice within the first few days. After 4 days, the quality may decline. Always check for any off smells or changes in texture. This ensures you enjoy your meal at its best. You can also freeze leftover egg fried rice. Use a freezer-safe container or bag, and it will last for up to 3 months. When you want to eat it, thaw it in the fridge overnight. Reheat it as mentioned earlier. Storing and reheating properly will keep your egg fried rice tasty and enjoyable for every meal. Can I use uncooked rice? No, you should not use uncooked rice for this dish. Uncooked rice needs to be boiled first. It takes too long to cook in the skillet. Use day-old cooked rice. This rice has a firmer texture and helps to prevent clumping. Is it possible to make it vegetarian or vegan? Yes, you can make it vegetarian or vegan. To do this, skip the eggs. You can replace them with scrambled tofu or chickpea flour. Use soy sauce and sesame oil for flavor. Add more vegetables for a tasty twist. How can I make it spicy? To make it spicy, add chili paste or hot sauce when cooking. You can also use fresh chili peppers. For a milder heat, try adding red pepper flakes. Adjust the spice level to fit your taste. Enjoy the kick! In this post, I shared how to make 45 Egg Fried Rice. You learned about the key ingredients like cooked jasmine rice, eggs, and veggies. I guided you through step-by-step instructions, tips for better flavor, and creative twists. You also found helpful storage info to keep it fresh. Enjoy making this dish your own. With practice, you'll master 45 Egg Fried Rice. It’s simple, fun, and offers endless options for your taste. Remember, the best meals come from your kitchen!

45 Egg Fried Rice Flavorful and Quick Meal Guide

Looking for a quick meal that bursts with flavor? You’ve come to the right place! In this guide, I’ll show

- 1 large head of cauliflower - 4 cloves garlic - 3 tablespoons olive oil - 1 teaspoon smoked paprika - 1 teaspoon cayenne pepper - 1 teaspoon ground cumin - Salt and pepper - Fresh parsley - Lemon zest The main ingredients for this dish start with a large head of cauliflower. It’s the star of the show! You also need garlic, which adds a bold flavor. Olive oil helps everything roast nicely. Next are the spices and seasonings. Smoked paprika gives a warm taste. Cayenne pepper adds heat, so you can adjust it to your liking. Ground cumin brings a nice earthiness to the mix. Finally, we have the garnishing ingredients. Salt and pepper enhance the flavors. Fresh parsley adds a pop of green and brightness. Lemon zest gives a fresh twist at the end. For the full recipe, check out the complete instructions. This dish is simple yet flavorful, making it a go-to side for any meal. - Preheat the oven to 425°F (220°C). - Line a baking sheet with parchment paper. Preheating the oven is key to getting that nice roast. Parchment paper helps with cleanup. This step sets us up for a great dish. - Combine cauliflower, garlic, and olive oil. - Add spices and seasonings. In a large bowl, toss the cauliflower florets, minced garlic, and olive oil. Next, sprinkle in the smoked paprika, cayenne pepper, ground cumin, salt, and pepper. Mix well until every piece of cauliflower is coated. This mixture is where the magic starts! - Spread cauliflower on the baking sheet. - Roast for 25-30 minutes, flipping halfway. Place the coated cauliflower on the lined baking sheet. Make sure they are in a single layer. This helps them roast evenly. After 12-15 minutes, flip the florets to get a nice brown on all sides. Roast until they are golden brown and tender. The aroma will fill your kitchen! For the full recipe, check the section above. Enjoy the fantastic flavors! To get the best flavor from your cauliflower, avoid overcrowding the baking sheet. If the florets touch, they will steam instead of roast. This will prevent them from becoming crispy and caramelized. Spread your cauliflower pieces so they have room to breathe. For even coating with oil and spices, use a large bowl. Toss the florets with olive oil, garlic, and spices until every piece glistens. This ensures that each bite is full of flavor. I love to experiment with marinades or spices. Try adding soy sauce or ginger for an Asian twist. You can also mix in some chili flakes for an extra kick. Another idea is to sprinkle nutritional yeast on the cauliflower. It adds a cheesy taste without dairy. This can make your dish even more enjoyable. Garnishing is key to a beautiful dish. After roasting, sprinkle fresh parsley and lemon zest on top. This adds color and a fresh taste. For plating, place the cauliflower in a shallow bowl. This allows the florets to shine. You can also serve it on a large platter for a family meal. These small touches can make your spicy garlic roasted cauliflower look as good as it tastes. For the full recipe, check out the detailed instructions provided. {{image_2}} You can mix it up with different spices. Try adding a bit of brown sugar for a sweet touch. A pinch of cinnamon can also bring warmth. If you want a herbal twist, use thyme or oregano instead of parsley. These herbs add nice flavor and change the dish a bit. Want to make it a meal? Add some cooked chickpeas or diced tofu to your cauliflower. Both options give added protein. You can also toss in some nuts, like almonds or walnuts, for a crunchy texture. This adds great flavor and makes the dish heartier. Spicy garlic roasted cauliflower pairs well with many meals. It goes great alongside grilled chicken or fish. You can also serve it with rice or quinoa for a filling meal. If you want to make a salad, chop the roasted cauliflower and mix it with greens. Add your favorite dressing for a tasty side salad. For more details on the recipe, check out the Full Recipe. To keep your Spicy Garlic Roasted Cauliflower fresh, use airtight containers. Glass containers work best. They do not stain and are easy to clean. You can also use BPA-free plastic containers. Make sure to let the cauliflower cool down before storing. Place it in the fridge within two hours of cooking. This helps keep it safe and tasty. When reheating, aim for the oven or an air fryer. These methods help keep the cauliflower crispy. Preheat your oven to 350°F (175°C). Spread the cauliflower on a baking sheet and heat for about 10-15 minutes. If using an air fryer, set it to 350°F (175°C) for about 5-7 minutes. Avoid the microwave, as it can make your cauliflower soggy. To freeze roasted cauliflower, let it cool completely first. Spread the florets on a baking sheet in a single layer. Freeze them for about an hour until firm. Then, transfer them to a freezer bag or container. Remove as much air as possible to prevent freezer burn. When you want to enjoy it, thaw overnight in the fridge. Reheat in the oven or air fryer, as discussed earlier. For best results, use within three months. For the full recipe, check out the earlier section. Roasting cauliflower takes about 25 to 30 minutes at 425°F (220°C). This time gives the cauliflower a nice golden color and a soft inside. Flip the florets halfway through to get even browning. Yes, you can make this dish ahead of time. Roast the cauliflower and let it cool. Store it in the fridge for up to three days. To reheat, warm it in the oven. This keeps the texture nice. If you want to switch things up, try using broccoli or Brussels sprouts. Both vegetables roast well and soak up flavors nicely. You can also use root veggies like carrots or sweet potatoes for a sweeter taste. Yes, this recipe is vegan-friendly. It contains no animal products. The olive oil and spices give it great flavor without any meat or dairy. Enjoy it as a plant-based side dish with any meal. For the full recipe, check out the complete details above. This blog post explored a simple and tasty roasted cauliflower recipe. We covered ingredients, step-by-step instructions, and tips to perfect your dish. You learned about storage, variations, and even some FAQs to answer your common questions. Roasted cauliflower is easy to make and full of flavor. Its versatility makes it a great addition to many meals. I encourage you to try this recipe and enjoy the delicious results!

Spicy Garlic Roasted Cauliflower Flavorful Side Dish

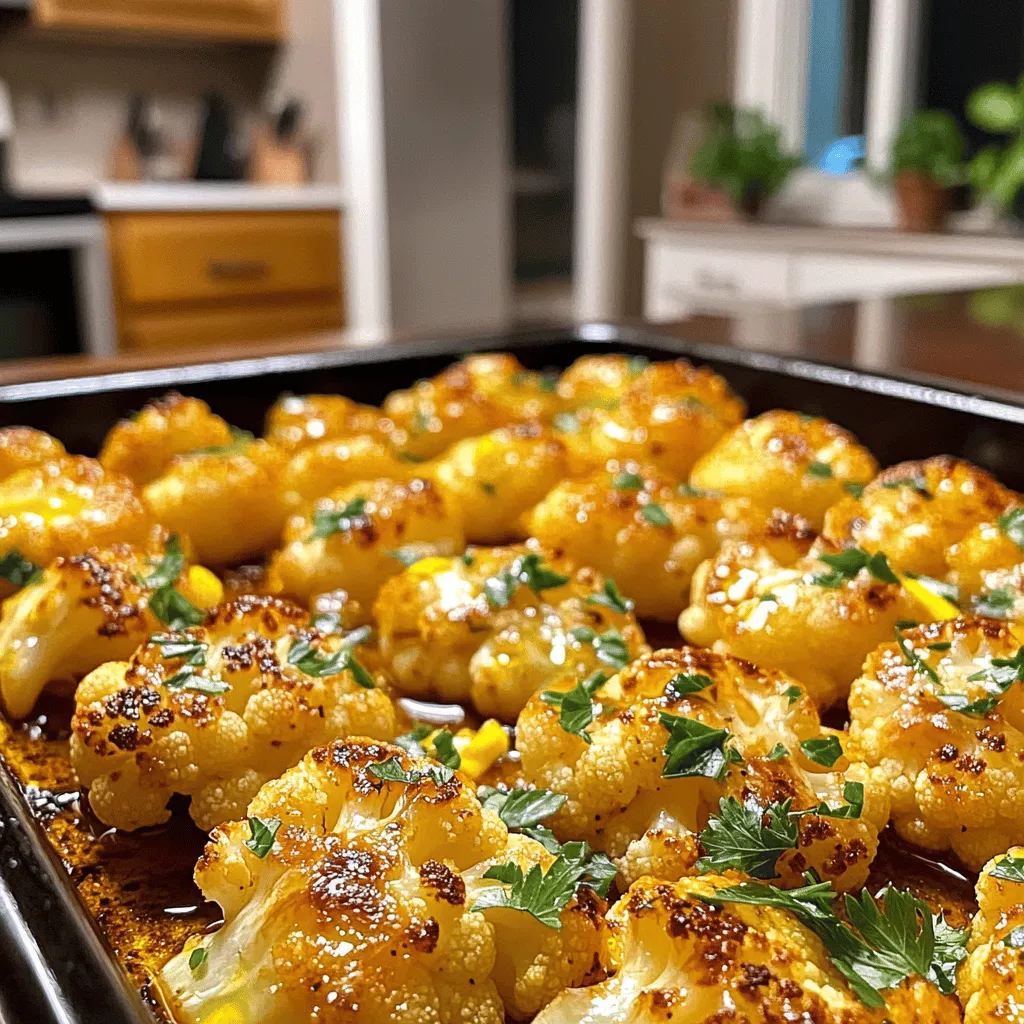
Looking for a tasty side dish that packs a punch? Try Spicy Garlic Roasted Cauliflower! This recipe features simple ingredients

- 1 lb large shrimp, peeled and deveined - 2 tablespoons olive oil - Zest and juice of 2 lemons - 3 cloves garlic, minced - 1 tablespoon fresh parsley, chopped - 1 tablespoon fresh cilantro, chopped - 1 teaspoon dried oregano - 1/2 teaspoon red pepper flakes (for heat) - Salt and pepper to taste When it comes to making Lemon Herb Grilled Shrimp, the right ingredients are key. Start with fresh shrimp. Look for large shrimp that are firm and smell like the ocean. They should be peeled and deveined for easy grilling. Next, you need olive oil. It adds richness and helps the shrimp cook well. The lemon zest and juice bring a bright and fresh taste. This balance of flavors makes the dish stand out. For seasoning, garlic is a must. It adds depth and makes the shrimp more flavorful. Fresh herbs like parsley and cilantro uplift the dish with their fragrant notes. Dried oregano gives it a warm, earthy taste. If you like a little heat, add red pepper flakes. They give a kick without being too spicy. Finally, use salt and pepper to taste. These simple seasonings truly enhance the shrimp's natural flavor. For the complete recipe and more details, check the Full Recipe. Enjoy the fresh and flavorful delight of Lemon Herb Grilled Shrimp! To start, grab a medium bowl. You will need to combine: - 2 tablespoons olive oil - Zest and juice of 2 lemons - 3 cloves garlic, minced - 1 tablespoon fresh parsley, chopped - 1 tablespoon fresh cilantro, chopped - 1 teaspoon dried oregano - 1/2 teaspoon red pepper flakes (optional) - Salt and pepper to taste Mix these ingredients well. The olive oil coats the shrimp nicely. The lemon juice adds a bright flavor. Garlic and herbs bring freshness. The red pepper flakes give a gentle kick, if you choose. This marinade is the key to great taste. Next, add 1 pound of large shrimp that are peeled and deveined to the marinade. Make sure the shrimp are fully coated. Cover the bowl with plastic wrap. Place it in the fridge to marinate for 30 minutes to 2 hours. The longer you marinate, the more flavor the shrimp will soak up. Just don’t overdo it, or the shrimp may get tough. Now, it’s time to grill! Preheat your grill to medium-high heat. If you use wooden skewers, soak them in water for 30 minutes. This step stops them from burning. Thread about 5-6 shrimp onto each skewer. Once the grill is hot, place the skewers on it. Grill the shrimp for 2-3 minutes on each side. You want them to turn pink and opaque. This means they are cooked and ready to eat! Remove the shrimp from the grill and let them rest for a minute. You can serve them hot, drizzled with any leftover marinade if you like. For the full recipe, check out the details above. How long should you marinate shrimp for the best flavor? Marinate shrimp for at least 30 minutes. If you want a stronger taste, go up to 2 hours. This time lets the flavors soak in. How can you adjust heat levels with red pepper flakes? Add red pepper flakes for a spicy kick. Use 1/2 teaspoon for mild heat. If you love spice, try more. Start small and taste as you go. What is the ideal grill temperature for shrimp? Set your grill to medium-high heat. This ensures the shrimp cooks evenly. Too low, and they may become tough. Too high, and they can burn. How can you check if shrimp is ready? Shrimp is done when it turns pink and opaque. It usually takes 2-3 minutes per side. You can also check if they curl into a “C” shape. What are some recommended side dishes to pair with grilled shrimp? Serve grilled shrimp with herbed rice, a fresh salad, or grilled veggies. These sides bring out the shrimp's bright flavors. What are some presentation tips for serving hot shrimp? Arrange shrimp on a platter with lemon wedges. Add fresh herbs for color. This makes the dish look inviting and fresh. {{image_2}} You can switch herbs to change the taste. Try using basil or dill instead of cilantro and parsley. Both herbs add a fresh twist. Basil gives a sweet touch, while dill offers a slight tang. You can also mix different spice blends. For a smoky flavor, add smoked paprika. For a kick, try a Cajun blend. Each option brings a new flavor to your dish. If you want to try something new, substitute the shrimp. Scallops are a great choice; they grill well and taste sweet. Fish like salmon or tilapia can also work. For a vegetarian option, use plant-based proteins. Tofu or tempeh absorbs flavors well and can be grilled. You can even use hearty vegetables like zucchini or bell peppers for a fun twist. Grilling is great, but other methods work too. You can broil shrimp in the oven as an alternative. This method gives you a nice char without a grill. Just place the shrimp on a broiler pan and cook until pink. If you prefer stovetop cooking, use a skillet. Heat some oil in the pan and cook the shrimp for about 2-3 minutes per side. Both methods keep the shrimp tasty and juicy. For the full recipe, check the details above. To store cooked shrimp, let it cool first. Place the shrimp in an airtight container. This helps keep the shrimp fresh. You can store it in the fridge for up to three days. Make sure to eat it before the third day for the best taste. To freeze grilled shrimp, first let it cool completely. Then, place it in a freezer-safe bag. Squeeze out as much air as you can before sealing. This helps prevent freezer burn. You can freeze shrimp for up to three months. To thaw it, move the shrimp to the fridge overnight. This keeps it safe and tasty. To reheat shrimp, use a skillet on low heat. Add a little olive oil to keep it moist. Cook for just a few minutes until warm. Avoid high heat to prevent overcooking. You want to maintain the shrimp's tender texture. Enjoy it just like you did after grilling! For more details, check the Full Recipe. You can serve many sides with Lemon Herb Grilled Shrimp. Here are some great ideas: - Herbed rice: This adds a nice, light flavor. - Fresh salad: A mix of greens with a citrus dressing works well. - Grilled vegetables: Bell peppers, zucchini, and asparagus bring color and taste. - Garlic bread: This is perfect for soaking up any leftover marinade. - Dipping sauces: Try a tangy cocktail sauce or a creamy garlic aioli. These options will make your meal balanced and fun! Yes, you can use frozen shrimp. Here’s how to do it right: - Thaw first: Place the shrimp in the fridge overnight or run them under cold water for a quick thaw. - Dry well: Pat the shrimp with paper towels to remove excess moisture. This helps the marinade stick better. - Marinate: Once thawed, follow the marinade steps as you would with fresh shrimp. Using frozen shrimp can save time and still taste great! To check if shrimp is cooked, look for these signs: - Color change: Shrimp should turn from gray to pink. - Shape: Fully cooked shrimp curl into a C shape. - Timing: Grill for about 2-3 minutes per side. When shrimp are opaque and firm, they are ready to eat! Marinating shrimp is simple with these tips: - Mix well: Combine your marinade ingredients in a bowl. Make sure they blend. - Coat shrimp: Add the shrimp to the marinade and stir until they are fully coated. - Refrigerate: Let the shrimp sit in the marinade for 30 minutes to 2 hours. This allows flavors to soak in. A good marinade makes all the difference in taste! For the full recipe, be sure to check the earlier section. In summary, this blog post walks you through making delicious lemon herb grilled shrimp. It covers key ingredients, step-by-step instructions, and helpful tips for marinating and grilling. You also learned about variations and how to store shrimp properly. By following these steps, you can enjoy flavorful shrimp anytime. Experiment with flavors and cooking methods to find your favorites. Now, get grilling and savor the taste of your creation!

Lemon Herb Grilled Shrimp Fresh and Flavorful Delight

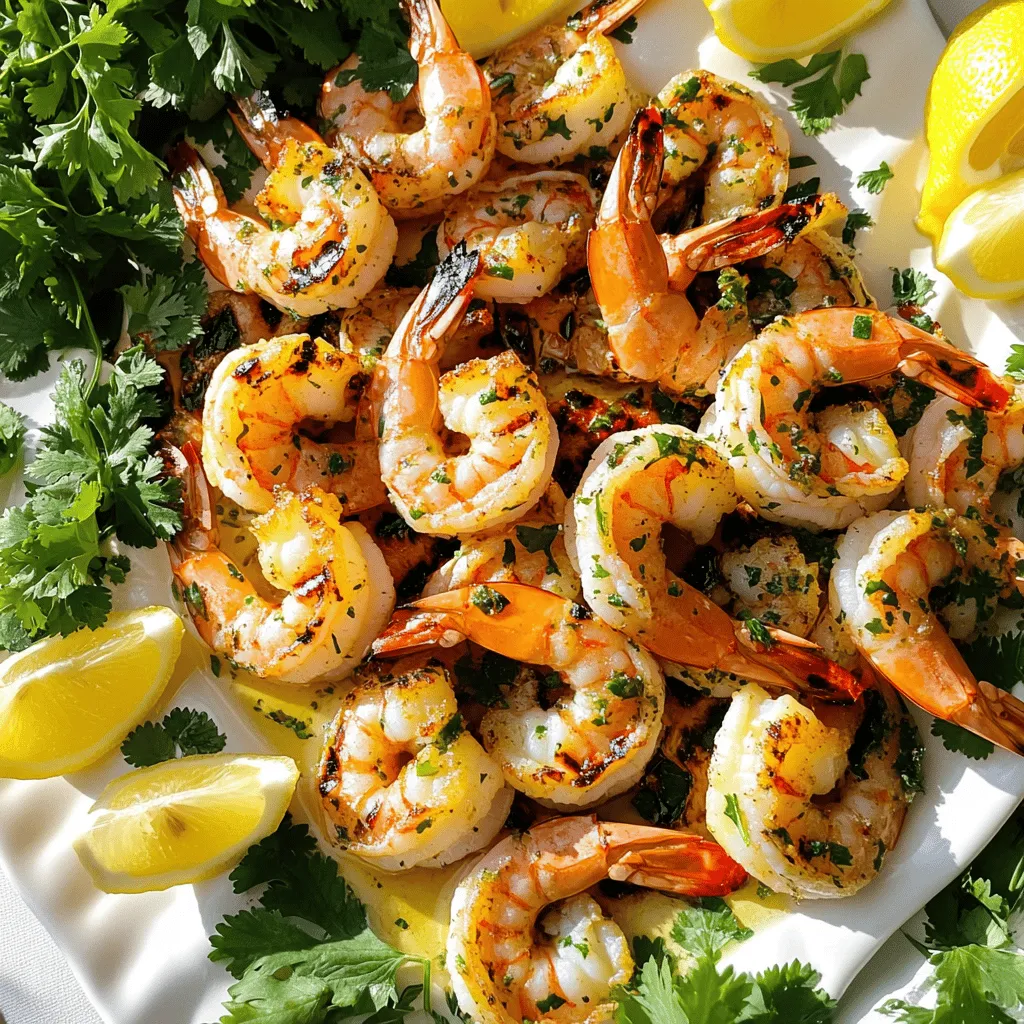
If you’re craving a dish that bursts with fresh flavors, look no further! My Lemon Herb Grilled Shrimp recipe combines

- Quinoa and its health benefits Quinoa is a super grain. It is full of protein, fiber, and vitamins. It helps you feel full and gives energy. Quinoa is gluten-free, making it great for many diets. Cooking it is easy, and it adds a nutty flavor to your salad. - Importance of fresh vegetables Fresh vegetables make your salad bright and tasty. Cherry tomatoes add sweetness, while cucumbers give crunch. Bell peppers bring color and flavor. Corn adds a nice pop. Using fresh ingredients ensures your salad is healthy and delicious. - Flavor-boosting ingredients like avocado and lime Avocado adds creaminess and healthy fats. It makes the salad richer and more filling. Lime juice gives a zesty kick. It brightens up all the flavors. Together, these ingredients make this salad fresh and fun. For the full recipe, check the detailed instructions. - Rinsing and boiling tips: First, rinse the quinoa in cold water. This helps remove the bitter coating. Use a fine mesh strainer for best results. Next, bring two cups of vegetable broth or water to a boil in a medium saucepan. - Cooking time and temperature: Once the broth is boiling, add the rinsed quinoa. Reduce the heat to low, cover, and let it cook for about 15 minutes. The quinoa is ready when it is fluffy and the liquid is absorbed. - Cooling the quinoa for salad: After cooking, remove the saucepan from heat. Let the quinoa sit for a few minutes, then fluff it with a fork. Spread it on a plate to cool faster. You want it cool before adding it to the salad. - Chopping and dicing vegetables: While the quinoa cools, chop your fresh veggies. Dice the cucumber, bell pepper, and red onion into small pieces. Halve the cherry tomatoes and chop the cilantro. - Combining ingredients in a large bowl: In a large mixing bowl, add all the chopped veggies. Then, add the corn and diced avocado. This mix will give your salad great color and crunch. - Making the dressing from scratch: In a small bowl, whisk together the lime juice, olive oil, cumin, salt, and pepper. This dressing adds a zesty kick to your salad. - How to combine the quinoa and vegetables: Once the quinoa is cool, add it to the bowl of veggies. Pour the dressing over everything. - Tossing tips for a perfect blend: Gently toss the salad with a large spoon. Be careful not to mash the avocado. You want all the flavors to mix well. - Adjusting flavors and seasonings: After mixing, taste your salad. If it needs more flavor, add extra lime juice, salt, or pepper. Adjust to your liking for the perfect bite. For the full recipe, be sure to check the complete instructions provided. To prevent overcooking quinoa, use the right water-to-quinoa ratio. I recommend two cups of liquid for every cup of quinoa. Bring your liquid to a boil before adding the rinsed quinoa. Once you cover it and reduce the heat, avoid lifting the lid. This keeps the steam in, cooking the quinoa evenly. After cooking, let it sit covered for five minutes. This helps the quinoa absorb any remaining liquid. When ready, fluff it with a fork. This gives it a light, airy texture. For homemade dressings, try mixing olive oil with lime juice. This simple combo adds fresh flavor. You can also add a teaspoon of honey for sweetness. If you want to kick it up, add garlic or mustard for a flavor boost. To customize flavors, think about herbs and spices. Fresh cilantro, basil, or mint can change the taste. You can also use smoked paprika or chili flakes for a bit of heat. Serve your salad in a large bowl. This makes it easy for everyone to enjoy. Add a garnish of cilantro and lime wedges for color. Pair this salad with grilled chicken or fish for a full meal. It also goes well with a warm soup or crusty bread. Enjoy it as a light lunch or picnic treat. For more ideas, check out the Full Recipe for different serving styles. {{image_2}} You can swap quinoa for other grains. Here are some tasty options: - Brown rice - Farro - Barley - Bulgur Each grain has its own nutrition. For example, brown rice is high in fiber. Farro has more protein. Barley is great for heart health. Bulgur cooks fast and is low in calories. Try them all! Add-ins can make your salad even better. Here are some ideas: - Feta cheese for creaminess - Nuts like almonds or walnuts for crunch - Fresh herbs like basil or mint - Dried fruits like cranberries or raisins You can also swap seasonal ingredients. Use fresh peas in spring or roasted butternut squash in fall. This keeps your salad fresh and exciting! To keep this salad vegan, skip the cheese or use a vegan cheese. For gluten-free, make sure to choose gluten-free grains like brown rice or quinoa. Always check labels for hidden gluten. This way, everyone can enjoy your delicious salad! To keep your vegetarian quinoa salad fresh, use an airtight container. Glass or plastic containers work well. Make sure to seal them tightly to prevent air from getting in. Store the salad in the fridge right away. This helps keep the flavors bright and the veggies crisp. Your salad can last in the fridge for about 3 to 5 days. After that, the ingredients may start to break down. Look for signs of spoilage, such as a sour smell or mushy vegetables. If you see these signs, it’s best to toss the salad. Always trust your nose and eyes! Yes, you can make this salad ahead of time. It tastes great after chilling in the fridge. To prep, cook the quinoa first and let it cool. Chop your veggies and store them in a separate bowl. Mix the quinoa and veggies just before serving. This keeps everything fresh and crisp. If you want a creamy texture but need to skip avocado, try using hummus or Greek yogurt. Both options add creaminess and flavor. You can also use nut butter for a different taste. Another choice is to add tahini for a rich flavor. To make this salad more filling, add some protein. Chickpeas are a great choice; they blend well with the flavors. You can also add black beans or lentils for extra texture. Another option is to toss in some feta cheese or grilled tofu for a heartier meal. This blog post provided a complete guide to making a tasty vegetarian quinoa salad. We learned about key ingredients like quinoa, fresh veggies, and boosting flavors. I shared steps to cook quinoa and mix your salad perfectly. You also got tips on dressing, serving, and variations to keep things fresh. In conclusion, this salad is easy to make and fun to customize. Enjoy how nutritious it is while trying new flavors!

Vegetarian Quinoa Salad Easy and Fresh Recipe

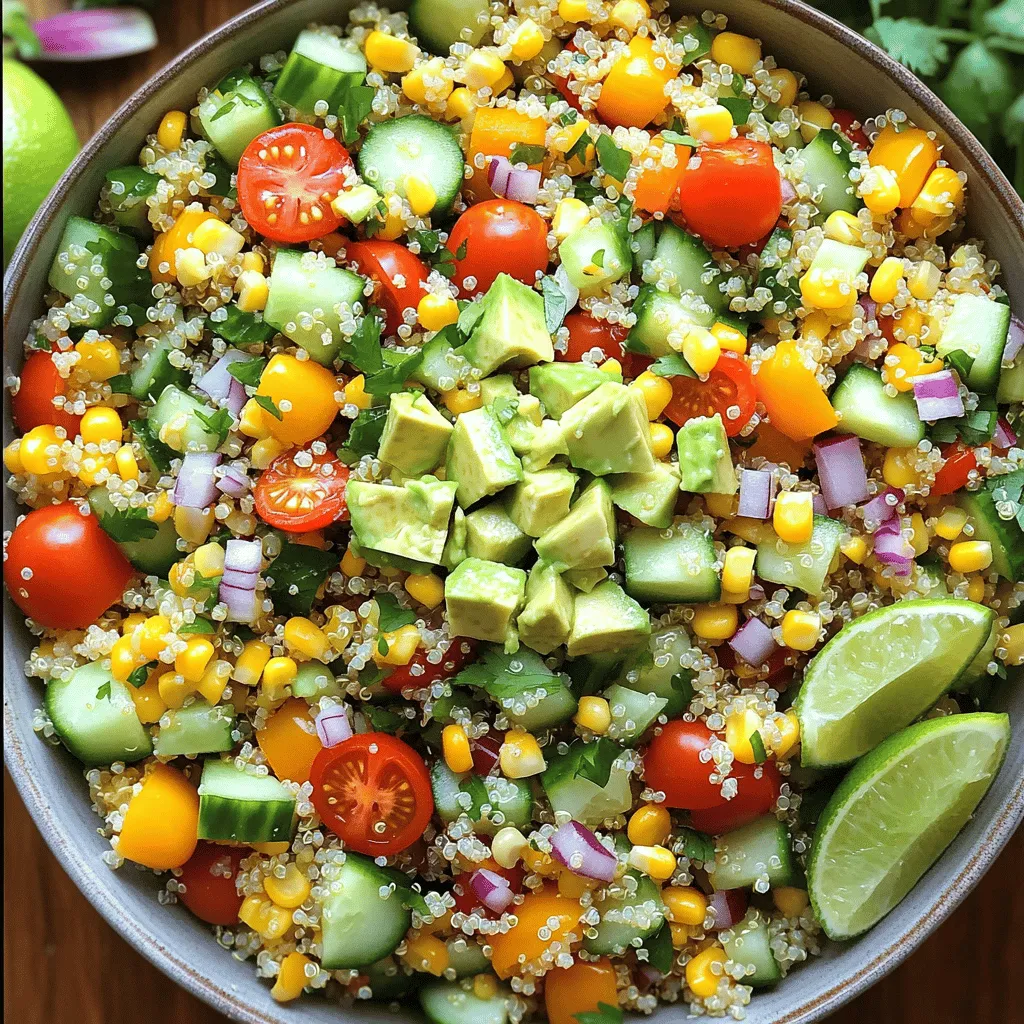
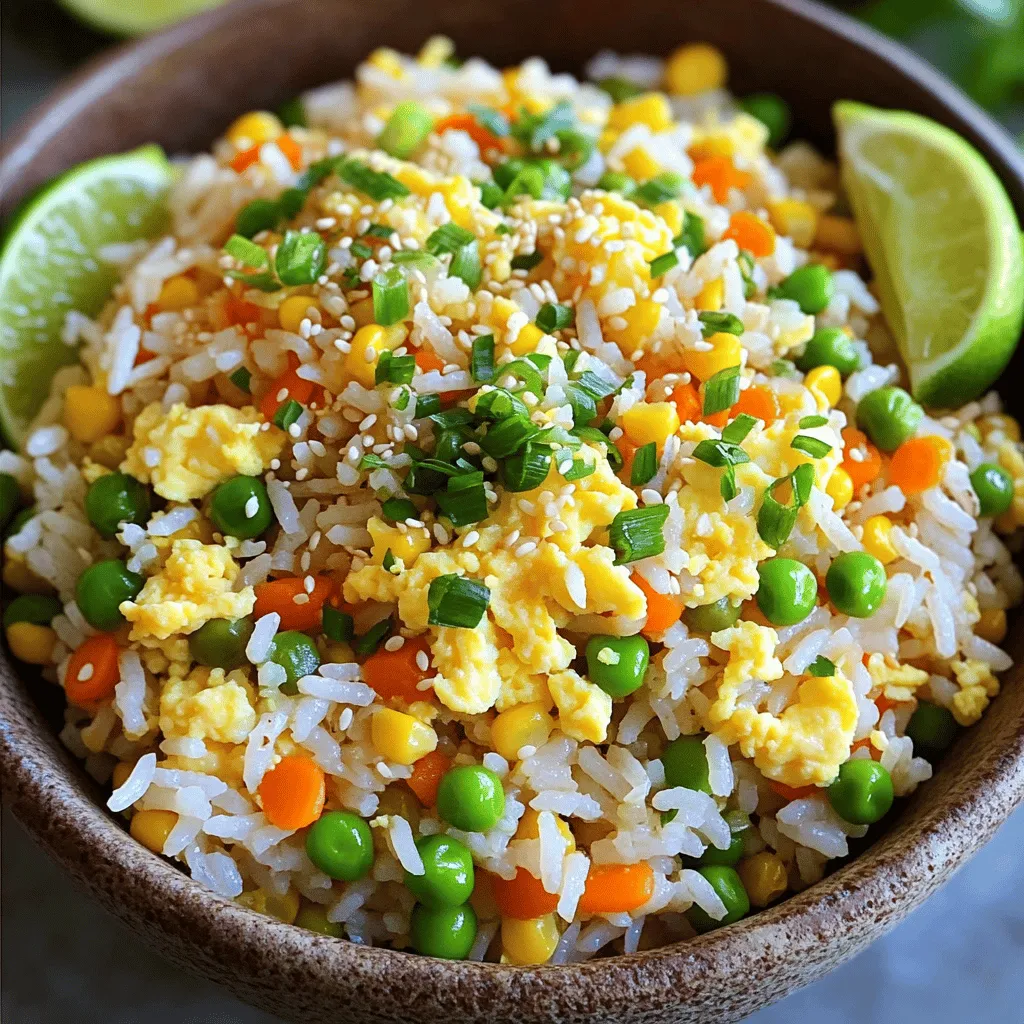
Looking for a fresh and easy meal? This Vegetarian Quinoa Salad packs flavor and nutrition in every bite. With simple

- 4 bone-in, skin-on chicken thighs - 4 tablespoons unsalted butter - 6 cloves garlic, minced - 1 lemon (zested and juiced) To make Garlic Butter Chicken Thighs, you need a few key items. First, the chicken thighs must have skin and bones. This adds flavor and helps keep the meat juicy. You will also need unsalted butter. This gives a rich taste without extra salt. Fresh garlic is a must for that strong flavor. Finally, a lemon adds bright notes to balance the dish. - 1 teaspoon dried thyme - 1 teaspoon dried rosemary - Salt and pepper to taste Herbs are essential for adding depth to the chicken. Thyme and rosemary work well together. They create a warm and earthy flavor. Don’t forget salt and pepper. These simple seasonings enhance all the other flavors. - Fresh parsley, chopped, for garnish For a finishing touch, use fresh parsley. Its bright green color makes the dish pop. Plus, it adds a fresh taste that complements the garlic butter. When you serve the chicken, sprinkle the parsley on top. This simple step makes your dish look professional and inviting. For the complete recipe, check out the [Full Recipe]. 1. First, preheat your oven to 400°F (200°C). This step warms the oven for even cooking. 2. Next, pat the chicken thighs dry with paper towels. This helps the skin crisp up nicely. 3. Season both sides of the chicken thighs with salt and pepper. Use enough to coat them well. 1. In an oven-safe skillet, melt 2 tablespoons of butter over medium heat. Watch it closely to prevent burning. 2. Once the butter melts, increase the heat to medium-high. Add the chicken thighs, skin-side down. 3. Sear the chicken for about 5-7 minutes. Look for a golden brown and crispy skin. 4. Flip the chicken and cook for another 2-3 minutes on the other side. This helps seal in the juices. 5. Reduce the heat back to medium. Add the minced garlic to the skillet, stirring for about 30 seconds. This brings out the garlic's flavor. 6. Pour in the lemon juice. Stir in the lemon zest, thyme, rosemary, and the rest of the butter. Let the butter melt and coat the chicken. 1. Carefully transfer the skillet to the preheated oven. Do this with oven mitts to avoid burns. 2. Bake for 25-30 minutes. Use a meat thermometer to check the internal temperature. 3. Ensure the chicken reaches 165°F (75°C). This is the safe temperature for cooked chicken. 4. Once cooked, remove the skillet from the oven. Let the chicken rest for 5 minutes before serving. For the full recipe, refer to the earlier section on ingredients and instructions. To get crispy skin on your chicken thighs, start by drying them well. Use paper towels to pat them dry. This step helps to remove moisture. Moisture keeps the skin from crisping up. Next, use the right searing technique. Heat your skillet over medium-high heat. Add a bit of butter and let it melt. Place the chicken thighs in the pan skin-side down. Sear them for about 5-7 minutes. Look for a golden-brown color. This step locks in flavor and ensures a crisp texture. Want to boost the flavor? Think about adding fresh herbs. You can try parsley, basil, or rosemary. Fresh herbs brighten the dish and add depth. You can also change the butter. Use garlic herb butter or even flavored olive oil. Each option brings a unique taste. These small swaps can take your meal to the next level. For side dishes, consider roasted veggies or mashed potatoes. They complement the chicken well. Serve the chicken on a big platter. Drizzle it with the garlic butter sauce. Add lemon wedges for a pop of color. Finish with a sprinkle of parsley for freshness. This not only looks great but makes for a tasty meal. For the full recipe, you can refer back to the start of this article. {{image_2}} To add a kick to your garlic butter chicken thighs, try making them spicy. You can easily do this by incorporating red pepper flakes into the butter. Start with half a teaspoon and adjust to your taste. If you want even more heat, add a splash of your favorite hot sauce. The heat from the sauce will blend well with the rich garlic flavor. Another fun way to change the taste is by experimenting with herbs. You can switch out thyme and rosemary for fresh basil or oregano. If you want a creamier sauce, mix in a bit of heavy cream while cooking. This will give you a rich, velvety sauce that pairs wonderfully with the chicken. You can also change how you cook the chicken. For a slow-cooked version, put the chicken thighs in a slow cooker. Add the garlic, butter, and seasonings. Cook on low for 4 to 6 hours. This method makes the chicken super tender. If you love grilling, this recipe works great on the grill, too! Just marinate the chicken in the garlic butter mixture for an hour. Then, grill over medium heat for about 6-8 minutes on each side. This gives you a smoky flavor that is perfect for summer cookouts. For the full recipe, check out the details above. To keep your garlic butter chicken thighs fresh, store them in the fridge. First, let them cool to room temperature. Then, place the chicken in an airtight container. This way, they stay juicy and tasty. You can keep them in the fridge for up to 3 days. If you want to eat them later, freezing is a great option. When you're ready to enjoy your leftovers, reheating is key. If you choose the oven, set it to 350°F (175°C). Place the chicken in a baking dish, cover it with foil, and heat for about 15-20 minutes. This keeps the chicken moist. If you use a microwave, heat on medium power for 2-3 minutes. Check often to avoid drying it out. Freezing is great for long-term storage. To freeze cooked chicken thighs, wrap each piece tightly in plastic wrap. Then, place them in a freezer bag. Make sure to remove as much air as possible. You can freeze them for up to 3 months. When you're ready to eat, thaw the chicken in the fridge overnight for the best results. This keeps the texture and flavor intact. To enhance the flavor of Garlic Butter Chicken Thighs, I suggest adding spices and herbs. You can try: - A pinch of smoked paprika for a slight smokiness. - Fresh thyme or rosemary for a more vibrant taste. - A dash of lemon pepper for a zesty kick. Mixing these ingredients into the butter and garlic makes a huge difference. Feel free to experiment with your favorite herbs, too! The safe internal temperature for chicken thighs is 165°F (75°C). Use a meat thermometer for accuracy. Insert it into the thickest part of the thigh, avoiding the bone. If it reads 165°F, your chicken is ready and safe to eat. Yes, you can use boneless chicken thighs! The cooking time will be shorter. Cook them for about 20-25 minutes in the oven. Check the internal temperature to ensure they reach 165°F. Garlic Butter Chicken Thighs pair well with many sides. Here are some popular choices: - Steamed broccoli or green beans for a healthy touch. - Mashed potatoes or rice to soak up the garlic butter. - A fresh salad for a light and crisp side. These sides enhance the meal and balance the rich flavors of the chicken. To check if your chicken is fully cooked, use a meat thermometer. Insert it into the thickest part of the thigh. Look for a reading of 165°F (75°C). If you don't have a thermometer, cut into the chicken and check for clear juices. No pink meat means it's done! In this post, you learned how to make garlic butter chicken thighs. We covered essential ingredients, like chicken, butter, garlic, and herbs. You also got step-by-step instructions for preparation and cooking, plus tips for crispy skin and flavor. Variations let you customize your dish. Remember, proper storage and reheating will keep your leftovers tasty. Enjoy this simple and delicious meal that impresses!

Garlic Butter Chicken Thighs Easy Family Dinner Recipe

Looking for a quick and tasty dinner? Garlic Butter Chicken Thighs are a winner! This easy family recipe uses just

To make Buffalo Chicken Pasta Bake, you need a mix of simple ingredients. This dish combines chicken, pasta, and bold flavors. You can check the Full Recipe for all the details. Here is the list of ingredients you will need: - 2 cups cooked penne pasta - 1 pound cooked chicken, shredded - 1 cup buffalo sauce - 1 cup cream cheese, softened - 1 cup shredded cheddar cheese - 1/2 cup blue cheese crumbles (optional) - 1/4 cup chopped green onions - 1 teaspoon garlic powder - 1 teaspoon onion powder - Salt and pepper to taste - 1/2 cup breadcrumbs (for topping) You can swap out some ingredients if needed: - Use rotisserie chicken instead of cooking your own. - Swap cream cheese for Greek yogurt for a lighter option. - Try different pasta shapes like macaroni or fusilli. - Change cheddar cheese to mozzarella or pepper jack for a twist. - For a dairy-free version, use nut cheese and coconut cream. These substitutions keep the dish tasty while fitting your needs. Enjoy cooking! 1. Start by preheating your oven to 350°F (175°C). This gets your oven ready for baking. 2. Take a large mixing bowl. Combine the shredded chicken with the buffalo sauce. Mix well until the chicken is coated. 3. Add the softened cream cheese to the bowl. Stir until it blends into a creamy mix. 4. Now, add the cooked penne pasta to the chicken mix. Sprinkle in garlic powder, onion powder, salt, and pepper. Mix everything until well combined. 5. Fold in the shredded cheddar cheese and half of the green onions. If you like blue cheese, add half of it too. 6. Grease a 9x13-inch baking dish. Transfer your pasta mix into this dish and spread it evenly. 7. In a small bowl, mix breadcrumbs with a tablespoon of melted butter. This helps the topping brown nicely. 8. Sprinkle the breadcrumb mix over the pasta evenly. 9. Top your dish with the remaining cheddar cheese and any blue cheese crumbles you want. 10. Place the dish in the preheated oven. Bake for 25-30 minutes. Look for melted cheese and a golden brown top. 11. Once done, take it out and let it sit for 5 minutes. Garnish with the remaining green onions before serving. - Use cooked chicken for a quick meal. Shredded rotisserie chicken works great. - Mix well to ensure flavors spread evenly. - Keep an eye on the bake. You want it hot and bubbly, not burnt. - Letting it sit helps it set. This makes serving easier. - For a twist, add veggies like spinach or bell peppers to your mix. You can find the Full Recipe to make this tasty Buffalo Chicken Pasta Bake. Enjoy your cooking! To make your Buffalo Chicken Pasta Bake great, avoid some common errors. First, do not overcook the pasta. You want it al dente since it will cook more in the oven. Also, make sure to mix the buffalo sauce well with the chicken. This step ensures every bite packs a punch. Finally, do not skip the resting time after baking. Letting it sit helps the flavors blend. For a creamy texture, use softened cream cheese. This makes mixing easier and smoother. You can also use a large bowl for mixing. This way, you avoid spills and get a better mix. Adding the cheese gradually gives you more control. It helps you see how cheesy you want your bake. Lastly, ensure even distribution of toppings. This gives each serving a delicious crust. If you prefer a milder taste, use less buffalo sauce. You can also add more cream cheese to balance the heat. For extra zing, try more garlic powder. It adds depth without making it too spicy. If you love heat, add some cayenne pepper or hot sauce. You can also mix different cheeses for varied flavor. Experimenting helps you find your perfect balance. For the complete recipe, check the [Full Recipe]. {{image_2}} You can change the cheese in this dish to fit your taste. For a creamier texture, try using mozzarella. It melts well and gives a nice stretch. If you love strong flavors, consider adding more blue cheese. Goat cheese offers a tangy twist, too. You can mix cheeses for depth. Just remember, each cheese changes the dish's flavor. While I love penne, many pasta shapes work here. You can use rotini for a fun twist. Shells hold the sauce well, making each bite tasty. For something different, try farfalle or fusilli. Just be sure to cook the pasta until al dente. This helps it hold its shape during baking. Buffalo sauce comes in various spice levels. If you prefer mild, look for sauces labeled as such. These offer flavor without the heat. If you like a kick, use hot sauce or extra spicy buffalo sauce. You can even mix sauces to find your perfect balance. Just remember, start with less sauce. You can always add more if you want it spicier. For the full recipe, check the [Full Recipe]. After you enjoy your Buffalo Chicken Pasta Bake, store the leftovers in an airtight container. Make sure it cools to room temperature first. This helps keep the flavors fresh. Place the container in the fridge. Your dish can last for about three to four days. To reheat, preheat your oven to 350°F (175°C). Place the pasta bake in a baking dish. Cover it with foil to prevent drying out. Heat for about 15-20 minutes until warmed through. You can also use a microwave. Just heat in short bursts, stirring in between to ensure even warmth. If you want to freeze the bake, do it before cooking. Use a freezer-safe dish. Cover tightly with plastic wrap and then foil. It can stay in the freezer for up to three months. When ready to bake, thaw it overnight in the fridge. Then, bake as directed in the Full Recipe. Enjoy your easy and tasty meal later! No, you should not use uncooked pasta. This dish needs cooked penne pasta for the best texture. Cooking the pasta first helps it absorb the flavors and stay tender. If you use uncooked pasta, it will not cook well in the oven. You risk ending up with hard pasta. Stick to the recipe and cook your pasta before mixing it in. Yes, you can make this dish ahead of time. Prepare the Buffalo Chicken Pasta Bake up to the baking step. Cover it tightly with plastic wrap or foil. You can store it in the fridge for up to two days. When you’re ready to bake it, just pop it in the oven. You may need to add a few extra minutes to the cooking time since it will be cold. Buffalo Chicken Pasta Bake pairs well with many sides. Here are some great options: - A simple green salad with ranch dressing - Steamed broccoli or green beans - Garlic bread or breadsticks - Coleslaw for a crunchy side - Fresh fruit for a sweet touch You can mix and match these sides to create a full meal. Enjoy experimenting with different flavors! For the complete recipe, check out the Full Recipe. We explored a complete recipe for Buffalo Chicken Pasta Bake, from ingredients to storage. You learned about key ingredients, how to prepare them, and oven steps for cooking. I shared tips to avoid mistakes and make your dish perfect. Plus, I offered variations to suit your taste and ways to store leftovers. Now, you can enjoy this easy and tasty meal whenever you want. Happy cooking!

Buffalo Chicken Pasta Bake Flavorful One-Pan Meal

Get ready for a delicious weeknight dinner with my Buffalo Chicken Pasta Bake! This one-pan meal brings the spicy goodness

- Fresh Peaches: Choose 4 ripe peaches. They should feel soft but not mushy. Sweet peaches are key for great flavor. - Basil Leaves: Use 1 cup of fresh, chopped basil leaves. The bright green color and aroma lift this dish. - Garlic Clove: A single clove, minced. Garlic adds a nice punch that balances the sweetness of the peaches. - Balsamic Vinegar: Just 1 tablespoon. This will add a tangy depth and enhance the flavors. - Honey: Use 1 tablespoon. Honey will bring out the natural sweetness of the peaches. - Olive Oil: 1 tablespoon of good quality olive oil. It adds richness and helps blend the flavors. - Salt and Pepper: Season to taste. These simple ingredients enhance all the other flavors. - Baguette: Get one baguette, sliced into 1/2 inch pieces. The toasted baguette serves as a crunchy base. - Optional Cheese Topping: Crumbled feta or goat cheese. This adds a creamy texture and extra flavor if you choose. This simple yet vibrant mix of ingredients creates a beautiful summer dish. For the full recipe, you can refer to the earlier section. Each ingredient plays a vital role in making this bruschetta a delightful treat. Prepping the Ingredients Start by gathering your ingredients. You need four ripe peaches, fresh basil, garlic, balsamic vinegar, honey, olive oil, salt, and pepper. Dice the peaches and chop the basil leaves. Mince one garlic clove finely. This mix gives a fresh taste to your bruschetta. Combining the Peach Mixture In a mixing bowl, combine the diced peaches, chopped basil, and minced garlic. Add one tablespoon each of balsamic vinegar and honey. Drizzle in one tablespoon of olive oil. Toss gently to coat all the ingredients. Season with salt and pepper to taste. Let this mixture rest for 10-15 minutes. This step allows the flavors to blend nicely. Toasting the Baguette Preheat your oven to 400°F (200°C). Slice the baguette into 1/2 inch pieces. Arrange these slices on a baking sheet in a single layer. Brush each slice lightly with olive oil. Toast the bread in the oven for 5-7 minutes. Look for a golden color and crisp edges. Once done, remove the bread and let it cool slightly. Spoon Peach and Basil Mixture Take the peach and basil mixture and spoon it generously onto each toasted baguette slice. The colorful topping makes each piece a delight. Adding Cheese (Optional) If you want, sprinkle crumbled feta or goat cheese on top of each slice. This adds a creamy texture and rich flavor. Presentation Tips Serve the bruschetta on a nice platter. You can garnish with extra basil leaves for a pop of color. This dish looks great and tastes even better. Enjoy this Peach and Basil Bruschetta as an appetizer or snack! You can find the full recipe in our guide. Choosing the Right Peaches To make great bruschetta, start with ripe peaches. Look for peaches that are soft but not mushy. They should smell sweet and fragrant. I recommend yellow peaches for their flavor. White peaches are also good but sweeter. Always wash the peaches before cutting them. Balancing Flavors with Honey and Balsamic Honey adds sweetness, while balsamic vinegar brings a tangy kick. Use both to balance the flavors in your bruschetta. Start with one tablespoon of each. Taste the mixture before serving. Adjust the honey or balsamic if needed. This step makes a big difference. Toasting Techniques for the Bread For the best toast, slice your baguette into half-inch pieces. Brush each slice with olive oil. Place them on a baking sheet in a single layer. Toast at 400°F (200°C) for 5-7 minutes. You want them golden and crisp. Keep an eye on them, so they don’t burn. Ideal Pairings with Beverages Peach and basil bruschetta pairs well with light drinks. Try it with white wine or sparkling water. A refreshing lemonade also works. These drinks enhance the flavors in the dish and keep it light. Best Occasions for Serving This bruschetta shines at summer gatherings. Serve it at picnics, barbecues, or casual dinners. It’s also perfect for brunch with friends. People love the fresh flavors, and it’s easy to make in large batches. Garnishing Ideas For a touch of flair, add extra basil leaves on top. You can also sprinkle crumbled feta or goat cheese for creaminess. A drizzle of balsamic glaze adds visual appeal too. These garnishes not only look good but also enhance the taste. For the complete recipe, check out the Full Recipe section. {{image_2}} Substituting Other Fruits If you can't find peaches, try using ripe nectarines or plums. These fruits add a nice sweetness and juicy texture. You can also try strawberries or mangoes for a fun twist. Herb Variations beyond Basil Basil shines in this recipe, but other herbs work too. Try mint for a refreshing taste. Cilantro can add a unique flair to your bruschetta. Each herb gives a different vibe to the dish. Different Bread Choices While a baguette is classic, feel free to mix it up. Use whole grain bread for added fiber. Ciabatta offers a chewy texture, while crostini brings an extra crunch. Each bread choice changes the bite and flavor. Gluten-Free Options To make this dish gluten-free, swap the baguette with gluten-free bread. Many brands offer great options that taste delicious. You won’t lose any flavor while still enjoying your bruschetta. Vegan Modifications To make this recipe vegan, skip the cheese or use a plant-based alternative. Nutritional yeast can give a cheesy taste without dairy. The rest of the ingredients are already vegan-friendly. Low-Sugar Adjustments If you want a low-sugar version, reduce the honey. You can also try using agave syrup or a sugar substitute. This way, you keep the dish tasty without too much sweetness. Explore the full recipe for more details on preparing this Peach and Basil Bruschetta. - Storing Leftover Peach Mixture: If you have leftover peach mixture, place it in an airtight container. This keeps it fresh for up to three days in your fridge. The flavors will deepen as it sits. Just be sure to give it a gentle stir before using again. - Keeping Toasted Baguette Fresh: Toasted baguette slices are best enjoyed fresh. If you must store them, let them cool completely. Then, place them in a paper bag, not plastic. This helps avoid sogginess. You can keep them at room temperature for a day. - Combining for Meal Prep: When prepping for a gathering, store the peach mixture and toasted baguette separately. This keeps the bread crispy. You can assemble them just before serving for the best taste and texture. - How to Best Reheat Toasted Baguette: If you need to reheat the toasted baguette, preheat your oven to 350°F (175°C). Place the slices on a baking sheet and warm them for about 5 minutes. This helps regain their crispness. - Avoiding Soggy Bruschetta: To avoid soggy bruschetta, do not add the peach mixture to the toasted bread until you are ready to serve. The moisture from the peaches can make the bread soft if it sits too long. Enjoy your bruschetta fresh for the best experience! For the complete recipe of Peach and Basil Bruschetta, visit the [Full Recipe]. How to make Peach and Basil Bruschetta? To make Peach and Basil Bruschetta, you start by gathering the ingredients. You need ripe peaches, fresh basil, garlic, balsamic vinegar, honey, olive oil, salt, pepper, and a baguette. First, preheat your oven to 400°F (200°C). Then, combine the diced peaches, chopped basil, minced garlic, balsamic vinegar, honey, and olive oil in a bowl. Toss everything gently. Season with salt and pepper. Let this mixture sit for about 10-15 minutes. While it sits, slice the baguette and brush each slice with olive oil. Toast these in the oven for 5-7 minutes until golden. Finally, spoon the peach mixture onto the toasted baguette slices. If you want, add crumbled feta or goat cheese on top. Serve it right away to enjoy the best flavors. What can I serve with Peach and Basil Bruschetta? Peach and Basil Bruschetta makes a great appetizer. It pairs well with light drinks like white wine or sparkling water. You can serve it at summer parties or picnics. For a complete meal, add a fresh salad or grilled veggies on the side. This dish also works well as a snack for movie nights. How long does the peach mixture last in the fridge? The peach mixture will stay fresh for about 2 days in the fridge. Store it in an airtight container to keep it from drying out. After two days, the peaches may become too soft, and the flavors might change. Can I use canned peaches? Yes, you can use canned peaches if fresh ones aren’t available. Just make sure to drain them well before using. Canned peaches can be softer, so handle them gently. They might also be sweeter, so adjust the honey in your recipe as needed. What’s the best way to ripen peaches quickly? If your peaches are hard, you can ripen them quickly. Place them in a paper bag at room temperature. Adding an apple or banana to the bag helps. These fruits release ethylene gas, speeding up the ripening process. Check them daily until they feel soft. This blog post showed how to make peach and basil bruschetta. We covered ingredients, step-by-step prep, and helpful tips. You learned about serving ideas and variations to fit any diet. Bruschetta is easy to prepare and fun to share. With fresh peaches, basil, and a little creativity, you can impress anyone. Try these ideas at your next gathering or enjoy them at home. Happy cooking!

Peach and Basil Bruschetta Flavorful Summer Delight

Ready to savor summer in a bite? Peach and Basil Bruschetta blends sweet and fresh flavors, making it an ideal

Creamy garlic mashed cauliflower is a rich and tasty dish. It has a smooth texture and a lovely garlic flavor. This recipe takes about 25 minutes to make and serves four people. You can find the full recipe above. - 1 large head of cauliflower, cut into florets - 4 cloves of garlic, peeled - 1/4 cup cream cheese, softened - 1/2 cup unsweetened almond milk (or regular milk) - 2 tablespoons butter - Salt and pepper to taste - Fresh chives or parsley for garnish These ingredients work together to create a creamy, flavorful dish. Cauliflower serves as the base, while garlic adds depth. Cream cheese makes it rich, and almond milk keeps it light. Butter enhances the flavor, while salt and pepper bring balance. Chives or parsley add a pop of color and taste. You can easily modify this recipe for different diets. If you're vegan, use plant-based cream cheese and butter. For a low-carb option, skip the cream cheese or use a cauliflower alternative. If you're lactose-free, almond milk is a great choice. Feel free to experiment! First, we need to prepare the cauliflower and garlic. Start by bringing a large pot of salted water to a boil. Use high heat to make it quick. While waiting, cut your cauliflower into bite-sized florets. Peel four cloves of garlic. Once the water boils, add the cauliflower and garlic to the pot. Cook them for about 10 to 12 minutes. They should be very tender when done. This step is key; it softens the veggies and helps develop flavor. Next, we blend and mash our cooked veggies. Drain the cauliflower and garlic using a colander. Return them to the pot to let excess moisture evaporate. Add in a quarter cup of softened cream cheese and two tablespoons of butter. This will make your dish rich and creamy. Now, take a potato masher or immersion blender and mash everything together. Blend until smooth. Gradually pour in half a cup of almond milk while mashing. This helps you reach your desired creaminess. Finally, it’s time for flavor! Season your mashed cauliflower with salt and pepper to taste. Mix well to ensure every bite is seasoned. If you want to elevate the dish, consider adding fresh chives or parsley. They add color and a fresh taste. Now, you're ready to serve your creamy garlic mashed cauliflower. For the full recipe, check the section above. Enjoy your delicious creation! To get the best texture, start with fresh cauliflower. Cut it into small, even florets. This helps it cook faster and more evenly. Boil it until it's very soft. This is key for a smooth mash. Use a potato masher or immersion blender to create that creamy texture. Add cream cheese and butter for richness. Pour in almond milk slowly while mashing. This controls the creaminess. Store your creamy garlic mashed cauliflower in an airtight container. Let it cool to room temperature before sealing. It stays fresh in the fridge for up to three days. To reheat, warm it on the stove over low heat. Add a splash of milk if it looks dry. Stir well to bring back that creamy texture. This dish pairs well with many main courses. Serve it with grilled chicken or beef for a hearty meal. It also complements roasted vegetables and fish nicely. For a fun twist, top it with crispy bacon or sautéed mushrooms. Fresh herbs like chives or parsley add a pop of color and flavor. Check out the Full Recipe for more tips! {{image_2}} You can boost flavor by adding cheese. Cream cheese gives a rich taste. For a sharper flavor, try grated Parmesan or cheddar. Melted cheese blends well, making the dish creamy and savory. Aim for about half a cup of cheese. Mix it in after mashing. Cheese adds depth and pairs nicely with garlic. Fresh herbs can change the whole dish. Try adding parsley, thyme, or rosemary. Each herb brings a new layer of flavor. For a bright taste, add chopped basil or dill. You can also use dried herbs if fresh ones aren't available. Adding herbs works best when you mix them in at the end. This way, they keep their color and taste. To make this dish vegan, swap cream cheese for a plant-based option. Cashew cream or vegan cream cheese works well. Use almond milk or any plant milk instead of regular milk. Replace butter with olive oil or vegan butter. These swaps keep the dish rich and creamy without dairy. You won't lose flavor, just the dairy! For the full recipe, check out the details above. After you make your creamy garlic mashed cauliflower, let it cool. Place it in an airtight container. You can store it in the fridge for up to 3 days. When you are ready to eat, check for any off smells or changes in texture. If it looks good, it’s still safe to enjoy! You can freeze creamy garlic mashed cauliflower for later. First, let it cool completely. Transfer it to a freezer-safe container. Leave some room at the top for expansion. Label the container with the date. It can last up to 3 months in the freezer. When you're ready to use it, move it to the fridge overnight to thaw. To reheat, use a microwave or a stove. If using the microwave, cover it with a damp paper towel. Heat in short bursts, stirring in between. If using the stove, add a splash of almond milk to keep it creamy. Heat over low heat and stir often. This helps bring back the rich, smooth texture. For the best flavor, always taste before serving. Adjust seasoning if needed. Enjoy your creamy garlic mashed cauliflower again! Yes, you can use frozen cauliflower. It saves time and is easy to find. Just cook it until tender, like you would with fresh. Do not forget to drain it well to avoid watery mashed cauliflower. Frozen cauliflower works great in this creamy garlic mashed cauliflower recipe. You can make this dish ahead of time. Simply prepare it fully and let it cool. Store it in an airtight container in the fridge for up to three days. When ready to serve, reheat slowly in a pot over low heat. You might need to add a splash of milk to keep it creamy. You can add many seasonings to enhance the taste. Try adding a pinch of nutmeg for warmth. A squeeze of lemon juice gives a nice zing. Fresh herbs like thyme or rosemary add depth. You can also mix in some grated cheese for richness. Feel free to get creative with your flavors! Creamy garlic mashed cauliflower offers a tasty twist on a classic dish. We covered the key ingredients and provided easy steps for making it at home. You can also explore variations and storage tips to fit your needs. Remember, you can customize this dish with cheese, herbs, or vegan options. Enjoy your creamy creation, and don’t hesitate to try new flavors. Your kitchen can be a fun place for new ideas and delicious meals.

Creamy Garlic Mashed Cauliflower Rich and Flavorful Dish

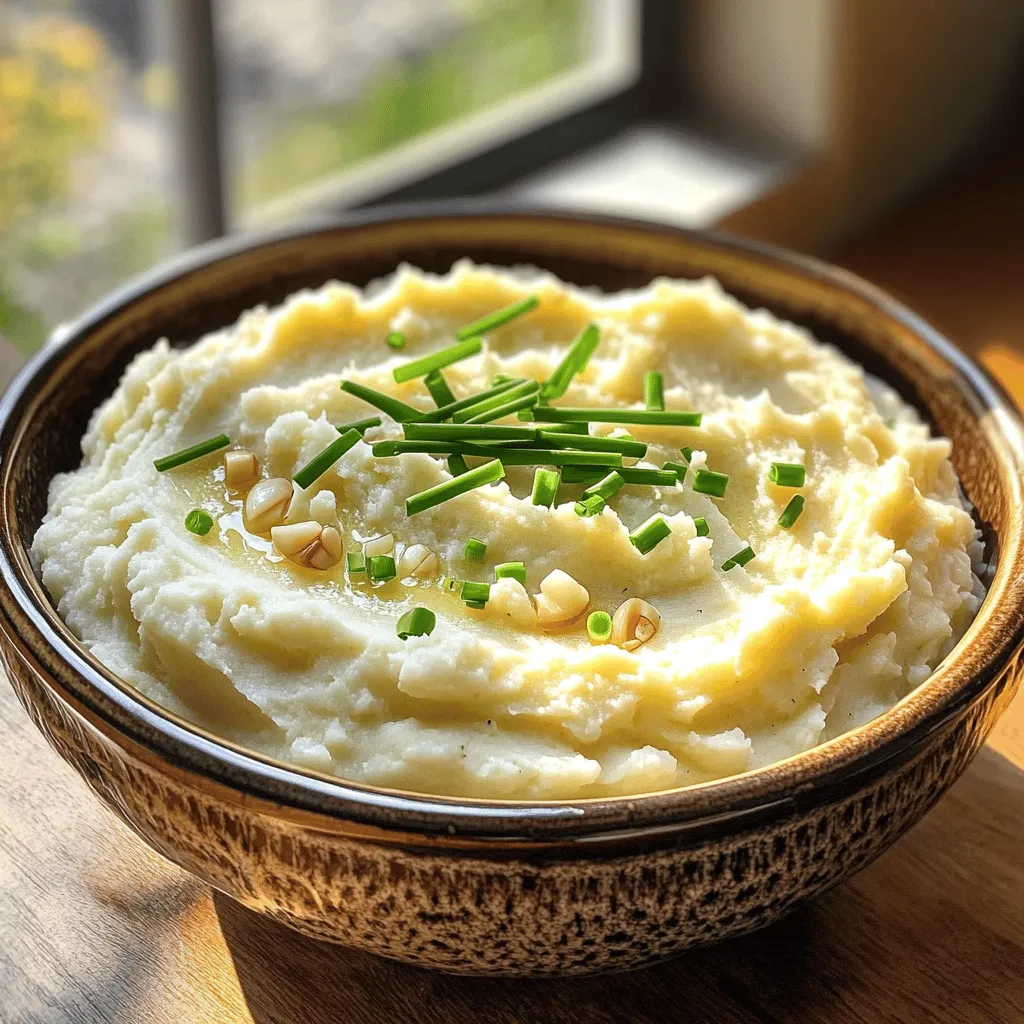
Are you ready to transform your dinner with a dish that’s both simple and delicious? Creamy Garlic Mashed Cauliflower offers

- 2 pounds chicken wings - 1 tablespoon baking powder - 1 teaspoon salt - 1 teaspoon black pepper - 1 teaspoon garlic powder - 1 teaspoon onion powder - ½ teaspoon paprika - ½ teaspoon smoked paprika (optional) - ½ cup unsalted butter - 4 cloves garlic, minced - 2 tablespoons honey - 2 tablespoons lemon juice - Fresh parsley, chopped (for garnish) Each serving of these crispy baked chicken wings contains about: - Calories: 400 - Protein: 25 grams - Fat: 30 grams - Carbohydrates: 6 grams The crispy baked chicken wings are not just tasty; they are also easy to make. You can enjoy them guilt-free, knowing you followed a simple, healthy recipe. The zesty garlic sauce adds a rich flavor that makes these wings stand out. You can find the full recipe in the sections above. 1. Pat chicken wings dry Start by patting the chicken wings dry with paper towels. This step is key for crispy wings. Removing moisture allows the skin to crisp up in the oven. 2. Prepare seasoning mix In a large bowl, add the baking powder, salt, black pepper, garlic powder, onion powder, paprika, and smoked paprika. Toss these spices together with the wings until they coat evenly. This mix adds great flavor and helps with crispiness. 1. Arrange wings on the wire rack Preheat your oven to 425°F (220°C). Line a baking sheet with aluminum foil and place a wire rack on top. Arrange the seasoned wings in a single layer on the rack. Make sure they do not touch. This helps air circulate for even cooking. 2. Baking time and temperature guidelines Bake the wings for 40-45 minutes. Flip them halfway through cooking. Look for a golden color and crispy skin. If you want extra crunch, broil them for 2-3 minutes at the end. 1. Preparing the butter and garlic mixture While the wings bake, melt the butter in a small saucepan over medium heat. Add the minced garlic and cook for 1-2 minutes. You want the garlic to be fragrant but not burnt. 2. Combining all sauce ingredients Stir in honey and lemon juice into the butter and garlic mix. Bring the mixture to a simmer, cooking for an additional 2-3 minutes. This will thicken the sauce a bit. Remove it from heat and set it aside until the wings are ready. Make sure to check the [Full Recipe] for all the detailed steps. Enjoy your cooking! To get crispy chicken wings, start by drying them well. Moisture makes wings soggy. Use paper towels to pat them dry. This simple step is key for that perfect crunch. Next, use baking powder. It helps create a crunchy outer layer. The baking powder raises the pH level of the skin. This allows it to brown better. Just one tablespoon mixed with your seasonings is all you need. Flipping the wings during baking is important. About halfway through baking, turn them over. This ensures even cooking and crispiness on both sides. For extra texture, broil the wings at the end. Set your oven to broil and place the wings under the heat for 2-3 minutes. Watch closely to prevent burning. This step gives a nice, crispy finish. When serving, presentation matters. I like to arrange the crispy wings on a large platter. Add lemon wedges around them for a pop of color. A small bowl of zesty garlic sauce on the side makes it fun for dipping. Pair your wings with classic dips, like ranch or blue cheese. You can also try different sauces, like barbecue or buffalo. Each adds its own unique flavor. For the full recipe, check out Crispy Baked Chicken Wings with Zesty Garlic Sauce. {{image_2}} You can change the flavor of your crispy baked chicken wings easily. Try these seasoning mixes for a twist: - Cajun: Add 1 tablespoon of Cajun seasoning for a spicy kick. - Lemon Pepper: Replace paprika with lemon pepper for a zesty taste. - Herb Blend: Use Italian herbs like oregano and thyme for a fresh flavor. - Smoky BBQ: Mix in your favorite BBQ seasoning for a sweet and smoky profile. Each seasoning gives a new life to the same base. You can mix and match these to fit your mood. Sauces can transform your wings from good to great. Here are some tasty options: - Buffalo Sauce: Use a classic spicy Buffalo sauce for a kick. - BBQ Sauce: Sweet BBQ sauce makes for a fun, sticky treat. - Honey Garlic Sauce: Mix honey with soy sauce for a sweet option. - Teriyaki Sauce: This gives a sweet and savory flavor that pairs well with chicken. Feel free to coat your wings in any sauce after baking. It adds flavor and fun! You can also change how you cook your wings for variety. Here’s how: - Air Fryer: Preheat your air fryer to 400°F (200°C). Cook wings for about 25-30 minutes, shaking halfway for crispiness. This method is fast and easy! - Grilling: Preheat your grill to medium heat. Grill wings for about 20 minutes, turning often. This gives a smoky flavor and nice grill marks. You can enjoy crispy wings using these different methods. Each way adds its own unique taste and texture to the dish. To store leftover wings, first let them cool. Place them in an airtight container. This keeps them fresh for up to three days. You can also wrap them tightly in aluminum foil or plastic wrap. Make sure they are sealed well to avoid drying out. To reheat wings, the oven is your best friend. Preheat your oven to 350°F (175°C). Spread the wings on a baking sheet. Bake them for about 10-15 minutes. This helps keep the wings crispy. You can also use an air fryer. Set it to 350°F (175°C) and heat for 5-7 minutes for crispy wings. Yes, you can freeze cooked wings! Let them cool completely. Place them in a freezer bag or container. Remove as much air as possible. They can last up to three months in the freezer. When you're ready to eat, thaw them overnight in the fridge before reheating. How do I make wings extra crispy? To make wings extra crispy, dry them well before cooking. Use paper towels to remove moisture. Adding baking powder helps with crispiness too. The baking powder raises the pH level of the wings. This makes them crisp up nicely in the oven. Can I use frozen chicken wings? Yes, you can use frozen chicken wings. Just make sure to thaw them first. Thaw them overnight in the fridge. This helps them cook evenly and get crispy. You may need to add a few more minutes to the cooking time. What are the best sides to serve with chicken wings? Great sides for chicken wings include celery sticks and carrot sticks. You can also serve them with a fresh salad. Potato wedges or fries make a tasty pairing too. Don't forget some ranch or blue cheese dressing for dipping! How long do leftover wings last in the fridge? Leftover wings last about 3 to 4 days in the fridge. Store them in an airtight container for best results. Reheat wings in the oven to keep them crispy. Can I bake wings without baking powder? You can bake wings without baking powder, but they may not be as crispy. Baking powder helps create a crust. If you skip it, dry the wings well and bake them at a higher temperature. How to adjust cooking time for larger wings? For larger wings, you will need to increase the cooking time. Add about 5 to 10 more minutes to the baking time. Always check that the internal temperature reaches 165°F (74°C). Should I toss wings in sauce before or after baking? It’s best to toss wings in sauce after baking. This keeps the wings crispy. If you coat them before, they may get soggy. You can serve extra sauce on the side for dipping as well. This post has shown you how to make crispy baked chicken wings with a zesty garlic sauce. We covered the ingredients, step-by-step prep and cooking instructions, plus tips for the perfect crispiness. You learned about storage options and variations if you want to switch flavors. Now, you have all the tools you need to create delicious wings at home. Enjoy experimenting with different sauces and serving ideas to make this dish your own!

Crispy Baked Chicken Wings Tasty and Easy Recipe

Craving crispy chicken wings that are both tasty and easy to make? You’ve come to the right place! In this

Older posts
Newer posts
← Previous Page1 … Page47 Page48 Page49 … Page79 Next →

dsad

© 2025 pureeatsnow • Built with GeneratePress

Our Policies

  • Copyright Policy
  • Cookie Policy
  • GDPR Policy
  • Privacy Policy
  • Disclaimer
  • Terms Of Use

More Information

  • Home
  • About
  • Contact
  • Appetizers
  • Dessert
  • Dinner
  • Drinks
©2025, pureeatsnow About Back To Top