Skip to content
DisclaimerTerms Of UseGDPR PolicyCookie Policy

pureeatsnow

  • Home
  • Drinks
  • Appetizers
  • Dinner
  • Dessert
  • About
  • Contact
  • Privacy Policy
DisclaimerTerms Of UseGDPR PolicyCookie Policy

Rachel

To create a delicious Simple Chicken Pho, you need a few key items. Here’s what you will need: - 1 lb chicken breast, thinly sliced - 8 cups chicken broth - 1 onion, sliced - 1 piece ginger (2 inches), sliced - 2 star anise - 1 cinnamon stick - 3 cloves - 2 tablespoons fish sauce - 1 tablespoon soy sauce - 1 package rice noodles (8 oz) These ingredients build the base of your pho, giving it rich flavor and warmth. Garnishes add a fresh kick to your pho. Here are some great options: - Fresh basil leaves - Fresh cilantro leaves - Bean sprouts - Lime wedges - Sliced jalapeños (optional) These toppings not only look pretty but also add layers of flavor to each bite. If you have dietary needs, don't worry. You can swap some ingredients. For a lighter meal, use chicken thighs instead of breasts. If you want a vegetarian option, replace chicken broth with vegetable broth and use tofu or mushrooms. You can also skip fish sauce for a vegan pho. These swaps keep the spirit of pho alive while catering to different diets. This recipe is flexible and allows you to make it yours! For the full recipe, check the details above. To start, you need a good broth. Pour 8 cups of chicken broth into a large pot. Heat it over medium heat until it starts to boil. Add the sliced onion, ginger, star anise, cinnamon stick, and cloves. This adds a rich flavor. Let it simmer for 15 minutes. This time helps all the spices mix together well. After 15 minutes, strain the broth to remove the spices. You want a clear broth, so return it to the pot. Now, we’ll cook the chicken and noodles. First, add 2 tablespoons of fish sauce and 1 tablespoon of soy sauce to the broth. Stir it gently and taste it. Adjust the salt if needed. Next, add the thinly sliced chicken breast to the pot. Cook it for about 5 to 7 minutes. The chicken should be tender and fully cooked. While the chicken cooks, prepare the rice noodles according to the package instructions. After they are done, drain them and set them aside. Now it’s time to serve! In a bowl, place a serving of the cooked rice noodles. Use a ladle to pour the hot broth with chicken over the noodles. This makes the noodles warm and flavorful. Now for the fun part: garnishing! Add fresh basil leaves, cilantro, and bean sprouts on top. You can serve lime wedges and sliced jalapeños on the side for extra kick. Enjoy your meal! For the full recipe, check the details above! To make the best broth, use fresh ingredients. Start with good-quality chicken broth. I like to use homemade broth if I can. The flavors deepen when you simmer it. Adding onion and ginger boosts the taste. Don't rush this step. Let the broth simmer for at least 15 minutes. Strain it well for a clear soup. This keeps your pho looking nice and clean. One common mistake is not simmering the broth long enough. This can leave your broth weak. Another mistake is adding too much salt too early. Taste as you go to avoid this. Make sure to use the right amount of spices. Too many spices can drown the chicken flavor. Lastly, don’t skip the fresh herbs. They add a pop of flavor that is key to pho. If you want a quick meal, use a pressure cooker. It speeds up the broth-making process. You can also use pre-cooked rotisserie chicken. Just shred it and add it to the broth. If you need to save time, soak the rice noodles in hot water instead of boiling them. This cuts down on cooking time. For a speedy dish, try using store-bought broth. It’s a great shortcut when you’re in a hurry. For the full recipe, check out the complete guide. {{image_2}} You can make a tasty vegetarian pho by swapping chicken for tofu. Use vegetable broth instead of chicken broth. Add mushrooms for a meaty texture. Fresh herbs like basil and cilantro still shine in this dish. You can even use soy sauce to add depth. This change keeps all the comfort while making it plant-based. Chicken pho changes by region in Vietnam. In the north, it has a clear broth and fewer spices. Southern versions are richer and often sweeter, adding more herbs and lime. Each region uses different noodles too. You can choose your style based on what you like best or try them all! You can switch out some ingredients to change the flavor. If you want a spicy kick, use more jalapeños or add chili oil. For a smoky taste, try adding smoked paprika. You might also replace rice noodles with egg noodles for a different texture. These swaps keep the dish fresh and exciting. For the full recipe, check out the Herbal Delight Chicken Pho. To keep your leftover pho fresh, store it in an airtight container. Place the broth and noodles in separate containers. This keeps them from getting soggy. If you have herbs or bean sprouts, store them in a bag. They stay crisp this way. When reheating, add the noodles to the broth. Heat the broth over medium heat until it’s hot. Stir gently so the noodles warm evenly. You can also use a microwave. Heat in short bursts, stirring in between. This keeps the noodles from becoming mushy. You can freeze the broth for later use. Let it cool before pouring it into freezer bags. Squeeze out the air before sealing. For noodles, freeze them cooked or uncooked. If cooked, they should be tossed with a little oil. This helps prevent sticking. When you're ready to use them, thaw in the fridge overnight. Then reheat as needed. For the best taste, use frozen broth within three months. I recommend using chicken breast for Simple Chicken Pho. It cooks quickly and stays tender. You can also use bone-in chicken for more flavor. The bones add richness to the broth. If you prefer dark meat, thighs work well too. Just adjust the cooking time to ensure it cooks through. Simple Chicken Pho lasts about three to four days in the fridge. Make sure to store the broth and noodles separately. This keeps the noodles from getting mushy. Use an airtight container for best results. If you notice any changes in smell or color, it’s best to toss it. Yes, you can prepare the broth in advance. It actually tastes better after a day. Just cool it down and place it in the fridge. You can also freeze the broth for up to three months. When you’re ready to eat, simply reheat and add fresh chicken and noodles. For the full recipe, check out the details above. In this post, I covered how to make simple chicken pho. We explored essential ingredients, cooking steps, and tips for great flavor. I shared options for different diets and variations to try. You learned how to store leftovers, reheat wisely, and freeze for later. Pho is versatile and fun to make. Don’t be afraid to experiment with flavors. Enjoy your cooking and share your best bowls with others!

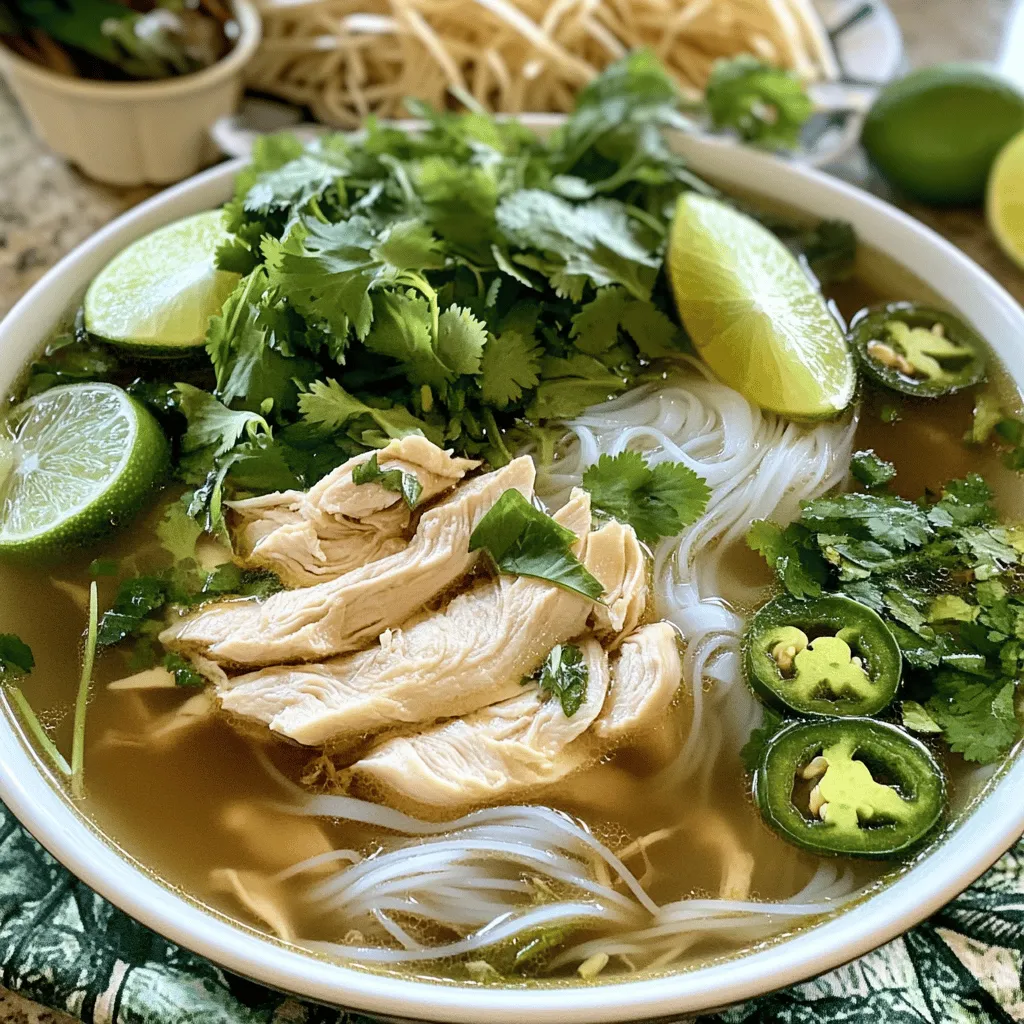
Simple Chicken Pho Easy Recipe for Comfort Food

If you crave a warm, soothing bowl of soup, Simple Chicken Pho is for you! This easy recipe delivers comfort

To make Peanut Butter Fluff, you need just a few simple items: - 1 cup creamy peanut butter - 1 cup marshmallow fluff - 1/2 cup powdered sugar - 1 teaspoon vanilla extract - 1/4 cup heavy cream (or coconut cream for a lighter option) - A pinch of salt - Chopped peanuts or chocolate chips for garnish If you want to switch things up, here are great alternatives: - Use crunchy peanut butter for added texture. - Swap marshmallow fluff with whipped cream for a lighter version. - For a vegan option, replace heavy cream with coconut cream. - Use maple syrup instead of powdered sugar for a natural sweetness. Each ingredient plays a special role in this dessert: - Creamy peanut butter gives a rich, nutty flavor. - Marshmallow fluff adds sweetness and a light texture. - Powdered sugar helps balance the flavors and sweeten the mix. - Vanilla extract enhances the overall taste with a warm note. - Heavy cream makes the fluff light and airy. - Salt brings out the sweetness and rounds out the flavors. This Peanut Butter Fluff is not just easy to make but also fun to enjoy. You can customize it based on your taste! For the full recipe, check the details above. To start, gather all your ingredients for Peanut Butter Fluff. You need: - 1 cup creamy peanut butter - 1 cup marshmallow fluff - 1/2 cup powdered sugar - 1 teaspoon vanilla extract - 1/4 cup heavy cream (or coconut cream for a lighter option) - A pinch of salt - Chopped peanuts or chocolate chips for garnish First, take a large mixing bowl. Combine the creamy peanut butter, marshmallow fluff, and powdered sugar. This mix is the heart of your fluff. Next, add the vanilla extract and the pinch of salt. These flavors make the dish taste great. Now, it's time to blend. Use a hand mixer or a whisk. Mix until everything is smooth and creamy. This should take about two minutes. In a separate bowl, whip the heavy cream. Keep mixing until stiff peaks form. This usually takes 2-3 minutes. After whipping, gently fold the whipped cream into the peanut butter mix. Use a spatula and be careful not to deflate the whipped cream. You want it light and fluffy. Once combined, transfer your fluff to a serving dish or an airtight container. Chill in the refrigerator for at least 30 minutes. This helps the flavors come together. When ready to serve, spoon the fluff into dessert cups. For a fun touch, garnish each cup with chopped peanuts or a sprinkle of chocolate chips. You can also add a drizzle of honey on the side. This sweet touch makes it even better. Serve with graham crackers or fresh fruit for dipping. Enjoy your tasty treat! To get the best fluffiness, use cold heavy cream. Cold cream whips up faster and holds its shape well. Whip the cream until it forms stiff peaks. This means the cream stands tall and doesn’t droop. When mixing, be gentle. Fold the whipped cream into the peanut butter mix slowly. This keeps the air in the whipped cream, making your fluff light and airy. Peanut Butter Fluff pairs well with many treats. Try serving it in dessert cups. Top each cup with chopped peanuts or chocolate chips. A drizzle of honey gives it a sweet touch. This dessert also shines when served with graham crackers or fresh fruit. Apple slices or banana chunks are fun options for dipping. You can even spread it between cookies for a tasty treat. Avoid over-mixing the fluff. It can turn dense if you stir too much. Also, don’t skip chilling it. Letting it chill for 30 minutes helps the flavors blend. If you want it sweeter, add powdered sugar, but do so slowly. Taste as you go to find the right balance. Lastly, use a clean bowl for whipping cream. Any oils or residues can affect how it whips. For more detailed steps, check the Full Recipe. {{image_2}} To make a rich chocolate peanut butter fluff, add cocoa powder. Start with 1/4 cup of unsweetened cocoa powder. Mix it in with the peanut butter, marshmallow fluff, and sugar. This gives your fluff a deep chocolate flavor. You can also fold in mini chocolate chips for extra texture. If you want a nut-free version, try sun butter or soy nut butter. These alternatives work well and keep the same creamy texture. Just swap the peanut butter for your choice. The rest of the recipe stays the same. You can still enjoy a tasty fluff without the nuts! For fun seasonal flavors, add spices or fruit. In fall, mix in pumpkin spice for a cozy flavor. In summer, fold in crushed strawberries or blueberries. This adds a fresh twist and bright color. Get creative with flavors to match the seasons and your mood! If you want to try making the classic version, check out the Full Recipe for Peanut Butter Fluff Delight. It’s a simple and tasty dessert treat! To keep your peanut butter fluff fresh, store it in an airtight container. This simple step prevents the fluff from absorbing other smells in the fridge. It also keeps the texture smooth and creamy. You can chill it for up to 5 days. Make sure to cover the container tightly. You can freeze peanut butter fluff if you want to save some for later. Scoop it into a freezer-safe container. Leave a little space at the top for expansion, as it may puff up. It can last for about 2-3 months in the freezer. To enjoy it again, thaw it in the fridge overnight before serving. Peanut butter fluff has a decent shelf life. If stored well in the fridge, it lasts about 5 days. If frozen, use it within 3 months for the best taste. Always check for any off smells or changes in texture before serving. If it looks or smells funny, it’s best to toss it. Enjoy this simple dessert treat fresh for the best experience! For the full recipe, check out the earlier section. To make Peanut Butter Fluff from scratch, you need five main ingredients: creamy peanut butter, marshmallow fluff, powdered sugar, vanilla extract, and heavy cream. First, mix the peanut butter, marshmallow fluff, and powdered sugar in a bowl. Then, add vanilla and a pinch of salt. Blend until smooth. In another bowl, whip the heavy cream until it forms stiff peaks. Gently fold the whipped cream into the peanut butter mix. This keeps the fluff light and airy. Chill it for at least 30 minutes before serving. You can find the full recipe above for all the details! If you need a substitute for marshmallow fluff, you can use whipped cream. You can also try making your own fluff with sugar, corn syrup, and egg whites. Another option is to use cream cheese mixed with powdered sugar. This gives a different taste but still works well. Each option brings a unique flavor and texture to the dessert. Yes, you can make Peanut Butter Fluff ahead of time! It stores well in the fridge. Make it a day in advance to save time. Just cover it tightly with plastic wrap or in an airtight container. This helps keep it fresh. The flavors will blend and taste amazing after chilling. In summary, this blog post guides you through making Peanut Butter Fluff. You learned about key ingredients, substitutions, and step-by-step instructions for a perfect blend. We shared tips for fluffiness, common mistakes to avoid, and different variations to enjoy. With proper storage techniques, you can keep your treats fresh. Remember that making this delicious fluff can be easy and fun! Try experimenting with flavors and share your creations. Enjoy your time in the kitchen!

Peanut Butter Fluff Simple and Tasty Dessert Treat

Craving a dessert that’s simple, tasty, and a little nostalgic? Look no further than Peanut Butter Fluff! This creamy treat

- 1 cup black lentils (urad dal) - 1/4 cup kidney beans (rajma) - 2 cups water - 1 medium onion, finely chopped - 2 tomatoes, pureed - 1 tablespoon ginger-garlic paste - 2 green chilies, slit - 1 teaspoon cumin seeds - 1 teaspoon garam masala - 1/2 teaspoon turmeric powder - 1 teaspoon red chili powder - 1 tablespoon butter - 1/4 cup heavy cream (or coconut cream) - Salt to taste - Fresh cilantro, chopped (for garnish) - Slow cooker - Measuring cups and spoons - Sauté pan - Blender (for pureeing tomatoes) - Additional spices (like coriander powder) - Vegan substitutions for cream - Fresh herbs for garnishing Dal Makhani has rich flavors. To make it, you need black lentils and kidney beans. Soaking them overnight helps soften them. The tomatoes and spices create a deep taste. I love adding cream for a smooth finish, but coconut cream works well too. You will need a slow cooker, which makes this dish easy. I recommend a sauté pan for cooking the onions and spices first. This step adds a lovely depth to the dish. You can get creative with optional ingredients. Adding extra spices can enhance the flavor. Fresh herbs brighten the dish and make it look nice. For the full recipe, check out the complete guide. Let your flavors shine through, and enjoy the process! - Soak black lentils and kidney beans overnight. - Drain and rinse soaked lentils and beans. - Combine lentils and beans with water in the slow cooker. - Sauté cumin seeds and onions in butter, then add ginger-garlic paste. - Incorporate pureed tomatoes and spices; cook until mixed. - Transfer the mixture to the slow cooker and add garam masala. - Cook on low for 6-8 hours. - Cook on high for 4 hours. - Final simmering after adding cream for 15-20 minutes. Using a slow cooker makes this dish easy and rewarding. You can prepare it in advance and let it cook while you relax. This is how I make flavorful dal makhani. I always soak the lentils and beans overnight. It helps them cook better and softer. After soaking, I drain and rinse them to remove any dirt. Next, I place the lentils and beans in the slow cooker. I add water, usually about two cups, to keep them moist. In a pan, I melt some butter and add cumin seeds. I let them sizzle, which brings out their flavor. Then, I add chopped onions and cook them until golden brown. I also stir in ginger-garlic paste. This step adds depth to the dish. After that, I pour in pureed tomatoes and add spices like turmeric and red chili powder. I let it cook for a few minutes to blend the flavors. Once the mixture is ready, I transfer it to the slow cooker. I mix in garam masala, which is essential for that signature taste. Cover the cooker and set it. You can choose low heat for 6-8 hours or high heat for 4 hours. After cooking, I finish it off with cream for a rich texture. I let it simmer for an extra 15-20 minutes. This final step makes the dal creamy and smooth. For the full recipe, check the section above! - Stir occasionally during cooking. This helps mix flavors well. - Adjust water for desired consistency. You may want it thicker or thinner. - Use fresh ingredients for better flavor. Fresh herbs and spices make a big difference. - Add additional spices for depth. Try a pinch of coriander or cumin for more layers. - Use smoked spices for a different taste profile. Smoked paprika can add a nice twist. - Incorporate a tadka (tempering) before serving. Heat oil and fry spices for a burst of flavor. - Best served with naan or basmati rice. Both soak up the rich sauce nicely. - Garnish with extra cream and cilantro. This adds color and a creamy touch. - Pair with pickles and yogurt dips. They balance the richness of the dal well. You can find the Full Recipe to make this delicious dish at home. {{image_2}} You can easily adapt this recipe for different diets. For a vegan version, use coconut cream instead of heavy cream. This change keeps the dish rich and creamy while being plant-based. If you need gluten-free options, this recipe is already gluten-free. Just ensure all spices and ingredients you choose are certified gluten-free. Feel free to switch up the lentils. While black lentils (urad dal) are traditional, you can use green or red lentils. Each type brings its own flavor and texture. If you want to change the fat, substitute butter with ghee or oil. Ghee adds a nutty taste, while oil is a lighter option. Dal Makhani varies by region in India. North Indian-style often features a rich, creamy texture. Punjabi-style might be thicker and spicier. You can add unique regional spices, like kasuri methi, to enhance the flavor. This dried fenugreek leaves add a special touch that makes your dal stand out. You can store leftover dal makhani in the fridge. Use an airtight container to keep it fresh. It will last for up to 5 days. Before placing it in the fridge, let it cool down. This helps prevent moisture buildup. If you want to save dal makhani for later, freezing is a great option. Freeze it in portioned containers. You can keep it frozen for up to 3 months. When you want to eat it, thaw the container in the fridge overnight. Then, reheat it slowly on the stovetop for the best taste. When reheating dal makhani, check if it has thickened. If it has, stir in a bit of water or cream to loosen it up. You can reheat it in the microwave or on the stovetop. Both methods work well. Just be sure to stir it occasionally to heat evenly. Dal Makhani is a rich and creamy dish from North India. It uses black lentils and kidney beans, cooked slowly to blend flavors. The dish has roots in Punjabi cuisine and often appears in Indian meals. Traditionally, cooks prepare it on a low flame for hours, allowing the lentils to soften. This slow cooking gives it a unique, deep flavor that warms the heart. With a touch of cream and spices, it creates a delightful taste experience. Yes, you can make Dal Makhani without a slow cooker. If you don't have one, use a stovetop or a pressure cooker. For stovetop cooking, follow the same steps but cook over medium heat. You will need to stir often and add water as it cooks. If using a pressure cooker, cook for about 15-20 minutes after the first whistle. This method speeds up cooking while still making the dish tasty. To spice up your Dal Makhani, add more green chilies or red chili powder. Start with half a teaspoon more and taste as you go. You can also include spices like cayenne or black pepper for extra heat. If you enjoy bold flavors, consider adding a pinch of smoked paprika for depth. Remember to balance the heat with cream or yogurt to keep it creamy and smooth. In this post, we covered the key ingredients and steps to make Dal Makhani. You learned how to prepare and cook this rich dish using lentils and beans, along with spices and cream. We discussed tips for flavor, possible variations, and storage methods. Cooking can be fun and creative, especially when you try different ingredients. Don't hesitate to adjust the recipe to fit your taste. Enjoy your time in the kitchen and share this dish with friends and family!

Slow Cooker Dal Makhani Flavorful and Easy Recipe

Are you ready to create a delightful Slow Cooker Dal Makhani that warms the soul? This rich and creamy dish

To make Baked French Onion Gnocchi, gather these simple ingredients. Each one adds to the rich flavor of this dish. - 1 pound potato gnocchi - 3 large onions, thinly sliced - 3 tablespoons olive oil - 2 tablespoons unsalted butter - 4 cloves garlic, minced - 1 teaspoon thyme (fresh or dried) - 1 teaspoon rosemary (fresh or dried) - 2 cups vegetable broth - 1 cup heavy cream - 1 ½ cups Gruyère cheese, shredded - ½ cup Parmesan cheese, grated - Salt and pepper, to taste - Fresh parsley, chopped (for garnish) Each ingredient plays a key role. The potato gnocchi gives the dish a soft base. Onions bring that sweet, deep flavor. Olive oil and butter help caramelize the onions, making them golden and tasty. Garlic adds a nice punch, while thyme and rosemary provide herbal notes. Vegetable broth and heavy cream create a creamy sauce that binds everything together. Gruyère and Parmesan add a cheesy richness that melts beautifully. Finally, salt and pepper enhance the taste, while fresh parsley gives a pop of color and freshness. This blend of flavors makes Baked French Onion Gnocchi a comforting and savory delight. For the full recipe, check the earlier section. 1. Preheat your oven to 375°F (190°C). This helps the dish cook evenly. 2. Gather your ingredients to make cooking easier. You will need: - 1 pound potato gnocchi - 3 large onions, thinly sliced - 3 tablespoons olive oil - 2 tablespoons unsalted butter - 4 cloves garlic, minced - 1 teaspoon thyme (fresh or dried) - 1 teaspoon rosemary (fresh or dried) - 2 cups vegetable broth - 1 cup heavy cream - 1 ½ cups Gruyère cheese, shredded - ½ cup Parmesan cheese, grated - Salt and pepper, to taste - Fresh parsley, chopped (for garnish) 3. In a large skillet, heat the olive oil and butter over medium heat. Add the sliced onions. Cook these, stirring often, until they are golden and sweet. This should take about 20-25 minutes. 4. Add minced garlic in the last 5 minutes of cooking. This will give it a nice flavor. 5. Stir in thyme, rosemary, salt, and pepper. Pour in the vegetable broth and let it simmer for about 5-7 minutes. This allows the flavors to meld. 1. Add the heavy cream to your skillet. Stir until everything mixes well. The sauce should be rich and smooth. 2. In a large pot of boiling salted water, cook the gnocchi. They are done when they float to the top, usually in about 2-4 minutes. Drain and set aside. 3. In your skillet, combine the gnocchi with the onion mixture. Toss gently until the gnocchi are fully coated in that tasty sauce. 1. Transfer the gnocchi and onion mixture to a baking dish. Top with shredded Gruyère and grated Parmesan. This will create a lovely cheesy crust. 2. Bake in the preheated oven for 20-25 minutes. Keep an eye on it until the cheese is bubbly and golden. 3. Once done, take it out and let it cool for a few minutes. Garnish with fresh chopped parsley before you serve. For the full recipe, check the recipe section above. To ensure your gnocchi is perfectly cooked, follow these steps: - Bring a large pot of salted water to a boil. - Add the gnocchi gently. They will sink first. - Watch for them to float, which shows they are done. - Drain them right away to avoid overcooking. If you want to try alternative methods, consider these: - Pan-frying: Cook gnocchi in a skillet until golden brown. - Baking: Toss them in olive oil and bake until crispy. Patience is key when caramelizing onions. Here are some tips: - Use medium heat to cook slowly and evenly. - Stir occasionally to prevent burning. - Cook until they turn a soft, golden brown. To achieve perfect caramelization, remember: - Start with a heavy skillet for even heat. - Add a pinch of salt to help draw out moisture. - If they brown too fast, lower the heat slightly. For a creamy texture in your dish, I recommend: - Gruyère cheese; it melts beautifully and adds rich flavor. - Try a mix of cheeses for depth, like mozzarella or fontina. If you need to substitute cheeses, consider: - Using cheddar for a sharper taste. - Cream cheese can add creaminess if you’re in a pinch. For more guidance, check out the Full Recipe. {{image_2}} You can switch up your gnocchi to make it even better. Try sweet potato gnocchi. It adds a nice sweetness. You can also use cauliflower gnocchi for a lighter dish. Adding more veggies can boost flavor too. Consider mushrooms or bell peppers. They add texture and taste to your meal. Try spinach for a fresh touch. You can mix and match until you find your favorite combo. If you need a gluten-free version, it’s easy! Look for gluten-free gnocchi at the store. They often taste great too. You can also make your own with gluten-free flour. For a vegan twist, swap out the heavy cream for coconut milk. It keeps the dish creamy and rich. Use vegan cheese for a cheesy layer. You can enjoy this dish while staying true to your diet. To take the flavor up a notch, add spices like paprika or cayenne. They bring warmth and depth. A sprinkle of nutmeg can also bring out the sweetness of the onions. If you want to add protein, consider chicken or sausage. Cook the meat before mixing it in. This adds heartiness and makes the dish even more filling. You can easily adjust this recipe to suit your taste. For the full recipe, check the recipe section above! To store your baked French onion gnocchi, let it cool at room temperature. Once cool, place it in an airtight container. You can keep it in the fridge for about 3 to 4 days. Make sure to cover it well to keep it fresh. When you want to eat it, just reheat it in the oven until warm. If you want to save some for later, you can freeze the baked gnocchi. First, let it cool completely. Then, transfer it to a freezer-safe container or a heavy-duty freezer bag. It can last in the freezer for up to 2 months. When you’re ready to eat it, thaw it in the fridge overnight. Reheat it in the oven at 350°F (175°C) until hot. Pair your baked French onion gnocchi with a fresh salad or some roasted veggies. A simple green salad with vinaigrette works well. You might also enjoy dipping sauces like marinara or a tangy aioli. These sides add a nice touch and make the meal even better! What is the best way to reheat baked French onion gnocchi? You can reheat it in the oven. Set it to 350°F (175°C). Cover your dish with foil. Heat for about 15-20 minutes. This keeps the gnocchi soft and the cheese melty. Can I make this dish ahead of time? Yes! Prepare it up to the baking step. Cover the dish and store it in the fridge. When you're ready, just bake it. Add a few extra minutes to the baking time if it's cold. What are some alternatives to gnocchi? You can use small pasta shapes like shells or orzo. Cauliflower rice or polenta also works well. These options give you a different texture but keep the dish tasty. Can I use frozen gnocchi? Absolutely! Frozen gnocchi cooks well. Just add it directly into boiling water. There’s no need to thaw it first. Cook until it floats, just like fresh gnocchi. What can I substitute for Gruyère cheese? If you can't find Gruyère, try Swiss or Emmental cheese. Both melt nicely and have a similar flavor. You can also mix in some mozzarella for a gooey texture. How do I know when the onions are caramelized properly? Onions should be soft, golden brown, and sweet. This takes about 20-25 minutes on medium heat. Stir them often to avoid burning. Is there a quicker way to make baked French onion gnocchi? You can speed it up by using pre-cooked gnocchi. Use a pressure cooker for the onions. This cuts down cooking time but still gives great flavor. For the full recipe, check the detailed instructions. In this blog post, we explored how to make baked French onion gnocchi. We covered the full list of ingredients, easy preparation steps, and baking instructions. I shared tips for cooking gnocchi, caramelizing onions, and selecting cheese. We looked at various adaptations for different diets and flavor enhancements. Lastly, we discussed how to store leftovers and answered common questions. Embrace this recipe to impress your family and friends. Enjoy the rich flavors and cozy comfort it brings!

Baked French Onion Gnocchi Savory Comfort Food Dish

If you’re craving a warm, comforting dish that brings a twist to classic flavors, you’re in the right place. Baked

- Tofu and Dairy Alternatives Tofu is the star here. Use a block of firm tofu for the best texture. Press it to remove extra water. This helps the tofu soak up flavors. Pair the tofu with almond milk or any plant-based milk. A splash of apple cider vinegar adds a bit of tang. - Flavoring Agents and Seasonings The spice mix is key. You will need garlic powder, smoked paprika, and onion powder. These spices give depth to the dish. Salt and pepper enhance the flavor. The real heat comes from cayenne pepper. Adjust the amount to suit your taste. You will also need vegan butter and hot sauce for that spicy drizzle. - Buns and Toppings Use vegan sandwich buns to hold all the goodness. Fresh lettuce and pickles add crunch and flavor. They balance the heat from the spice mix. This makes every bite delicious. Check the Full Recipe for all the details! - Pressing and Slicing To start, you need to press the tofu. This removes extra moisture, making it firmer. Wrap the block of tofu in a clean kitchen towel. Place a heavy object, like a cast-iron skillet, on top. Let it sit for about 15 to 20 minutes. After pressing, slice the tofu into 1/2-inch thick slabs. These slabs will hold the marinade and flavors well. - Marinating Process Next, you'll marinate the tofu. In a bowl, mix 1 cup of almond milk with 1 tablespoon of apple cider vinegar. Dip each tofu slab into this mixture. Make sure each piece is fully coated. Let the tofu marinate for at least 30 minutes. This step adds great flavor and helps it stay moist while cooking. - Dry Mixture Ingredients Now it's time to prepare the dry mix. In a shallow dish, combine 1 cup of all-purpose flour, 1 cup of cornmeal, 1 teaspoon of garlic powder, 1 teaspoon of smoked paprika, 1 teaspoon of onion powder, salt, and pepper. Mix well to ensure all the spices are evenly distributed. - Dredging Technique Once the tofu has marinated, remove it from the bowl. Allow the excess liquid to drip off. Take each slab and dredge it in the dry mixture. Press the tofu gently into the mix to ensure it sticks well. This creates a nice, thick coating. - Frying Tips for Crispy Texture Heat about 1/2 inch of oil in a large skillet over medium-high heat. You want the oil hot enough to fry but not smoking. Carefully add the coated tofu slabs to the skillet. Fry each piece for about 4-5 minutes on each side. They should turn golden brown and crispy. Once done, drain them on paper towels to remove excess oil. - Spreading the Spice Mix In a small bowl, mix 1 tablespoon of cayenne pepper with 1 tablespoon of melted vegan butter and 1 tablespoon of hot sauce. This will be your spice mix. Spread some of this mix on the bottom half of each sandwich bun. This adds a kick of flavor right from the start. - Adding Toppings Now, place a piece of crispy tofu on top of the spice mix. Add some fresh lettuce and pickles for crunch. Drizzle a bit more spice mix on top for extra flavor. Finally, place the other half of the bun on top. Your crispy vegan Nashville hot chicken sandwich is ready to enjoy! For the full recipe, don't forget to check out the details! - Oil Temperature: Heat your oil to 350°F (175°C). This helps the tofu cook fast and get crispy. Use a thermometer for best results. If the oil is too cool, the tofu will soak up too much oil. If it's too hot, it will burn. - Cooking Time Recommendations: Fry each tofu slab for about 4-5 minutes on each side. This gives a golden-brown color and a crunchy texture. Keep an eye on it to avoid burning. - Spice Level Customizations: Adjust the cayenne pepper to suit your taste. If you want it milder, use less. For more heat, add a pinch more. You can also use a hot sauce with a higher heat level. - Alternative Seasonings: Feel free to mix in other spices. Try adding smoked paprika for a deeper flavor. Nutritional yeast can add a cheesy note. Garlic powder gives an extra kick, too. {{image_2}} You can make this crispy vegan Nashville hot chicken gluten-free. For flour substitutes, use almond flour or gluten-free all-purpose flour. Both options provide a nice crust. For bread alternatives, choose gluten-free buns or lettuce wraps. Either option works well to hold your spicy tofu. You can easily change the spice mix to suit your taste. Try adding smoked chili powder for a smoky flavor. You can also mix in some dried herbs like oregano or thyme for extra aroma. For serving suggestions, pair your sandwiches with coleslaw or potato wedges. They balance the heat from the chicken. You can find the full recipe [here](insert link). - Refrigeration Tips: Store leftover crispy vegan Nashville hot chicken in an airtight container. Keep it in the fridge for up to three days. This helps keep it fresh and safe to eat. Make sure to let it cool down before sealing. - Freezing Guidelines: You can freeze leftover tofu for up to three months. Wrap each piece in plastic wrap or foil. Place the wrapped tofu in a freezer bag. When ready to eat, thaw in the fridge overnight. - Maintaining Crispiness: To reheat, preheat your oven to 375°F (190°C). Place the tofu on a baking sheet. Bake for about 10 to 15 minutes. This method keeps the tofu crispy. Avoid microwaving, as it can make the tofu soggy. Enjoy your meal just like fresh! You can add more cayenne pepper to the spice mix. Start with an extra teaspoon. You can also use a hotter hot sauce. A few drops of sriracha can give it a nice kick. Taste the spice mix before drizzling it on the tofu. Adjust until you reach your preferred heat level. Yes! You can use seitan or tempeh as alternatives. Both have great texture and absorb flavors well. If you want a nut-based option, try using chickpea patties. These choices can give you a different twist on the classic recipe. Some great sides include coleslaw, fries, and cornbread. You can also serve it with pickles and a side of baked beans. These sides add crunch and balance the spice of the sandwich. They complement the flavors and make for a hearty meal. Tofu needs to be well-pressed to remove moisture. This step helps it fry better. Make sure your oil is hot enough before frying. Frying in batches can also help keep the temperature steady. Lastly, drain the fried tofu on paper towels to absorb excess oil. This blog post shared how to make a tasty vegan Nashville hot chicken sandwich. We covered key ingredients like tofu, seasonings, and buns. I detailed each step, from prepping tofu to frying it to crispy perfection. We also explored tips for that perfect crunch and offered mix-and-match variations. Don’t forget storage tips for leftovers! Now you’re ready to impress your friends with this fun dish. Enjoy creating and customizing your own vegan delight!

Crispy Vegan Nashville Hot Chicken Delightful Recipe

If you’re craving a spicy, crunchy treat that won’t betray your plant-based diet, you’re in for a delight! I’ll guide

To make this tasty Sweet Berry Loaf Delight, gather these ingredients: - 1 ½ cups all-purpose flour - ½ cup sugar - 2 teaspoons baking powder - ½ teaspoon baking soda - ½ teaspoon salt - 1 teaspoon vanilla extract - ½ cup unsalted butter, softened - 2 large eggs - ¾ cup Greek yogurt - 1 cup mixed berries (blueberries, raspberries, strawberries), fresh or frozen - Zest of 1 lemon - 2 tablespoons lemon juice - ½ cup chopped nuts (walnuts or pecans, optional) - 1 tablespoon powdered sugar (for dusting) You can swap a few ingredients if you need to. For sugar, use honey or maple syrup. Instead of Greek yogurt, plain yogurt works too. If you want a dairy-free option, try coconut yogurt. You can also use coconut oil in place of butter. For gluten-free, use a gluten-free flour blend. Mixing berries can bring fun flavors. Blueberries and raspberries pair well together. You can also try strawberries and blackberries for a twist. If you want to be bold, add some tart cranberries for a surprising touch. Combining different berries will make your loaf colorful and delicious! To start your Sweet Berry Loaf, gather your ingredients. You will need flour, sugar, baking powder, baking soda, salt, and more. Preheat your oven to 350°F (175°C). Grease and flour a 9x5-inch loaf pan. In a large bowl, whisk together the dry ingredients: flour, sugar, baking powder, baking soda, and salt. This ensures even mixing. In another bowl, cream the softened butter and sugar. Mix for about 3-4 minutes. Add the eggs one at a time, mixing well after each. Stir in the vanilla extract, lemon zest, and lemon juice. This mix adds great flavor. Alternate adding the dry mixture and Greek yogurt. Start and end with the dry mix. Mix until just combined. Gently fold in the mixed berries and nuts if you choose to use them. Be careful not to mash the berries. Pour the batter into the prepared loaf pan, smoothing the top with a spatula. Place the loaf pan in the preheated oven. Bake for 50-60 minutes. The loaf should rise and turn golden brown. The sweet smell will fill your kitchen. To check if it's done, insert a toothpick in the center. If it comes out clean, your loaf is ready. If it has batter on it, bake for a few more minutes. Checking for doneness is easy. Use a toothpick or a knife. Insert it in the center of the loaf. If it comes out clean, you are set. If you see wet batter, give it more time. Remember, every oven is different. You might need to adjust the time by a few minutes. Once done, let the loaf cool in the pan for about 10-15 minutes. After that, transfer it to a wire rack to cool completely. Now you’re ready to enjoy your Sweet Berry Loaf Delight! To make the best Sweet Berry Loaf Delight, start with fresh ingredients. Use room temperature eggs and butter. This helps the batter mix well. When mixing, do not over-mix. Stir just until the dry and wet ingredients blend. This keeps your loaf light and fluffy. Add berries gently to avoid mashing them. This keeps their shape and flavor intact. If you want a sweeter loaf, feel free to add a bit more sugar. Just watch the texture; too much can make it dense. One common mistake is not measuring ingredients correctly. Use measuring cups and spoons for accuracy. Another issue is baking at the wrong temperature. Always preheat your oven to 350°F (175°C) before you start. Do not skip greasing the loaf pan. This helps the loaf come out easily. If you bake too long, your loaf may dry out. Check it at 50 minutes with a toothpick. It’s ready when it comes out clean. You don't need fancy tools to bake this loaf. Here’s what I recommend: - Mixing bowls - Measuring cups and spoons - Whisk - Rubber spatula - Loaf pan (9x5-inch) - Toothpick for checking doneness - Wire rack for cooling With these tools, you can make your Sweet Berry Loaf Delight with ease. Happy baking! {{image_2}} You can switch up the berries in this loaf. Try blackberries, cranberries, or even cherries. Each fruit brings a unique taste. For example, blackberries add a rich flavor, while cherries lend a sweet, tart twist. Mix and match to find your favorite combo! If you need a gluten-free option, use almond flour or oat flour. These flours work well and taste great. For a vegan version, swap eggs for flax eggs. Combine one tablespoon of flaxseed meal with three tablespoons of water. Let it sit until thick. Use plant-based yogurt instead of Greek yogurt for moisture. You can enhance the flavor of your loaf with spices. Try adding cinnamon or nutmeg for warmth. A pinch of cardamom can add a lovely zing. For a fresh touch, add mint or basil. These herbs can brighten the taste and make the loaf special. Experiment with these ideas to create your own Sweet Berry Loaf Delight! For the complete recipe, check the Full Recipe section. You can keep your leftover Sweet Berry Loaf at room temperature. Wrap it in plastic wrap or place it in an airtight container. This helps to keep it moist and fresh. It will stay good for about three days. If you prefer, you can refrigerate it. Just note that it may dry out a bit. To freeze your Sweet Berry Loaf, first let it cool completely. Wrap it tightly in plastic wrap, then place it in a freezer bag. Be sure to remove as much air as possible. You can freeze it for up to three months. Label the bag with the date to keep track. When you are ready to enjoy your loaf again, take it out of the freezer. Let it thaw in the fridge overnight for best results. If you want to eat it warm, preheat your oven to 350°F (175°C). Place the loaf in the oven for about 10-15 minutes. This helps to bring back its fresh-baked taste. You can also microwave individual slices for about 20-30 seconds. Enjoy your delicious treat! To make your berry loaf more moist, you can add extra Greek yogurt. Yogurt keeps the loaf soft and adds flavor. You can also use more butter or oil. This adds richness and moisture. Another tip is to avoid over-mixing the batter. Over-mixing can make your loaf dense. Finally, make sure to bake it just until a toothpick comes out clean. Yes, you can use frozen berries in your sweet berry loaf. They work well and save prep time. Just remember to add them straight from the freezer. If you thaw them first, the batter may get too wet. Using frozen berries can also add a nice color to the loaf. They may bleed a bit, creating beautiful swirls. You can serve your sweet berry loaf with many tasty sides. A dollop of whipped cream adds a creamy touch. Fresh berries on the side add color and flavor. You might also like to pair it with a scoop of vanilla ice cream. For a fun twist, try drizzling some honey or maple syrup on top. If you want something savory, a slice of cheese can balance the sweetness. For more details, check the Full Recipe. We explored how to make a delightful Sweet Berry Loaf. You learned about essential ingredients, substitutions, and recommended berry mixes. The step-by-step instructions guide you from prep to baking and checking doneness. Helpful tips ensure your loaf is perfect, while variations let you personalize the recipe. Lastly, storage info helps keep leftovers fresh. Now, it's time to bake your unique loaf. Enjoy the process and share it with loved ones!

Sweet Berry Loaf Delight Simple and Tasty Recipe

Looking for a sweet treat that’s easy to make? You’re in the right place! My Sweet Berry Loaf Delight is

- 200g chorizo sausage, sliced - 1 onion, diced - 3 cloves garlic, minced - 1 carrot, diced - 2 stalks celery, diced - 400g can of white beans (like cannellini or great northern), drained and rinsed - 4 cups vegetable broth Chorizo gives this soup its rich flavor. It has a spicy kick that draws you in. White beans add creaminess and make the soup filling. You can use cannellini or great northern beans. Both work well here. Fresh vegetables like onion, garlic, carrot, and celery add depth and sweetness. - 1 teaspoon smoked paprika - 1/2 teaspoon ground cumin - 1 bay leaf - Salt and pepper to taste Seasonings are key to great flavor. Smoked paprika adds a warm, smoky taste. Ground cumin brings a earthy note. The bay leaf enhances the overall aroma. Don’t forget to season with salt and pepper. This helps balance all the flavors. - Fresh parsley for garnish - Juice of 1 lemon for brightness You can garnish with fresh parsley. It adds a pop of color and freshness. A squeeze of lemon juice brightens the soup. This little touch lifts the dish to a new level. For the full experience, check the Full Recipe. 1. Start by heating the olive oil in a large pot over medium heat. 2. Add the sliced chorizo and cook it until it turns crispy. This should take about 5 minutes. 3. Once crispy, remove the chorizo from the pot and set it aside. The oil left in the pot is full of flavor. This is the base for your soup. 1. Next, add the diced onion, carrot, and celery to the pot. 2. Sauté these vegetables for about 5-7 minutes. You want the onion to become soft and see-through. 3. Now, stir in the minced garlic, smoked paprika, and ground cumin. Cook this mix for another 1-2 minutes. The smell will be amazing! This step builds the soup's flavor. The spices add warmth and depth. 1. Return the crispy chorizo to the pot. 2. Add the rinsed white beans and vegetable broth along with the bay leaf. 3. Bring the mix to a gentle boil. Once boiling, lower the heat and let it simmer for about 30 minutes. This simmering time allows all the flavors to blend together beautifully. 4. After 30 minutes, taste and season with salt and pepper. 5. Don’t forget to remove the bay leaf before serving! Just before serving, stir in fresh lemon juice. This adds a nice bright taste. For a complete meal, serve with crusty bread. Enjoy every bite! You can find the Full Recipe for more details. To enhance your Chorizo White Bean Soup, adjust the seasoning. Add salt and pepper little by little. Taste after each addition. You want a balance that suits your palate. Simmering is key for flavor. Cook the soup for at least 30 minutes. This time allows the ingredients to blend well. The longer it simmers, the better the flavor. Garnish your soup with fresh parsley. This adds a pop of color and freshness. Just chop some parsley and sprinkle it on top before serving. Serve your soup with crusty bread on the side. The bread complements the soup well. You can use it to soak up every last drop. One common mistake is overcooking the vegetables. Aim for a tender texture, not mushy. Keep an eye on them while sautéing. Another mistake is not draining the beans properly. Rinse them well to remove excess sodium. This step keeps your soup from getting too salty. {{image_2}} You can change the beans in this soup. Try black beans or pinto beans. Each type adds a different taste. You can also use lentils for a twist. If you can’t find chorizo, use Italian sausage. It has a nice flavor too. You can even try turkey sausage for a lighter option. For a vegan twist, use plant-based sausage. Many brands offer great flavors. You can also skip the sausage entirely. Use more spices to bring out the taste. Smoked paprika and cumin work well. Adding some liquid smoke can give you that smoky flavor without meat. Want to boost the nutrition? Toss in some spinach or kale. They add color and vitamins. You can also add bell peppers for sweetness. Try different spices like chili flakes for heat. If you like a bit of zing, add a splash of vinegar too. For the full recipe, check out the [Full Recipe]. After you make Chorizo White Bean Soup, let it cool. Store leftovers in an airtight container. This keeps the soup fresh and tasty. You can keep it in the fridge for up to four days. When you want to reheat it, pour the soup into a pot. Heat it on medium, stirring often. You can also use the microwave. Just heat it in short bursts and stir in between to ensure even warming. To freeze the soup, let it cool completely first. Then, pour it into freezer-safe containers. Make sure to leave some space at the top. The soup expands when frozen. You can freeze Chorizo White Bean Soup for up to three months. When ready to eat, take it out of the freezer. Thaw it overnight in the fridge. For reheating, use a pot on low heat or the microwave. Stir occasionally until it's hot throughout. Chorizo White Bean Soup lasts about four days in the fridge. If you freeze it, it can stay good for up to three months. Just remember to check for any signs of freezer burn if it’s been in there a while. Enjoy your soup at its best by following these storage tips! Making Chorizo White Bean Soup takes about 40 minutes total. - Prep time: 10 minutes - Cook time: 30 minutes You chop the veggies and slice the chorizo in the prep time. The cook time includes browning the chorizo and simmering the soup. In just over half an hour, you have a hearty meal. Yes, you can make this soup ahead of time. It stores well in the fridge. - Best practices: - Allow the soup to cool before storing it. - Use an airtight container. - It can last up to 4 days in the fridge. For meal prep, you can cook a big batch. Reheat it on the stove or in the microwave when you’re ready to enjoy it. Chorizo White Bean Soup can be a healthy meal choice. It has many nutritious ingredients. - Nutritional highlights: - Chorizo offers protein and flavor. - White beans are high in fiber and protein. - Vegetables add vitamins and minerals. This soup is filling yet packed with nutrients. It can fit well in a balanced diet when enjoyed in moderation. For the full recipe, check out the details above. Chorizo White Bean Soup blends rich flavors and healthy ingredients. I covered the key components: chorizo, beans, and seasonings. We explored how to prepare, sauté, and simmer these ingredients. Adding tips helped ensure great flavor, while variations cater to different diets. Proper storage keeps leftovers fresh for later enjoyment. This soup is easy to make and perfect for sharing. Dive into making this tasty dish and enjoy every bowl!

Chorizo White Bean Soup Hearty and Flavorful Delight

Are you ready to warm up with a bowl of Chorizo White Bean Soup? This hearty dish is full of

- 2 cups refrigerated or frozen cheese tortellini - 1 cup breadcrumbs (panko recommended for crunch) - ½ cup grated Parmesan cheese - 2 large eggs, beaten - 1 teaspoon garlic powder - ½ teaspoon dried Italian herbs - Salt and pepper to taste - Fresh parsley, chopped for garnish In this recipe, I focus on a few key elements. First, the cheese tortellini. I prefer using fresh or frozen cheese tortellini. Both options work well, but fresh tortellini will save you some time. For the best crunch, I recommend panko breadcrumbs. They add a delightful texture that makes each bite so satisfying. Next is the Parmesan cheese. This adds a rich flavor that pairs perfectly with the tortellini. The grated form mixes well with breadcrumbs. It helps create a crispy coating. You also need two large eggs, beaten. This will help the breadcrumbs stick to the tortellini. In the seasoning mix, I add garlic powder and Italian herbs. They bring out the tortellini's flavors and give it a nice aroma. Don't forget the salt and pepper for taste! Lastly, fresh parsley is a great garnish. It adds color and a fresh touch to your dish. For the full recipe, check out the details above. Enjoy your cooking adventure! First, cook the frozen tortellini. Follow the package instructions carefully. Most of the time, this means boiling them in salted water. You want to cook them until they are al dente. This means they should be firm, not too soft. Once done, drain the tortellini in a colander. Let them cool for a few minutes. Cooling helps them hold their shape when frying. Now, let’s make the breading mix. In a bowl, combine the breadcrumbs, grated Parmesan cheese, garlic powder, dried Italian herbs, salt, and pepper. Mix it well. In a separate bowl, beat two large eggs. You will dip each tortellini into the egg first. Let the excess egg drip off. Then, coat it in the breadcrumb mixture. Press down gently to make sure the crumbs stick. This step is key for the crunch! Next, heat some vegetable oil in a deep skillet over medium-high heat. You want about ½ inch of oil. Wait until it shimmers, which means it’s hot enough. Carefully add the breaded tortellini in small batches to the hot oil. Fry each batch for about 2-3 minutes on each side. You want them golden brown and crispy. Use a slotted spoon to take them out and place them on a paper towel-lined plate. This helps drain any extra oil. Enjoy your crispy tortellini as a delightful snack! For the full recipe, check out the detailed instructions above. To get the best crunch, I always use panko breadcrumbs. Panko is lighter and flakier than regular breadcrumbs. This texture helps the tortellini get that nice, crispy layer you want. When you bite into them, you’ll hear that satisfying crunch. The frying temperature is crucial too. Heat your oil to about 350°F (175°C). If the oil is too cool, the tortellini can become soggy. If it's too hot, they can burn quickly. A deep-frying thermometer can help you keep track. For dipping, marinara sauce is a classic choice. Its tomato flavor pairs well with the cheesy tortellini. You can also try ranch or garlic aioli for a fun twist. When serving, arrange the crispy tortellini on a nice plate. You can sprinkle some extra Parmesan on top for added flavor. A few sprigs of fresh parsley not only add color but also a fresh taste. Your guests will love the look and the taste! For the full recipe, check out the ingredients and steps above! {{image_2}} You can easily change the taste of your crispy tortellini. Adding spices or herbs can give you new flavors. For a kick, try red pepper flakes or smoked paprika. Fresh herbs like basil or parsley can brighten the dish. Using different cheeses can also change the taste. Instead of Parmesan, try mozzarella for a gooey texture. You can also use cheddar for a sharper flavor. Mixing these cheeses can create a unique blend that excites your taste buds. If you want a healthier option, consider baking instead of frying. Preheat your oven to 400°F (200°C). Place the breaded tortellini on a baking sheet lined with parchment paper. Spray them lightly with oil to ensure they crisp up. Bake for about 15-20 minutes, flipping halfway through. This method gives you a crunchy snack without all the oil. You can also use an air fryer for a quick and easy method. Preheat your air fryer to 375°F (190°C). Arrange the breaded tortellini in a single layer in the basket. Cook for about 10-12 minutes, shaking the basket halfway through. This method keeps the tortellini crispy and delicious with less oil. For the full recipe, check out the detailed steps and tips included above. To keep your crispy fried tortellini fresh, store them in an airtight container. Place parchment paper between layers to prevent sticking. You can refrigerate them for up to 3 days. For longer storage, freeze the tortellini in a single layer on a baking sheet. Once frozen, transfer them to a freezer-safe bag. They will stay fresh for about 2 months. To reheat your tortellini, use an oven for the best results. Preheat it to 375°F (190°C). Spread the tortellini on a baking sheet and heat for about 10-15 minutes. This method keeps them crispy. Avoid using a microwave, as it may make them soggy. If you must use a microwave, place a paper towel over the plate to absorb moisture. Yes, you can use frozen tortellini. They work great for this recipe. Just cook them according to the package instructions. This ensures they are tender and ready to fry. If you use fresh tortellini, skip the boiling step. Just coat them in the egg and breadcrumbs directly. The best oils for frying are vegetable and canola oil. These oils have high smoke points, which means they can handle the heat well. Olive oil is another option, but it has a lower smoke point. This can lead to a burnt taste if you fry at high heat. I prefer vegetable oil for its neutral flavor. To make this recipe vegetarian-friendly, choose cheese-filled tortellini. You can also add extra veggies. Try spinach or mushrooms for added flavor. If you want to replace the cheese, use vegan cheese or nutritional yeast. This keeps the crunch and flavor without meat. Frying tortellini takes about 2-3 minutes on each side. You want them golden brown and crispy. Fry in small batches to keep the oil hot. This helps them cook evenly. Use a slotted spoon to remove them when done. Drain on paper towels to soak up extra oil. For best results, keep an eye on the color. This recipe highlights the joy of crispy cheese tortellini. You learned the key ingredients, from tortellini to seasoning. The step-by-step process ensures you can easily achieve the perfect crunch. Tips for serving and storage keep it fresh and enjoyable later. Feel free to explore variations to suit your taste. Whether frying or baking, this dish is versatile and delicious. Now go ahead and make it your own! Enjoy your cooking adventure with these tasty tortellini bites.

Quick Crispy Parmesan Fried Tortellini Delightful Snack

Looking for a fun and tasty snack? You’ll love my Quick Crispy Parmesan Fried Tortellini! This easy recipe turns ordinary

- 1 cup all-purpose flour - 1/2 cup granulated sugar - 1/2 teaspoon baking powder - 1/4 teaspoon baking soda - 1/4 teaspoon salt - 1/2 cup unsalted butter, softened - 2 large eggs - 1 teaspoon vanilla extract - 1 cup vanilla custard (store-bought or homemade) - 1/2 cup semi-sweet chocolate chips - 1/4 cup heavy cream For the main ingredients, you want the best. Use fresh eggs and good quality butter. If you need to swap the flour, you can use a gluten-free blend. For a lighter version, try using applesauce instead of some butter. - Fresh berries - Dusting of powdered sugar - Chopped nuts (like almonds or hazelnuts) - Flavored extracts (like almond or orange) You can get creative with toppings. Fresh berries add a nice touch and flavor. A dusting of powdered sugar makes it look fancy. If you like nuts, sprinkle some on top for crunch. For a flavor twist, add a few drops of flavored extract to the custard. Each choice adds a new layer of taste to your Boston Cream Bars. For the full recipe, check out the detailed instructions to guide you through making this dessert delight. To make the cake, start by mixing the butter and sugar. Beat them well until light and fluffy. Next, add the eggs one at a time, mixing after each. Don’t forget the vanilla extract! In another bowl, whisk the flour, baking powder, baking soda, and salt. Slowly add this to the butter mixture. Mix until just combined. Pour the batter into a greased 9x9 inch baking dish. Spread it evenly. Bake at 350°F (175°C) for 25-30 minutes. Check doneness with a toothpick. It should come out clean. After baking, let the cake cool completely in the dish. This step is key for a good texture. Now it’s time to layer the dessert. Start by spreading the vanilla custard over the cooled cake. Use a spatula to spread it evenly. This layer adds a creamy richness. For the chocolate ganache, heat the chocolate chips and heavy cream in a small saucepan over low heat. Stir until smooth and melted. Once ready, pour the ganache over the custard. Smooth it out with your spatula for a nice finish. Chill the Boston Cream Bars in the fridge for at least 2 hours. This helps the layers set nicely. When you’re ready to serve, cut them into squares. For a pretty touch, serve them on a platter garnished with fresh berries or a light dusting of powdered sugar. Enjoy this delightful dessert! To get the best cake texture, avoid common mistakes. One big mistake is overmixing the batter. Mix just until combined for a lighter cake. Another mistake is using cold ingredients. Make sure your butter and eggs are at room temperature. This helps the batter mix evenly. For the custard, the right consistency is key. It should be thick enough to hold its shape but smooth enough to spread. If it’s too thin, chill it for a bit. The ganache should also be smooth. Heat the cream gently and stir in the chocolate. If you have leftovers, store them in an airtight container in the fridge for up to three days. Using store-bought custard can save time. It still tastes great and cuts your prep time in half. You can also prepare the cake a day in advance. Just chill it in the fridge overnight. This makes assembly easy the next day. For the chocolate ganache, it can also be made ahead. Simply reheat it before pouring over the custard. {{image_2}} You can get creative with the custard in your Boston Cream Bars. Instead of plain vanilla, try adding a hint of almond or coconut extract. For a fruity twist, use lemon or orange zest. You can also mix in chocolate or coffee for a rich taste. For the ganache, think beyond semi-sweet chocolate. Dark chocolate gives a bold flavor, while white chocolate adds sweetness. You can even try a swirl of peanut butter in the ganache for a fun twist. If you're gluten-free, swap all-purpose flour with a blend of gluten-free flour. You can use almond flour or coconut flour too, but adjust your liquid as needed. A mix of tapioca and rice flour works well for texture. For a vegan version, replace eggs with flaxseed meal or applesauce. Use a plant-based butter alternative and swap heavy cream with coconut cream or almond milk. This keeps the bars tasty and friendly for everyone! These variations let you personalize your Boston Cream Bars. Just follow the full recipe for the base, then add your special twist! To keep your Boston Cream Bars fresh, store them in the fridge. Use an airtight container to prevent them from drying out. This method keeps the bars moist and tasty. Make sure the bars are completely cool before you store them. If they are warm, condensation can form and make them soggy. If you want to freeze your Boston Cream Bars, follow these steps: - First, cut the bars into squares. - Wrap each square tightly in plastic wrap. - Place the wrapped squares in a freezer bag or container. To thaw, take the bars out and let them sit in the fridge overnight. This keeps them from becoming too soft. The shelf life in the freezer is about three months. Enjoy your Boston Cream Bars even after a long time! Boston Cream Bars last about 3 to 4 days in the fridge. Store them in an airtight container. This keeps them fresh and tasty. Yes, you can make Boston Cream Bars ahead of time. They taste even better after chilling overnight. Just remember to cover them well to keep them fresh. You can use half-and-half or whole milk instead of heavy cream. For a dairy-free option, try coconut cream. Both alternatives work well for a rich ganache. Yes, Boston Cream Bars can easily be nut-free. Just use nut-free chocolate chips and check your vanilla custard for any nut ingredients. To cut the bars, use a sharp knife and warm it under hot water. Wipe the blade after each cut for clean edges. This keeps the layers neat and pretty. Boston Cream Bars are a sweet treat you can make at home. They have a soft cake base, creamy custard, and rich chocolate ganache. To start, gather these ingredients: - 1 cup all-purpose flour - 1/2 cup granulated sugar - 1/2 teaspoon baking powder - 1/4 teaspoon baking soda - 1/4 teaspoon salt - 1/2 cup unsalted butter, softened - 2 large eggs - 1 teaspoon vanilla extract - 1 cup vanilla custard (store-bought or homemade) - 1/2 cup semi-sweet chocolate chips - 1/4 cup heavy cream First, preheat your oven to 350°F (175°C) and grease a 9x9 inch baking dish. In a large bowl, mix the softened butter and sugar until fluffy. Add the eggs one by one, mixing well after each. Then, stir in vanilla extract. In another bowl, combine flour, baking powder, baking soda, and salt. Gradually add this mix to the butter mix. Stir until just combined. Pour the batter into the greased dish and spread it evenly. Bake for 25-30 minutes. To check if it's done, insert a toothpick; it should come out clean. Let the cake cool completely in the dish. After cooling, spread the vanilla custard over the top of the cake. For the chocolate ganache, melt chocolate chips and heavy cream in a small saucepan over low heat. Stir until smooth. Pour the ganache over the custard layer. Spread it out carefully with a spatula. Place the Boston Cream Bars in the fridge for at least 2 hours to set. When ready, cut into squares and serve. You can garnish with fresh berries or dust with powdered sugar for a fancy touch. Enjoy your Boston Cream Bars! Boston Cream Bars are a delightful treat with a creamy custard and rich chocolate ganache. We covered the key ingredients, optional toppings, and step-by-step instructions to create these bars. I shared tips to perfect texture and offered ideas for variations, including gluten-free and vegan options. Storing and freezing methods ensure you keep them fresh for longer. With this guide, you're ready to make a delicious dessert everyone will love. Enjoy experimenting with flavors and make these bars your own!

Boston Cream Bars Irresistible Dessert Delight

If you love sweet treats, then Boston Cream Bars will make your heart skip a beat. This delicious dessert combines

Caprese salad is simple yet delicious. This dish highlights fresh tomatoes, mozzarella, and basil. It is perfect for warm days or a light meal. You can make it quickly in just 15 minutes. To make Caprese salad, you will need: - 4 large ripe tomatoes, sliced - 250g fresh mozzarella, sliced - 1 cup fresh basil leaves - 3 tablespoons extra virgin olive oil - 1 tablespoon balsamic reduction - Salt and freshly cracked black pepper to taste If you cannot find fresh mozzarella, try burrata for a creamier texture. You can also use heirloom tomatoes for added color and flavor. For a twist, add arugula for a peppery kick. If you want less acidity, skip the balsamic reduction. Using a good quality olive oil is key for the best taste. Each substitution can change the overall flavor, making the dish uniquely yours. Start by washing the tomatoes and basil leaves under cool water. This step keeps your salad fresh. Next, slice the tomatoes into thick rounds. Aim for about half an inch thick. Set them aside on a plate. Now, take the fresh mozzarella and slice it into similar thickness. Use a sharp knife to get clean cuts. This helps the layers match perfectly. On a large serving platter, begin layering. Start with a slice of tomato, followed by a slice of mozzarella. Repeat this, alternating between the two. Make sure they overlap slightly. This creates a beautiful pattern. Tuck whole basil leaves between the layers. The green adds color and flavor to your salad. Don’t rush this part; it’s all about presentation! Once your salad is arranged, it’s time to add flavor. Drizzle the extra virgin olive oil evenly over the salad. This adds richness and depth. Next, drizzle the balsamic reduction on top. It brings a sweet, tangy kick that complements the fresh ingredients. Finally, sprinkle a pinch of salt and freshly cracked black pepper over the top. This enhances all the flavors. Allow the salad to sit for a few minutes. This lets the flavors blend together beautifully. For more details, check the Full Recipe. To make a great Caprese salad, you need ripe tomatoes. Look for tomatoes that feel firm but slightly soft. Their skin should be smooth and shiny. Choose ones with bright colors. I love using heirloom tomatoes for their rich taste and many colors. If you can, pick tomatoes at a local market. They often have better flavor than store-bought ones. Always smell the tomatoes; they should have a sweet, fresh scent. Serve your Caprese salad on a big platter. Layer the tomatoes and mozzarella in a circle for a nice look. You can also serve it in individual bowls for a personal touch. Add some extra basil leaves on top for color. If you want more flavor, sprinkle some flaky sea salt before serving. This salad pairs well with crusty bread. Use the bread to soak up the olive oil and balsamic reduction. To drink with your Caprese salad, try a light white wine. A chilled Sauvignon Blanc works well. It has a crisp taste that matches the salad. If you prefer non-alcoholic options, serve sparkling water with lemon. This drink keeps it refreshing. For something a bit special, try a basil lemonade. The basil in the drink will match your salad. You can find the full recipe for the Caprese salad at the end of this article. {{image_2}} Adding avocado to your Caprese salad makes it creamy and rich. Just slice one ripe avocado and layer it with the tomatoes and mozzarella. The buttery texture of the avocado complements the fresh flavors well. You can also sprinkle a bit of lime juice on top. This keeps the avocado bright and adds a zesty kick. Grilling your ingredients adds a smoky flavor. Start by grilling the tomato slices and fresh mozzarella until they get nice grill marks. This brings out their natural sweetness. After grilling, layer them as usual with basil. Drizzle with olive oil and balsamic reduction for a tasty twist. This version is perfect for summer cookouts. Caprese skewers are fun and easy for parties. Simply thread cherry tomatoes, mozzarella balls, and basil leaves onto small skewers. You can drizzle with olive oil and balsamic reduction right before serving. These bite-sized treats are colorful and packed with flavor. They make a great finger food option for gatherings. For more ideas, be sure to check out the Full Recipe. To store leftover Caprese salad, use an airtight container. Layer the tomatoes and mozzarella carefully. Keep the basil separate to avoid wilting. Place the container in the fridge. Consume leftovers within two days for the best taste. When prepping Caprese salad, slice your tomatoes and mozzarella just before serving. This keeps everything fresh and vibrant. You can wash and dry basil leaves in advance. Store them in a damp paper towel inside a bag. This method keeps them fresh for a few days. Check for signs of spoilage before eating leftover salad. Look for mold or slimy texture on the mozzarella. Tomatoes may become mushy or have unpleasant smells. If the basil turns brown or wilts, it’s time to toss it. Always trust your senses when it comes to food safety. Yes, you can prepare Caprese Salad ahead of time. However, I suggest waiting to add the olive oil and balsamic reduction until just before serving. This keeps the salad fresh. If you store it in the fridge, it will stay good for about a day. Caprese Salad pairs well with many dishes. You can serve it with grilled chicken or fish for a light meal. It also complements crusty bread or bruschetta. Don't forget a glass of chilled white wine or sparkling water! Yes, Caprese Salad is naturally gluten-free. The main ingredients are tomatoes, mozzarella, basil, and olive oil. None of these contain gluten. So, it's a great choice for those who need to avoid gluten. If you have leftovers, place the salad in an airtight container. Store it in the fridge. Try to eat it within a day for the best taste. The tomatoes and mozzarella can become soggy if left too long. Yes, you can use other cheeses if you prefer. Burrata works well as a creamy alternative. Feta or goat cheese can add a tangy twist. Just remember to adjust the flavor with salt and pepper. The best way to slice tomatoes is to use a sharp knife. A serrated knife works great too. Cut the tomatoes into even slices for a nice look. Thicker slices hold up better and look appealing in the salad. This blog post covered how to make a great Caprese salad. We looked at the key ingredients and explored fun variations. You learned step-by-step instructions and helpful tips to choose the best tomatoes. We also talked about how to store leftovers and answered common questions. Caprese salad is simple, fresh, and tasty. Try different versions or pair it with your favorite drink. Enjoy making this dish for your next meal!

Caprese Salad with Fresh Mozzarella Easy Delight

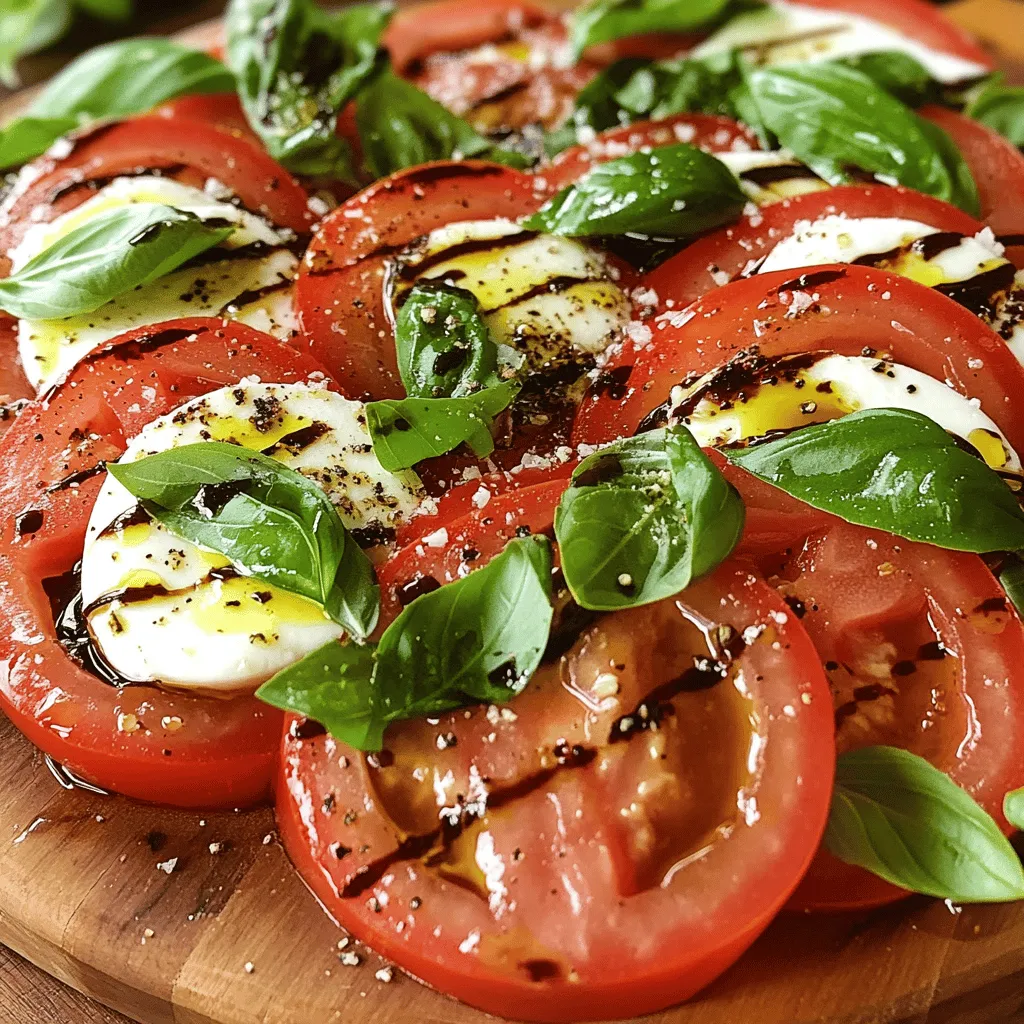
Welcome to a delicious journey with Caprese Salad featuring fresh mozzarella! This easy delight is a perfect way to enjoy

Older posts
Newer posts
← Previous Page1 … Page49 Page50 Page51 … Page79 Next →

dsad

© 2025 pureeatsnow • Built with GeneratePress

Our Policies

  • Copyright Policy
  • Cookie Policy
  • GDPR Policy
  • Privacy Policy
  • Disclaimer
  • Terms Of Use

More Information

  • Home
  • About
  • Contact
  • Appetizers
  • Dessert
  • Dinner
  • Drinks
©2025, pureeatsnow About Back To Top