Skip to content
DisclaimerTerms Of UseGDPR PolicyCookie Policy

pureeatsnow

  • Home
  • Drinks
  • Appetizers
  • Dinner
  • Dessert
  • About
  • Contact
  • Privacy Policy
DisclaimerTerms Of UseGDPR PolicyCookie Policy

Rachel

To make tasty quinoa bowls, gather these main ingredients: - 1 cup quinoa - 2 cups vegetable broth - 1 cup black beans, drained and rinsed - 1 cup cherry tomatoes, halved - 1 bell pepper (any color), diced - 1 cup corn (fresh or frozen) - 1 avocado, sliced - 1 cup spinach or kale - 1 tablespoon olive oil - 1 tablespoon lemon juice - Salt and pepper to taste - Fresh cilantro for garnish (optional) These ingredients create a colorful and nutritious meal. Quinoa is a great base. It’s high in protein and very filling. The black beans add more protein and fiber. The vegetables bring freshness and crunch. You can add even more to your quinoa bowls. Here are some fun options: - Roasted sweet potatoes - Diced cucumbers - Chopped green onions - Sliced jalapeños for spice - Nuts or seeds for crunch - Feta cheese or goat cheese These optional ingredients can change the flavor and texture. You can mix and match based on what you like or have at home. The right seasonings can elevate your dish. Here are some great choices: - Cumin for warmth - Paprika for smokiness - Garlic powder for depth - A splash of hot sauce for heat - Your favorite dressing, like ranch or vinaigrette Drizzle your bowls with a dressing to enhance the taste. A simple olive oil and lemon juice combo works great. Experiment with these options to find what you love! For the full recipe, click [Full Recipe]. How to Rinse and Cook Quinoa Rinse quinoa in cold water before cooking. This step removes its bitter coating. Use a fine-mesh strainer to make this easy. After rinsing, put two cups of vegetable broth in a pot. Bring it to a boil. Add one cup of rinsed quinoa to the pot. Lower the heat and cover it. Let it simmer for about 15 minutes. The quinoa will be fluffy when done. Tips for Perfectly Fluffy Quinoa To make your quinoa perfect, make sure not to overcook it. After 15 minutes, check if it's tender. If there is broth left, cook it for a few more minutes. Fluff it gently with a fork afterward. This helps separate the grains and keeps it light. Mixing Vegetables and Beans While the quinoa cooks, prepare your veggies. In a large bowl, mix one cup of black beans, one cup of halved cherry tomatoes, one diced bell pepper, and one cup of corn. You can use fresh or frozen corn. Add one cup of spinach or kale for extra greens. Stir everything well to combine the flavors. Incorporating Quinoa into the Mixture Once the quinoa is ready, add it to the vegetable mix. Gently fold the quinoa into the veggies and beans. This will make a colorful and tasty mixture that is packed with nutrients. Drizzling with Olive Oil and Lemon Juice Next, drizzle one tablespoon of olive oil and one tablespoon of lemon juice over the bowl. This adds flavor and freshness. Season with salt and pepper to taste. Toss everything together until it’s well mixed. Proper Portioning in Meal Prep Containers Now, it’s time to divide the mixture into meal prep containers. A good portion is about one cup per container. Top each bowl with sliced avocado for creaminess. You can add fresh cilantro for an extra pop of flavor, if you like. Let the bowls cool before sealing them. Store in the fridge for up to four days. Enjoy your meals with ease during busy weeks! Batch Cooking Basics for Busy Weeks Batch cooking means making large amounts of food at once. Start by planning your meals for the week. Use my colorful quinoa bowls as a base. Cook enough quinoa for several meals in one go. This saves time and gives you a ready-to-eat option. Store your meals in the fridge or freezer. This keeps your food fresh and tasty. Utilizing Kitchen Tools for Efficiency Using the right kitchen tools can save time. A rice cooker or instant pot cooks quinoa perfectly. A sharp knife and cutting board make chopping veggies quick. A food processor can help mix ingredients fast. Invest in a good set of measuring cups for accurate portions. These tools help you cook smarter, not harder. Creating Eye-Catching Layered Bowls Layering your ingredients makes your meal prep look great. Start with quinoa at the bottom. Add colorful veggies like bell peppers and cherry tomatoes on top. This not only looks nice but adds flavor and nutrition. Use clear containers to show off these layers. Your meal will be more inviting this way. Keeping Ingredients Fresh and Colorful Freshness matters in meal prep. To keep your ingredients vibrant, store them properly. Keep avocado slices separate until ready to eat. This prevents browning. Use lemon juice on cut fruits and veggies to maintain color. Always choose fresh, colorful ingredients for a healthy bowl. Must-Have Cookware and Storage Options Invest in good cookware. A non-stick pan helps when cooking quinoa. Use a large mixing bowl for combining ingredients. For storage, glass containers are best. They keep food fresh and are safe for the microwave. Make sure you have lids that seal tightly to prevent spills. Recommended Meal Prep Containers Look for meal prep containers that are microwave-safe and dishwasher-safe. Choose ones that are BPA-free for safety. I recommend containers with sections, so ingredients stay separate. This keeps your meals looking great and helps with portion control. Good containers make meal prep easier and more organized. Remember, meal prep is not just about cooking. It's about planning, saving time, and enjoying healthy meals like my quinoa bowls. For the full recipe, check out Meal Prep Magic: Colorful Quinoa Bowls. {{image_2}} You can switch up your grains for meal prep. If you want alternatives to quinoa, try these options: - Brown rice - Farro - Barley - Couscous - Bulgur Each grain has its own taste and texture. For a nutty flavor, use farro. Brown rice adds a chewy bite. Couscous cooks fast, making it great for busy days. Mix and match to keep meals exciting. Need more protein in your meals? Adding chicken, tofu, or beans can help. Here are some easy ways to boost protein: - Grilled chicken breast - Crispy baked tofu - Lentils - Chickpeas Chicken provides lean protein. Tofu is a great plant-based option. Lentils and chickpeas are full of fiber and protein. You can easily add any of these to your bowls. Using seasonal vegetables makes your meals fresh and tasty. Here are the best veggies by season: - Spring: Asparagus, peas, and radishes - Summer: Zucchini, bell peppers, and tomatoes - Fall: Sweet potatoes, carrots, and squash - Winter: Kale, Brussels sprouts, and root veggies Swap in these veggies for a colorful dish. Seasonal produce tastes better and is often cheaper. Enjoy what’s fresh to make every bite delicious! Remember to check out the Full Recipe for a tasty start to your meal prep! To keep your meal prep bowls fresh, use airtight containers. This helps prevent spoilage. Label the containers with dates. Store them in the fridge for up to four days. If you see any signs of spoilage, toss them out right away. For best results, let the bowls cool before sealing them. This stops condensation, which can make your food soggy. You can freeze your meal prep bowls for long-term storage. Freezing works best for dishes without fresh toppings. For example, store the quinoa and veggies together. Leave out the avocado and fresh herbs until serving. To freeze, use freezer-safe containers. Write the date on each container. They can last for up to three months in the freezer. When ready to eat, thaw them overnight in the fridge. To keep quinoa bowls delicious, use gentle reheating methods. The best way is to use the microwave. Add a splash of water to keep it moist. Heat in short bursts, stirring in between. You can also use the stove. Heat on low, adding a little water until warmed through. Avoid overheating, as this can make quinoa dry and tough. Enjoy your meal prep magic with ease! Meal prep quinoa bowls last up to four days in the fridge. Always store them in airtight containers. This keeps them fresh and safe to eat. If you notice any signs of spoilage, throw them away. For best taste, eat them within the first few days. Yes, you can customize the recipe easily. Swap out the beans for chickpeas or lentils. You can also change the veggies to match your taste. Try adding roasted sweet potatoes or zucchini. This helps you enjoy different flavors each week. Feel free to experiment with different dressings too. Quinoa bowls are great on their own, but you can add sides for more variety. Serve them with a simple green salad. A light soup pairs well too. You can also include some crusty bread for a filling meal. The options are endless! To keep quinoa from getting mushy, start with rinsing it well. Rinsing removes the bitter coating called saponin. Use the right water-to-quinoa ratio; usually, two cups of water for one cup of quinoa works best. Simmer gently and avoid overcooking. Follow the [Full Recipe] for precise cooking times. Quinoa bowls are versatile, healthy, and easy to make. We covered main and optional ingredients, as well as seasoning ideas. You learned how to prepare quinoa and assemble your bowls with fresh veggies and beans. Don’t forget our tips on storage and time-saving meal prep. You can easily customize your bowls for any season. Enjoy experimenting with flavors and textures. With these steps, you are ready to enjoy delicious meals all week!

Meal Prep for Busy Weeks Simplified and Effective

Are you tired of chaotic weeknight dinners? Meal prep can change that! In this guide, I’ll share simple steps to

To make a delightful Chocolate Pistachio Cake, you need these key ingredients: - 1 cup all-purpose flour - 1/2 cup unsweetened cocoa powder - 1 cup granulated sugar - 1/2 cup unsalted butter, softened - 2 large eggs - 1/2 cup buttermilk - 1 teaspoon baking soda - 1/2 teaspoon baking powder - 1/4 teaspoon salt - 1 teaspoon vanilla extract - 1/2 cup shelled pistachios, chopped - 1/2 cup chocolate chips Each ingredient plays a vital role in the final product. The flour gives structure, while cocoa powder adds rich flavor. Sugar sweetens the cake and helps it stay moist. Softened butter creates a tender crumb. Eggs bind everything together, while buttermilk adds a slight tang and moisture. Baking soda and baking powder help the cake rise. Salt balances the sweetness, and vanilla enhances all the flavors. Finally, pistachios and chocolate chips add texture and taste. You can also try these optional ingredients to boost flavor: - A splash of espresso for depth - Orange zest for a citrus twist - Almond extract for a nutty flavor If you have dietary restrictions, consider these substitutes: - Use gluten-free flour instead of all-purpose flour. - Swap eggs with applesauce or flaxseed meal for a vegan option. These changes will let you enjoy this cake in many ways! For the full recipe, check out the complete details above. First, preheat your oven to 350°F (175°C). This step warms up the oven for even baking. While the oven heats, grab your 8-inch round cake pan. Grease the pan with butter or cooking spray, then sprinkle a light layer of flour. This helps the cake slide out easily later. Next, in a mixing bowl, cream the softened butter and granulated sugar until fluffy. This should take about 2-3 minutes. It's key for a light cake. Add the eggs one at a time, mixing well after each addition. Stir in the vanilla extract for extra flavor. In another bowl, sift together the flour, cocoa powder, baking soda, baking powder, and salt. Sifting removes lumps and mixes the dry ingredients well. Gradually add this to the wet mixture, alternating with the buttermilk. Start and end with dry ingredients. Mix until just combined. Over-mixing can make the cake dense. Now, fold in the chopped pistachios and chocolate chips gently. This keeps them evenly distributed without deflating your batter. Pour the batter into your prepared pan and smooth the top with a spatula. Place the cake pan in your preheated oven. Bake for 30-35 minutes. To check for doneness, insert a toothpick in the center. If it comes out clean, your cake is ready. If you see wet batter, bake for a few more minutes. Keep an eye on it to avoid overbaking, which can dry it out. Once the cake is baked, take it out of the oven. Let it cool in the pan for 10 minutes. This helps it firm up a bit. After 10 minutes, carefully transfer the cake to a wire rack. This allows air to circulate and cools the cake evenly. Let it cool completely before serving. This step keeps the texture just right. To make a moist and tasty chocolate pistachio cake, follow these tips: - Use fresh ingredients. Make sure your baking powder and cocoa powder are fresh. This helps the cake rise well. - Measure accurately. Use a kitchen scale for flour and sugar. This ensures the right texture. - Room temperature ingredients. Bring butter and eggs to room temperature. This helps them blend smoothly. - Don’t overmix. Mix just until combined. Overmixing can make the cake tough. - Check oven temperature. Use an oven thermometer. An accurate temperature helps avoid undercooked or burnt cake. Common mistakes to avoid: - Too much flour. Adding too much flour can make the cake dry. Use a spoon to scoop flour, then level it off. - Skipping the buttermilk. This adds moisture and flavor. If you don’t have it, use milk with a splash of vinegar. - Not folding in nuts. Gently fold in pistachios and chocolate chips. This keeps them evenly distributed without deflating the batter. For frosting or ganache, consider these options: - Chocolate ganache. Heat equal parts cream and chocolate until smooth. Drizzle it over the cake for a rich finish. - Cream cheese frosting. Mix cream cheese, butter, and powdered sugar. This adds a tangy flavor that pairs well with chocolate. - Whipped cream. Top with lightly sweetened whipped cream for a light touch. To make your cake visually appealing: - Powdered sugar. Dust the cooled cake with powdered sugar for a simple yet elegant look. - Garnish with pistachios. Sprinkle additional chopped pistachios on top to enhance color and texture. - Fresh berries. Add fresh raspberries or strawberries for a pop of color and a fruity contrast. These tips will ensure your chocolate pistachio cake not only tastes amazing but looks stunning too! For a complete recipe, check out the Full Recipe. {{image_2}} You can easily change the flavor of your Chocolate Pistachio Cake. Adding a splash of orange extract gives a bright twist. Just a teaspoon enhances the cake's aroma. Almond extract is another great option. It pairs well with chocolate and pistachios. Feel free to swap nuts too! Instead of pistachios, try walnuts or hazelnuts. Each nut brings its own taste. You can also use dark, milk, or even white chocolate chips. This change affects flavor and sweetness. Making the cake vegan or gluten-free is simple. For a vegan version, replace eggs with flaxseed meal. Mix one tablespoon of flaxseed with three tablespoons of water for each egg. Use almond milk instead of buttermilk. To make it gluten-free, use a gluten-free flour blend. Baking times may change slightly, so keep an eye on it. Start checking for doneness a few minutes earlier. Make sure a toothpick comes out clean before removing the cake. For the full recipe, check out the details above! To keep your Chocolate Pistachio Cake fresh, store it at room temperature. Place it in an airtight container. This keeps the cake moist. If you have leftovers, you can store the cake in the fridge. Make sure to wrap it with plastic wrap to prevent drying out. The cake will stay fresh for about three days this way. For longer storage, freezing is a great option. Cut the cake into slices for easy serving later. Wrap each slice tightly in plastic wrap, then place them in a freezer bag. This helps keep the cake tasty. When ready to eat, take out a slice and let it thaw in the fridge overnight. For best flavor, enjoy it within three months of freezing. To keep your cake fresh, wrap it tightly in plastic wrap. Place it in an airtight container. This method helps keep moisture in and air out. You can store it at room temperature for up to three days. If you want it to last longer, put it in the fridge. It will stay fresh for about a week when refrigerated. Just remember to let it warm up to room temperature before serving. This will enhance the flavor and texture. Yes, you can make this cake ahead of time! It tastes great when made a day or two in advance. Just bake and cool the cake as usual. Then, wrap it well and store it in the fridge. This allows the flavors to blend and deepen. When you are ready to serve, let it sit out for a bit. This brings back the perfect texture. You can also frost it right before serving for a fresh look. Many toppings go well with this cake. Whipped cream adds a light touch. A scoop of vanilla ice cream balances the rich chocolate flavor. You can also drizzle chocolate sauce on top for extra sweetness. For a nutty crunch, sprinkle more chopped pistachios on the cake. Another option is to use a raspberry or cherry sauce. This adds a fruity contrast. Each topping enhances the cake's flavor, making it even more delightful. Check out the Full Recipe for more ideas! In this article, we explored the key ingredients for Chocolate Pistachio Cake and their roles in taste and texture. I provided detailed steps for preparing, baking, cooling, and storing your cake. You learned tips to enhance flavor and avoid common mistakes. Experimenting with variations lets you customize your cake for any occasion. Following these simple guidelines will help you create a delicious dessert that impresses everyone. Remember, great baking leads to joy in every slice. Happy baking!

Chocolate Pistachio Cake Delightful and Rich Recipe

Are you ready to indulge in a sweet treat that excites your taste buds? This Chocolate Pistachio Cake is rich,

For a delightful plate of ravioli with tomatoes and asparagus, gather these main ingredients: - 250g fresh ravioli (cheese or spinach-filled) - 200g cherry tomatoes, halved - 150g asparagus, trimmed and cut into 2-inch pieces - 3 tablespoons olive oil - 2 cloves garlic, minced - 1 teaspoon dried oregano - Salt and pepper to taste - 50g Parmesan cheese, freshly grated - Fresh basil leaves for garnish These ingredients create a fresh and vibrant dish. The ravioli serves as the base. The cherry tomatoes add sweetness, while asparagus gives a nice crunch. Together, they bring a burst of flavor. You can enhance the dish with these optional ingredients: - Red pepper flakes for heat - Lemon zest for brightness - Pine nuts for crunch These extras let you customize your dish. Add a pinch of red pepper flakes for spice. A sprinkle of lemon zest brightens the flavors. Pine nuts add a lovely texture. This dish is not only tasty but also nutritious. Here’s a quick look at the nutritional facts per serving: - Calories: Approximately 450 - Protein: 18g - Carbohydrates: 60g - Fat: 18g - Fiber: 5g This meal offers a balance of carbs and protein. The fresh veggies add vitamins and minerals. Enjoy this dish knowing it’s both delicious and wholesome. For the complete cooking guide, check the Full Recipe. First, bring a big pot of salted water to a boil. This helps the ravioli cook evenly. Add 250g of fresh ravioli to the pot. You can use either cheese or spinach-filled varieties. Cook them for about 3-4 minutes. They are done when they float to the top. Drain the ravioli and set them aside. Remember to save 1/4 cup of the pasta water for later. Next, grab a large skillet and heat it over medium heat. Pour in 3 tablespoons of olive oil. After the oil warms up, add 2 minced garlic cloves. Sauté the garlic for about 30 seconds until it smells great. Now, toss in 150g of trimmed and cut asparagus pieces. Cook the asparagus for 3-4 minutes. They should soften but stay crunchy. Then, add 200g of halved cherry tomatoes and 1 teaspoon of dried oregano. Cook this mix for another 3-4 minutes. The tomatoes will soften and release their juices. Season with salt and pepper to taste. Now it’s time to bring everything together. Gently add the cooked ravioli to the skillet with the veggies. Pour in the reserved pasta water as well. Toss everything together so the flavors mix well. Heat it through for another 1-2 minutes. The ravioli should be warm and coated with the sauce. Finally, serve the dish by plating the ravioli mixture. Sprinkle 50g of freshly grated Parmesan cheese on top. Add fresh basil leaves to garnish for a touch of color and flavor. For the full recipe, check out the details above. To cook ravioli just right, use a big pot. Fill it with water and add salt. Bring the water to a fast boil. Once boiling, add the ravioli. Fresh ravioli usually cooks in 3-4 minutes. You know it's done when it floats to the top. This means it’s light and fluffy. Be sure to save some pasta water for later. For the best flavor, use fresh asparagus and ripe tomatoes. Start by trimming the asparagus. Cut it into 2-inch pieces. Heat olive oil in a skillet over medium heat. Add minced garlic first to bring out its flavor. Then, toss in the asparagus. Cook it until it softens but stays crunchy. Add halved cherry tomatoes and let them cook until soft. This brings out their natural sweetness. Serve the ravioli in a shallow bowl for a nice look. Top it with freshly grated Parmesan cheese. Add fresh basil leaves for a colorful touch. This dish is tasty alone, but you can pair it with a crisp salad or crusty bread. For extra flavor, drizzle some extra olive oil on top. This dish is perfect for a quick weeknight dinner or a special meal. For the full recipe, check out the details above. {{image_2}} You can use many types of ravioli. Cheese-filled ravioli adds a rich taste. Spinach ravioli gives a fresh, green flavor. If you want something unique, try lobster or mushroom ravioli. Each type brings its own twist to the dish. Feel free to switch up the veggies. Zucchini or bell peppers work well too. You can also add peas for a sweet crunch. For herbs, try thyme or parsley instead of basil. Each swap changes the dish while keeping it fresh. To make this dish vegan, use plant-based ravioli. Check for vegan cheese or skip it altogether. You can use nutritional yeast for a cheesy flavor. For a gluten-free option, use gluten-free ravioli. Always check ingredients to ensure they fit your diet. For a full recipe, see the *Full Recipe* section. After you enjoy your ravioli dish, store any leftovers in an airtight container. Place the container in the fridge. Your leftovers will stay fresh for about three days. Make sure to let the dish cool before sealing it. This helps prevent steam buildup, which can make the pasta soggy. If you want to keep the flavors bright, store the sauce and ravioli separately. When it’s time to enjoy your leftovers, reheating is easy! You can use the microwave or the stove. If you choose the microwave, place the ravioli in a bowl and add a splash of water. Cover it with a damp paper towel. Heat in short bursts until warm, stirring in between. For the stove, gently warm the dish in a skillet over low heat. Add a bit of olive oil if needed to keep it moist. If you want to save your ravioli dish for later, freezing is a great option. First, let the dish cool completely. Then, divide it into portions and place them in freezer-safe bags. Remove as much air as possible before sealing to prevent freezer burn. Your ravioli can last up to three months in the freezer. When you are ready to eat, thaw it in the fridge overnight before reheating. For the best results, try to freeze the dish without the sauce, then add the sauce fresh after reheating. For the full recipe, check out the earlier section on ingredients and cooking steps. Cooking fresh ravioli is quick and easy. It usually takes about 3-4 minutes. You know it's done when it floats to the top. If you use frozen ravioli, check the package for exact times. It may take a bit longer. Yes, you can use frozen ravioli. Just remember to cook it longer than fresh ravioli. Follow the package instructions for the best results. Frozen ravioli works well and can save time. Ravioli pairs well with many sides. You might serve it with a simple green salad. Garlic bread is also a great choice. Consider a light vinaigrette to brighten the meal. For drinks, a crisp white wine complements the dish nicely. For the full recipe, check out the complete guide on Ravioli Delight with Tomatoes & Asparagus. This blog post covered how to make a tasty ravioli dish with tomatoes and asparagus. You learned about key ingredients, step-by-step cooking, and helpful tips. We also explored variations to suit your needs and how to store leftovers. Remember, each choice adds a unique touch to your meal. Try different ingredients and enjoy your creation. Cooking should be fun, so get creative and share with friends. Your kitchen adventures start here!

Ravioli with Tomatoes & Asparagus Fresh Flavor Boost

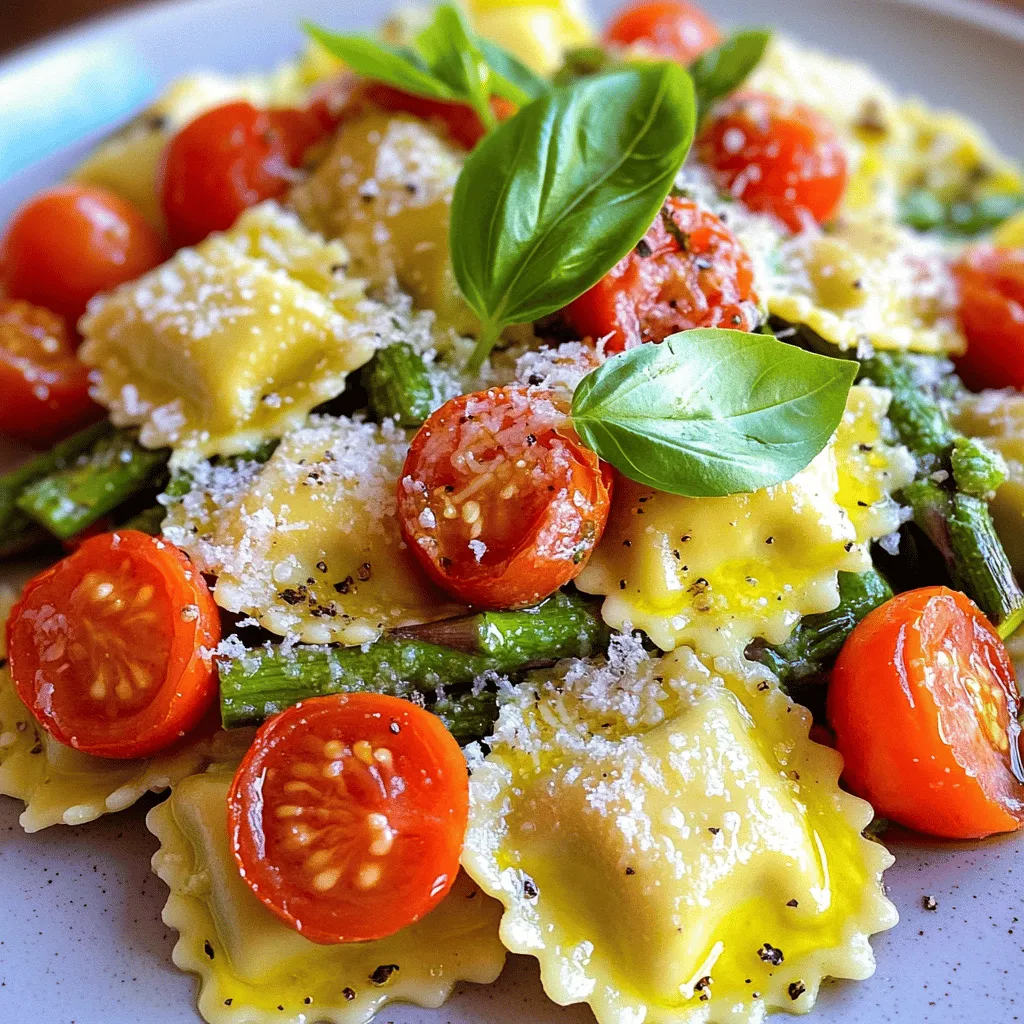
Are you ready to elevate your pasta game? This Ravioli with Tomatoes & Asparagus will bring fresh flavor to your

- 4 large russet potatoes - 1 cup cooked and shredded chicken - 1 cup sliced ham - 1 cup Swiss cheese, shredded - 1/2 cup dill pickles, sliced - 2 tablespoons yellow mustard - 2 tablespoons mayonnaise - Salt and pepper to taste - Olive oil for drizzling - Fresh cilantro for garnish Cuban Sandwich Potato Skins are a fun twist on a classic dish. The main ingredients create a hearty base. Russet potatoes give great texture and flavor. The chicken adds protein, while the ham brings a savory taste. Swiss cheese melts beautifully, creating creamy goodness. Dill pickles add a nice crunch and tang. For extra flavor, mustard and mayonnaise bring creaminess and zest. Salt and pepper enhance the dish, while olive oil adds richness. A sprinkle of fresh cilantro makes it look great and adds freshness. This mix of ingredients makes each bite exciting. You can find the full recipe above, guiding you through the steps to create this tasty snack. - Preheat the oven to 400°F (200°C). - Scrub and poke holes in the russet potatoes. - Bake the potatoes until tender (45-60 minutes). Now, let’s get those potatoes ready! Start by washing them well. Scrubbing them helps remove dirt. Then, use a fork to poke holes. This lets steam escape while they bake. Place the potatoes right on the oven rack. Bake them until they feel soft when you poke them with a fork. This takes about 45 to 60 minutes. - Cool and cut the potatoes in half. - Scoop out the insides, leaving 1/4 inch flesh. - Mix chicken, ham, cheese, pickles, mustard, mayonnaise, salt, and pepper. Once the potatoes cool down, cut them in half lengthwise. Use a spoon to scoop out most of the insides. Make sure to leave about 1/4 inch of flesh. This keeps the skins strong. In a bowl, mix the chicken, ham, Swiss cheese, dill pickles, mustard, mayonnaise, salt, and pepper. Stir well until everything combines nicely. - Fill the potato skins with the mixture. - Drizzle with olive oil and place on a baking sheet. - Bake for an additional 10-15 minutes until cheese is melted. Next, fill each potato skin with your tasty mixture. Don’t be shy—pile it high! Drizzle a little olive oil on top. This adds flavor and helps with browning. Place the filled skins on a baking sheet. Bake them again for 10 to 15 minutes. You want the cheese to melt and bubble. The smell will drive everyone wild! Enjoy making Cuban Sandwich Potato Skins from the Full Recipe. Choosing the right potatoes is key. I always pick large russet potatoes. They have a thick skin, which holds up well. When cooking, you want to bake them until they are soft. This usually takes about 45 to 60 minutes at 400°F (200°C). To check for doneness, poke them with a fork. If it slides in easily, they are ready. For garnishing, fresh cilantro adds a nice touch. You can also drizzle extra mustard or mayonnaise on top. This gives your potato skins a pop of flavor and looks great on the plate. One big mistake is overcooking the potatoes. They can become too mushy, making them hard to scoop. Another issue is skipping the skin scooping step. You need to leave some flesh inside. This keeps the skin sturdy for filling. Lastly, be careful with filling ratios. Too much filling can cause a mess, while too little leaves them dry. Aim for a good balance for the best taste. For the full recipe, check the earlier section. {{image_2}} You can easily swap ingredients for a unique twist. Instead of chicken, use turkey or pulled pork. For the ham, consider using salami or prosciutto. If you're a cheese lover, try pepper jack or gouda for a bolder flavor. For a vegetarian option, plant-based meats work well. Look for products that mimic chicken or ham closely to keep that hearty texture. To amp up the flavor, add spices like smoked paprika or cumin. Fresh herbs, such as oregano or thyme, bring brightness. You can also mix in garlic powder or onion powder for depth. For sauces, experiment with chipotle mayo or spicy mustard to add a kick. Customize your potato skins based on what you love. Add jalapeños for heat or switch up the pickles with sweet ones for contrast. For the Full Recipe of Cuban Sandwich Potato Skins, refer to the earlier section. To keep your Cuban Sandwich Potato Skins fresh, follow these steps: - Refrigerating: Place leftover potato skins in an airtight container. They stay good for up to three days. - Freezing: For longer storage, wrap each potato skin tightly in plastic wrap, then place them in a freezer bag. They can last for up to three months. - Ideal Containers: Use glass or plastic containers with tight lids to avoid air exposure. This helps keep the skins from drying out. To reheat and maintain texture and flavor: - Oven Method: Preheat your oven to 350°F (175°C). Place the skins on a baking sheet and bake for about 15 minutes. - Microwave Method: If you’re short on time, use a microwave. Heat for about 1-2 minutes, though this may make them a bit softer. These Cuban Sandwich Potato Skins make great party snacks! Here are some ideas: - Presentation: Serve them on a large platter. Add bowls with extra mustard or mayonnaise for dipping. - Drink Pairings: They pair well with light beers or fruity cocktails like mojitos. The flavors blend perfectly. - Alternative Uses: If you have leftover filling, use it as a sandwich spread. You can also mix it into pasta or a salad for a fun twist. Cuban Sandwich Potato Skins combine classic Cuban flavors with crispy potato skins. They feature tender potato skins filled with cooked chicken, sliced ham, and melted Swiss cheese. The tangy dill pickles and zesty mustard give a nice kick. These flavors blend well to create a delicious snack that everyone will love. Yes, you can prep these potato skins ahead of time! Bake the potatoes and scoop out the insides. Store the potato skins in the fridge for up to two days. You can also mix the filling and keep it in the fridge. When you are ready to eat, fill the skins and bake them. You can freeze the filled skins too. Just make sure to wrap them well. They will last for about three months in the freezer. You can serve these potato skins with several tasty sides. Here are some ideas: - A fresh salad with lime dressing - Crispy plantain chips - Creamy avocado dip - Extra mustard or mayonnaise for dipping These options will add fun flavors to your meal. Yes, scaling this recipe is simple! Just multiply the ingredients based on how many guests you have. For example, if you want to serve 16 people, double all the ingredients. You can use more potatoes or make extra filling. This recipe works great for parties and gatherings. Don't forget to keep an eye on baking time as the number of potato skins increases. Cuban Sandwich Potato Skins are a tasty way to enjoy classic flavors. We made them using russet potatoes, chicken, ham, and Swiss cheese, while adding dill pickles for that extra crunch. Following the steps carefully ensures perfect skins every time. Remember to get creative with your ingredients and storage tips. This dish is great for gathering and can be made ahead. Enjoy sharing this fun recipe with friends and family. You will impress everyone with your cooking!

Cuban Sandwich Potato Skins Flavorful and Fun Snack

Are you ready for a snack that’s both tasty and fun to make? Cuban Sandwich Potato Skins bring together the

To make this dish, you will need some key items. Here’s what you need: - 1 pound large shrimp, peeled and deveined - 2 tablespoons gochujang (Korean chili paste) - 1 tablespoon honey - 1 tablespoon soy sauce - 1 tablespoon rice vinegar - 1 teaspoon sesame oil - 3 cloves garlic, minced - 1 inch piece of ginger, grated - 1 tablespoon vegetable oil - 2 green onions, chopped (for garnish) - Sesame seeds (for garnish) These ingredients deliver a perfect blend of sweet and spicy. The shrimp soak up the gochujang, honey, and soy sauce, creating a tasty sauce. You can add some extra touches to make this dish your own. Here are a few ideas: - Red pepper flakes for added heat - Lime juice for a zesty kick - Bell peppers or snap peas for crunch - Cilantro for fresh flavor Feel free to mix and match based on what you love. This dish allows for creativity. You don’t need too many tools to make this dish. Here’s what I recommend: - Medium mixing bowl for the marinade - Whisk for blending the marinade ingredients - Large skillet for cooking the shrimp - Spatula for flipping the shrimp - Serving plate for a beautiful presentation Having the right tools makes cooking easier and more fun. Follow the full recipe for a delicious experience! To start, gather your ingredients. You need gochujang, honey, soy sauce, rice vinegar, sesame oil, minced garlic, and grated ginger. In a medium bowl, whisk these together. This marinade brings sweet and spicy notes to the shrimp. Make sure all the ingredients mix well. The smell alone will make your mouth water! Now, take your pound of shrimp, already peeled and deveined. Add the shrimp to the bowl with the marinade. Toss the shrimp gently until they are fully coated. This step is key for flavor. Let the shrimp sit for at least 15 minutes. This allows the shrimp to soak up all that tasty goodness. Next, heat vegetable oil in a large skillet over medium-high heat. When the oil is hot, add the marinated shrimp in a single layer. Cook them for about 2-3 minutes on one side. Watch as they turn pink and opaque. Then, flip the shrimp and cook for an additional 2 minutes. Once done, remove the shrimp from the heat. Drizzle any remaining marinade over them. Let it thicken slightly in the pan for about 1 minute. Finally, plate the shrimp and garnish with green onions and sesame seeds. Enjoy this flavorful delight! For a complete guide, check out the Full Recipe. When picking shrimp, look for ones that are firm and shiny. Fresh shrimp should smell like the ocean, not fishy. If you are unsure, buy shrimp that are frozen. Frozen shrimp can be just as fresh. I prefer large shrimp for this recipe. They hold the sauce well and look great on the plate. Gochujang packs a punch, but you can control the heat. If you want less spice, use less gochujang. You can also add more honey to sweeten the dish. If you like it hot, add some chili flakes or a dash of hot sauce. Taste the marinade before adding it to the shrimp. This way, you can adjust the flavors to suit your taste. Serve your Sweet & Spicy Gochujang Shrimp over rice or noodles. This helps soak up all the tasty sauce. You can also add a side of steamed veggies for a colorful plate. Garnish with extra green onions and sesame seeds for crunch. For a fun twist, serve with lettuce wraps. This adds a fresh crunch to each bite. Check out the Full Recipe for more ways to enjoy this dish! {{image_2}} You can switch shrimp for other proteins. Chicken, tofu, or scallops work well. Just cut them into small pieces for even cooking. Marinate them in the same gochujang mix. Follow the same cooking steps for perfect results. You will enjoy how the flavors blend with each protein. For a meatless version, try using veggies or tempeh. Cauliflower, bell peppers, and mushrooms absorb the gochujang well. Cut them into bite-sized pieces and marinate like you did with shrimp. Cook until tender, about 5-7 minutes. This option brings a tasty twist to the dish. Pair your dish with quick sides for a full meal. Steamed rice or quinoa balances the spice. Sautéed greens like spinach or bok choy add freshness. You can also serve a simple cucumber salad for crunch. These sides are easy to make and complement the shrimp beautifully. For the full recipe, check out the Sweet & Spicy Gochujang Shrimp. To keep your Sweet & Spicy Gochujang Shrimp fresh, let it cool first. Place it in an airtight container. This helps lock in flavors. Store it in the fridge. It will last for up to three days. Make sure you seal it well. This prevents any odors from other foods. When it's time to eat again, reheating is key. Use a skillet for the best results. Heat it over medium-low heat. Add a little water or oil to keep it moist. Stir it often until it's warm. This helps retain the sauce's sticky goodness. Avoid the microwave if you can. It may make the shrimp rubbery. If you want to save it longer, freezing is a good option. Place the shrimp in a freezer-safe bag. Squeeze out as much air as you can. This helps avoid freezer burn. It can stay good for up to two months. To thaw, move it to the fridge overnight. This keeps the texture intact. For quick meals, you can cook it straight from frozen. Just add a few extra minutes to the cooking time. For the full recipe, check the [Full Recipe]. Gochujang is a spicy Korean chili paste. It has a rich, sweet taste. Made from red chili, glutinous rice, fermented soybeans, and salt, it packs a punch. You can use it in many dishes. It adds depth and flavor, making it a must-have for your kitchen. Yes, you can make Sweet & Spicy Gochujang Shrimp ahead of time. Marinate the shrimp and store them in the fridge. Let them soak up those flavors for a few hours. When you are ready to cook, just heat the skillet and follow the cooking steps. This saves time for busy days! To make it spicier, add more gochujang or some red pepper flakes. You can also include diced fresh chili peppers. If you prefer it milder, reduce the gochujang amount. Adding honey or more rice vinegar can help balance the heat too. Adjust until it fits your taste! Gochujang shrimp pairs well with many side dishes. Here are some great options: - Steamed rice - Quinoa - Stir-fried vegetables - Kimchi - Cucumber salad These sides add freshness and balance the spicy shrimp. You can find gochujang in Asian markets or grocery stores. Look in the international aisle near soy sauce. Many online stores sell it too. Brands like Chung Jung One and Sunchang are popular. Choose one that suits your taste! In this article, we covered making Sweet & Spicy Gochujang Shrimp. We discussed essential and optional ingredients, along with the tools you need. I shared step-by-step instructions for preparing, marinating, and cooking the shrimp. You learned tips for choosing shrimp and adjusting the spice levels. I also shared variations, storage tips, and answers to common questions. Now, you have all the tools to create a tasty dish. Enjoy experimenting with flavors and impressing your friends!

Sweet & Spicy Gochujang Shrimp Flavorful Delight

Get ready to spice up your dinner with this Sweet & Spicy Gochujang Shrimp! If you crave bold flavors that

When making Buckeye Dip, you need the right ingredients. Each one adds to the rich, sweet flavor. Here’s what you will need: - 1 cup creamy peanut butter - 1 cup powdered sugar - 1 cup cream cheese, softened - 1 teaspoon vanilla extract - 1 cup semisweet chocolate chips - 2 tablespoons coconut oil - Graham crackers or apple slices for dipping Each ingredient plays a key role. The creamy peanut butter gives it that classic taste. The powdered sugar adds sweetness, while the cream cheese creates a smooth texture. Vanilla extract brings in warmth and depth. The semisweet chocolate chips melt beautifully, making a rich topping. Coconut oil helps the chocolate blend well and stay smooth. For dipping, use graham crackers or crisp apple slices. They complement the dip perfectly. Now that you know the ingredients, you're ready to make this delightful treat. Check out the Full Recipe for all the details. Enjoy the sweet and creamy goodness! To start, grab a medium bowl. Add 1 cup of creamy peanut butter, 1 cup of powdered sugar, 1 cup of softened cream cheese, and 1 teaspoon of vanilla extract. Mix these ingredients together. You can use a hand mixer or a spatula. Make sure to mix until it becomes smooth and creamy. This base is key for your Buckeye dip. Next, take a microwave-safe bowl. Add 1 cup of semisweet chocolate chips and 2 tablespoons of coconut oil. Microwave in 30-second bursts. Stir between each interval. Continue until the chocolate is melted and smooth. Be careful not to overheat it. This chocolate layer will add a rich flavor to your dip. Now, it's time to put everything together. Transfer your peanut butter mixture into a serving bowl. Use a spatula to smooth the top. Drizzle the melted chocolate over the peanut butter layer. For added flair, create swirls with a spatula. Chill the dip in the fridge for at least 30 minutes. This lets it firm up. Serve with graham crackers or apple slices. You just made a delicious Buckeye dip! For more detailed steps, refer to the Full Recipe. Mixing Buckeye Dip right is key for great texture. Start with soft cream cheese. This helps it blend smoothly. Use a hand mixer if you have one. It makes mixing easy. Mix until the dip is creamy and free of lumps. If using a spatula, stir with a steady hand. Be sure to scrape the bowl's sides too. This ensures even mixing. Melted chocolate makes your dip look fancy. Use semisweet chocolate chips and coconut oil. The oil helps the chocolate stay smooth. Microwave the chocolate in short bursts. Stir after each burst to avoid burning. Once smooth, drizzle it over the peanut butter mix. For a fun twist, use a fork to create swirls. This adds a nice touch to your dip. Leftover Buckeye Dip is a treat too! Store it in an airtight container. Keep it in the fridge for up to five days. If you want to enjoy it later, you can freeze it. Just thaw it overnight in the fridge before serving. Stir it well after thawing to bring back its creamy texture. Enjoy your Buckeye Dip again with graham crackers or apple slices for dipping! {{image_2}} You can play with flavors in your Buckeye Dip. Try different nut butters like almond or cashew for a twist. You can also add flavor extracts, like almond or hazelnut, to give it a unique taste. Adding a pinch of sea salt can bring out the sweetness, too. Don't be afraid to mix and match. Each change can create a new and exciting dip. How you serve your Buckeye Dip can change the whole vibe. Use a pretty bowl to make it stand out. You can layer it in a glass dish for a fun look. Topping it with crushed nuts or chocolate shavings adds a nice touch. Consider using a festive platter for special events. A little creativity makes the dip more inviting. While graham crackers and apple slices are great, there are more options. Try using pretzels for a sweet and salty mix. Cookies, like vanilla wafers or chocolate chip, work well, too. You can also serve it with fresh fruit, like strawberries or bananas. The choices are endless, and each pairing can make the dip even more enjoyable. Buckeye dip is perfect for many events. You can serve it at parties, game days, or family gatherings. Kids love it, and adults do too. This dip stands out at potlucks and picnics. It adds a sweet touch to any table. The rich flavors make it a crowd-pleaser. When it comes to drinks, think sweet and refreshing. A cold glass of milk goes well with buckeye dip. You can also serve it with coffee for a cozy vibe. For a fun twist, try it with sweet iced tea. If you want something fruity, lemonade is a great choice. These drinks balance the creamy dip nicely. Plating can make your dip look fancy. Use a large, shallow bowl for a big impact. You can drizzle extra melted chocolate on top. Add a sprinkle of crushed nuts for texture. Arrange graham crackers and apple slices around the bowl. This makes it easy for guests to dip in. You can even use small cups for individual servings. These tips will make your buckeye dip a showstopper. For the full recipe, check out the detailed steps above. You can make Buckeye Dip gluten-free by choosing the right dippers. Use gluten-free graham crackers or fresh apple slices. The dip itself is already gluten-free, so you only need to pick safe dippers. Yes, you can make Buckeye Dip in advance. Prepare the dip ahead of time and chill it in the fridge. It tastes even better when the flavors meld together overnight. Just remember to cover it tightly before storing. You can try many toppings for Buckeye Dip. Here are some ideas: - Crushed nuts for a crunchy texture - Mini chocolate chips for extra sweetness - Drizzles of caramel sauce for a sweet twist - Sprinkles for a fun, colorful look These toppings add a fun flair and make the dip even more special. You can even mix and match them to suit your taste! For the full recipe, check out the Buckeye Dip section above. In this post, we explored how to make a delicious Buckeye Dip. We detailed each ingredient, from creamy peanut butter to chocolate chips. You learned the steps to prepare, melt, and assemble this tasty treat. I shared tips to get the best mix and drizzle. We also discussed fun variations and serving ideas. Buckeye Dip is easy to make and fun to share. It’s perfect for parties or snack times. Enjoy getting creative with it!

Buckeye Dip Irresistible Treat for Any Occasion

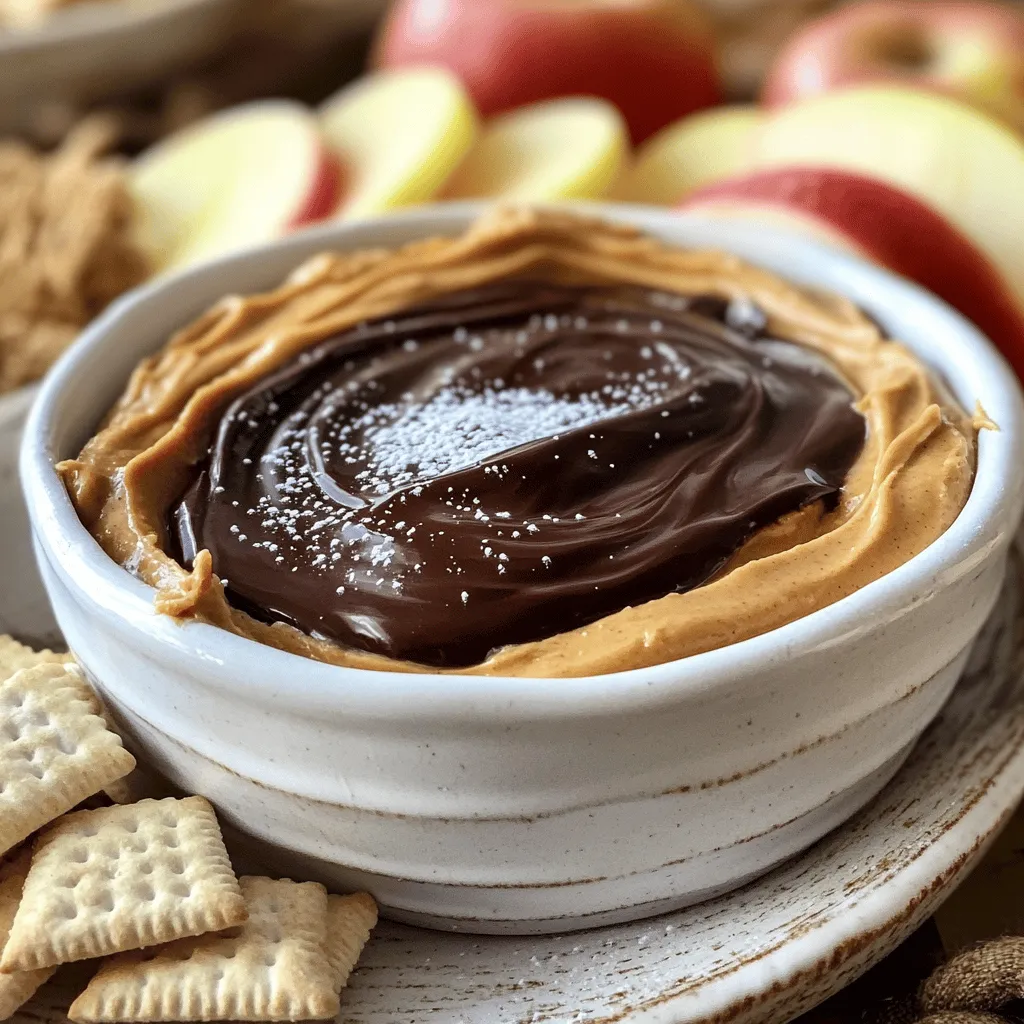
Get ready to indulge in Buckeye Dip, an easy and delicious treat perfect for any gathering! With creamy peanut butter,

- Cheese tortellini - Romaine lettuce - Cherry tomatoes - Parmesan cheese - Caesar dressing - Optional toppings The star of this salad is the cheese tortellini. I love using fresh, store-bought tortellini. It adds a rich and creamy texture. Next, the romaine lettuce gives a crisp crunch. Cherry tomatoes add a burst of sweetness. Don't forget the parmesan cheese, which melts into the salad. The Caesar dressing ties it all together with a tangy kick. You can also add optional toppings like croutons for crunch. - Olive oil - Garlic powder - Black pepper - Croutons (optional) These cooking essentials enhance the dish. Olive oil adds a smooth flavor. Garlic powder gives a warm, savory note. A sprinkle of black pepper adds just the right heat. If you want more crunch, toss in croutons. They are easy to make at home or buy at the store. - Calories - Macronutrients breakdown - Dietary considerations This salad is not just tasty; it's also healthy! A serving has about 350 calories. It provides a good balance of carbs, protein, and fats. The cheese tortellini gives some carbs, while romaine and tomatoes are low in calories. You can adjust the dressing for less fat. This meal is great for vegetarians. Start by boiling water in a large pot. Add a pinch of salt to the water. Once it boils, carefully add the cheese tortellini. Cook them for about 3-5 minutes. You will know they are done when they float to the top. Drain the tortellini and rinse them under cold water. This stops the cooking process and cools them down. While the tortellini cooks, grab a cutting board and a sharp knife. Chop the romaine lettuce into bite-sized pieces. Make sure the pieces are not too big. Next, take the cherry tomatoes and slice them in half. This adds a nice burst of flavor in each bite. In a small bowl, mix together the Caesar dressing, olive oil, garlic powder, and a pinch of black pepper. Whisk this until it is smooth and blended. In a large mixing bowl, combine the cooled tortellini, chopped romaine, and halved cherry tomatoes. Pour the dressing over the salad. Toss everything gently until all the ingredients are coated. Now, fold in the grated parmesan cheese. If you like a little crunch, you can also add croutons now. To serve, transfer the salad to a large platter or individual bowls. For a nice touch, sprinkle extra parmesan on top and add some freshly cracked black pepper. You can find the full recipe above for more details. To make the best cheese tortellini, cook it just right. Boil salted water and add the tortellini. They usually take about 3-5 minutes to cook. You know they are done when they float. After cooking, drain and rinse them under cold water to stop the cooking process. For fresh ingredients, always check the romaine lettuce. It should be crisp and green. Look for bright cherry tomatoes with no bruises. Fresh parmesan cheese is best, so buy it whole and grate it yourself for better flavor. You can choose between homemade or store-bought Caesar dressing. Homemade dressing gives a fresh taste and is easy to make with simple ingredients. Store-bought is quick and saves time. Both options work well in this salad. If you want to try other dressings, consider ranch or balsamic vinaigrette. These can add a fun twist to the classic Caesar flavor. A great way to serve this salad is on a large platter. It looks more inviting that way. For garnish, sprinkle extra parmesan cheese on top. You can also add freshly cracked black pepper for flavor. Consider using fresh herbs like parsley or basil. They not only add color but also enhance the taste. For plating, use bowls for individual servings. This makes it easy for guests to enjoy the salad. For the complete recipe, check out the [Full Recipe]. {{image_2}} You can make your Cheese Tortellini Caesar Salad even better by adding protein. Grilled chicken or shrimp works great. This adds flavor and makes the dish filling. You could also try adding bacon bits for a salty crunch. You can include other vegetables too. Think of bell peppers, cucumbers, or even olives. These add color and nutrition. Don't hesitate to mix and match based on what you like! If you need gluten-free options, look for gluten-free cheese tortellini. There are many brands that make this. Use fresh veggies and a gluten-free dressing to keep it safe. For vegan modifications, you can swap the cheese tortellini for a plant-based version. Look for vegan Caesar dressing or make your own. Use nuts or seeds for a cheesy flavor without dairy. You can change the salad with the seasons. In spring, add fresh peas or asparagus for a bright taste. In summer, throw in corn or diced avocado for creaminess. Fall brings roasted squash or apple slices, adding sweetness. In winter, use hearty greens like kale. You can get creative with flavors by mixing in seasonal fruit or herbs. These choices keep your salad fresh and exciting! Check out the Full Recipe for the basic steps to make this dish shine! To store leftover Cheese Tortellini Caesar Salad, place it in an airtight container. This keeps it fresh and safe. The salad lasts about 3 days in the fridge. After that, the tortellini can get mushy, and the lettuce may wilt. You can freeze the salad, but it’s not the best option. Freezing can change the texture of the lettuce and tomatoes. If you must freeze it, store only the tortellini. For the best results, cook the tortellini fully, cool it, and freeze in a single layer. Once frozen, transfer to a bag for easy storage. To refresh the salad, let it sit at room temperature for about 15 minutes before serving. For reheating tortellini, place it in boiling water for about a minute. This warms it up without losing its taste. Avoid using the microwave, as it can make the tortellini rubbery. For the best flavor, toss the salad again with fresh dressing before serving. You can find the Full Recipe in the earlier section. How to make homemade Caesar dressing? To make homemade Caesar dressing, mix ¼ cup mayonnaise, 2 tablespoons lemon juice, 1 tablespoon Dijon mustard, and 2 cloves of minced garlic. Add ¼ cup grated parmesan cheese, salt, and pepper to taste. Blend until smooth. This easy dressing tastes fresh and rich! Can I use frozen tortellini? Yes, you can use frozen tortellini! Just cook it according to the package directions. Frozen tortellini saves time and still tastes great. What can I substitute for Caesar dressing? If you want a substitute for Caesar dressing, try ranch dressing or a yogurt-based dressing. These options give a different taste but still work well with the salad. What to serve with Cheese Tortellini Caesar Salad? This salad pairs well with grilled chicken or shrimp. You can also serve it alongside garlic bread or a light soup for a full meal. Best wines to pair with this salad A crisp white wine like Sauvignon Blanc or a light red like Pinot Noir complements the flavors well. Both wines enhance the taste without overpowering the salad. Can I make this salad in advance? Yes, you can prepare this salad in advance. Keep the dressing separate until you're ready to serve. This keeps the lettuce fresh and crunchy. How to customize the recipe for specific diets? For a gluten-free option, use gluten-free tortellini. To make it vegan, substitute the cheese and use a plant-based dressing. You can also add more veggies to boost nutrition! For the complete recipe, check out the Full Recipe. This blog post covered the key ingredients, cooking steps, and tips for making a Cheese Tortellini Caesar Salad. We explored how to cook the tortellini, prepare fresh veggies, and snap it all together. We also touched on variations to suit your taste and dietary needs. In summary, this salad is not just tasty but also flexible. With easy steps and helpful tips, you can make it your own. Enjoy this dish, and let your creativity flow!

Cheese Tortellini Caesar Salad Healthy and Tasty Dish

Looking for a fresh take on a classic dish? My Cheese Tortellini Caesar Salad is the answer. This healthy yet

To make Creamy Chicken Delight, you'll need a variety of fresh ingredients. Each one adds flavor and texture, making this dish special. The creamy sauce helps tie everything together, creating a meal that feels luxurious yet simple to make. Here’s what you need for this recipe: - 4 chicken breasts, diced - 1 tablespoon olive oil - 1 medium onion, finely chopped - 3 cloves garlic, minced - 1 cup mushrooms, sliced - 1 cup spinach, fresh - 1 cup heavy cream - ½ cup chicken broth - 1 teaspoon dried thyme - 1 teaspoon paprika - Salt and pepper to taste - 1 cup grated Parmesan cheese - Fresh parsley, chopped (for garnish) You can swap some ingredients if needed. Here are a few options: - Chicken: Use turkey or tofu for a different protein. - Olive oil: Any cooking oil works, like canola or avocado oil. - Heavy cream: Try coconut cream for a dairy-free version. - Spinach: Kale or Swiss chard can be good alternatives. - Parmesan cheese: Nutritional yeast adds a cheesy flavor without dairy. Feel free to mix and match as you see fit. Cooking is all about creativity! Start by gathering all your ingredients. This makes cooking smooth and fun. Dice the chicken breasts into small pieces. Chop the onion finely to ensure it cooks quickly. Mince the garlic, as it adds great flavor. Slice the mushrooms thinly for even cooking. Wash the spinach and set it aside. Measure your heavy cream and chicken broth for easy pouring later. 1. Heat the olive oil in a large skillet over medium heat. 2. Add the diced chicken and cook for 7-8 minutes. Make sure it is no longer pink. 3. Remove the chicken and set it aside on a plate. 4. In the same skillet, add the chopped onion. Sauté for 2-3 minutes until it turns translucent. 5. Stir in the minced garlic and let it cook for about a minute. 6. Add the sliced mushrooms next. Cook them for 4-5 minutes until they are tender. 7. Toss in the fresh spinach and cook until it wilts, about 2 minutes. 8. Pour in the heavy cream and chicken broth. Mix well to combine. 9. Sprinkle in the dried thyme and paprika. Season with salt and pepper to taste. 10. Return the cooked chicken to the skillet. Mix it well with the creamy sauce. 11. Gradually add the grated Parmesan cheese. Stir until it melts and the sauce thickens, about 2-3 minutes. When ready to serve, use a large spoon to scoop out the creamy chicken delight. Place it on a warm plate to keep it cozy. Sprinkle chopped parsley on top for a fresh touch. This adds color and makes the dish look beautiful. Enjoy this simple and delicious meal! For the complete recipe, check the Full Recipe section. To cook chicken perfectly, start with even pieces. Dice the chicken breasts into uniform cubes. This helps them cook evenly. Use medium heat in your skillet. This keeps the chicken juicy and tender. Always check for doneness; the center should not be pink. If you have a meat thermometer, aim for 165°F. To boost flavor, use fresh herbs. Thyme and parsley add a great taste. You can also try adding a splash of lemon juice. This brings brightness to the dish. For more depth, sauté the garlic until golden. It gives a nice nutty flavor. Don't forget to taste the sauce as you cook. Adjust salt and pepper when needed. Serve Creamy Chicken Delight with rice or pasta. These sides soak up the creamy sauce well. You can also pair it with crusty bread. It’s perfect for mopping up every bite. Add a side salad for a fresh crunch. This adds color and health to your meal. Always garnish with fresh parsley for a pop of color. {{image_2}} You can swap some ingredients to change the flavor. For a lighter dish, use chicken thighs instead of breasts. If you want a vegan option, replace chicken with chickpeas or tofu. Instead of heavy cream, try coconut milk for a dairy-free version. You can also add different veggies. Bell peppers, zucchini, or sun-dried tomatoes make great additions. This recipe can fit many diets. For gluten-free eaters, ensure the chicken broth is gluten-free. You can make it low-carb by skipping the pasta or serving it over cauliflower rice. If you are watching calories, use low-fat cream or Greek yogurt instead of heavy cream. These swaps keep the dish creamy without the extra fat. Travel the world with this dish by adding unique flavors. For an Italian twist, mix in sun-dried tomatoes and basil. For a spicy kick, add jalapeños or chili flakes for a Mexican flair. You could also go Asian by adding soy sauce and sesame oil. Each change brings new life to the creamy chicken delight, making it fun and versatile. Explore these ideas to find your favorite version. Check the Full Recipe for the original version. Store any leftover creamy chicken delight in an airtight container. It will stay fresh in the fridge for up to three days. Make sure to let the dish cool down before sealing it. This helps keep it from getting soggy. When you’re ready to enjoy it again, just take it out and go to the next step. If you want to keep creamy chicken delight longer, freezing is a great option. First, allow the dish to cool completely. Then, pack it in a freezer-safe container or bag. You can freeze it for up to three months. For best results, remember to label the container with the date. This way, you won’t forget how long it’s been stored. To reheat creamy chicken delight, you have a few choices. The best method is to use the stove. Place it in a pan on low heat. Stir it often to avoid burning. If it seems thick, add a splash of chicken broth or cream. You can also use the microwave. Place it in a microwave-safe bowl and cover it. Heat it in short bursts, stirring in between. This ensures even heating. Always check that it is hot all the way through before serving. Enjoy your meal again! You can easily adjust the spice level in Creamy Chicken Delight. To add heat, use cayenne pepper or red pepper flakes. Start small; you can always add more. If you prefer milder flavors, skip the spicy ingredients. You can also use sweet paprika for flavor without the heat. Yes, you can prepare Creamy Chicken Delight ahead of time. Cook the dish, then let it cool. Store it in the fridge for up to three days. When you're ready to eat, reheat on the stove. Add a splash of cream if the sauce thickens. Creamy Chicken Delight pairs well with many sides. Here are some tasty options: - Steamed rice - Quinoa - Garlic bread - Roasted vegetables - Mashed potatoes These sides complement the creamy sauce and add more flavor to your meal. Check out the Full Recipe to make this dish at home! This blog post covered everything about making Creamy Chicken Delight. We explored the ingredients and how to pick them wisely. I shared step-by-step instructions for easy cooking. Tips and tricks highlighted ways to make your dish shine. We also looked at variations to suit all diets. Finally, I provided storage tips to keep your meal fresh. Creating delicious meals is fun. Enjoy trying new flavors and methods!

Creamy Chicken Delight Simple and Savory Recipe

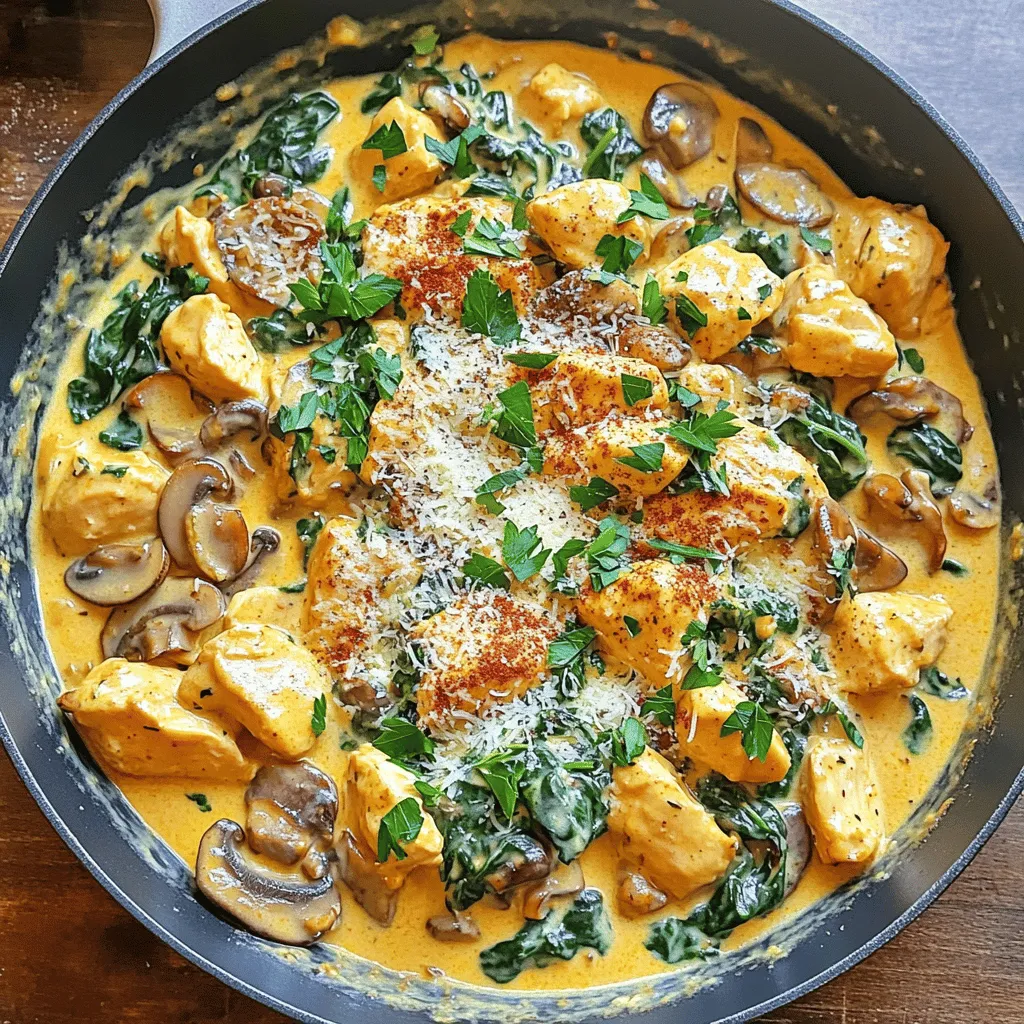
If you’re craving a cozy meal that’s easy to make, look no further! My Creamy Chicken Delight is simple yet

- Boneless, skinless chicken breasts - Grated Parmesan cheese - Breadcrumbs (panko preferred) - Garlic powder - Dried Italian herbs (oregano, basil, thyme) - Salt and pepper - Eggs - Dijon mustard - Olive oil - Fresh parsley for garnish When I make Parmesan crusted chicken, I start with the essential ingredients. The boneless, skinless chicken breasts are easy to work with. They cook evenly and stay juicy. Next, I grab some grated Parmesan cheese. This cheese gives the dish its rich flavor. Panko breadcrumbs add a great crunch to the coating. They create a crispy texture that I love. For seasoning, I always use garlic powder. It adds a nice kick. Dried Italian herbs like oregano, basil, and thyme bring warmth and depth. Salt and pepper are a must for flavor balance. I also use eggs and Dijon mustard for the coating. The eggs help the breadcrumbs stick. Dijon mustard adds a subtle tanginess that boosts the flavor. A little olive oil helps cook the chicken to golden perfection. Lastly, I always top it off with fresh parsley. It adds color and a fresh taste. These ingredients make Parmesan crusted chicken a simple yet tasty dish. For the complete recipe, check the [Full Recipe]. 1. First, preheat your oven to 400°F (200°C). 2. Line a baking dish with parchment paper or lightly grease it. 3. In a shallow bowl, whisk together two large eggs and one tablespoon of Dijon mustard. Mix until smooth. Set this aside for later. 1. In a separate bowl, combine one cup of grated Parmesan cheese, one cup of breadcrumbs, one teaspoon of garlic powder, one teaspoon of dried Italian herbs, and salt and pepper to taste. Mix well. 2. Take each boneless, skinless chicken breast. Dip it into the egg mixture first. Make sure it's fully coated. 3. Next, coat the chicken in the Parmesan breadcrumb mixture. Press gently to help it stick. 1. Heat a large skillet over medium heat and add 1/4 cup of olive oil. 2. Once the oil is hot, add the coated chicken breasts. Cook for about 3-4 minutes on each side until they turn golden brown. 3. After searing, transfer the chicken to the prepared baking dish. Bake in the oven for 15-20 minutes, or until the chicken reaches an internal temperature of 165°F (75°C). 4. When the chicken is done, take it out and let it rest for a few minutes. You can garnish it with fresh chopped parsley before serving. This recipe is simple and gives you a tasty meal. You can find the Full Recipe with all these steps outlined clearly. Enjoy your cooking! To get a crispy coating, press the breadcrumb mix firmly onto the chicken. This step helps it stick. If your chicken is thicker, adjust the cooking time. Thicker pieces need more time to cook through. Want to boost flavor? Add spices or herbs to the breadcrumb mix. Try paprika or fresh herbs for a twist. Marinating the chicken before cooking adds another layer of taste. Just a few hours in a simple marinade works wonders. For a beautiful dish, garnish with chopped parsley. It adds color and freshness. Serve your Parmesan crusted chicken with a side of roasted veggies or a light salad. These sides complement the chicken well and create a balanced meal. For the full recipe, check out the detailed instructions above. {{image_2}} To change the taste of Parmesan crusted chicken, try different flavors. A lemon garlic Parmesan crust adds a bright and fresh taste. Simply mix lemon zest and minced garlic into the breadcrumb mixture. This adds zing to every bite. For a spicy kick, add crushed red pepper or cayenne pepper to the breadcrumbs. This gives the chicken a warm heat that many enjoy. You can also mix in your favorite herbs for extra flavor, like rosemary or thyme. You can cook Parmesan crusted chicken in different ways for unique results. Using an air fryer makes it crispy and quick. Preheat the air fryer to 375°F (190°C). Cook the chicken for about 12-15 minutes, flipping halfway through. This method uses less oil and keeps the chicken juicy. Grilling is another great option. It adds a smoky flavor that enhances the dish. Preheat the grill and cook the chicken for about 6-8 minutes on each side. Check for doneness to ensure the chicken is safe to eat. If you need gluten-free options, you can use gluten-free breadcrumbs. Many brands offer tasty choices that work well in this dish. Just swap them in for regular breadcrumbs in the recipe. For a vegan version, replace the chicken with tofu or eggplant. Use a mixture of ground nuts or seeds for the coating. You can also use a vegan egg substitute for the binding. This way, everyone can enjoy a delicious meal! To keep your Parmesan crusted chicken fresh, store it in the fridge. Place the chicken in an airtight container. Make sure to let it cool first. Properly stored, it lasts up to three days. If you notice any strange smells or colors, it's best to toss it. Want to save some for later? You can freeze your cooked chicken. Wrap each piece tightly in plastic wrap, then place them in a freezer bag. When ready to eat, thaw it overnight in the fridge. To reheat, bake it in the oven at 350°F (175°C) until hot. This usually takes about 20-25 minutes. Use high-quality containers for the best results. Glass or BPA-free plastic containers work well. Make sure they seal tightly to keep air out. Label your containers with the date you stored the chicken. This helps you keep track of how long it's been in the fridge or freezer. Cooking Parmesan Crusted Chicken is quick and easy. It takes about 15 minutes to prep. Then, you will need 20 minutes to bake it. So, the total time is about 40 minutes. This makes it perfect for a weeknight dinner. Yes, you can use frozen chicken breasts. Just remember to thaw them first. You can do this in the fridge overnight or use the microwave for a quick thaw. Fresh chicken cooks faster and tastes better, but frozen works in a pinch. Some great side dishes to serve with this chicken are: - Mashed potatoes - Steamed broccoli - Garlic bread - A fresh green salad These sides complement the flavors well and create a balanced meal. Yes, you can make this recipe ahead of time. You can coat the chicken and store it in the fridge for a few hours. Just bake it when you're ready to eat. This way, you save time and enjoy a tasty meal without much fuss. Check out the Full Recipe for more details. This blog post covered all the key ingredients and steps for making Parmesan Crusted Chicken. You learned about the essential ingredients like chicken breasts, breadcrumbs, and spices. We provided clear, step-by-step instructions for preparing and cooking. Tips on achieving crispy coatings and variations let you customize the dish. Lastly, we shared proper storage advice and answered common questions. Embrace these tips to create a delicious meal that pleases everyone. Enjoy your cooking!

Parmesan Crusted Chicken Tasty and Simple Dish

Are you ready to impress your family with a delicious dish? Parmesan Crusted Chicken is not only tasty, but it’s

- 4 large flour tortillas - 1 cup milk chocolate chips - 1 cup mini marshmallows - 1/2 cup crushed graham crackers - 2 tablespoons butter, softened - 1/2 teaspoon vanilla extract - A pinch of salt Grilled S'mores Quesadillas use simple and fun ingredients. Flour tortillas are the base. They hold all the yummy stuff inside. Milk chocolate chips add sweetness and creaminess. Mini marshmallows give that classic s'mores taste. You can also use optional ingredients for extra flavor. Crushed graham crackers bring a nice crunch. Butter makes the quesadillas golden and rich. A touch of vanilla extract adds warmth to the flavor. Don't forget the pinch of salt! It balances the sweetness and enhances the taste. Each ingredient plays a role in making this treat special. You can find the full recipe for more details on how to combine them. Enjoy making this fun dessert! 1. Preheat your grill or a skillet over medium heat. This step is key for even cooking. 2. In a small bowl, mix the crushed graham crackers with a pinch of salt. This adds flavor to your dessert. 1. Take two tortillas and spread a thin layer of softened butter on one side of each. This helps them crisp up nicely. 2. On the unbuttered sides, sprinkle a layer of chocolate chips. Cover them well so every bite is sweet. 3. Add a generous amount of mini marshmallows on top of the chocolate. Make sure to balance the marshmallows for good melty goodness. 4. Sprinkle half of the graham cracker mix over the marshmallows. This gives a nice crunch. 5. Top with the second tortilla, buttered side facing out. This seals in all the tasty layers. 1. Carefully place the quesadilla on the preheated grill or skillet. Cook for about 2-3 minutes until golden brown. 2. Flip the quesadilla and cook for another 2-3 minutes on the other side. Keep an eye on it. 3. Once both sides are crispy and the chocolate and marshmallows are melted, remove the quesadilla from the heat. 4. Let it sit for a minute, then cut into wedges. Serve them dusted with any leftover graham cracker crumble from the Full Recipe. To get that perfect crunch, start with the right cooking temperature. Preheat your grill or skillet to medium heat. This heat lets the quesadilla cook evenly. Too hot and it burns; too low and it won’t crisp up. Timing for flipping is also key. Cook for about 2-3 minutes on one side. When it turns golden brown, it’s time to flip. Use a spatula to check the crispiness. If it looks good, flip it carefully. You can make these quesadillas even tastier. Adding nuts like chopped pecans or almonds gives a nice crunch. You can also switch up the chocolate. Try dark chocolate or even white chocolate for a twist. Using flavored tortillas can add fun tastes too. Cinnamon, herb, or even chocolate tortillas will bring new flavors. Experiment with what you like best. Serving ideas can make your dessert pop. Use a wooden cutting board for a rustic look. A colorful plate can make the dish more appealing. For garnishing techniques, dust with leftover graham cracker crumbs. Drizzle some chocolate syrup on top for extra flavor. A dollop of whipped cream can make it feel extra special. You can find the full recipe to try these tips and tricks! {{image_2}} You can switch up the classic s'mores quesadilla in fun ways. One tasty option is the peanut butter s'mores quesadilla. Just spread peanut butter on the tortillas before adding chocolate and marshmallows. The creamy texture adds richness. Another fun twist is to use fruit. Try adding sliced strawberries or bananas. The fruit adds freshness and brightness to each bite. Need a gluten-free option? Use corn tortillas instead of flour. They hold up well and taste great. For a vegan alternative, choose dairy-free chocolate chips and skip the butter. You can use coconut oil instead. This way, everyone can enjoy these sweet treats. If you don't have a grill, you can bake these quesadillas in the oven. Preheat your oven to 375°F. Place the assembled quesadillas on a baking sheet. Bake for about 10 minutes until crispy. If you prefer a stovetop method, a skillet works well too. Heat the skillet over medium heat and cook as you would on the grill. These methods give you options for perfecting your grilled s'mores quesadillas. Check out the Full Recipe for more details! To store leftover grilled s'mores quesadillas, place them in an airtight container. Make sure to cool them first. This keeps them fresh longer. You can store them in the fridge for up to three days. When you're ready to eat, reheat them in a skillet. Heat them over medium for about 2-3 minutes per side. This will make them crispy again. If you want to make quesadillas ahead of time, freezing is great. Wrap each quesadilla tightly in plastic wrap. Then, place them in a freezer bag. They can last up to two months in the freezer. When you're ready to cook, take them out and defrost in the fridge overnight. After that, grill them as you normally would. This will bring back their yummy taste. Grilled s'mores quesadillas last for about three days in the fridge. Always check for signs of spoilage. If you see mold or an off smell, it's best to throw them away. Keeping them stored properly helps them stay fresh and tasty. Grilled s'mores quesadillas are a fun twist on the classic campfire treat. They combine crispy tortillas with gooey chocolate and marshmallows. You fill them up, grill them, and slice them into wedges. This dessert is sweet and crunchy, perfect for kids and adults alike. You can even find the full recipe above to try it yourself! Yes, you can prepare some parts in advance. Mix the crushed graham crackers and salt before your event. You can also butter the tortillas ahead of time. Just keep them in the fridge until you’re ready to cook. This saves time and keeps your cooking fun and easy! Grilled s'mores quesadillas pair well with ice cream or whipped cream. You can also serve them with fresh fruit like strawberries or bananas. For drinks, try hot chocolate or milk for a cozy touch. These sides enhance the sweet flavor and make your dessert even more enjoyable! In this blog post, we explored how to make delicious grilled s'mores quesadillas. We covered main ingredients like flour tortillas, chocolate chips, and mini marshmallows. I shared tips for perfecting the cooking process, maintaining the right temperature, and trying fun variations. Remember, you can customize your quesadillas and even make them gluten-free or vegan. Enjoy these sweet treats fresh or as leftovers! With the right techniques, you’ll impress everyone with your tasty creations.

Grilled S’mores Quesadillas Tasty and Easy Dessert

Imagine biting into a warm, gooey dessert that combines the best of s’mores and quesadillas. That’s what Grilled S’mores Quesadillas

Older posts
Newer posts
← Previous Page1 … Page52 Page53 Page54 … Page78 Next →

dsad

© 2025 pureeatsnow • Built with GeneratePress

Our Policies

  • Copyright Policy
  • Cookie Policy
  • GDPR Policy
  • Privacy Policy
  • Disclaimer
  • Terms Of Use

More Information

  • Home
  • About
  • Contact
  • Appetizers
  • Dessert
  • Dinner
  • Drinks
©2025, pureeatsnow About Back To Top