Skip to content
DisclaimerTerms Of UseGDPR PolicyCookie Policy

pureeatsnow

  • Home
  • Drinks
  • Appetizers
  • Dinner
  • Dessert
  • About
  • Contact
  • Privacy Policy
DisclaimerTerms Of UseGDPR PolicyCookie Policy

Rachel

To make delicious spicy honey chicken, gather these key ingredients: - 1 pound boneless, skinless chicken thighs - 2 tablespoons olive oil - 1 teaspoon garlic powder - 1 teaspoon onion powder - 1 teaspoon smoked paprika - 1/2 teaspoon cayenne pepper (adjust to heat preference) - Salt and pepper to taste - 1/4 cup honey - 2 tablespoons soy sauce (low sodium) - 1 tablespoon sriracha (or to taste) - 1 tablespoon rice vinegar - 1 tablespoon sesame seeds (for garnish) - Chopped green onions (for garnish) You can add a few optional ingredients to enhance your dish: - Fresh ginger for a spicy kick - Red pepper flakes for extra heat - Lime juice for a zesty flavor - Mixed vegetables to serve alongside the chicken If you’re missing an ingredient, try these substitutes: - Chicken thighs can be swapped with chicken breasts or drumsticks. - Olive oil can be replaced with canola or avocado oil. - Honey can be substituted with maple syrup or agave nectar. - Soy sauce may be replaced with tamari for a gluten-free option. Making spicy honey chicken is simple and fun. You can adjust flavors based on what you love. For the full recipe, check out the detailed steps ahead. First, gather all your ingredients. This makes cooking smooth and fast. You need: - 1 pound boneless, skinless chicken thighs - 2 tablespoons olive oil - 1 teaspoon garlic powder - 1 teaspoon onion powder - 1 teaspoon smoked paprika - 1/2 teaspoon cayenne pepper (adjust to heat preference) - Salt and pepper to taste - 1/4 cup honey - 2 tablespoons soy sauce (low sodium) - 1 tablespoon sriracha (or to taste) - 1 tablespoon rice vinegar - 1 tablespoon sesame seeds (for garnish) - Chopped green onions (for garnish) Next, mix the spices. In a bowl, combine garlic powder, onion powder, smoked paprika, cayenne pepper, salt, and pepper. Rub this spice mix onto the chicken thighs. Make sure every piece is coated well. Heat a large skillet over medium-high heat. Add olive oil and let it get hot. Place the seasoned chicken thighs in the skillet. Cook for about 5-7 minutes on each side. You want them golden brown and fully cooked. The chicken should reach an internal temperature of 165°F. While the chicken cooks, prepare the sauce. In a small bowl, whisk together honey, soy sauce, sriracha, and rice vinegar. Mix until it’s combined well. Once the chicken is done, reduce the heat to medium. Pour the honey sauce over the chicken in the skillet. Let it simmer for 2-3 minutes. This will thicken the sauce and coat the chicken nicely. Remove the chicken from the skillet and let it rest for a few minutes. This makes it juicy. Slice it into bite-sized pieces. Drizzle the extra sauce from the skillet over the chicken. Finally, sprinkle sesame seeds and chopped green onions on top for garnish. For a great meal, serve the spicy honey chicken over steamed rice or with stir-fried veggies. Enjoy your delicious dish! For the full recipe, refer back to the ingredients and instructions above. To get the best taste, use a mix of sweet and spicy. The honey gives a nice sweetness, while the cayenne adds heat. Adjust the cayenne based on your spice level. You can taste the sauce before pouring it onto the chicken. This way, you can make it just right for you. To keep the chicken tender, do not overcook it. Cook each side for 5-7 minutes. Use medium-high heat to get a nice brown color. After cooking, let it rest for a few minutes. This helps the juices stay inside, making it juicy and flavorful. Serve the spicy honey chicken over steamed rice or with stir-fried veggies. This adds a nice touch. Drizzle the extra sauce on top for more flavor. Garnish with sesame seeds and green onions. This makes the dish look great and taste even better. For the full recipe, check the earlier section. {{image_2}} You can change the heat of your spicy honey chicken easily. To do this, adjust the cayenne pepper. If you want it mild, use less. For more heat, add more cayenne or add extra sriracha. Taste the sauce before serving. This way, you can find the perfect heat for you and your guests. You can cook this chicken in many ways. Grilling adds a nice smoky flavor. To grill, marinate the chicken in the sauce first. Then, cook it on medium heat for about 6-8 minutes per side. Baking is another great option. Preheat your oven to 400°F and bake the chicken for 25 minutes. This gives you juicy chicken with less mess. You can easily swap ingredients to fit your diet. If you want to make it gluten-free, use tamari instead of soy sauce. For a vegan version, try tofu or tempeh in place of chicken. Use maple syrup instead of honey for sweetness. These swaps keep the flavor while meeting your needs. For the full recipe, check the previous section! To keep your spicy honey chicken fresh, let it cool first. Place it in an airtight container. Store it in the fridge for up to three days. If you want to keep it longer, consider freezing it. Just make sure to separate the chicken pieces. This helps keep the sauce from getting too thick. When you're ready to eat, take the chicken from the fridge. You can reheat it in a skillet over medium heat. Add a splash of water or broth to keep it moist. Stir it often for even heating. If you use a microwave, cover it with a lid or wrap. Heat for about 1-2 minutes. Check that it is hot all the way through. If you want to freeze your spicy honey chicken, first allow it to cool completely. Then, place it in a freezer-safe bag. Try to remove as much air as possible. This will help prevent freezer burn. You can freeze it for up to three months. When you're ready to eat, thaw it overnight in the fridge. Then, follow the reheating instructions to enjoy your meal again. Check out the Full Recipe for more details on making this delicious dish! Spicy honey chicken blends sweet and spicy flavors. This dish has roots in Asian cuisine, where sweet sauces pair well with meat. Many people enjoy it in Chinese or Thai meals. The combination of honey and spice creates a unique taste that makes it popular worldwide. Yes, you can use chicken breast. Chicken breasts are leaner than thighs. They will cook faster, so keep an eye on them. Adjust the cooking time to ensure they do not dry out. Thighs add richer flavor, but breasts are a good alternative. To reduce the spice level, cut back on cayenne pepper. You can also add more honey to balance the heat. Another option is to use less sriracha in the sauce. Taste as you go to find the right level for you. Yes, you can make this recipe gluten-free. Use gluten-free soy sauce instead of regular soy sauce. Most of the other ingredients are already gluten-free. Just check the labels to be sure. Enjoy a tasty meal without gluten! Leftovers can last in the fridge for up to four days. Store them in an airtight container. Reheat thoroughly before eating. The dish tastes great even after a day in the fridge. Try it with rice or veggies for an easy lunch. For more detailed instructions and cooking tips, check out the Full Recipe. In this post, we explored the key ingredients for Spicy Honey Chicken and how to customize them. You learned step-by-step cooking directions and helpful tips for perfect flavor. I shared variations to suit your taste and dietary needs, plus storage advice for leftovers. With this knowledge, you can create a dish that's delicious and unique. Enjoy experimenting in your kitchen!

Delicious Spicy Honey Chicken Quick and Easy Recipe

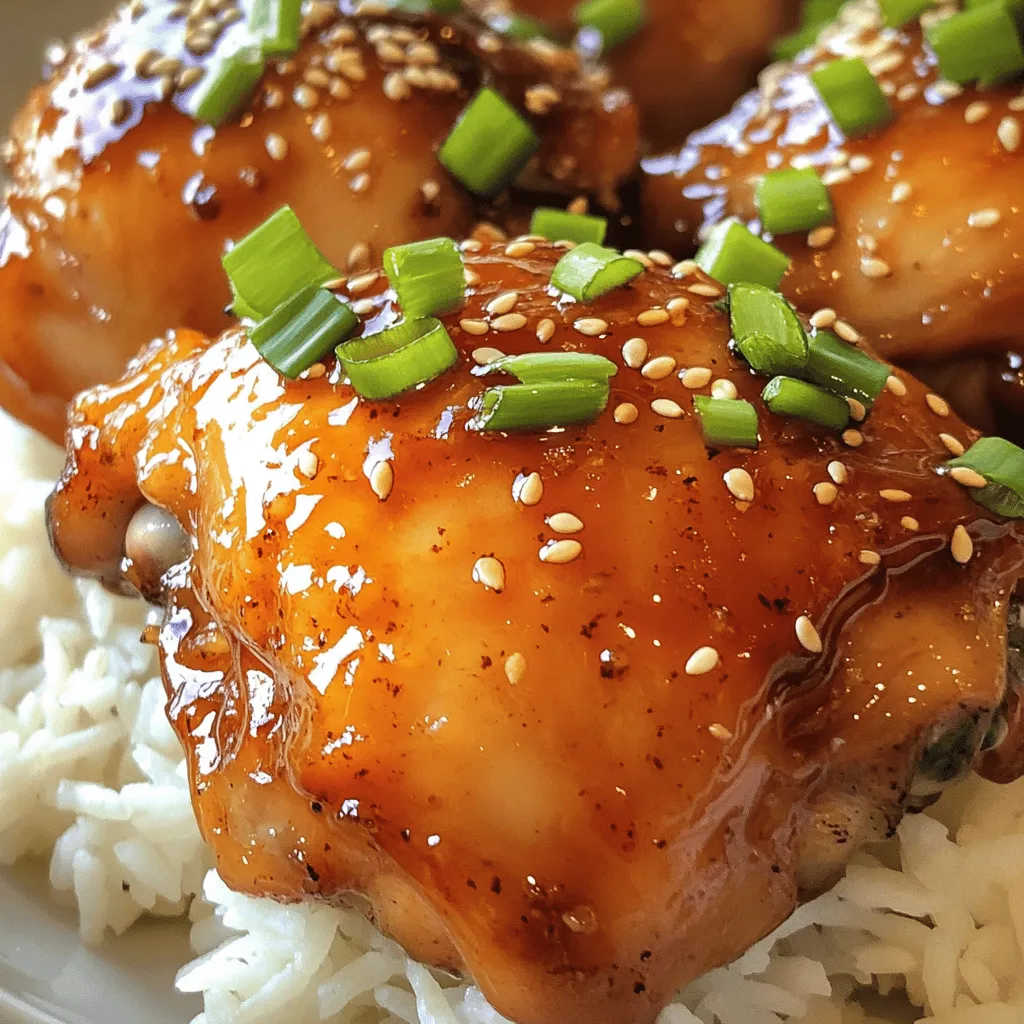
Are you ready to spice up your dinner game? This Delicious Spicy Honey Chicken recipe brings sweet heat to your

- 300g penne pasta - 2 boneless chicken breasts, diced - 1 tablespoon olive oil - 2 cloves garlic, minced - 1 small onion, finely chopped - 1 cup mushrooms, sliced - 1 cup heavy cream - 1 cup chicken broth - 1 teaspoon Italian seasoning - 1/2 teaspoon red pepper flakes (optional) - Salt and pepper - Grated Parmesan cheese for serving - Fresh basil leaves for garnish In my kitchen, I love to create a meal that warms the heart. Creamy Chicken Penne does just that! Let’s break down the ingredients. First, you need penne pasta. This shape holds the creamy sauce nicely. Next, diced chicken breasts bring protein and flavor. Olive oil helps cook the chicken and adds richness. Garlic and onion create a fragrant base. Mushrooms add texture and earthiness. For the creamy sauce, heavy cream is key. It makes the dish rich and smooth. Chicken broth adds depth. Italian seasoning gives a burst of flavor. Red pepper flakes can spice things up a bit, but they’re optional. Don’t forget about the garnishes! A pinch of salt and pepper enhances all the flavors. Grated Parmesan cheese adds a salty kick. Fresh basil leaves brighten the dish. With these ingredients, you’ll create a hearty and flavorful meal that impresses everyone at your table. For the complete recipe, check out the Full Recipe section. - Bring a large pot of salted water to a boil. - Add the penne pasta and cook until al dente, about 10-12 minutes. - Drain the pasta and reserve a cup of pasta water for later. - Heat a tablespoon of olive oil in a large skillet over medium-high heat. - Add the diced chicken and sauté until it is cooked through and browned, about 6-8 minutes. - Season the chicken with salt and pepper, then remove it from the skillet and set aside. - In the same skillet, sauté the chopped onion and minced garlic for about 2-3 minutes. - Add the sliced mushrooms and cook until they turn golden, about 4-5 minutes. - Pour in the chicken broth and heavy cream, stirring to combine. Let the sauce simmer briefly for about 5 minutes. - Return the cooked chicken to the skillet with the sauce. - Add the cooked penne and mix everything together well. - If the sauce is too thick, add a little of the reserved pasta water until it's just right. - Serve the dish hot, garnished with grated Parmesan cheese. - Top with fresh basil leaves for added flavor and color. For the full details on making this delicious meal, check out the full recipe. To get the right sauce consistency, start with heavy cream. It makes the sauce rich and smooth. If it feels too thick, add reserved pasta water. This helps loosen it. Taste the sauce as you go. Adjust seasoning with salt and pepper to make it pop. Keep the chicken moist by not overcooking it. Cook until it’s just browned. If you want a different flavor, try grilling or baking the chicken. Both methods add a nice touch. Grilled chicken gives a smoky taste, while baked chicken keeps it juicy. Cook the penne until al dente for the best bite. Follow the package directions carefully. Reserve a cup of pasta water before draining. This water is magic for mixing into the sauce. It helps bind everything together and enhances flavor. {{image_2}} You can make a tasty vegetarian version of creamy chicken penne. Just swap the chicken for your favorite veggies or tofu. Zucchini, bell peppers, and spinach work great. Tofu adds protein and absorbs the sauce well. This change keeps the dish hearty and satisfying. If you want extra protein, try adding shrimp or turkey. Shrimp cooks quickly and brings a nice flavor. Just sauté it for a few minutes until it turns pink. Turkey is another good choice. Use ground turkey or diced turkey breast for a leaner option. Both add a fun twist to the dish. Experimenting with seasonings can take your penne to the next level. Try different herbs like parsley, thyme, or even paprika. You can also use homemade broth for a richer taste. Store-bought broth works fine, but homemade can really shine. Adjust the seasoning to match your taste. This will make each meal feel fresh and new. For the full recipe, check out the delicious creamy chicken penne! To keep your Creamy Chicken Penne fresh, store leftovers in an airtight container. This helps keep moisture in and prevents odors from other foods. You can refrigerate it for up to three days. If you want to save it longer, freeze it in a freezer-safe container. Just make sure to let it cool completely before freezing. This way, your pasta stays tasty. To reheat, you can use the stove or microwave. If using the stove, place the pasta in a skillet over low heat. Add a splash of chicken broth or water to help it steam and regain creaminess. Stir often until heated through. For the microwave, place your pasta in a bowl, cover it with a damp paper towel, and heat in short bursts. Stir between each burst to avoid hot spots. Creamy Chicken Penne lasts about three days in the fridge. If you store it in the freezer, it can last up to two months. Just remember, the longer it sits, the more it may lose texture and flavor. Always check for any signs of spoilage before enjoying your leftovers. For the full recipe, be sure to check the details earlier in this article! Yes, you can make Creamy Chicken Penne ahead of time. Cook the pasta and chicken as directed. Then, make the sauce. Combine everything, but don’t add the cheese or basil yet. Let it cool, then store it in the fridge. When you're ready to eat, just reheat in a pot. If the sauce is too thick, add a splash of reserved pasta water to loosen it. If you want to swap out heavy cream, use half-and-half or whole milk. For a non-dairy option, try coconut milk or cashew cream. These choices will change the flavor a bit, but they still work well. You can also use silken tofu blended until smooth for a creamy texture without dairy. Absolutely! You can use any pasta you like. Bowtie, fusilli, or even spaghetti works great. Choose what you have on hand or what you enjoy. Just keep in mind that cooking times may vary, so check the package for instructions. Yes, you can make this recipe gluten-free. Look for gluten-free penne pasta made from rice or corn. Also, make sure to use a gluten-free chicken broth. This way, you can enjoy the creamy goodness without worrying about gluten. This blog post shared a simple and tasty recipe for Creamy Chicken Penne. You learned about the main ingredients, sauces, and garnishes that make this dish special. I provided clear steps to cook everything perfectly and gave tips to help you adjust the flavors. Remember, you can also make fun variations and store leftovers well. Enjoy cooking this dish and feel free to improvise based on what you have. Cooking should be fun and flexible, so let your creativity shine!

Creamy Chicken Penne Hearty and Flavorful Meal

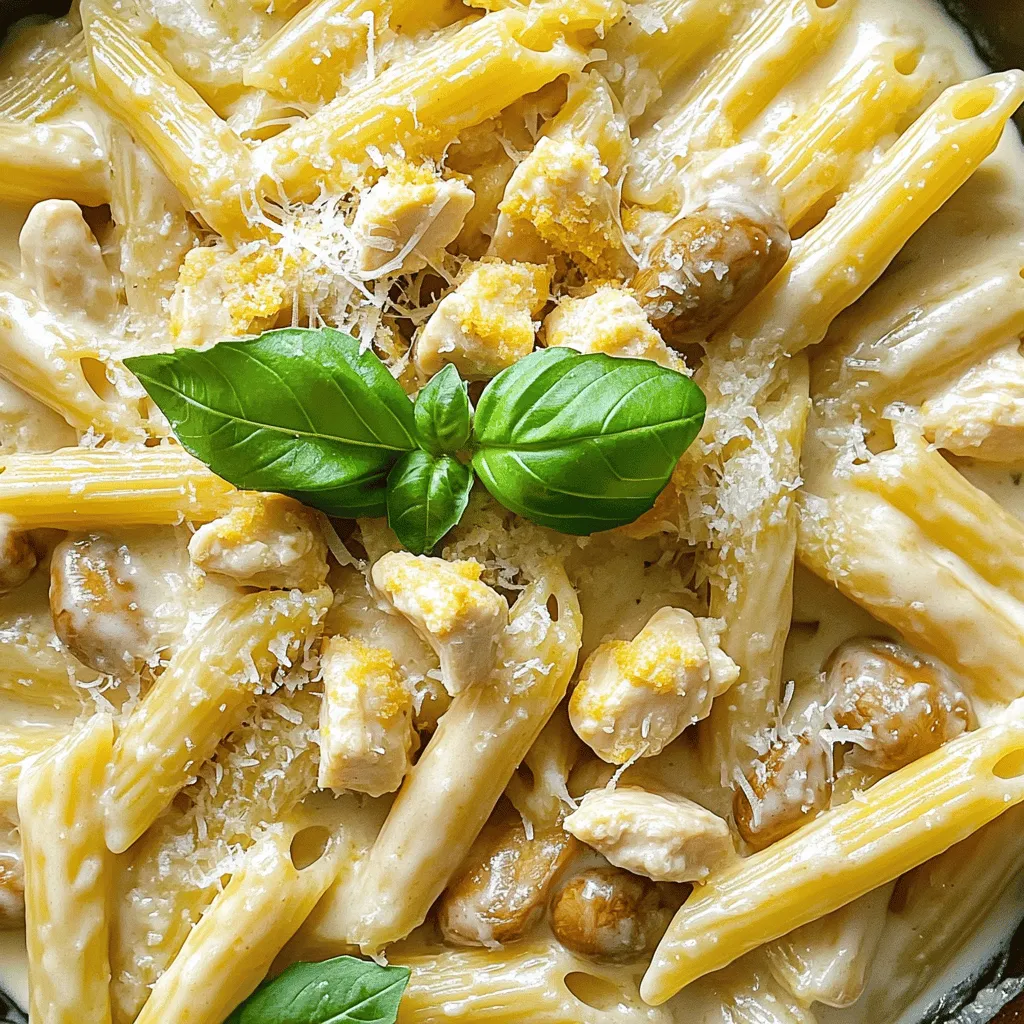
Craving a warm, filling meal that brings comfort to your table? Look no further! My Creamy Chicken Penne is rich,

- 1 ½ cups graham cracker crumbs - ½ cup unsalted butter, melted - ½ cup brown sugar, packed - 1 teaspoon vanilla extract - 1 cup mini marshmallows - 1 cup semisweet chocolate chips - ½ cup chopped walnuts or pecans (optional) The main ingredients form the heart of your oven-baked s'mores bars. Each one plays a crucial role. The graham cracker crumbs give a sweet, crunchy base. The melted butter binds everything together, adding richness. Brown sugar adds a deeper sweetness, while vanilla enhances the overall flavor. Mini marshmallows bring that classic s'mores taste. They melt beautifully and create a gooey layer. Semisweet chocolate chips add that rich chocolate flavor. If you love nuts, adding walnuts or pecans will give a great crunch and extra flavor. - 8x8-inch baking dish - Mixing bowls - Measuring cups and spoons You need some basic tools for this recipe. An 8x8-inch baking dish works perfectly. It holds the mixture well and helps with even baking. Mixing bowls are essential for combining all your ingredients. Measuring cups and spoons ensure you get the right amounts. - Preheating the oven to 350°F - Greasing the baking dish Before you start, preheat your oven to 350°F. This step is key for even cooking. Greasing the baking dish helps prevent sticking. You can use butter or a non-stick spray. These simple steps set you up for success. For the full recipe, check the details to make your s'mores bars an easy and delicious treat. - First, preheat your oven to 350°F (175°C). Grease an 8x8-inch baking dish. - In a large bowl, combine graham cracker crumbs, melted butter, brown sugar, and vanilla extract. Mix until it looks like wet sand. - Press half of this mixture firmly into the bottom of the baking dish. This creates a solid base. - Next, sprinkle mini marshmallows and chocolate chips evenly over the graham cracker base. - If you like nuts, add chopped walnuts or pecans on top. - Finally, take the remaining graham cracker mixture and crumble it over the marshmallows and chocolate. - Now, place the dish in the oven and bake for 25 to 30 minutes. - Look for a golden brown top and toasted marshmallows. - Once done, remove it from the oven and let it cool for at least 10 minutes before slicing into bars. For the complete recipe with all ingredients and steps, check out the Full Recipe. To make your s'mores bars great, spread marshmallows and chocolate evenly. If you do this, every bite will have the right mix of flavors. Press down the top layer a bit. This helps everything stick together well. These bars taste best warm. Serve them with a drizzle of chocolate sauce. A scoop of vanilla ice cream adds extra joy. You can also sprinkle graham cracker crumbs on top for a fun touch. Be careful not to overbake the bars. If you do, they can turn dry. Let them cool before cutting. This step keeps the bars from falling apart. Enjoy your perfect oven-baked s'mores bars! For the full recipe, check out the full recipe section. {{image_2}} You can change the flavor of your s'mores bars easily. Try using white chocolate chips or even peanut butter chips instead of regular chocolate chips. This small swap gives a new taste to your bars. Also, consider using flavored graham crackers. Options like cinnamon or chocolate graham crackers can add a fun twist. Get creative with add-ins. You can crush up your favorite candy bars and mix them in. Snickers or Reese's pieces work great. Another tasty idea is to add fruit. Sliced bananas or strawberries add freshness and sweetness. For extra flavor, drizzle caramel or nut butter on top before serving. This makes your bars even more delicious. If you need gluten-free options, don’t worry! Just use gluten-free graham crackers. Many brands offer great choices that taste just as good. Always check the labels on all your ingredients. This ensures everything is safe for your gluten-free diet. Enjoy your tasty bars without any worries! Keep your s'mores bars in an airtight container at room temperature. This helps keep them fresh and tasty. If you want them to last longer, refrigerate them. The cool air slows down spoilage and keeps the flavors strong. To freeze the bars, wrap each piece individually in plastic wrap. This helps prevent freezer burn. When you want to eat them, just thaw them at room temperature. You can also reheat them slightly in the oven for a warm treat. These delicious bars last up to 5 days at room temperature. If you freeze them, they can stay good for up to 3 months. Just remember to keep track of how long they have been stored! Yes, you can prepare them a day in advance. Just store them in an airtight container. This helps keep them fresh and tasty. You can serve them warm or at room temperature. Use marshmallow fluff or a different type of sweet topping. You can try peanut butter, caramel, or even chocolate spread. This adds a fun twist to the bars while still keeping them sweet and gooey. Ensure the pan is well-greased or lined with parchment paper. This makes it easy to lift the bars out after baking. If the bars stick, they might break apart. Greasing or lining the pan is a simple step that ensures success. Oven-Baked S'mores Bars are easy to make and delicious to eat. You need simple ingredients like graham crackers, chocolate chips, and marshmallows. I shared tips for perfecting your bars and options for variations. Remember to avoid common mistakes like overbaking. Store them properly to keep them fresh. With a bit of creativity, you can make these bars your own. Enjoy your tasty treats!

Oven-Baked S’mores Bars Blissful and Easy Treat

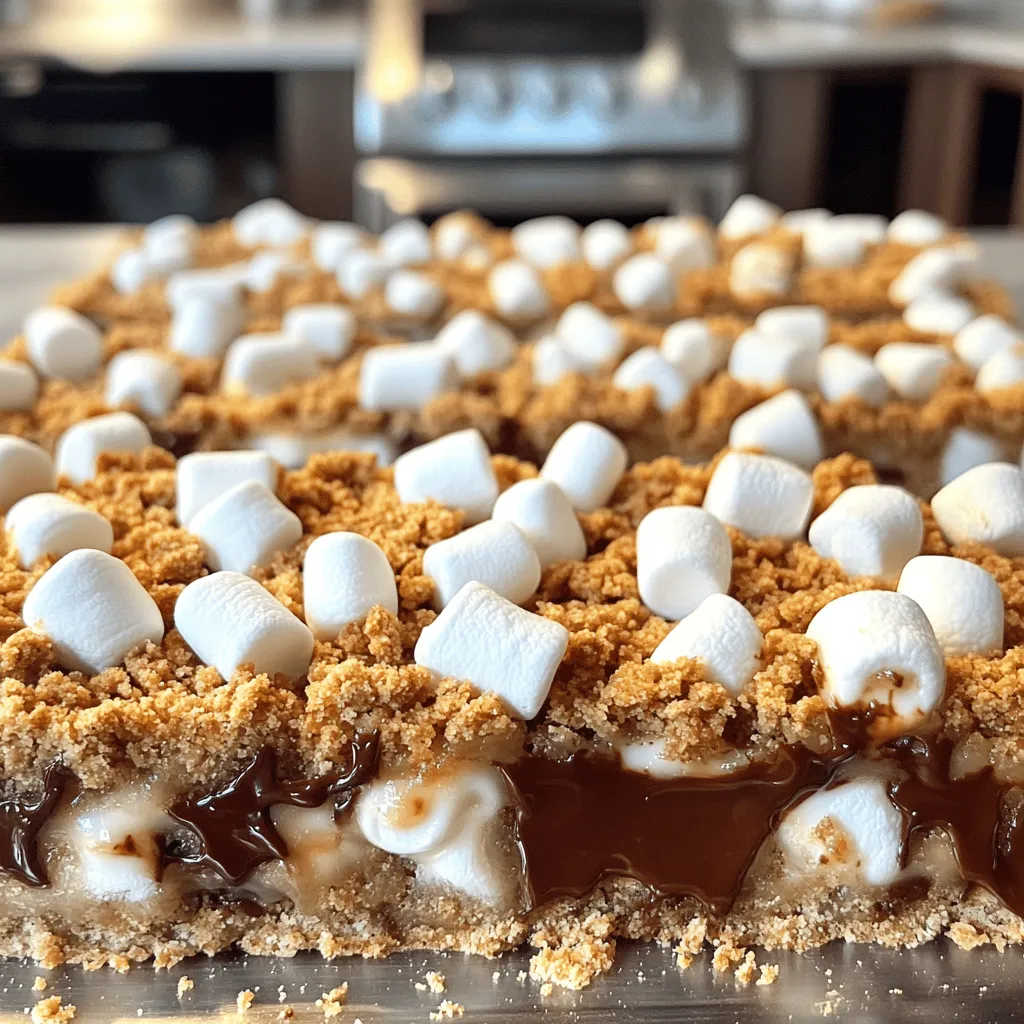
Ready to indulge in a sweet treat that’s super easy and fun to make? My Oven-Baked S’mores Bars bring that

- 4 oz dark chocolate (70% cocoa), chopped - 2 oz milk chocolate, chopped - 2 oz white chocolate, chopped - 1/2 cup unsalted butter - 4 large eggs, separated The heart of this cake is the chocolate. Dark chocolate gives depth. Milk chocolate adds sweetness. White chocolate offers a creamy texture. Each layer brings its own charm. - 1/2 cup granulated sugar, divided - 1 cup heavy whipping cream - 1 teaspoon vanilla extract - Pinch of salt - Cocoa powder (for dusting) - Chocolate shavings (for garnish) Sugar helps to sweeten the mousse. Heavy cream makes it light and fluffy. Vanilla adds warmth, while salt balances the flavors. Dusting cocoa powder on top makes it look fancy. Chocolate shavings are a delightful touch. For the full recipe, check out the complete guide. 1. First, preheat your oven to 350°F (175°C). This step is key for a good bake. 2. Grease an 8-inch round springform pan. Line the bottom with parchment paper. This helps the cake come out easily. 3. In a medium saucepan, melt the dark chocolate and unsalted butter over low heat. Stir until it is smooth. 4. Once melted, remove the saucepan from heat. Let it cool slightly before you mix it with the eggs. 1. In a large bowl, whisk the egg yolks with half of the granulated sugar. This should be light and fluffy. 2. Gradually add the melted chocolate mixture and vanilla extract. Mix until it blends well. 3. In another bowl, beat the egg whites with a pinch of salt. Beat until soft peaks form. 4. Gradually add the remaining sugar while beating the egg whites. Continue until stiff peaks form. 5. Gently fold a third of the whipped egg whites into the chocolate mixture. This lightens the batter. 6. Fold in the remaining egg whites until just combined. Be careful not to overmix. 7. Pour the chocolate batter into your prepared pan. Spread it evenly. 8. Bake for about 25 minutes. The center should be set but still jiggly. 9. Let the cake cool completely in the pan. This helps it firm up. 1. While the cake cools, melt the three types of chocolate separately. Use a double boiler or microwave. Stir until smooth. 2. In a bowl, whip 1/3 cup of heavy cream for each chocolate until soft peaks form. 3. Divide the whipped cream among the melted chocolates. Fold gently until combined. 4. Once the cake is cool, remove it from the pan. Slice it into three even layers. 5. Place the bottom layer back in the springform pan. Spread the dark chocolate mousse over this layer. 6. Add the second cake layer on top, then spread the milk chocolate mousse. 7. Finally, add the last cake layer and top it with white chocolate mousse. 8. Refrigerate for at least 4 hours or overnight to set. Be sure to check the Full Recipe for more details and tips. Enjoy every step! To make the best mousse, start with egg whites. Beat them until soft peaks form. This means they should hold a shape but still be soft. Then, add sugar slowly to create stiff peaks. This gives your mousse a light texture. For cream, whip it until soft peaks form too. It should be fluffy but not too thick. Use a cold bowl and cold beaters for best results. This helps keep the cream from melting. When melting chocolate, use a double boiler or microwave. If using the microwave, melt in short bursts. Stir in between each burst. This helps prevent the chocolate from seizing. Stir until smooth and let it cool slightly before mixing with other ingredients. Presentation makes your cake even more special. Dust the top with cocoa powder for a rich look. Chocolate shavings add a nice touch too. You can make these by using a vegetable peeler on a chocolate bar. When serving, slice the cake with a warm knife. This helps get clean cuts. Serve with fresh berries or a dollop of whipped cream for extra flair. Your guests will love the look and taste of your triple chocolate mousse cake! For more details and guidance, check out the Full Recipe. {{image_2}} You can add coffee or espresso to your mousse. This boosts the rich chocolate taste. Just mix in one tablespoon of espresso powder when blending the chocolate. It adds a nice depth. For a fruity twist, try incorporating fruit purees. You can use raspberry or strawberry puree. Just fold in a half cup of your chosen puree into the mousse. This gives a fresh and vibrant flavor. If you want to make this cake gluten-free, you can swap regular flour with a gluten-free blend. Just ensure it measures the same as all-purpose flour. If you're looking for vegan options, use aquafaba instead of eggs. This is the liquid from canned chickpeas. You can also use coconut cream in place of heavy cream. Both options will keep the mousse creamy and delicious. These variations make the triple chocolate mousse cake fun and adaptable for everyone! For the full recipe, check out the link above. After you enjoy your Triple Chocolate Mousse Cake, store any leftovers in the fridge. Place the cake in an airtight container. If you don’t have one, cover it tightly with plastic wrap. This helps keep the cake moist and fresh. The cake stays good in the fridge for up to three days. Remember to slice off pieces as needed. This way, the rest stays safe from air and drying out. If you want to keep the cake longer, you can freeze it. First, make sure the cake is fully cooled. Then, wrap each slice in plastic wrap tightly. After that, place the slices in a freezer-safe bag or container. This helps keep the texture and flavor intact. When you’re ready to eat, take out a slice and let it thaw in the fridge overnight. Enjoy it as if it were fresh! For the best taste, try to eat frozen slices within a month. Triple chocolate mousse cake combines French and Italian dessert styles. Mousse originated in France, where chefs whipped cream and egg whites to create light and airy textures. The cake adds layers of different chocolate mousses, giving it depth and flavor. This dessert became popular in many kitchens worldwide, especially for special occasions and celebrations. Yes, you can make this cake ahead of time. It tastes even better after chilling overnight. The flavors meld together, and the mousse firms up nicely. You can prepare it a day or two before serving. Just store it in the fridge, covered with plastic wrap. To check if your cake is done, look for a slight jiggle in the center. It should not be liquid, but it can be soft. You can also insert a toothpick into the cake. If it comes out with a few moist crumbs, it is ready. Remember, the cake will continue to cook a little as it cools. Yes, using high-quality chocolate is key. Good chocolate makes a huge difference in taste. It adds rich flavors and smooth textures to the mousse. Look for chocolate with a high cocoa content for the best results. The better the chocolate, the better your cake will taste. For the best outcome, use chocolate you enjoy eating. Make sure to check the [Full Recipe](#) for step-by-step instructions on creating this delightful dessert! Triple chocolate mousse cake combines rich flavors and textures for a delightful treat. We explored key ingredients, from dark chocolate to heavy cream. I shared step-by-step instructions to guide you through baking and assembling your cake. We covered tips for perfecting the mousse and presented ideas to elevate your cake's look. Finally, I discussed variations for dietary needs and storage options. Enjoy creating this delicious dessert, and remember, practice makes perfect! The joy of baking awaits you at every step.

Triple Chocolate Mousse Cake Delightful Decadent Treat

If you love chocolate, get ready for a treat! My Triple Chocolate Mousse Cake is rich, creamy, and oh-so-delicious. With

Creamy Cajun Shrimp Pasta is a tasty and quick meal. It takes just 30 minutes to make. This dish combines shrimp, pasta, and a rich sauce. You can find the full recipe at the top of this section. Here is what you need to make this dish: - 8 oz fettuccine or penne pasta - 1 lb large shrimp, deveined and tails removed - 1 tablespoon Cajun seasoning - 2 tablespoons olive oil - 1 small onion, diced - 3 cloves garlic, minced - 1 red bell pepper, sliced - 1 cup heavy cream - 1 cup chicken broth - 1 cup cherry tomatoes, halved - 1/2 cup grated Parmesan cheese - Salt and pepper to taste - Fresh parsley, chopped for garnish These ingredients work together to create a rich and creamy flavor. The Cajun seasoning adds a nice kick. The heavy cream and cheese give the sauce its creamy texture. You can use either fresh or frozen shrimp. Fresh shrimp often taste better, but frozen shrimp are easier to find. If you use frozen shrimp, make sure to thaw them first. Just place them in cold water for about 15 minutes. Both options will work well in this dish. Choose what you prefer or what you have on hand! Start with a large pot of water. Add salt to the water. Bring it to a boil. Once boiling, add 8 oz of fettuccine or penne pasta. Cook the pasta until it is al dente, following the package instructions. This usually takes about 8-10 minutes. After cooking, drain the pasta and set it aside. In a bowl, take 1 lb of large shrimp. Make sure they are deveined and tails are off. Sprinkle 1 tablespoon of Cajun seasoning over the shrimp. Toss the shrimp gently until they are well coated. This adds great flavor to the shrimp. In a large skillet, heat 2 tablespoons of olive oil over medium-high heat. Once hot, add the seasoned shrimp. Cook the shrimp for about 2-3 minutes on each side. They should turn pink and be fully cooked. Remove the shrimp and set them aside. In the same skillet, add 1 small diced onion, 3 minced garlic cloves, and 1 sliced red bell pepper. Cook these for about 5 minutes. You want the onion to be soft and clear. Then, pour in 1 cup of chicken broth and 1 cup of heavy cream. Stir well and let it simmer. Next, add 1 cup of halved cherry tomatoes to the skillet. Let them cook for 2-3 minutes until they start to soften. Now, return the cooked pasta and shrimp to the skillet. Stir in 1/2 cup of grated Parmesan cheese, mixing everything together until smooth. Season with salt and pepper to taste. Serve this dish hot, garnished with fresh chopped parsley. Enjoy your creamy Cajun shrimp pasta! For full details, refer to the Full Recipe. Want to change the heat level? You can adjust the Cajun seasoning. Start with one tablespoon. Taste the dish as you cook. If you want more heat, add extra seasoning little by little. You can also add a pinch of cayenne pepper for an extra kick. Remember, it’s easier to add spice than to take it away. For the creamiest sauce, use heavy cream. It blends well with the Cajun flavors. Be sure to simmer the sauce gently. This helps it thicken without curdling. Stir in the Parmesan cheese slowly. This adds richness and depth. If the sauce feels too thick, add a splash of chicken broth. This keeps the sauce smooth and creamy. Creamy Cajun shrimp pasta is great on its own, but sides can enhance the meal. A crisp green salad pairs well. It balances the richness of the pasta. Garlic bread is also a favorite. It lets you enjoy every drop of the creamy sauce. For a fun twist, serve with sautéed greens like spinach or kale. Each bite will be delicious! Check out the Full Recipe for more tips. {{image_2}} You can swap heavy cream for a lighter option like Greek yogurt or coconut milk. This change cuts calories and adds protein. You can also use whole wheat pasta instead of regular pasta. Whole wheat pasta has more fiber, making it a healthier choice. You can use many types of pasta for this dish. Try using gluten-free pasta if you have a gluten sensitivity. Spiralized zucchini or spaghetti squash works well for a low-carb option. These alternatives keep the flavors but change the texture. To make a vegetarian version, replace shrimp with sautéed mushrooms or firm tofu. Season them with Cajun spices for that same kick. For a vegan dish, use coconut cream instead of heavy cream. Don’t forget to use vegetable broth in place of chicken broth. These swaps keep the dish rich and tasty without animal products. For more ideas, check out the Full Recipe. Store your leftover creamy Cajun shrimp pasta in an airtight container. Make sure to let it cool first. This way, it keeps its flavor and texture. The pasta stays fresh in the fridge for up to three days. Label your container with the date. This helps you remember when you made it. When you want to reheat your creamy Cajun shrimp pasta, I recommend using the stove. Put your pasta in a pan over low heat. Add a splash of chicken broth or cream to help it stay creamy. Stir often until it’s hot. If you use a microwave, place it in a microwave-safe bowl. Cover it with a damp paper towel to keep moisture in. Heat in short bursts, stirring in between. You can freeze creamy Cajun shrimp pasta if you want to save it for later. First, let it cool completely. Then, place it in a freezer-safe container. It will keep for up to three months. When you’re ready to eat, thaw it in the fridge overnight. Then, reheat it on the stove or in the microwave. Enjoy a tasty meal anytime! For the full recipe, check out the recipe section. Yes, you can use chicken, scallops, or even tofu. Chicken works well with Cajun spices. You can cook it the same way as the shrimp. Just make sure it is cooked through. Scallops also add a nice touch. They cook quickly and have a sweet flavor. Tofu is a great choice for a vegetarian option. It absorbs the Cajun flavor well. You can serve this pasta with a side salad or garlic bread. A fresh green salad adds a nice crunch. Use ingredients like romaine, cherry tomatoes, and cucumbers. Garlic bread goes well with the creamy sauce. You can also pair it with grilled veggies for more flavor. This recipe takes about 30 minutes to make. You’ll spend 15 minutes prepping and cooking the pasta. The shrimp and sauce take another 15 minutes. It’s quick and easy, perfect for a weeknight dinner. You can find the full recipe [here](#). In this blog post, we explored how to make creamy Cajun shrimp pasta. We covered essential ingredients, cooking steps, and tips for the best flavors. You learned how to adjust the spice level and create a creamy sauce. I shared fun variations and storage tips for leftovers. Your choice of shrimp can elevate the dish. Whether you use fresh or frozen shrimp, you can enjoy a great meal. Try out these ideas and enjoy cooking a dish that brings joy to your table.

Creamy Cajun Shrimp Pasta Simple and Flavorful Dish

Are you ready to spice up dinner? My creamy Cajun shrimp pasta is a simple and flavorful dish that will

To make Cheesy Garlic Butter Linguine, you need a few key items: - 12 oz linguine pasta - 4 tablespoons unsalted butter - 6 cloves garlic, minced - 1 cup heavy cream - 1 cup grated Parmesan cheese - 1 cup shredded mozzarella cheese - Salt and pepper to taste These ingredients come together to create a creamy, cheesy dish. The butter and garlic form the base. The cheeses give it that rich, gooey texture we love. You can add a few extra items if you want more taste: - 1 teaspoon red pepper flakes (for heat) - 2 tablespoons fresh parsley, chopped (for garnish) - Zest of 1 lemon (for a fresh note) These ingredients can elevate the dish. Red pepper flakes add heat, while lemon zest brightens it up. Fresh parsley gives a nice color and taste. Having the right tools makes cooking easier: - Large pot for boiling pasta - Large skillet for the sauce - Wooden spoon or spatula for stirring - Measuring cups and spoons for accuracy These tools help you create the dish smoothly. A good skillet ensures even cooking, while a pot is essential for pasta. With these items, you’ll be ready to whip up this tasty meal. For the complete recipe, check out the Full Recipe. Start by boiling a large pot of salted water. Once it boils, add 12 oz of linguine pasta. Cook it according to the package instructions until it’s al dente. This usually takes about 8 to 10 minutes. When done, reserve 1 cup of pasta water. Drain the linguine and set it aside for later. In a large skillet, melt 4 tablespoons of unsalted butter over medium heat. Once the butter bubbles, add 6 minced garlic cloves. Sauté them for 2 to 3 minutes. You want the garlic to smell good but not burn. This step adds a nice depth of flavor to your dish. Next, pour in 1 cup of heavy cream. Stir well and let it simmer for about 3 to 4 minutes. You want it to thicken a bit. After that, lower the heat and add 1 cup of grated Parmesan cheese and 1 cup of shredded mozzarella cheese. Stir constantly until the cheeses melt into a smooth sauce. This is where the magic happens! Now it's time to combine everything. Add the drained linguine to the cheese sauce. Toss it well to coat all the pasta evenly. If you find the sauce too thick, slowly add some of the reserved pasta water. This helps achieve the perfect creamy texture. Season your dish with salt, pepper, and red pepper flakes if you like a kick. Finish by adding lemon zest and fresh parsley for a bright touch. For the full recipe, check out the detailed instructions above. Enjoy your delicious meal! To cook pasta right, use plenty of water. Start with a big pot filled with salted water. Bring it to a rolling boil before adding your linguine. This keeps the pasta from sticking. Stir the pasta for the first minute to separate strands. Cook until al dente, which means firm but not hard. Always check the package for the right cooking time. Don’t forget to reserve some pasta water for later! A watery sauce is a common issue. To prevent this, make sure to cook your sauce long enough. The heavy cream should simmer until it thickens. If your sauce seems too thin, add some reserved pasta water slowly. This helps to adjust the sauce without making it watery. Also, remember to add cheese gradually. Cheese helps thicken the sauce, adding a rich texture. Flavor is key in any dish. Start with quality ingredients like fresh garlic and real butter. Use freshly grated Parmesan and mozzarella for the best taste. Don’t skip the red pepper flakes if you like heat. They add a nice kick! Also, lemon zest brightens up the dish. A sprinkle of fresh parsley brings color and flavor. These small details make a big difference in your Cheesy Garlic Butter Linguine. Check out the Full Recipe to get started on this tasty dish! {{image_2}} You can make this dish without meat. Swap the butter for olive oil for a vegan touch. Use vegetables like spinach, mushrooms, or bell peppers. Just sauté them with the garlic. They add great flavor and color. Want more protein? Cook chicken or shrimp separately. Add them to the skillet after you mix in the cheese. For chicken, season it well with salt and pepper. For shrimp, just cook until pink. Both options make the dish heartier and more filling. Don't limit yourself to just Parmesan and mozzarella. Try adding cheddar for a sharper taste. Feta can give a salty kick. Goat cheese adds creaminess and tang. Mix different cheeses for a unique flavor. Experiment and find your favorite blend! You can find the full recipe for Cheesy Garlic Butter Linguine above. To store leftover Cheesy Garlic Butter Linguine, place it in an airtight container. Make sure the lid seals tightly. Store it in the fridge for up to three days. Keeping it separate from other foods helps maintain its flavor. If you want to freeze your Cheesy Garlic Butter Linguine, first let it cool. Then, pack it in a freezer-safe container. Leave some space at the top for expansion. You can freeze it for up to three months. When ready to eat, thaw it in the fridge overnight. To reheat Cheesy Garlic Butter Linguine, use a skillet over low heat. Add a splash of milk or cream while warming. This helps keep the sauce creamy. Stir gently and heat until warm. You can also use a microwave, but cover it to prevent drying out. The best pasta for Cheesy Garlic Butter Linguine is linguine. Its flat shape holds the sauce well. You can also use fettuccine or spaghetti if you prefer. Just remember to adjust cooking times as needed. Yes, you can make this dish dairy-free. Use coconut cream or a dairy-free cream alternative. Substitute nutritional yeast for Parmesan cheese to give it a cheesy flavor. For mozzarella, try a dairy-free cheese that melts well. To make your Cheesy Garlic Butter Linguine spicier, add more red pepper flakes. You can also mix in chopped fresh chili peppers or a splash of hot sauce. Start with a little and taste as you go to find your perfect heat level. You can serve this dish with a fresh salad or garlic bread. A side of steamed vegetables also pairs well. For protein, grilled chicken or shrimp makes a great addition. If you're feeling fancy, a glass of white wine is perfect too. For the full recipe, check out the details above! Cheesy garlic butter linguine is a simple yet tasty dish. You learned about key ingredients, cooking steps, and how to make it your own. I shared tips to avoid a watery sauce and suggested storage methods. You now have options for every taste, from vegetarian to protein-packed. With this guide, you can create a dish that's full of flavor and easy to enjoy. So, grab your tools and start cooking! This meal is sure to impress!

Cheesy Garlic Butter Linguine Tasty Weeknight Meal

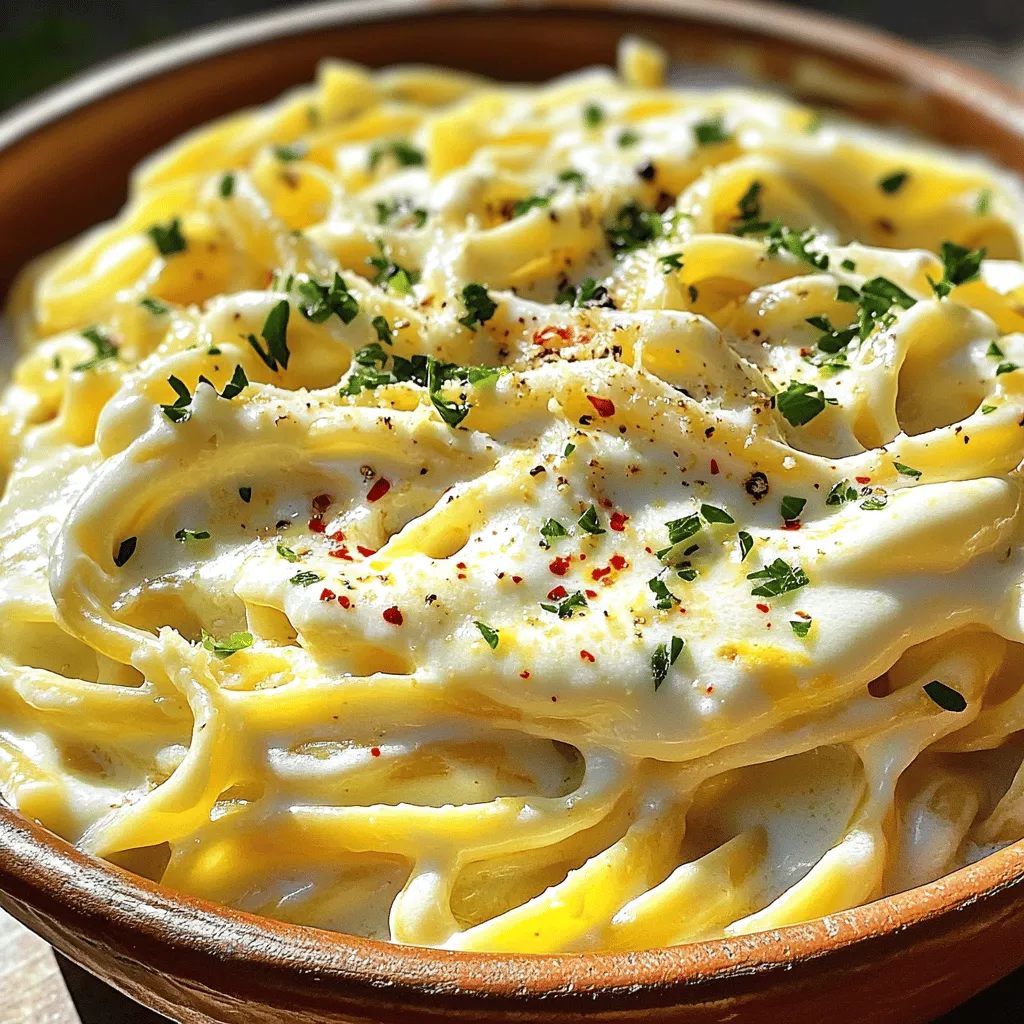
Looking for an easy weeknight meal that packs a punch? This Cheesy Garlic Butter Linguine is simple, yet bursting with

- 1 large French baguette - 1 cup cream cheese, softened - 1/2 cup sour cream - 1/2 cup mayonnaise - 1 cup shredded mozzarella cheese - 1 cup grated Parmesan cheese - 4 cloves garlic, minced - 1 tablespoon fresh parsley, chopped - 1 teaspoon dried oregano - 1/2 teaspoon red pepper flakes (optional) - Salt and pepper to taste To create a rich and tasty Baked Garlic Bread Dip, I focus on the right ingredients. First, I use a large French baguette to hold all that creamy goodness. Then I blend cream cheese, sour cream, and mayonnaise for a smooth base. This creamy mix is the heart of the dip. Next, I add two kinds of cheese: mozzarella for stretch and Parmesan for a sharp bite. The minced garlic brings a punch of flavor, and fresh parsley adds a touch of color. I sprinkle in dried oregano for an earthy note and red pepper flakes if I want some heat. Finally, I season with salt and pepper to make all the flavors shine. To get the full recipe, you can check out the [Full Recipe]. With these ingredients, you’ll create a dip that everyone will love and want to scoop up with the baguette! 1. Preheat your oven to 375°F (190°C). This step is key for even baking. 2. Take the large French baguette and slice it in half lengthwise. 3. Use a spoon to scoop out some soft bread from each half. Set aside this scooped bread for later use. 1. In a large mixing bowl, combine 1 cup of softened cream cheese, 1/2 cup of sour cream, and 1/2 cup of mayonnaise. Mix them well until smooth. 2. Next, stir in 4 minced garlic cloves, 1 cup of shredded mozzarella cheese, 1 cup of grated Parmesan cheese, 1 tablespoon of chopped fresh parsley, and 1 teaspoon of dried oregano. 3. Season the mixture with salt and pepper to taste. If you like a little heat, add 1/2 teaspoon of red pepper flakes. 1. Fill each hollowed baguette half with the creamy dip mixture. Pack it in gently with a spatula. 2. Place the filled baguette halves on a baking sheet. Bake for 25-30 minutes. You want the top to turn golden brown and the dip to bubble. 3. Once done, take it out of the oven and let it cool for a few minutes. Then, slice into pieces for serving. For the full recipe, make sure to check the ingredient list and instructions provided above. Enjoy your delicious creation! Using room temperature ingredients is key for a smooth dip. Cold cream cheese can make mixing tough. Let your cream cheese, sour cream, and mayonnaise sit out for about 30 minutes before using. This helps them blend well. If you want a creamier dip, add more sour cream or mayonnaise. You can also mix in some heavy cream for extra richness. Keep an eye on your dip while it bakes. Aim for 25 to 30 minutes at 375°F. Check for a golden top and bubbling edges. If it browns too fast, cover it with foil. This will help avoid overcooking. A bubbly top means it’s ready to serve. That golden color adds a nice touch to your dip. For garnishes, fresh parsley works great. It adds color and flavor. You can also sprinkle extra cheese on top right before baking. For dipping, don’t just stick to bread. Try veggie sticks, crackers, or tortilla chips. Each option brings a new taste to your dip. For a fun twist, serve it with fruit slices like apples or pears. This adds a sweet contrast to the savory dip. Make sure to check the full recipe for all the details. {{image_2}} You can change the taste of your baked garlic bread dip by adding extra flavors. One fun way is to mix in sun-dried tomatoes or fresh spinach. Both options add color and a tasty twist. Sun-dried tomatoes bring a sweet, tangy flavor that contrasts well with the creamy dip. Fresh spinach adds a nice green hue and a boost of nutrition. Another way to enhance the dip is by using different types of cheese. While mozzarella and Parmesan are great, you can try cheddar for a sharper taste. Gouda adds a rich, smoky flavor, while feta gives a nice salty bite. Mixing cheeses can create a unique flavor profile that everyone will enjoy. If you need gluten-free options, you can use a gluten-free baguette. Many stores offer gluten-free breads that taste great. Just make sure to check the label for any hidden gluten. This way, everyone can join in on the fun! For those looking for vegan alternatives, replace cream cheese, sour cream, and mayonnaise with plant-based versions. Many brands offer tasty dairy-free options. You can also use nutritional yeast to add a cheesy flavor without dairy. These swaps make the dip suitable for vegans while keeping it rich and creamy. You can get creative with how you serve this dip. One fun idea is to turn it into a full platter. You can add fresh veggies, crackers, or breadsticks around the dip. This makes a great snack for parties or gatherings. Another option is to serve the dip in individual ramekins. This way, each guest has their own portion. It makes for a nice presentation and keeps things neat. Plus, it allows everyone to dig in without sharing. For the full recipe, check out the details above! To store leftovers, put the dip in an airtight container. Make sure it cools to room temperature first. This keeps it fresh and tasty. You can store it in the fridge for up to three days. After that, it may lose flavor and texture. To reheat the dip, use the oven for the best results. Preheat the oven to 350°F (175°C). Place the dip in an oven-safe dish. Cover it with foil to keep it moist. Heat for about 15 minutes or until warm. You can also use the microwave. Heat it in short bursts of 30 seconds. Stir between each burst to keep it creamy. Yes, this dip is freezer-friendly! To freeze it, put it in a container that seals well. Make sure to leave some space for it to expand. It can last in the freezer for up to three months. To thaw, move it to the fridge overnight. Reheat it as directed above after thawing. Enjoy your dip any time! For the full recipe, check out the details above. Baked Garlic Bread Dip lasts about 3 to 5 days in the fridge. Store it in an airtight container for best results. Make sure to let it cool before sealing it up. This way, it stays fresh and tasty for your next snack or meal. Yes, you can prepare Baked Garlic Bread Dip ahead of time! Mix the dip and fill the baguette. Cover it well and store it in the fridge. When you are ready to bake, just pop it in the oven. This saves time and makes hosting easy. If you don’t have a baguette, many other breads work well. You can use ciabatta, sourdough, or even pita bread. Just make sure the bread can hold the dip and has a nice crust for dipping. You can use Greek yogurt or cottage cheese instead of cream cheese. Both options add creaminess and a bit of tang. If you prefer a dairy-free choice, try cashew cream or a vegan cream cheese. These options keep the dip rich and delicious. You’ll know the dip is ready when the top is golden brown and bubbly. The edges of the dip should start to pull away from the bread. A nice, brown crust means it’s time to take it out. Let it cool a little before serving. Enjoy the warm, cheesy goodness! In this post, I shared how to make a delicious baked garlic bread dip. We covered the key ingredients, step-by-step instructions, and handy tips to perfect your dish. You can add personal touches with various flavors and dietary adjustments. Remember to store leftovers properly for the best taste. This dip is fun for gatherings or cozy nights at home. Enjoy experimenting and customizing it to suit your taste! Your friends will love your dip, and it will quickly become a favorite.

Baked Garlic Bread Dip Tasty and Simple Recipe

Are you ready to impress your friends and family with a mouthwatering appetizer? This Baked Garlic Bread Dip is both

To make a tasty sweet chili sauce, you need the following: - 1 cup of water - 1/2 cup sugar - 1/2 cup rice vinegar - 1 tablespoon cornstarch - 1/2 cup chopped red bell pepper - 2 tablespoons soy sauce - 2-3 tablespoons chili flakes (adjust to taste) - 1 minced garlic clove - 1 teaspoon grated ginger - 1 tablespoon sesame oil Each serving of sweet chili sauce has about: - Calories: 70 - Fat: 0g - Carbohydrates: 17g - Fiber: 0g - Sugar: 15g - Protein: 1g This sauce gives a burst of flavor without adding too many calories. It pairs well with many dishes! When choosing fresh ingredients for your sauce, consider these tips: - Water: Use filtered water for the best taste. - Sugar: Look for granulated sugar. It helps in dissolving quickly. - Rice Vinegar: Choose a clear rice vinegar for a light flavor. - Red Bell Pepper: Pick firm peppers with bright color. They add sweetness. - Soy Sauce: Use low-sodium soy sauce for better control over saltiness. - Chili Flakes: Choose fresh flakes for a stronger flavor. - Garlic: Use fresh garlic for a bold taste. - Ginger: Opt for fresh ginger for a nice zing. - Sesame Oil: Get toasted sesame oil for a nutty aroma. These tips help ensure your sweet chili sauce tastes great! For the full recipe, check the earlier section. To make sweet chili sauce, you need just a few simple steps. Start by gathering your ingredients. Here’s what you’ll need: - 1 cup of water - 1/2 cup sugar - 1/2 cup rice vinegar - 1 tablespoon cornstarch - 1/2 cup chopped red bell pepper - 2 tablespoons soy sauce - 2-3 tablespoons chili flakes (adjust to taste) - 1 minced garlic clove - 1 teaspoon grated ginger - 1 tablespoon sesame oil 1. In a medium saucepan, mix the water, sugar, and rice vinegar. Heat it over medium heat. Stir until the sugar dissolves. 2. In a separate small bowl, mix the cornstarch with a few tablespoons of the warm liquid from the saucepan. This makes a smooth slurry. 3. Slowly whisk the cornstarch slurry back into the saucepan. Keep stirring to thicken the sauce. 4. Add the chopped red bell pepper, soy sauce, chili flakes, minced garlic, grated ginger, and sesame oil. 5. Let the mixture simmer on low heat for 10-15 minutes. This helps the sauce deepen its flavor. 6. When the sauce is thick enough for you, remove it from heat and let it cool. 7. Pour the sauce into a clean bottle or jar. Store it in the fridge for up to 2 weeks. The total time to make sweet chili sauce is about 30 minutes. Here’s the breakdown: - Prep time: 10 minutes - Cooking time: 20 minutes Use medium heat to dissolve the sugar. This helps blend the flavors well. Simmering on low heat is key to thickening the sauce. It also enhances the taste. If your sauce is too thin, try adding more cornstarch. Make a slurry and mix it in while cooking. If it's too sweet, add a bit more vinegar. This balances the flavors. For too much heat, add more sugar or water. Adjusting spice levels is easy once you get the hang of it. Don't be afraid to experiment! To change the spice level in sweet chili sauce, use chili flakes. Start with 2-3 tablespoons, then taste. If you want more heat, add more chili flakes a little at a time. You can also use fresh chilis for a different flavor. For less spice, reduce the chili flakes or remove them completely. Mixing in a bit of honey can balance out the heat too. Thickening your sweet chili sauce is easy. Use cornstarch, as listed in the recipe. Mix it with warm liquid to make a smooth slurry. This helps it blend well into the sauce. Stir it in slowly while cooking to avoid lumps. If the sauce is still thin, let it simmer longer. This will help it thicken naturally. Always check the sauce's thickness before cooling it. Sweet chili sauce is great for many dishes. Serve it as a dip with spring rolls or chicken nuggets. You can drizzle it over grilled meats for a sweet touch. It goes well with roasted vegetables too. Try it in a stir-fry for added flavor. Pair it with rice or noodles for a complete meal. Don't forget to serve it in a small bowl, topped with chili flakes for a fun look. {{image_2}} You can change the flavor of sweet chili sauce by using different ingredients. Here are some ideas: - Pineapple Juice: Swap out some water for pineapple juice. This adds a fruity twist. - Honey: Use honey instead of sugar. It gives a rich sweetness and a nice glaze. - Lime Juice: Add fresh lime juice for a zesty kick. It brightens the sauce nicely. - Hoisin Sauce: Mix in hoisin sauce for a deeper, savory taste. It adds complexity and richness. These swaps let you create your own signature sweet chili sauce. You can use sweet chili sauce in many dishes. It works great as a dip, marinade, or glaze. Here are a few recipes to try: - Grilled Chicken Skewers: Brush it on chicken before grilling. It gives a sweet and spicy flavor. - Stir-Fried Vegetables: Add the sauce to your favorite stir-fry for a tasty finish. - Spring Rolls: Use it as a dip for fresh spring rolls. It adds a perfect balance of sweet and spicy. For the full recipe, refer back to the earlier section. You’ll love how easy it is to make! You can easily make sweet chili sauce vegan and gluten-free. Here’s how: - Soy Sauce: Use tamari instead of regular soy sauce. Tamari is often gluten-free. - Sugar: Ensure the sugar you use is vegan. Most granulated sugars are safe, but check labels. - Cornstarch: This ingredient is naturally gluten-free. It helps thicken your sauce without any issues. These options let everyone enjoy this flavorful sauce without worry. To keep your sweet chili sauce fresh, store it in a clean jar. Make sure the lid is tightly sealed. This prevents air from getting in and keeps the flavor intact. Always use a clean spoon when scooping out sauce. This avoids cross-contamination and extends its life. Homemade sweet chili sauce lasts about two weeks in the fridge. Over time, it may change in color or smell. If you notice mold or an off odor, it’s best to throw it away. A thick layer of separation can also mean it’s time to toss it. If your sauce thickens too much, add a little water or vinegar. Heat it on low until it reaches your desired consistency. You can also use leftover sauce in stir-fries or marinades. It adds a sweet, spicy kick to grilled meats and veggies. Sweet chili sauce is a blend of simple ingredients. It often includes: - Water - Sugar - Rice vinegar - Cornstarch - Red bell pepper - Soy sauce - Chili flakes - Garlic - Ginger - Sesame oil These ingredients create a balance of sweet and spicy flavors. Each adds its own unique taste to the sauce. You can find sweet chili sauce in many places. Look in the condiment aisle at your local grocery store. Asian markets often carry a wide range of brands. You can also shop online for various options. Sweet chili sauce is very versatile. You can use it as a dip, glaze, or marinade. It adds flavor to grilled meats, stir-fries, and roasted vegetables. Feel free to get creative in the kitchen! Homemade sweet chili sauce can last up to two weeks. Store it in a clean jar in the fridge. Always check for changes in color or smell before using. Sweet chili sauce has a mild heat. The level of spice depends on the chili flakes used. You can adjust the spice by adding more or less chili flakes when making the sauce. Enjoy the balance of sweet and spicy! You learned how to make sweet chili sauce from scratch. We covered ingredients, cooking steps, and storage tips. Adjusting spice levels and exploring variations can enhance your sauce. With these tips, you can create a flavorful sauce that suits your taste. Enjoy your sweet chili sauce in many dishes or as a dip. Feel free to experiment and share your results. Your kitchen will become more fun with this tasty recipe!

Sweet Chili Sauce Flavorful and Easy Cooking Guide

Are you ready to transform your meals with a burst of flavor? In this cooking guide, I’ll show you how

To make fluffy pancakes, you need a few simple ingredients. Here’s what you will need: - 1 cup all-purpose flour - 2 tablespoons sugar - 1 tablespoon baking powder - 1/4 teaspoon salt - 1 large egg - 3/4 cup milk (or a dairy-free alternative) - 2 tablespoons unsalted butter, melted - 1 teaspoon vanilla extract - Maple syrup, for serving - Fresh berries (like strawberries or blueberries) for garnish - Whipped cream (optional) These ingredients work together to create a light and fluffy texture in your pancakes. The baking powder helps them rise, while the melted butter adds richness. Using fresh berries on top adds a lovely burst of flavor. You can find the full recipe with instructions to guide you through the cooking process. - Whisk together dry ingredients: In a large bowl, mix 1 cup of flour, 2 tablespoons of sugar, 1 tablespoon of baking powder, and 1/4 teaspoon of salt. This mix gives your pancakes a sweet flavor and fluffy texture. - Combine wet ingredients: In another bowl, beat 1 large egg. Then, add 3/4 cup of milk, 2 tablespoons of melted butter, and 1 teaspoon of vanilla extract. Mix until smooth. This step adds moisture and richness. - Mix wet and dry ingredients: Pour the wet mix into the dry mix. Stir gently with a spatula until just combined. Don't worry about lumps; they help make the pancakes fluffy. - Preheat skillet: Set a non-stick skillet over medium heat. Lightly grease it with butter or cooking spray. This helps prevent sticking and gives a nice golden color. - Pour batter and cook pancakes: Pour about 1/4 cup of batter for each pancake into the skillet. Cook for 2-3 minutes. Watch for bubbles forming on the surface and the edges looking set. - Flip and finish cooking: Carefully flip the pancakes using a spatula. Cook for another 1-2 minutes until golden brown. This ensures they cook evenly and stay soft. - Stack and drizzle with maple syrup: Once cooked, stack your pancakes high on a plate. Drizzle a generous amount of maple syrup over the top. This sweet addition is a must-have. - Garnish with fresh berries and whipped cream: Add fresh berries like strawberries or blueberries on top. You can also add a dollop of whipped cream for an extra treat. This makes your dish look great and adds fresh flavor. To make your pancakes fluffy, avoid overmixing the batter. When you mix too much, the pancakes can turn out dense. You want to mix just until the dry and wet ingredients blend. Some lumps are okay; they help keep the pancakes light. Next, check the batter consistency. It should be thick but pourable. If it’s too runny, add a bit more flour. If it's too thick, add a splash of milk. This perfect balance creates a dreamy pancake texture. For the best pancakes, cook them on medium heat. If the pan is too hot, the outside will burn, but the inside will stay raw. A non-stick skillet works great, but a cast-iron pan can add extra flavor. To know when to flip your pancakes, watch for bubbles. When bubbles form on the surface and the edges look set, it’s time to flip. Cook until golden brown on the other side for perfect pancakes. Choosing the right maple syrup can make a big difference. Look for pure maple syrup, not imitation. Pure syrup has a rich flavor that enhances your pancakes. If you want something different, try honey or agave syrup. You can also use fruit syrups, like blueberry or raspberry, for a fun twist. These alternatives can add a unique taste to your breakfast. For the Full Recipe, check the instructions earlier in this article. {{image_2}} You can easily change the flavor of your pancakes. One fun way is to add chocolate chips. Just mix in about 1/2 cup of chips into your batter. This makes the pancakes sweet and rich. Kids love this addition! Another tasty option is to add fruits. You can use sliced bananas or fresh blueberries. Fold them gently into the batter before cooking. The fruit adds natural sweetness and makes each bite juicy. If you need gluten-free pancakes, use gluten-free flour instead. Many brands offer great mixes that work well. Just swap in the same amount as the all-purpose flour. For vegan pancakes, you can replace the egg with mashed banana or applesauce. Use a plant-based milk too. Almond or oat milk works great! These swaps keep your pancakes fluffy and delicious. While maple syrup is a classic choice, you can try unique toppings. Consider using yogurt or nut butter. They add creaminess and flavor. Seasonal toppings can also be fun. In spring, use fresh strawberries. In fall, try sliced apples with cinnamon. Each season brings new tastes to enjoy with your pancakes. For the full recipe, you can check the earlier section. Happy cooking! To keep your fluffy pancakes fresh, store them in an airtight container. Line the container with parchment paper to avoid sticking. Pancakes last about three days in the fridge. If you want them longer, freezing is a great option. The best way to reheat pancakes is in a skillet. Heat on low and flip them to warm both sides. The stovetop keeps pancakes fluffy. You can use a microwave too. Just place them on a plate and heat for about 20 seconds. This method makes them soft but can dry them out. Freezing pancakes is easy. Stack them with parchment paper between each one. Place them in a freezer bag, and they will last up to two months. To thaw, leave them in the fridge overnight. You can reheat them in the microwave or on the stovetop as mentioned. For the best results, always reheat from thawed, not frozen. For the full recipe, check out the details above! Can I make pancake batter ahead of time? Yes, you can make pancake batter ahead of time. Just mix it and store it in the fridge. Use it within a day for the best fluffiness. Give it a gentle stir before cooking. Why are my pancakes not fluffy? Pancakes may not be fluffy for a few reasons. You might have overmixed the batter. Overmixing makes them dense. Also, check if your baking powder is fresh. Old baking powder can fail to rise. What drinks pair well with pancakes? Coffee and tea are classic choices. Fresh orange juice adds a nice zing. Milk or almond milk also pairs well. For a fun twist, try a chai latte or a smoothie. Can I make pancakes without eggs? Yes, you can! Use a banana or applesauce as a binder. One small banana or 1/4 cup of applesauce works well. This keeps the pancakes moist and adds a hint of sweetness. Can I use whole wheat flour instead of all-purpose? Absolutely! Whole wheat flour can replace all-purpose flour. Just note that the pancakes may be denser. You may want to add a bit more milk to keep them fluffy. What can I use instead of maple syrup? You can use honey or agave syrup if you prefer. Fruit compote or jam also makes a tasty topping. For a unique twist, try yogurt with a drizzle of honey. For the complete recipe, check out the [Full Recipe]. This blog post showed how to make perfect pancakes from scratch. We covered ingredients, step-by-step instructions, and tips for delicious results. Remember, mixing your batter gently keeps pancakes fluffy. Explore fun variations and toppings to customize your meal. You can store and reheat pancakes easily, too. Enjoy your tasty creations and share them with others! The joy of pancakes is in the making and sharing. Get cooking and have fun!

Fluffy Pancakes with Maple Syrup Dreamy Breakfast Delight

Do you dream of fluffy pancakes dripping with sweet maple syrup? You’re in the right place! In this delicious guide,

To make Coconut Curry Lentil Soup, gather these key ingredients: - 1 cup red lentils, rinsed - 1 can (14 oz) coconut milk - 4 cups vegetable broth - 1 medium onion, finely chopped - 2 cloves garlic, minced - 1 tablespoon ginger, grated - 1 tablespoon curry powder - 1 teaspoon turmeric - 1 teaspoon cumin - 1 tablespoon olive oil - 1 cup spinach, roughly chopped - Juice of 1 lime - Salt and pepper to taste - Fresh cilantro, for garnish These ingredients form the base of your soup. The red lentils provide protein and fiber. The coconut milk makes the soup creamy and rich. The spices bring warmth and depth. You can enhance the soup with these optional ingredients: - 1 small red chili, finely chopped - Extra lime juice for brightness - A dash of soy sauce for umami Adding a chili gives the soup a nice kick. More lime juice brightens the flavors. Soy sauce can boost savory notes. If you lack an ingredient, here are some easy swaps: - Use green or brown lentils instead of red, though they may take longer to cook. - Swap vegetable broth for chicken broth if you prefer. - Coconut cream can replace coconut milk for a richer texture. These substitutions keep the soup delicious while accommodating what you have on hand. Always feel free to experiment with flavors to suit your taste. For the full recipe, check the details provided earlier. First, heat the olive oil in a large pot over medium heat. I use a big pot to give the soup room to grow. Add the finely chopped onion and cook it until soft and clear. This should take about five minutes. The smell will fill your kitchen and let you know you’re on the right track. Next, stir in the minced garlic, grated ginger, curry powder, turmeric, cumin, and red chili if you want some heat. Cook this mix for two more minutes. The spices will wake up and fill the room with their warmth. Now, it’s time for the star of the show: the lentils. Add the rinsed red lentils to the pot along with the vegetable broth and coconut milk. Give everything a good stir. This mix brings together the flavors and creates a cozy base. Bring the soup to a gentle simmer, then lower the heat. Let it cook uncovered for 20 to 25 minutes. Stir it occasionally so nothing sticks to the bottom. You know it’s ready when the lentils are soft and tender. Once the lentils are cooked, add the roughly chopped spinach. Cook for another five minutes until it wilts down. This step adds color and nutrients to your soup. After that, turn off the heat and squeeze in the juice of one lime. This adds a nice zing to the flavor. Season with salt and pepper to taste. I always taste the soup before serving to make sure it’s just right. Finally, ladle the soup into bowls and sprinkle fresh cilantro on top. This adds freshness and a pop of color. For the complete recipe, check out the Full Recipe. To boost the taste of your Coconut Curry Lentil Soup, try a few simple tricks. First, add fresh herbs like cilantro during cooking. Fresh lime juice adds brightness at the end. You can also sprinkle in some chili flakes for extra heat. If you want a richer flavor, sauté the onion and spices longer. This deepens the taste. Another option is to add a dash of soy sauce or tamari for umami. These tweaks will make every bowl burst with flavor. If you have leftover soup, store it in an airtight container. The soup can stay fresh in the fridge for up to five days. Make sure to cool it down before sealing. If you want to keep it longer, consider freezing it. Portion it into freezer-safe containers. This way, you can enjoy it later. Just remember to leave a little space at the top for expansion. Making your Coconut Curry Lentil Soup ahead of time is easy. Prepare the soup and let it cool. Transfer it to an airtight container. You can store it in the fridge for up to five days or freeze it for months. When you’re ready to eat, simply reheat the soup on the stove. Stir it gently to mix in any separated ingredients. This dish tastes even better the next day, as the flavors meld together. Check out the Full Recipe for more details! {{image_2}} Coconut curry lentil soup shines in its vegetarian and vegan forms. The base is already plant-based, with rich flavors from coconut milk and spices. To boost nutrition, add more veggies. Carrots, bell peppers, or sweet potatoes work well. They add texture and taste. Just chop them up and add them in with the onion. This makes the soup even more colorful and hearty. If you want more protein, chicken or tofu are great choices. For chicken, use cooked, shredded meat. Stir it in after the lentils are soft. This way, it warms up without overcooking. For tofu, use firm tofu. Cut it into cubes and sauté it with the onions. This adds a nice texture. Both options make the soup filling and satisfying. Spice can change the whole soup. If you like heat, add more red chili. You can also use cayenne pepper for a kick. Start with a small amount, then taste. You can always add more if needed. If you prefer milder flavors, skip the chili altogether. Coconut milk cools the spice, providing balance. This soup is customizable to fit your taste perfectly. For the full recipe, check out the Coconut Curry Lentil Soup 🥥. After you make your Coconut Curry Lentil Soup, let it cool first. Once cool, store it in an airtight container. I recommend using glass jars or plastic containers. This keeps the soup fresh. It will last in the fridge for about 4-5 days. You can also freeze this tasty soup. Pour it into freezer-safe bags or containers. Leave some space at the top for expansion. Label the bags with the date. The soup can last in your freezer for up to three months. When you are ready to enjoy it, just thaw it in the fridge overnight. To reheat, pour the soup into a pot and warm it over low heat. Stir it often to avoid sticking. If the soup is too thick, add a splash of vegetable broth or water. For the best flavor, taste it and adjust the seasoning if needed. Enjoy every bowl of warmth! Coconut Curry Lentil Soup lasts about five days in the fridge. Store it in an airtight container. This keeps the soup fresh and tasty. If you want to enjoy it later, you can freeze it too. Just remember to thaw it in the fridge before reheating. Yes, you can use other lentils like green or brown lentils. However, they may need more cooking time. Red lentils cook faster and break down, making the soup creamier. If you use green or brown lentils, adjust the liquid and time accordingly. You can serve this soup with bread or rice. Naan or crusty baguettes pair well too. A side salad adds freshness and crunch. You can also top the soup with yogurt or extra herbs for a nice touch. Absolutely! This soup is great for meal prep. It stores well and reheats nicely. Make a big batch and portion it out for easy lunches or dinners. It saves time and keeps your meals healthy and tasty. For the full recipe, check out the earlier section. This coconut curry lentil soup is rich in flavor and easy to make. We discussed the key ingredients, step-by-step preparation, and smart storage tips. You can adapt it to your taste by adding proteins or adjusting the spice level. Remember, this soup is great for meal prep and tastes even better the next day. Enjoy this dish as a comforting meal that warms both body and spirit.

Coconut Curry Lentil Soup Goodness in Every Bowl

There’s something magical about a warm bowl of soup, and my Coconut Curry Lentil Soup will make your taste buds

Older posts
Newer posts
← Previous Page1 … Page53 Page54 Page55 … Page78 Next →

dsad

© 2025 pureeatsnow • Built with GeneratePress

Our Policies

  • Copyright Policy
  • Cookie Policy
  • GDPR Policy
  • Privacy Policy
  • Disclaimer
  • Terms Of Use

More Information

  • Home
  • About
  • Contact
  • Appetizers
  • Dessert
  • Dinner
  • Drinks
©2025, pureeatsnow About Back To Top