Sheet-Pan BBQ Chicken Nachos for Quick Flavor Fix
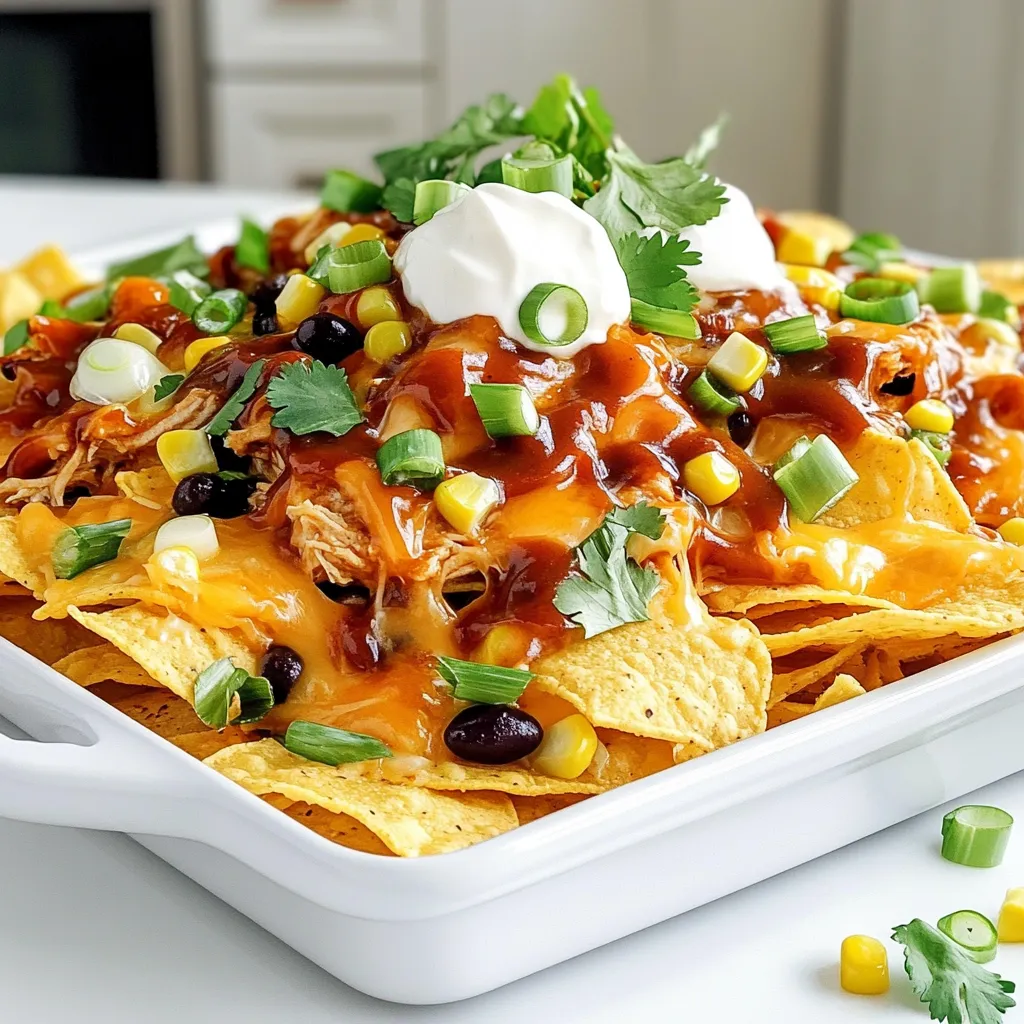
Craving a quick and tasty meal? I’ve got just the thing! These Sheet-Pan BBQ Chicken Nachos combine barbecue chicken, crispy
Craving a quick and tasty meal? I’ve got just the thing! These Sheet-Pan BBQ Chicken Nachos combine barbecue chicken, crispy
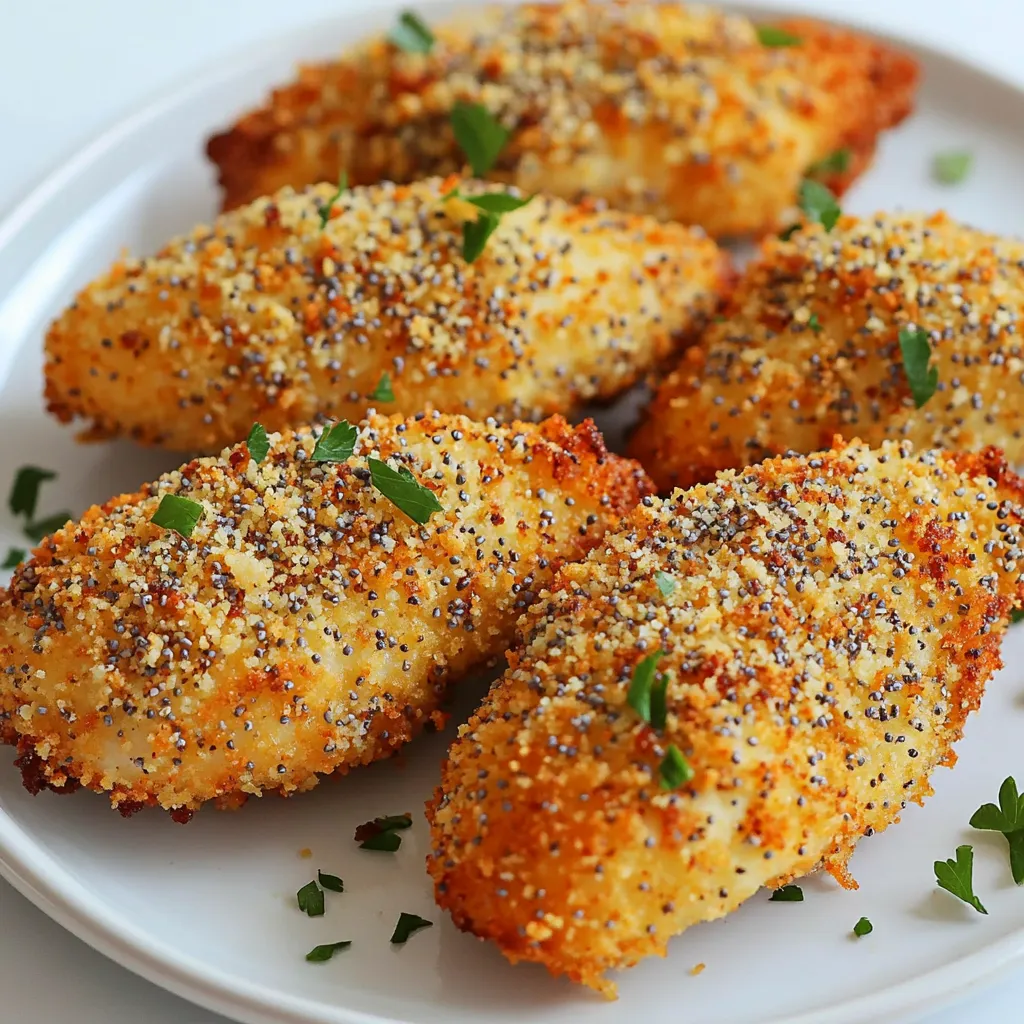
Get ready to elevate your dinner game with Air Fryer Everything Bagel Chicken Tenders! These crispy, flavorful tenders are simple

If you’re craving comfort food that’s quick and easy, you’re in luck! My Instant Pot Creamy Broccoli Cheddar Soup is
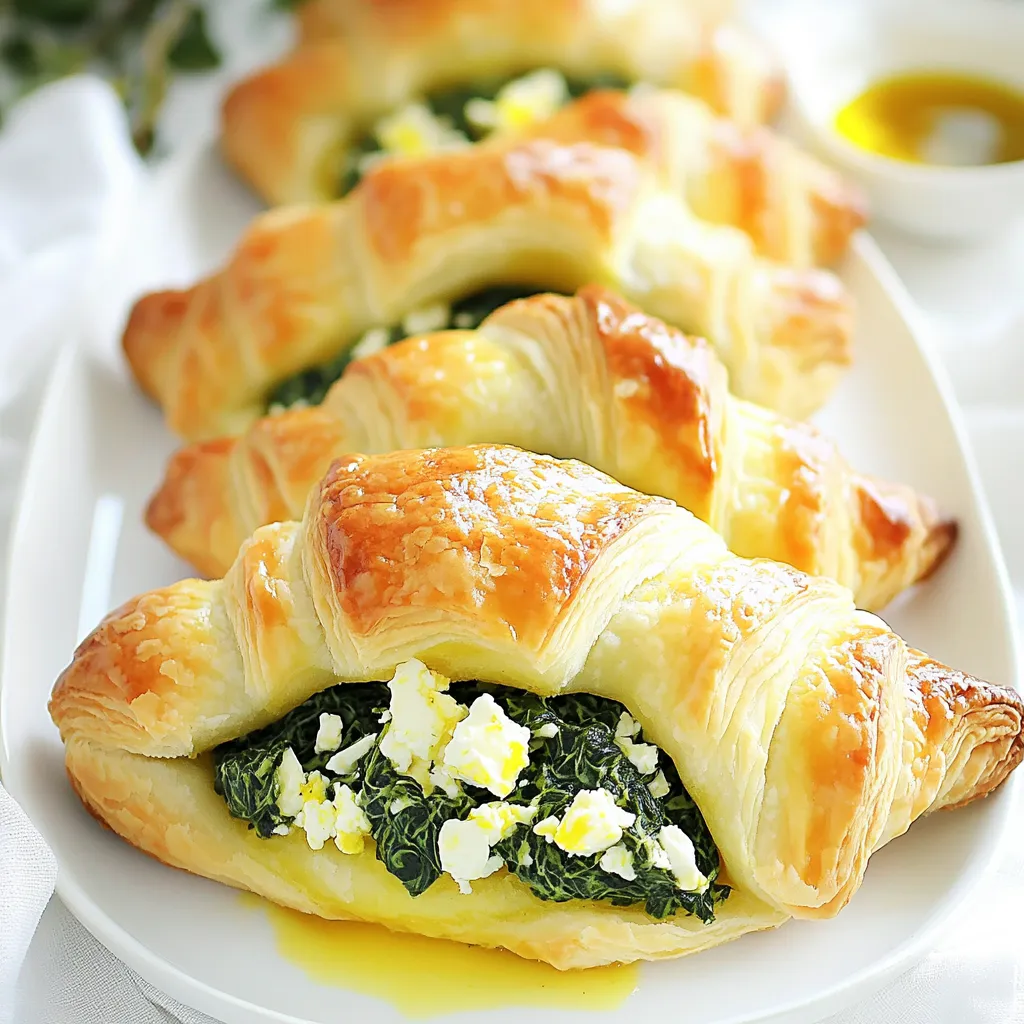
Ready to elevate your snack game? In this article, I’ll guide you through making Savory Spinach Feta Stuffed Crescent Rolls.
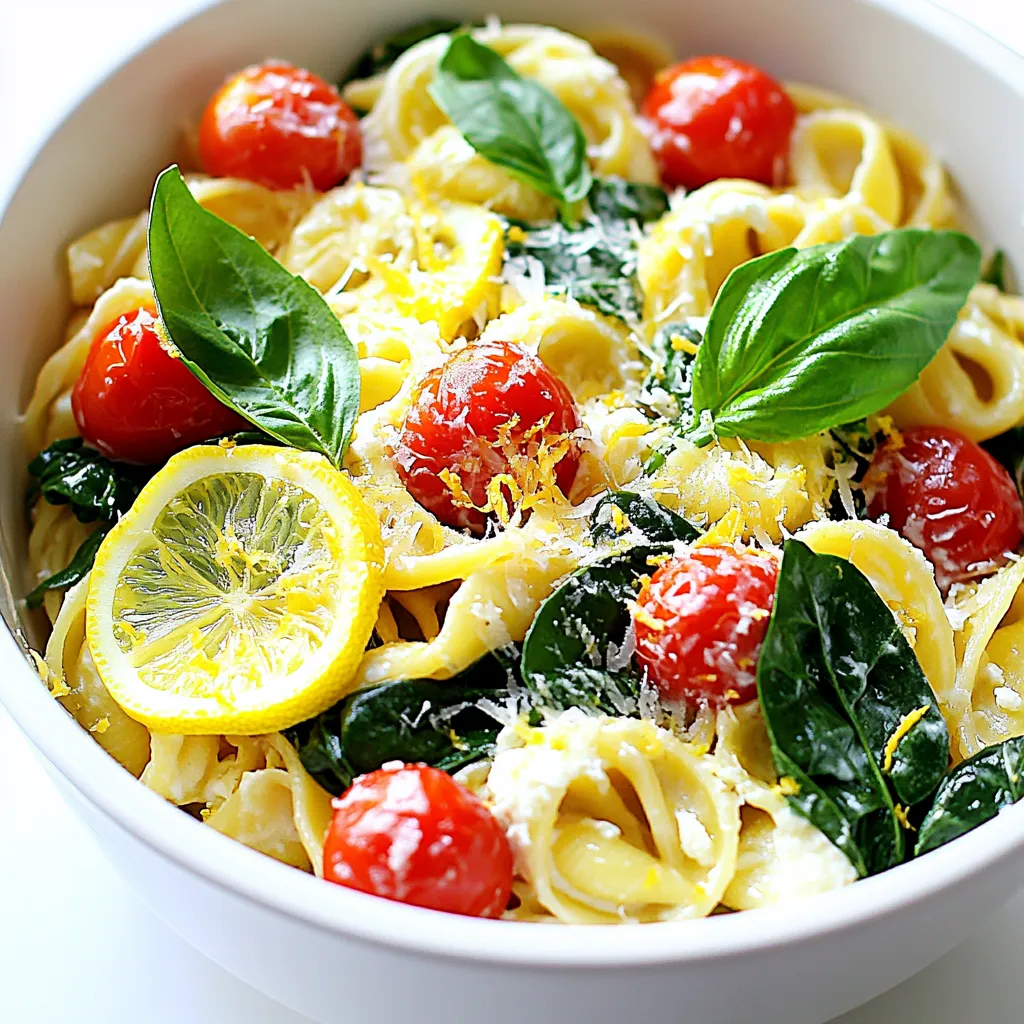
Looking for a quick and tasty meal? One Pot Lemon Ricotta Pasta is your answer! This dish is simple, fresh,
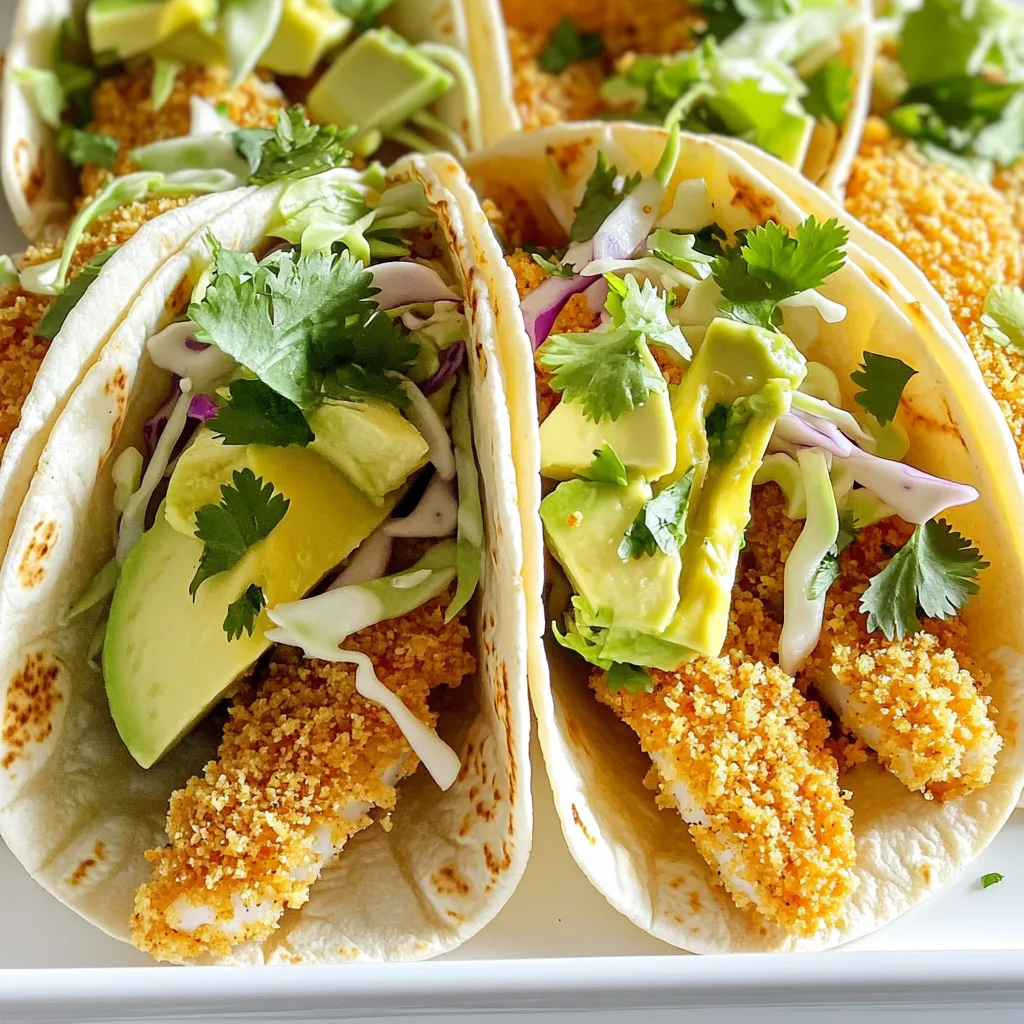
Are you ready to make a tasty meal? I’m excited to share my crispy air fryer fish tacos with you!

Are you ready to indulge in a treat that’s hard to resist? These Double Chocolate Donuts are made to satisfy
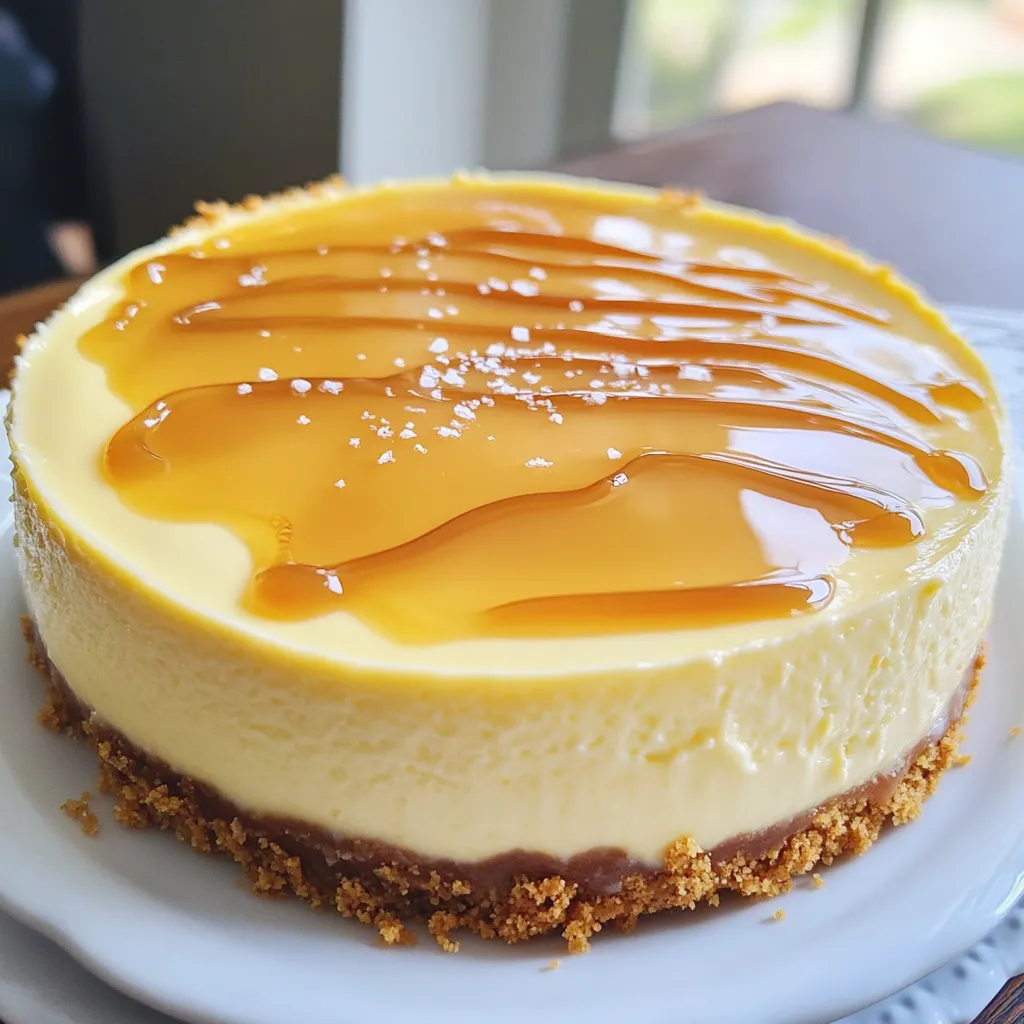
Are you ready to indulge in a dessert that combines your love for coffee and cheesecake? The Caramel Macchiato Cheesecake
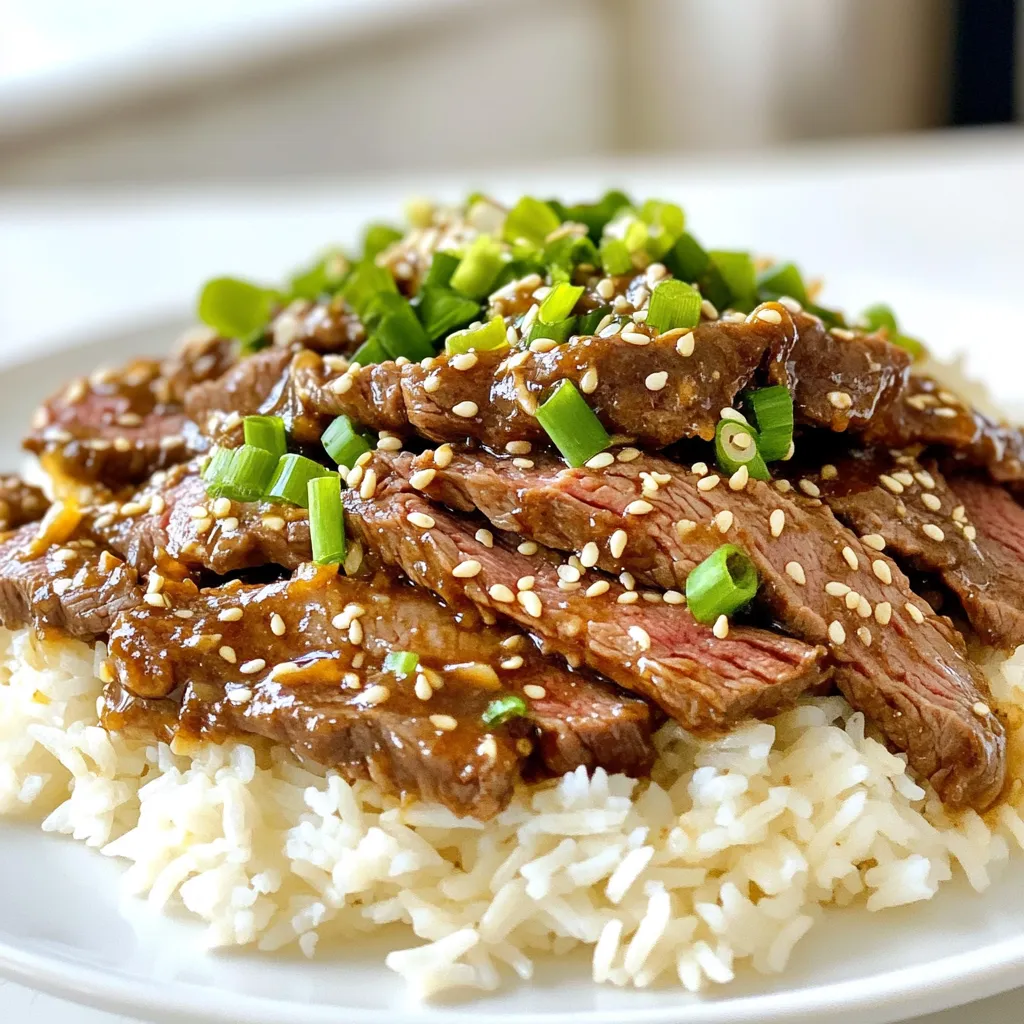
Are you tired of takeout and craving a delicious meal at home? Let me guide you to create a Better
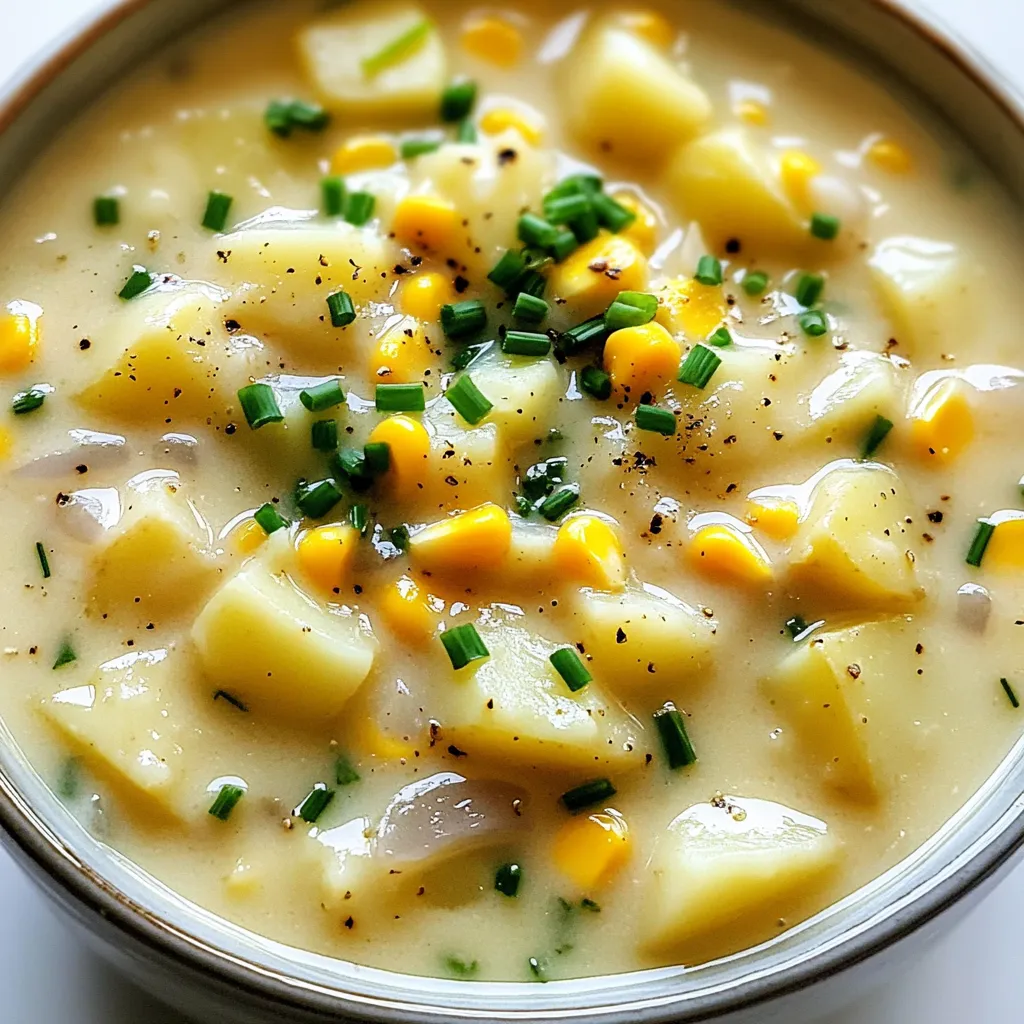
Are you craving a warm, filling dish that’s easy to make? My Hearty Slow Cooker Creamy Potato Corn Chowder is
