Skip to content
DisclaimerTerms Of UseGDPR PolicyCookie Policy

pureeatsnow

  • Home
  • Drinks
  • Appetizers
  • Dinner
  • Dessert
  • About
  • Contact
  • Privacy Policy
DisclaimerTerms Of UseGDPR PolicyCookie Policy

Rachel

For Loaded Baked Potato Gnocchi, you will need a few key ingredients that pack a lot of flavor. Here’s what you’ll need: - 1 pound potato gnocchi - 2 large russet potatoes (baked, cooled, and mashed) - 1/2 cup cream cheese, softened - 1/2 cup sour cream - 1 cup shredded cheddar cheese - 1/2 cup cooked bacon, crumbled - 1/4 cup green onions, chopped - 1 teaspoon garlic powder - Salt and pepper to taste - Olive oil for drizzling - Fresh parsley for garnish These ingredients create a creamy and comforting dish. The potato gnocchi serves as a soft base. The baked russet potatoes add richness and depth. Cream cheese and sour cream make the dish creamy and delicious. Shredded cheddar cheese provides that classic loaded baked potato flavor. Cooked bacon gives a nice crunch and smoky taste. Green onions add freshness and brightness to the dish. Garlic powder boosts the overall flavor. A drizzle of olive oil adds richness, while fresh parsley gives a touch of color. Using high-quality ingredients is key for the best taste. You can find most of these items at your local grocery store. For the full recipe, check out the complete instructions. Baking and Cooling the Potatoes Start by baking two large russet potatoes. Preheat your oven to 400°F (200°C). Place the potatoes on a baking sheet. Bake them for about 45-60 minutes, until they are soft. When done, take them out and let them cool for a bit. Mashing Techniques Once the potatoes are cool, cut them in half. Scoop out the flesh into a bowl. Use a fork or potato masher to mash them until smooth. This will give your gnocchi a nice creamy texture. Combining Ingredients In a large mixing bowl, mix the mashed potatoes with cream cheese and sour cream. Add garlic powder, salt, and pepper to taste. Stir until everything looks creamy and well combined. Salting the Water Fill a large pot with water and add salt. Bring the water to a boil. The salt helps to flavor the gnocchi as they cook. Cooking Time Gently add the potato gnocchi to the boiling water. Cook them until they float to the surface, which takes about 2-3 minutes. Use a slotted spoon to remove them and set aside. Heating Techniques in Skillet In a large skillet, drizzle some olive oil over medium heat. Add the cooked gnocchi to the skillet. Then, pour in the creamy cheese mixture. Stir gently to combine and heat everything through for about 5 minutes. Incorporating Bacon and Cheddar Stir in the crumbled bacon and half of the shredded cheddar cheese. Mix until the gnocchi is well coated and the cheese is melted. Proper Broiling Techniques Transfer the loaded gnocchi mixture to a baking dish. Top with the remaining cheddar cheese. Place it under the broiler for 3-5 minutes until it's golden and bubbly. Serving Suggestions Once broiled, take it out and sprinkle with chopped green onions and fresh parsley. Serve hot and enjoy! You can find the Full Recipe for more details. - Cooking Tips for Fluffy Gnocchi When making gnocchi, use a light touch. Overworking the dough makes it dense. Cook the gnocchi in salted water. They should float when ready. This means they are cooked perfectly. - Avoiding Common Mistakes Do not use too much flour. This can make the gnocchi heavy. Ensure your potatoes are dry after baking. Too much moisture can ruin the texture. - Additional Seasonings Add a pinch of smoked paprika for a kick. A dash of onion powder can deepen the flavor. You can also try fresh herbs like thyme or rosemary. - Cheese Choices Cheddar is classic, but try mozzarella for a stretchy texture. Parmesan can add a nice savory note. Mixing cheeses can create a richer taste. - Plating Techniques Use a large bowl to serve. This allows the colorful layers to show. Create height by stacking the gnocchi. This makes the dish look inviting. - Garnish Suggestions Fresh parsley or chives add a pop of color. A sprinkle of crispy bacon on top enhances flavor. Drizzle with olive oil for a shiny finish. For more detailed steps, check the Full Recipe. {{image_2}} If you want to change things up, consider these options: - Dairy-Free Options: Use plant-based cream cheese and sour cream. They blend well and keep the dish creamy. - Alternative Cheeses: Try using mozzarella or a vegan cheese blend. Both melt nicely and add a different taste. You can easily make this dish vegetarian or vegan: - Plant-Based Alternatives: Swap out the bacon for mushrooms or tempeh. This adds a nice texture and flavor while keeping it plant-based. Enhance your Loaded Baked Potato Gnocchi with these extras: - Ingredients for Extra Flavor: Add crispy onions, jalapeños, or smoked paprika for a spicy kick. Each will give your dish a new twist. - Adding Vegetables: Mix in spinach, broccoli, or bell peppers. They add color, nutrition, and taste, making every bite exciting. For the complete recipe, check out the Full Recipe. To keep your loaded baked potato gnocchi fresh, store it in an airtight container. Place it in the fridge within two hours of cooking. This step helps it stay tasty for up to three days. Make sure to let the dish cool before sealing it. This prevents moisture buildup, which can make the gnocchi soggy. When you want to enjoy your leftovers, the stovetop is the best method. Heat a skillet over medium heat. Add a splash of water or broth to keep it moist. Stir gently until it warms through, about 5-7 minutes. You can also use the microwave. Place the gnocchi in a microwave-safe dish, cover it, and heat in short bursts. Check often to avoid overcooking. If you want to save some for later, freezing is a great option. First, let the gnocchi cool completely. Then, portion it into freezer bags. Squeeze out the air to prevent freezer burn. It can last up to three months in the freezer. When you’re ready to eat, transfer it to the fridge to thaw overnight. For best results, let the frozen gnocchi thaw in the fridge. This method keeps the texture nice. If you're in a hurry, you can thaw it in the microwave on low power. Once thawed, reheat as mentioned earlier. Enjoy the rich flavors again with every bite! For gnocchi, I recommend using russet potatoes. They are starchy and fluffy. This helps create a light texture. Yukon Gold potatoes also work well. They add a creamy taste to the gnocchi. Avoid waxy potatoes like red or new potatoes. They can make the gnocchi dense and heavy. To make this dish gluten-free, choose gluten-free gnocchi. Many brands offer tasty options made from rice or potatoes. Always check the label for gluten-free certification. You can also make your own gnocchi using gluten-free flour. Just mix it with the mashed potatoes and follow the same steps. Yes, you can prepare Loaded Baked Potato Gnocchi ahead of time. You can make the cheese mixture and cook the gnocchi. Store them separately in the fridge. When you are ready to eat, combine them and bake. This saves time on busy nights. Gnocchi cooks quickly. They are done when they float to the surface of the water. This usually takes about 2-3 minutes. If they sink, they need more time. Keep an eye on them, so they don't overcook. Overcooked gnocchi can become mushy. Making Loaded Baked Potato Gnocchi is simple and fun. We covered every step, from choosing the right potatoes to adding toppings. Remember, properly mashing your potatoes and using the right techniques makes a difference. Have fun experimenting with variations and flavors. This dish is perfect for sharing or enjoying on your own. With the right tips, you can create a dish that is both tasty and satisfying. Enjoy your cooking and savor each bite!

Loaded Baked Potato Gnocchi Flavorful Comfort Meal

Comfort food takes a delicious twist in this Loaded Baked Potato Gnocchi recipe! Imagine soft, pillowy gnocchi loaded with creamy

To make Bang Bang Shrimp Pasta, you need a few key ingredients. Here’s the complete list to get you started: - 8 oz fettuccine or spaghetti - 1 lb medium shrimp, peeled and deveined - 1/2 cup mayonnaise - 1/4 cup sweet chili sauce - 1 teaspoon sriracha (adjust for spice preference) - 2 tablespoons lime juice - 2 tablespoons olive oil - 3 cloves garlic, minced - 1/4 cup green onions, chopped (for garnish) - 1/2 cup panko breadcrumbs - Salt and pepper to taste - Optional: Fresh cilantro leaves for garnish Gathering these ingredients is simple. You can find most of them in your kitchen or at a local store. The shrimp adds a nice touch, and the sauce brings bold flavors to the dish. The optional garnishes elevate the presentation and taste. Enjoy the process of cooking, as it will lead to a tasty meal! For the full recipe, check out the detailed steps provided. First, bring a large pot of salted water to a boil. Add your fettuccine or spaghetti. Cook it until it's al dente, which means it's firm yet cooked through. This usually takes about 8-10 minutes, but check the package for exact times. Once done, drain the pasta in a colander and set it aside. Next, grab a medium bowl for the sauce. Whisk together 1/2 cup mayonnaise, 1/4 cup sweet chili sauce, 1 teaspoon sriracha, and 2 tablespoons lime juice. Blend these until smooth. If you want it spicier, feel free to add more sriracha. Set this tasty sauce aside for later. In a large skillet, heat 2 tablespoons of olive oil over medium heat. Add 3 cloves of minced garlic and sauté for about one minute until it smells great. Then, raise the heat to medium-high and add 1 pound of medium shrimp. Season them with salt and pepper. Cook the shrimp for about 2-3 minutes on one side until they turn pink. Then flip them and cook for another minute. Now, it’s time to mix! Pour the Bang Bang sauce over the cooked shrimp. Toss gently until all the shrimp are coated. Reduce the heat to medium and add the cooked pasta to the skillet. Toss everything together until the pasta is evenly coated in that delicious sauce. For a crunchy topping, toast 1/2 cup of panko breadcrumbs in a small pan over medium heat. Stir them frequently for about 3-4 minutes until they turn golden brown. Finally, sprinkle the toasted breadcrumbs over the pasta before serving. Enjoy your Bang Bang Shrimp Pasta! For the full recipe, check out the earlier instructions. Timing is key when cooking Bang Bang Shrimp Pasta. Start by boiling water for the pasta. Once it reaches a rolling boil, add your fettuccine or spaghetti. Cook it until al dente. This usually takes about 8-10 minutes. While the pasta cooks, heat your skillet for the shrimp. This way, both will finish around the same time. You’ll have hot pasta and perfectly cooked shrimp ready to mix together. To make the sauce fit your taste, start with the sriracha. If you like it spicy, add more. If you prefer less heat, keep it simple. You can also mix in a bit of honey to balance the spice. This adds sweetness and makes the sauce creamy and tasty. Taste it as you go. This way, you can find the perfect heat level for you. Bang Bang Shrimp Pasta pairs well with several sides. A fresh green salad with light dressing is a great choice. Garlic bread also works well, giving you a nice crunch. For drinks, try a crisp white wine or sparkling water with lime. These drinks will enhance the meal and make it even more enjoyable. You can find the Full Recipe linked here to help you get started! {{image_2}} You can easily switch shrimp for chicken or tofu. For chicken, use cooked, diced chicken breast. Sauté it until golden brown. For tofu, press it to remove water and cut it into cubes. Sauté the tofu in olive oil until crispy. Both options taste great with the Bang Bang sauce. While fettuccine or spaghetti works well, you can try other pasta shapes. Penne or rigatoni hold sauce nicely and add fun texture. You might also use whole wheat or gluten-free pasta for a healthier choice. Just be sure to follow the cooking times on the package. To make a meat-free version, load your dish with vegetables. Bell peppers, zucchini, and broccoli work well. Sauté them until tender before adding the Bang Bang sauce. You can also add cooked chickpeas for protein. This way, you keep the meal filling and delicious. For the full recipe, check out my Bang Bang Shrimp Pasta recipe. Store your Bang Bang Shrimp Pasta in airtight containers. This keeps it fresh for later. Make sure it cools down before sealing. If you store it right, it can last 3 to 4 days in the fridge. To reheat, you can use the microwave or stovetop. If using a microwave, put it in a bowl and cover it lightly. Heat for 1 to 2 minutes, stirring halfway through. For the stovetop, add a splash of water or broth in a pan. Heat it on low, stirring gently. This helps keep the pasta soft and creamy. Yes, you can freeze Bang Bang Shrimp Pasta. Use freezer-safe containers, and store it for up to 2 months. When freezing, leave some space at the top. This allows the pasta to expand. To thaw, place it in the fridge overnight. Reheat it gently to enjoy the flavors again. For the full recipe, check the link. Bang Bang Shrimp Pasta is a fun dish that mixes shrimp with creamy sauce and pasta. It has a kick from the sriracha and a sweet touch from the chili sauce. This meal has grown popular for its bold flavors and quick prep time. You can whip it up in about 30 minutes, making it perfect for busy nights or special dinners. Yes, you can make Bang Bang Shrimp Pasta ahead of time. Cook the pasta and shrimp, but keep them separate. Store them in airtight containers. On the night you plan to serve, just reheat the pasta and shrimp together with the sauce. This saves you time and still gives you a fresh taste. To complete your meal, try serving a light salad or garlic bread. A fresh side salad with greens adds crunch and balance. Garlic bread is great for soaking up any extra sauce. For drinks, a chilled white wine or sparkling water pairs well with the flavors. Adjusting the spice level is easy. To make it spicier, add more sriracha to the sauce. Start with half a teaspoon and add more until it’s just right for you. If you prefer it milder, reduce the sriracha or skip it altogether. The sweet chili sauce still adds flavor. Bang Bang Shrimp comes from the United States. It started as an appetizer at a popular restaurant chain. The name comes from the sound of shrimp frying. The dish quickly grew in fame and made its way into home kitchens. Now, it’s a favorite for many who love bold flavors. This blog post explored the delicious Bang Bang Shrimp Pasta. We covered the key ingredients and how to cook them step-by-step. With tips to adjust spice levels and serving ideas, you can make it just right for your taste. You can easily switch proteins or make a veggie version. Proper storage and reheating also keep leftovers tasty. Now, you have the tools to create this flavorful dish. Enjoy cooking and savor each bite!

Bang Bang Shrimp Pasta Creamy Flavorful Dinner Delight

If you’re craving a dinner that’s both creamy and full of flavor, you’re in for a treat! Today, I’ll share

This dish starts with bold flavors. You need: - 1 pound chorizo sausage, casings removed - 4 medium potatoes, peeled and diced - 1 medium onion, chopped - 1 red bell pepper, diced - 4 large eggs - 1 cup milk - 1 cup shredded cheddar cheese - 1 teaspoon smoked paprika - 1 teaspoon garlic powder - Salt and pepper to taste - Fresh cilantro, chopped (for garnish) These ingredients create a hearty meal. The chorizo adds spice, while the potatoes provide comfort. Want to kick it up a notch? Consider these add-ins: - 1 cup black beans for extra protein - 1 jalapeño, diced for heat - 1 cup frozen corn for sweetness - ½ cup diced tomatoes for freshness Each option brings a new twist. Feel free to mix and match to suit your taste. Need to adjust for diets? Here are some easy swaps: - Use turkey or chicken chorizo for a leaner choice. - Swap regular milk for almond or oat milk for lactose-free. - Replace potatoes with sweet potatoes for a healthier twist. - Try vegan cheese to make it dairy-free. These substitutions help everyone enjoy this dish. You can still savor the rich flavors while meeting dietary needs. For the full recipe, check the earlier section. Start by gathering all your ingredients. You need: - 1 pound chorizo sausage, casings removed - 4 medium potatoes, peeled and diced - 1 medium onion, chopped - 1 red bell pepper, diced - 4 large eggs - 1 cup milk - 1 cup shredded cheddar cheese - 1 teaspoon smoked paprika - 1 teaspoon garlic powder - Salt and pepper to taste - Fresh cilantro, chopped (for garnish) Make sure to wash and chop all veggies. This step keeps your work area clean. Set everything aside for easy access while you cook. Heat a large skillet over medium heat. Add the chorizo and cook it for about 5-7 minutes. Break it apart with a spoon. The chorizo should be browned and crumbly. If there is too much fat, drain it. Next, add the diced potatoes and onion to the same pan. Cook them for around 10-12 minutes. Stir often until the potatoes start to get soft. After that, add the red bell pepper. Cook for another 5 minutes until all the veggies are tender. This blend of flavors will be the base of your casserole. Now it's time to put everything together. In a mixing bowl, whisk together the eggs and milk. Add smoked paprika, garlic powder, salt, and pepper. Mix until well combined. Grease a 9x13 inch baking dish. Layer the cooked chorizo over the potato mixture evenly. Pour the egg mixture over this layer. Make sure everything is well coated. Finally, sprinkle the shredded cheddar cheese on top. Bake in your preheated oven at 375°F for 25-30 minutes. The casserole is done when the eggs are set and the cheese looks bubbly and golden. Let it cool for a few minutes before slicing. This dish is great for breakfast or brunch. You can find the full recipe above to guide you through. To get the best texture in your casserole, cook the potatoes first. You want them tender but not mushy. Sauté them until they are just starting to brown. This adds flavor and keeps them firm. The chorizo should be cooked until it’s crispy. This gives a nice bite to each forkful. When mixing the eggs, whisk them well. This helps create a fluffy texture. Pour the egg mixture evenly over the layers. This ensures every bite has the right mix of flavors. Layering is key to a great casserole. Start with the cooked chorizo at the bottom. This helps keep the meat moist. Next, add the potato and vegetable mixture. Make sure they cover the chorizo well. It creates a nice barrier. When pouring the egg mix, do it slowly. This allows the eggs to seep down and mix with the layers. Top with cheese for a delicious, golden crust. Always remember to grease your baking dish. This makes serving easier. Serve your casserole warm for the best taste. Fresh cilantro adds a nice touch. For extra flavor, drizzle some hot sauce around the edges. Sliced avocados make a great side. They add creaminess that balances the spice. If you want more crunch, serve with tortilla chips. A simple green salad pairs well too. It adds freshness and balances the richness of the dish. For more ideas, check out the Full Recipe for extra tips and pairings. {{image_2}} You can easily make a vegetarian version of this dish. Instead of chorizo, use a plant-based sausage. Look for options that have bold flavors. You can also add mushrooms for a meaty texture. Bell peppers and onions will still give you that great taste. Just follow the same steps in the recipe, and you will have a delicious meal. If you're cutting carbs, swap out potatoes for cauliflower. Cauliflower rice works well and keeps it light. You can also use zucchini or sweet potatoes for a different flavor. These choices still give you a satisfying base for the casserole. Just be sure to adjust the cooking time based on what you use. Cheese adds a rich taste to the casserole. While cheddar is a classic choice, you can try other cheeses too. Monterey Jack gives a mild flavor with a nice melt. Feta cheese adds a tangy twist. You could even mix cheeses for a unique blend. Adding a sprinkle of Parmesan on top gives a nice crust. Each cheese brings its own character to this filling meal. For the full recipe, check out the main article. To keep your Chorizo & Potato Egg Casserole fresh, let it cool first. Once cooled, cut it into portions. Store these portions in airtight containers. Place them in the fridge. Your casserole will stay good for about 3-4 days. Label each container with the date to track freshness. If you want to save some for later, freezing is great! Wrap each piece in plastic wrap tightly. Then, place the wrapped pieces in a freezer-safe bag or container. They will stay fresh for up to 2-3 months. Remember to label the bags with the date. When you're ready to eat, just thaw it in the fridge overnight. For the best taste when reheating, preheat your oven to 350°F (175°C). Place the casserole in an oven-safe dish. Cover it with foil to keep it moist. Heat for about 20-25 minutes, or until it's hot all the way through. You can also reheat in the microwave, but the oven gives a better texture. Enjoy your meal with a sprinkle of fresh cilantro on top for added flavor! You can store your Chorizo & Potato Egg Casserole in the fridge for up to 3 days. Just keep it in an airtight container. This way, it stays fresh and safe to eat. When you want to enjoy it again, just reheat it in the oven or microwave. Yes, you can make this recipe ahead of time. You can prepare the casserole a day before and keep it in the fridge. Just bake it when you are ready to serve. This makes it perfect for busy mornings or special occasions. You can serve this casserole with a simple green salad or sliced avocado. A dollop of sour cream adds a nice touch. You might also enjoy some hot sauce on the side for extra flavor. Try pairing it with fresh fruit for a balanced meal. For the full experience, check out the Full Recipe. This blog post walks you through making a tasty Chorizo & Potato Egg Casserole. You learned about the main ingredients and some fun add-ins. I shared tips on prepping, cooking, and serving your dish. You also found ways to customize it for different diets and flavors. Remember, leftovers can be stored well and reheated easily. Enjoy making your casserole your way—it's a dish loaded with flavor and joy.

Chorizo & Potato Egg Casserole Flavorful and Filling Meal

Are you ready to whip up a dish that’s both hearty and flavorful? My Chorizo & Potato Egg Casserole is

To make a fantastic banana pudding cheesecake, you will need: - 1 ½ cups graham cracker crumbs - ½ cup unsalted butter, melted - 2 tablespoons sugar - 3 (8 oz) packages cream cheese, softened - 1 cup granulated sugar - 1 teaspoon vanilla extract - 3 large eggs - 1 cup heavy cream - 1 cup ripe bananas, mashed (about 2 medium bananas) - 1 teaspoon lemon juice - 1 package instant vanilla pudding mix (3.4 oz) - 2 cups milk - Whipped cream and banana slices for garnish These ingredients create a rich and creamy dessert that everyone will love. The graham cracker crust gives it a nice crunch, while the bananas add a sweet touch. You can change the flavor and look of your cheesecake with these optional ingredients: - Chocolate chips for a chocolatey twist - Caramel sauce for drizzling on top - Chopped nuts for added crunch - Coconut flakes for a tropical vibe Feel free to get creative! You can mix and match these options to suit your taste. To choose the best bananas for your cheesecake, look for: - Firmness: They should be firm but not hard. - Color: A bright yellow color with a few small brown spots is perfect. - Ripeness: Overripe bananas have more flavor for your cheesecake. Always smell the bananas. They should have a sweet, fruity scent. This means they are fresh and ready to use in your recipe. Enjoy making your banana pudding cheesecake! For the full recipe, check out the detailed instructions. To start, we need to make the crust. First, preheat your oven to 325°F (162°C). In a medium bowl, mix these ingredients: - 1 ½ cups graham cracker crumbs - ½ cup unsalted butter, melted - 2 tablespoons sugar Stir until everything blends well. Now, take a 9-inch springform pan and press the mixture firmly into the bottom. Bake this crust for 10 minutes. When done, remove it and let it cool. Next, we will create the cheesecake batter. Grab a large mixing bowl and beat together: - 3 (8 oz) packages cream cheese, softened - 1 cup granulated sugar - 1 teaspoon vanilla extract Use an electric mixer for a smooth and creamy texture. Add in 3 large eggs, one at a time. Mix on low speed after each addition until just blended. Then, fold in: - 1 cup ripe bananas, mashed (about 2 medium bananas) - 1 teaspoon lemon juice Now, let’s mix the pudding. In a separate bowl, whisk together: - 1 package instant vanilla pudding mix (3.4 oz) - 2 cups milk Let it sit for about 5 minutes to thicken. Gently fold this pudding mixture into your cheesecake batter until smooth and free of lumps. Now, it's time to bake the cheesecake. Pour the batter over the cooled crust. Bake in the oven for about 50-60 minutes. The edges should be set, but the center needs a slight jiggle. After baking, turn off the oven and crack the door open. Let the cheesecake cool in the oven for about 1 hour. This helps to prevent cracking. Once cooled, cover it and refrigerate for at least 4 hours or overnight for the best taste. After chilling, your cheesecake is ready! You can garnish it with whipped cream and banana slices. Enjoy every bite of your banana pudding cheesecake! For the full recipe, check out the details above. To prevent cracks in your cheesecake, follow these steps. First, cool the cheesecake slowly. After baking, turn off the oven and crack the door open. This helps the cheesecake cool down gradually. Second, don’t overmix the batter. Mix just until smooth to avoid adding too much air. Lastly, bake the cheesecake in a water bath. This creates steam, which keeps the temperature even. For a creamy texture, use room temperature cream cheese. Cold cream cheese can lead to lumps. Beat the cream cheese well until it's fluffy. Add eggs one at a time, mixing on low speed. This prevents too much air from getting in the batter. Incorporate the mashed bananas gently to maintain airiness. Finally, don’t overbake. The center should jiggle slightly when done. Serve your banana pudding cheesecake cold for the best taste. Garnish with whipped cream and banana slices. For added flair, drizzle caramel or chocolate sauce on the plate. You can also sprinkle crushed graham crackers on top. This adds a nice crunch. The mix of textures will wow your guests. For more details, check out the Full Recipe. {{image_2}} You can switch up the crust for more flavor. Instead of graham crackers, try using crushed vanilla wafers. They add a nice twist that complements the banana flavor. Another option is an Oreo crust. Just crush Oreos and mix with melted butter. The chocolate will give your cheesecake a rich taste. Feel free to play with flavors in your cheesecake. Adding a teaspoon of cinnamon gives a warm touch. You can also mix in some chopped nuts for crunch, like walnuts or pecans. Want a tropical vibe? Add a bit of coconut extract! For a lighter option, use Greek yogurt instead of cream cheese. This keeps it creamy but adds protein. Mini cheesecakes are perfect for parties or quick bites. Use a muffin tin and line it with paper liners. Press the crust mixture into each liner just like you would in a springform pan. Fill with the cheesecake batter and bake for 20-25 minutes. Chill them just like the full cheesecake. Top with whipped cream and banana slices for a cute treat. You can find the full recipe for these mini delights in the main article. To keep your banana pudding cheesecake fresh, first let it cool completely. Then, cover it tightly with plastic wrap or aluminum foil. This helps keep moisture in and odors out. If you have a springform pan, leave it in that for easy storage. Always place it in the fridge. Cheesecake does best at a cool temperature. Banana pudding cheesecake can last up to five days in the fridge. After that, the texture may change. If you see any signs of spoilage, like mold or off smells, it's best to throw it away. Always check for freshness before enjoying your dessert! If you want to save some cheesecake for later, freezing is a great option. First, slice the cheesecake into pieces. Wrap each slice in plastic wrap, then place them in an airtight container. This helps prevent freezer burn. You can freeze banana pudding cheesecake for up to three months. When you're ready to eat it, thaw the slices in the fridge overnight. Enjoy your treat whenever you like! For the full recipe, check out the details above. Yes, you can make this cheesecake ahead of time. I often prepare it the day before serving. This allows the flavors to blend well. Just remember to chill it for at least four hours. For best taste, overnight is ideal. If you need a substitute for cream cheese, try mascarpone or ricotta cheese. Both options will keep the creaminess. You can also use Greek yogurt as a lighter choice. Just make sure to adjust the sugar to taste. To check if your cheesecake is done, look for the edges. They should be set while the center remains slightly jiggly. It will firm up as it cools. A toothpick test can also help. Insert it in the center; it should come out clean or with a few moist crumbs. For more details, check the Full Recipe. This blog post covered how to make a delicious Banana Pudding Cheesecake. We discussed essential and optional ingredients, preparation steps, and tips for a smooth texture. I shared ways to prevent cracking and served helpful variations. Storing tips ensure your cheesecake stays fresh longer. Enjoy experimenting with flavors and customizations. This recipe allows you to make a treat everyone will love. Go ahead and make your own creamy, tasty cheesecake!

Irresistible Banana Pudding Cheesecake Easy Recipe

Craving something sweet and creamy? Let me introduce you to my irresistible Banana Pudding Cheesecake. This easy recipe combines the

To make a tasty shrimp fried rice, gather these main ingredients: - 2 cups cooked jasmine rice (preferably day-old) - 1 pound large shrimp, peeled and deveined - 2 tablespoons vegetable oil - 1 cup mixed frozen vegetables (peas, carrots, corn) - 3 green onions, chopped (white and green parts separated) - 2 cloves garlic, minced - 2 large eggs, lightly beaten - 3 tablespoons soy sauce - 1 tablespoon oyster sauce (optional) - Salt and pepper to taste - 1 teaspoon sesame oil (for drizzling) Each of these ingredients plays a part in building flavor. The day-old rice helps keep things light and fluffy. Fresh shrimp adds a nice protein boost. To elevate your dish, consider these optional ingredients: - 1 tablespoon of fresh ginger, minced - 1 tablespoon of chili paste for heat - A splash of rice vinegar for brightness Adding these can change the flavor profile and make your dish unique. You can mix and match based on your taste. Here are some tools you will need for easy cooking: - A large skillet or wok - A spatula or wooden spoon - A sharp knife and cutting board - Measuring spoons and cups - A bowl for mixing eggs Having the right tools makes cooking more enjoyable. They help you work faster and keep your kitchen organized. If you want to see the full recipe, check out the detailed steps provided above. To start, use day-old jasmine rice. Fresh rice is too sticky. Cold rice helps it fry better. If you don't have day-old rice, make some and chill it. Spread it out on a tray to cool down quickly. Heat 1 tablespoon of vegetable oil in your skillet. Use medium-high heat. Once hot, add the shrimp. Season them lightly with salt and pepper. Cook the shrimp for about 2-3 minutes. They should turn pink and opaque. Remove the shrimp and set them aside. In the same skillet, add the remaining oil. Toss in the minced garlic and the white parts of the green onions. Sauté for about 30 seconds. Let the aroma fill the kitchen! Next, add your frozen mixed vegetables. Stir-fry them for 2-3 minutes until they heat through. Now, push the veggies to one side. Pour the beaten eggs on the other side. Scramble the eggs until they are fully cooked. Mix everything together to combine. Now it’s time to add the cold jasmine rice. Break up any clumps as you mix. Stir in the cooked shrimp next. Drizzle in the soy sauce and oyster sauce if you choose to use it. Stir continuously until all the ingredients are heated through. Finally, drizzle sesame oil over the fried rice for flavor. Mix gently and taste. Adjust the seasoning with salt and pepper if needed. Stir in the green parts of the chopped onions for a fresh crunch. For the full recipe, you can refer to the Full Recipe section. To keep your rice firm, use day-old jasmine rice. Freshly cooked rice holds water and can become mushy. When cooking, rinse the rice until the water runs clear. This removes extra starch. After cooking, spread the rice out on a tray to cool. This helps it dry out and firm up. I recommend using large shrimp for this dish. They have a nice bite and flavor. You can choose fresh or frozen shrimp. If using frozen, thaw them under cold water. Always peel and devein your shrimp for the best texture. Look for shrimp that are firm and have a slight sheen. For extra flavor, consider marinating the shrimp. A mix of soy sauce, garlic, and ginger works well. You can also add more veggies for color and nutrition. Try bell peppers or bean sprouts. Stir-frying over high heat gives a nice char and flavor. Always keep your ingredients moving to avoid burning. You can find the full recipe for this delicious dish above. {{image_2}} You can change the shrimp in this recipe easily. Chicken is a great option. Use diced chicken breast and cook it until it is fully done. Tofu is another good choice. Press it to remove water, then cube it and sauté it until golden. Both give a nice texture and flavor to the fried rice. Feel free to swap in seasonal veggies. In spring, add fresh peas and asparagus. In summer, use zucchini and bell peppers. Fall is perfect for adding butternut squash or mushrooms. Winter calls for hearty greens like kale or bok choy. This keeps your meal fresh and interesting. If you need a gluten-free option, use tamari instead of soy sauce. It tastes just as good! For a vegetarian dish, skip the shrimp and use more vegetables or tofu. You can also add some nuts for crunch and protein. These small changes let everyone enjoy this meal. For the full flavor experience, check out the Full Recipe. To keep leftover shrimp fried rice fresh, place it in an airtight container. Allow it to cool first. Store it in the fridge for up to three days. When storing, separate the shrimp from the rice if possible. This helps maintain the shrimp's texture. Reheat the shrimp fried rice in a skillet over medium heat. Add a splash of water to help steam it. Stir often to heat evenly. You can also use a microwave. Cover it with a damp paper towel to keep moisture in. Heat in short bursts, stirring in between. For longer storage, freeze shrimp fried rice in a freezer-safe bag. Press out as much air as you can before sealing. It can last up to three months in the freezer. To use, thaw it overnight in the fridge. Reheat as mentioned above for the best taste. For the [Full Recipe], make sure to check the specific steps to create this delightful dish! The best rice for fried rice is jasmine rice. It has a nice texture and flavor. Day-old rice works best because it dries out a bit. This helps prevent mushy rice when you stir-fry. If you don’t have day-old rice, spread fresh rice on a tray to cool and dry it out a bit. Yes, you can use fresh shrimp! Just make sure it's peeled and deveined. Fresh shrimp may taste sweeter and more tender. When using fresh shrimp, cook them until they turn pink and opaque. This usually takes about 2-3 minutes. Shrimp fried rice can last up to 3 days in the fridge. Make sure to store it in an airtight container. When you want to eat it, just reheat it in the microwave or on the stove. You can serve shrimp fried rice with several tasty sides. Some great options are: - Egg rolls - Spring rolls - Hot and sour soup - Sweet and sour chicken These dishes pair well and add variety to your meal. For a full guide on making this dish, check the Full Recipe. You now have all the tools to make delicious Chinese style shrimp fried rice. We explored key ingredients, step-by-step cooking methods, and important tips to enhance your dish. Remember, you can substitute proteins and adjust veggies based on your needs. Store any leftovers properly for later enjoyment. This easy meal is versatile and fun to make. With a little practice, you'll impress yourself and others with your cooking skills. Enjoy your time in the kitchen and savor every bite of your shrimp fried rice!

Chinese Style Shrimp Fried Rice Flavorful Meal Option

Looking for a tasty and quick meal? Chinese Style Shrimp Fried Rice hits the spot. This dish brings together juicy

- Potatoes: Use waxy potatoes like Yukon Gold. They hold moisture well and make fluffy dumplings. Avoid starchy potatoes, as they can make the dumplings heavy. - Flour and Other Ingredients: All-purpose flour is key. It adds structure without making the dumplings tough. One egg helps bind the mixture, giving it a nice texture. Salt adds flavor, so don't skip it. - Optional Garnishes: Fresh parsley brightens the dish. It adds color and a fresh taste. You can also drizzle melted butter on top for extra richness. Serve the dumplings with a meat dish or sauce for a complete meal. For the full recipe, check the complete list above. Boiling the Potatoes: Start by choosing waxy potatoes. They hold their shape well. Place the potatoes in a large pot. Cover them with water and bring it to a boil. Cook the potatoes until they are fork-tender, which takes about 20 to 25 minutes. Once done, drain the water and let them cool for a short time. This cooling step is key for easy peeling. Making the Dough: While the potatoes are still warm, peel them. Use a potato ricer or a masher to create a smooth base. Transfer the mashed potatoes to a bowl and let them cool completely. Once cooled, add the all-purpose flour, egg, and salt. Mix everything gently. Be careful not to overwork the dough. It should be soft but still hold together well. Forming and Cooking Dumplings: Dust your hands with flour to prevent sticking. Take a piece of dough about the size of a golf ball. Flatten it slightly and place a teaspoon of breadcrumbs in the center. Enclose the breadcrumbs with the dough and roll it into a ball. Repeat this for all the dough. Next, bring a large pot of salted water to a boil. Carefully drop the dumplings into the water. Cook for about 10 to 15 minutes. You'll know they are done when they float to the top. Let them cook for an extra 3 to 4 minutes once they float. For added flavor, sauté the dumplings in melted butter after boiling. This gives them a nice golden and slightly crispy outside. Enjoy your delicious German potato dumplings! You can find the full recipe for more detailed instructions. Tips for Potato Selection: Choose waxy potatoes like Yukon Gold or red potatoes. These types hold moisture and create a fluffy texture. Avoid starchy potatoes, as they can make your dumplings dense. Common Mistakes: One mistake is overworking the dough. Mix just until combined to keep your dumplings light. Another issue is using cold potatoes. Always use warm, freshly cooked potatoes for the best results. Best Practices for Cooking: When boiling, make sure your water is at a gentle boil. If the boil is too strong, the dumplings may break apart. Once they float, let them cook for a few more minutes. This ensures they are cooked through and ready to enjoy. If you want to impress, try sautéing them in butter after boiling. This adds a nice golden color and crispy texture. Follow these tips, and you’ll make perfect German potato dumplings every time! For the full recipe, check out the details above. {{image_2}} You can make German potato dumplings unique by changing a few things. First, think about the filling. Instead of plain breadcrumbs, try using: - Cheese - Herbs like chives or dill - Cooked bacon bits These options add new flavors and textures. You can also switch up the cooking method. You can steam the dumplings instead of boiling them. Steaming gives them a lighter texture and keeps them fluffy. Next, consider adding different spices. You can mix in: - Nutmeg for warmth - Paprika for a bit of heat - Garlic powder for a savory kick Cheeses also work well. Adding a soft cheese like ricotta gives a creamy center. The options are endless! Feel free to get creative with your favorite flavors. For the full recipe, check out the [Full Recipe]. Refrigeration Tips After cooking, let the dumplings cool to room temperature. Place them in an airtight container. Store in the fridge for up to three days. This keeps them fresh and tasty. Make sure to separate layers with parchment paper if you stack them. Freezing Dumplings You can freeze both raw and cooked dumplings. For raw dumplings, lay them on a baking sheet in a single layer. Freeze until firm, then transfer to a zip-top bag. This way, they won’t stick together. For cooked dumplings, cool them first. Place in a container and cover tightly. They can last up to three months in the freezer. Reheating Instructions To reheat cooked dumplings, use a pan on medium heat. Add a bit of butter. This keeps them crispy. If you prefer, you can also steam them. Place dumplings in a steamer basket over boiling water. Heat until warmed through, about five minutes. This method helps maintain their soft texture and flavor. Can I use other types of potatoes? Yes, you can use other types of potatoes, but waxy potatoes work best. Waxy potatoes hold their shape when cooked. They give the dumplings a nice, fluffy texture. If you use starchy potatoes, the dumplings might get too mushy. How do I know when the dumplings are done cooking? Dumplings are done when they float to the top. Once they float, let them cook for an extra 3-4 minutes. This ensures they are cooked through. You can also check one by cutting it in half. It should be soft and well-cooked inside. What are some traditional dishes to serve with dumplings? Dumplings pair well with many dishes. Some classic options include roast meats, like pork or beef. They also go great with mushroom sauce or rich gravies. For a lighter dish, serve them with sautéed greens. You can enjoy them any way you like! For the complete recipe, check out the Full Recipe. In this post, we explored how to make great German potato dumplings. We covered the best potatoes, flour, optional garnishes, and step-by-step cooking tips. I shared common mistakes to avoid and some tasty variations to try. You now know how to store leftovers and keep them tasty. Making dumplings can be fun and rewarding. With practice, your dumplings will impress everyone. Enjoy cooking and experimenting with flavors!

German Potato Dumplings Flavorful and Easy Recipe

If you’re craving a comforting meal, German potato dumplings are a must-try. These soft, fluffy bites are made with simple

The key to making delicious Spinach Garlic Mozzarella Meatballs is using fresh, quality ingredients. Here’s what you need: - 1 lb ground beef or turkey - 1 cup fresh spinach, finely chopped - 1 cup mozzarella cheese, shredded - 1/2 cup breadcrumbs - 1/4 cup grated Parmesan cheese - 2 cloves garlic, minced - 1 large egg - 1 teaspoon dried oregano - 1 teaspoon salt - 1/2 teaspoon black pepper - 1 tablespoon olive oil (for cooking) - Marinara sauce (for serving) These ingredients work together to create a tasty and healthy dish. I always choose fresh spinach for its bright flavor. Mozzarella cheese adds creaminess. The garlic gives a warm, savory taste that blends well with the meat. When picking ground meat, I often switch between beef and turkey. Turkey makes the dish lighter, while beef offers a richer taste. You can also use gluten-free breadcrumbs if needed. This recipe is all about flexibility, so feel free to adapt it to your taste. You can find the Full Recipe, which contains detailed steps to make these meatballs, to ensure your dish turns out perfectly. - Preheat your oven to 400°F (200°C) and line your baking sheet with parchment paper. - In a large mixing bowl, combine the ground beef or turkey, chopped spinach, mozzarella cheese, breadcrumbs, grated Parmesan cheese, minced garlic, egg, oregano, salt, and black pepper. - Use your hands to mix the ingredients until just combined. Be careful not to overwork the meat. - Shape the mixture into meatballs, about 1.5 inches in diameter, and place them onto the prepared baking sheet. - Drizzle a tablespoon of olive oil over the meatballs for added moisture during cooking. - Bake the meatballs in the preheated oven for 20-25 minutes. They should be browned and cooked through. - While the meatballs bake, heat marinara sauce in a saucepan over medium heat until warmed through. - Serve the meatballs hot, nestled in a bowl of marinara sauce or on a platter. - For presentation, arrange the meatballs on a serving platter and drizzle with extra marinara sauce. Garnish with fresh basil leaves or a sprinkle of parsley for a pop of color. For the full recipe, check out the Spinach Garlic Mozzarella Meatballs section. For the best meatballs, mix gently. Overworking the meat can make them tough. Use your hands to blend the ingredients just until they come together. Shape the meatballs to about 1.5 inches wide for even cooking. Bake the meatballs at 400°F for 20-25 minutes. This high heat helps them brown nicely. Check that they are cooked through. You want an internal temperature of 165°F. This ensures they are safe to eat and juicy. Feel free to adjust the spices. Add more garlic for a bolder taste or a pinch of red pepper flakes for heat. Fresh herbs like basil or parsley can also give a nice lift. Consider adding chopped sun-dried tomatoes or olives for a twist. These ingredients add unique flavors that can surprise your palate. You can also swap out the mozzarella for feta cheese for a tangy kick. Serve the meatballs with marinara sauce for a classic touch. They pair well with spaghetti or on a sub roll. Top with extra cheese and fresh herbs for a nice finish. For a fun twist, make meatball sliders. Use small buns and add some fresh greens. You can also serve them on a charcuterie board with cheese and crackers for a great appetizer. For the complete recipe, check the Full Recipe section above. {{image_2}} You can switch up the meat in this recipe. Ground turkey works well if you want a lighter option. For those who prefer beef, that works great too. If you want a vegetarian dish, consider using lentils or chickpeas instead of meat. These options still pack a punch of flavor. You might want to bake or pan-fry your meatballs. Baking gives a nice, even cook and keeps them healthier. On the other hand, pan-frying adds a crispy texture that many love. You can also add sauces or toppings. Try marinara for a classic touch or pesto for a fresh flavor boost. These meatballs are perfect for parties. You can serve them as appetizers on toothpicks. They can also be a hit at family dinners. Everyone loves a hearty meatball served with pasta or in a sub. You can even make mini versions for kids’ meals. The options are endless! For the full recipe, don't forget to check the ingredients and instructions to get started. To keep your Spinach Garlic Mozzarella Meatballs fresh, follow these tips: - Refrigeration: Place cooked meatballs in an airtight container. They stay good for up to 4 days in the fridge. - Freezing: For longer storage, let meatballs cool. Then, place them in a freezer-safe bag. Use parchment paper between layers to prevent sticking. Frozen meatballs can last for up to 3 months. You can reheat meatballs in several ways: - Oven: Preheat your oven to 350°F (175°C). Place meatballs on a baking sheet and heat for 10-15 minutes. - Microwave: Place meatballs in a microwave-safe dish. Cover and heat for 1-2 minutes. - Stovetop: Add meatballs to a pan with a little marinara sauce. Heat on low for about 5 minutes. To keep meatballs moist, add a splash of water or sauce while reheating. This helps to prevent them from drying out. Knowing how long your meatballs last is key: - Freshness: Cooked meatballs in the fridge should be eaten within 4 days. - Frozen: When stored properly, frozen meatballs are best used within 3 months. - Signs of Spoilage: If you see any discoloration, foul smell, or slimy texture, it's time to toss them out. For the full recipe, check out the details above. To make these meatballs gluten-free, simply swap breadcrumbs for a gluten-free option. Here are some great substitutes: - Almond flour - Crushed gluten-free crackers - Oats (ensure they are gluten-free) - Cooked quinoa These options keep the meatballs moist and tasty while removing gluten. Yes, you can use frozen spinach! To maintain flavor and texture, follow these tips: - Thaw the spinach first. - Squeeze out any excess water. - Chop it finely before mixing it in. This helps balance the moisture and flavor in your meatballs. You have many options for sides and sauces to enjoy with your meatballs: - Spaghetti or pasta - A fresh salad - Garlic bread - Zucchini noodles Pair them with marinara sauce for a classic touch. For more ideas, check the Full Recipe. This article covered everything you need for delicious Spinach Garlic Mozzarella Meatballs. We discussed key ingredients, step-by-step instructions, and tips for cooking and serving. I shared how to store meatballs and also provided interesting variations. Whether you’re cooking for a family dinner or a party, these meatballs can impress everyone. Enjoy experimenting with the flavors and serving ideas. You have the tools to make a great meal ahead!

Spinach Garlic Mozzarella Meatballs Flavorful Recipe

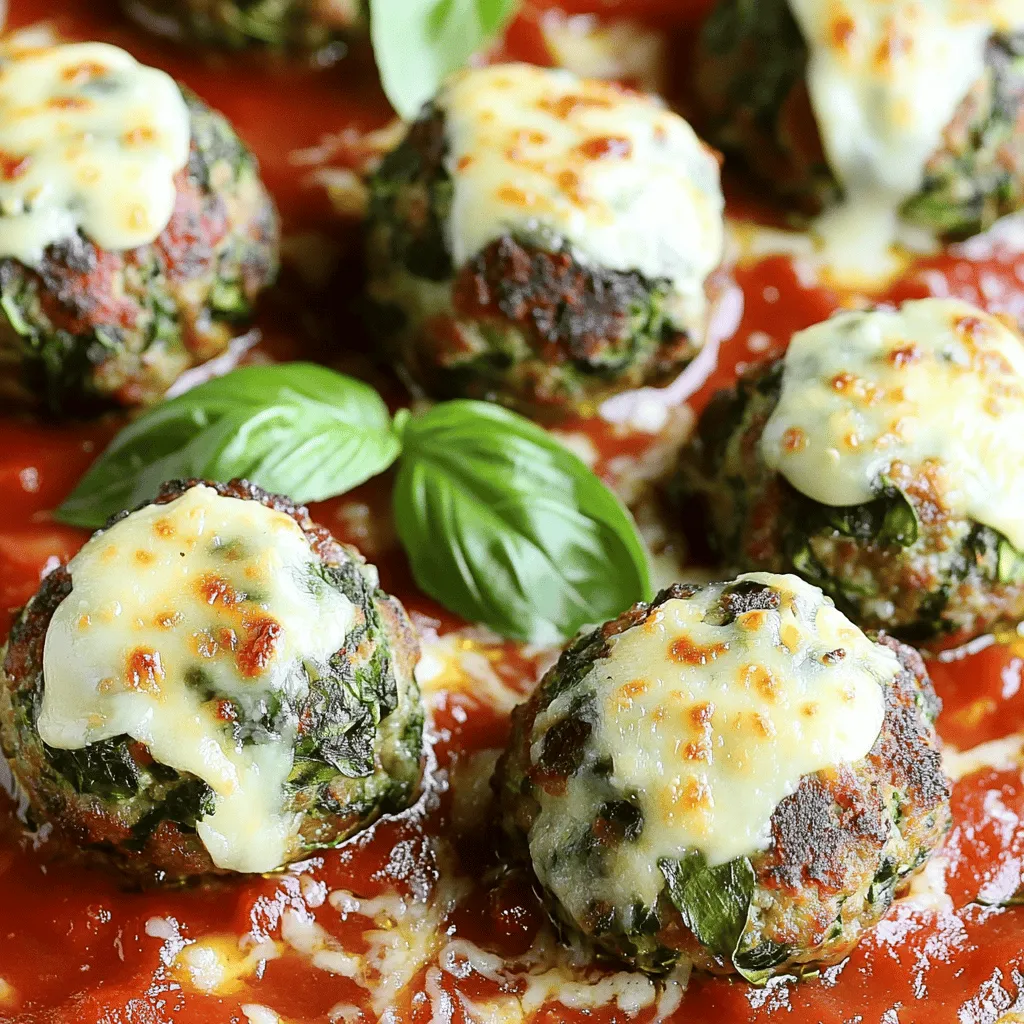
Are you ready to elevate your dinner game? Spinach Garlic Mozzarella Meatballs are not just tasty; they pack a punch

- Ramen noodles: 200g - Mushrooms: 250g shiitake & 100g enoki - Aromatics: garlic and ginger - Broth and seasonings: vegetable broth, soy sauce, miso paste, chili paste - Fresh greens and garnishes: baby spinach, green onions, toasted sesame seeds, cilantro When I make Asian mushroom ramen, I focus on fresh, vibrant ingredients. Ramen noodles are the heart of this dish. They soak up flavors and bring a satisfying chew. I prefer using 200g of ramen noodles for two to three servings. Mushrooms add depth and umami. I like to use 250g of shiitake mushrooms and 100g of enoki mushrooms. Shiitake offers a robust flavor, while enoki adds a nice crunch. Aromatics like garlic and ginger kick up the taste. I always use three cloves of minced garlic and a one-inch piece of grated ginger for that perfect zing. The broth is key to a great ramen. I choose four cups of vegetable broth, along with two tablespoons of soy sauce. For an extra boost, I add one tablespoon of miso paste and one teaspoon of chili paste. Adjust the chili paste based on your spice level. Fresh greens make the dish come alive. I add one cup of baby spinach, which wilts perfectly in the hot broth. For garnishing, I slice two green onions, sprinkle one tablespoon of toasted sesame seeds, and add fresh cilantro. With these ingredients, you will craft a bowl of flavorful comfort. For the full recipe, be sure to check out the detailed instructions. To cook the ramen noodles, start by boiling water in a large pot. Add a pinch of salt to the water. Once it boils, add 200g of ramen noodles. Cook them according to the package instructions, usually around 3-4 minutes. Drain the noodles in a colander and set them aside. To prevent sticking, toss them with a splash of sesame oil. This keeps them separate and adds a nice flavor. For the aromatics, heat 1 tablespoon of sesame oil in a large skillet over medium heat. Add 3 cloves of minced garlic and 1 inch of grated ginger. Sauté these for about 1 minute until they smell great. Make sure the heat is not too high, or the garlic will burn. Cooking at the right temperature helps keep the flavors bright and fresh. Now, it’s time to build your flavor! Increase the heat to medium-high. Add 250g of sliced shiitake mushrooms and 100g of trimmed enoki mushrooms to the skillet. Sauté them for about 5-7 minutes, stirring often, until they are tender and slightly caramelized. Pour in 4 cups of vegetable broth next. Bring it to a simmer and stir in 2 tablespoons of soy sauce, 1 tablespoon of miso paste, and 1 teaspoon of chili paste. Let everything cook for another 5 minutes so the flavors meld beautifully. Then, add the cooked ramen noodles and 1 cup of baby spinach to the broth. Stir gently until the spinach wilts, which should take about 2 minutes. Now you can serve! Ladle the soup into bowls and add sliced green onions, toasted sesame seeds, and fresh cilantro for garnish. Enjoy this flavorful comfort dish! For the complete details, refer to the Full Recipe. To make your Asian mushroom ramen noodles shine, focus on your broth first. A rich, flavorful broth can elevate your dish. Use high-quality vegetable broth. If you want extra depth, add miso paste. This gives a nice umami boost. You can also adjust ingredients based on your taste. Add more garlic or ginger for a bolder flavor. If you like heat, increase the chili paste. Perfect sautéing is key to great flavor. Start with medium heat when cooking garlic and ginger. This keeps them fragrant without burning. When adding mushrooms, raise the heat to medium-high. This helps them caramelize and release their natural flavors. To avoid mushy noodles, don’t overcook them. Follow the package instructions carefully. Rinse them with cold water after cooking to stop the cooking process. Garnishing makes your dish pop! After serving, sprinkle sliced green onions on top for color. Add toasted sesame seeds for crunch and a nutty flavor. Fresh cilantro adds a bright touch. For special occasions, serve in nice bowls. You can also add a lime wedge on the side for a zesty finish. This simple step can impress your guests and enhance the meal. Enjoy your flavorful comfort dish! If you want the complete recipe, check out the Full Recipe section. {{image_2}} You can easily add protein to your Asian mushroom ramen. Tofu is a great choice. It absorbs flavors well and adds texture. Simply cube it and sauté it with the mushrooms. For meat lovers, chicken works too. Use cooked, shredded chicken for quick prep. Shrimp is another tasty option. Just add it in the last few minutes of cooking. This way, it stays tender and juicy. To keep the dish vegan, skip the chicken or shrimp. You can replace them with extra mushrooms or tofu. Many veggies also fit well. Try adding bok choy or carrots for crunch. Zucchini or bell peppers can add color and flavor. Feel free to mix and match your favorite vegetables. This keeps your ramen fresh and exciting. You can control the spice level in your ramen. If you like it mild, reduce the chili paste. Start with half a teaspoon and adjust to taste. For those who love heat, add more chili paste or fresh chili slices. You can also use sriracha for a different kick. Just remember to taste as you go. This way, you create the perfect bowl for your palate. To store your Asian mushroom ramen noodles, follow these simple steps. First, let the dish cool down to room temperature. Then, place it in an airtight container. You can refrigerate it for up to three days. If you want to keep it longer, freeze it. In the freezer, it will last for about a month. Just be sure to separate the noodles from the broth to avoid mushy noodles later. When you're ready to enjoy leftovers, reheating properly is key. Use a saucepan over low heat for best results. Add a splash of water or broth to keep it moist. You can also microwave it, but cover it with a damp paper towel. This helps maintain moisture. Stir occasionally to heat evenly. This way, your flavors and texture will stay great, just like the first time you made it! Shiitake and enoki mushrooms shine in this dish. Shiitake mushrooms are rich and earthy, adding a deep flavor. They also have a meaty texture that enhances the broth. Enoki mushrooms offer a delicate crunch and mild taste, creating a nice contrast. You can also try oyster mushrooms for a buttery flavor. Each type brings its own unique taste, making your ramen even better. Yes, you can use different noodles. Soba noodles are a great choice. They have a nutty flavor that pairs well with the broth. Udon noodles are thicker and chewier, adding a nice bite. Rice noodles work too, especially for gluten-free options. Just cook them according to their package instructions and add them to the broth. Absolutely! You can use gluten-free ramen or rice noodles. Be sure to check the labels for gluten-free options. For the broth, use tamari instead of soy sauce. This provides the same salty flavor without the gluten. Miso paste can also be gluten-free, just verify the brand you choose. To boost umami, add a tablespoon of miso paste to the broth. It gives depth and richness. You can also toss in a few dried shiitake mushrooms while simmering. They will release more flavor into the broth. Adding a splash of soy sauce or a few drops of fish sauce will also enhance that savory taste. These tips will make your ramen even more delicious. For the full recipe, check out the detailed cooking instructions. In this guide, we explored the elements that make a delicious ramen dish. We covered key ingredients like noodles, mushrooms, and broth. You learned how to cook the noodles and sauté the aromatics for rich flavor. We also shared tips to enhance taste, serve beautifully, and store leftovers. Ramen is versatile and fun to customize. Whether you add protein or adjust spices, your dish will shine. Experiment with different ingredients to create your perfect bowl. Enjoy your ramen journey!

Asian Mushroom Ramen Noodles Flavorful Comfort Dish

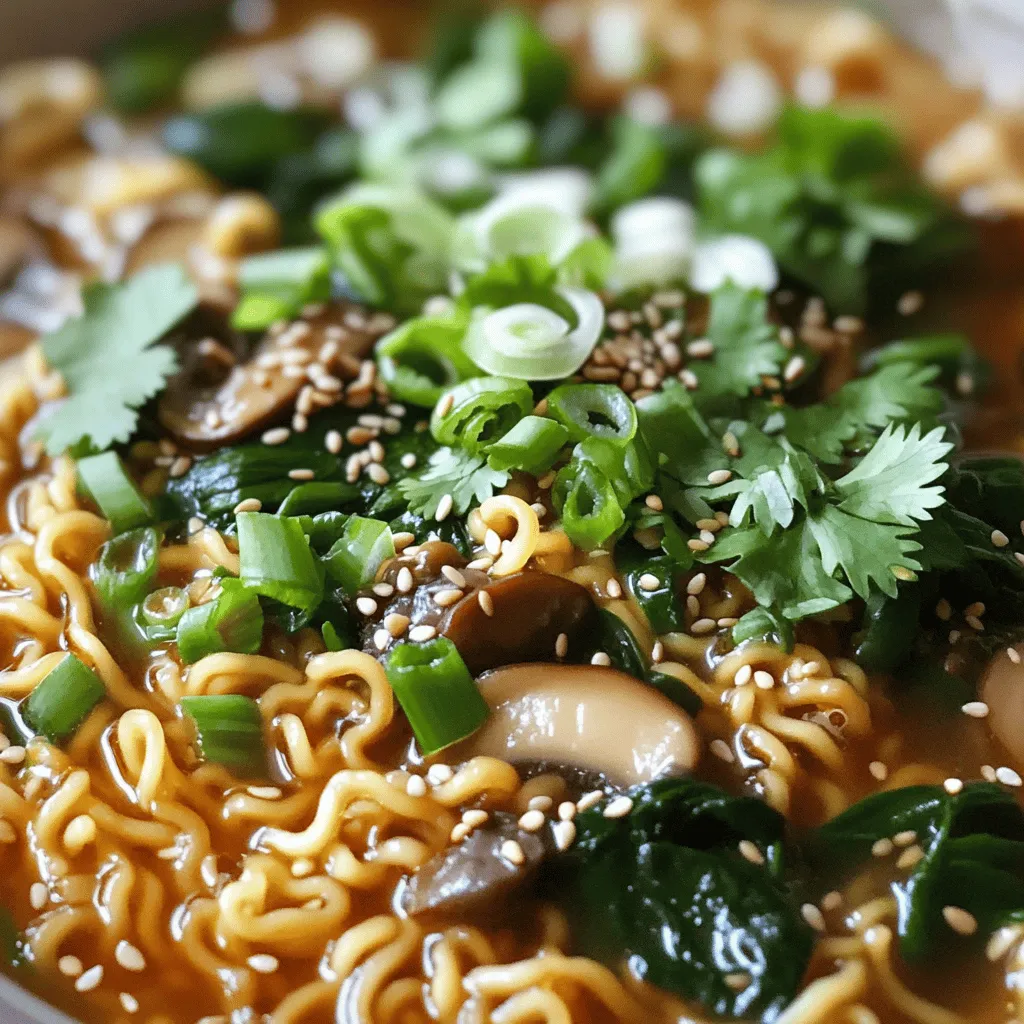
Are you ready for a bowl of steaming goodness? My Asian Mushroom Ramen Noodles are the perfect comfort dish to

To create the best herb and garlic swirl rolls, you need simple yet flavorful ingredients. Here’s the list: - 3 cups all-purpose flour - 1 packet (2 ¼ teaspoons) instant yeast - 1 teaspoon sugar - 1 teaspoon salt - 1 cup warm milk (110°F) - 3 tablespoons unsalted butter, melted - 2 cloves garlic, minced - 2 tablespoons fresh parsley, finely chopped - 1 tablespoon fresh rosemary, finely chopped - 1 tablespoon fresh thyme, finely chopped - ½ teaspoon black pepper - 1 egg (for egg wash) These ingredients blend together to create a rich dough. The warm milk helps to activate the yeast. Using fresh herbs adds a burst of flavor that makes these rolls truly special. You can find the full recipe to guide you through the steps. - Combine warm milk, sugar, and yeast for frothy consistency. - Wait 5 minutes after mixing. Start with warm milk, around 110°F. It should feel warm to the touch, not hot. Add one teaspoon of sugar and one packet of instant yeast. Stir it gently, then set it aside. After 5 minutes, it will look foamy. This frothy mix shows that your yeast is active. It means your dough will rise well. - Add melted butter, salt, and flour to the yeast mixture. - Mix and knead to form a soft dough. Next, add three tablespoons of melted butter and one teaspoon of salt to the yeast mix. Then, add two cups of all-purpose flour. Stir this together until it forms a thick paste. Gradually add more flour, mixing until the dough pulls away from the bowl. Knead it on a floured surface for about 5 to 7 minutes. You want a soft and smooth dough that springs back when you poke it. - Let the dough rise for an hour until doubled. - Prepare and set aside herb-garlic filling mixture. Now, shape the dough into a ball and place it in a greased bowl. Cover it with a clean cloth. Let it rise in a warm spot for about an hour. The dough should double in size. While this happens, mix your filling. In a bowl, combine minced garlic, chopped parsley, rosemary, thyme, and black pepper. Set this aside for later. - Roll out the dough into a rectangle. - Spread the filling and cut into equal pieces. After the dough rises, punch it down gently to release air. Roll it out on a floured surface. Aim for a rectangle about 12x18 inches. Spread melted butter on the surface, then sprinkle the herb-garlic mixture evenly. Roll the dough tightly from the long edge into a log. Pinch the seam to seal it. - Allow rolls to rise for another 30-40 minutes. - Proceed to bake until golden brown. Cut the log into 12 equal pieces. Place these cut-side up in a greased baking dish. Cover again with a cloth and let them rise for another 30 to 40 minutes. Preheat your oven to 375°F (190°C) while the rolls are rising. Just before baking, whisk one egg and brush it on top of the rolls for a nice finish. Bake for 20 to 25 minutes until they turn golden brown. Enjoy your delicious Herb & Garlic Swirl Rolls! For more details, check the Full Recipe. - Use fresh herbs for enhanced flavor. Fresh herbs make your rolls taste alive and bright. I love using parsley, rosemary, and thyme. They add a nice depth to the rolls. - Knead dough thoroughly for a better texture. Kneading helps develop gluten, which makes the rolls fluffy. Aim to knead for 5-7 minutes until the dough is smooth. You’ll feel it become more elastic under your hands. - Pair with garlic butter for added flavor. Garlic butter complements these rolls perfectly. Just melt butter and mix in minced garlic. Brush it on while the rolls are warm. - Best served warm or slightly cooled. I find these rolls taste best fresh out of the oven. The flavors are at their peak, and the texture is soft. For a delightful treat, serve them with a sprinkle of fresh herbs on top. {{image_2}} Want to add a cheesy twist? You can easily make cheese herb and garlic swirl rolls. Just mix in mozzarella or cheddar cheese with your herb filling. The gooey cheese adds a delightful richness. It melts perfectly and enhances the flavor. You’ll have a savory treat that everyone will love! For a healthier option, try whole wheat herb and garlic swirl rolls. Simply substitute half the all-purpose flour with whole wheat flour. This gives the rolls a nutty flavor and more fiber. The texture will be hearty yet still fluffy. You can enjoy a guilt-free indulgence while savoring the delicious taste. If you want a kick, make spicy herb and garlic swirl rolls. Just add red pepper flakes to the filling mix. This simple change brings heat to the rolls. The spicy flavor pairs well with the herbs and garlic. It creates a fun surprise in every bite! For more ideas, check out the Full Recipe for detailed steps. After baking your Herb & Garlic Swirl Rolls, let them cool. Then, store them in an airtight container at room temperature. They stay fresh for 2-3 days. This method keeps them soft and tasty for your next meal. Want to keep them longer? You can freeze the rolls. This works for both unbaked and baked rolls. Place them in a freezer bag or container for up to 2 months. When you are ready to enjoy, reheat them in the oven. This method helps restore their soft texture and warm flavor. Yes, just ensure to activate it properly. To do this, dissolve the active dry yeast in warm milk with sugar. Let it sit for about 5 minutes until it becomes frothy. This step is key for a good rise. Make sure to knead well and allow to rise adequately. Knead the dough for about 5-7 minutes to develop the gluten. This makes the rolls soft and airy. Let the dough rise in a warm spot until it doubles in size. This can take about an hour. Patience pays off! Yes, they freeze well both before and after baking. You can freeze the unbaked rolls after shaping them. Just cover them well and pop them in the freezer. When ready to bake, let them thaw and rise first. If you freeze baked rolls, wrap them tightly. Reheat in the oven for the best taste and texture. You now have a simple, tasty recipe for herb and garlic swirl rolls. We covered important steps like activating the yeast and preparing the dough. Fresh herbs and proper kneading bring great flavor and texture. You can explore different variations to suit your taste. Remember, these rolls store well, making them perfect for future meals. Enjoy baking and savoring each warm roll! Cooking at home can be fun and rewarding. Happy baking!

Herb & Garlic Swirl Rolls Fluffy and Flavorful Treat

If you crave a warm, fluffy treat that bursts with flavor, you’re in the right place. My Herb & Garlic

- 4 large russet potatoes, peeled and diced - 1 medium onion, chopped - 2 cloves garlic, minced - 4 cups chicken or vegetable broth - 1 cup heavy cream - 1 tablespoon Cajun seasoning - 1 teaspoon smoked paprika - 1/2 teaspoon cayenne pepper (adjust for spice preference) - 1 cup corn kernels (fresh or frozen) - 1/2 cup diced green bell pepper - 1/4 cup chopped green onions (for garnish) - Salt and pepper to taste - 2 tablespoons olive oil When cooking, the right measurements matter. For potatoes, select large russet ones. They give a creamy texture. Use one medium onion for a good base flavor. Two cloves of garlic add depth. For the broth, you can choose chicken or vegetable, both work well. Heavy cream adds richness, so don’t skip it. Cajun seasoning is your key spice here. Smoked paprika gives a unique taste, while cayenne pepper adds heat. Adjust the cayenne to fit your spice level. Corn adds sweetness, and green bell pepper brings crunch. Use fresh or frozen corn based on what's handy. Finally, season to taste with salt and pepper. If you need to swap ingredients, here are some ideas: - Potatoes: Yukon gold or red potatoes can work. - Broth: Use water with seasonings if broth is not available. - Cream: Coconut cream is a great dairy-free option. - Cajun seasoning: Make your own blend with paprika, garlic powder, and oregano. - Corn: You can use peas if corn isn’t available. - Green bell pepper: Any color bell pepper will do, or skip it for a simpler soup. Using these substitutions keeps the dish tasty and satisfying. Explore different blends to find what you love! To start, gather your ingredients. You'll need four large russet potatoes, a medium onion, and two cloves of garlic. Also, have four cups of chicken or vegetable broth ready. Don't forget the heavy cream, Cajun seasoning, smoked paprika, and cayenne pepper. You will also need corn kernels and a diced green bell pepper. Lastly, chop some green onions for garnish. Next, peel and dice the potatoes. Chop the onion and mince the garlic. If you are using fresh corn, you should cut it off the cob. Heat two tablespoons of olive oil in a large pot over medium heat. Add the chopped onion and diced bell pepper. Sauté these for about five minutes until they soften. Now, stir in the minced garlic and cook for one more minute until it smells great. Add the diced potatoes, chicken or vegetable broth, Cajun seasoning, smoked paprika, and cayenne pepper. Bring this mixture to a boil. Then, reduce the heat and let it simmer for about twenty minutes. The potatoes should be tender when done. After the potatoes cook, grab an immersion blender. Blend the soup until it is as smooth or chunky as you like. Stir in the corn kernels and heavy cream. Let the soup simmer for another five minutes to heat everything through. Remember to taste it and adjust the seasoning with salt and pepper as needed. Serve the soup hot and sprinkle chopped green onions on top. Enjoy your flavorful and hearty Cajun potato soup! For the complete recipe, see the [Full Recipe]. To boost the taste of your Cajun potato soup, use good quality broth. Homemade broth adds rich flavor. A splash of hot sauce can also enhance the spice. If you love herbs, try adding fresh thyme or parsley. These herbs brighten the soup and add depth. When cooking potatoes, choose russet potatoes for their creamy texture. Cut them into even-sized pieces. This helps them cook evenly. Don’t rush the cooking time; let them simmer until tender. For a creamier soup, blend the potatoes longer. Serve your soup hot with crusty bread on the side. Cornbread pairs well, adding a sweet touch. For a fun twist, top with crispy bacon bits or shredded cheese. You can also offer a dollop of sour cream for a creamy finish. Enjoy your flavorful meal with family and friends! {{image_2}} You can change up your Cajun potato soup with fun add-ins. Try adding cooked sausage for a meaty touch. Shrimp is another great choice. It adds a nice seafood flavor. You can also toss in some diced tomatoes. They add sweetness and color. If you like greens, stir in some spinach or kale. They cook down well and add nutrients. To make this soup vegetarian, use vegetable broth instead of chicken broth. Swap heavy cream with coconut milk for a creamy texture. This gives a nice twist and keeps it dairy-free. You can also add more veggies like carrots or celery. They boost flavor and make it heartier. This way, you get a delicious meal that everyone can enjoy. Adjust the spice levels to fit your taste. If you want it mild, skip the cayenne pepper. You can also use less Cajun seasoning. For more heat, add more cayenne or even hot sauce. Experiment with different spices to find your favorite mix. Remember, cooking is all about personal taste. Enjoy finding your perfect flavor! After you enjoy your Cajun potato soup, store it in an airtight container. Let the soup cool to room temperature first. Place the lid on tightly and keep it in the fridge. It will stay fresh for about three to four days. If you want to keep it longer, consider freezing it. To reheat the soup, pour it into a pot. Heat it over medium-low heat. Stir often to avoid sticking. You can also use a microwave. Place the soup in a microwave-safe bowl. Cover it loosely and heat for 1 to 2 minutes. Stir halfway through to heat evenly. If you want to freeze your Cajun potato soup, let it cool completely. Use freezer-safe containers or bags. Leave some space at the top for expansion. Label the bags with the date. This soup can stay good for up to three months in the freezer. When ready to eat, thaw it in the fridge overnight before reheating. Enjoy your flavorful soup any time! For the full recipe, check out the details above. Cajun potato soup is a rich and hearty dish. It combines potatoes, broth, and Cajun spices. The soup has a creamy base, thanks to heavy cream. You can taste the warmth of Cajun flavors in every bite. It also contains corn, onions, and peppers for added texture. This soup is perfect for chilly nights. It warms you up inside and out. Yes, you can easily make this recipe gluten-free. Use gluten-free broth instead of regular broth. Check the Cajun seasoning to ensure it is gluten-free. Most brands are safe, but it’s good to verify. All other ingredients in this recipe are naturally gluten-free. This makes it simple to enjoy without worry. To make Cajun potato soup spicier, add more cayenne pepper. Start with an extra 1/4 teaspoon and taste it. You can also use a spicier Cajun seasoning blend. If you want more heat, add diced jalapeños when cooking. For an extra kick, top with hot sauce before serving. Adjust spice to fit your taste! We’ve covered everything you need to make Cajun Potato Soup. You learned about key ingredients, preparation, and cooking methods. I shared tips for boosting flavor and ways to adapt the recipe. You now know how to store and reheat your soup, and answered common questions. This soup is simple, tasty, and perfect for any meal. Try it out, and enjoy the warm, spicy goodness.

Cajun Potato Soup Flavorful and Hearty Meal

Welcome to a taste of the South! This Cajun Potato Soup is both flavorful and hearty, perfect for any meal.

Older posts
Newer posts
← Previous Page1 … Page67 Page68 Page69 … Page77 Next →

dsad

© 2025 pureeatsnow • Built with GeneratePress

Our Policies

  • Copyright Policy
  • Cookie Policy
  • GDPR Policy
  • Privacy Policy
  • Disclaimer
  • Terms Of Use

More Information

  • Home
  • About
  • Contact
  • Appetizers
  • Dessert
  • Dinner
  • Drinks
©2025, pureeatsnow About Back To Top