Sheet Pan Teriyaki Tofu and Veggies Delightful Dish
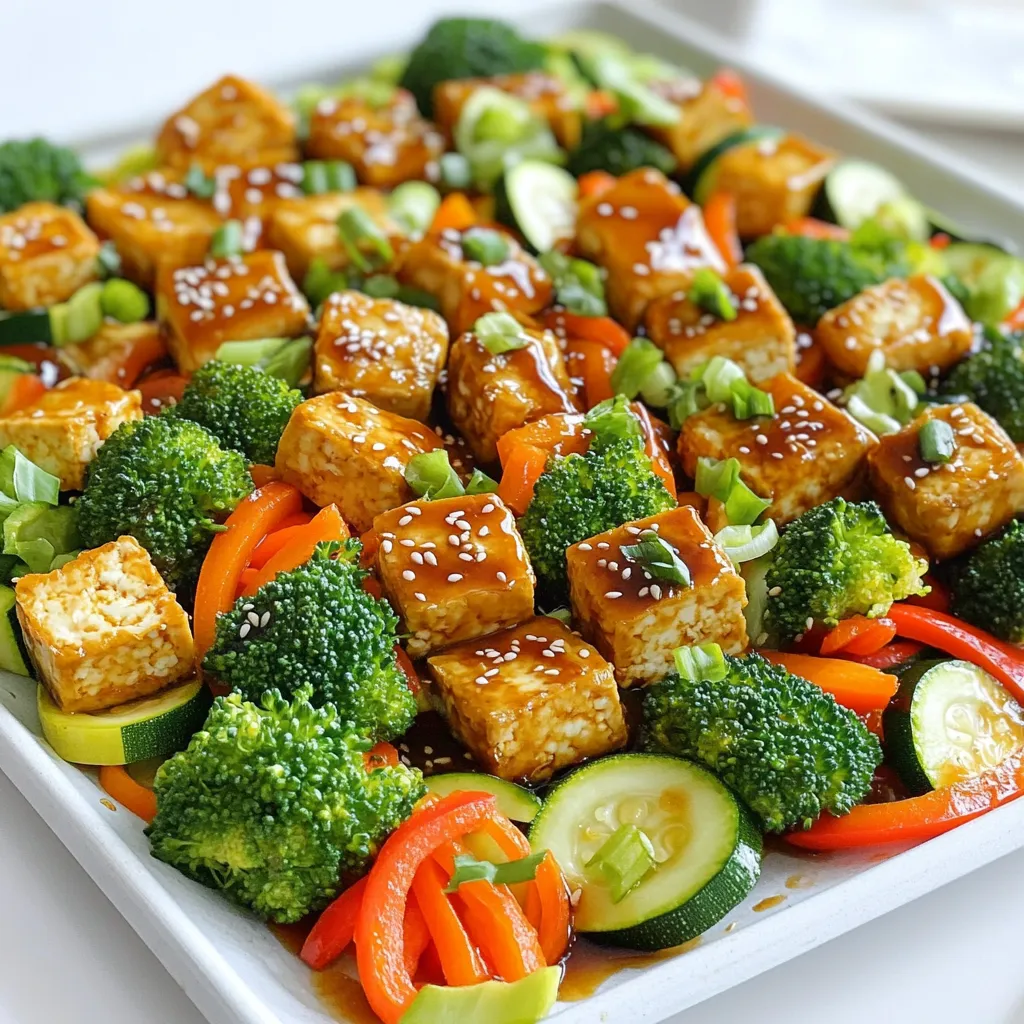
Looking for a quick, tasty meal? My Sheet Pan Teriyaki Tofu and Veggies is the answer! This dish combines crispy
Looking for a quick, tasty meal? My Sheet Pan Teriyaki Tofu and Veggies is the answer! This dish combines crispy
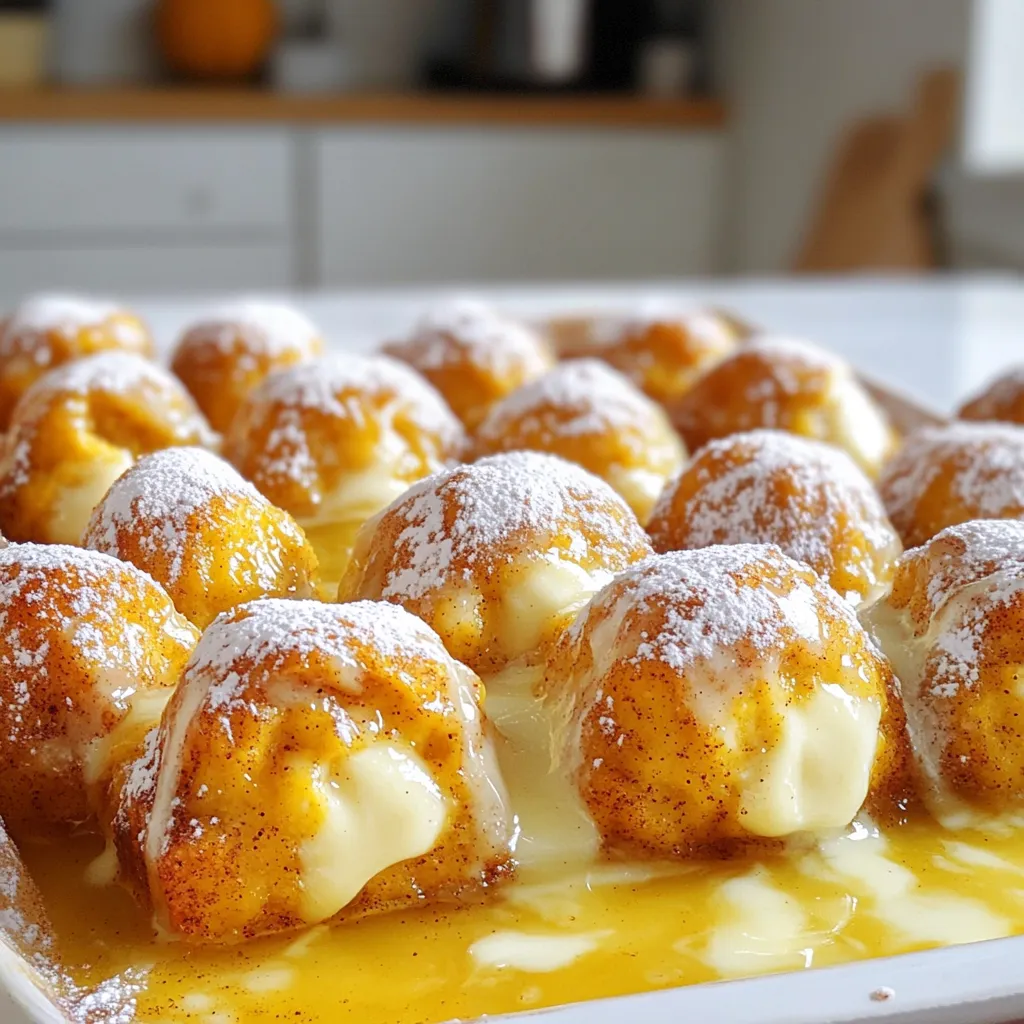
Are you ready to dive into a delicious fall treat? This Pumpkin Cream Cheese Monkey Bread combines warm, gooey goodness
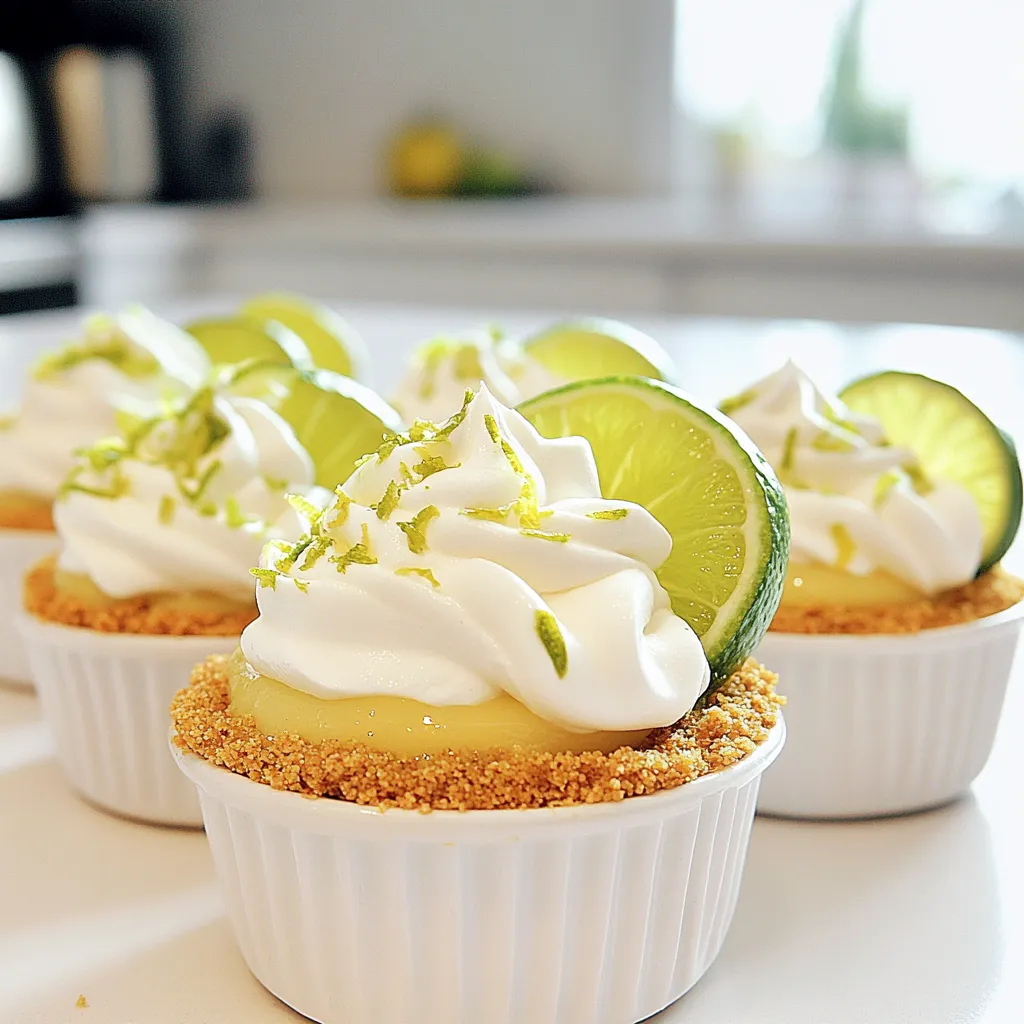
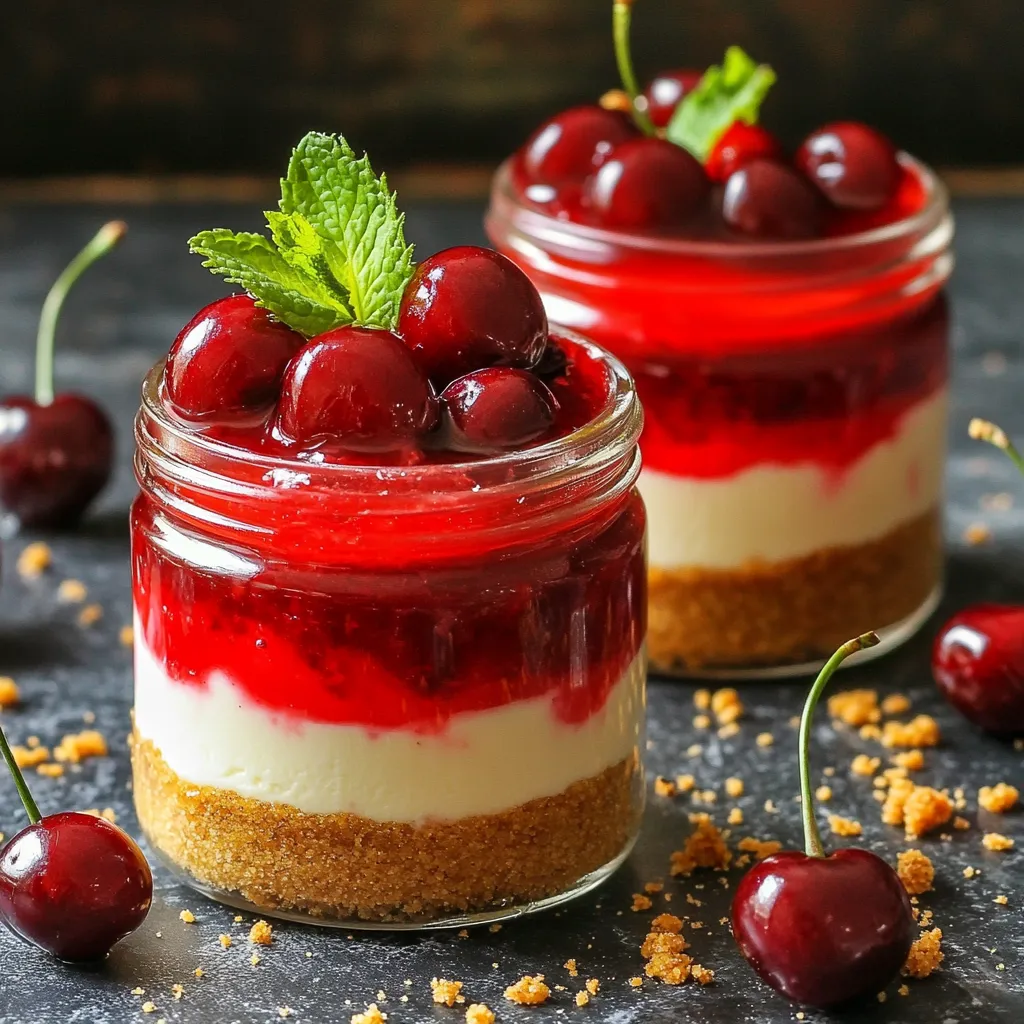
Looking for a delicious, easy dessert? These No Bake Key Lime Pie Cups are the perfect treat! You’ll love how
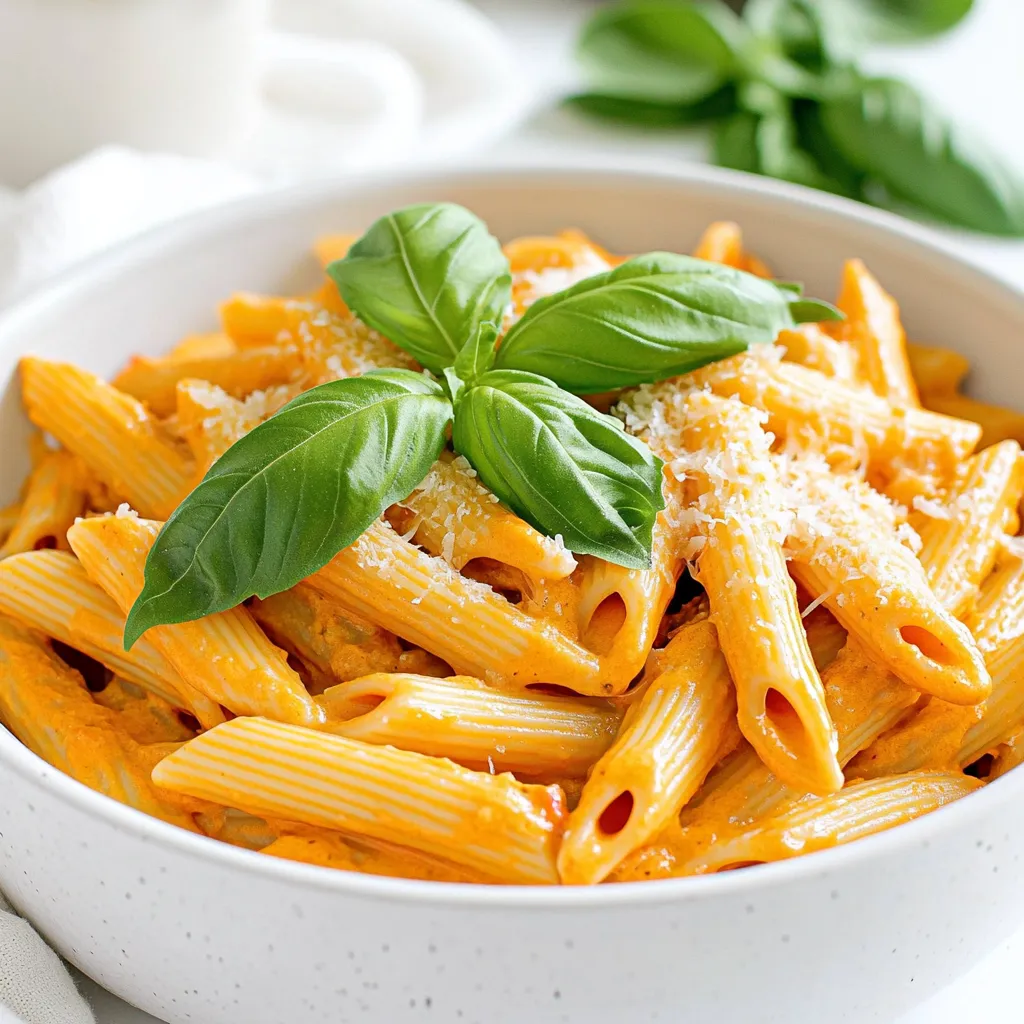
Are you ready for a simple yet delicious pasta dish? My One Pot Creamy Roasted Red Pepper Pasta Delight is
Looking for a sweet treat that’s easy to make and fun to eat? You’ve come to the right place! I’m
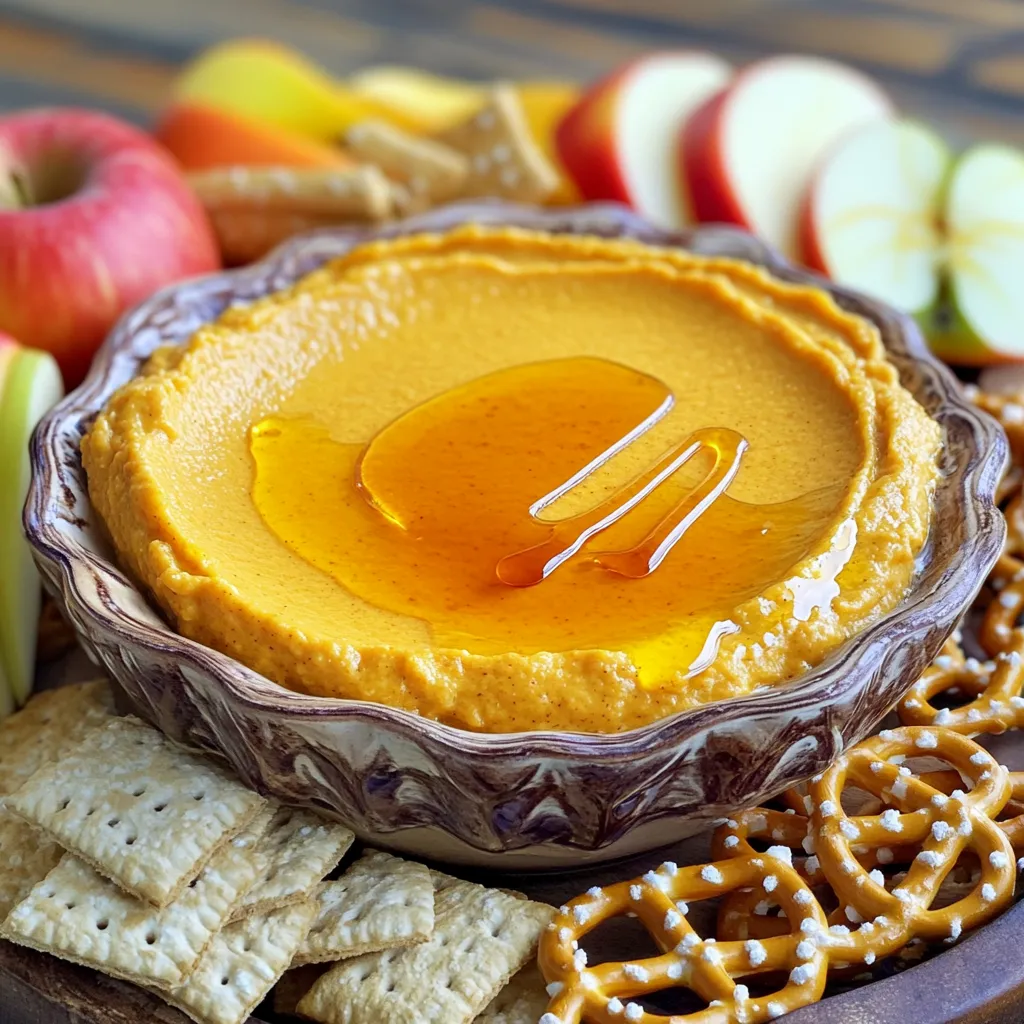
If you love fall flavors, you’ll adore this Pumpkin Spice Cheesecake Dip! It’s creamy and delicious, perfect for gatherings or
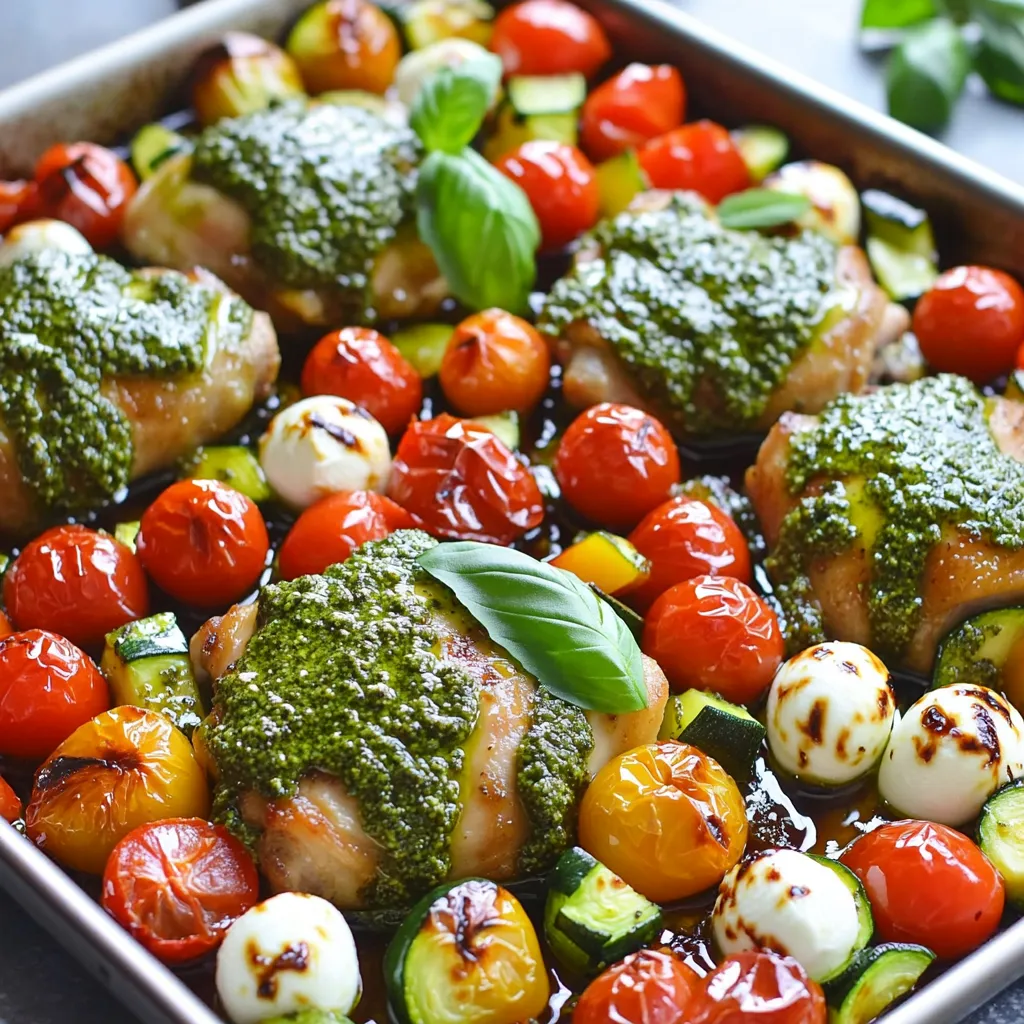
Looking for a quick, tasty meal? You’ll love this Sheet-Pan Pesto Chicken Caprese. It’s easy to make and packed with
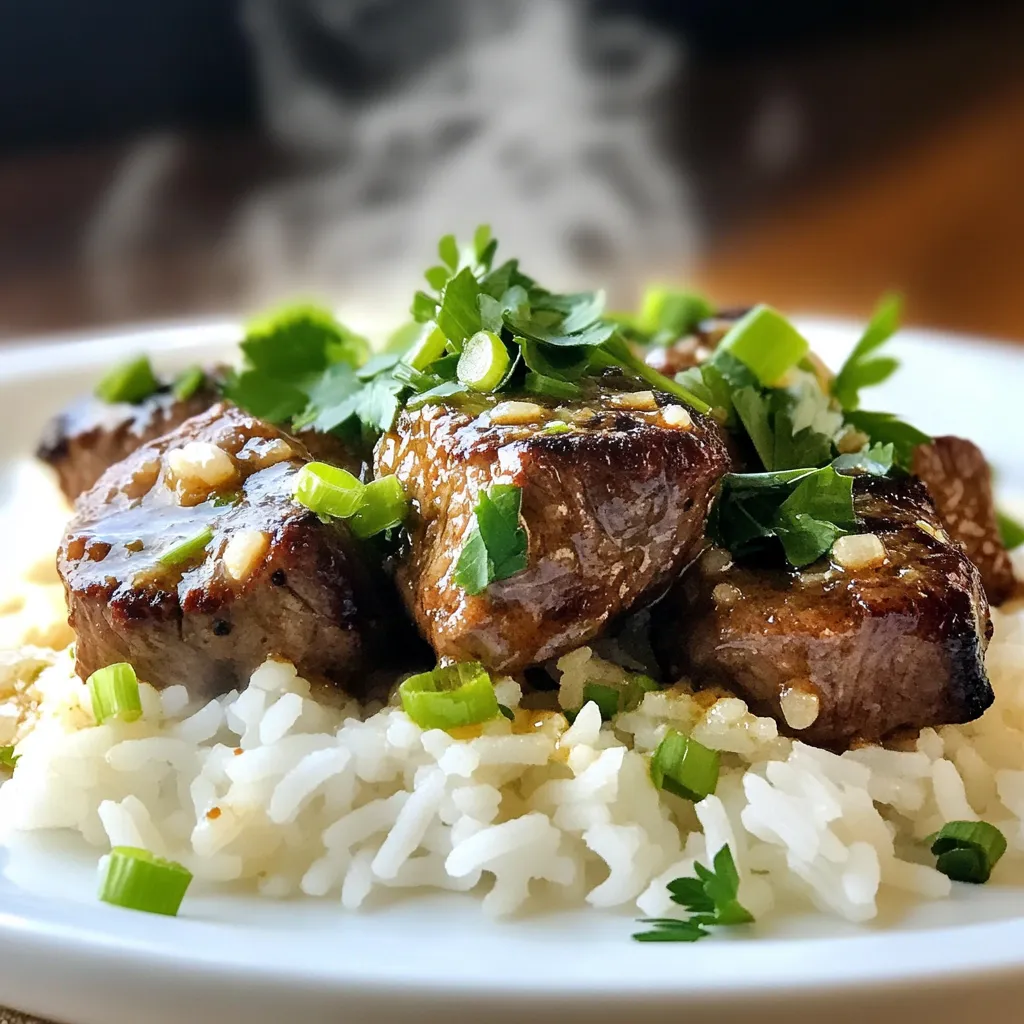
Are you ready to impress your family with a quick and tasty meal? In Minute Garlic Butter Steak Bites and

Are you ready to whip up a delicious meal in no time? This One-Pot Creamy Thai Peanut Noodles recipe is

Looking for a tasty snack that’s easy to make and healthy? Try these Air Fryer Ranch Cauliflower Bites! With a
