Skip to content
DisclaimerTerms Of UseGDPR PolicyCookie Policy

pureeatsnow

  • Home
  • Drinks
  • Appetizers
  • Dinner
  • Dessert
  • About
  • Contact
  • Privacy Policy
DisclaimerTerms Of UseGDPR PolicyCookie Policy

Rachel

To make fluffy pancakes, you need a few simple ingredients. Here’s what you will need: - 1 cup all-purpose flour - 2 tablespoons sugar - 1 tablespoon baking powder - 1/4 teaspoon salt - 1 large egg - 3/4 cup milk (or a dairy-free alternative) - 2 tablespoons unsalted butter, melted - 1 teaspoon vanilla extract - Maple syrup, for serving - Fresh berries (like strawberries or blueberries) for garnish - Whipped cream (optional) These ingredients work together to create a light and fluffy texture in your pancakes. The baking powder helps them rise, while the melted butter adds richness. Using fresh berries on top adds a lovely burst of flavor. You can find the full recipe with instructions to guide you through the cooking process. - Whisk together dry ingredients: In a large bowl, mix 1 cup of flour, 2 tablespoons of sugar, 1 tablespoon of baking powder, and 1/4 teaspoon of salt. This mix gives your pancakes a sweet flavor and fluffy texture. - Combine wet ingredients: In another bowl, beat 1 large egg. Then, add 3/4 cup of milk, 2 tablespoons of melted butter, and 1 teaspoon of vanilla extract. Mix until smooth. This step adds moisture and richness. - Mix wet and dry ingredients: Pour the wet mix into the dry mix. Stir gently with a spatula until just combined. Don't worry about lumps; they help make the pancakes fluffy. - Preheat skillet: Set a non-stick skillet over medium heat. Lightly grease it with butter or cooking spray. This helps prevent sticking and gives a nice golden color. - Pour batter and cook pancakes: Pour about 1/4 cup of batter for each pancake into the skillet. Cook for 2-3 minutes. Watch for bubbles forming on the surface and the edges looking set. - Flip and finish cooking: Carefully flip the pancakes using a spatula. Cook for another 1-2 minutes until golden brown. This ensures they cook evenly and stay soft. - Stack and drizzle with maple syrup: Once cooked, stack your pancakes high on a plate. Drizzle a generous amount of maple syrup over the top. This sweet addition is a must-have. - Garnish with fresh berries and whipped cream: Add fresh berries like strawberries or blueberries on top. You can also add a dollop of whipped cream for an extra treat. This makes your dish look great and adds fresh flavor. To make your pancakes fluffy, avoid overmixing the batter. When you mix too much, the pancakes can turn out dense. You want to mix just until the dry and wet ingredients blend. Some lumps are okay; they help keep the pancakes light. Next, check the batter consistency. It should be thick but pourable. If it’s too runny, add a bit more flour. If it's too thick, add a splash of milk. This perfect balance creates a dreamy pancake texture. For the best pancakes, cook them on medium heat. If the pan is too hot, the outside will burn, but the inside will stay raw. A non-stick skillet works great, but a cast-iron pan can add extra flavor. To know when to flip your pancakes, watch for bubbles. When bubbles form on the surface and the edges look set, it’s time to flip. Cook until golden brown on the other side for perfect pancakes. Choosing the right maple syrup can make a big difference. Look for pure maple syrup, not imitation. Pure syrup has a rich flavor that enhances your pancakes. If you want something different, try honey or agave syrup. You can also use fruit syrups, like blueberry or raspberry, for a fun twist. These alternatives can add a unique taste to your breakfast. For the Full Recipe, check the instructions earlier in this article. {{image_2}} You can easily change the flavor of your pancakes. One fun way is to add chocolate chips. Just mix in about 1/2 cup of chips into your batter. This makes the pancakes sweet and rich. Kids love this addition! Another tasty option is to add fruits. You can use sliced bananas or fresh blueberries. Fold them gently into the batter before cooking. The fruit adds natural sweetness and makes each bite juicy. If you need gluten-free pancakes, use gluten-free flour instead. Many brands offer great mixes that work well. Just swap in the same amount as the all-purpose flour. For vegan pancakes, you can replace the egg with mashed banana or applesauce. Use a plant-based milk too. Almond or oat milk works great! These swaps keep your pancakes fluffy and delicious. While maple syrup is a classic choice, you can try unique toppings. Consider using yogurt or nut butter. They add creaminess and flavor. Seasonal toppings can also be fun. In spring, use fresh strawberries. In fall, try sliced apples with cinnamon. Each season brings new tastes to enjoy with your pancakes. For the full recipe, you can check the earlier section. Happy cooking! To keep your fluffy pancakes fresh, store them in an airtight container. Line the container with parchment paper to avoid sticking. Pancakes last about three days in the fridge. If you want them longer, freezing is a great option. The best way to reheat pancakes is in a skillet. Heat on low and flip them to warm both sides. The stovetop keeps pancakes fluffy. You can use a microwave too. Just place them on a plate and heat for about 20 seconds. This method makes them soft but can dry them out. Freezing pancakes is easy. Stack them with parchment paper between each one. Place them in a freezer bag, and they will last up to two months. To thaw, leave them in the fridge overnight. You can reheat them in the microwave or on the stovetop as mentioned. For the best results, always reheat from thawed, not frozen. For the full recipe, check out the details above! Can I make pancake batter ahead of time? Yes, you can make pancake batter ahead of time. Just mix it and store it in the fridge. Use it within a day for the best fluffiness. Give it a gentle stir before cooking. Why are my pancakes not fluffy? Pancakes may not be fluffy for a few reasons. You might have overmixed the batter. Overmixing makes them dense. Also, check if your baking powder is fresh. Old baking powder can fail to rise. What drinks pair well with pancakes? Coffee and tea are classic choices. Fresh orange juice adds a nice zing. Milk or almond milk also pairs well. For a fun twist, try a chai latte or a smoothie. Can I make pancakes without eggs? Yes, you can! Use a banana or applesauce as a binder. One small banana or 1/4 cup of applesauce works well. This keeps the pancakes moist and adds a hint of sweetness. Can I use whole wheat flour instead of all-purpose? Absolutely! Whole wheat flour can replace all-purpose flour. Just note that the pancakes may be denser. You may want to add a bit more milk to keep them fluffy. What can I use instead of maple syrup? You can use honey or agave syrup if you prefer. Fruit compote or jam also makes a tasty topping. For a unique twist, try yogurt with a drizzle of honey. For the complete recipe, check out the [Full Recipe]. This blog post showed how to make perfect pancakes from scratch. We covered ingredients, step-by-step instructions, and tips for delicious results. Remember, mixing your batter gently keeps pancakes fluffy. Explore fun variations and toppings to customize your meal. You can store and reheat pancakes easily, too. Enjoy your tasty creations and share them with others! The joy of pancakes is in the making and sharing. Get cooking and have fun!

Fluffy Pancakes with Maple Syrup Dreamy Breakfast Delight

Do you dream of fluffy pancakes dripping with sweet maple syrup? You’re in the right place! In this delicious guide,

To make Coconut Curry Lentil Soup, gather these key ingredients: - 1 cup red lentils, rinsed - 1 can (14 oz) coconut milk - 4 cups vegetable broth - 1 medium onion, finely chopped - 2 cloves garlic, minced - 1 tablespoon ginger, grated - 1 tablespoon curry powder - 1 teaspoon turmeric - 1 teaspoon cumin - 1 tablespoon olive oil - 1 cup spinach, roughly chopped - Juice of 1 lime - Salt and pepper to taste - Fresh cilantro, for garnish These ingredients form the base of your soup. The red lentils provide protein and fiber. The coconut milk makes the soup creamy and rich. The spices bring warmth and depth. You can enhance the soup with these optional ingredients: - 1 small red chili, finely chopped - Extra lime juice for brightness - A dash of soy sauce for umami Adding a chili gives the soup a nice kick. More lime juice brightens the flavors. Soy sauce can boost savory notes. If you lack an ingredient, here are some easy swaps: - Use green or brown lentils instead of red, though they may take longer to cook. - Swap vegetable broth for chicken broth if you prefer. - Coconut cream can replace coconut milk for a richer texture. These substitutions keep the soup delicious while accommodating what you have on hand. Always feel free to experiment with flavors to suit your taste. For the full recipe, check the details provided earlier. First, heat the olive oil in a large pot over medium heat. I use a big pot to give the soup room to grow. Add the finely chopped onion and cook it until soft and clear. This should take about five minutes. The smell will fill your kitchen and let you know you’re on the right track. Next, stir in the minced garlic, grated ginger, curry powder, turmeric, cumin, and red chili if you want some heat. Cook this mix for two more minutes. The spices will wake up and fill the room with their warmth. Now, it’s time for the star of the show: the lentils. Add the rinsed red lentils to the pot along with the vegetable broth and coconut milk. Give everything a good stir. This mix brings together the flavors and creates a cozy base. Bring the soup to a gentle simmer, then lower the heat. Let it cook uncovered for 20 to 25 minutes. Stir it occasionally so nothing sticks to the bottom. You know it’s ready when the lentils are soft and tender. Once the lentils are cooked, add the roughly chopped spinach. Cook for another five minutes until it wilts down. This step adds color and nutrients to your soup. After that, turn off the heat and squeeze in the juice of one lime. This adds a nice zing to the flavor. Season with salt and pepper to taste. I always taste the soup before serving to make sure it’s just right. Finally, ladle the soup into bowls and sprinkle fresh cilantro on top. This adds freshness and a pop of color. For the complete recipe, check out the Full Recipe. To boost the taste of your Coconut Curry Lentil Soup, try a few simple tricks. First, add fresh herbs like cilantro during cooking. Fresh lime juice adds brightness at the end. You can also sprinkle in some chili flakes for extra heat. If you want a richer flavor, sauté the onion and spices longer. This deepens the taste. Another option is to add a dash of soy sauce or tamari for umami. These tweaks will make every bowl burst with flavor. If you have leftover soup, store it in an airtight container. The soup can stay fresh in the fridge for up to five days. Make sure to cool it down before sealing. If you want to keep it longer, consider freezing it. Portion it into freezer-safe containers. This way, you can enjoy it later. Just remember to leave a little space at the top for expansion. Making your Coconut Curry Lentil Soup ahead of time is easy. Prepare the soup and let it cool. Transfer it to an airtight container. You can store it in the fridge for up to five days or freeze it for months. When you’re ready to eat, simply reheat the soup on the stove. Stir it gently to mix in any separated ingredients. This dish tastes even better the next day, as the flavors meld together. Check out the Full Recipe for more details! {{image_2}} Coconut curry lentil soup shines in its vegetarian and vegan forms. The base is already plant-based, with rich flavors from coconut milk and spices. To boost nutrition, add more veggies. Carrots, bell peppers, or sweet potatoes work well. They add texture and taste. Just chop them up and add them in with the onion. This makes the soup even more colorful and hearty. If you want more protein, chicken or tofu are great choices. For chicken, use cooked, shredded meat. Stir it in after the lentils are soft. This way, it warms up without overcooking. For tofu, use firm tofu. Cut it into cubes and sauté it with the onions. This adds a nice texture. Both options make the soup filling and satisfying. Spice can change the whole soup. If you like heat, add more red chili. You can also use cayenne pepper for a kick. Start with a small amount, then taste. You can always add more if needed. If you prefer milder flavors, skip the chili altogether. Coconut milk cools the spice, providing balance. This soup is customizable to fit your taste perfectly. For the full recipe, check out the Coconut Curry Lentil Soup 🥥. After you make your Coconut Curry Lentil Soup, let it cool first. Once cool, store it in an airtight container. I recommend using glass jars or plastic containers. This keeps the soup fresh. It will last in the fridge for about 4-5 days. You can also freeze this tasty soup. Pour it into freezer-safe bags or containers. Leave some space at the top for expansion. Label the bags with the date. The soup can last in your freezer for up to three months. When you are ready to enjoy it, just thaw it in the fridge overnight. To reheat, pour the soup into a pot and warm it over low heat. Stir it often to avoid sticking. If the soup is too thick, add a splash of vegetable broth or water. For the best flavor, taste it and adjust the seasoning if needed. Enjoy every bowl of warmth! Coconut Curry Lentil Soup lasts about five days in the fridge. Store it in an airtight container. This keeps the soup fresh and tasty. If you want to enjoy it later, you can freeze it too. Just remember to thaw it in the fridge before reheating. Yes, you can use other lentils like green or brown lentils. However, they may need more cooking time. Red lentils cook faster and break down, making the soup creamier. If you use green or brown lentils, adjust the liquid and time accordingly. You can serve this soup with bread or rice. Naan or crusty baguettes pair well too. A side salad adds freshness and crunch. You can also top the soup with yogurt or extra herbs for a nice touch. Absolutely! This soup is great for meal prep. It stores well and reheats nicely. Make a big batch and portion it out for easy lunches or dinners. It saves time and keeps your meals healthy and tasty. For the full recipe, check out the earlier section. This coconut curry lentil soup is rich in flavor and easy to make. We discussed the key ingredients, step-by-step preparation, and smart storage tips. You can adapt it to your taste by adding proteins or adjusting the spice level. Remember, this soup is great for meal prep and tastes even better the next day. Enjoy this dish as a comforting meal that warms both body and spirit.

Coconut Curry Lentil Soup Goodness in Every Bowl

There’s something magical about a warm bowl of soup, and my Coconut Curry Lentil Soup will make your taste buds

- 1 lb (450g) shrimp, peeled and deveined - 3 tablespoons honey - 3 tablespoons soy sauce - 3 cloves garlic, minced - 1 tablespoon fresh ginger, grated - 1 tablespoon olive oil - 1 teaspoon lime juice - 8 small corn tortillas - 1 cup red cabbage, thinly sliced - 1 avocado, sliced - 1/4 cup cilantro, chopped - Lime wedges for serving Each ingredient plays a key role in making these tacos a hit. The shrimp adds protein and a sweet flavor. Honey and soy sauce create a tasty marinade. Garlic and ginger give it a nice kick. Corn tortillas hold everything together, making them easy to eat. For toppings, red cabbage adds crunch. Avocado gives a creamy texture. Cilantro adds freshness, while lime juice brightens the dish. Together, these ingredients create a fresh and flavorful treat. To learn how to put these ingredients together, check out the Full Recipe. You will enjoy making these tacos as much as eating them! Start by making the marinade. In a medium bowl, whisk together these ingredients: - 3 tablespoons honey - 3 tablespoons soy sauce - 3 cloves garlic, minced - 1 tablespoon fresh ginger, grated - 1 tablespoon olive oil - 1 teaspoon lime juice - Salt and pepper to taste This mixture adds sweet and savory flavor to your shrimp. Next, add the shrimp to the marinade. Toss them gently to coat. Let the shrimp sit in the marinade for 15-20 minutes. This step builds great flavor, so don’t rush it! Now, it’s time to cook. Heat a large skillet over medium-high heat. Add the marinated shrimp to the hot skillet. Sear them for about 4-5 minutes. They will turn pink and caramelize nicely. Flip them halfway through to cook evenly. When the shrimp are done, remove them from heat. While the shrimp cools slightly, warm the corn tortillas. You can do this in a dry skillet or microwave. Once warm, it’s assembly time! Place a spoonful of shrimp on each tortilla. Top with: - 1 cup red cabbage, thinly sliced - 1 avocado, sliced - 1/4 cup cilantro, chopped Serve your tacos right away. Lime wedges on the side add a burst of zest. For full details, check out the Full Recipe. Enjoy your fresh and flavorful tacos! Marinating shrimp is key for great taste. The honey and soy sauce mix adds depth. Let your shrimp soak for 15 to 20 minutes. This gives the shrimp time to absorb flavors. To avoid overcooking shrimp, watch the time closely. Cook them just until they turn pink. This usually takes about 4 to 5 minutes. If they curl tightly, they may be overdone. Warm tortillas for the best texture. You can do this in a dry skillet. Heat them for about 30 seconds on each side. This makes them soft and easy to fold. Choose small corn tortillas for a traditional feel. They hold the shrimp well. Flour tortillas can also work if you prefer a softer bite. Add toppings like salsa or crema for extra flavor. A fresh mango salsa gives a sweet kick. You can also add creamy avocado for richness. If you like spice, include jalapeños or hot sauce. This lets you control the heat. Start with a little and add more to taste. {{image_2}} You can switch out the shrimp for chicken or tofu. If you choose chicken, slice it into thin strips. Marinate the chicken just like you would the shrimp. For tofu, use firm tofu and press it to remove excess water. Then, cut it into cubes. This way, you can enjoy different textures and flavors in your tacos. Instead of tacos, serve the shrimp as a rice bowl. Cook some rice and pile it high with shrimp, cabbage, and avocado. You can also add other veggies like bell peppers or carrots for a crunchier bite. This change makes it a hearty meal that's just as delicious. You can use different sauces to change the taste. Try teriyaki sauce for a sweet and savory mix. If you like heat, use chili sauce for a spicy kick. Another fun option is to add fruits like mango. The mango’s sweetness pairs well with the savory shrimp. This gives your tacos a fresh twist that’s hard to resist. For the full recipe, check out the Honey Garlic Shrimp Tacos. To store leftover tacos, place them in an airtight container. Keep the shrimp and toppings separate from the tortillas. This helps keep everything fresh and prevents sogginess. You can store them in the fridge for up to two days. When you're ready to enjoy, simply reheat the shrimp in a pan on low heat until warm. Warm the tortillas in a dry skillet for a few seconds. If you want to freeze cooked shrimp, let them cool first. Place the shrimp in a freezer-safe bag. Make sure to remove as much air as possible to avoid freezer burn. You can freeze the shrimp for up to three months. To reheat, thaw overnight in the fridge. Then, warm them in a skillet until heated through. Always ensure the shrimp are hot before serving. To keep your shrimp tacos fresh, follow these key tips: - Store shrimp and toppings separately from tortillas. - Use fresh ingredients for the best flavor. - Avoid adding toppings until you're ready to eat. This keeps everything crisp. - If using sauces, keep them on the side until serving. For the full recipe, check the detailed cooking instructions and enjoy your tasty meal! Yes, you can use frozen shrimp. Thaw them first. To thaw, place the shrimp in cold water for 15-20 minutes. You can also leave them in the fridge overnight. Once thawed, pat them dry before marinating. This step helps the shrimp absorb the flavors better. If you need a substitute for honey, try agave syrup or maple syrup. Both options add sweetness. They also work well with the other flavors in the tacos. Use the same amount as honey in the recipe. To add heat, use spices like cayenne pepper or chili powder. You can also add sliced jalapeños or hot sauce. Mix them into the marinade or sprinkle them on top of the tacos. This way, you can control the spice level to your liking. Leftovers can last 3-4 days in the fridge. Store them in an airtight container. If you want to keep them longer, freeze the shrimp. They can last up to 3 months in the freezer. Just remember to reheat them properly to keep the flavor. This blog post covers how to make delicious shrimp tacos. We explored key ingredients, step-by-step cooking, and tips to perfect your dish. You can switch shrimp for chicken or tofu if you prefer. Don't forget to store leftovers properly to keep them fresh. With these insights, you can enjoy tasty tacos tailored to your taste. Dive in and get cooking!

Honey Garlic Shrimp Tacos Fresh and Flavorful Treat

Craving a fresh and zesty dinner? Honey Garlic Shrimp Tacos are the perfect solution! With just a few simple ingredients,

- 1 cup long-grain white rice - 2 cups vegetable broth (or water) - 1/4 cup fresh cilantro, finely chopped - 1 lime, zested and juiced - 1 tablespoon olive oil - 1 small garlic clove, minced - 1/2 teaspoon ground cumin - Salt to taste - Fresh lime wedges for garnish To make zesty cilantro lime rice, you need a few simple ingredients. Start with one cup of long-grain white rice. This rice gives a nice fluffy texture. Next, use two cups of vegetable broth or water to cook the rice. The broth adds rich flavor. You will also need a quarter cup of fresh cilantro, finely chopped. This herb brightens the dish. One lime is important too; zest it and juice it for that zesty flavor. Add a tablespoon of olive oil to sauté the garlic. A small garlic clove, minced, adds depth. Half a teaspoon of ground cumin gives warmth. Don’t forget salt to taste. Finally, have fresh lime wedges on the side for serving. These ingredients create a tasty side dish that pairs well with many meals. For the full recipe, check out the details in the cooking section. - Rinsing the rice Rinse the rice under cold water until it runs clear. This step helps remove excess starch. It keeps the rice fluffy and prevents clumping. Make sure to drain it well after rinsing. - Sautéing garlic Heat olive oil in a medium saucepan over medium heat. Add minced garlic to the pan. Sauté for about one minute. You want it to smell fragrant but not brown. This adds a rich flavor to the rice. - Toasting the rice Once the garlic is ready, add the rinsed rice. Toast the rice for about 2-3 minutes. Stir it often to avoid burning. You want it to turn a light golden color. This step deepens the flavor of the rice. - Simmering with broth Pour vegetable broth into the saucepan with the toasted rice. Add ground cumin for extra flavor. Bring the mix to a boil. Then, reduce the heat to low and cover. Let it simmer for 18-20 minutes. The rice will absorb the liquid and become fluffy. - Adding lime and cilantro After cooking, let the rice sit covered for 5 minutes. This helps it finish cooking. Then, fluff it gently with a fork. Add lime juice, lime zest, and chopped cilantro. Stir carefully to mix everything well. - Fluffing and seasoning Taste the rice and add salt as needed. Serve it warm with fresh lime wedges on the side. This adds a fresh burst of flavor. You can find the full recipe above for more details. Enjoy your zesty cilantro lime rice! To achieve fluffy rice, rinse the rice well. Rinsing removes excess starch. This step prevents the rice from clumping together. It also helps each grain stay separate and light. After rinsing, be sure to drain it well. This keeps the right water ratio when cooking. When cooking, toasting the rice adds flavor. Heat olive oil over medium heat. Add the rinsed rice and stir for a few minutes. This will give it a nice golden color. Then, add your broth. The right cooking time is key. Let it simmer until the liquid is absorbed. To enhance the flavor, adjust lime and cilantro to your taste. Fresh lime juice brightens the dish. Zest adds a punch of citrus. Start with the juice of one lime. Tweak it for more zing if needed. Cilantro adds a fresh, herbal note. If you love cilantro, add more! You can also mix in spices for a twist. Ground cumin adds warmth. For extra kick, try a pinch of chili powder. You can also use garlic powder for a different flavor. For the Full Recipe, check the instructions above. Enjoy experimenting with these tips! {{image_2}} You can switch the rice for a healthier choice. Brown rice works great in this recipe. It gives a nutty flavor and a chewy texture. Just remember, brown rice takes longer to cook, about 40-45 minutes. Use two and a half cups of broth for best results. Quinoa is another good option. It cooks faster than brown rice and is full of protein. Use the same amount of quinoa as rice, but reduce the broth to one and a half cups. This will keep it from being too watery. Want some heat? Add jalapeños! Chop fresh jalapeños and mix them in with the rice. Start with one pepper, and adjust based on your spice level. This adds a nice kick that pairs well with lime. You can also play with herbs. Try adding parsley or mint along with the cilantro. These herbs will bring new flavors to your rice. Just chop them finely and mix them in at the end for a fresh taste. For the full recipe, check out the Zesty Cilantro Lime Rice details above. To store leftovers, let the rice cool first. Place it in an airtight container. It will stay fresh for up to four days in the fridge. Always label your container with the date. This helps you know when to use it. For fresh cilantro, wrap it in a damp paper towel. Place it in a sealed bag. This keeps it moist and fresh for about a week. You can freeze cooked rice for later use. Allow it to cool completely before you freeze it. Place it in a freezer-safe bag, pressing out the air. This helps prevent freezer burn. It will last for up to three months in the freezer. When you’re ready to eat, thaw it in the fridge overnight. Reheat it in a microwave or on the stovetop. Add a splash of water to keep it moist. For the full recipe, check out the Zesty Cilantro Lime Rice section above. Zesty Cilantro Lime Rice pairs well with many dishes. You can serve it with tacos, grilled chicken, or shrimp. It also complements beans and roasted veggies. This rice adds a fresh kick to any meal. You can use dried cilantro, but fresh is best. Dried cilantro has less flavor and aroma. If you must use dried, use less. About one tablespoon of dried cilantro equals one-fourth cup of fresh. To make more, simply double or triple the ingredients. Keep the same cooking method. For four servings, use one cup of rice. For eight servings, use two cups. Adjust broth and spices accordingly. You can pair this rice with grilled fish, chicken fajitas, or chili. It also goes well with salsa or guacamole. Consider serving it with a fresh salad for a complete meal. Enjoy your flavorful creations! For the complete recipe, check out the Full Recipe. This blog post covered everything you need to make Zesty Cilantro Lime Rice. You learned about the important ingredients and how to prepare them. We explored cooking steps, tips for perfect texture, and ways to enhance flavors. You can use different rice and herbs for a twist. Finally, I shared how to store and reheat leftovers safely. Embrace these tips to enjoy a tasty side dish every time. Let great flavors inspire your next meal!

Zesty Cilantro Lime Rice Flavorful and Easy Recipe

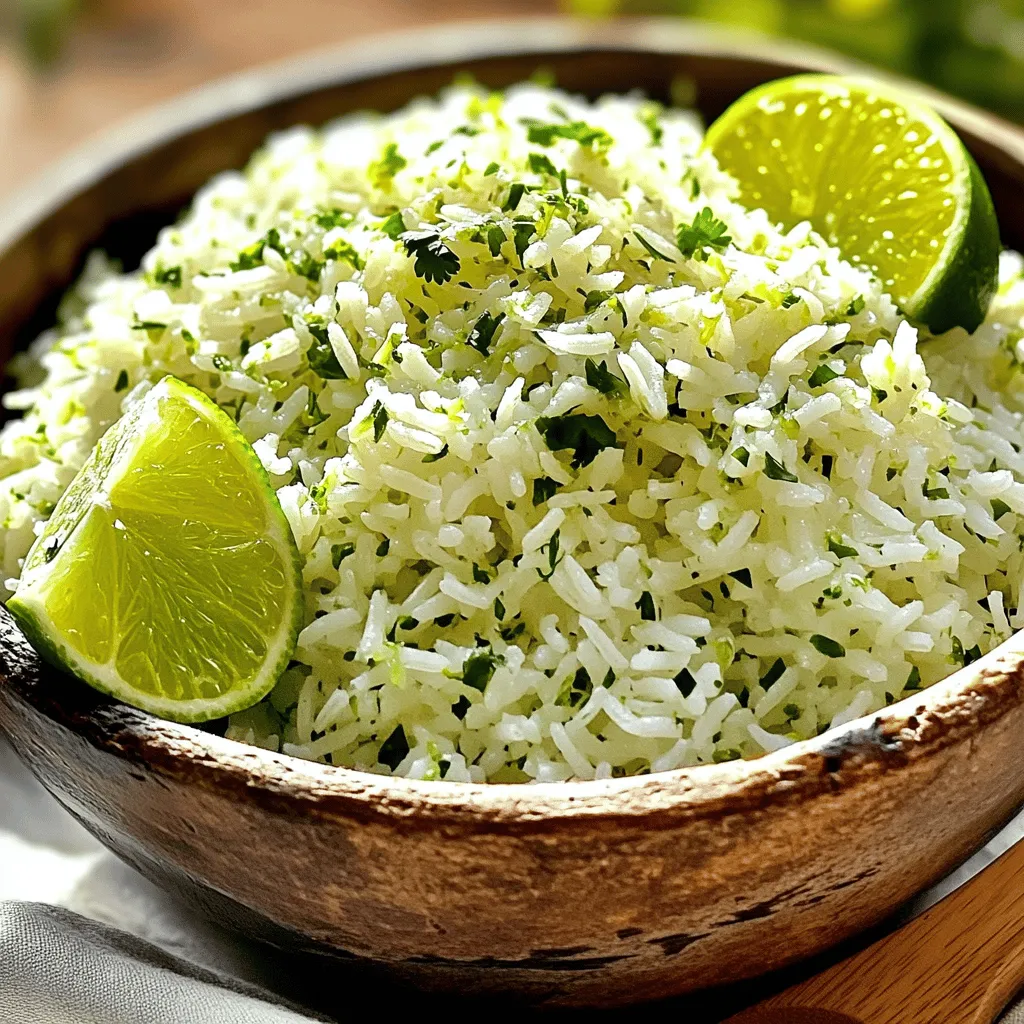
Get ready to brighten up your meals with my Zesty Cilantro Lime Rice recipe! This dish is simple, flavorful, and

To make this creamy spinach and artichoke dip, gather these simple ingredients: - 1 cup fresh spinach, chopped - 1 cup canned artichoke hearts, drained and chopped - 1 cup cream cheese, softened - ½ cup sour cream - ½ cup mayonnaise - 1 cup shredded mozzarella cheese - ½ cup grated Parmesan cheese - 2 cloves garlic, minced - 1 teaspoon lemon juice - Salt and pepper to taste - ¼ teaspoon red pepper flakes (optional for a kick) These ingredients combine to create a rich and flavorful dip. If you need to swap any ingredients, here are some great options: - Use Greek yogurt instead of sour cream for a tangy taste. - Swap mayonnaise with plain yogurt for a lighter option. - You can use frozen chopped spinach, but make sure to drain it well. - Substitute mozzarella with cheddar cheese for a sharper flavor. - Instead of artichoke hearts, try using roasted red peppers for a different twist. These substitutions keep the dip tasty and fun. Want to make this dip a bit healthier? Here are some ideas: - Use low-fat cream cheese to cut down on calories. - Opt for reduced-fat mozzarella and Parmesan cheese. - Include more veggies like bell peppers or zucchini for added nutrients. - Replace part of the mayonnaise with mashed avocado for creaminess. - Add herbs like spinach or basil for extra flavor without extra calories. These swaps let you enjoy the dip without the guilt. For the full recipe, refer to the [Full Recipe]. Start by preheating your oven to 350°F (175°C). In a large mixing bowl, mix the cream cheese, sour cream, and mayonnaise. Use a spatula or fork to blend them until smooth. Then, add the chopped spinach and artichokes. Next, sprinkle in the mozzarella and Parmesan cheeses, minced garlic, and lemon juice. This gives the dip a fresh taste. After that, season with salt, pepper, and optional red pepper flakes. Stir well until everything is mixed. Transfer the dip mixture into a greased baking dish or an oven-safe skillet. Make sure to smooth the top with a spatula. Place it in the preheated oven and bake for 25 to 30 minutes. Look for the dip to be bubbling and the top to turn golden. This step is important for the best texture and flavor. Once done, take it out of the oven and let it cool slightly. To get the best dip, keep the cream cheese soft. Let it sit at room temperature before you use it. Mixing well helps all ingredients combine seamlessly. If your dip seems too thick, add a little more sour cream or mayonnaise. This will help create a creamy texture. For a fun twist, try adding different cheeses or spices. You can serve it hot with pita chips or veggie sticks. Don’t forget to check the [Full Recipe] for extra details! To make your dip creamier, use full-fat cream cheese. This gives a rich texture. You can also add a bit more sour cream or mayonnaise. A splash of milk can help too. Mix well after each addition. This will ensure everything blends nicely. Store your dip in an airtight container. It will stay fresh in the fridge for up to three days. If you want to save it longer, freeze it. Use a freezer-safe container for this. Just remember to leave some space, as it may expand. Serve this dip hot for the best taste. Pair it with pita chips or toasted bread. Fresh veggie sticks also work well. For a fun twist, add some extra red pepper flakes on top. This gives a nice kick. You can also sprinkle some fresh herbs for color and flavor. For more details, check the Full Recipe. {{image_2}} You can switch up the cheese in this dip. Try using sharp cheddar for a bold taste. A blend of gouda and cream cheese can also add a nice twist. If you want a creamier dip, go for ricotta. Each cheese gives a different flavor. Mix and match to find your favorite! Spices can bring life to your dip. A pinch of cayenne pepper adds heat. You can also try smoked paprika for a smoky touch. For fresh flavor, add chopped herbs like basil or parsley. Experiment with garlic powder or onion powder to enhance the taste. Just remember to start small and taste as you go! If you need gluten-free options, use gluten-free chips or veggies for dipping. For a vegan version, swap cream cheese with a plant-based cream cheese. Use vegan mayo and sour cream too. Nutritional yeast can add a cheesy flavor without dairy. These swaps keep the spirit of the dip while meeting your needs. You can find the full recipe here to get started on this delicious dip! After you enjoy the creamy spinach and artichoke dip, let it cool. Place any leftovers in an airtight container. Store it in the fridge. It will stay fresh for about three to five days. If you want to keep it longer, freezing is a great option. To freeze the dip, first let it cool completely. Then, use a freezer-safe container. You can also use a heavy-duty freezer bag. Make sure to remove as much air as possible. This dip can last up to three months in the freezer. When you're ready to eat it, thaw it in the fridge overnight. To reheat the dip, preheat your oven to 350°F (175°C). Place the dip in an oven-safe dish. Cover it with foil to keep it moist. Heat for about 20 minutes or until warm. You can also microwave it in short bursts. Stir between each burst to heat evenly. Enjoy it warm for the best flavor! For the full recipe, check out the complete guide. You can make this dip healthier by swapping some ingredients. Use Greek yogurt instead of sour cream. It adds creaminess with fewer calories. You can also reduce the cheese amount. A mix of low-fat cream cheese and part-skim mozzarella works well. Adding more fresh spinach boosts nutrition without changing the taste much. Yes, you can use frozen spinach! Just make sure to thaw and drain it well. Frozen spinach has great flavor and is easy to use. It saves prep time and is often cheaper. Use the same amount as fresh spinach in the recipe. This dip pairs well with many tasty options. Consider serving it with: - Pita chips - Toasted baguette slices - Fresh vegetable sticks like carrots and celery - Tortilla chips - Crackers These options let everyone enjoy the creamy spinach and artichoke dip in their own way. For a fun twist, try serving it with some sliced apples for a sweet crunch! For the full recipe, check out the above section. This blog post covered everything you need for a great dip. We looked at ingredients, including swaps and healthier choices. You learned step-by-step instructions for preparation and baking. I shared tips for the best texture and storage methods. Variations let you explore different flavors and dietary needs. Ultimately, whether you’re serving it at a party or just enjoying it at home, following these steps will help you create a tasty dip everyone will love. Dive in and enjoy!

Creamy Spinach and Artichoke Dip Delightful Recipe

If you crave a rich, creamy dip that takes just minutes to make, you’re in the right place! My Creamy

To make a tasty Spaghetti Aglio e Olio, you need simple ingredients. Each one plays a key role in the flavor. Here’s what you’ll need: - 400g spaghetti - 6 cloves garlic, thinly sliced - 1/2 cup extra virgin olive oil - 1 teaspoon red pepper flakes - Zest and juice of 1 lemon - 1/4 cup fresh parsley, chopped - Salt to taste - Freshly grated Parmesan cheese (optional) These ingredients create a dish that’s rich in taste yet easy to prepare. The garlic and olive oil blend perfectly. The red pepper flakes add just the right amount of heat. Zesty lemon juice brightens the flavor. Fresh parsley gives it a vibrant look and taste. If you love cheese, sprinkle some Parmesan on top for a creamy touch. For the full recipe, follow the steps to enjoy this classic dish. You’ll impress your family and friends with a meal that feels gourmet but is quick to whip up! To start, bring a large pot of salted water to a rolling boil. The salt helps season the pasta as it cooks. Add 400g of spaghetti to the boiling water. Cook it until it is al dente, which usually takes around 8 to 10 minutes. This means it should still have a slight bite to it. Before you drain the pasta, reserve about a cup of the pasta water. This water is starchy and will help mix the sauce later. While the pasta cooks, grab a large skillet and heat 1/2 cup of extra virgin olive oil over medium heat. Once the oil is warm, add 6 cloves of thinly sliced garlic. Stir it often and cook for about 2 to 3 minutes. You want the garlic to turn golden and release a nice aroma. Be careful not to let it burn, as burnt garlic can taste bitter. Next, add 1 teaspoon of red pepper flakes to the skillet. This will give your dish a nice kick. Stir for about 30 seconds to let the flavors mix. Now, it's time to add the drained spaghetti to the skillet. Toss it well in the garlic oil mixture. If the pasta looks too dry, slowly add some of the reserved pasta water until it reaches the right consistency. Finally, remove the skillet from the heat. Mix in the zest and juice of 1 lemon for a fresh, zesty flavor. To finish, fold in 1/4 cup of chopped fresh parsley. This adds a touch of color and freshness. Season the dish with salt to taste, tossing everything together well. Enjoy your simple yet delicious Spaghetti Aglio e Olio with a zesty twist. If you want, you can sprinkle some freshly grated Parmesan cheese on top when serving. For the complete cooking process, refer to the Full Recipe. Choosing the right olive oil matters. Use extra virgin olive oil for the best flavor. It should be rich and fruity, enhancing the dish. Low-quality oil can ruin the taste. Be careful when cooking the garlic. You want it golden and fragrant, not burnt. Burnt garlic tastes bitter and unpleasant. Keep an eye on it as it cooks. Stir often to avoid burning. You can change the spice level with red pepper flakes. Start with one teaspoon and adjust to your taste. If you want less heat, use half a teaspoon. For more spice, add more flakes. Consider other spices if you like variety. Crushed black pepper or smoked paprika can add unique flavors. Try experimenting to find what you like best. Presentation is key for a great meal. Use fresh parsley to add color and flavor. Drizzle a bit more olive oil on top for shine. It makes the dish look inviting. Serve with lemon wedges on the side. They add a bright, zesty kick. Squeezing lemon over the pasta right before eating enhances the flavor. For the full recipe, check out the instructions above. Enjoy your Spaghetti Aglio e Olio! {{image_2}} You can add protein to make your spaghetti aglio e olio heartier. Shrimp works great. Just sauté the shrimp in olive oil first, then add the garlic. This adds a nice seafood flavor. Chicken is another option. Cook it in the same pan. Slice it thin and mix it in for a tasty bite. If you want a vegetarian option, try chickpeas. They add protein and a nice texture. Just drain and rinse a can of chickpeas. Toss them in with the spaghetti. You will get a filling meal that is still light. Herbs can change the flavor of your dish. Basil brings a sweet taste. Just chop it fresh and sprinkle it on top. Oregano adds a nice earthy note. Use dried oregano if you have it on hand. You can also mix different greens for freshness. Try arugula or spinach. Toss them in at the end for a bright touch. Want a richer sauce? You can add cream. Just pour in a small amount after you mix in the lemon juice. Stir well for a silky finish. If you prefer a vegan option, use coconut cream or cashew cream. These work well and keep the dish creamy without dairy. For complete details, check out the Full Recipe. To keep your spaghetti aglio e olio fresh, store leftovers in the fridge. Place the pasta in an airtight container. Make sure it cools first to prevent steam buildup. This helps avoid soggy pasta. Use it within three days for the best taste. When it’s time to eat, you can reheat your pasta. For the best texture, use the stovetop. Heat a bit of olive oil in a pan. Add your spaghetti and stir gently until warm. If you prefer the microwave, use a microwave-safe dish. Heat it in short bursts, stirring in between. This prevents the pasta from drying out. Freezing spaghetti aglio e olio is easy but has some steps. First, let it cool completely. Portion the pasta into freezer-safe bags. Remove as much air as possible before sealing. You can freeze it for up to a month. When you’re ready to eat, thaw it overnight in the fridge. Reheat it gently on the stovetop for the best results. Enjoy your dish as if it was just made! For the full recipe, refer to the earlier sections. Spaghetti Aglio e Olio is a classic Italian dish. It comes from Naples, Italy. The name means “spaghetti with garlic and oil.” The dish has few ingredients, making it simple yet tasty. Traditionally, it uses spaghetti, garlic, olive oil, and red pepper flakes. It highlights the flavor of each ingredient. This dish is perfect for a quick meal or late-night snack. If you want a garlic-free version, use sautéed shallots for flavor. Shallots have a milder taste but give a nice aroma. You can also try using leeks or onions. These options add depth without overpowering the dish. The essence of Aglio e Olio lies in the oil and spice, so keep that in mind. The best pasta for this dish is spaghetti. However, you can also use linguine or fettuccine. These noodles hold onto the garlic oil well. Whole wheat pasta is a healthier option, too. It adds a nutty flavor and more fiber to your meal. Yes, adding vegetables can enhance the dish! You can toss in cherry tomatoes for sweetness. Spinach or kale adds color and nutrition. Broccoli or zucchini can also work well. Just sauté them lightly in the olive oil before adding the pasta. Spaghetti Aglio e Olio can be a healthy choice. It contains good fats from olive oil and has no heavy sauces. Garlic has health benefits, like boosting the immune system. The dish is low in calories, especially when you control portion sizes. However, watch the amount of oil and cheese you use to keep it light. For the full recipe, check the section above. Spaghetti Aglio e Olio is simple yet delicious. We covered ingredients, cooking steps, and variations. Remember to choose good olive oil and watch the garlic. You can add shrimp, veggies, or even cream to change it up. Proper storage keeps leftovers tasty, and reheating can be quick and easy. Enjoy making this meal, and share it with friends or family. You'll impress them with your skills and flavors.

Spaghetti Aglio e Olio Tasty and Simple Recipe

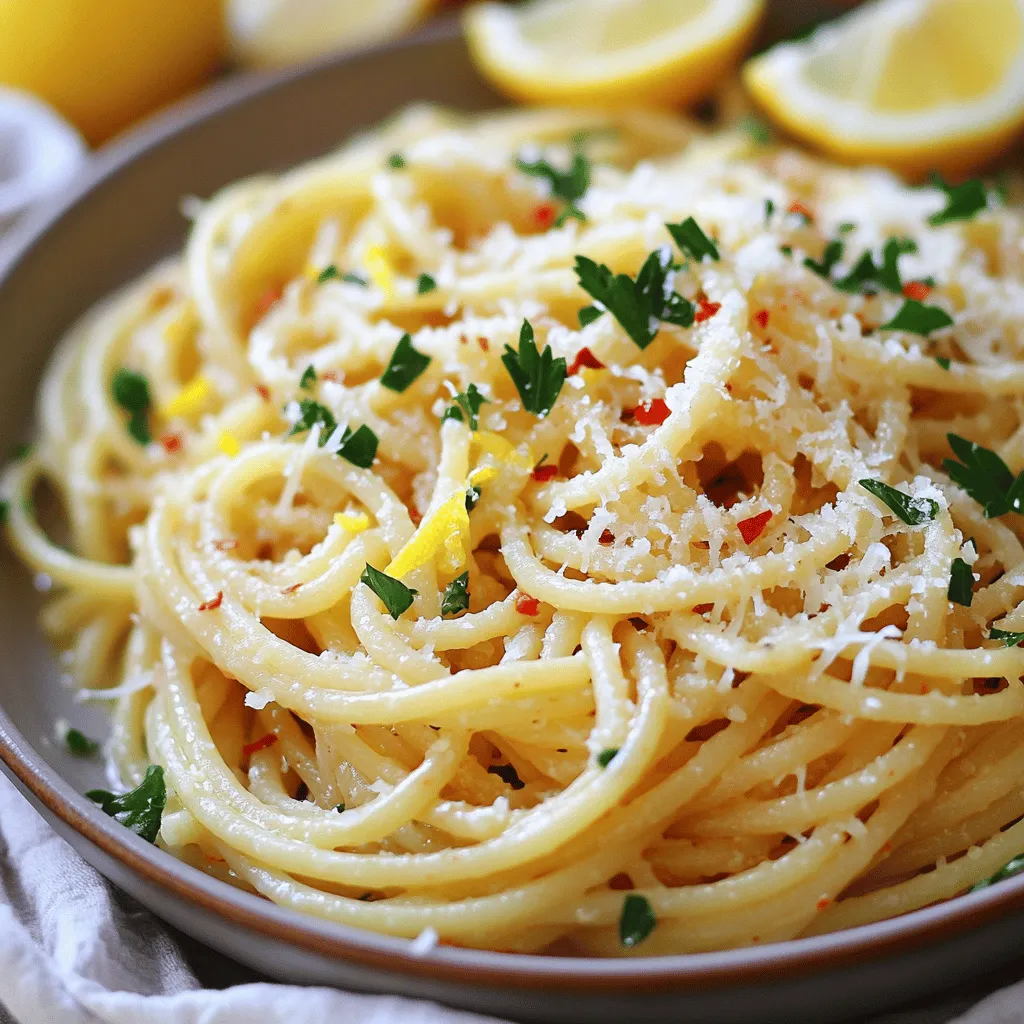
Are you craving a quick and tasty dinner? Look no further than Spaghetti Aglio e Olio! This classic Italian dish

For a tasty Garlic Herb Roasted Chicken, gather these ingredients: - 1 whole chicken (about 4-5 pounds) - 1/4 cup olive oil - 6 cloves garlic, minced - 2 tablespoons fresh rosemary, chopped - 2 tablespoons fresh thyme, chopped - 1 tablespoon fresh parsley, chopped - 1 lemon, zested and halved - Salt and pepper to taste - 1 medium onion, quartered - 4 medium carrots, peeled and cut into large chunks - 3 medium potatoes, cut into quarters These ingredients create a flavorful dish that impresses everyone. Using fresh herbs gives the best flavor. Fresh herbs have bright tastes that wake up the chicken. They also add a nice look to your dish. Dried herbs work too, but use less. About one-third of the amount is good. Dried herbs do not have the same fresh taste. If you can, always choose fresh when making this recipe. For this recipe, a whole chicken weighing 4-5 pounds is ideal. This size cooks well and serves about six people. You can choose organic or free-range chicken for better taste. These chickens often have more flavor and better texture. A good chicken makes all the difference in your meal. First, you need to prep the chicken. Start by rinsing the whole chicken under cold water. Pat it dry with paper towels. This step helps the skin get crispy. Next, season the inside of the chicken cavity with salt and pepper. This adds flavor from the inside out. Now, let’s make the herb marinade. In a small bowl, mix together olive oil, minced garlic, chopped rosemary, thyme, parsley, and lemon zest. Add salt and pepper to taste. This mix will give your chicken a great herbal flavor. Rub half of this marinade under the chicken's skin and all over the outside. Squeeze the lemon halves into the cavity. Then, place them inside the chicken along with quartered onion. This adds moisture and flavor. It’s time to roast! Preheat your oven to 425°F (220°C). In a large roasting pan, arrange the carrot and potato chunks. Drizzle them with the remaining herb marinade and toss to coat. Place the marinated chicken on top of the veggies. Roast for about 1 hour and 15 minutes. Make sure the chicken reaches an internal temperature of 165°F (75°C). The juices should run clear when you pierce it. Once cooked, remove the chicken from the oven. Let it rest for 10-15 minutes before carving. This resting time helps the juices settle back into the meat. For the full recipe, check out the detailed instructions above. To get that perfect crispy skin, you must dry the chicken well. Use paper towels to pat it dry. This step helps the skin crisp up in the oven. Next, make sure to rub the herb mix under the skin and all over the outside. The oil in the marinade helps the skin brown nicely. High heat is your friend here, so roast at 425°F (220°C). This temperature cooks the chicken fast and gives it a great texture. When picking herbs, fresh is best! Fresh herbs pack more flavor than dried ones. Look for bright leaves without brown spots. Rosemary, thyme, and parsley work well in this recipe. You can even mix in some oregano for extra taste. If you can’t find fresh herbs, dried ones are fine, but use less. About one-third the amount will do. Resting the chicken is key to juicy meat. After roasting, let it sit for 10-15 minutes. This step lets the juices redistribute. If you cut it too soon, the juices will run out, leaving it dry. Cover it loosely with foil to keep it warm while it rests. This little trick makes a big difference in taste and texture. For the full recipe, check out the details above. {{image_2}} You can change up your dish by adding different vegetables. Try using bell peppers, zucchini, or Brussels sprouts. These vegetables roast well and add great flavor. Just cut them into similar sizes for even cooking. Toss them with olive oil and any leftover herb marinade. This adds color and nutrition to your meal. While rosemary, thyme, and parsley are classic choices, feel free to get creative! You can use basil, oregano, or even dill. Each herb brings a unique taste to the chicken. For a spicy kick, add crushed red pepper flakes or smoked paprika. Mixing these herbs can make your dish stand out. You don’t have to stick to just roasting. A slow cooker is great for tender chicken. Rub the chicken with your herb mix, place it in the cooker, and let it work its magic. Cooking on the grill gives a smoky flavor. Just be sure to monitor the temperature for safe cooking. Each method gives a different but delicious outcome. After you enjoy your Garlic Herb Roasted Chicken, store leftovers safely. Let the chicken cool to room temperature first. Then, wrap it tightly in plastic wrap or aluminum foil. You can also use an airtight container. This keeps the chicken fresh and prevents it from drying out. Store it in the fridge for up to four days. When you reheat your chicken, aim to keep it moist. Preheat your oven to 350°F (175°C). Place the chicken in a baking dish and add a splash of chicken broth or water. Cover the dish with foil to trap steam. Heat for about 20-30 minutes, checking often. This method helps keep your chicken juicy and flavorful. If you have more leftovers than you can eat, freezing is a great option. Cut the chicken into pieces for easier storage. Wrap each piece tightly in plastic wrap, then place them in a freezer bag. Remember to remove as much air as possible. Label the bag with the date. You can freeze the chicken for up to three months. When ready to eat, thaw it overnight in the fridge before reheating. Be sure to check out the Full Recipe for more tips! The best way to check if the chicken is done is to use a meat thermometer. Insert it into the thickest part of the thigh. The chicken is safe to eat when it reaches 165°F (75°C). You can also cut into the chicken. If the juices run clear, it is cooked. Always let the chicken rest for about 10-15 minutes. This helps keep it juicy. Yes, you can use other meats. Bone-in chicken thighs or breasts work well. You can try a whole turkey or a duck for a special meal. If using a different meat, adjust the cooking time. Always ensure it reaches the safe cooking temperature. To make this dish in an air fryer, follow the same steps for seasoning the chicken. Preheat your air fryer to 360°F (182°C). Place the chicken in the basket, breast side down. Cook for about 45 minutes, flipping halfway. Ensure it reaches the safe temperature of 165°F (75°C). For detailed steps, check the Full Recipe. In this post, we explored how to make a delicious garlic herb roasted chicken. We covered key ingredients, step-by-step instructions, and useful tips for the perfect dish. Remember to use fresh herbs for better taste and select the right chicken size. Don’t forget to rest your chicken to keep it juicy and flavorful. Try different herbs and cooking methods for new flavors. For leftovers, store them properly to enjoy later without losing moisture. Check out the full recipe to get started on your own amazing dinner. Enjoy your cooking journey!

Garlic Herb Roasted Chicken Simple and Tasty Recipe

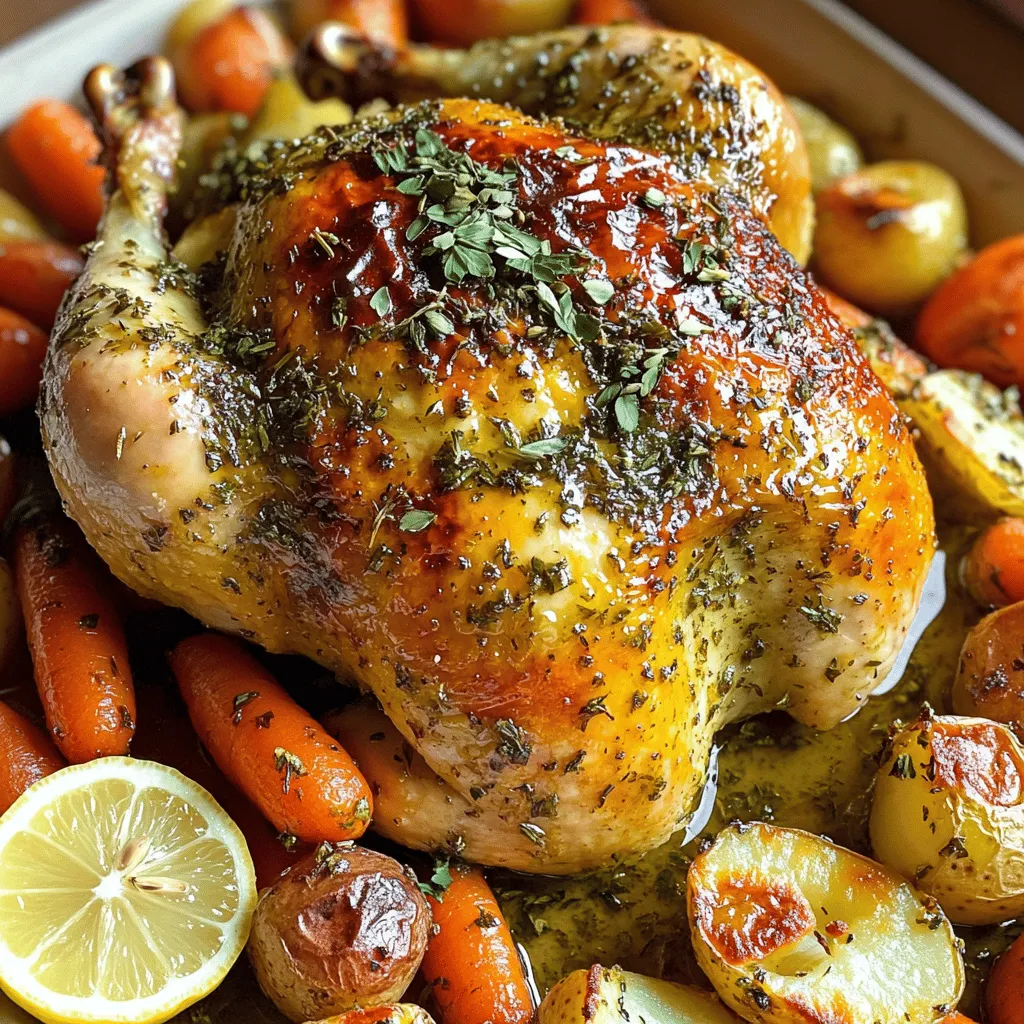
Welcome to my simple and tasty recipe for Garlic Herb Roasted Chicken! If you want a meal that’s both easy

To make a delicious sweet potato casserole with marshmallows, gather these items: - 4 medium sweet potatoes, peeled and cubed - 1/2 cup brown sugar - 1/4 cup maple syrup - 1/4 cup unsalted butter, melted - 1/2 cup milk (or almond milk for a dairy-free option) - 1 teaspoon vanilla extract - 1/2 teaspoon ground cinnamon - 1/4 teaspoon nutmeg - 1 teaspoon salt - 1 1/2 cups mini marshmallows - 1/2 cup pecans, chopped (optional) You can make your casserole even more special with these additions: - Chopped apples for a fruity twist - Dried cranberries for a touch of tartness - A sprinkle of ginger for extra warmth - Coconut flakes for a tropical vibe This sweet potato casserole is not just tasty, but it also packs some nutrition. Here’s what you get per serving (based on 10 servings): - Calories: 230 - Total Fat: 8g - Saturated Fat: 4g - Cholesterol: 20mg - Sodium: 150mg - Total Carbohydrates: 38g - Dietary Fiber: 3g - Sugars: 14g - Protein: 2g For the full recipe, check out the [Full Recipe]. Start by peeling and cubing four medium sweet potatoes. Make sure to cut them into small pieces. This helps them cook faster. Next, bring water to a boil in a large pot. Carefully add the sweet potatoes to the boiling water. Cook them for about 15 minutes. They should be tender and easy to mash. After cooking, drain the sweet potatoes. Place them in a large bowl and mash until smooth. Now, we need to mix the sweet potatoes with other tasty ingredients. Add 1/2 cup of brown sugar and 1/4 cup of maple syrup to the bowl. Pour in 1/4 cup of melted unsalted butter and 1/2 cup of milk. You can use almond milk if you want a dairy-free option. Add 1 teaspoon of vanilla extract, 1/2 teaspoon of ground cinnamon, and 1/4 teaspoon of nutmeg for flavor. Don't forget to sprinkle in 1 teaspoon of salt. Mix everything together until it's smooth and well combined. Next, it's time to bake! Preheat your oven to 350°F (175°C). Grease a 9x13-inch baking dish to prevent sticking. Pour the sweet potato mixture into the dish and spread it evenly. Now, grab 1 1/2 cups of mini marshmallows. Scatter them on top of the sweet potato layer. If you like, add 1/2 cup of chopped pecans for a nice crunch. Place the dish in the oven and bake for 25-30 minutes. Watch for the marshmallows to turn golden brown and slightly toasted. Once done, take it out and let it cool for about 5 minutes. For the full recipe, check out the Sweet Potato Delight Casserole. Enjoy your tasty treat! When picking sweet potatoes, look for firm ones. They should have smooth skin without spots. A good sweet potato feels heavy for its size. Choose medium-sized ones for this recipe. These will cook evenly and taste sweet. To get a creamy texture, mash the sweet potatoes well. Use a potato masher or fork for this. Make sure there are no lumps. Adding milk helps make it smooth. If you like it rich, add more butter. The right texture makes a big difference. Serve this casserole warm for the best taste. You can drizzle extra maple syrup on top. A sprinkle of cinnamon adds flavor and looks nice. For a crunch, add chopped pecans. Each bite should be sweet and delightful. For the full recipe, check the link. {{image_2}} You can make this casserole dairy-free easily. Just swap regular milk for almond milk. Almond milk gives a nice flavor without the dairy. You can also use coconut milk for a tropical twist. It adds creaminess while keeping it light. Toppings can change the whole dish. Try adding crushed graham crackers for a sweet crunch. You can also use toasted coconut flakes for a fun texture. If you like nuts, sprinkle some chopped walnuts or pecans on top. Each topping brings a new taste. Want to add some flair? Mix in a bit of orange zest for a citrus twist. You can also add a pinch of cayenne pepper for heat. Just a little can give a nice kick. Each of these flavors makes your casserole stand out. For the full recipe, check out the Sweet Potato Delight Casserole. Enjoy creating your own version! After you enjoy your sweet potato casserole, let it cool to room temperature. Then, cover it tightly with plastic wrap or aluminum foil. You can also transfer it to an airtight container. Store it in the fridge for up to four days. Keeping it sealed helps maintain its delicious taste and texture. If you want to save some for later, freezing works well. First, let the casserole cool completely. Then, cut it into smaller portions. Wrap each portion in plastic wrap, then place it in a freezer-safe bag. Label the bag with the date. You can freeze it for up to three months. This way, you can enjoy this treat whenever you want! To reheat your casserole, take it out of the fridge or freezer. If frozen, let it thaw in the fridge overnight. Preheat your oven to 350°F (175°C). Place the casserole in an oven-safe dish. If it seems dry, add a splash of milk. Cover it with foil to keep it moist. Bake for 20-30 minutes or until heated through. You can also use a microwave for a quick option, heating in 30-second intervals until warm. Enjoy the delightful flavors again! Yes, you can make this casserole ahead of time. To do this, follow the recipe steps up to baking. Then, cover the dish and store it in the fridge for up to 24 hours. When ready to bake, take it out and let it sit at room temperature for about 30 minutes. Then, bake it as directed. This keeps the flavors fresh and makes meal prep easy. If you want to skip marshmallows, try using pecans or walnuts. They add a nice crunch. You can also use crushed graham crackers for a sweet, crunchy topping. Another option is to mix in a bit of coconut for a tropical twist. These swaps still give you a tasty and fun dish. Sweet Potato Casserole can be healthy if you choose the right ingredients. Sweet potatoes are full of vitamins and fiber. However, the added sugar and butter can add calories. To make it healthier, use less sugar or swap butter for coconut oil. You can also add more nuts or oats for extra nutrition. Enjoy this dish in moderation for a balanced meal. This blog post covered how to make a delicious sweet potato casserole. We discussed key ingredients, optional variations, and detailed step-by-step instructions. You learned tips for choosing sweet potatoes and perfecting the dish's texture. We also explored storage methods and answered common questions. Remember, you can adapt this recipe to suit your taste. Feel free to experiment with toppings and flavors. Enjoy making this comforting dish!

Sweet Potato Casserole with Marshmallows Delight

If you’re looking for a warm and sweet dish to brighten your table, you’ve found it! Sweet Potato Casserole with

- 1 ½ cups chocolate cookie crumbs - ½ cup unsalted butter, melted - 16 oz cream cheese, softened - 1 cup powdered sugar - 1 cup heavy cream - 1 cup semi-sweet chocolate chips, melted - 1 teaspoon vanilla extract - Pinch of salt - Cocoa powder or chocolate shavings for garnish You can swap the chocolate cookie crumbs for graham cracker crumbs if you prefer. This change still offers a nice flavor. For those needing dairy-free options, use almond or cashew cream cheese. Coconut cream works well as a heavy cream substitute. If you like dark chocolate, feel free to use it instead of semi-sweet chocolate. It adds a rich taste. This recipe has a lot of flexibility. You can mix and match as you wish! Feel free to explore the [Full Recipe] for more details. To start, you need to mix the chocolate cookie crumbs with melted butter. In a bowl, combine 1 ½ cups of chocolate cookie crumbs with ½ cup of melted butter. Stir until the crumbs are fully coated. This step is key for a tasty base. Next, press the mixture firmly into the bottom of a 9-inch springform pan. Make sure it is even and compact. Once done, place it in the fridge while you make the filling. This helps the crust set well. In a large bowl, beat 16 oz of softened cream cheese until it is smooth. This should take about 2-3 minutes. Gradually add in 1 cup of powdered sugar. Keep mixing until everything is well blended. In another bowl, whip 1 cup of heavy cream. Whip until stiff peaks form. This gives the cheesecake its light texture. Gently fold the whipped cream into the cream cheese mixture in two batches. Mix until fluffy and well combined. Now, pour in 1 cup of melted semi-sweet chocolate, 1 teaspoon of vanilla extract, and a pinch of salt. Fold these into the cream cheese mixture. This will create a rich and creamy chocolate filling. Pour the filling over the chilled crust. Use a spatula to spread it evenly. Make sure to smooth the top for a nice finish. Cover the cheesecake with plastic wrap and place it in the fridge. Let it chill for at least 4 hours, but overnight is best. This waiting time allows the cheesecake to set properly. After it's set, carefully remove it from the springform pan. For a final touch, dust the top with cocoa powder or sprinkle some chocolate shavings. This adds a beautiful finish to your no-bake chocolate cheesecake. For the full recipe, check out the complete guide! To make your cheesecake smooth, start with room temperature cream cheese. Cold cream cheese can form lumps, making your filling uneven. Beat the cream cheese for about 2-3 minutes until it's creamy. This helps it blend well with the sugar. After that, whip the heavy cream until it forms stiff peaks. Gently fold the whipped cream into the cream cheese mixture. This keeps your filling light and fluffy. For a simple touch, use cocoa powder to dust the top. It adds a nice contrast to the rich chocolate. If you want to go a step further, sprinkle chocolate shavings for a decorative flair. You can also add fresh fruits like raspberries or strawberries. They add color and a fresh taste that brightens the dessert. If your filling is too runny, check if you whipped the cream enough. It should hold stiff peaks. You can also add a bit more cream cheese to thicken it. Cracks can happen if the cheesecake cools too quickly. To avoid this, let it chill slowly in the fridge. Cover it well to keep moisture in. This way, your cheesecake stays smooth and beautiful. For the complete recipe, check out the Full Recipe section. {{image_2}} You can easily add new flavors to your cheesecake. For a mocha twist, mix in espresso powder. It gives a rich taste that pairs well with chocolate. You can also swap the chocolate types. Use dark chocolate for a bolder flavor or white chocolate for a sweet touch. Each choice changes the taste, making it fun to experiment. The crust can also change. Instead of chocolate cookie crumbs, try nuts like pecans or almonds for a crunchy base. These nut-based crusts add a unique flavor. If you need a gluten-free option, use gluten-free cookie crumbs or almond flour. Both options keep the cheesecake tasty and enjoyable. When serving, think about sauces. A drizzle of raspberry or caramel sauce can elevate each slice. It adds color and a sweet contrast. You can serve the cheesecake in individual cups for fun, or go classic with a cake slice. Both styles look great and taste amazing. To keep your no-bake chocolate cheesecake fresh, use these simple methods: - Refrigerating leftovers: Store any leftovers in an airtight container. Place it in the fridge. This helps keep it creamy and tasty. - Freezing options: You can freeze the cheesecake if you want to save some for later. Wrap it tightly in plastic wrap and then place it in a freezer bag. It can last up to three months in the freezer. How long does the cheesecake last? In the fridge, it stays fresh for about five days. If you see any signs of spoilage, it is best to toss it. Look for changes in color or texture. If it smells off, don’t eat it. If you freeze your cheesecake, you need to defrost it properly. Take it out and place it in the fridge overnight to thaw. This keeps the texture smooth and nice. When serving, try adding fresh berries or a drizzle of chocolate sauce. It makes the cheesecake even more delightful! Yes, you can freeze No-Bake Chocolate Cheesecake. To freeze it, wrap it well in plastic wrap and then in aluminum foil. This keeps it fresh. You can freeze it for up to three months. When you're ready to eat, move it to the fridge for about six hours to thaw. This way, it stays creamy and tasty. To make your cheesecake firmer, you can try a few tips. First, use more cream cheese in your recipe. You can add an extra 4 oz to help with firmness. Second, make sure your cream cheese is at room temperature before mixing. This helps it blend better. Lastly, let it chill for longer. Aim for at least six hours or overnight for the best results. A springform pan is not a must, but it helps. If you don’t have one, you can use a regular pie dish. Just be careful when serving. You can also line the dish with parchment paper. This makes it easier to remove the cheesecake later. The key is to ensure the crust holds together well. This blog post outlined how to make a delicious no-bake chocolate cheesecake. We covered the key ingredients, step-by-step instructions, and tips for success and variations. You learned practical ways to store it and answers to common questions. In conclusion, making this cheesecake is easy and rewarding. Don't hesitate to try it with your favorite twists! Enjoying your creation will be the best reward.

No-Bake Chocolate Cheesecake Simple and Delicious Treat

If you love chocolate, you’ll adore this No-Bake Chocolate Cheesecake! It’s a quick and simple dessert that melts in your

To make creamy tomato basil pasta, gather these items: - 300g pasta (any shape you like) - 2 tablespoons olive oil - 4 cloves garlic, minced - 1 can (400g) crushed tomatoes - 1 teaspoon sugar - 1 teaspoon dried oregano - 1/2 teaspoon red pepper flakes (optional for heat) - 200ml heavy cream - 1/2 cup freshly grated Parmesan cheese - Salt and pepper to taste - 1/2 cup fresh basil leaves, roughly chopped - Extra basil leaves for garnish These ingredients blend to create a rich and creamy flavor. Each item plays a role in making the dish delicious. The pasta offers a nice base, while the tomatoes and cream make it creamy. Garlic and basil add depth and freshness. You can customize this recipe easily. For gluten-free options, use gluten-free pasta. It cooks well and tastes great. If you need a dairy-free version, swap heavy cream with coconut cream or cashew cream. Both add a creamy texture without dairy. You can try different cheeses too, like nutritional yeast for a vegan twist. These substitutions keep the spirit of the dish while making it fit your needs. Enjoy your cooking! To cook your pasta well, start with a large pot. Fill it with water and add a good amount of salt. Bring the water to a rolling boil. Once boiling, add your pasta. Cook it according to the package instructions until it is al dente. This means it should be firm but not hard. Don't forget this crucial step: reserve one cup of pasta water before draining the rest. This water is starchy and will help the sauce stick to the pasta later. In a large skillet, heat two tablespoons of olive oil over medium heat. Add four minced garlic cloves and sauté for about one minute. You want the garlic to smell nice but not burn. Next, pour in one can of crushed tomatoes. Stir this mix well. Now, add one teaspoon of sugar, one teaspoon of dried oregano, and half a teaspoon of red pepper flakes if you like some heat. Let the sauce simmer for about ten minutes. This helps all the flavors come together. Lower the heat and stir in 200 milliliters of heavy cream. Cook for an extra five minutes to thicken the sauce. If it gets too thick, use your reserved pasta water. Gradually add it until you get the right consistency. Finally, mix in half a cup of freshly grated Parmesan cheese until it melts completely. Once your sauce is ready, it’s time to bring everything together. Add the drained pasta to the skillet with the sauce. Toss the pasta well to coat every noodle. This step is key for flavor! Now, season with salt and pepper to your taste. To finish, stir in half a cup of roughly chopped fresh basil. This adds a bright and fresh flavor that makes the dish pop. Enjoy your creamy tomato basil pasta, and don't forget to check the Full Recipe for more details! To make your sauce creamy, adjust the amount of heavy cream. If you want it richer, add more cream. If you prefer a lighter sauce, use less. You can mix in a little pasta water to change the texture. This helps coat the pasta better. For flavor, add spices like black pepper or a pinch of nutmeg. Fresh herbs like thyme or parsley bring more taste. You can also try a splash of lemon juice for brightness. Each addition enhances the overall flavor of the dish. Cook your pasta until it is al dente. This usually takes about 8 to 10 minutes. Check the package for exact timing. Remember to reserve at least one cup of pasta water before you drain it. This water helps adjust your sauce later. When cooking garlic, keep a close eye on it. Sauté it for just one minute on medium heat. If it burns, it can ruin the sauce's taste. If you smell a strong aroma, it's time to add the tomatoes. Pair your creamy tomato basil pasta with garlic bread. A fresh salad also complements the dish well. For drinks, a light white wine or sparkling water works nicely. To make your dish look appealing, serve it in shallow bowls. Garnish with extra basil leaves and a sprinkle of Parmesan cheese. This adds color and makes the meal feel special. You can find the Full Recipe for more details. {{image_2}} You can add protein to your creamy tomato basil pasta to make it heartier. Chicken, shrimp, or tofu work great. - Chicken: Cook bite-sized pieces in the skillet before adding the garlic. Ensure the chicken is cooked through, about 7-10 minutes. - Shrimp: Add shrimp after the garlic. They cook quickly, usually in 3-5 minutes. - Tofu: Use firm tofu. Cube it and brown it in the skillet before adding garlic. This takes about 5-7 minutes. Adjust cooking times as needed. Make sure all proteins are cooked well to keep your meal safe and tasty. Adding veggies boosts nutrition and flavor. Try these ideas: - Spinach: Toss in fresh spinach at the end. It wilts quickly. - Zucchini: Sauté diced zucchini with the garlic. It adds a nice crunch. - Bell peppers: Chop and add them early in the process. They add sweetness. Incorporate seasonal produce for the best flavor. Fresh tomatoes or asparagus are great in spring, while squash shines in fall. You can easily customize the flavors in your creamy tomato basil pasta. Here are some fun ideas: - Cheese: Swap Parmesan for other cheeses like mozzarella or feta. Each cheese brings a unique taste. - Lemon zest: Add zest at the end for a bright flavor. It lifts the dish. - Balsamic vinegar: A splash can add a nice tang. Use it sparingly, as it can quickly overpower. Explore these variations to create your perfect dish. For the full recipe, check out the complete instructions above. To keep your creamy tomato basil pasta fresh, store it in an airtight container. Place it in the fridge if you plan to eat it within three days. For longer storage, you can freeze it. Use freezer-safe containers or bags, and make sure to remove as much air as possible. This helps prevent freezer burn. When you’re ready to enjoy it, thaw it overnight in the fridge. When reheating, gently warm it in a skillet over low heat. Add a splash of water or cream to help restore its creamy texture. Stir often to avoid sticking. If using a microwave, heat it in short intervals, stirring in between. This method keeps the dish creamy and tasty. Creamy tomato basil pasta stays safe to eat for about three days in the fridge. In the freezer, it can last up to three months. Always check for signs of spoilage. If you see any mold or the pasta smells off, it’s time to toss it. When reheating, if the texture seems grainy or the sauce separates, it’s best to discard it. Always prioritize food safety to enjoy your meal to the fullest. Yes, you can use fresh tomatoes. Fresh tomatoes offer a bright flavor. They have a different texture than canned tomatoes. If you use fresh, look for ripe varieties like Roma or vine tomatoes. You will need about 6-8 fresh tomatoes for this recipe. First, blanch them to remove the skins. Then, chop and cook them down until they break apart. This will help create a nice sauce. To make this dish vegan, swap heavy cream for plant-based cream. Coconut cream or cashew cream works well. For cheese, use nutritional yeast or a vegan cheese substitute. Both options add a nice flavor. Be sure to check the labels to avoid dairy. This way, you keep the creamy texture without animal products. Absolutely! This recipe is perfect for meal prep. Cook the pasta and sauce separately. Store them in airtight containers in the fridge. The pasta will stay fresh for about 3-5 days. The sauce can last up to a week. When ready to eat, reheat the sauce and mix it with the pasta. Add a little pasta water to keep it creamy. To add heat, try red pepper flakes or cayenne pepper. Start with a small amount and adjust to your taste. You can also add sliced fresh chili peppers for more flavor. Another option is to use spicy sausage or chicken, if you prefer. This gives a nice kick and extra depth to the dish. Any pasta shape works, but some are better than others. I recommend using penne, fusilli, or fettuccine. These shapes hold the sauce well. They create a nice balance of creamy sauce and pasta. You can also use gluten-free pasta if needed. Just follow the package instructions for cooking times. For the full recipe, refer back to the main section. This guide provided key ingredients, cooking steps, and tips for a creamy pasta dish. I shared ways to adjust flavors, use alternative ingredients, and enhance presentation. Remember, cooking is about creativity. Don't hesitate to experiment with proteins or vegetables. Proper storage helps keep your leftovers fresh. Push your cooking skills further by trying new flavors. Enjoy making this dish, and don't forget to share your delicious results! Happy cooking!

Creamy Tomato Basil Pasta Simple Delightful Recipe

Craving a pasta dish that’s both creamy and bursting with flavor? You’re in the right place! In this blog post,

Older posts
Newer posts
← Previous Page1 … Page80 Page81 Page82 … Page104 Next →

dsad

© 2025 pureeatsnow • Built with GeneratePress

Our Policies

  • Copyright Policy
  • Cookie Policy
  • GDPR Policy
  • Privacy Policy
  • Disclaimer
  • Terms Of Use

More Information

  • Home
  • About
  • Contact
  • Appetizers
  • Dessert
  • Dinner
  • Drinks
©2025, pureeatsnow About Back To Top