Skip to content
DisclaimerTerms Of UseGDPR PolicyCookie Policy

pureeatsnow

  • Home
  • Drinks
  • Appetizers
  • Dinner
  • Dessert
  • About
  • Contact
  • Privacy Policy
DisclaimerTerms Of UseGDPR PolicyCookie Policy

Rachel

- 1 lb large shrimp, peeled and deveined - 2 tablespoons olive oil - 1 tablespoon chipotle powder - 1 teaspoon smoked paprika - 1 lime, juiced and zested - 1 teaspoon garlic powder - 1 teaspoon salt - 1 cup cooked quinoa - 1 cup black beans, drained and rinsed - 1 cup corn, frozen or fresh - 1 avocado, sliced - ½ cup cherry tomatoes, halved - Fresh cilantro for garnish When making a Chipotle Lime Shrimp Bowl, fresh ingredients shine. The shrimp brings a sweet and tender taste. The chipotle powder adds a smokey kick. Lime juice gives a bright, zesty burst. Quinoa serves as a hearty base, while black beans and corn add texture. Each bite is colorful and full of flavor. - Additional spices for extra flavor - Fresh lime wedges for serving - Greek yogurt or sour cream as a topping Optional ingredients can elevate your bowl. You can add fresh lime wedges for a tangy touch. A dollop of Greek yogurt or sour cream adds creaminess. Have fun with extra spices to match your taste. These additions let you make the dish your own. For the complete cooking steps, check the Full Recipe. To start, mix the marinade ingredients in a bowl. You need olive oil, chipotle powder, smoked paprika, lime juice, lime zest, garlic powder, and salt. Stir them well until they blend nicely. Next, add the shrimp to the bowl. Toss the shrimp in the marinade until they are well coated. Let the shrimp marinate for 15 minutes. This step adds great flavor. Now, heat a skillet over medium-high heat. Once hot, add the marinated shrimp to the skillet. Cook the shrimp for about 2-3 minutes per side. You want the shrimp to turn pink and opaque. This shows they are cooked well. Be careful not to overcook them, as this can make them tough. While the shrimp cooks, prepare the quinoa according to the package instructions. Once the quinoa is ready, set it aside. In serving bowls, layer the cooked quinoa, black beans, and corn as the base. Then, top each bowl with the cooked shrimp. Add sliced avocado and halved cherry tomatoes on top. Finally, garnish with fresh cilantro. This adds a burst of flavor and color to your dish. For all the details, you can check the Full Recipe. To make your shrimp juicy, avoid overcooking it. Cook shrimp for 2-3 minutes per side. When done, shrimp should be pink and opaque. This shows it is cooked perfectly. If it turns gray, it is overcooked. You can make this bowl your own. Add other veggies like bell peppers or spinach. These add color and nutrients. You can also swap quinoa for brown rice or cauliflower rice. This change can fit your taste or dietary needs. Want to boost the taste? Use fresh herbs like cilantro or parsley. You can also add spices like cumin or chili powder. These will give your bowl extra kick. Serve your bowl with lime wedges for added zest. A squeeze of lime can brighten up the dish and make it even more refreshing. {{image_2}} You can easily make this dish vegetarian. Just swap the shrimp for roasted vegetables or tofu. Roasted bell peppers, zucchini, and onions add great flavor. Tofu gives a nice texture and absorbs the marinade well. Bake the veggies or pan-fry the tofu until golden. This change keeps the bowl tasty and filling. If you love heat, try this spicy version. You can increase the amount of chipotle powder in the marinade. For a kick, add fresh jalapeños to the bowl. Slice them thin and mix them in with the shrimp. This twist makes your meal exciting and packed with flavor. For a low-carb option, use lettuce instead of quinoa. Butter lettuce or romaine works great. Just toss the shrimp, beans, and corn on top of the lettuce. This change cuts carbs while keeping the meal fresh and crunchy. You still get that great chipotle lime flavor without the extra carbs. For more details, you can find the Full Recipe linked above. To keep your Chipotle Lime Shrimp Bowl fresh, store leftovers in an airtight container. This helps lock in flavor and moisture. I recommend eating them within 2-3 days. After that, the shrimp may lose their texture and taste. If you want to freeze your meal, separate the components. Freeze the shrimp, quinoa, black beans, and corn in different bags. This way, they stay fresh longer. When you’re ready to enjoy, thaw them overnight in the fridge. To reheat, use a skillet over medium heat. This method helps keep the shrimp juicy and flavorful. Avoid using a microwave, as it may make the shrimp rubbery. Enjoy your meal anytime with these simple storage tips! You can serve this bowl with a fresh side salad. A simple green salad with lime dressing works well. You can also add crispy tortilla chips for crunch. For extra color, consider grilled veggies like zucchini or bell peppers. A side of guacamole adds a creamy touch that pairs nicely with the shrimp. Yes, you can prep some parts ahead. Cook the quinoa and let it cool. Store it in the fridge for up to four days. You can also marinate the shrimp a day before. Just keep it covered in the fridge. Assemble the bowl just before serving for the best taste and texture. You can use fresh or frozen shrimp. Fresh shrimp has a nice taste and texture. If you choose frozen shrimp, thaw it first. Look for shrimp that are large and raw, as they cook better. Always check for a clean smell and firm texture. This bowl is quite healthy! It is full of protein from shrimp and fiber from beans. The quinoa adds whole grains, which are great for your body. Each serving has about 400 calories, depending on toppings. You can easily adjust the recipe for your dietary needs. You can find the Full Recipe for detailed cooking instructions and tips. It includes all the steps to make this delicious meal at home. You can create a delicious Chipotle Lime Shrimp Bowl with simple steps. Start with fresh ingredients like shrimp, quinoa, and avocado. Marinate the shrimp, cook it perfectly, and layer your bowl with vibrant flavors. Customize it with extra veggies or spices to suit your taste. Storing leftovers is easy, making it great for meal prep. This dish is not just tasty but also healthy. Enjoy making and sharing this satisfying meal with others!

Chipotle Lime Shrimp Bowl Flavorful and Easy Recipe

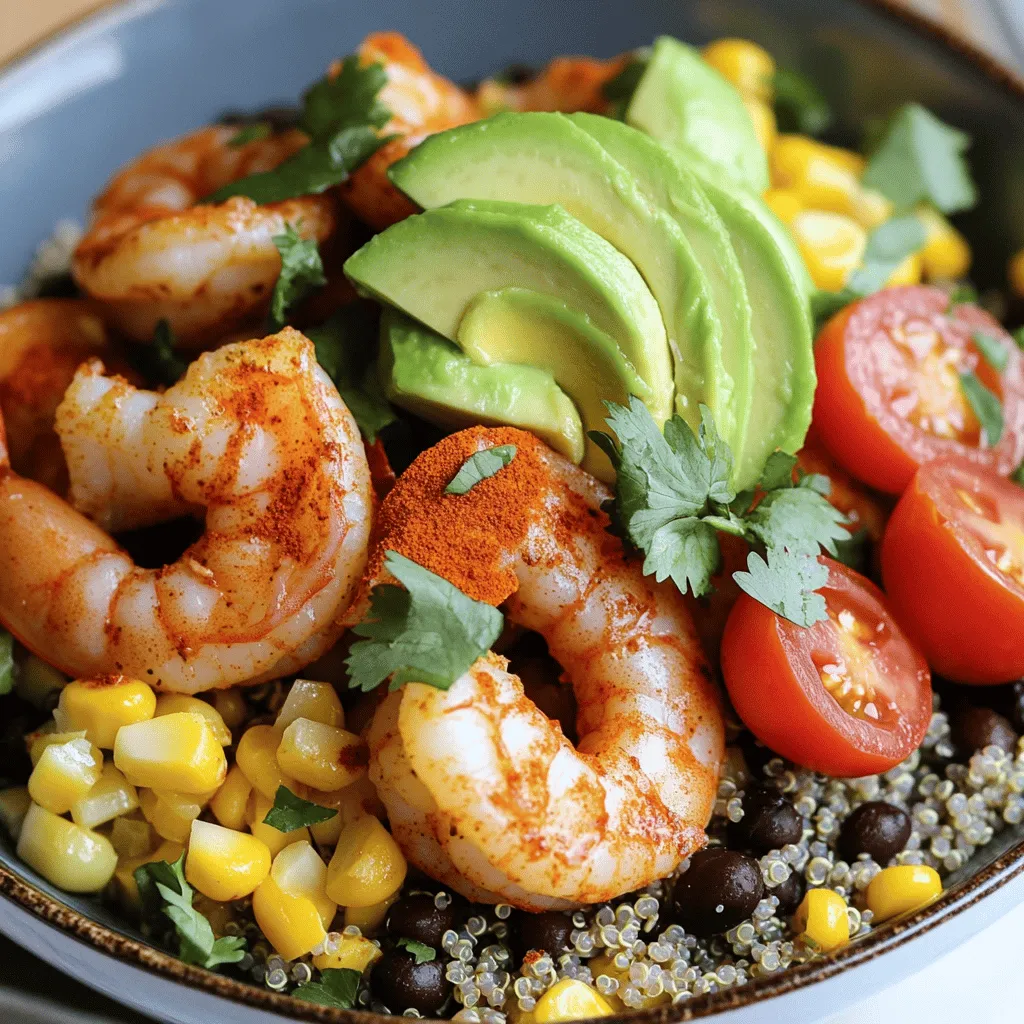
Are you ready to spice up your dinner? The Chipotle Lime Shrimp Bowl is bursting with flavor and easy to

To make Tropical Mango Sticky Rice, you will need a few simple ingredients. Here’s the list: - 1 cup glutinous rice (sticky rice) - 1 1/2 cups coconut milk - 1/2 cup sugar - 1/4 teaspoon salt - 2 ripe mangoes, peeled and sliced - 2 tablespoons toasted sesame seeds (for garnish) - Fresh mint leaves (for garnish) Glutinous rice is key for the perfect sticky texture. Coconut milk adds rich flavor and creaminess. Sugar balances the creaminess with sweetness. The salt enhances the dish's overall taste. Always choose ripe mangoes for the best flavor. Toasted sesame seeds add a nice crunch. Fresh mint leaves brighten the dish with a pop of color and flavor. When you gather these ingredients, your Tropical Mango Sticky Rice will be delightful. For the complete preparation method, check out the Full Recipe. - Rinse the glutinous rice. - Soak the rice for optimal texture. To prepare the rice, first, rinse the glutinous rice under cold water. You want to rinse until the water runs clear. This step removes excess starch. It helps the rice become soft and sticky. Next, soak the rinsed rice in water. I suggest soaking it for at least 4 hours. For the best results, soak it overnight. This gives the rice time to absorb water. It will cook more evenly and be tender. - Steaming the soaked rice. - Tips for perfect steaming. After soaking, drain the rice. You will now steam it. Use a steamer lined with cheesecloth or parchment paper. Steam the rice for about 30 to 40 minutes. You will know it is ready when it is tender. Keep an eye on the water level in the steamer. Add more water if needed. This ensures the rice cooks well without burning. - Combining coconut milk, sugar, and salt. - Ensuring the right consistency. While the rice steams, it's time to make the coconut sauce. Combine coconut milk, sugar, and salt in a saucepan. Use medium heat and stir until the sugar dissolves. Make sure it does not boil. You want a smooth sauce with a creamy texture. Remove it from heat once it's ready. - Mixing the coconut milk with rice. - Layering with sliced mango. Once the rice is cooked, transfer it to a mixing bowl. Drizzle about 1 cup of the coconut milk mixture over the rice. Gently fold the rice to mix in the coconut milk. Let it sit for 15 minutes. This allows the rice to absorb the flavors. To serve, place a portion of the sticky rice on a plate. Layer it with sliced mangoes on top. Drizzle extra coconut milk over everything. For a finishing touch, sprinkle with toasted sesame seeds and add fresh mint leaves. Enjoy your Tropical Mango Sticky Rice! For the full recipe, check the earlier section. To make the best Tropical Mango Sticky Rice, you need ripe mangoes. Look for mangoes that yield slightly when you gently press them. They should have a sweet scent. The best mango varieties for this dish are the Ataulfo and Haden. Ataulfo mangoes are creamy and sweet, while Haden mangoes offer a mix of sweetness and tang. To get the right texture, soak glutinous rice for at least 4 hours. You can soak it overnight for even better results. This step helps the rice absorb water. When you cook the rice, steam it for 30 to 40 minutes. Make sure the rice is tender but not mushy. Use a steamer lined with cheesecloth or parchment paper for the best result. For a beautiful serving, use a banana leaf or a nice plate. Place a mound of sticky rice in the center. Layer it with the sliced mangoes. Drizzle some coconut milk over the top for a glossy look. For garnishing, sprinkle toasted sesame seeds and add fresh mint leaves. This adds color and freshness, making your dish pop. {{image_2}} You can enhance the taste of your coconut milk. Adding pandan leaves gives a nice herbal note. Simply steep the leaves in the coconut milk while heating. Another option is to add vanilla extract for a sweet aroma. You might also try alternative sweeteners like honey or agave. These can change the flavor and sweetness level. Mango is classic, but you can switch it up! Try using other seasonal fruits. Pineapple or kiwi adds a nice zing. You could also use berries like strawberries or blueberries for a pop of color. Mixing fruits not only changes the taste but also makes your dish look beautiful. If you need vegan options, stick with the current recipe. The ingredients are already vegan! However, if you have a nut allergy, be careful with coconut milk. You can use soy milk or oat milk instead. These substitutes keep the dish creamy and delicious while meeting your dietary needs. To keep your sticky rice fresh, store it in an airtight container. This helps prevent it from drying out. You can place the mango slices in a separate container. They will stay fresh longer this way. Make sure to keep everything in the fridge. Consume leftovers within three days for the best taste. To reheat sticky rice, use a microwave or a steamer. If using a microwave, place the rice in a bowl and sprinkle a bit of water on top. Cover it loosely and heat in short bursts. Check every 30 seconds to avoid overheating. For steaming, put the rice in a steamer and steam for about 10 minutes. This method helps keep the rice soft and fluffy. Tropical Mango Sticky Rice comes from Thailand. It is a well-loved dessert there. This dish holds cultural significance, often seen at festivals and special events. In Thailand, many people enjoy it as a sweet treat. You can find different versions across the country, each with unique flavors and styles. For example, some regions may add a hint of pandan leaf for extra aroma. Regular rice won’t work well in this recipe. Glutinous rice, also known as sticky rice, has a high starch content. This gives the dish its famous chewy texture. Using regular rice will lead to a different texture and taste. You’ll miss out on the signature stickiness that makes this dish so delightful. The ingredients for this recipe are naturally gluten-free. Just be sure to choose a gluten-free soy sauce if you want to add it. Avoid any sauces or additives that may contain gluten. For the best results, stick to fresh ingredients like mango and coconut milk, which are safe and tasty options. Yes, you can prepare some parts ahead of time. Cook the sticky rice and store it in the fridge overnight. Keep the coconut sauce separate until you are ready to serve. This helps keep the texture right. When you’re ready, just warm the rice and mix in the sauce. Enjoy it fresh for the best flavor. Tropical mango sticky rice is a delightful dish that combines sweet flavors and sticky textures. We covered the key ingredients, preparation methods, and tips for perfect results. You can customize flavors and fruits to suit your taste. Storage and reheating tips ensure you enjoy leftovers at their best. This dish not only brings joy but also tells a cultural story. Follow these steps and savor the real taste of Thailand. Enjoy making this easy and delicious treat!

Tropical Mango Sticky Rice Quick and Easy Recipe

Mango sticky rice is a tropical delight that everyone should try! In this quick and easy recipe, I’ll guide you

- Ground beef - Italian sausage - Pepperoni slices - Shredded mozzarella cheese - Mixed bell peppers - Sliced black olives - Fresh basil leaves - Italian seasoning - Garlic powder - Pizza sauce The heart of these tacos lies in the main ingredients. Ground beef and Italian sausage bring a delicious, hearty flavor. I love using pepperoni slices for that classic pizza taste. Shredded mozzarella cheese gives a creamy texture and mouth-watering pull. You can add mixed bell peppers for a fresh crunch. Sliced black olives add a salty touch. Fresh basil leaves at the end give a lovely aroma. For seasonings, I use Italian seasoning for that herbal kick. Garlic powder adds depth, while pizza sauce brings everything together. You can find the full recipe for these meat lovers pizza tacos to guide you through the cooking process. Enjoy! 1. Start by heating a large skillet over medium heat. 2. Add 1 pound of ground beef and 1 pound of Italian sausage to the pan. 3. Cook the meat until it turns brown. This takes about 8 to 10 minutes. 4. Use a spatula to break the meat into small pieces as it cooks. 5. After cooking, drain any extra grease from the meat mixture. 6. Add 1 tablespoon of Italian seasoning and 1 teaspoon of garlic powder. 7. Stir well to combine all the flavors. Remove from heat. 1. Preheat your oven to 400°F (200°C). 2. Line a baking sheet with parchment paper for easy cleanup. 3. Place 8 small flour tortillas on the baking sheet. 4. Spread 1 tablespoon of pizza sauce on each tortilla. 5. Leave a small border around the edges to keep the sauce in. 6. Next, layer on the meat mixture generously. 7. Add pepperoni slices, diced bell peppers, and black olives. 8. Finish by sprinkling 1 cup of shredded mozzarella cheese on top. 1. Place the baking sheet in the preheated oven. 2. Bake for about 10 to 12 minutes. 3. Keep an eye on them until the tortillas are crispy. 4. Look for the cheese to melt and bubble, which means it's ready. 5. Remove the tacos from the oven and let them cool for a minute or two. 6. Garnish with fresh basil leaves before serving. These steps make it easy to enjoy your savory meat lovers pizza tacos. You can find the full recipe for more details. Choosing the right tortilla is key. I recommend using small flour tortillas. They are soft and easy to fold. Corn tortillas can be used, but they may crack. Balancing flavors with toppings makes a big difference. Start with rich meat, like ground beef and sausage. Then, add salty pepperoni for extra taste. Diced bell peppers add freshness and crunch. Black olives give a nice briny kick. Don’t forget the melted mozzarella on top. It ties everything together with cheesy goodness. Pair these pizza tacos with simple side dishes. A fresh salad can be a great choice. Try a garden salad with a light dressing. You can also serve with crispy potato wedges. They complement the tacos well. For dipping sauces, pizza sauce is a classic. You can also try ranch dressing for a creamy twist. Marinara sauce works too, adding a rich flavor. Garnishing with herbs makes your tacos pop. Fresh basil leaves add color and a lovely aroma. You can drizzle extra pizza sauce on the tacos for flair. When serving at parties, arrange the tacos on a large platter. This way, everyone can see the tasty spread. You can place small bowls of dipping sauces around the platter. This invites guests to enjoy the flavors in their own way. For the full recipe, check out the details above. {{image_2}} I love how versatile these meat lovers pizza tacos can be! You can easily swap ground beef for chicken or turkey. Chicken gives a lighter taste, while turkey adds a nice twist. Just make sure to cook it well until no pink remains. If you want to skip meat entirely, try vegetarian alternatives. You could use mushrooms, zucchini, or even lentils. These options can add depth and flavor while keeping it hearty. Want to spice things up? Add sliced jalapeños for a kick. They bring heat and enhance the flavor without overpowering the dish. You can also mix in different cheeses. Try cheddar or pepper jack for a unique twist. Each cheese melts differently and adds rich flavors. For a vegan take on these tacos, substitute meat with plant-based options like lentils or jackfruit. These choices mimic meat's texture and soak up flavors well. You can also use dairy-free cheese alternatives. Look for brands that melt nicely. This way, everyone can enjoy delicious pizza tacos, no matter their diet! To keep your meat lovers pizza tacos fresh, cool them down first. Place the tacos in airtight containers. This helps prevent them from getting soggy. You can store them in the fridge for up to three days. For longer storage, freeze them. Just make sure to wrap them well in plastic wrap or foil before placing them in a freezer-safe container. When it's time to enjoy your leftovers, reheating is key. The best method is to use an oven. Preheat it to 350°F (175°C). Place the tacos on a baking sheet and heat for about 10 minutes. This keeps the tortillas crispy, which is super important. If you use a microwave, the tortillas may turn soft. If you must use it, heat them in short bursts. In the fridge, your meat lovers pizza tacos will last about three days. After that, they might lose their taste and texture. If you freeze them, they can last for up to three months. Just remember to label your containers with the date. This way, you can enjoy them later without worry. A meat lovers pizza taco is a fun twist on classic pizza. It combines the best of two worlds: pizza and tacos. You take small flour tortillas and fill them with a hearty meat mix. The mix usually includes ground beef, Italian sausage, and pepperoni. You then add pizza sauce, cheese, and your favorite toppings. After baking, you get a crispy, cheesy, and savory treat. It’s perfect for parties or a family dinner. Yes, you can prepare this dish in advance. Cook the meat mixture and store it in the fridge. You can also prepare the tortillas with sauce and toppings. Just keep them covered to prevent drying. When you’re ready to eat, bake the tacos as instructed. This saves time and makes serving easy during busy days. Pizza tacos pair well with many sides. Here are some tasty options: - Garlic bread: The buttery flavor complements the tacos. - Caesar salad: A fresh salad adds crunch and balances the meal. - Buffalo wings: Add some spice for those who enjoy heat. - Veggie platter: Fresh veggies with dip keep it light. These sides enhance the meal and offer variety for everyone. We covered all the essentials for making meat lovers pizza tacos, from ingredients to tips for serving. You now know how to cook the meat, assemble the tacos, and achieve the perfect bake. Don’t forget to explore different variations and storage tips to enjoy your tacos later. With a few tweaks, you can personalize this dish to fit any taste. Enjoy your cooking adventure and impress your friends with this tasty twist!

Savory Meat Lovers Pizza Tacos for Tasty Meals

Craving something unique and delicious? Try my Savory Meat Lovers Pizza Tacos! This tasty twist on classic flavors combines ground

To make these salted caramel bars, gather these key ingredients: - 1 ½ cups all-purpose flour - ½ cup unsweetened cocoa powder - 1 cup unsalted butter, softened - ¾ cup white sugar - ½ cup brown sugar, packed - 1 teaspoon vanilla extract - 1 cup sweetened condensed milk - 1 cup caramel sauce (store-bought or homemade) - ½ teaspoon sea salt - ½ teaspoon baking soda - 1 cup chocolate chips (milk or dark, your choice) For those with dietary needs, you can substitute some ingredients. Use gluten-free flour if you want a gluten-free version. If you need dairy-free options, try vegan butter and almond milk instead of sweetened condensed milk. Quality matters in this recipe. Use good-quality caramel sauce for the best taste. I prefer dark chocolate chips for a richer flavor, but milk chocolate works well too. The sea salt should be flaky for a nice texture contrast with the sweet caramel. For the full recipe, check the details above. 1. Preheat your oven to 350°F (175°C). This step warms the oven, ensuring even baking. 2. Prepare your baking dish. Grease a 9x9 inch dish or line it with parchment paper. This makes it easy to lift the bars out later. 3. Mix dry ingredients. In a medium bowl, whisk together 1 ½ cups of flour, ½ cup of cocoa powder, and ½ teaspoon of baking soda. This helps combine them well. 4. Cream the butter and sugars. Take a large bowl and beat 1 cup of softened butter, ¾ cup of white sugar, and ½ cup of brown sugar. Beat until it’s light and fluffy, about 2-3 minutes. You’ll know it’s ready when it looks pale. 5. Add vanilla. Pour in 1 teaspoon of vanilla extract and mix well. This adds depth to your bars. 6. Combine the mixtures. Gradually add the dry mix into the wet mixture. Mix until just combined. Be careful not to over-mix. 7. Press the dough. Take half of the cookie dough and press it evenly into the bottom of your prepared dish. It should cover the bottom well. 8. Make the caramel layer. In another bowl, combine 1 cup of sweetened condensed milk with 1 cup of caramel sauce. Stir until smooth. This will be your creamy layer. 9. Pour the caramel. Carefully pour the caramel mixture over the pressed dough. Spread it evenly with a spatula. 10. Top with dough. Drop spoonfuls of the remaining cookie dough on top of the caramel. Let some caramel show through for a nice look. 11. Add chocolate chips and salt. Sprinkle 1 cup of chocolate chips and ½ teaspoon of sea salt over the top. This makes it extra tasty. 12. Bake the bars. Place the dish in the oven and bake for 25-30 minutes. Look for golden brown edges and a set center. 13. Cool before slicing. Once baked, remove the dish from the oven and let it cool completely. This step is important. If you slice too soon, the bars may fall apart. Enjoy the process and the sweet aroma filling your kitchen! For the complete recipe, check out the Full Recipe section. To find that sweet spot between sweet and salty, I suggest using sea salt. It enhances the flavor without overpowering the dessert. Start with half a teaspoon and adjust to your taste. Remember, you can always add more, but you can't take it away! For caramel sauce, you have two great options. You can buy a quality brand like Ghirardelli or make your own from scratch. If you choose homemade, use good butter and brown sugar for the best flavor. It will give you a rich, deep caramel that pairs well with the bars. When mixing and layering the ingredients, be sure to press the cookie dough firmly into the baking dish. This helps create a strong base. Spread your caramel mixture evenly over this layer. Drop spoonfuls of the remaining dough on top, allowing some caramel to peek through. This creates a nice texture and a beautiful look. Follow these tips, and you will have salted caramel bars that are both simple and sweet! For the full recipe, check the complete guide above. {{image_2}} You can easily change up this salted caramel bars recipe to fit different diets. To make vegan salted caramel bars, substitute the butter with coconut oil. Use a vegan chocolate chip brand for the topping. Replace sweetened condensed milk with a homemade version made from coconut milk and sugar. This keeps the bars creamy and delicious without dairy. If you need gluten-free options, swap the all-purpose flour for a gluten-free blend. Almond flour or oat flour can work well too. Just make sure the blend you choose has some binding agents like xanthan gum. For creative twists, try adding nuts like pecans or walnuts to the cookie layer. You can also switch up the chocolate. Use white chocolate or dark chocolate for a different taste. Each option gives the bars a unique flavor that you will love. These variations make it easy to enjoy salted caramel bars no matter your dietary needs. Check out the Full Recipe for the base version of these tasty treats! To keep your salted caramel bars fresh, store them in an airtight container. You can place them in the fridge for up to one week. The cool air helps the caramel stay firm and the bars taste great. If you prefer room temperature, keep them in a cool, dry spot. They will last about three days without refrigeration. If you want to save some for later, freezing is a great option. Cut the bars into squares and wrap each piece in plastic wrap. Place them in a freezer-safe bag or container. They can stay in the freezer for up to three months. When you want to enjoy them again, let the bars thaw in the fridge overnight. To maintain texture and flavor, avoid stacking the bars directly on top of each other. Use parchment paper between layers if you need to stack them. This keeps the caramel from sticking to each bar. Also, keep them away from strong odors in the fridge or freezer. Caramel can absorb flavors from other foods. Remember, these simple steps will help you enjoy your salted caramel bars at their best! Salted caramel bars can last up to one week. Store them in an airtight container. Keep them in the fridge for the best taste. They also freeze well for up to three months. Just thaw them in the fridge before eating. Yes, you can use store-bought caramel sauce. It saves time and still tastes great. Just make sure it’s a quality brand for the best flavor. Homemade sauce adds a special touch, but store-bought works well too. To cut caramel bars cleanly, use a sharp knife. Run the knife under hot water and dry it off before cutting. This helps the knife glide through the bars without pulling or tearing. Clean the knife between cuts for neat pieces. For the full recipe, check out the Salted Caramel Dream Bars . In this post, we covered the key ingredients for salted caramel bars, including substitutes for allergens. I shared clear steps for preparation and tips to get the balance right in flavor. Variations like vegan and gluten-free options allow everyone to enjoy these treats. We also discussed storage methods to keep them fresh. Remember, the right ingredients and proper storage make all the difference. Enjoy your baking!

Savory Salted Caramel Bars Simple and Sweet Treat

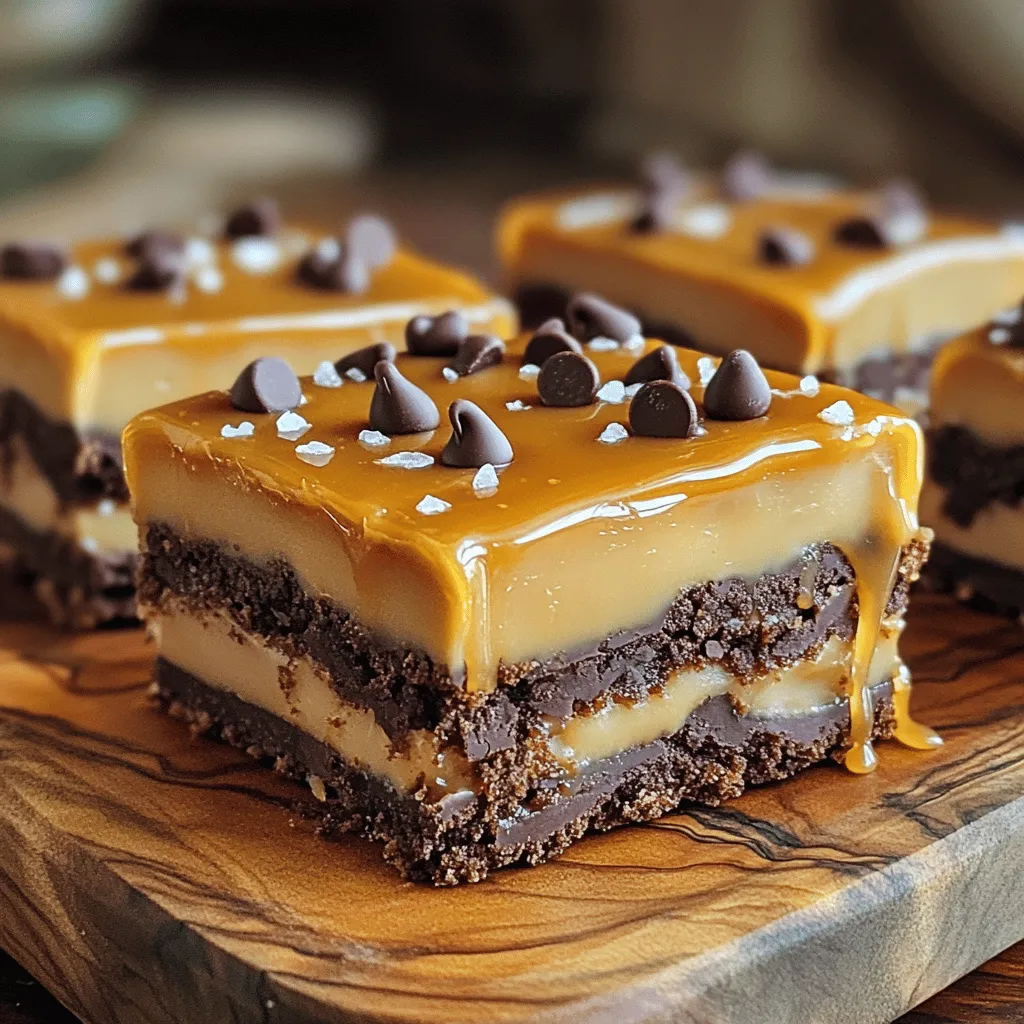
Craving something sweet and savory? These Salted Caramel Bars are the perfect solution! In this recipe, I’ll guide you through

To make this delightful Pineapple Cream Cake, you will need the following items: - 1 cup all-purpose flour - 1 teaspoon baking powder - ½ teaspoon baking soda - ¼ teaspoon salt - ½ cup unsalted butter, softened - 1 cup granulated sugar - 2 large eggs - 1 teaspoon vanilla extract - ½ cup milk - 1 cup crushed pineapple (drained) - 1 cup heavy cream - 2 tablespoons powdered sugar - 1 teaspoon coconut extract - Fresh pineapple slices and mint leaves for garnish Using the right measurements is key. Here are some tips: - If you need gluten-free flour, use a 1:1 blend. - For dairy-free options, try coconut milk and a plant-based butter. - If you don’t have powdered sugar, blend granulated sugar until fine. Both fresh and canned pineapple can work well in this recipe. Fresh pineapple gives a bright flavor and texture. It’s also less sweet and has more natural juice. Canned pineapple is more convenient and often sweeter. Make sure to drain it well to avoid sogginess in your cake. For the best results, use what you love most! To make your Pineapple Cream Cake, you need to follow a few simple steps. Start by gathering your ingredients. You'll need flour, sugar, butter, eggs, and pineapple. Remember to preheat your oven, too. This helps the cake bake evenly. First, preheat your oven to 350°F (175°C). Grease and flour an 8-inch round cake pan. In a medium bowl, whisk together the dry ingredients: flour, baking powder, baking soda, and salt. In a large bowl, cream the softened butter and sugar. Mix until it's light and fluffy. Add the eggs one by one, then stir in the vanilla extract. Next, mix the dry ingredients with the butter mixture. Alternate adding the dry mix and the milk. Start with the dry mix and end with it. Gently fold in the crushed pineapple. Pour the batter into the prepared pan. Bake for 25-30 minutes. Check with a toothpick. When it comes out clean, your cake is ready. Let it cool for 10 minutes in the pan before moving it to a wire rack. Once your cake cools, it's time to make the whipped cream. In a chilled mixing bowl, whip the heavy cream. Add powdered sugar and coconut extract. Beat until you see stiff peaks form. This means your cream is ready to spread. After that, slice the cake in half. Spread whipped cream between the layers and on top. You can use the full recipe for more detail. Finally, garnish with fresh pineapple slices and mint leaves. Enjoy your tropical treat! To bake the best Pineapple Cream Cake, follow these tips: - Use room temperature butter and eggs. This helps the batter mix well. - Measure flour correctly. Spoon it into the cup, then level it off. - Do not overmix the batter. Mix just until combined for a light cake. - Check the cake at 25 minutes. A toothpick should come out clean when done. - Cool the cake in the pan for 10 minutes. Then move it to a wire rack. For a fluffy whipped cream, keep these steps in mind: - Chill your mixing bowl and beaters. Cold tools help the cream whip better. - Use heavy cream. It has a higher fat content, which makes it stable. - Add powdered sugar for sweetness and a bit of coconut extract for flavor. - Whip until stiff peaks form. This means the cream holds its shape well. A beautiful cake makes it even more special. Here are some ideas: - Slice the cake evenly. A serrated knife works best for clean cuts. - Spread whipped cream thickly between layers and on top. This adds to the look. - Use fresh pineapple slices and mint leaves as garnishes. They add color and freshness. - Serve the cake chilled for a refreshing treat. Enjoy every bite! For the full recipe, check out the details above. {{image_2}} You can make this cake gluten-free. Use a gluten-free flour blend instead of all-purpose flour. Look for blends with xanthan gum. This helps achieve the right texture. Follow the same steps as the original recipe. Your cake will still be soft and tasty. To create a vegan version, swap eggs for flaxseed meal or applesauce. Use a plant-based butter and milk. This keeps the cake moist and fluffy. The flavor remains delightful. You will still enjoy the same creamy topping. Use coconut cream instead of heavy cream for the icing. You can change the flavor of this cake to suit your taste. Add coconut extract for a tropical twist. You can also mix in some chocolate. Use cocoa powder in the batter for a rich chocolate flavor. Don’t forget to adjust the sugar to balance the taste. Another option is to add lemon zest for a fresh, zesty kick. These variations keep the cake fun and exciting. To keep your cake fresh, wrap it well. Use plastic wrap or foil. Place it in an airtight container. Store it in the fridge if you have leftovers. It stays good for about 3 to 5 days. Always check for any signs of spoilage before eating. You can freeze this cake too! First, let it cool completely. Slice the cake into pieces if you want. Wrap each piece in plastic wrap, then foil. This helps prevent freezer burn. Store it in the freezer for up to 3 months. When you’re ready to eat, just thaw it in the fridge overnight. Reheat your cake gently to keep it moist. Use the microwave for a quick fix. Heat it for about 10-15 seconds at a time. If you want to use the oven, preheat it to 300°F (150°C). Place the cake on a baking sheet and cover it with foil. Heat for about 10 minutes. This keeps your cake soft and tasty. For the best flavor, serve it cold with fresh toppings! Yes, you can use fresh pineapple. Just make sure to chop it small. Fresh pineapple adds a bright taste. You may need to drain excess juice. This keeps the cake from becoming soggy. To reduce the sweetness, cut back on sugar. Use only ¾ cup of sugar instead of a full cup. You can also add a pinch of salt. This helps balance the flavors in the cake. Use a proper cake pan and grease it well. Make sure to drain the crushed pineapple fully. You can also bake the cake longer if needed. This ensures the bottom stays firm and delicious. For a complete guide to making this cake, check out the full recipe. It shows each step clearly. This way, you can enjoy every bite of this delightful treat! This blog post covered key ingredients for a tasty cake, along with easy steps to make it. I shared tips for baking, whipping, and presenting. You also learned about fun variations, including gluten-free and vegan options. Proper storage and reheating techniques help keep your cake fresh. With these insights, you can confidently create a delicious Pineapple Paradise Cream Cake. Enjoy the process and the treat!

Pineapple Cream Cake Delightful and Simple Recipe

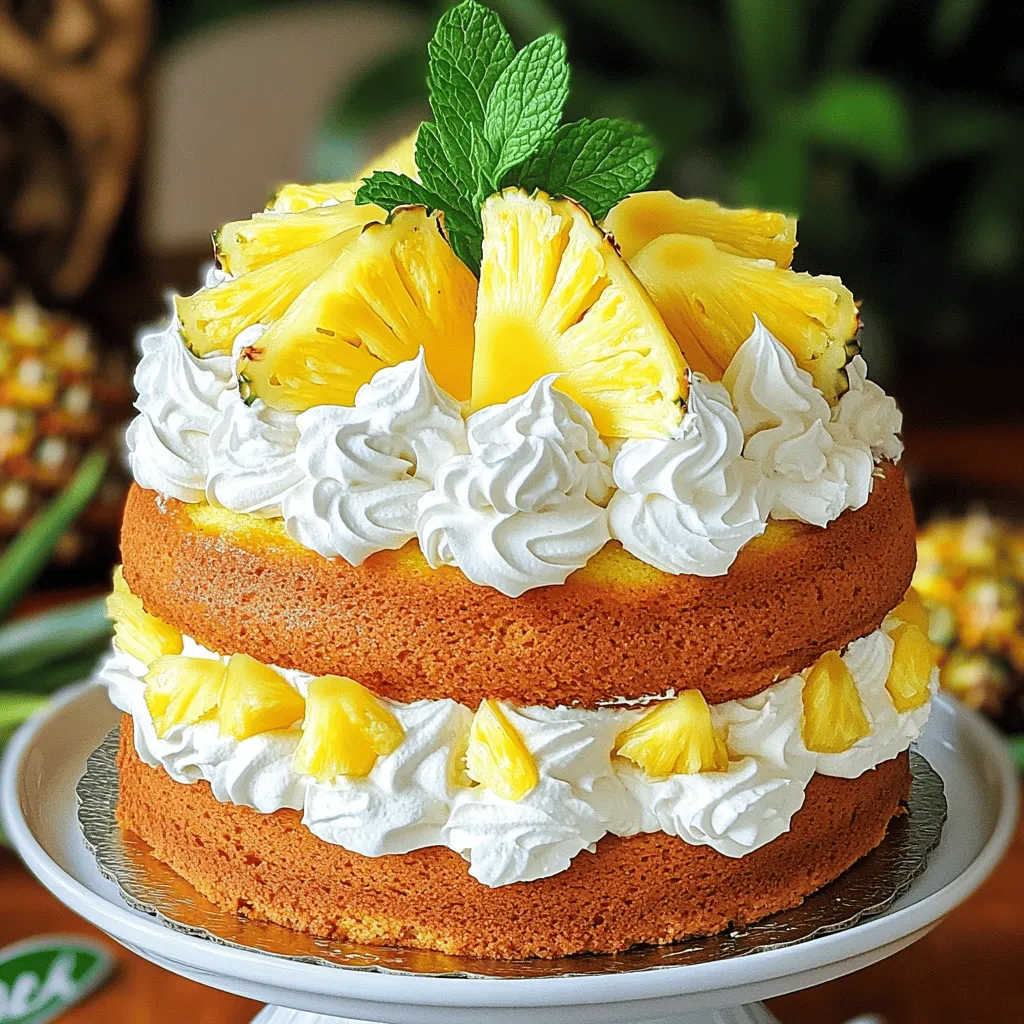
Are you ready to bake something truly delicious? My Pineapple Cream Cake recipe is both simple and delightful. This cake

To make Moose Munch Caramel Popcorn, you will need the following: - 12 cups popped popcorn (about 1 cup unpopped kernels) - 1 cup unsalted butter (2 sticks) - 2 cups packed brown sugar - 1/2 cup light corn syrup - 1 teaspoon vanilla extract - 1/2 teaspoon baking soda - 1 1/2 cups mixed nuts (almonds, pecans, cashews) - 1/2 cup chocolate chips (optional) - Sea salt to taste Gather these ingredients before you start. Popped popcorn is the base of this sweet treat. You can pop your own kernels or buy pre-popped popcorn. Unsalted butter gives the caramel a nice rich flavor. Brown sugar and corn syrup work together to create that gooey caramel we love. Vanilla extract adds a warm, sweet touch. Baking soda helps aerate the caramel, making it light and crunchy. Mixed nuts bring a delightful crunch and flavor. If you want, add chocolate chips for a sweet twist. Finally, sprinkle sea salt for that perfect sweet and salty balance. With these ingredients, you're ready to create a snack that everyone will love! Don’t forget to check the Full Recipe to make your Moose Munch Caramel Popcorn. First, you need to set your oven to 250°F (120°C). This low heat will help the caramel popcorn crisp up nicely. Next, prepare a large baking sheet. Line it with parchment paper to keep the popcorn from sticking. Now, let’s pop the popcorn. You can use an air popper or the stovetop method. If you use the stovetop, heat some oil in a pot. Add popcorn kernels and cover. Once you hear the popping slow down, remove it from the heat. After popping, make sure to sift through the popcorn. Remove any unpopped kernels. You want only the fluffy, popped pieces! To make the caramel sauce, take a medium saucepan. Melt one cup of unsalted butter over medium heat. Once the butter melts, add two cups of packed brown sugar and half a cup of light corn syrup. Stir well to combine. Now, let this mixture come to a boil. Do not stir during this time! Let it boil for about 4 to 5 minutes until it turns a beautiful caramel color. This step is key for the right flavor and texture. After boiling, remove the saucepan from the heat. Carefully stir in one teaspoon of vanilla extract and half a teaspoon of baking soda. Watch out because it may bubble up. Next, it’s time to coat the popcorn. Pour the warm caramel sauce over the popped popcorn. Use a spatula to gently toss the popcorn. Make sure every piece gets a nice coat of caramel. Now, add one and a half cups of mixed nuts. Toss them in with the popcorn to mix well. Spread the popcorn mixture evenly on your prepared baking sheet. This helps it bake evenly. Now you are ready to bake! Place the sheet in the preheated oven. Bake for one hour, stirring every 15 minutes. This stirring helps the caramel coat the popcorn evenly and prevents burning. Once done, take it out and let it cool completely. If you like, drizzle melted chocolate chips over it and sprinkle with sea salt before breaking it into clusters. Enjoy your Moose Munch Caramel Popcorn! For the full recipe, check out the detailed instructions above. To make great caramel, timing is key. Boil your sugar mixture for 4 to 5 minutes. Watch closely for a rich, golden color. This means you have the right texture. If the caramel gets too dark, it can taste burnt. To avoid this, use a thermometer. The perfect temperature is around 240°F. When pouring the caramel over the popcorn, be quick. Use a spatula to fold the popcorn gently. This helps ensure each piece gets a nice coat. If you mix too hard, you might break the popcorn. Take your time and be gentle to keep everything whole. You can serve Moose Munch in fun ways. Try using clear bags tied with ribbons for gifts. Or, fill a big bowl for parties. For a special touch, drizzle melted chocolate on top. This adds a sweet twist and looks great. You can also sprinkle sea salt for a nice contrast. Enjoy your tasty treat! {{image_2}} You can make Moose Munch without nuts. This is great for those with allergies. Instead of mixed nuts, try seeds like pumpkin or sunflower. These add crunch and flavor. You can also use other popcorn additives. Think about adding toasted coconut or pretzel pieces. These swaps keep the snack fun and safe. Want to change up the taste? Consider seasonal flavors. Pumpkin spice is a hit in fall. You can mix in chocolate peanut butter for a rich twist. Try combining dark and white chocolate for extra fun. You can even mix in candies like M&Ms or Reese's Pieces. Each choice adds a new layer of flavor. You can lighten up this treat, too. Swap unsalted butter for coconut oil or a plant-based butter. Use a sugar substitute to cut calories. For a gluten-free version, make sure your popcorn is certified gluten-free. You can also skip the nuts and use puffed rice for crunch. These changes keep the joy of Moose Munch while making it a bit healthier. For the full recipe, check out the section above! To keep your Moose Munch caramel popcorn fresh, use airtight containers. Glass jars or plastic bins work well. These containers protect the popcorn from air and moisture. Store it in a cool, dry place. A pantry or cupboard is great. This keeps it crunchy and tasty. Moose Munch caramel popcorn stays fresh for about one week. After that, the flavor may fade. If your popcorn loses its crunch, don't worry! You can re-crisp it easily. Preheat your oven to 250°F (120°C) again. Spread the popcorn on a baking sheet. Heat it in the oven for about 10 minutes. This method helps restore the texture. Be sure to keep an eye on it. You want it warm, not burnt. To avoid moisture, always seal your container tightly. If you notice any soft spots, re-crisping will help. Enjoy your delicious Moose Munch caramel popcorn fresh every time! Moose Munch Caramel Popcorn can last about one week when stored correctly. To keep it fresh, place it in an airtight container. Make sure the container is dry to avoid moisture. If you want to keep it longer, you can freeze it for up to three months. Just remember to let it thaw at room temperature before eating. Yes, you can make Moose Munch Caramel Popcorn ahead of time. It’s a great snack for parties or gifts. Just make sure to store it in an airtight container. This helps keep the popcorn crisp and fresh. If you want to make it even earlier, you can pop the corn and store it separately from the caramel until you are ready to mix them. For gifts, you can use clear cellophane bags or decorative boxes. Fill the bags with the popcorn and tie them with a ribbon. This looks nice and keeps it fresh. You can also use mason jars for a fun touch. If you want to add a personal note, attach a tag with the recipe or a sweet message. Moose Munch makes a great gift for friends and family! You now know how to make Moose Munch Caramel Popcorn from scratch. We discussed the key ingredients and followed simple steps to create that delicious caramel goodness. Remember, the right cooking time is vital for perfect caramel. You can enjoy many variations, from nut-free options to healthier swaps. Store your popcorn well to keep it fresh. You can even package it nicely for gifts or special occasions. Enjoy your tasty treat and share it with friends!

Moose Munch Caramel Popcorn Irresistible Snack Recipe

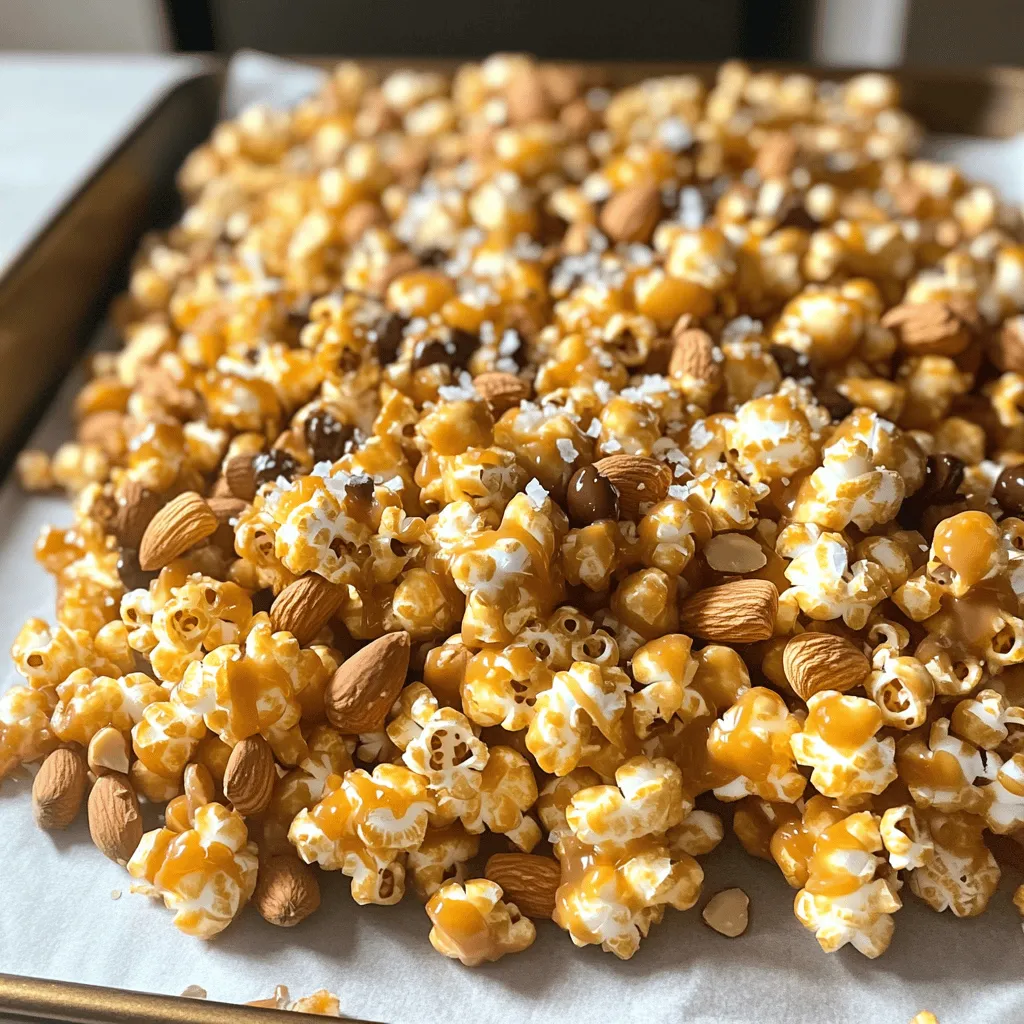
Get ready to treat your taste buds! Today, I’m sharing my easy Moose Munch Caramel Popcorn recipe. This crunchy, sweet

To make Peanut Butter Banana Overnight Oats, you need a few key items. These ingredients give the dish its creamy and tasty flavor. Here’s what you will need: - 1 cup rolled oats - 1 ½ cups almond milk (or any milk of your choice) - 2 tablespoons peanut butter - 1 ripe banana, mashed - 1 tablespoon chia seeds - ½ teaspoon vanilla extract - Pinch of salt These ingredients work together to create a smooth and rich texture. The oats soak up the milk, making them soft and tasty. Sweetness is a personal choice. You can add some optional sweeteners if you like. Here are two good options: - 1 tablespoon honey - 1 tablespoon maple syrup Adding honey or maple syrup gives a lovely sweet touch. Adjust the amount to fit your taste. Toppings can make your oats look and taste even better. Here are some fun ideas to try: - Sliced banana - Crushed peanuts - A sprinkle of cinnamon These toppings add texture and extra flavor. They also make your dish pop with color. You can mix and match these toppings based on what you love. For the full recipe, check out Peanut Butter Banana Bliss Overnight Oats. To start, gather your ingredients. You need rolled oats, almond milk, peanut butter, a ripe banana, chia seeds, vanilla extract, and a pinch of salt. You can also add honey or maple syrup for sweetness. Measure out 1 cup of oats and 1.5 cups of almond milk. In a medium-sized mixing bowl, combine all your ingredients. Add the rolled oats, almond milk, mashed banana, and peanut butter. If you want it sweeter, add honey or maple syrup. Toss in the chia seeds, vanilla extract, and salt. Mix everything well. Ensure the peanut butter spreads evenly. After mixing, divide the mixture into two jars. Seal them tightly. Place the jars in the fridge overnight. This lets the oats soak up the milk. In the morning, stir the oats. If they are too thick, add a splash of milk. Top with sliced banana, crushed peanuts, and a sprinkle of cinnamon. For the full recipe, check the earlier section. To make the best overnight oats, use a good mix of ingredients. Start with rolled oats. They soak up liquid well and soften nicely. Combine the oats with your choice of milk. Almond milk works great, but any milk will do. Mix in peanut butter and mashed banana for flavor. Stir until everything is well blended. This helps the oats soak up all the yummy tastes. When picking oats, always choose rolled oats. They are less processed than instant oats. Instant oats can become mushy, while rolled oats stay chewy. Steel-cut oats are healthy but take longer to soften. If you want quick oats, rolled oats are your best bet. They give you the right texture for overnight oats. To boost flavor, use ripe bananas. They add natural sweetness and creaminess. You can also add a pinch of salt to bring out the taste. Want more crunch? Top your oats with crushed peanuts or chia seeds. A sprinkle of cinnamon adds warmth too. For a sweet touch, drizzle honey or maple syrup on top. For the full recipe, check out the Peanut Butter Banana Bliss Overnight Oats. {{image_2}} If you want a nut-free option, swap peanut butter for sunflower seed butter. This keeps the creamy texture and taste you love. You can also use pumpkin seed butter for a unique twist. Both options are tasty and safe for those with nut allergies. Feel free to mix in other fruits! Berries, like strawberries or blueberries, add a burst of color and flavor. You can also try diced apples or pears for a crunchy bite. For a tropical touch, add shredded coconut or pineapple. A sprinkle of cocoa powder gives a chocolatey twist, too! To make your oats vegan, simply use maple syrup instead of honey. Almond milk is already a great choice for vegan diets. You can also add flaxseed meal for a boost of omega-3s. This keeps your oats delicious while meeting your dietary needs. Check out the Full Recipe for more tips on making your perfect peanut butter banana overnight oats! To keep your peanut butter banana overnight oats fresh, use airtight containers. Mason jars work great. Fill them with your prepared oats and seal them well. This helps prevent any odors from your fridge mixing in. You can store your overnight oats in the fridge for up to five days. This means you can make a batch on Sunday and enjoy it all week. If you see any changes in color or smell, it's best to toss them out. Always trust your senses! You can eat your overnight oats cold right from the fridge. They taste amazing that way! If you prefer them warm, simply heat them in the microwave for about 30 seconds. Stir well after heating. If they are too thick, add a splash of milk to make them creamy again. Yes, you can swap peanut butter for other nut butters. Almond butter, cashew butter, or sunflower seed butter work well. Each nut butter gives a unique taste and texture. Choose one that you enjoy or have on hand. This makes the recipe fun and flexible. Overnight oats stay fresh in the fridge for up to five days. Just make sure to keep them in a sealed jar. This lets you prepare meals ahead of time. It’s a great way to save time on busy mornings. Absolutely! You can make several jars at once. Just multiply the ingredients by the number of servings you want. Store them in individual jars for easy grab-and-go options. This helps you enjoy delicious breakfasts all week. For the full recipe, check out the Peanut Butter Banana Bliss Overnight Oats. Overnight oats are easy and fun to make. We covered the key ingredients, from main oats to tasty toppings. You learned how to mix, store, and even add your favorite flavors. Remember, there are many ways to change the recipe to fit your taste. Follow best practices for perfect results. Keep oats in the fridge for convenience. Enjoy your tasty and healthy breakfast regularly!

Peanut Butter Banana Overnight Oats Easy Delight

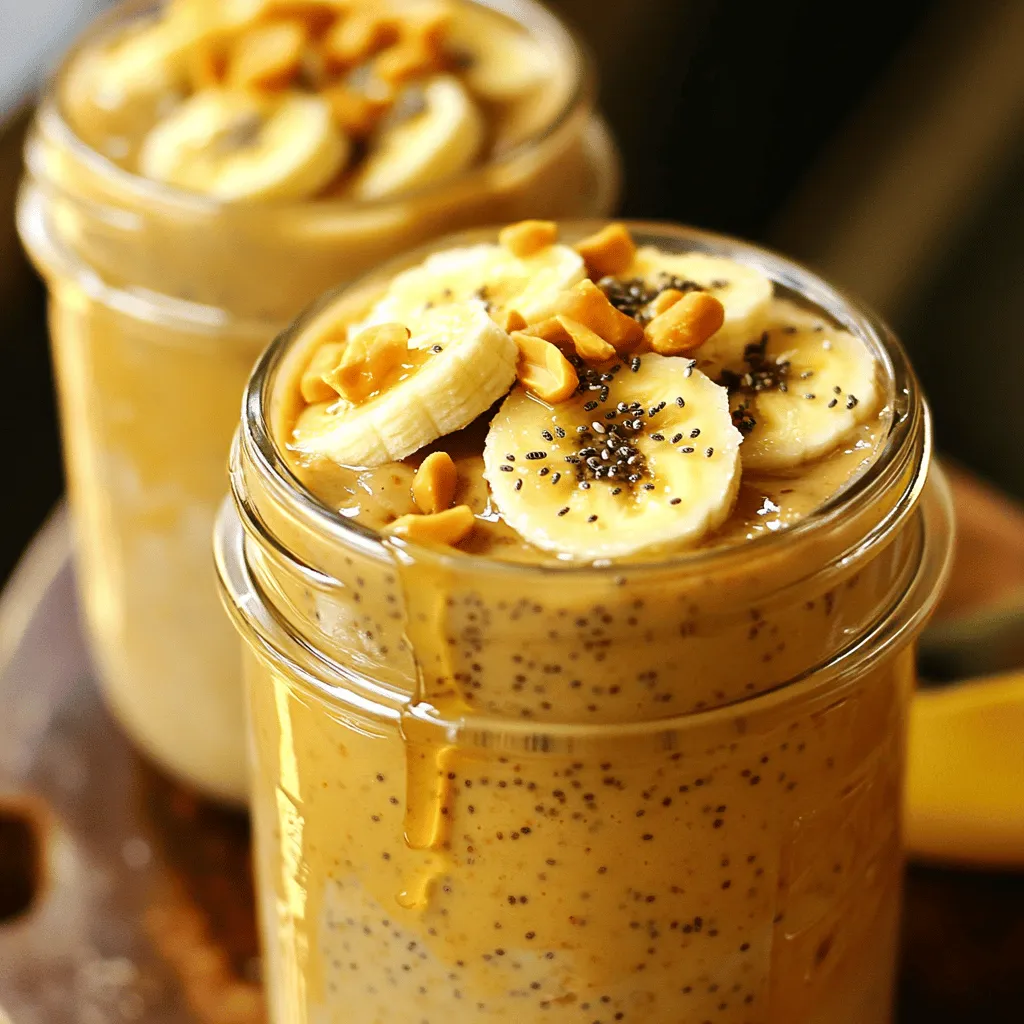
Ready to kickstart your mornings with a simple yet delicious recipe? Peanut Butter Banana Overnight Oats are the answer! This

To make Coconut Cream Pie Bars, gather the following main ingredients: - 1 ½ cups graham cracker crumbs - ½ cup unsweetened shredded coconut - ⅓ cup granulated sugar - ½ cup unsalted butter, melted - 1 cup heavy cream - 1 can (14 oz) sweetened condensed milk - ½ cup coconut milk - 3 large egg yolks - 2 tablespoons cornstarch - 1 teaspoon vanilla extract - 1 cup whipped cream (for topping) - Extra shredded coconut and lime zest for garnish These ingredients create a rich and creamy dessert that everyone loves. Want to boost the flavor? Here are some fun add-ins: - A dash of lime juice for tanginess - A few drops of coconut extract for extra coconut flavor - Chopped nuts like macadamia or pecans for crunch These options give you room to be creative and adjust to your taste. If you need to adjust the recipe, here are some easy swaps: - Use gluten-free graham crackers for a gluten-free option. - Swap heavy cream with coconut cream for a dairy-free treat. - If you can’t find sweetened condensed milk, make your own with coconut milk and sugar. These substitutions let everyone enjoy this tasty dessert without worry. For the full recipe, check out the provided link. To start, preheat your oven to 350°F (175°C). Grab a mixing bowl and add: - 1 ½ cups graham cracker crumbs - ½ cup unsweetened shredded coconut - ⅓ cup granulated sugar - ½ cup unsalted butter, melted Mix these ingredients well. You want them to be combined into a sandy texture. Next, press this mixture firmly into a greased 8x8-inch baking pan. Make sure it forms an even layer. Bake this crust for about 10 minutes. When it’s done, let it cool completely. This crust will give your bars great flavor and a nice crunch. Now, let’s make the coconut filling. In a medium saucepan over medium heat, combine: - 1 cup heavy cream - 1 can (14 oz) sweetened condensed milk - ½ cup coconut milk - 3 large egg yolks - 2 tablespoons cornstarch - 1 teaspoon vanilla extract Whisk these ingredients together well. Keep stirring continuously as it cooks. You want to watch for it to thicken and start to bubble. This should take about 5-7 minutes. When it reaches the right thickness, take it off the heat. Pour the thickened coconut filling over your cooled crust. Spread it evenly with a spatula. Now, it’s time to chill! Cover the pan and place it in the fridge for at least 4 hours, or until it sets. This step is key to getting that perfect texture. After chilling, your bars will be ready to cut into squares. Top each piece with whipped cream and a sprinkle of extra shredded coconut for a beautiful finish. Enjoy your delicious Coconut Cream Pie Bars! For the full recipe, see above. To make a great crust, use fresh graham cracker crumbs. You can crush them in a bag or use a food processor. Mix the crumbs with unsweetened shredded coconut and sugar. This adds flavor and texture. Make sure to press the mixture down firmly in the pan. A well-packed crust holds together better. Bake it for ten minutes, but don’t let it get too brown. A light golden color is perfect. For a creamy filling, you will need to whisk the mixture well while cooking. Combine heavy cream, sweetened condensed milk, coconut milk, egg yolks, and cornstarch in a saucepan. Heat it over medium heat. Stir constantly until it thickens. This helps prevent lumps. Remove it from heat as soon as it starts to simmer. Let it cool slightly before pouring it on the crust. This will keep the layers separate and distinct. One common mistake is not cooling the crust before adding the filling. This can cause the filling to melt into the crust. Another mistake is not chilling the bars long enough. They need at least four hours in the fridge to set properly. Avoid overcooking the filling; it should be thick, not dry. Lastly, don’t forget to taste your filling before pouring it. Adjust sweetness if necessary. For the full recipe, check out the detailed instructions. {{image_2}} You can change the flavor of these bars for fun. Adding chocolate is a great choice. Just mix in half a cup of cocoa powder into your filling. This gives a rich chocolate flavor. You can also add lime for a zesty twist. Just use lime juice and zest instead of some of the coconut milk. This brings a bright and fresh taste to your bars. The crust can change to fit your taste. If you love chocolate, try using Oreo crumbs. Just replace the graham cracker crumbs with crushed Oreos. If you want a nutty flavor, use almond flour mixed with melted butter. This will give a crunchy and rich crust. You can also use gluten-free options if needed. These bars are great with drinks. A cold glass of lemonade pairs well with the sweet filling. You can also serve them with coffee for a nice contrast. Top your bars with whipped cream for extra creaminess. Adding fresh fruit like berries can bring color and flavor. A sprinkle of toasted coconut on top adds texture and taste too. For the full recipe, check out the complete guide to making these delicious Coconut Cream Pie Bars! To keep your Coconut Cream Pie Bars fresh, store them in the fridge. Use an airtight container to prevent them from drying out. They will stay good for up to five days. If you have leftovers, make sure to separate layers with parchment paper. This keeps the bars from sticking together. You can freeze these bars for later. First, cut them into squares. Wrap each piece in plastic wrap, then place them in a freezer-safe bag. This helps avoid freezer burn. They can last up to three months in the freezer. To enjoy them later, let them thaw in the fridge overnight. Reheating is not usually needed for these bars. They taste best cold. If you prefer them warm, place them in the oven at a low temperature for a few minutes. Watch closely to avoid melting the filling. Enjoy your Coconut Cream Pie Bars at your desired temperature! Coconut Cream Pie Bars stay fresh for about 4 to 5 days in the fridge. Keep them in an airtight container. This helps keep the bars moist and tasty. After that, the filling may start to lose its creamy texture. So, eat them while they're fresh! Yes, you can make Coconut Cream Pie Bars a day or two ahead of time. This dessert actually tastes better after chilling. Just be sure to let them set in the fridge for at least 4 hours. This will help the filling firm up nicely. You can serve them cold, which adds to the refreshing taste! If you need a substitute for sweetened condensed milk, try using coconut cream mixed with sugar. A ratio of 1 cup of coconut cream to 1/3 cup of sugar works well. You can also use homemade versions or other milk alternatives. Just keep in mind, these options may change the texture a bit. For the best results, you can follow the Full Recipe to see how it all comes together. Coconut Cream Pie Bars are easy to make and delicious. We covered the main ingredients, optional add-ins, and dietary swaps. You learned how to prep the crust and create a creamy filling. Tips helped you avoid common mistakes. Exploring flavor variations keeps it exciting, while storage tips ensure leftovers last. Remember, these bars are simple and fun to customize. You can enjoy them any way you like!

Coconut Cream Pie Bars Delicious and Easy Recipe

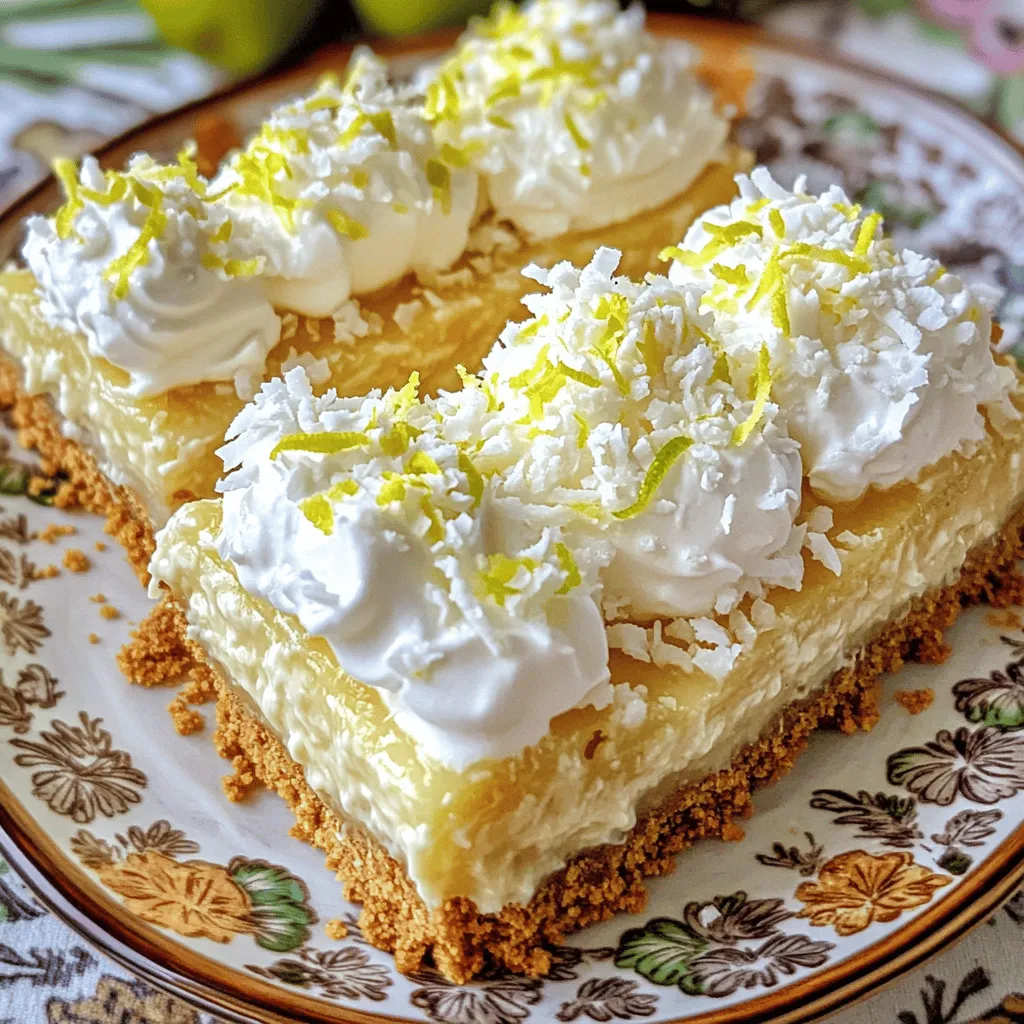
If you love coconut, you’re in for a treat! My Coconut Cream Pie Bars are easy to make and full

To make Chocolate Chip Cookie Dough Dip, you need these simple ingredients: - 1 cup all-purpose flour - ½ cup brown sugar, packed - ½ cup granulated sugar - 1 cup cream cheese, softened - ½ cup butter, softened - 1 teaspoon vanilla extract - ½ cup mini chocolate chips - ¼ teaspoon salt - Assorted dippers (e.g., graham crackers, apple slices, pretzels) Each ingredient plays a key role. The flour gives the dip its cookie dough base. The cream cheese and butter create a creamy texture. The sugars add sweetness and depth. Vanilla extract brings a warm flavor that ties it all together. Mini chocolate chips offer bursts of chocolate goodness in every bite. I love using assorted dippers to make this dessert fun. You can use graham crackers for crunch or apple slices for a refreshing bite. Pretzels add a nice salty touch that balances the sweetness. This dip is easy to make and perfect for sharing. You can find the full recipe further in the article. - Step 1: Combine Cream Cheese and Butter Start by taking your soft cream cheese and butter. Place them in a medium bowl. Beat them together with an electric mixer. Mix until the texture is creamy and smooth. - Step 2: Add Sugars and Mix Next, add both types of sugar: brown and granulated. Mix them in slowly. Keep blending until the mixture is fluffy and well combined. - Step 3: Incorporate All-Purpose Flour Now, sift the all-purpose flour into your bowl. Mix it in on low speed. This helps to keep the dip smooth and avoids any lumps. - Step 4: Mix in Vanilla and Salt Add in the vanilla extract and salt. Stir until everything is mixed well. This adds great flavor to your dip. - Step 5: Fold in Chocolate Chips Take your mini chocolate chips and fold them into the dip. Use a spatula or wooden spoon for this. Make sure the chips are evenly spread throughout. - Step 6: Transfer and Chill Finally, transfer your dip into a serving bowl. Smooth out the top with a spoon. Cover it with plastic wrap and chill for at least 30 minutes. This helps the flavors blend and makes it firmer. Make sure to check out the Full Recipe if you need more details. Best Dippers to Use I love using assorted dippers to enhance the experience. Here are my favorites: - Graham crackers - Apple slices - Pretzels - Vanilla wafers - Fresh strawberries Each dipper offers a different taste and texture, making each bite exciting. Presentation Tips for Serving Make your dip look great! Use a decorative bowl for serving. Surround the bowl with colorful dippers. This creates an inviting spread. For a special touch, sprinkle a few extra chocolate chips on top. It adds charm and visual appeal. How to Make it Extra Creamy For a super creamy dip, make sure your cream cheese and butter are very soft. You can microwave them for a few seconds if needed. Mix them well. This step helps to create that smooth texture everyone loves. What to Avoid When Mixing Do not rush the mixing process. If you mix on high speed too soon, you might create air bubbles. This can lead to a dip that is not as smooth. Start mixing slowly and then gradually increase speed. How to Prevent Lumps To avoid lumps, sift the flour before adding it. This helps break up any clumps. Also, mix on low speed when adding flour. This keeps the dip nice and smooth. If lumps do form, just keep mixing until they disappear. {{image_2}} Gluten-Free Options You can make this dip gluten-free. Simply swap all-purpose flour for gluten-free flour. Many brands work well. Just make sure to follow the same measurement. This keeps the flavor without the gluten. Vegan Chocolate Chip Cookie Dough Dip For a vegan version, replace cream cheese and butter with plant-based options. Use vegan cream cheese and coconut oil. You can also use maple syrup instead of granulated sugar. This makes the dip both tasty and vegan-friendly. Adding Peanut Butter Peanut butter adds a rich taste. Stir in half a cup of your favorite peanut butter when mixing the dip. It gives a nice twist and a nutty flavor. You can even use crunchy peanut butter for some texture. Experimenting with Different Mix-Ins Feel free to get creative with mix-ins. Try adding chopped nuts like walnuts or pecans for crunch. Shredded coconut can also add a fun tropical twist. These additions make each bite exciting and unique. For the full recipe, check out the Chocolate Chip Cookie Dough Dip details above! - Refrigeration Tips: Keep any leftover dip in an airtight container. This helps to maintain its creamy texture. Store in the fridge for up to five days. Remember to take it out about 15 minutes before serving to soften it slightly. - Freezing Instructions: If you want to save some for later, you can freeze the dip. Place it in a freezer-safe container. Make sure to leave some space for expansion. It can stay good for up to three months. When ready to enjoy, thaw it in the fridge overnight. - How Long It Lasts in the Fridge: The dip stays fresh for about five days when refrigerated properly. After this time, the texture may change, and the taste might not be as good. - Signs of Spoilage: Look for any off smells or changes in color. If you see any mold, it’s best to toss it. Also, if the dip has separated or feels watery, it’s time to say goodbye. Can I eat raw flour in this recipe? No, raw flour can carry bacteria like E. coli. It's safer to heat-treat the flour. To do this, spread the flour on a baking sheet and bake it at 350°F for about 5 minutes. This step makes it safe to eat. What can I use as a substitute for cream cheese? You can use Greek yogurt or mascarpone cheese. Both options give a creamy texture. They also add a nice flavor. If you want a dairy-free option, try coconut cream. It has a rich taste and works well in this dip. How do I make the dip less sweet? To reduce the sweetness, cut back on sugar. You can use only ¼ cup of brown sugar. Adding a pinch of salt can help balance the sweetness too. Another idea is to mix in unsweetened cocoa powder for a chocolatey twist. Can I prepare this dip in advance? Yes, you can make this dip ahead of time. Just store it in the fridge for up to three days. Cover it with plastic wrap to keep it fresh. Chilling helps the flavors blend well and makes it even tastier. What do others think about this recipe? Many people love this dip! They rave about its creamy texture and sweet chocolate flavor. It is a hit at parties and gatherings. Reviewers say it’s a fun treat for kids and adults alike. Popular adjustments people have made Some users add nuts for crunch. Others use mini marshmallows for extra sweetness. A few creative cooks mix in peanut butter for a nutty flavor. These tweaks make the dip unique while keeping it delicious. For the full recipe, check out our detailed instructions above! This blog post shared a fun chocolate chip cookie dough dip recipe. You learned easy steps to mix simple ingredients. I offered tips for presentation and serving, ensuring you impress your guests. We discussed variations, so you can make it healthier or explore new flavors. Feel free to store leftovers for later enjoyment. Dive into the world of dips and personalize your experience. This recipe is a tasty treat that anyone can enjoy.

Chocolate Chip Cookie Dough Dip Irresistible Dessert Delight

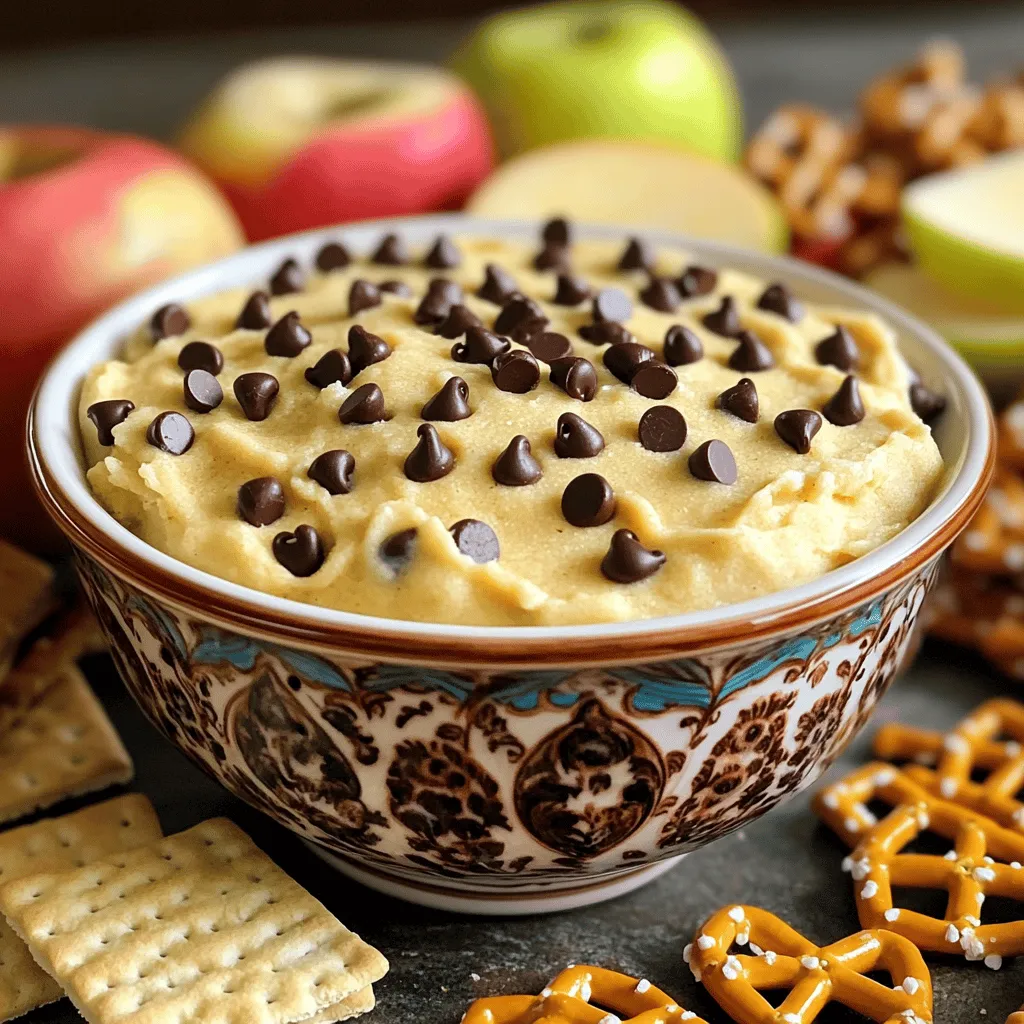
Craving something sweet and fun? You’ve got to try this Chocolate Chip Cookie Dough Dip! It’s rich, creamy, and perfect

To make these lemon blueberry muffins, you need a few key ingredients. Here’s the complete list of ingredients: - 1 ½ cups all-purpose flour - ½ cup granulated sugar - 2 teaspoons baking powder - ½ teaspoon baking soda - ½ teaspoon salt - 1 large egg - ½ cup buttermilk (or milk + 1 tablespoon vinegar) - ⅓ cup vegetable oil - 1 tablespoon freshly grated lemon zest - 1 tablespoon lemon juice - 1 cup fresh blueberries (or frozen, no need to thaw) - Optional: 2 tablespoons powdered sugar for dusting Each ingredient plays a big role in making these muffins tasty. The flour gives structure, while sugar adds sweetness. Baking powder and baking soda help the muffins rise. Salt brings out the flavors. The egg binds everything together. Buttermilk makes the muffins moist, while the vegetable oil adds richness. Lemon zest and juice give a bright flavor that pairs perfectly with blueberries. You can use fresh or frozen blueberries. If you choose frozen, there’s no need to thaw them. If you want to add a little sweetness on top, you can dust with powdered sugar. For the full recipe, check out the instructions to see how these ingredients come together in your kitchen. Set your oven to 375°F (190°C). Line a 12-cup muffin tin with paper liners or spray it with non-stick cooking spray. This step keeps your muffins from sticking and makes cleanup easier. In a large bowl, combine 1 ½ cups of all-purpose flour, ½ cup of granulated sugar, 2 teaspoons of baking powder, ½ teaspoon of baking soda, and ½ teaspoon of salt. Whisk them together well. This mix gives your muffins structure and sweetness. In a separate bowl, beat 1 large egg. Then mix in ½ cup of buttermilk, ⅓ cup of vegetable oil, 1 tablespoon of freshly grated lemon zest, and 1 tablespoon of lemon juice. This mixture adds moisture and bright flavor to your muffins. Pour the wet ingredients into the dry ones. Gently fold them together until just combined. It’s okay if there are a few lumps. Over-mixing will make your muffins tough, so be gentle. Gently fold in 1 cup of fresh blueberries. Make sure to do this carefully so the berries don’t break. You want those bursts of flavor in every bite! Using a spoon or ice cream scoop, fill each muffin cup about ¾ full with the batter. Bake in your preheated oven for 18-20 minutes. Check for doneness by inserting a toothpick into the center. If it comes out clean, your muffins are ready. Let them cool in the tin for 5 minutes before moving them to a wire rack. For an extra touch, dust with powdered sugar before serving. Enjoy your delicious Lemon Burst Blueberry Bliss Muffins! For the complete recipe, check out the Full Recipe. To get fluffy muffins, avoid over-mixing the batter. When you combine the wet and dry ingredients, mix gently. It is fine to have lumps! Over-mixing makes the muffins dense. Aim for a light hand when folding in the blueberries as well. This keeps them whole and juicy. You can enhance the lemon flavor by adding more lemon zest or juice. For a stronger blueberry taste, use more berries. Fresh blueberries work best, but frozen ones are fine too. Just remember, if you use frozen, do not thaw them. This keeps the muffins from becoming soggy. Baking at the right temperature is key for even muffins. Preheat your oven to 375°F (190°C). Make sure to use an oven thermometer for accuracy. Place the muffin tin in the center of the oven. This helps the heat circulate evenly for perfect baking. Check the muffins around 18 minutes. If a toothpick comes out clean, they are ready! For the complete recipe, refer to the [Full Recipe]. {{image_2}} You can make your lemon blueberry muffins even more exciting. Here are some fun add-ins: - Other Fruits: Try raspberries, strawberries, or blackberries. Each fruit brings a new flavor. - Nuts: Walnuts or pecans add a nice crunch. Chop them up and fold them in gently. - Spices: A pinch of cinnamon or nutmeg can enhance the flavor. Just don’t add too much! If you need a gluten-free version, swap the all-purpose flour. Use a gluten-free flour blend instead. Look for one that has xanthan gum. This helps mimic the texture of regular flour. You can enjoy these muffins without worry! To make these muffins vegan, you can replace a few ingredients. Use flax eggs instead of a regular egg. Mix one tablespoon of ground flaxseed with three tablespoons of water. Let it sit for five minutes to thicken. For the buttermilk, combine plant-based milk with a splash of vinegar. This will create a dairy-free version that tastes just as good. These variations make the recipe flexible and fun. You can try different combinations each time you bake! For the full recipe, check out the complete guide. To keep your muffins fresh, store them in an airtight container. This helps prevent them from drying out. Place a paper towel at the bottom of the container. This towel absorbs moisture, keeping the muffins soft. You can store them at room temperature for up to two days. If you want to keep them longer, you can refrigerate them for up to a week. Freezing muffins is easy and keeps them fresh for later. Let the muffins cool completely before freezing. Wrap each muffin in plastic wrap. Then, place them in a freezer bag. Make sure to label the bag with the date. You can freeze them for up to three months. When you're ready to enjoy them, just thaw them in the fridge overnight or at room temperature for a few hours. Reheating muffins is simple. You can use the microwave or the oven. For the microwave, place a muffin on a plate. Heat it for 15 to 20 seconds. Check if it's warm. If not, heat for a few more seconds. For the oven, preheat it to 350°F (175°C). Place the muffins on a baking sheet. Heat for about 5 to 10 minutes. This will give the muffins a nice, warm texture. Enjoy your Lemon Burst Blueberry Bliss Muffins! For the Full Recipe, check earlier sections. Yes, you can use frozen blueberries in your muffins. There’s no need to thaw them first. Just add them straight to the batter. Keep in mind that frozen blueberries may tint your batter a bit blue, but they will still taste great. You might want to reduce the baking time slightly, as frozen berries can cool the batter. Muffins stay fresh for about 2 to 3 days at room temperature. Store them in an airtight container to keep them moist. For longer storage, you can refrigerate them for up to a week. If you want to save them for later, muffins freeze well for up to 3 months. Wrap them tightly in plastic wrap and place them in a freezer bag. If you don't have buttermilk, you can easily make a substitute. Here are some options: - Use regular milk with 1 tablespoon of vinegar or lemon juice. - Use plain yogurt thinned with a bit of water. - Use sour cream mixed with water. These substitutes will give you a similar tangy flavor and moisture in your muffins. For the full recipe, check out the Lemon Burst Blueberry Bliss Muffins 🫐. You now have a simple guide to make delicious lemon blueberry muffins. We covered all the key ingredients, steps, and helpful tips. Remember to avoid over-mixing to keep them fluffy. You can also explore fun variations to suit your taste. Whether you store them for later or share with friends, these muffins are sure to please. Follow these steps, and enjoy the burst of flavor with every bite! Happy baking!

Lemon Blueberry Muffins Delightful and Easy Recipe

Are you ready to bake something delightful? These Lemon Blueberry Muffins are easy to make and bursting with flavor. I’ll

Older posts
Newer posts
← Previous Page1 … Page82 Page83 Page84 … Page104 Next →

dsad

© 2025 pureeatsnow • Built with GeneratePress

Our Policies

  • Copyright Policy
  • Cookie Policy
  • GDPR Policy
  • Privacy Policy
  • Disclaimer
  • Terms Of Use

More Information

  • Home
  • About
  • Contact
  • Appetizers
  • Dessert
  • Dinner
  • Drinks
©2025, pureeatsnow About Back To Top