Skip to content
DisclaimerTerms Of UseGDPR PolicyCookie Policy

pureeatsnow

  • Home
  • Drinks
  • Appetizers
  • Dinner
  • Dessert
  • About
  • Contact
  • Privacy Policy
DisclaimerTerms Of UseGDPR PolicyCookie Policy

Rachel

- 250g fettuccine or your pasta of choice - 2 tablespoons olive oil - 2 chicken breasts, cut into bite-sized pieces - 4 cloves garlic, minced - 1 cup heavy cream - 1 cup chicken broth - 1/2 cup grated Parmesan cheese - 1 teaspoon Italian seasoning - Salt and pepper to taste - Fresh parsley, chopped (for garnish) You need these ingredients for a tasty Creamy Garlic Chicken Pasta. Each one brings its own flavor. The fettuccine is perfect for holding the creamy sauce. You can use any pasta you like. I often switch it up with penne or spaghetti. Olive oil adds a nice richness. It helps cook the chicken well. The chicken breasts provide protein and flavor. Garlic is key for that bold taste. Don’t skip it! Heavy cream gives the dish its creamy texture. Chicken broth adds depth and makes the sauce more flavorful. Parmesan cheese makes it rich and savory. Italian seasoning brings extra flavor. Salt and pepper enhance everything. Garnish with parsley for a fresh touch. It looks pretty and adds a bit of brightness. - Different types of pasta - Alternative proteins (shrimp, tofu) - Additional spices and herbs Feel free to get creative! You can try different pasta shapes or sizes. If you prefer shrimp or tofu, those work well too. Add your favorite spices or herbs to change the flavor. For example, a pinch of red pepper flakes can add heat. This recipe is flexible, so make it your own! Start by boiling a large pot of salted water. It should bubble and roll. Add 250g of fettuccine or your pasta of choice. Cook it for about 8-10 minutes. Check the package for exact timing. You want the pasta to be al dente, which means it should be firm but not hard. This gives the best texture. To test, bite a piece. If it has a slight resistance, it's ready. Save a cup of pasta water before draining. This water helps adjust the sauce later. Use a large skillet for this step. Heat 2 tablespoons of olive oil over medium heat. Once hot, add the chicken pieces. Make sure they are cut into bite-sized pieces for even cooking. Season with salt and pepper for great flavor. Cook for about 5-7 minutes, until they turn golden brown and are no longer pink inside. This browning adds depth to the dish. Remove the chicken and set it aside. It's important not to crowd the pan. Crowding leads to steaming, not browning. In the same skillet, add 4 minced garlic cloves. Sauté them for about 1 minute. Watch closely; you don’t want them to burn. Burnt garlic can taste bitter. Pour in 1 cup of chicken broth. Use a wooden spoon to scrape the bottom of the pan. This step is called deglazing. It lifts the tasty bits stuck to the pan. Let the broth simmer for a few minutes to reduce slightly. Lower the heat and stir in 1 cup of heavy cream, 1 teaspoon of Italian seasoning, and 1/2 cup of grated Parmesan cheese. Stir until smooth, allowing it to thicken. If the sauce is too thick, add a bit of the reserved pasta water. This helps adjust the sauce to your liking. Return the chicken to the skillet, mixing gently. Now add the cooked pasta. Toss everything together carefully so the pasta doesn’t break. If needed, season with more salt and pepper to taste. To get the right thickness, start with heavy cream. This adds a rich, smooth texture. If your sauce is too thick, add reserved pasta water. This will help you reach the perfect creaminess. For flavor, use Italian seasoning, salt, and pepper. You can also add a squeeze of lemon for brightness. Serve your creamy garlic chicken pasta with a fresh salad. A simple green salad pairs well. You can also offer garlic bread on the side. For a beautiful serving, use a large bowl. Top each serving with chopped parsley and extra Parmesan. This adds color and makes the dish appealing. Use a large skillet for sautéing. A non-stick skillet works best for the sauce. This prevents the chicken from sticking. A wooden spoon is great for mixing. You may also want to have measuring cups and spoons ready. These tools help you get the right amounts for your dish. {{image_2}} For a gluten-free dish, choose gluten-free pasta. Brands like brown rice or quinoa pasta work well. You can also use spiralized veggies as a low-carb choice. Zucchini noodles or spaghetti squash are great options. When cooking, just adjust the cooking time as these alternatives may cook faster. To modify the recipe, use a gluten-free flour blend in the sauce. This will help thicken it without gluten. You can also add nutritional yeast for a cheesy flavor without dairy. Adding vegetables can boost flavor and nutrition. Spinach wilts down nicely and adds color. Mushrooms provide a rich, earthy taste. Simply sauté them with the garlic for extra depth. You can also experiment with different cheeses. Try adding goat cheese for tanginess or mozzarella for a creamy stretch. Mixing in a bit of blue cheese creates a bold flavor that elevates the dish. For a dairy-free version, use coconut cream instead of heavy cream. It gives a rich texture while keeping it plant-based. Almond milk or oat milk can also work, but they may not be as thick. If you want to swap the chicken, consider shrimp or tofu. Both options absorb the sauce's flavor well. Shrimp cooks quickly, while tofu can add a hearty texture if pressed and cubed. For the full recipe, check out the complete guide to Creamy Garlic Chicken Pasta. To keep your creamy garlic chicken pasta fresh, follow these tips: - Refrigeration: Store leftovers in an airtight container. It stays good in the fridge for up to 3 days. - Freezing: If you want to freeze, place pasta in a freezer-safe container. It can last up to 3 months. Reheating can change the texture. Here’s how to avoid that: - Avoiding Dryness: Add a splash of chicken broth or cream when reheating. This keeps it moist. - Recommended Methods: Use the stovetop or microwave. For the stovetop, heat on low and stir frequently. For the microwave, cover with a damp paper towel. Knowing how long your dish lasts is key: - Safe Consumption Timeframe: Eat refrigerated pasta within 3 days for the best taste. - Signs of Spoilage: Check for off smells, discoloration, or a slimy texture. If you see these signs, throw it out. For the full recipe, check out the Creamy Garlic Chicken Pasta section! If you want a lighter dish, you have options. You can use half-and-half for a creamy texture. Another choice is whole milk with a bit of butter. For a dairy-free option, use coconut cream or almond milk. Each option will change the taste a bit, but they work well in this recipe. Yes, you can prepare this dish ahead. Cook the pasta and chicken, then store them separately. Make the sauce and cool it before storing. Keep everything in the fridge for up to two days. When you're ready, just heat and combine. This saves time on busy nights. Yes, it is great for meal prep. Store the pasta and sauce in airtight containers. Refrigerate for up to four days. For best results, reheat in a pan over low heat. Add a splash of chicken broth to keep it creamy. This way, you enjoy fresh, delicious meals all week. This blog post covered the main ingredients for Creamy Garlic Chicken Pasta, plus cooking steps and tips. You learned how to sauté chicken and make a creamy sauce without burning garlic. Customization ideas let you switch flavors or adapt for diets. Remember to store leftovers properly and reheat carefully. This dish is versatile and can impress at any meal. Enjoy making it your own and share it with others!

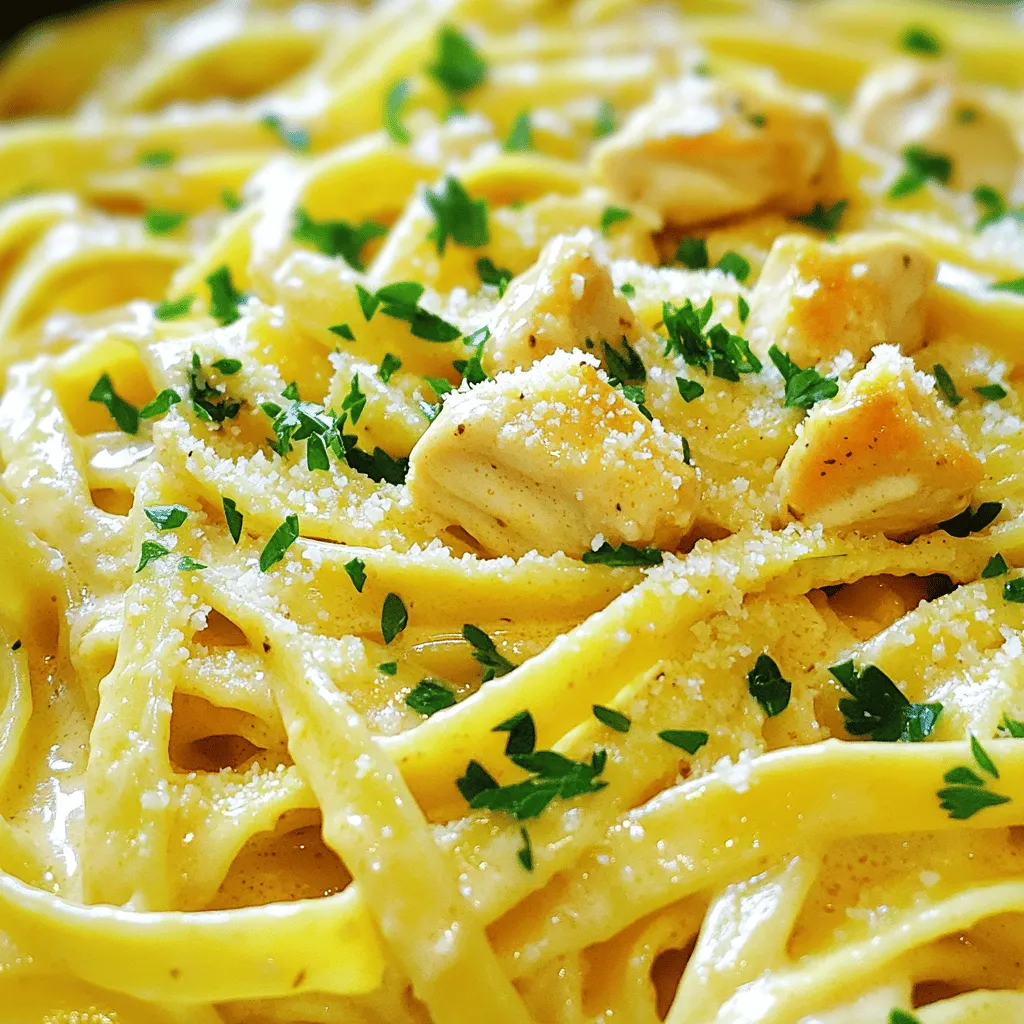
Creamy Garlic Chicken Pasta Quick and Savory Dish

Are you ready for a dinner that’s both quick and satisfying? Creamy Garlic Chicken Pasta combines tender chicken, rich sauce,

To make a delightful seafood pasta salad, gather these fresh ingredients: - Seafood options: - 1 cup cooked shrimp, peeled and deveined - 1 cup cooked calamari rings - Pasta type and quantity: - 8 oz fusilli pasta (or any pasta of choice) - Fresh vegetables and herbs: - 1 cup cherry tomatoes, halved - 1/2 cup black olives, sliced - 1/4 cup red onion, finely chopped - 1/4 cup fresh parsley, chopped - Dressing components: - 1/4 cup mayonnaise - 2 tablespoons lemon juice - 1 tablespoon olive oil - 1 teaspoon Dijon mustard - Salt and pepper to taste These ingredients come together to create a refreshing and light dish. You can easily customize the seafood to your liking. Try adding crab or even scallops for a different twist. Fresh herbs like basil or cilantro can also elevate the flavors. This seafood pasta salad is perfect for warm days or gatherings. Check out the Full Recipe for more detailed steps to assemble this dish! Start by boiling water in a large pot. Add a good amount of salt. This helps the pasta taste better. Next, add your fusilli pasta. Cook it according to the package instructions. Aim for al dente, which means it should be firm but not hard. To check, taste a piece before draining. After cooking, drain the pasta and rinse it under cold water. This cools it down and stops the cooking process. If your shrimp and calamari are not cooked yet, sauté them in a skillet. Heat a splash of olive oil over medium heat. Cook the shrimp for 3-5 minutes until they turn pink. For calamari, cook until it is opaque and tender. Be careful not to overcook, as it can become rubbery. Once done, set the seafood aside to cool. In a small bowl, mix mayonnaise, lemon juice, olive oil, and Dijon mustard. Use a whisk to blend everything until smooth. This dressing adds creaminess and a zesty flavor to your salad. For extra flavor, taste and add salt and pepper as needed. In a large mixing bowl, combine the cooked pasta, shrimp, calamari, cherry tomatoes, black olives, red onion, and parsley. Pour the dressing over the top. Gently toss everything together. Make sure each piece is coated well with the dressing. Finally, cover the salad and chill it in the refrigerator for at least 30 minutes. Chilling helps the flavors mix and makes it taste better. For the Full Recipe, check out the instructions above. Enjoy the process of creating this seafood pasta salad! To make your seafood pasta salad shine, focus on the right balance. Aim for equal parts seafood and pasta. This keeps each bite flavorful. If you want extra crunch, add chopped bell peppers or celery. Both add a refreshing bite that complements the seafood well. You can play with the dressing to fit your taste. For a healthier option, swap mayonnaise for Greek yogurt. It adds creaminess with less fat. Consider flavor profiles too. You can spice things up with chili flakes or fresh herbs like basil or dill for a garden-fresh taste. This adds depth and makes the salad more interesting. For more details, check the Full Recipe to see how these tips come together in the dish. {{image_2}} You can use many seafood options for your salad. Shrimp and calamari are popular, but don't stop there. Try using tuna or crab for a different taste. Both add a nice flavor and texture. If you want a vegetarian option, consider chickpeas or tofu. They provide protein and absorb flavors well. Sometimes you may want to switch up your pasta. Gluten-free pasta options are great for those with allergies. You can find rice, corn, or quinoa pasta in stores. These choices work well in this salad. Another option is whole grain pasta. It adds fiber and a nutty taste. Lastly, try vegetable-based pasta made from zucchini or spinach for a fresh twist. These alternatives can make your salad unique and healthy. To keep your seafood pasta salad fresh, store it properly. First, place the salad in an airtight container. This keeps moisture out and helps maintain flavor. Always refrigerate the salad right after serving. The cool temperature slows down spoilage. The shelf life of your pasta salad is about three days in the fridge. After that, the seafood may not taste good. If you see any signs of spoilage, like an off smell or discoloration, throw it away. Should you reheat seafood pasta salad? Most people enjoy it cold. However, if you prefer it warm, you can do so. Just be careful not to overheat it. To refresh the salad after storage, add a splash of lemon juice and a drizzle of olive oil. This brightens the flavors. Toss gently to mix. You can also add fresh herbs for a pop of taste. For the full recipe, refer to the earlier section. Yes, you can use frozen seafood. Just make sure to thaw it properly. The best way to thaw seafood is to place it in the fridge overnight. If you're short on time, you can also run it under cold water for about 30 minutes. After thawing, pat it dry with a paper towel. This helps to remove excess moisture. To add some heat, consider using red pepper flakes. You can mix them into the dressing or sprinkle them on top. Another great option is to add diced jalapeños or a splash of hot sauce. If you like a smoky flavor, try adding chipotle powder to the dressing. These options can give your salad a fun kick! Serve the salad in a large bowl for sharing. You can garnish it with extra parsley and lemon wedges for a fresh look. A colorful platter always catches the eye! If you want to impress, serve it in individual bowls with a sprig of parsley on top. This makes it easy for guests to enjoy their own portion. To keep pasta from sticking, add salt to the boiling water. This helps the pasta cook evenly. Cook the pasta until it is al dente. After draining, rinse it under cold water to stop cooking. Toss the pasta with a little olive oil right after draining. This adds flavor and keeps it from clumping together. This blog outlined how to create a delicious seafood pasta salad. We discussed the best ingredients, cooking methods, and tips to enhance flavor and texture. Remember to balance seafood and pasta for the best dish. Experiment with variations and don’t shy away from making it your own. With proper storage and reheating tips, you can enjoy this meal for days. Dive in and savor every bite of your creation!

Seafood Pasta Salad Refreshing and Light Dish

Looking for a light and tasty dish to brighten up your meals? This Seafood Pasta Salad is just what you

To make Southern Bananas Foster, gather these ingredients: - 4 ripe bananas, peeled and halved lengthwise - 1/2 cup unsalted butter - 1 cup packed brown sugar - 1 teaspoon vanilla extract You can add spices for more depth. Consider using: - 1/2 teaspoon ground cinnamon - 1/4 teaspoon nutmeg Fresh mint leaves make a nice garnish too. This dessert shines with creamy accompaniments. Serve it with: - 4 scoops of vanilla ice cream - 1/2 cup chopped pecans for crunch For the best experience, let the warm sauce melt the ice cream a bit. The mix of flavors creates a delightful treat. Don’t forget to check out the Full Recipe for all the details! First, grab a large skillet. Place it on the stove over medium heat. Add 1/2 cup of unsalted butter. Let it melt completely. Once the butter melts, add 1 cup of packed brown sugar. Stir the mixture well. You want it to dissolve into a smooth syrup. This takes just a few moments. Next, mix in 1 teaspoon of vanilla extract, 1/2 teaspoon of ground cinnamon, and 1/4 teaspoon of nutmeg. Let this bubble for about 2 minutes. The aromas will be amazing! Now, it’s time for the bananas. Take 4 ripe bananas and peel them. Cut them in half lengthwise. Carefully place the banana halves cut-side down into the syrup. Cook them for about 2-3 minutes. Use a spoon to gently pour the syrup over the bananas. This helps them absorb the flavor. After that, flip the bananas over. Sprinkle in 1/2 cup of chopped pecans. Cook for another 2 minutes. The bananas should become warm and slightly caramelized. You are almost done! Remove the skillet from the heat. Let it cool slightly. Now, take 4 scoops of vanilla ice cream and place them in bowls. Ladle the warm banana mixture over the ice cream. The heat will melt the ice cream a bit. It creates a perfect blend of flavors. To make it look fancy, add fresh mint leaves on top. This adds a nice pop of color and flavor. Enjoy your delightful Southern Bananas Foster! For the complete recipe, refer to the Full Recipe section. Choosing the best bananas is key to a great dessert. Look for bananas that are ripe but not overripe. A perfect banana has a bright yellow color with a few brown spots. These spots tell you the banana is sweet and ready to use. Avoid bananas that are green or too brown. They can change the taste and texture of your dish. When making Southern Bananas Foster, a few mistakes can lead to less tasty results. First, don’t cook the bananas too long. They should be warm and soft but not mushy. Second, make sure to stir the sugar and butter well. This helps create a smooth syrup. Lastly, don’t skip the pecans. They add a nice crunch and flavor that balance the sweetness. How you serve Southern Bananas Foster can make it even more special. Use individual bowls for each serving. Place a scoop of ice cream in the center. Then, ladle the warm banana mixture over the ice cream. This creates a nice melting effect. For extra flair, add crushed pecans on top. A sprig of fresh mint can also brighten the dish. It makes the dessert look inviting and fresh. {{image_2}} If you want to switch up the nuts in your Southern Bananas Foster, try walnuts or almonds. Walnuts add a rich, nutty flavor that pairs well with the sweetness of the bananas. Almonds, on the other hand, give a nice crunch and a hint of sweetness. Just chop them up and use the same amount as the pecans. You can also toast the nuts before adding them for an extra layer of flavor. You can easily make this dessert without alcohol. Instead of rum, use a splash of orange juice or vanilla extract. This swap keeps the flavor rich but makes it family-friendly. If you want to try a different liqueur, consider using banana liqueur for an even fruitier twist. Just replace the rum with the same amount of banana liqueur in the recipe. For gluten-free options, all ingredients in this recipe are already gluten-free. Make sure the liqueur you choose is also gluten-free. If you want a vegan version, swap the butter for a plant-based alternative. You can use coconut oil or vegan butter. Instead of ice cream, serve with a scoop of dairy-free ice cream. These changes keep the dessert delicious while meeting your dietary needs. For the full recipe, check out the details above. To keep your Southern Bananas Foster fresh, proper storage is key. First, let the banana syrup cool down. Use an airtight container to store it. Pour the syrup over the bananas if you plan to eat it soon. For ice cream, keep it in its original container or move it to a sealed container. This helps prevent freezer burn. When you want to enjoy your leftovers, reheating them correctly is important. Start by warming the banana syrup in a skillet over low heat. Stir it gently until it becomes smooth again. Avoid high heat, as it can change the flavor. For the ice cream, take it out of the freezer and let it sit at room temperature for a few minutes. This makes it easier to scoop. How long can you keep your stored Bananas Foster? If stored properly, the banana syrup can last up to three days in the fridge. The bananas may start to lose their texture after this. Ice cream can last for about two weeks if kept in the freezer. Always check for any signs of spoilage before eating. Bananas Foster started in New Orleans in the 1950s. A chef named Paul Blangé created it. He made it for a friend, Owen Brennan, who owned a popular restaurant. The dish quickly became famous. It blends bananas, butter, brown sugar, and rum. This dessert reflects the rich culture of Southern cuisine. It combines French and American flavors, making it a unique treat. Today, Bananas Foster remains a favorite for many people. You can prepare some parts of Bananas Foster ahead. You can slice the bananas and mix the butter and sugar. However, it’s best to cook the bananas just before serving. This keeps them soft and warm. If you make it too early, the bananas can get mushy. The caramel sauce may lose its shine. So, prepare the base, but cook when you’re ready to enjoy. If you want a non-alcoholic version, you can use apple juice. It adds a sweet and fruity taste. Another option is to use vanilla extract with a splash of water. This keeps the flavor rich without the alcohol. You can also try coconut water for a tropical feel. Each substitute gives a different twist to the dish. Experiment and find what you like best. In this blog post, we explored how to make a delicious Bananas Foster. We covered ingredients, cooking steps, tips for the best results, and fun variations. You learned about serving suggestions and how to store leftovers. Remember, the right bananas and careful cooking can make all the difference. Enjoy experimenting with flavors and sharing this treat with friends! You now have the tools to impress anyone with this classic dessert. Happy cooking!

Southern Bananas Foster Delightful Dessert Recipe

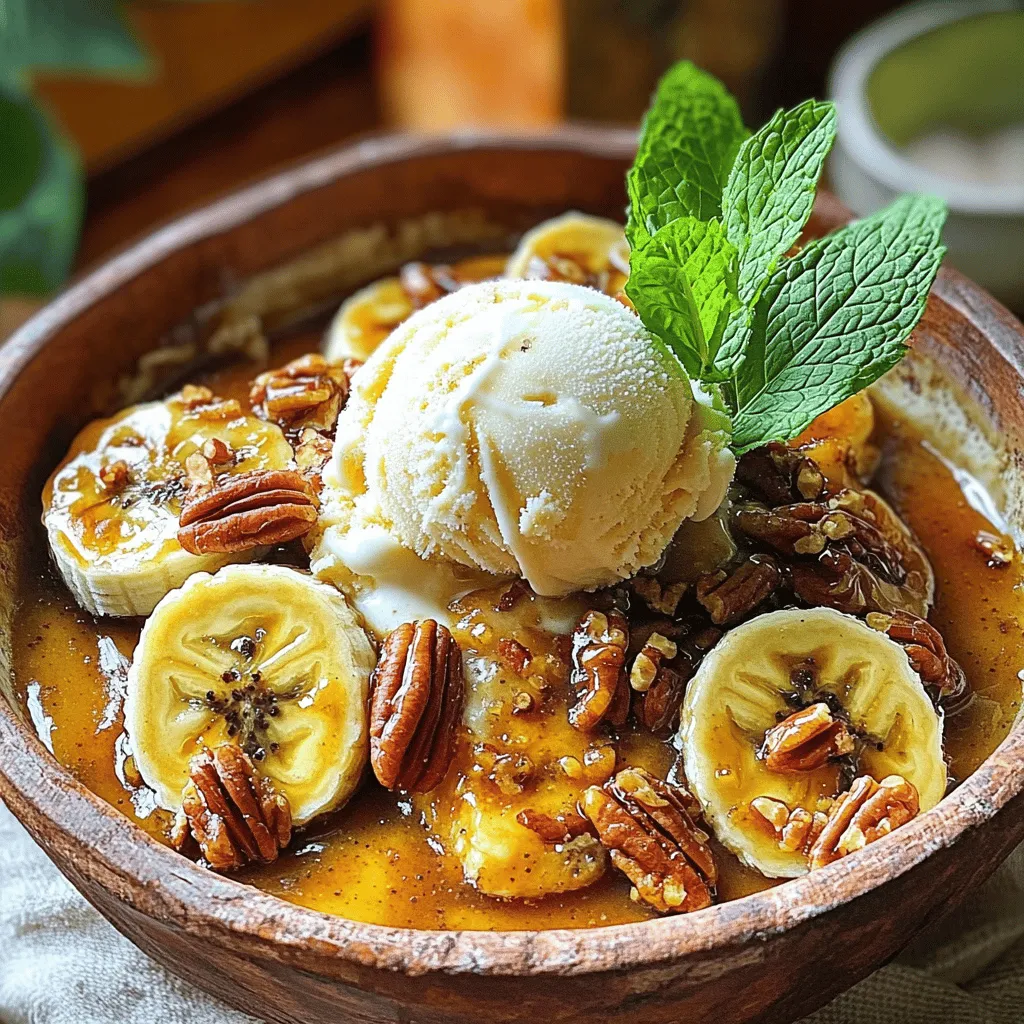
If you’re craving a delightful dessert that’s rich, warm, and easy to make, look no further than Southern Bananas Foster!

- 250 grams paneer, cubed - 2 tablespoons butter - 1 tablespoon oil - 1 medium onion, finely chopped - 2 tomatoes, pureed - 1 tablespoon ginger-garlic paste - ½ cup heavy cream To make butter paneer, you need some key ingredients. Paneer is the star of the dish. It gives the dish its creamy texture and rich flavor. Next, you need fresh tomatoes. They create a smooth sauce that is both tangy and sweet. Onions add depth to the dish when sautéed. Heavy cream makes everything rich and velvety. - 1 teaspoon cumin seeds - 1 teaspoon red chili powder (adjust for spice) - 1 teaspoon garam masala - 1 tablespoon kasuri methi (dried fenugreek leaves) Spices bring life to butter paneer. Cumin seeds add a warm, earthy note. Red chili powder gives it a kick. You can adjust the spice level based on your taste. Garam masala adds warmth and complexity. Kasuri methi adds a fragrant touch that enhances the dish. - 1 teaspoon sugar - Salt to taste - Fresh cilantro for garnish Adding a bit of sugar balances the acidity of the tomatoes. Salt brings out all the flavors. Fresh cilantro is perfect for garnish. It adds color and a fresh taste to the dish. Butter and oil are also essential for cooking. They help create a rich base for the sauce. You can find the full recipe for this mouthwatering dish [here](#). To start, you need to cube the paneer. Cut it into small, even squares. This helps it cook evenly. For a firmer texture, pan-fry the cubes in a non-stick pan. Heat the pan on medium. Add a little oil. Cook the paneer until it turns golden brown on all sides. This step adds flavor and makes it crispy. Once done, set the paneer aside. Now, let’s prepare the base. In the same pan, add two tablespoons of butter and one tablespoon of oil. Heat it over medium heat. Once the butter melts, drop in one teaspoon of cumin seeds. Let them sizzle for a few moments. You will smell the rich aroma. This is the base for your sauce. Next, we sauté the onions. Add one finely chopped onion to the pan. Cook until they turn golden brown. This takes about five minutes. Then, add one tablespoon of ginger-garlic paste. Stir it for one minute. The smell will be amazing! Now, pour in the pureed tomatoes. Use two tomatoes for this. Add one teaspoon of red chili powder and salt to taste. Cook this mixture until the oil separates from the tomatoes. This will take about five to seven minutes. It's time to mix in the cream and spices. Stir in half a cup of heavy cream. Add one teaspoon of sugar and one teaspoon of garam masala. Mix everything well. Let it simmer for three to five minutes. The sauce will thicken and become creamy. Finally, gently fold in the fried paneer cubes. Add one tablespoon of kasuri methi for extra flavor. Cook for another two to three minutes. This ensures the paneer is heated through and coated in sauce. Your delicious Butter Paneer (Paneer Makhani) is now ready to enjoy! For the complete recipe, check out the [Full Recipe]. To make Butter Paneer really tasty, you can play with spice levels. If you like it spicy, add more red chili powder. If you prefer it mild, cut back on the chili. Using fresh spices is key for a better taste. Fresh spices give a burst of flavor. Dried spices are good too, but they often lose some of their punch. A creamy sauce is what makes this dish special. To get that creaminess, use heavy cream as shown in the full recipe. Stir it in gently to avoid breaking the cream. Be careful not to overcook the paneer. Overcooked paneer can turn rubbery. Just fold the paneer into the sauce and warm it for a few minutes. Garnishing your Butter Paneer can elevate its look. Fresh cilantro adds a pop of color and freshness. You can also use a drizzle of cream on top for a fancy touch. Serve it with naan or steamed rice for a complete meal. The warm bread or rice soaks up the sauce perfectly, making every bite a delight. {{image_2}} You can make Butter Paneer even more exciting by adding vegetables. Try adding bell peppers, peas, or spinach. These veggies add color and nutrition to your dish. For a creamy vegan version, swap the heavy cream for cashew cream or coconut milk. This keeps the richness while making it plant-based. Butter Paneer varies across India. Some regions use more spices, while others keep it simple. In Punjab, you may find a richer, creamier sauce. Modern cooks might experiment with new flavors or cooking methods. Each version brings a unique taste to your table. Why not try Butter Paneer pasta? Mix your buttery sauce with cooked pasta for a fun twist. You can also make Butter Paneer pizza. Spread the sauce on pizza dough, top with paneer, and bake until golden. These dishes let you enjoy Butter Paneer in new ways. For the full recipe, check out the [Full Recipe]. To store Butter Paneer (Paneer Makhani) properly, follow these steps: - Cool it down: Allow the dish to cool to room temperature. - Choose containers: Use airtight containers to keep it fresh. - Keep it separate: If serving with rice or naan, store them separately. Reheating Butter Paneer can be tricky, but here’s how to do it right: - Avoid losing creaminess: Reheat on low heat to maintain the sauce's texture. - Microwaving tips: Use a microwave-safe dish and cover it loosely. Heat in short bursts, stirring in between. - Stovetop method: Warm it gently in a pan. Add a splash of cream if it thickens too much. Freezing Paneer Makhani is possible, but it requires care: - Prepare for freezing: Cool the dish completely before freezing. - Use freezer-safe containers: Ensure they are airtight to prevent freezer burn. - Texture tips: To avoid texture loss, consider freezing the sauce and paneer separately. Thaw in the fridge before reheating. For the full recipe, check my earlier sections! Butter Paneer, or Paneer Makhani, is a rich Indian dish. It features soft paneer in a creamy tomato sauce. The dish has roots in North India and is loved worldwide. This recipe mixes butter, cream, and spices for a delightful taste. The history of Paneer Makhani dates back to the 1950s. It originated in Delhi at the Moti Mahal restaurant. The chefs aimed to create a dish for everyone to enjoy. Yes, you can prepare Butter Paneer in advance. Cook the dish and let it cool. Store it in an airtight container in the fridge. It stays fresh for up to three days. When you're ready to eat, reheat it gently on the stove. Add a splash of cream to keep it creamy. For best results, avoid the microwave as it may change the texture. Butter Paneer pairs well with many dishes. Here are some great options: - Naan bread - Steamed basmati rice - Jeera rice (cumin rice) - Roti - Pulao (spiced rice) - Salad for freshness These sides will balance the rich flavors of the dish. To spice up your Butter Paneer, adjust the red chili powder. Start with a little and taste as you go. You can also add chopped green chilies for more heat. Another option is to include a pinch of cayenne pepper. If you like, add a dash of hot sauce before serving. Just be careful not to overpower the creamy sauce! Butter Paneer, or Paneer Makhani, shines with its rich blend of tomatoes, spices, and cream. You'll love how the spices mix to create depth in each bite. Remember, you can customize this dish easily by adding veggies or trying a vegan twist. Store your Butter Paneer well and reheat it right to keep its creamy goodness. With these tips and instructions, you can impress anyone at your table. Now, go ahead and enjoy making this delightful dish!

Butter Paneer (Paneer Makhani) Irresistible Creamy Dish

Butter Paneer, or Paneer Makhani, is a creamy delight that you won’t forget. With its rich taste and smooth texture,

- 4 slices of sourdough bread - 2 tablespoons unsalted butter - 1 cup shredded mozzarella cheese - ½ cup pizza sauce - ¼ cup sliced pepperoni - ¼ cup diced bell peppers - ¼ cup sliced olives - 1 teaspoon Italian seasoning - Fresh basil leaves for garnish To make a great pizza grilled cheese, gather these ingredients. Sourdough bread gives a nice crunch and flavor. Butter adds a rich taste that makes each bite delightful. Mozzarella cheese melts perfectly, creating a gooey center. Pizza sauce brings that classic flavor we love. Pepperoni adds a savory kick, while bell peppers and olives add color and texture. Italian seasoning enhances the overall taste, bringing it all together. Fresh basil leaves not only look nice but add a burst of flavor. With this list, you are ready to create your own pizza grilled cheese masterpiece. For the full recipe, refer to the section above. - Preheat the skillet: First, turn on your skillet to medium heat. This step is key. A hot skillet gives the bread a nice crisp. - Butter the bread: Next, take your unsalted butter. Spread one tablespoon on one side of each sourdough slice. This will help the bread brown perfectly. - Layering the ingredients: Take two slices of bread, buttered side down. Sprinkle half the mozzarella cheese evenly on top. Then, add about 2 tablespoons of pizza sauce over the cheese. - Creating the sandwich: On top of the sauce, add your toppings. Place pepperoni, diced bell peppers, and olives. Finish with the rest of the mozzarella cheese. Finally, add the other two slices of bread on top, buttered side facing out. - Cooking time and technique: Place the sandwiches in the hot skillet. Cook for 3-4 minutes. Check for a golden brown color before you flip. - Tips for flipping the sandwich: Use a spatula to gently flip the sandwich. Press down slightly while it cooks for another 3-4 minutes. This helps melt the cheese inside. Using these steps, you will create a delicious pizza grilled cheese. For the complete process, check the Full Recipe. Enjoy your cooking! When making pizza grilled cheese, mozzarella is the best choice. It melts well and stretches nicely. You can also use provolone or fontina. Both have great flavors and melt well, too. - Mozzarella: Creamy and stretchy. It creates that classic pizza feel. - Provolone: A bit sharper. It adds a nice twist to your grilled cheese. - Fontina: Rich and buttery. It brings a deep flavor to the mix. Cooking pizza grilled cheese requires the right skillet temperature. Medium heat is ideal. It allows the bread to brown without burning. - Skillet Temperature: Preheat your skillet for 3-5 minutes. This helps achieve even cooking. - Perfect Crisp: Use enough butter on the bread. This creates a golden crust. Press down gently with a spatula. This helps the cheese melt evenly. You can serve pizza grilled cheese with a side of pizza sauce. This makes a great dip! You can also add a small salad for a fresh touch. - Dips: Try garlic butter or ranch dressing. Both add flavor and fun. - Garnishes: Fresh basil leaves brighten the dish. A sprinkle of Parmesan cheese also enhances the flavor. For the full experience and recipe details, check out the [Full Recipe]. Enjoy your cooking! {{image_2}} You can make your pizza grilled cheese your own in many ways. Adding vegetables or proteins makes it more filling. Some great options are: - Spinach - Mushrooms - Cooked chicken - Bacon You can also swap out different breads. Sourdough is tasty, but try: - Whole wheat - Ciabatta - Gluten-free bread Each type of bread will change the flavor and texture. Think about different pizza toppings to try! You can add: - Pineapple for sweetness - Jalapeños for heat - Feta cheese for a tangy twist Don't forget international variations! Try using: - Naan for an Indian twist - Tortillas for a quesadilla-style sandwich These options bring fun flavors and textures to the table. If you need gluten-free options, use gluten-free bread. Make sure to check labels on your pizza sauce and cheese. For vegan modifications, swap the mozzarella for vegan cheese. Use olive oil instead of butter. You can also skip the pepperoni and add: - Avocado - Sun-dried tomatoes These changes keep the flavor while meeting your diet needs. For the full recipe, check the section above! To keep your pizza grilled cheese fresh, you need to cool it first. Let the sandwiches sit at room temperature for about 30 minutes. This helps prevent moisture buildup. Once cooled, wrap each sandwich in plastic wrap or foil. You can also place them in an airtight container. This method keeps them from drying out or getting soggy. When it's time to enjoy your leftovers, you want them warm and crispy. The best way to reheat grilled cheese is in a skillet. Heat a non-stick skillet over medium heat. Add a little butter for extra flavor. Place the sandwich in the skillet and cover it with a lid. Cook for about 3-5 minutes on each side. This method helps maintain the crispiness and avoids sogginess. If you are in a rush, you can use the microwave. Place the sandwich on a plate and cover it with a damp paper towel. Heat it for 30 seconds, then check if it’s warm. If not, heat in short bursts until heated through. However, this method may not keep the bread crispy. For the best results, stick with the skillet method. Enjoy your pizza grilled cheese fresh or reheated! For the full recipe, check out the complete instructions. You can prepare the components ahead. Keep the sauce and toppings separate. Spread the butter on the bread slices in advance. When ready to eat, assemble the sandwiches. Cooking them fresh gives the best taste and texture. A simple, smooth sauce works best. You can use store-bought for speed. If you want to make your own, blend canned tomatoes with garlic and herbs. This way, you control the flavor. Use whole-grain bread instead of sourdough. You can reduce cheese or swap it for a lower-fat option. Add more veggies like spinach or mushrooms for extra nutrients. This keeps the taste without too many calories. Yes! Try whole wheat, rye, or even gluten-free bread. Each type gives a different taste and texture. Just make sure it can hold the filling well. Cut the sandwiches diagonally for nice pieces. This makes them easier to eat and looks nice on a plate. Serve with a small bowl of extra pizza sauce for dipping. It adds a fun touch to your meal. In this blog post, we explored how to make a delicious Pizza Grilled Cheese. You learned about the key ingredients, step-by-step instructions, and useful tips for cooking. Customizing your sandwich offers endless possibilities, from different toppings to dietary adjustments. Storing leftovers and reheating them can keep your meal fresh and tasty. Keep these ideas in mind as you create this fun dish at home. With just a few simple ingredients, you can enjoy a flavor-packed treat anytime. Happy cooking!

Pizza Grilled Cheese Savory and Simple Delight

If you’re craving a quick yet delicious meal, you’ve hit the jackpot with Pizza Grilled Cheese! This dish combines crispy

To make Garlic Parmesan Cheeseburger Bombs, gather these simple ingredients: - 1 lb ground beef - 1 cup cheddar cheese, shredded - 1/2 cup cream cheese, softened - 1/4 cup grated Parmesan cheese - 1 teaspoon garlic powder - 1 teaspoon onion powder - Salt and pepper to taste - 1 can refrigerated biscuits (8-count) - 2 tablespoons butter, melted - Parsley, chopped (for garnish) These ingredients come together to create a tasty treat. You get a mix of cheese with juicy beef. The garlic and onion add great flavor. The buttery biscuits wrap everything up perfectly. You can swap some ingredients if you like. Here are a few ideas: - Use ground turkey instead of ground beef for a lighter option. - Try mozzarella or pepper jack cheese for a different taste. - If you don’t have cream cheese, use sour cream instead. - Fresh garlic can replace garlic powder for a stronger flavor. - Use whole wheat biscuits for a healthier option. These swaps can help you adjust the recipe to fit your taste or what you have on hand. Each serving of these Garlic Parmesan Cheeseburger Bombs has about: - Calories: 300 - Protein: 15g - Fat: 22g - Carbohydrates: 18g - Fiber: 1g - Sugar: 1g This meal is hearty and filling. It’s great for a snack or a main dish. Be mindful of portion sizes if you are watching your diet. You can enjoy these bombs while still being aware of nutrition. For the full recipe, check out the details above. To start, gather all your ingredients. You will need ground beef, cheeses, and spices. Having everything ready makes cooking easier and more fun. Preheat your oven to 375°F (190°C). This step is key for getting that nice, golden brown color on your bombs. In a large bowl, mix the ground beef with the cheddar cheese, cream cheese, and Parmesan cheese. Add garlic powder, onion powder, salt, and pepper. Stir well until all the ingredients blend together. Next, open the can of refrigerated biscuits. There are eight biscuits in a can. Take one biscuit and flatten it in your hand. It should be about the size of your palm. Now, scoop a spoonful of the cheeseburger mix and place it in the center of the biscuit. Carefully fold the edges over the filling. Pinch the edges tightly to seal in the goodness. This step is important. Make sure there are no gaps. Repeat these steps for all biscuits until the mixture is gone. Place the filled biscuits seam-side down on a baking sheet lined with parchment paper. This keeps them from sticking. Brush the tops with melted butter for a crispy finish. Bake them for 15 to 20 minutes. Keep an eye on them. You want them to turn a lovely golden brown. Once done, take them out and let them cool for a few minutes. Garnish with some fresh chopped parsley for a nice touch. For the full recipe, check [Full Recipe]. To make the best Garlic Parmesan Cheeseburger Bombs, follow these tips: - Use fresh ingredients for the best flavor. - Mix the beef with the cheeses gently. This keeps the meat tender. - Don’t overfill the biscuits. A spoonful of filling works well. - Seal the bombs tightly to keep the filling inside. - Brush the tops with butter for a golden crust. Watch out for these common mistakes: - Using cold ingredients can make mixing hard. Let cream cheese sit out first. - Flattening the biscuits too much may lead to tearing. Keep them thick enough to hold the filling. - Not preheating the oven can result in uneven cooking. Always preheat for best results. - Skipping the parchment paper can lead to sticking. Always line your baking sheet. Here are some fun serving ideas: - Arrange the bombs on a wooden board for a rustic look. - Garnish with chopped parsley for color. - Offer dipping sauces like ketchup, mustard, or ranch. - Pair with a light salad or crispy fries for a full meal. For the full recipe, check out the detailed instructions. Enjoy your cooking! {{image_2}} You can switch up the cheese in these bombs for fun. Try mozzarella for a stretchy, gooey bite. Monterey Jack adds a mild flavor and melts well, too. For a stronger taste, use blue cheese or feta. Mixing cheeses can give you unique flavors that surprise your taste buds. Add more to your cheeseburger bombs by including other fillings. Chopped onions or bell peppers add crunch and sweetness. You can also mix in cooked bacon for a smoky flavor. For a spicy kick, add jalapeños or hot sauce. These extras can make each bite even more enjoyable. You can make these bombs meatless for a tasty veggie option. Use cooked lentils or black beans as a filling base. Add cheese, garlic, and your favorite spices. Try sautéed mushrooms or spinach to give more flavor and texture. These vegetarian bombs can be just as delicious and satisfying. For the full recipe, check out the detailed steps provided in the main article. Store your Garlic Parmesan Cheeseburger Bombs in an airtight container. This keeps them fresh. Place the container in the fridge. They will stay good for up to three days. If you want to keep them longer, freezing is a great option. To reheat, take out the bombs from the fridge. Preheat your oven to 350°F (175°C). Place the bombs on a baking sheet. Heat them for about 10-15 minutes. This makes them warm and crispy again. You can also use the microwave. Just heat for about 30 seconds to 1 minute. You can freeze the assembled bombs before baking. Wrap each bomb tightly in plastic wrap. Place them in a freezer bag for up to three months. When you’re ready to bake, take them out. Let them thaw in the fridge overnight. Then bake them as usual. This way, you can enjoy fresh bombs anytime! For the full recipe, check the earlier section. Yes, you can prepare these bombs ahead of time. Make the filling and fill the biscuits. Then, place them on a baking sheet. Cover the sheet with plastic wrap. You can store it in the fridge for up to 24 hours. When ready to bake, just preheat the oven and pop them in. This makes it easy for parties or busy nights. Dipping sauces add fun flavors to your Garlic Parmesan Cheeseburger Bombs. Here are some tasty options: - Ketchup - Mustard - Ranch dressing - BBQ sauce - Garlic aioli These sauces complement the cheesy, savory taste of the bombs and make every bite special. Absolutely! You can switch the ground beef for other meats. Ground turkey or chicken works well. You could even try ground pork for a different flavor. Just keep the seasonings the same to maintain the overall taste. To keep your biscuits fluffy, do not overwork the dough. When you flatten them, use gentle pressure. Also, don't skip preheating the oven. The hot air will help them rise while baking. Lastly, brush them with melted butter right before baking. This adds flavor and a nice golden color. You’ll love how airy and light they turn out. For the full recipe, check out the instructions above! In this blog post, we explored every aspect of making delicious cheeseburger bombs. We covered the essential ingredients, step-by-step instructions, and common mistakes to avoid. You now know about different cheese options, filling ideas, and how to store leftovers. As you try your hand at these tasty treats, remember to have fun and be creative. Your cheeseburger bombs will impress anyone who tries them! Enjoy your cooking adventure!

Garlic Parmesan Cheeseburger Bombs Tasty and Easy Recipe

If you’re craving a snack that packs flavor and fun, you’ve hit the jackpot! These Garlic Parmesan Cheeseburger Bombs are

- Chicken and Vegetables For this dish, I use 1 pound of boneless, skinless chicken thighs. They stay juicy and tender. You also need a bell pepper, broccoli florets, and a carrot. Slice the bell pepper and thinly slice the carrot. The broccoli adds great color and crunch. - Teriyaki Sauce Components The teriyaki sauce is a mix of flavors. You will need ½ cup of low-sodium soy sauce. It adds salt and depth. Next, add ¼ cup of honey for sweetness. You also need 2 tablespoons of rice vinegar for acidity. Don't forget 2 cloves of minced garlic and 1 teaspoon of grated ginger. They both bring a nice zing. Finally, sprinkle in 1 tablespoon of sesame seeds for garnish. - Rice Options You can serve this dish over cooked rice. White or brown rice works well. The rice serves as a base and soaks up the sauce. For a full recipe, check out the detailed instructions above. To make the teriyaki sauce, grab a medium bowl. Mix these ingredients well: - ½ cup low-sodium soy sauce - ¼ cup honey - 2 tablespoons rice vinegar - 2 cloves garlic, minced - 1 teaspoon ginger, grated This sauce gives your chicken a sweet and salty taste. Set the bowl aside for later. Now, heat 2 tablespoons of vegetable oil in a large pan over medium-high heat. Once the oil is hot, add 1 pound of diced chicken thighs. Cook them for about 5 to 7 minutes. You want the chicken to turn golden brown and be fully cooked. After the chicken is cooked, pour the teriyaki sauce over it. Let it simmer for 2 to 3 minutes. Stir occasionally. This step helps the sauce thicken and flavor the chicken. While the chicken simmers, prepare your veggies. Add 1 sliced bell pepper, 1 cup of broccoli florets, and 1 thinly sliced carrot to the pan. Stir everything together and cook for another 3 to 4 minutes. You want the veggies to stay tender yet crisp. Now, it’s time to build your bowl! Place a scoop of cooked rice at the bottom. Spoon the teriyaki chicken and veggies over the rice. Don't forget to drizzle any extra sauce from the pan on top. Finish with a sprinkle of sesame seeds and chopped green onions for a pop of flavor and color. Your easy chicken teriyaki bowls are ready to enjoy! For the full recipe, check out the detailed steps above. To make a great teriyaki sauce, start with low-sodium soy sauce. This keeps the flavor strong but not too salty. Mix soy sauce with honey for a sweet touch. Add rice vinegar for brightness. Don’t forget fresh minced garlic and grated ginger. These ingredients add depth and warmth. Whisk them together well and let the sauce sit a bit. This helps the flavors blend together nicely. When cooking chicken, use boneless and skinless thighs. They stay juicy and tender. Cut the chicken into small pieces for even cooking. Heat your pan to medium-high before adding oil. This helps the chicken get a nice brown color. Cook the chicken for about 5-7 minutes. Make sure it is golden brown and cooked all the way through. Pour the teriyaki sauce over the chicken last. Let it simmer to thicken, which adds flavor. You can mix up the veggies in your teriyaki bowl. Bell peppers, broccoli, and carrots work well together. But you can also use snap peas, zucchini, or mushrooms. Just slice them thinly for quick cooking. Stir-fry the veggies until they are tender but still crisp. This keeps the colors bright and the textures fresh. Want to add more flavor? Consider sprinkling sesame seeds or chopped green onions on top. These small touches make your dish look and taste impressive. For the full recipe, check out the complete details above. {{image_2}} You can switch the chicken for other proteins. Try diced beef or shrimp. These options add unique flavors to the bowl. Tofu is a great choice too, giving a nice texture and taste. Just make sure to cook the protein until it’s safe to eat. This way, you keep the dish tasty and healthy. For a vegetarian or vegan dish, use tofu or tempeh. Both of these can absorb flavors well. Marinate them in the teriyaki sauce before cooking. This adds depth to the taste. You can also add more veggies like mushrooms or zucchini. These choices not only boost flavor but also keep it colorful and fun. Get creative with your toppings! Sprinkle sesame seeds, chopped green onions, or even crushed peanuts. You can add fresh herbs like cilantro for a pop of flavor. Sliced avocado or pickled ginger can give a nice twist too. These toppings can change each time you make the dish. It keeps your meals exciting and fresh. You can explore different flavors with each bowl! For a complete guide on making these variations, refer to the Full Recipe. To keep your chicken teriyaki fresh, store leftovers in airtight containers. This helps prevent moisture loss and keeps flavors intact. Allow the dish to cool down before sealing. If you have extra rice, store it separately. This prevents it from becoming soggy. When you're ready to enjoy leftovers, reheat them gently. Use the microwave or a skillet. If using a microwave, cover the bowl to retain moisture. Heat in short bursts, checking often to avoid overcooking. If using a skillet, add a splash of water or soy sauce to keep it moist. Stir occasionally for even heating. Properly stored teriyaki chicken can last in the fridge for 3 to 4 days. If you want it to last longer, consider freezing it. When frozen, it can last for up to 3 months. Just remember to label your containers with dates. This way, you can enjoy your easy chicken teriyaki bowls whenever you like. For the full recipe, check out the instructions above. To make Easy Chicken Teriyaki Bowls from scratch, start with fresh ingredients. First, mix the teriyaki sauce in a bowl. Combine low-sodium soy sauce, honey, rice vinegar, minced garlic, and grated ginger. This sauce brings flavor to your dish. Then, cook diced chicken in vegetable oil until golden brown. Pour the sauce over the chicken and let it simmer. Add your favorite veggies like bell pepper, broccoli, and carrots. Cook until crisp and tender. Serve it all over cooked rice for a hearty meal. For the full recipe, check out the details above. Common mistakes include using too much sauce or overcooking the chicken. Balance the sauce for the best flavor. If the chicken cooks too long, it becomes dry. Always check for doneness with a meat thermometer; it should reach 165°F (75°C). Don't forget to prep your vegetables. Cutting them evenly ensures they cook at the same time. Lastly, avoid skipping the garnishes. Sesame seeds and green onions add great taste and color. Yes, you can freeze Teriyaki Chicken Bowls. First, let the dish cool down completely. Then, place it in an airtight container. You can separate the rice and chicken for better texture. The chicken can last up to three months in the freezer. When you are ready to eat, thaw it overnight in the fridge. Reheat the bowl in a microwave or on the stove until hot. This way, you keep its great taste and texture. You now have a guide for making easy chicken teriyaki bowls. We covered key ingredients, simple steps, and helpful tips. You learned how to make teriyaki sauce and cook chicken perfectly. We also explored fun variations and storage tips. With these insights, you can create delicious meals tailored to your taste. Enjoy experimenting and don’t hesitate to try new ingredients. Happy cooking!

Easy Chicken Teriyaki Bowls Simple and Quick Meal

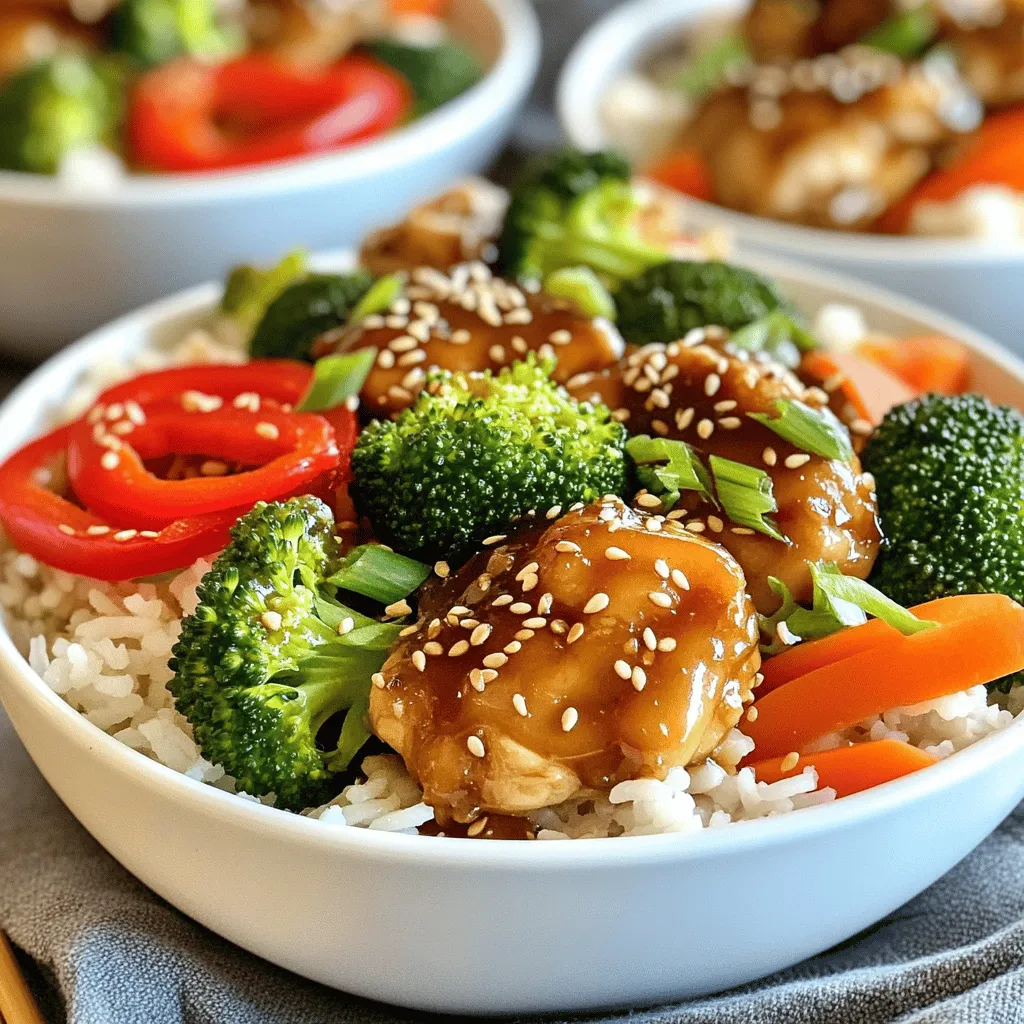
Looking for a quick and tasty meal? Easy Chicken Teriyaki Bowls are your answer! This dish combines tender chicken, crisp

To make this chocolate chip cookie skillet, you need: - 1 cup unsalted butter, softened - 1 cup packed brown sugar - 1/2 cup granulated sugar - 1 teaspoon vanilla extract - 2 large eggs - 2 1/4 cups all-purpose flour - 1 teaspoon baking soda - 1/2 teaspoon salt - 1 1/2 cups semi-sweet chocolate chips - 1/2 cup chopped nuts (optional) These ingredients come together to create a warm and gooey treat. You can swap some ingredients if you have dietary needs or preferences: - Use coconut oil instead of butter for a dairy-free option. - Replace brown sugar with coconut sugar for a lower glycemic index. - Use gluten-free flour in place of all-purpose flour for a gluten-free version. - If you do not have eggs, try using 1/4 cup unsweetened applesauce per egg. - Dark chocolate chips can replace semi-sweet chips for a richer flavor. These substitutions can still give you a tasty dessert. For the best results, I recommend these brands: - Butter: Kerrygold for a rich, creamy flavor. - Chocolate Chips: Ghirardelli or Nestlé for quality and taste. - Flour: King Arthur Flour for consistent results. - Vanilla Extract: Nielsen-Massey for pure, real flavor. Choosing trusted brands can make your dessert even better. For the complete method, check the Full Recipe. 1. Preheat your oven to 350°F (175°C). Grease a 10-inch cast iron skillet. 2. In a large bowl, cream together 1 cup of softened butter, 1 cup of brown sugar, and 1/2 cup of granulated sugar. Mix until light and fluffy. 3. Add 1 teaspoon of vanilla extract and 2 large eggs to the butter mix. Stir well until everything is mixed. 4. In another bowl, whisk together 2 1/4 cups of all-purpose flour, 1 teaspoon of baking soda, and 1/2 teaspoon of salt. This is your dry mix. 5. Gradually add the dry mix to the wet mix. Stir until just combined. Do not overmix! 6. Fold in 1 1/2 cups of semi-sweet chocolate chips and 1/2 cup of chopped nuts, if you want. 7. Spoon the cookie dough into the prepared skillet. Spread it evenly to cover the bottom. 8. Bake in the preheated oven for 25-30 minutes. Look for golden edges and a soft center. 9. Remove the skillet from the oven and let it cool for a few minutes. 10. Serve warm, right from the skillet. Top with a scoop of vanilla ice cream and drizzle with chocolate sauce. Enjoy this delicious dessert with friends or family! For more details, check the Full Recipe. To get the best texture in your chocolate chip cookie skillet, focus on the butter. Use softened, unsalted butter. This helps create a creamy base. Make sure to cream it well with the sugars until it's light. This adds air to your dough, making it fluffy. Don't overmix after adding the flour. Mix just until combined. This keeps your cookie soft and chewy. Bake until the edges are golden but the center is still soft. This will create a nice contrast in textures. One common mistake is not measuring the flour correctly. Too much flour can make the cookie dry. Use a spoon to scoop the flour into your measuring cup. Don’t pack it down. Another mistake is baking too long. Every oven is different. Start checking your cookie skillet a few minutes early. If you see golden edges and a slightly soft center, it’s ready. Lastly, don’t skip the resting time. Letting it cool for a few minutes helps set the texture. Serve your chocolate chip cookie skillet warm for the best taste. Top it with a scoop of vanilla ice cream. The heat from the cookie melts the ice cream, creating a perfect blend. You can also drizzle some chocolate sauce over the top. Add chopped nuts for extra crunch if you like. For a fun twist, try adding fresh berries on the side. These add a burst of flavor and color to your plate. For the full recipe, check back to ensure you have all the details. {{image_2}} You can change the chocolate chips in your skillet cookie. Try dark chocolate for a rich taste. Milk chocolate offers a sweet, creamy flavor. You may even mix different types for a fun twist. White chocolate adds a nice contrast too. Each type will give your cookie a new look and taste. If you want to add nuts, there are many choices. Walnuts bring a nice crunch and flavor. Pecans add a buttery taste. If you prefer no nuts, skip them altogether. You could also use seeds like sunflower or pumpkin seeds. These give a similar crunch without the nutty flavor. Consider adding toppings for extra joy. Sprinkling sea salt on top can enhance the flavors. You might try adding caramel sauce for sweetness. A scoop of ice cream makes it a treat. For fun, mix in candy pieces like M&Ms or toffee bits. Each topping makes your cookie skillet even more special. You can find the full recipe to explore these variations. To keep your chocolate chip cookie skillet fresh, let it cool first. Once cool, cover the skillet tightly with plastic wrap or aluminum foil. You can also transfer leftovers to an airtight container. Store it at room temperature if you plan to eat it within two days. If you want to keep it longer, place it in the fridge for up to a week. When you are ready to enjoy your leftover cookie skillet, preheat your oven to 350°F (175°C). Place the skillet in the oven for about 10 minutes. This warms the cookie and helps it regain its soft texture. You can also use the microwave. Just heat a slice for about 20-30 seconds. Be careful not to overheat it, or it may become tough. If you want to save some cookie skillet for later, freezing is a great option. First, let the skillet cool completely. Then, cut the cookie into slices. Wrap each slice tightly in plastic wrap, then place them in a freezer-safe bag or container. You can freeze it for up to three months. When ready to eat, thaw in the fridge overnight and reheat as needed. Yes, you can prepare the cookie dough in advance. Mix it up and store it in the fridge for up to 24 hours. When you're ready to bake, just spread the dough in the skillet and bake as usual. This makes it easy to serve fresh, warm cookies right when you want them. Check the edges of the cookie. They should be golden brown. The center might look a bit soft, and that's okay. It will firm up as it cools. A toothpick inserted in the center should come out with a few moist crumbs. Yes, you can use any oven-safe skillet. A cast iron skillet works best for even cooking. If you don’t have one, a metal or ceramic skillet will also work. Just make sure it can handle the oven heat. This article explored the key ingredients, step-by-step instructions, and expert tips for making a cookie skillet. I shared ingredient substitutions and brand recommendations to help you enjoy the best flavor. You now know how to achieve the perfect texture and avoid common mistakes. With variations and storage info, you can customize your recipe and enjoy leftovers. Follow these guidelines to create a delightful treat that suits your taste. Enjoy baking your cookie skillet!

Chocolate Chip Cookie Skillet Delicious Dessert Recipe

If you crave a warm, gooey dessert, you’re in the right place! This Chocolate Chip Cookie Skillet recipe is easy

- 1 can (15 oz) chickpeas, drained and rinsed - 1 tablespoon olive oil - 1 teaspoon smoked paprika - 1 teaspoon cumin - ½ teaspoon cayenne pepper (adjust to taste) - Salt and pepper, to taste - 1 cup shredded red cabbage - 1 avocado, sliced - ½ cup cherry tomatoes, halved - ¼ cup fresh cilantro, chopped - 6 small corn or flour tortillas - 2 tablespoons lime juice - ¼ cup Greek yogurt or dairy-free alternative (optional) Each ingredient plays a key role in your taco. Chickpeas are the star. They provide protein and fiber. Olive oil helps in cooking and adds richness. Smoked paprika and cumin give the tacos a warm, earthy flavor. Cayenne pepper adds heat, which you can adjust to your liking. Salt and pepper enhance all the flavors in the mix. Shredded red cabbage adds a crunchy texture and bright color. Avocado gives creaminess and healthy fats. Cherry tomatoes add sweetness and acidity. Fresh cilantro brings a burst of freshness. Tortillas are the base, holding all the tasty fillings. Lime juice brightens the dish, while Greek yogurt can add creaminess if you choose to include it. One serving of Spicy Chickpea Tacos has about 350 calories. The tacos are rich in protein, thanks to the chickpeas. Each taco also provides fiber, which is good for digestion. Chickpeas are packed with vitamins and minerals, like folate and iron. The avocado offers healthy fats, while the cabbage is full of vitamins K and C. If you want to switch things up, there are great alternatives. Instead of chickpeas, you can use black beans or lentils. For a gluten-free option, use corn tortillas. If you prefer dairy-free, skip the Greek yogurt or use a plant-based alternative. You can replace avocado with guacamole for added flavor. Try adding different veggies like bell peppers or corn for variety. To start, gather all your ingredients. You will need: - 1 can (15 oz) chickpeas, drained and rinsed - 1 tablespoon olive oil - 1 teaspoon smoked paprika - 1 teaspoon cumin - ½ teaspoon cayenne pepper (adjust to taste) - Salt and pepper, to taste - 1 cup shredded red cabbage - 1 avocado, sliced - ½ cup cherry tomatoes, halved - ¼ cup fresh cilantro, chopped - 6 small corn or flour tortillas - 2 tablespoons lime juice - ¼ cup Greek yogurt or dairy-free alternative (optional) Next, lightly mash the chickpeas in a bowl. Use a fork or potato masher. Leave some whole for texture. This step is key for a nice bite in your tacos. While you prepare the chickpeas, toss the shredded red cabbage with lime juice in a small bowl. This mix adds brightness and crunch to your tacos. Set this aside while you cook the chickpeas. Heat olive oil in a skillet over medium heat. Once hot, add the mashed chickpeas. This will help them crisp up nicely. Sprinkle smoked paprika, cumin, cayenne pepper, salt, and pepper over the chickpeas. Stir well to combine. Cook for about 5-7 minutes. Stir occasionally. You want them to be heated through and slightly crispy. This brings out the rich flavors and adds a satisfying texture. Now it's time to assemble your tacos! Warm the tortillas in another pan or over a flame for a few seconds on each side. This makes them soft and easy to fill. Take a warm tortilla and add a generous scoop of spicy chickpeas. Next, layer the limey cabbage, followed by avocado slices, cherry tomatoes, and fresh cilantro. If you like, top with a dollop of Greek yogurt for creaminess. For the best presentation, arrange the tacos on a wooden board. Garnish with extra lime wedges and a sprinkle of cilantro. Serve with a side of lime for squeezing over the tacos. Enjoy your tasty creation! For the full recipe, refer to the detailed instructions above. To make your spicy chickpea tacos perfect, focus on time and taste. First, mash the chickpeas lightly to keep some whole. This gives your tacos great texture. Heat the olive oil well before adding the chickpeas. This helps them crisp up nicely. For extra flavor, let the spices cook for a full 5-7 minutes. This step makes them fragrant and tasty. You can adjust the cayenne pepper to suit your spice level. If you like it hot, add more! Presentation matters! Serve your tacos on a bright wooden board. This gives a rustic vibe. Add extra lime wedges and fresh cilantro for color. Arrange the tacos neatly, and stack them slightly for a fun look. You can also serve them with a small bowl of Greek yogurt on the side. This adds creaminess and contrasts well with the spicy flavors. You want your dish to look as good as it tastes! If you have leftovers, store them properly to keep them fresh. Place the chickpea mixture in an airtight container in the fridge. It will last for up to three days. Keep your toppings separate. This keeps the tortillas from getting soggy. When you’re ready to eat, warm the chickpeas and tortillas again. You can mix and match toppings as you please. Enjoy your tasty tacos again! For the complete cooking process, check out the Full Recipe. {{image_2}} If you want to kick up the heat in your spicy chickpea tacos, try these ideas: - Add more cayenne pepper: This is an easy way to boost the spice. - Fresh jalapeños: Slice them thin and add to your tacos. - Hot sauce: Drizzle your favorite hot sauce over the top. - Chipotle powder: This gives a smoky flavor with a spicy kick. - Sriracha mayo: Mix sriracha with mayo for a creamy, spicy topping. These options will make your tacos even more exciting! You can switch up ingredients to change the flavors in your tacos. Here are some fun ideas: - Different legumes: Use black beans or lentils instead of chickpeas. - Add more veggies: Try diced bell peppers or roasted corn for crunch. - Toppings: Swap avocado for guacamole or add pickled onions for tang. - Herbs: Experiment with parsley or mint for a fresh taste. These variations keep the recipe fresh and fun! The type of tortilla you use can change the whole meal. Here are some choices: - Corn tortillas: These have a nice flavor and are naturally gluten-free. - Flour tortillas: Soft and chewy, they hold up well with fillings. - Lettuce wraps: For a low-carb option, use large lettuce leaves instead. - Whole wheat tortillas: A healthier choice that adds a nutty flavor. Each tortilla type brings a unique twist to your spicy chickpea tacos. Spicy Chickpea Tacos pair well with many tasty sides. Here are some ideas: - Mexican Street Corn: This dish adds sweetness and crunch. - Black Bean Salad: A refreshing mix with beans, corn, and lime. - Guacamole: Creamy and rich, it complements the spice. - Rice and Quinoa: These grains add a hearty touch. - Salsa: Fresh or roasted salsa brings extra flavor. These sides enhance the meal and add variety to your plate. Choosing the right drink can elevate your taco experience. Here are some great options: - Margaritas: The classic lime flavor balances the spice. - Cold Beer: A light lager or pale ale cools down the heat. - Iced Tea: Unsweetened tea is refreshing and simple. - Sparkling Water: A fizzy drink cleanses the palate. - Fresh Limeade: This sweet and tangy drink brightens the meal. These beverages will make your dining experience more enjoyable. Spicy Chickpea Tacos can shine as part of a larger meal. Here are some suggestions: - Taco Night: Offer a variety of fillings for family or friends. - Build-Your-Own Bowl: Serve the tacos with rice, beans, and toppings. - Casual Lunch: Pair with a light soup or salad for a quick meal. - Party Platter: Serve tacos with dips and snacks for gatherings. - Picnic Option: These tacos travel well and taste great cold. These ideas show how versatile Spicy Chickpea Tacos can be. For the full recipe, check out the earlier section! Yes, you can make Spicy Chickpea Tacos ahead of time. Cook the chickpeas and store them in an airtight container in the fridge. They will stay fresh for up to three days. You can also prepare the toppings in advance. Keep the shredded cabbage, avocado, and tomatoes in separate containers. Just warm the chickpeas and tortillas just before serving. This way, you save time on busy days. To adjust the spice level, you can change the amount of cayenne pepper. If you want it milder, use less or skip it. For more heat, add more cayenne or try diced jalapeños. Another option is to use hot sauce as a topping. Remember, start small and taste as you go. This lets you find the perfect spice level for your taste. Spicy Chickpea Tacos are great for meal prep. You can cook a big batch of chickpeas and store them for later. They keep well in the fridge and are easy to reheat. Prepare the toppings separately to keep them fresh. Assemble the tacos just before eating to keep everything crunchy and vibrant. This makes them a quick, healthy option for lunches or dinners. You can find the full recipe [here](#). In this post, we explored the art of making Spicy Chickpea Tacos. We covered ingredients, nutritional information, and substitutions for various diets. You learned step-by-step instructions on preparation and cooking, along with tips for best results. We discussed serving ideas and how to customize flavors to suit your taste. Now, you have everything you need to create this tasty meal. Enjoy getting creative in the kitchen!

Spicy Chickpea Tacos Flavorful and Easy Recipe

Are you ready to spice up your taco night? This Spicy Chickpea Taco recipe is not only easy to make,

- 1 cup Arborio rice - 2 cups pumpkin puree (fresh or canned) - 4 cups vegetable broth The main ingredients in my creamy pumpkin risotto create a rich base. Arborio rice gives it a creamy texture. Pumpkin puree adds a sweet taste and bright color. Vegetable broth brings depth and flavor. - 1 medium onion, finely chopped - 2 cloves garlic, minced - 1/2 cup grated Parmesan cheese - 1 tablespoon olive oil - 1 tablespoon butter The additional ingredients enhance the dish. Onions and garlic add aroma and flavor. Parmesan cheese brings creaminess and a savory kick. Olive oil and butter provide richness to the risotto. - 1 teaspoon thyme (fresh or dried) - Salt and pepper to taste - Fresh parsley, chopped (for garnish) Seasoning makes the dish shine. Thyme gives a lovely herbal note. Salt and pepper balance the flavors. Fresh parsley adds a pop of color and freshness as a garnish. For the full recipe, check out the details above. Start by heating the vegetable broth. Pour it into a saucepan over medium-low heat. You want to warm it gently. Keep it at a low simmer while you cook the risotto. This step helps your rice cook evenly. In a large skillet, add olive oil and butter. Heat them over medium heat. Once hot, add the chopped onion. Sauté the onion until it turns translucent, which takes about five minutes. Then, stir in the minced garlic. Cook it for one more minute until it smells great. Next, add the Arborio rice to the skillet. Stir it well for about two to three minutes. You want to toast the rice slightly. The grains should look a bit translucent on the edges. This enhances the flavor. Now, it’s time to add the broth. Use a ladle to pour in a bit of warm broth. Stir the rice while it cooks. Wait for the rice to absorb most of the liquid before adding more. Repeat this process, ladle by ladle. This should take about 18 to 20 minutes. The rice will become creamy and al dente. Once the rice is almost done, stir in the pumpkin puree and thyme. Mix it well until the risotto is creamy and a lovely orange color. Remove the pan from heat. Stir in the grated Parmesan cheese. Season with salt and pepper to taste. Let the risotto sit for a couple of minutes. This resting time helps achieve perfect creaminess. For the full recipe, check out the recipe section. To make creamy pumpkin risotto, stirring is key. Stir often and gently. This helps the rice release its starch, creating a smooth texture. Use a wooden spoon for the best results. Choosing the right broth matters too. A rich vegetable broth enhances flavor. Make sure it stays warm while cooking. This keeps the rice from cooling down too much. Want to make it vegetarian? It’s easy! Simply skip the Parmesan cheese. You can use nutritional yeast instead. This gives a cheesy flavor without the dairy. For a vegan twist, swap the butter with olive oil. Coconut cream also adds a rich texture without dairy. Using the right pans makes a big difference. I recommend a heavy-bottomed skillet. It distributes heat evenly and helps cook the rice well. Good quality equipment lasts longer and cooks better. Investing in a solid pot makes cooking fun and easy. A sturdy spoon is also great for stirring. {{image_2}} You can change the pumpkin for different flavors. Butternut squash works well and tastes sweet. Sweet potatoes are another great option. They add a nice creaminess too. For cheese, Parmesan is classic, but you can swap it. Try Pecorino for a sharper kick. Goat cheese adds a tangy twist. If you want something creamy, use mascarpone. Herbs and spices can take your risotto higher. Sage pairs well with pumpkin and gives warmth. Nutmeg adds a cozy flavor, perfect for fall. A dash of cayenne pepper adds a little heat. You can also add protein to your risotto. Cooked chicken gives it heartiness and keeps you full. Shrimp adds a touch of luxury and pairs beautifully with the creamy texture. In fall, use vegetables like roasted carrots or Brussels sprouts. They add color and flavor to your dish. You can mix in kale for added nutrients and a nice crunch. In summer, switch to fresh tomatoes and basil. These bright flavors keep the dish light. You might even add zucchini for extra texture. Adjust your risotto to match the seasons! For the full recipe, check out [Full Recipe]. To store leftover creamy pumpkin risotto, let it cool first. Transfer it to an airtight container. This will keep it fresh. Make sure to eat it within three days. When reheating, add a splash of broth or water. This helps restore creaminess. Heat it slowly on the stove. Stir often to avoid sticking. You can freeze creamy pumpkin risotto if you have extra. First, let it cool completely. Then, scoop it into freezer-safe bags. Remove as much air as possible. Label the bags with dates. To thaw, place the risotto in the fridge overnight. Reheat it in a pan with some broth. This keeps the texture nice. In the fridge, risotto lasts about three days. If it smells off or looks strange, throw it away. Signs of spoilage include a sour smell or visible mold. Always check before you eat! Enjoy creamy pumpkin risotto fresh for the best taste, but storing it is easy. For the full recipe, check the section above. The best rice for risotto is Arborio rice. Its round grains absorb liquid well. Other rice types, like jasmine or basmati, do not have the same creamy texture. Arborio rice has a high starch content. This gives risotto its rich and smooth quality. If you can't find Arborio, you can try Carnaroli or Vialone Nano. These types also work well and have similar properties. You can make risotto ahead, but it may change in texture. To prepare it in advance, cook the risotto as usual. When done, let it cool and store it in the fridge. When you’re ready to serve, reheat it gently. Add a bit of broth to restore creaminess. Stir often to keep it smooth. This way, you can enjoy risotto with less stress. Yes, pumpkin risotto is gluten-free. The main ingredients, like Arborio rice and vegetable broth, do not contain gluten. Always check the broth label to ensure it is gluten-free. Some pre-made broths may contain gluten. If you use homemade broth, you can be sure of its ingredients. This dish is a great option for those with gluten sensitivities. Enjoy creamy pumpkin risotto without worry! In this blog post, I covered how to make creamy pumpkin risotto. We talked about the essential ingredients like Arborio rice, pumpkin puree, and vegetable broth. Then, I shared step-by-step instructions for cooking and tips for achieving that perfect creamy texture. I also explored variations, storage tips, and answered common questions. Risotto is a versatile dish. You can tailor it to your taste and dietary needs. Enjoy experimenting and creating your own versions!

Creamy Pumpkin Risotto Flavorful Comfort Food Dish

Welcome to the warm and cozy world of creamy pumpkin risotto! This dish is the perfect blend of autumn flavors

Older posts
Newer posts
← Previous Page1 … Page83 Page84 Page85 … Page104 Next →

dsad

© 2025 pureeatsnow • Built with GeneratePress

Our Policies

  • Copyright Policy
  • Cookie Policy
  • GDPR Policy
  • Privacy Policy
  • Disclaimer
  • Terms Of Use

More Information

  • Home
  • About
  • Contact
  • Appetizers
  • Dessert
  • Dinner
  • Drinks
©2025, pureeatsnow About Back To Top