Skip to content
DisclaimerTerms Of UseGDPR PolicyCookie Policy

pureeatsnow

  • Home
  • Drinks
  • Appetizers
  • Dinner
  • Dessert
  • About
  • Contact
  • Privacy Policy
DisclaimerTerms Of UseGDPR PolicyCookie Policy

Rachel

To make your own strawberry ice cream, you need five key ingredients: - 2 cups fresh strawberries, hulled and sliced - 1 cup granulated sugar, divided - 1 cup whole milk - 2 cups heavy cream - 1 teaspoon vanilla extract These ingredients work together to create a creamy and fruity delight. The strawberries bring a bright flavor, while the sugar adds sweetness. Whole milk and heavy cream give it that rich, smooth texture we love in ice cream. Vanilla enhances all the flavors, making each bite special. You can make your ice cream even more fun with these optional add-ins: - Chocolate chips - Fresh mint leaves - Nuts or seeds for crunch These extras add texture and new flavors. Chocolate chips mix great with strawberries. Mint leaves give a fresh twist, while nuts add a nice crunch. To make homemade strawberry ice cream, you will need a few simple tools: - Ice cream maker - Mixing bowls - Fork or potato masher - Airtight container An ice cream maker is key for getting that soft and creamy texture. Mixing bowls help combine your ingredients easily. A fork or potato masher will help break down the strawberries. Finally, an airtight container is perfect for storing your ice cream once it's ready. For the complete process, check out the Full Recipe. - Macerating the strawberries Start by placing the sliced strawberries in a medium bowl. Add half a cup of sugar and mix gently. Let them sit for 30 minutes. This helps release the sweet juices and boosts the flavor. - Mashing for texture After 30 minutes, grab a fork or a potato masher. Lightly mash the strawberries. Leave some chunks for a fun texture. Set them aside for later. - Combining milk, cream, and sugar In a large mixing bowl, whisk together the rest of the sugar, whole milk, heavy cream, vanilla extract, and a pinch of salt. Make sure the sugar dissolves completely. This mix is the base of your ice cream. - Incorporating the strawberries Add the macerated strawberries and their juice to the cream mixture. Stir well to blend everything evenly. The strawberries will give your ice cream a beautiful pink hue and sweet taste. - Operating the ice cream maker Pour the mixture into your ice cream maker. Follow the manufacturer’s instructions to churn. Typically, it takes about 20 to 25 minutes. You want it to turn creamy and soft. - Storing the ice cream Once churned, move the ice cream to an airtight container. Freeze it for at least 2 to 4 hours. This will help it firm up. Before serving, let it sit at room temperature for a few minutes to soften. This makes scooping easier. For the full recipe, check out Strawberry Fields Forever Ice Cream. Freezing time is key to a creamy ice cream. After churning, let your ice cream sit in the freezer for at least 2 to 4 hours. This step helps it firm up nicely. The consistency while churning also matters. Aim for a soft-serve texture. If you churn too long, it can become too hard once frozen. Ripening your strawberries before using them boosts their sweetness. Leave them on the counter for a day or two. The extra time helps them develop great flavor. You can add extracts, too. A splash of almond or lemon extract can give your ice cream a new twist. If your ice cream is too hard to scoop, it may need more time at room temperature. Just let it sit for a few minutes before trying again. Ice crystals can form if you don’t churn enough or if the ice cream freezes too fast. Make sure your ice cream maker is cold before you start. This helps avoid icy bits in your treat. For the full recipe, check the section above. Enjoy your homemade strawberry ice cream! {{image_2}} You can easily make vegan strawberry ice cream. Start by substituting dairy with plant-based milk. Almond or coconut milk works great. These milks add a nice creaminess without using dairy. Use agave or maple syrup as sweeteners. Both options are natural and tasty. They add a unique flavor to your ice cream. If you want a dairy-free version, there are good alternatives. You can use oat milk or cashew milk instead of whole milk. They are rich and creamy. For heavy cream, try using coconut cream. It gives a smooth texture. You can also blend in nut butters. Almond or cashew butter adds creaminess and flavor. Mixing flavors can make your ice cream even more fun. Try a strawberry banana swirl. Just blend ripe bananas with the strawberries. The banana adds a sweet and creamy taste. Another great combo is strawberry lemonade ice cream. Mix in lemon juice and zest for a tangy twist. This brightens the flavor and makes it refreshing. Check the Full Recipe to explore more ways to enjoy homemade strawberry ice cream! To keep your homemade strawberry ice cream fresh, use an airtight container. This will stop air from getting in and causing freezer burn. I recommend using a glass or plastic container that seals tightly. Make sure to fill it close to the top to limit air space. Freezer burn can ruin the taste and texture of your ice cream. To prevent this, cover the surface with plastic wrap before sealing the lid. This helps to block air and keep it creamy. For the best flavor, eat your ice cream within two weeks. It will stay fresh for about a month if stored well. After that, the taste and smoothness may fade. If you need to refreeze your ice cream, do it quickly. Take it out only when you are ready to serve. If it melts too much, it can form ice crystals. This can make it less creamy and enjoyable. Sometimes, ice cream can freeze too hard. To make it easier to scoop, let it sit at room temperature for about five minutes. This will soften it just enough for a smooth scoop. When serving, use a warm ice cream scoop. Run it under hot water for a few seconds. This trick helps to get that perfect scoop with ease. Enjoy your homemade strawberry ice cream! Making homemade strawberry ice cream takes about 4 hours and 50 minutes in total. You need around 50 minutes for prep work. Start by preparing your strawberries and mixing your ingredients. Then, churn the mixture in an ice cream maker for about 20 to 25 minutes. After that, you must freeze it for 2 to 4 hours to let it firm up. That’s when it becomes creamy and delicious! Yes, you can make strawberry ice cream without an ice cream maker! Here are two easy methods: - Freezer method: Pour your mixture into a shallow dish. Stir it every 30 minutes for about 3 to 4 hours. This helps break up ice crystals and keeps it creamy. - Bag method: Place your mixture in a smaller zip-top bag. Seal it tightly, then place it in a larger bag filled with ice and salt. Shake for about 10 to 15 minutes. Your ice cream will form in the smaller bag! If your ice cream turns out too icy, here are some tips: - Mix it well: If possible, let it soften, then mix it again. This can break up ice crystals. - Add more cream: Use more heavy cream next time. More fat helps create a smoother texture. - Sugar balance: Make sure you use enough sugar. Sugar lowers the freezing point, helping to keep your ice cream creamy. For the full recipe, check out Strawberry Fields Forever Ice Cream and enjoy this simple treat! Making homemade strawberry ice cream is fun and rewarding. You need fresh strawberries, sugar, milk, and cream. Optional add-ins like chocolate chips or nuts add more flavor. Use an ice cream maker to churn your mix. Remember to store it in an airtight container. Final thoughts: Enjoying your own ice cream is a treat. Follow the tips for the best texture and flavor. Experiment with variations to find your favorite. With a little practice, you can master homemade strawberry ice cream. Enjoy every scoop!

Homemade Strawberry Ice Cream Enjoyable and Simple Treat

Ready to cool off with a delicious treat? Making homemade strawberry ice cream is easy and fun! With fresh strawberries,

To make these spicy chickpea tacos, you need: - 1 can (15 oz) chickpeas, drained and rinsed - 2 tablespoons olive oil - 1 teaspoon ground cumin - 1 teaspoon smoked paprika - 1/2 teaspoon cayenne pepper (adjust to taste) - Salt and pepper to taste - 8 small corn or flour tortillas These ingredients give the tacos a great flavor and texture. Chickpeas are packed with protein and fiber. They make a hearty base for the tacos. You can add more to your tacos for extra taste. Here are some ideas: - 1 ripe avocado, sliced - 1/2 cup red cabbage, thinly sliced - 1/2 cup cherry tomatoes, halved - 1/4 cup fresh cilantro, chopped - Lime wedges for serving These toppings add freshness and crunch. The avocado gives a creamy touch, while the lime adds a zing. When choosing tortillas, you have options. I recommend: - Small corn tortillas for a classic taste - Flour tortillas for a softer bite Both types work well. Corn tortillas have a nice texture, while flour tortillas are easy to fold. Choose what you enjoy most! Check the Full Recipe for more details on how to prepare these tasty tacos. To start, take your can of chickpeas. Drain and rinse them well. This removes excess salt and makes them cleaner. Next, heat two tablespoons of olive oil in a medium skillet over medium heat. Once the oil is hot, add the chickpeas. Sprinkle them with one teaspoon of ground cumin, one teaspoon of smoked paprika, and half a teaspoon of cayenne pepper. You can adjust the cayenne to fit your spice level. Add salt and pepper to taste. Stir the chickpeas often for about 5 to 7 minutes. You want them hot and slightly crispy. While the chickpeas cook, it’s time to warm the tortillas. You can do this in two ways. First, place them in a dry skillet on medium heat for about 30 seconds on each side. This makes them soft and warm. Alternatively, you can wrap them in a damp paper towel and microwave them for about 20 seconds. This method also keeps them soft. Now comes the fun part! Grab your warm tortillas. Place a generous scoop of spicy chickpeas in the center of each tortilla. Next, add slices of ripe avocado, thinly sliced red cabbage, and halved cherry tomatoes. Finish by sprinkling fresh cilantro on top. Serve with lime wedges on the side. Squeeze fresh lime juice over your tacos right before you eat. This adds a zesty kick! For the full recipe, check back on the main article. To change the spice level, you can add or reduce cayenne pepper. Start with less if you prefer mild tacos. You can also mix in some sour cream or yogurt for a cooling effect. If you want more heat, add hot sauce or diced jalapeños. Each bite can match your taste! I love using canned chickpeas for this recipe. They cook quickly and are full of flavor. If you prefer dried chickpeas, soak them overnight. Then, boil them until soft. You can also roast chickpeas in the oven for a crunchy texture. Just toss them with olive oil and spices. Make your tacos look great! Use colorful toppings like red cabbage and ripe avocado. Layer the chickpeas first, then add the veggies. Serve with lime wedges on the side for a fresh touch. A sprinkle of chopped cilantro adds a nice pop. Check out the Full Recipe for more tasty ideas! {{image_2}} For a vegetarian twist, you can add black beans or lentils. These options boost protein and flavor. You can mix chickpeas with diced bell peppers or corn for added crunch. Each choice keeps the dish vibrant and tasty. If you need gluten-free options, choose corn tortillas. Corn tortillas are naturally gluten-free, making them perfect for anyone avoiding gluten. You can also serve the chickpeas over a bed of lettuce. This creates a taco salad that is fresh and light. Experiment with different spice blends for a unique taste. Try adding curry powder for a warm flavor. You can also use taco seasoning for a classic twist. If you like heat, add more cayenne or some crushed red pepper flakes. Each blend brings a new adventure to your tacos. You can find the full recipe to make these tacos and explore more. You can easily store leftover tacos in the fridge. Place the tacos in an airtight container. If you want to keep the tortillas soft, store them separately from the filling. Use them within two days for the best taste. To reheat the chickpeas, use a skillet over medium heat. Add a small splash of olive oil. Stir until they are hot and slightly crispy again. You can also microwave them in a bowl. Cover with a damp paper towel to keep moisture. Heat for about 30 seconds, checking to avoid overcooking. If you want to save for later, freeze the chickpeas. Spread them in a single layer on a baking sheet. Once they freeze solid, transfer to a freezer bag. You can freeze them for up to three months. When ready to use, thaw in the fridge overnight. Reheat as mentioned above. Don’t freeze the tortillas, as they become soggy. For the best taste, make fresh tortillas right before enjoying your tacos. Yes, you can use dried chickpeas. Just soak them overnight. After soaking, cook them until soft. This process can take a few hours. Canned chickpeas are quicker and easier. They save you time and effort. Many sides complement Spicy Chickpea Tacos. Here are some great options: - Mexican rice: It adds a tasty base. - Black beans: They boost protein and flavor. - Guacamole: It enhances creaminess and taste. - Corn salad: This adds freshness and crunch. - Salsa: It brings extra zest to your meal. The recipe is already vegan! All the ingredients are plant-based. Chickpeas, spices, and veggies make it wholesome. Just ensure your tortillas are also vegan. Check the label to be sure. Enjoy your tasty, plant-based meal! For the full recipe, check out the detailed instructions above. We covered how to make delicious spicy chickpea tacos. You learned about key ingredients, optional toppings, and ideal tortillas. I guided you through the steps for preparing, warming, and assembling your tacos. You discovered tips to adjust spice levels and present your dish nicely. We also explored fun variations, storage methods, and answered common questions. Enjoy making these tasty tacos your own. Simple swaps can lead to great meals. Happy cooking!

Spicy Chickpea Tacos Flavorful and Easy Recipe

Are you craving a quick and tasty meal? Look no further than these Spicy Chickpea Tacos! This recipe packs flavor,

- 1 cup all-purpose flour (heat-treated) - 1/2 cup unsalted butter, softened - 1/4 cup brown sugar, packed - 1/4 cup granulated sugar - 2 tablespoons vanilla extract - 1/4 teaspoon salt - 1 cup mini chocolate chips - 1/2 cup cream cheese, softened - 1/4 cup powdered sugar - Assorted dippers (graham crackers, pretzels, apple slices) When making Chocolate Chip Cookie Dough Dip, it’s key to use heat-treated flour. This makes it safe to eat. You can heat-treat flour by baking it at 350°F for five minutes. This step helps kill any harmful bacteria. Use unsalted butter for better flavor control. Softened butter mixes well and gives a creamy texture. Cream cheese adds to the dip's richness. If you need a dairy-free option, use plant-based butter and cream cheese. For a sugar-free dip, try using sugar substitutes like stevia or erythritol. If you want a different flavor, swap mini chocolate chips for white chocolate or peanut butter chips. You can also mix in nuts or dried fruit for extra texture. To start, gather all your ingredients. Here’s what you need: - 1 cup all-purpose flour (heat-treated) - 1/2 cup unsalted butter, softened - 1/4 cup brown sugar, packed - 1/4 cup granulated sugar - 2 tablespoons vanilla extract - 1/4 teaspoon salt - 1 cup mini chocolate chips - 1/2 cup cream cheese, softened - 1/4 cup powdered sugar - Assorted dippers (graham crackers, pretzels, apple slices) Make sure your butter and cream cheese are at room temperature. This helps them mix well. Heat-treat the flour to kill any bacteria. To do this, spread it on a baking sheet and bake at 350°F for about 5 minutes. In a large mixing bowl, combine the softened butter, brown sugar, and granulated sugar. Mix until smooth and fluffy. You can use a hand mixer or a wooden spoon. Next, add in the softened cream cheese. Keep mixing until it blends nicely. Now, pour in the vanilla extract and salt. Mix again until everything is combined. Gradually add the heat-treated flour. Stir until it blends well with the mix. Lastly, fold in the mini chocolate chips. Make sure they spread evenly throughout the dip. Once your dip is mixed well, transfer it to a serving bowl. Cover it with plastic wrap or a lid. Place the bowl in the fridge for about 30 minutes. Chilling helps the dip firm up and enhances the flavors. After chilling, it’s ready to serve with your favorite dippers. Enjoy this decadent treat! For the full recipe, check out the provided link. To get a smooth texture in your dip, start with soft butter and cream cheese. They blend easily and make the dip creamy. Mix the butter and sugars well until fluffy. This step adds air and lightness. If your dip feels grainy, mix it more. Patience is key in making it smooth. You can change the flavor of the dip to match your taste. Try adding a pinch of cinnamon for warmth. You can also use almond extract instead of vanilla for a twist. For a fun touch, mix in peanut butter or even mint extract. Each small change can create a new flavor delight. Presentation makes your dip more fun. Serve it in a bright, colorful bowl. This adds excitement to your table. You can sprinkle extra mini chocolate chips on top for a nice look. Arrange assorted dippers like graham crackers, pretzels, and apple slices around the bowl. This way, everyone has a choice and it looks inviting. Check out the Full Recipe for more ideas! {{image_2}} You can easily make this dip gluten-free. Just swap the all-purpose flour for a gluten-free flour blend. Make sure the blend has a good texture for baking. This way, you can enjoy the same tasty dip without the gluten. For a healthier dip, use Greek yogurt instead of cream cheese. This choice lowers fat and adds protein. You can also cut the sugar by half or use a natural sweetener like honey or maple syrup. This gives you a lighter treat, while still being delicious. Add fun seasonal flavors to your dip. In fall, mix in pumpkin spice for a cozy taste. In summer, try adding crushed berries for a fruity twist. You can also stir in some peppermint extract during winter for a festive touch. Each season brings a new chance to enjoy this dip in a fresh way. To keep your chocolate chip cookie dough dip fresh, store it in an airtight container. This helps keep moisture out and flavors in. When you scoop out some dip, use a clean spoon. This avoids adding germs to the dip and keeps it safe to eat. Your dip lasts about 3 to 5 days in the fridge. After that, it may lose its taste and texture. Always check for any strange smells or changes in color before eating. If it looks or smells off, it is best to throw it away. You can freeze cookie dough dip if you want it to last longer. Place it in a freezer-safe container. Make sure to leave some space for it to expand. It can stay good for about 2 to 3 months in the freezer. When you're ready to enjoy it, thaw it in the fridge overnight. Stir it well before serving. Enjoy your dreamy treat anytime! For the full recipe, check out the detailed instructions above. No, you should not eat raw flour. Raw flour can carry harmful bacteria. To make it safe, heat-treat the flour. You can do this by spreading it on a baking sheet. Bake it at 350°F for about five minutes. This kills any germs. Once cooled, you can use it in your dip. You have many fun options for dippers! Here are some great ideas: - Graham crackers - Pretzels - Apple slices - Vanilla wafers - Strawberries Each of these pairs well with the sweet taste of the dip. You can mix and match to find your favorite combo. Making this dip vegan is easy! Here are some swaps: - Use coconut oil instead of butter. - Choose a vegan cream cheese. - Replace regular chocolate chips with dairy-free ones. - Use maple syrup instead of granulated sugar. These changes keep the flavor while making it vegan-friendly. Enjoy your delicious treat! For the full recipe, check the section above. This blog post covered everything you need for a delicious cookie dough dip. We explored the key ingredients, preparation steps, and even some tasty variations. You can customize flavors and make healthy swaps while ensuring a smooth texture. Storing it correctly helps you enjoy this treat longer. Remember, experimenting can lead to great flavors. Whether you serve it at a party or keep it for yourself, this dip is sure to delight. Enjoy your cooking adventure!

Chocolate Chip Cookie Dough Dip Dreamy Delight Recipe

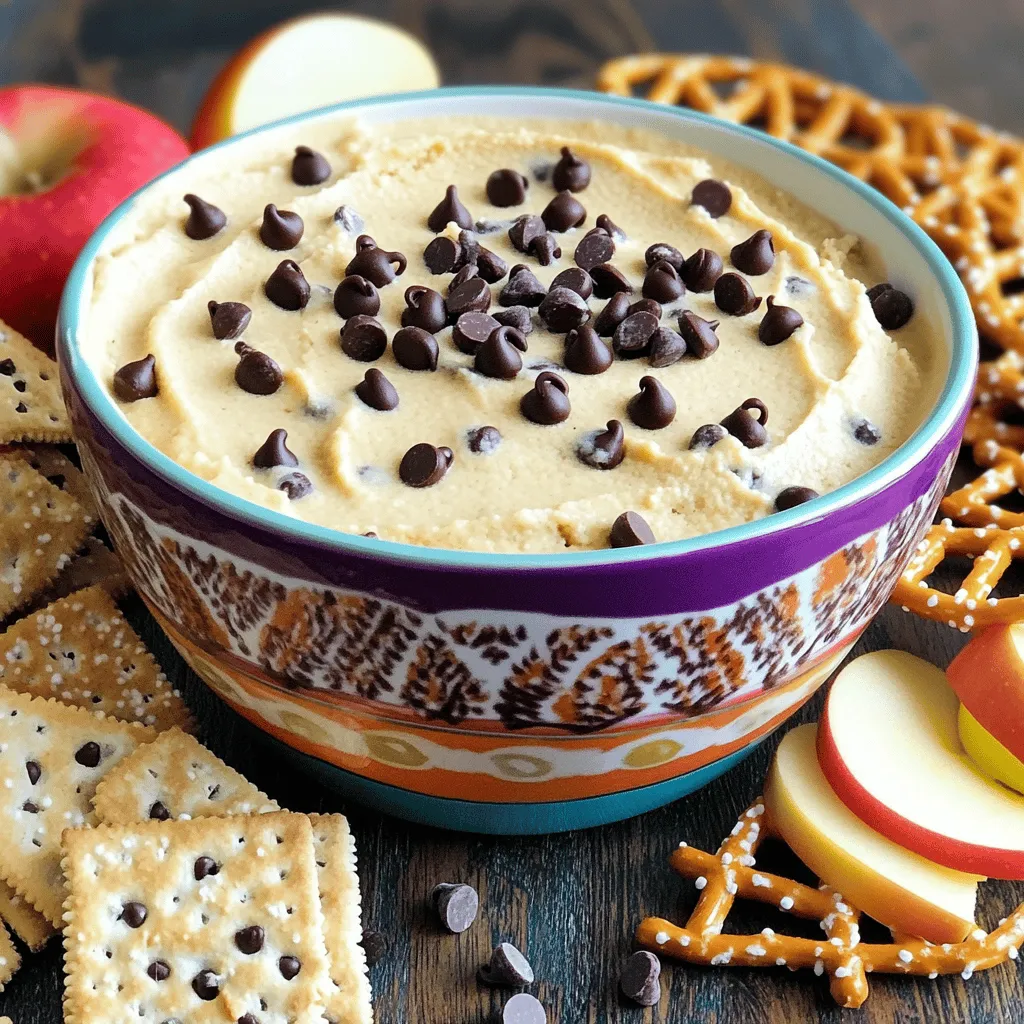
Are you ready to dive into a sweet treat that’s simple and delicious? My Chocolate Chip Cookie Dough Dip Dreamy

To make these vegan quinoa stuffed peppers, you will need the following: - 4 large bell peppers (any color) - 1 cup cooked quinoa - 1 can (15 oz) black beans, rinsed and drained - 1 cup corn kernels (fresh or frozen) - 1 medium onion, diced - 2 cloves garlic, minced - 1 teaspoon cumin powder - 1 teaspoon smoked paprika - ½ teaspoon chili powder - 1 cup diced tomatoes (canned or fresh) - Salt and pepper to taste - ¼ cup fresh cilantro, chopped (for garnish) - 1 avocado, sliced (for serving) You can swap some ingredients if you want. Here are a few ideas: - For bell peppers, use zucchini or tomatoes as a base. - Replace black beans with chickpeas or lentils for a different taste. - If you want a milder flavor, skip the chili powder or use bell pepper instead. - Use cooked brown rice or farro instead of quinoa for a chewy texture. - Fresh herbs like parsley can replace cilantro if you prefer. Each ingredient adds value to this dish: - Bell Peppers: They are high in vitamins A and C, boosting your immune system. - Quinoa: This grain is rich in protein and fiber, keeping you full longer. - Black Beans: They offer protein and iron, essential for energy and muscle health. - Corn: Packed with antioxidants, corn also adds sweetness and texture. - Onion & Garlic: Both support heart health and add great flavor. - Cumin & Paprika: These spices bring warmth and depth to the dish. - Diced Tomatoes: They provide vitamins and moisture, making the filling juicy. - Cilantro: This herb adds freshness and helps detoxify. - Avocado: Full of healthy fats, avocado enhances creaminess and flavor. For the full recipe, check the detailed instructions above. Start by preheating your oven to 375°F (190°C). Next, grab four large bell peppers. You can choose any color you like! Cut the tops off the peppers and remove the seeds and membranes. This step helps the peppers cook evenly. Lightly brush the outside with olive oil. Place the peppers in a baking dish with the open side facing up. In a skillet, drizzle some olive oil and heat it over medium. Add a diced onion and cook for about 3-4 minutes until it turns soft. Then, add two minced garlic cloves. Sauté for one more minute until you smell the garlic. Now, it’s time to mix in the cooked quinoa, black beans, corn, and diced tomatoes. Sprinkle in the cumin, smoked paprika, chili powder, salt, and pepper. Stir everything well and cook for another 5 minutes. This allows all the flavors to blend nicely. Now, it’s time to stuff the peppers! Carefully fill each pepper with the quinoa mixture. Pack it in tight so they are full. After that, cover your baking dish with aluminum foil. Bake the peppers for 30 minutes. Then, take off the foil and bake for another 10-15 minutes. You want the peppers to be tender but not mushy. To check if the peppers are done, poke them with a fork. If it slides in easily, they are ready. If you want them softer, bake a bit longer. Also, let the stuffed peppers cool for a few minutes before serving. Garnish with fresh cilantro for a pop of color! Serve with avocado slices on the side for extra creaminess. For the full recipe, check out the details above. To cook quinoa perfectly, rinse it first. Rinsing removes the bitter coating called saponin. Use a 2:1 ratio of water to quinoa. Bring water to a boil, then add quinoa. Reduce heat and simmer for about 15 minutes. Once cooked, fluff it with a fork. This technique ensures light and fluffy quinoa for your stuffed peppers. Presentation makes food more appealing. After baking your stuffed peppers, place them upright on a plate. Sprinkle fresh cilantro on top for a pop of color. You can also add avocado slices beside them. For extra flair, drizzle tahini sauce over the peppers. A squeeze of lime adds freshness and tang too. You can prepare these stuffed peppers in advance. Cook the quinoa and filling and stuff the peppers. Store them in the fridge for up to two days. When ready to eat, simply bake them. This saves time on busy weeknights. Plus, they taste great reheated! Check the Full Recipe for more details on preparation. {{image_2}} You can change the filling for your vegan quinoa stuffed peppers. Try using lentils instead of black beans. They give a nice texture and taste. Chickpeas also work well and add protein. You can mix in different grains like brown rice or farro for a fun twist. Each option brings a unique flavor. Do you like it spicy? You can add more chili powder or diced jalapeños to the filling. If you want less heat, skip the chili powder. You can also use sweet paprika instead of smoked paprika for a milder taste. Adjust the spices to fit your taste buds. Adding vegan cheese can make your stuffed peppers extra creamy. Sprinkle some on top before baking. You can also mix in chopped spinach or mushrooms for more nutrients. Try adding fresh herbs like parsley or basil for a burst of flavor. The choices are endless, so get creative with your ingredients. For the full recipe, check out the complete guide! After you make the vegan quinoa stuffed peppers, you might have some leftovers. You can store them in the fridge. Use an airtight container to keep them fresh. They will last about 3 to 4 days. When you want to enjoy them again, simply take them out. If you want to save some for later, freezing is a great option. First, let the stuffed peppers cool completely. Wrap each pepper in plastic wrap or aluminum foil. Then, place them in a freezer-safe bag. They will last up to 3 months in the freezer. When you are ready to eat, thaw them in the fridge overnight. Reheating is easy! You can use the oven or microwave. For the oven, preheat it to 375°F (190°C). Place the peppers in a baking dish, cover with foil, and heat for about 20 minutes. For the microwave, put one pepper on a plate and heat for 2 to 3 minutes. Check that it is hot all the way through. These steps will help you enjoy the quinoa stuffed peppers just like fresh! Yes, you can prep these stuffed peppers in advance. Just cook the filling and stuff the peppers. Store them in the fridge for up to two days. When ready to cook, just bake them as directed. This makes dinner quick and easy! These stuffed peppers are tasty on their own, but you can add sides. Serve with a fresh salad or some roasted veggies. You can also enjoy them with guacamole or a zesty salsa. These pairings boost flavor and nutrition. You can tell the peppers are done when they are soft. Gently poke them with a fork. If the fork goes in easily, they are ready. The filling should also be hot and flavorful. Absolutely! You can use zucchini, eggplant, or mushrooms. Just hollow them out like the peppers. Each veggie adds a unique flavor. Experiment with different veggies to find your favorite combo. For the full recipe, refer to the initial section. In this blog post, we explored ingredients, cooking steps, and tips for stuffed peppers. You learned how to prepare, cook, and store them. Remember, you can mix fillings and adjust spices for your taste. Use these tips for meal prep and serving. I hope this guide makes your cooking fun and easy. Enjoy your stuffed peppers in many ways!

Vegan Quinoa Stuffed Peppers Flavorful and Healthy Dish

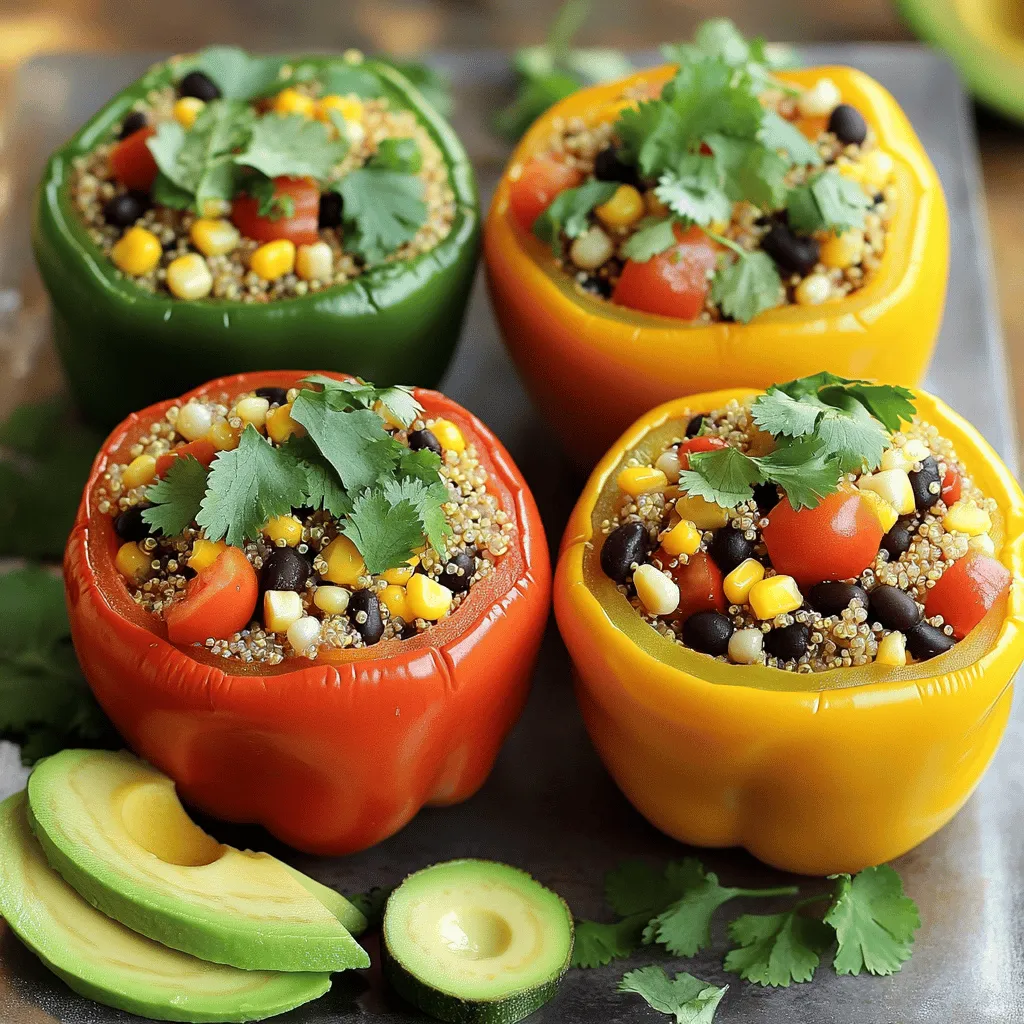
Looking for a tasty, healthy meal? Vegan quinoa stuffed peppers pack a punch with flavor and nutrition. This dish is

To make Zesty Lemon Garlic Shrimp, you will need: - 1 pound large shrimp, peeled and deveined - 4 cloves garlic, minced - 1/4 cup fresh lemon juice (about 2 lemons) - 1 teaspoon lemon zest - 1/4 cup olive oil - 1 teaspoon red pepper flakes (adjust to taste) - Salt and black pepper to taste - 2 tablespoons fresh parsley, chopped - Lemon wedges for serving For the best flavor, I suggest using high-quality brands. Here are my favorites: - Shrimp: Look for wild-caught shrimp for better taste and texture. - Olive Oil: Choose extra virgin olive oil for rich flavor. Brands like California Olive Ranch work well. - Garlic: Fresh garlic is best. If you need convenience, consider using garlic paste from brands like Gourmet Garden. - Lemon: Organic lemons can add extra zest and freshness. You can make this dish your own with a few swaps. Here are some ideas: - Shrimp: If you can't find shrimp, try scallops or firm white fish like cod. - Olive Oil: You can substitute with avocado oil for a different flavor. - Red Pepper Flakes: For less heat, use smoked paprika instead. - Parsley: Basil or cilantro can also add a fresh touch. Feel free to check out the Full Recipe for more details! Start by gathering your ingredients. You need fresh shrimp, garlic, lemon juice, lemon zest, olive oil, red pepper flakes, salt, pepper, and parsley. In a large mixing bowl, add the shrimp, minced garlic, lemon juice, lemon zest, olive oil, red pepper flakes, salt, and black pepper. Mix well until the shrimp is fully coated in the marinade. Cover the bowl with plastic wrap and let it sit in the fridge for 15 to 20 minutes. This step lets the shrimp soak up all the zesty flavors. Heat a large skillet over medium-high heat. Add the marinated shrimp along with all the marinade into the skillet. Cook the shrimp for about 2 to 3 minutes on each side. You want them to turn pink and look opaque. Be careful not to overcook them. They will become tough if cooked too long. Once done, remove the skillet from heat and sprinkle fresh parsley over the shrimp. Gently toss to combine everything. Serve your zesty lemon garlic shrimp right away. Arrange the shrimp on a colorful platter. Add some extra parsley and lemon wedges on the side. The lemon wedges give an extra burst of flavor. This dish pairs well with rice, pasta, or a fresh salad. For the full recipe, check the complete details above. Enjoy your tasty meal! To get the best shrimp, focus on timing. Cook shrimp for just 2-3 minutes on each side. They should turn pink and opaque. If you cook them too long, they become tough. Keep an eye on the color change. When they are ready, remove them from heat right away. To boost flavor, try adding fresh herbs. Fresh basil or cilantro can add a unique twist. You can also mix in some lemon zest for extra zing. If you like heat, increase red pepper flakes. A splash of white wine can deepen the taste too. Experiment with these ideas to find your favorite flavor blend. One common mistake is overcooking the shrimp. Always check them closely. Another error is not marinating long enough. Let the shrimp sit for at least 15 minutes in the marinade. This helps them soak up all the good flavors. Lastly, don’t skip the parsley garnish. It adds color and freshness to the dish. For the complete cooking details, check the Full Recipe. {{image_2}} If you want a kick, try adding more heat. Use extra red pepper flakes or a dash of hot sauce. You can also mix in fresh chopped jalapeños. This adds a nice crunch and spice. Adjust the heat to your taste. Serve it over rice or with crusty bread to soak up the sauce. This variation is a crowd-pleaser. Cook your favorite pasta while you make the shrimp. Toss the cooked pasta with the shrimp and sauce. Add a splash of pasta water for creaminess. Top with grated Parmesan cheese and fresh parsley. It’s a filling meal that feels special. Make tacos for a fun twist. Use small tortillas and fill them with shrimp. Add shredded cabbage for crunch and fresh avocado for creaminess. Squeeze extra lemon juice on top. These tacos are fresh, bright, and perfect for a quick meal. You can even serve them with a side of salsa for extra flavor. For the base recipe, check out the Full Recipe. Each variation keeps the bright lemon and garlic flavors, making them tasty and fun! I love to save leftovers from Zesty Lemon Garlic Shrimp. They taste great later. To store, put the shrimp in an airtight container. Make sure to seal it well. Place the container in the fridge. The shrimp will stay fresh for 2 to 3 days. If you have more than that, consider freezing. When you want to eat your leftovers, heat them gently. You can use a skillet or microwave. For the skillet, add a little oil and warm it over low heat. Stir until the shrimp is hot. If you use a microwave, cover the shrimp with a damp paper towel. Heat it in short bursts of 30 seconds. This keeps them moist and tasty. Freezing is a great option if you want to save shrimp for longer. Start by letting the shrimp cool completely. Then, place them in a freezer-safe container or bag. Remove as much air as you can. This helps prevent freezer burn. You can freeze Zesty Lemon Garlic Shrimp for up to 3 months. When you're ready to eat, thaw it in the fridge overnight. Reheat it using the methods above for the best results. To add spice, you can use red pepper flakes. Start with one teaspoon. You can add more if you like it hotter. You can also try fresh or dried chili peppers. Just chop them finely and add them to the mix. This will give the dish a nice kick. Yes, you can use frozen shrimp. Just make sure to thaw them first. Place them in a bowl of cold water for about 15 minutes. Once thawed, peel and devein them if needed. This way, they will cook evenly. Some great side dishes include: - Steamed rice - Quinoa - Garlic bread - A fresh salad - Roasted vegetables These sides will complement the shrimp well. They will soak up the zesty flavors. You can store leftovers in the fridge for up to two days. Keep them in an airtight container. To enjoy them later, reheat gently on the stove. This keeps the shrimp tender and tasty. You can prepare the marinade a day ahead. Just marinate the shrimp when you're ready to cook. This will save time and let the flavors mix well. You can serve the shrimp with lemon wedges. This adds a fresh burst of flavor. Pair it with a light white wine, like Sauvignon Blanc. It complements the zesty notes nicely. Yes, this dish is healthy. Shrimp is low in calories and high in protein. The olive oil provides healthy fats. The fresh herbs and lemon add vitamins and flavor. Absolutely! You can use scallops or fish instead of shrimp. Just adjust the cooking time based on the seafood you choose. Each option will bring its own unique taste to the dish. Shrimp is cooked when it turns pink and opaque. It should curl into a "C" shape. If it curls into an "O," it's overcooked. Keep an eye on them to ensure a perfect texture. In this blog post, we covered the key ingredients and brands for zesty lemon garlic shrimp. You learned how to prep, cook, and serve it perfectly. I shared tips to avoid common mistakes and enhance flavor. We explored tasty variations and discussed storage methods. Enjoying this dish can be fun and simple. Cooking shrimp well takes practice, but it's worth it. Try my recommendations, and you'll impress everyone at your table. Shift your cooking skills and enjoy every bite!

Zesty Lemon Garlic Shrimp Fresh and Tasty Delight

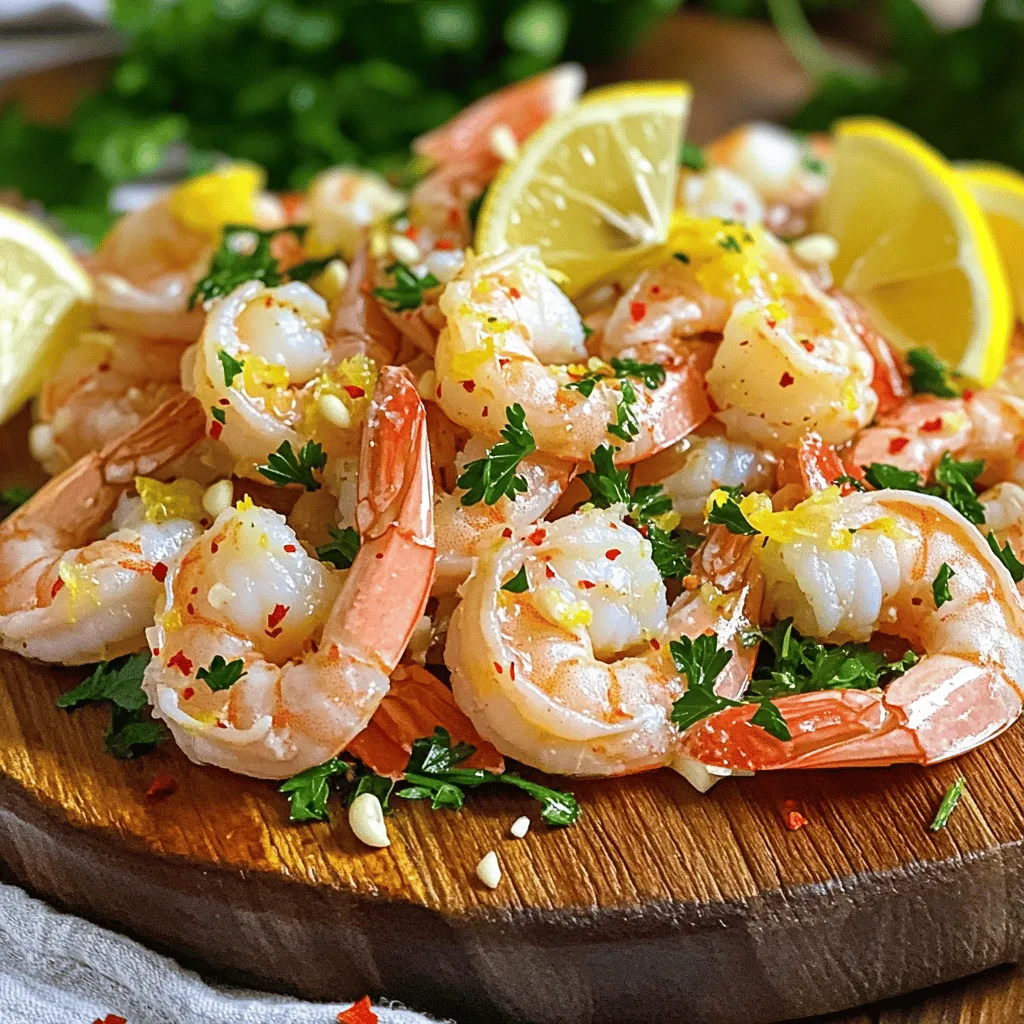
If you crave a fresh and tasty dish, Zesty Lemon Garlic Shrimp is for you! This recipe is quick, easy,

To make the Heavenly Banana Walnut Cream Cake, you need a simple list of ingredients. Here’s what you’ll need: - 3 ripe bananas, mashed - 1 cup sugar - 1/2 cup unsalted butter, softened - 2 large eggs - 1 teaspoon vanilla extract - 1 1/2 cups all-purpose flour - 1 teaspoon baking soda - 1/2 teaspoon salt - 1/2 cup buttermilk - 1 cup walnuts, chopped (reserve a few whole for garnish) - 1 cup heavy cream - 2 tablespoons powdered sugar - 1 teaspoon vanilla extract (for whipped cream) Each ingredient plays a key role in making this cake moist and flavorful. The ripe bananas add sweetness and a rich texture. The sugar and butter create a creamy base. Eggs provide structure, while vanilla adds a warm note. The flour and baking soda combine to give the cake lift. The salt enhances the flavors. Buttermilk makes the cake tender and rich. Chopped walnuts offer crunch and a nutty taste, while the whipped cream on top creates a light finish. You can find the full recipe in the article for detailed steps. Enjoy gathering these ingredients and getting ready to bake! Prepping the oven and cake pan is simple. First, preheat your oven to 350°F (175°C). This step is key for even baking. Next, grab a 9-inch round cake pan. Grease it with butter, then dust it with flour. This ensures your cake comes out clean. Now, it's time for mixing. In a large bowl, cream together the softened butter and sugar. Mix until it becomes light and fluffy. This process adds air to your batter. Then, incorporate the mashed bananas. Make sure they are well blended. Next, add the eggs one at a time, mixing after each addition. Pour in the vanilla extract for added flavor. Now, let's work on the dry ingredients. In a separate bowl, whisk together the flour, baking soda, and salt. This mixes the dry parts evenly. Gradually add this mixture to the banana mixture. Alternate with the buttermilk, starting and ending with the dry mix. This helps keep your batter smooth. Once mixed, fold in the chopped walnuts carefully. This adds a nice crunch. Pour the batter into your prepared cake pan and smooth the top with a spatula. The baking stage is next. Place your cake pan in the preheated oven. Bake for 25-30 minutes. To check if it’s ready, insert a toothpick into the center. If it comes out clean, your cake is done. Once finished, take it out and let it cool. Leave the cake in the pan for about 10 minutes. Then, transfer it to a wire rack to cool completely. This step is important for the perfect texture. For the whipped cream, beat the heavy cream in a clean bowl. Mix until soft peaks form. Add powdered sugar and vanilla extract, then continue beating. You want stiff peaks this time. After your cake has cooled, frost the top with the whipped cream. Spread it evenly for a nice finish. Finally, garnish with whole walnuts for a beautiful touch. Chill the cake in the refrigerator for about an hour. This helps the frosting set. Enjoy your Heavenly Banana Walnut Cream Cake! You can find the Full Recipe for more details. - First, ensure your butter is softened properly. This makes the batter smooth. - Alternate adding the dry ingredients and buttermilk. This helps keep the batter light. - Avoid over-mixing the batter. Mix just until combined to keep the cake fluffy. - Use whipped cream for icing. It adds a light and creamy touch to the cake. - Garnish with whole walnuts on top. This gives a nice, crunchy finish. - Chill the cake before serving for best results. It helps set the frosting nicely. For the full recipe, check out the detailed steps and enjoy making this delightful treat! {{image_2}} You can play with flavors in the Heavenly Banana Walnut Cream Cake. Here are some fun ideas: - Chocolate Chip Banana Walnut Cake: Fold in 1 cup of chocolate chips. The sweet chocolate pairs well with the banana and nuts. It adds a rich twist that kids love. - Coconut Banana Walnut Cake: Add 1 cup of shredded coconut to the batter. This gives a tropical feel to your cake. The coconut adds texture and a lovely flavor. - Spiced Banana Walnut Cake: Sprinkle in a teaspoon of cinnamon and a pinch of nutmeg. This gives your cake a warm, cozy vibe. Spices make it perfect for fall gatherings. You can adjust the recipe to fit special diets. Here are some easy swaps: - Gluten-Free Option: Replace all-purpose flour with a gluten-free blend. Look for one that has a 1:1 ratio. This keeps the texture light and fluffy. - Vegan Substitutes for Ingredients: Use flax eggs instead of regular eggs. Mix 1 tablespoon of ground flaxseed with 3 tablespoons of water. Let it sit for 5 minutes to thicken. You can also swap buttermilk with almond milk mixed with a little vinegar. These variations make the cake fun and enjoyable for all! For the complete recipe, check out the Full Recipe section. You can leave your Heavenly Banana Walnut Cream Cake at room temperature for 1-2 days. Make sure to cover it well. A cake dome or plastic wrap works great for this. This keeps it fresh and moist. For longer storage, refrigerate the cake for up to a week. Place it in an airtight container to avoid drying out. If you want to keep it even longer, you can freeze it. Wrap the cake tightly in plastic wrap, then place it in a freezer bag. It will stay good for about three months. When you want to eat it, just thaw it in the fridge overnight. Enjoy the cake just like you made it fresh! For the full recipe, check the section above. This cake is heavenly due to its rich flavors and soft texture. The ripe bananas add natural sweetness and moisture. When you bite into it, you feel the soft, fluffy cake and the crunch of walnuts. The creamy whipped topping adds a beautiful finish. Altogether, these elements create a delightful treat for your taste buds. Yes, you can make this cake ahead of time. To do this, bake the cake and let it cool completely. Once cool, wrap it tightly in plastic wrap. Store it at room temperature for up to two days. If you need to store it longer, freeze the cake. Just make sure it's well-wrapped to prevent freezer burn. You can frost it just before serving for the best taste. If you need a substitute for all-purpose flour, try using almond flour or oat flour. Almond flour adds a nutty taste and makes the cake moist. Oat flour gives a light texture but may make the cake denser. You can mix different flours to find your favorite taste and texture. Remember to adjust the liquid slightly, as different flours absorb moisture differently. To check if the cake is done, insert a toothpick into the center. If it comes out clean or with a few crumbs, the cake is ready. If the toothpick has wet batter, bake it a little longer. Always check it towards the end of the baking time. This way, you avoid overbaking, which can dry out the cake. This banana walnut cake combines simple ingredients and easy steps to create a treat everyone loves. We covered how to mix the batter, bake the cake, and store it properly. Use tips for decoration and explore flavor variations to make it your own. Remember, baking is about fun and creativity. So gather your ingredients, enjoy the process, and share the delicious results with friends. Your cake will surely impress!

Heavenly Banana Walnut Cream Cake Delightful Treat

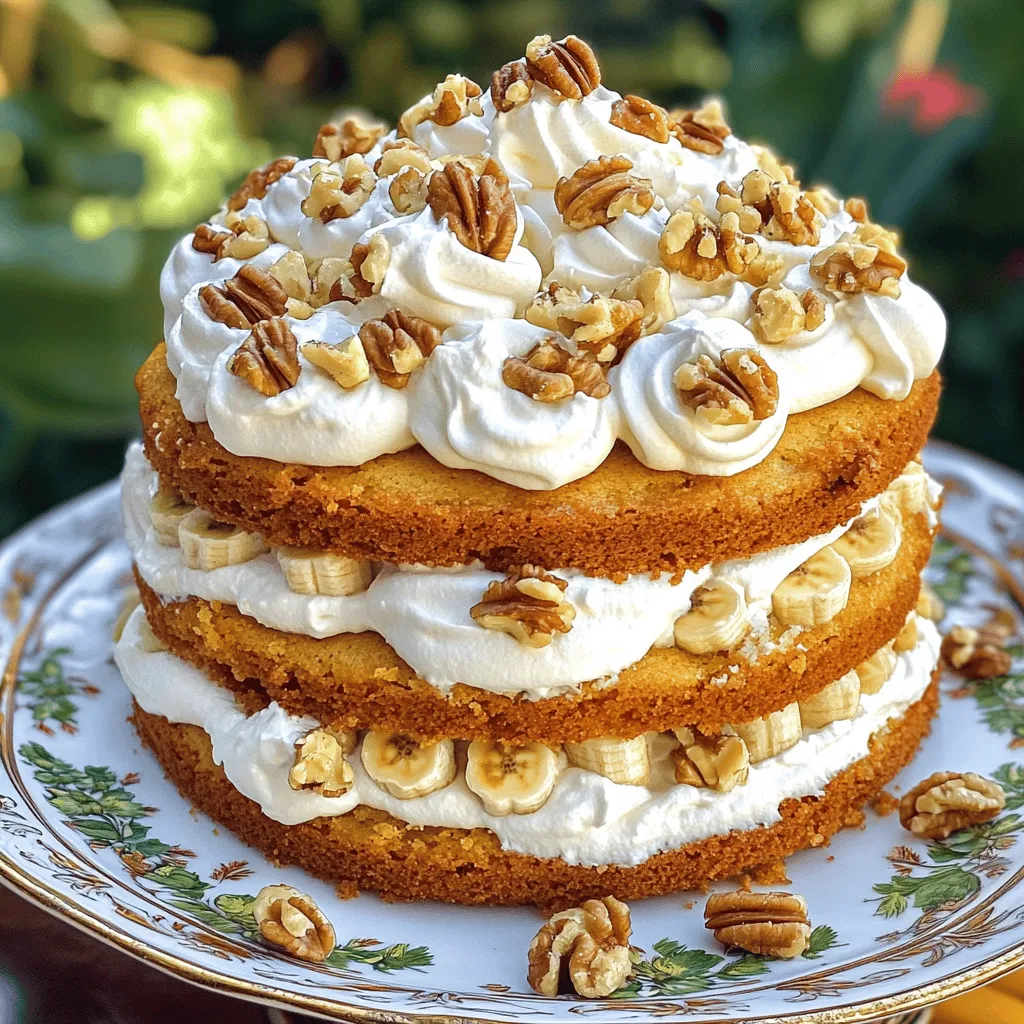
If you’re craving a sweet treat that’s bursting with flavor, look no further than my Heavenly Banana Walnut Cream Cake.

To create this tasty Creamy Broccoli and Chicken Penne, you’ll need the following ingredients: - 8 oz penne pasta - 2 cups broccoli florets - 1 lb boneless, skinless chicken breasts, diced - 1 tablespoon olive oil - 3 cloves garlic, minced - 1 cup heavy cream - 1 cup grated Parmesan cheese - 1 teaspoon Italian seasoning - Salt and pepper to taste - 1/4 teaspoon red pepper flakes (optional) - Fresh parsley, chopped (for garnish) These ingredients combine to make a dish that is creamy, savory, and full of flavor. You can easily find them at your local grocery store. Each item plays a key role in building taste and texture. The penne pasta gives a nice bite, while the broccoli adds freshness. The chicken provides protein, making this meal hearty. The heavy cream and Parmesan create a rich sauce that ties everything together. Using fresh herbs can also enhance the flavor. Feel free to switch it up based on what you have at home. For the complete cooking process, check out the Full Recipe. First, fill a large pot with salted water. Bring it to a rolling boil. Add 8 oz of penne pasta. Cook it according to the package instructions. When there are just 3 minutes left, toss in 2 cups of broccoli florets. This step makes your broccoli bright and crisp. After the pasta is done, drain everything and set it aside. Grab a large skillet and heat 1 tablespoon of olive oil. When it gets hot, add 1 lb of diced chicken. Make sure to season it with salt, pepper, and 1 teaspoon of Italian seasoning. Cook the chicken until it turns golden brown and is cooked through, which should take about 5-7 minutes. Once cooked, remove the chicken and set it aside. In the same skillet, add 3 cloves of minced garlic. Sauté it for about 30 seconds until it smells great. Then, pour in 1 cup of heavy cream, stirring it well. Bring the mixture to a gentle simmer. Now, add 1 cup of grated Parmesan cheese. Stir until the cheese is fully melted and the sauce is creamy. If you like a bit of heat, sprinkle in 1/4 teaspoon of red pepper flakes. Now, it’s time to bring everything together! Add the cooked chicken back into the skillet with the cream sauce. Next, mix in the cooked penne and broccoli. Toss everything together until all the pasta and veggies are well coated with that creamy sauce. Give your dish a taste. You might want to add more salt, pepper, or Italian seasoning to suit your taste. This step is key to making it just right for you. Serve your creamy broccoli and chicken penne right away. To make it look nice, garnish it with some fresh chopped parsley. Enjoy this delightful dish, and don't forget to check the Full Recipe for more details! - Ensure pasta is cooked al dente for best texture. - Sauté garlic carefully to avoid burning. Cooking pasta just right can change your dish. Al dente means the pasta is firm, not mushy. This helps the penne hold sauce better. For garlic, heat it gently. You want it fragrant, not brown. Burned garlic tastes bitter and can ruin your dish. - Experiment with additional spices or herbs. - Incorporate lemon juice for an extra zing. To make your creamy broccoli and chicken penne shine, try adding spices. Oregano or thyme can add warmth. Fresh herbs like basil or parsley can brighten the flavor. A splash of lemon juice can make your dish pop. It adds a fresh, zesty note that balances the creaminess. - Use a large pot for boiling pasta. - A non-stick skillet helps prevent sticking. A large pot lets you boil pasta evenly. It also prevents clumping. For the sauce, a non-stick skillet is your best friend. It makes stirring easier and helps clean-up quick. If you want to make cooking more fun, consider investing in good tools. They can save time and effort, making your cooking experience smoother. For the full recipe, check the [Full Recipe]. {{image_2}} You can easily change the recipe to fit your needs. - Use whole wheat penne for a healthier option. - Substitute chicken with shrimp or tofu for a different flavor. These swaps keep the dish tasty and fun. Whole wheat penne adds fiber. Shrimp cooks quickly and gives a nice seafood flavor. Tofu is great for a plant-based twist. If you have special dietary needs, this dish can adapt. - Make it gluten-free with gluten-free pasta. - Use dairy-free cream for a vegan version. Gluten-free pasta works well in this recipe. It holds the sauce just like regular pasta. Dairy-free cream gives a rich taste without the milk. You won't miss the heavy cream at all! Want to change the flavor profile? Try these ideas. - Add sun-dried tomatoes for a Mediterranean twist. - Include vegetables like bell peppers or spinach for more nutrition. Sun-dried tomatoes add a sweet and tangy flavor. They pair well with the cream sauce. Bell peppers and spinach boost the dish's vitamins and color. Mix and match these ideas to make it your own! After enjoying your creamy broccoli and chicken penne, store any leftovers. Place them in an airtight container. Keep them in the fridge for up to 3 days. This method helps maintain the dish's flavor and texture. If you want to save some for later, freezing is a good option. Portion the dish into single servings. Use freezer-safe containers or bags. This way, you can enjoy a quick meal anytime! When you're ready to eat your frozen or refrigerated meal, reheating is simple. Use a microwave or stovetop to warm it. To bring back the creamy texture, add a splash of cream while heating. This keeps it delicious and fresh! Yes, best to store ingredients separately if making ahead. This keeps the pasta and broccoli fresh. When ready to eat, mix everything together and heat it up. Pair it with a side salad or garlic bread for a complete meal. Fresh greens add crunch, while garlic bread brings warmth. Both options balance the creamy dish well. Increase red pepper flakes or add jalapeños. Both will add heat. Start with a small amount and taste as you go. You can always add more spice. Yes, just adjust the cooking time accordingly. Frozen broccoli cooks faster than fresh. Add it to the pot during the last three minutes of pasta cooking. Remove chicken and use more vegetables or plant-based protein. Try chickpeas, mushrooms, or tofu. This will keep the dish hearty and delicious without meat. For the full recipe, check out the link provided. This dish combines pasta with chicken, broccoli, and a creamy sauce. You can easily adapt it to fit your needs, whether with different proteins or dietary choices. Storing leftovers is simple, making it a great meal for busy days. I encourage you to try this recipe and play with flavors. Enjoy your cooking and make it your own!

Creamy Broccoli and Chicken Penne Delightful Dish

Looking for a tasty dinner idea? You’re in the right place! My Creamy Broccoli and Chicken Penne is a dish

To make chewy Rice Krispies treats, you need some simple ingredients. Here’s what you need: - 6 cups Rice Krispies cereal - 1 package (10 oz) mini marshmallows - 3 tablespoons unsalted butter - 1 teaspoon vanilla extract - ½ teaspoon salt - ½ cup peanut butter (creamy or crunchy) - ½ cup chocolate chips (optional) - ½ cup rainbow sprinkles (optional for a fun twist) Each ingredient plays a key role in making the treats chewy and sweet. The mini marshmallows give the treats their classic gooeyness. Butter adds richness, while peanut butter brings in a nutty flavor. You can play with the flavors in your treats. Here are some fun ideas: - Swap peanut butter for almond butter. - Use flavored marshmallows for a twist. - Add crushed cookies or candies for crunch. - Mix in dried fruit like cranberries or raisins. These options let you create your unique version of this classic treat. Using fresh ingredients makes a big difference in taste. Old marshmallows may not melt well. Stale cereal can make your treats hard. Always check the date on your ingredients before starting. This ensures your treats come out soft and tasty. For the best results, use the full recipe and enjoy the process! To start, gather your ingredients: Rice Krispies cereal, mini marshmallows, butter, peanut butter, vanilla extract, salt, and optional chocolate chips or sprinkles. In a large saucepan, melt 3 tablespoons of butter over low heat. Next, add 10 ounces of mini marshmallows. Stir this mix until it melts and becomes smooth. Remove the pan from heat and mix in ½ cup of peanut butter. Blend everything well. Then, add 1 teaspoon of vanilla extract and ½ teaspoon of salt. Stir until combined. In a large mixing bowl, pour the melted mixture over 6 cups of Rice Krispies cereal. Gently stir until all the cereal gets coated. If using chocolate chips or sprinkles, fold them in now for extra flavor. To get that chewy texture, make sure you don’t overcook the marshmallows. Melt them just until smooth and mix quickly. Press the mixture into the pan firmly, but don’t crush it too much. This keeps the treats soft and chewy. Let them cool at room temperature for about 30 minutes before cutting them into squares. Greasing the pan is key. Use butter or cooking spray to coat a 9x13 inch baking pan. This helps remove the treats easily later. When pressing the mixture down, dampen your hands to prevent sticking. You can also use a spatula for a smooth finish. Press evenly across the pan to ensure all parts are the same thickness. This helps them cool evenly and stay chewy throughout. For more on the complete method, check the Full Recipe. To get your Rice Krispies treats chewy, follow these steps closely. Use fresh mini marshmallows for the best texture. Melt the butter and marshmallows slowly over low heat. Stir constantly to avoid burning. When they are fully melted, add the peanut butter quickly. This step adds creaminess and helps with chewiness. Press the mixture firmly into your pan. This helps it hold together better when cooled. One common mistake is melting the marshmallows too fast. This can lead to a hard texture. Another mistake is not measuring the cereal properly. Too much cereal makes the treats dry. Also, avoid pressing the mixture too hard. If you press too hard, the treats can become dense and tough. Lastly, don't skip the salt. It balances the sweetness and enhances flavor. You can easily change the flavor of your treats. Try adding different types of nut butter, like almond or cashew. You can also mix in flavored extracts, like almond or mint, for a twist. For extra fun, fold in crushed candies or nuts. Use crushed graham crackers for a s'mores version. You can find the full recipe for these delicious treats above. {{image_2}} You can make your chewy Rice Krispies treats even more fun by adding special mix-ins. Try mixing in: - ½ cup of mini chocolate chips - ½ cup of crushed cookies - ½ cup of dried fruit like cranberries or raisins These add-ins not only change the flavor but also give a nice texture. You can also swap peanut butter for almond butter or sun butter for a nut-free option. Change the look and taste of your treats for special days. For Halloween, add orange and black sprinkles. For Christmas, use red and green sprinkles and a dash of peppermint extract. Easter is perfect for pastel-colored sprinkles or even mini egg candies. Each season brings a chance to be creative and make your treats festive. You can lighten up your treats with some simple swaps. Use: - 3 cups of whole grain Rice Krispies for added fiber - 1 cup of mini marshmallows made with natural sweeteners You can also reduce the butter to 2 tablespoons and add mashed bananas for moisture. This way, you still enjoy a delicious treat, but with a healthier twist. For the full recipe, check out the details above! To keep your Chewy Rice Krispies Treats fresh, store them in an airtight container. This helps prevent them from becoming hard. You can stack the squares in the container, but place parchment paper between layers to avoid sticking. Keep them in a cool, dry place. Avoid direct sunlight, as heat can change their texture. To extend the freshness of your treats, try adding a slice of bread to the container. The bread will keep the treats soft. Change the slice every few days to maintain moisture. You can also wrap each square in plastic wrap. This keeps them fresh longer and makes them easy to grab on the go. If you want to save your treats for later, freezing is a great option. Wrap each square tightly in plastic wrap and place them in a freezer bag. Remove as much air as possible before sealing. They can last up to three months in the freezer. When you're ready to eat them, let them thaw at room temperature. You can also warm them in the microwave for a few seconds for that fresh-out-of-the-pan feel. For the complete recipe, check out the Full Recipe. To make your Rice Krispies treats softer, you can add more marshmallows. Use about 11 ounces instead of 10. You can also add a bit more butter. This extra fat keeps them chewy and moist. Mix the marshmallows well with butter until they melt completely. This helps create a smooth mix that coats the cereal well, giving you that soft texture you desire. Yes, you can use different cereals! Try fruity cereals for a fun twist. Cornflakes or Cheerios work too. Just keep the measurements similar to Rice Krispies. It’s a great way to play with flavors and textures. The key is to keep the sticky mixture balanced, so it holds together well. You can find pre-made chewy Rice Krispies treats at most grocery stores. Look in the snack aisle. Some brands offer different flavors, like chocolate or peanut butter. You can also check online retailers for a wide selection. However, making them at home is much more fun and fresh! If you want the full recipe, just follow the steps I shared earlier. In this blog post, I shared how to make chewy Rice Krispies Treats. We covered key ingredients, step-by-step instructions, and tips for maximum chewiness. You learned how to customize your treats and store them properly. Remember, fresh ingredients are vital for the best flavor. Now, with these tips, you can create delicious, fun treats for any occasion. Enjoy experimenting with your own unique twists!

Chewy Rice Krispies Treats Simple and Tasty Recipe

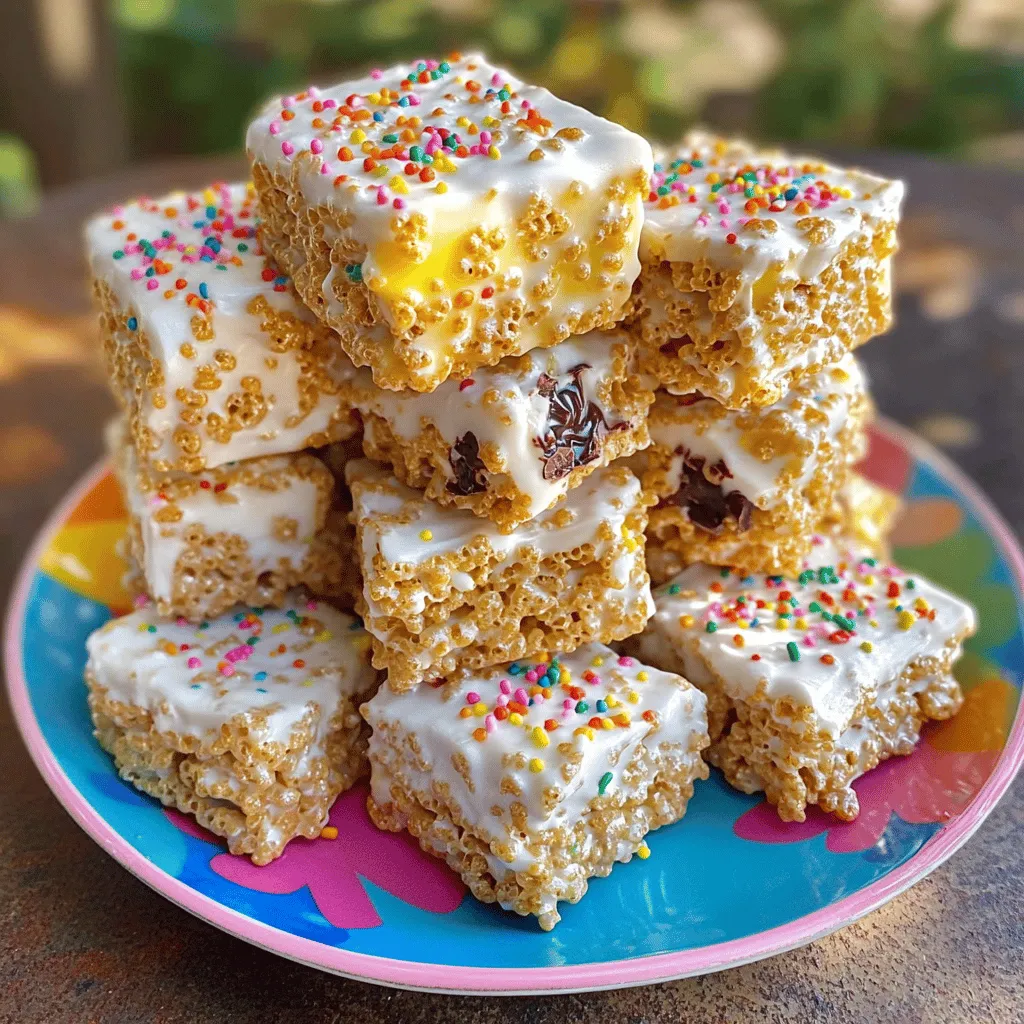
Are you ready to make the best chewy Rice Krispies treats ever? This simple recipe will help you create that

To make your breakfast burritos with potatoes and eggs, you will need a simple list of ingredients. Here’s what to gather: - 4 large flour tortillas - 2 medium Yukon gold potatoes, peeled and diced - 4 large eggs - ½ cup shredded cheddar cheese - ½ cup diced bell peppers (red and green) - ¼ cup finely chopped onion - 1 teaspoon smoked paprika - 1 teaspoon garlic powder - Salt and pepper to taste - 2 tablespoons olive oil - Fresh cilantro, chopped (for garnish) - Salsa or hot sauce (for serving) Each ingredient plays a key role in creating a tasty meal. The Yukon gold potatoes add creaminess, while the eggs bring protein. The bell peppers and onions add crunch and flavor. Spice it up with smoked paprika and garlic powder, making every bite memorable. Gather these items to craft your breakfast burritos. For the full recipe, check out the complete instructions. Enjoy the process, and let's get cooking! To start, boil the potatoes. Use a medium pot and fill it with salted water. Bring the water to a boil. Add the diced Yukon gold potatoes. Cook them until they are tender, about 10 minutes. Once cooked, drain the potatoes and set them aside. Next, heat olive oil in a large skillet over medium heat. Add the chopped onion and diced bell peppers. Sauté them for about 5 minutes until soft. This step adds great flavor to your burrito filling. Now, it's time to mix! Stir in the cooked potatoes with the onion and peppers. Add smoked paprika, garlic powder, salt, and pepper. Cook this mixture for 3 to 4 minutes. This helps the spices blend well with the potatoes and veggies. In a bowl, whisk the eggs. Add a pinch of salt and pepper. Push the potato mixture to one side of the skillet. Pour the eggs into the other side. Cook the eggs gently, scrambling them until they are just set, about 3 minutes. Combine the potato mixture with the scrambled eggs in the skillet. Sprinkle shredded cheddar cheese on top. Let it melt slightly. For each tortilla, lay a generous amount of the filling in the center. Fold the bottom of the tortilla up and tuck it over the filling. Then fold in the sides and roll tightly. Repeat this for all tortillas. For a crispy finish, heat a clean skillet over medium heat. Place the burritos seam-side down in the skillet. Cook for 2 to 3 minutes on each side until golden and crispy. This step adds a delightful crunch to your breakfast burritos. Follow this method to make your breakfast burritos with potatoes and eggs delightfully tasty! You can find the full recipe included in this article. Choose Yukon gold potatoes for your breakfast burritos. They have a creamy texture and rich flavor. Other good options include red potatoes or Russets. Each type offers a unique taste. Yukon golds hold their shape well when cooked, making them perfect for mixing with eggs. For fluffy scrambled eggs, whisk them well with salt and pepper. Use a non-stick skillet for best results. Heat the skillet to medium-low. Pour in the eggs and let them sit for a few seconds. Gently stir with a spatula, pushing the eggs from the edges to the center. Remove them from heat while still slightly runny. They will continue to cook off the heat. To wrap your burrito, lay the tortilla flat. Place the filling in the center, but not too close to the edges. Fold the bottom over the filling first. Then, fold in the sides tightly. Roll it up from the bottom. This method seals the burrito well and keeps everything inside. Enjoy your delicious breakfast burritos with a twist! For the full recipe, check out the detailed steps. {{image_2}} You can easily swap out some ingredients in your breakfast burrito. For cheese, try Monterey Jack or pepper jack for a different taste. If you like a kick, add crumbled feta or goat cheese. For proteins, consider using diced ham, cooked bacon, or sausage. You can even add tofu for a plant-based option. These changes keep the dish fresh and exciting. If you want a vegetarian burrito, simply skip the meat and add more veggies. Try spinach, mushrooms, or zucchini for added flavor. For a vegan version, replace eggs with scrambled tofu or chickpea flour. Use vegan cheese or skip the cheese altogether. This way, everyone can enjoy a delicious breakfast burrito. To spice things up, add more herbs and spices. A pinch of cumin or chili powder can add warmth. Fresh herbs like cilantro or parsley brighten the dish. You can also add diced jalapeños for heat or roasted red peppers for sweetness. These small changes can make a big difference in flavor. You can store leftover burritos in the fridge. Wrap them tightly in plastic wrap or foil. Place them in an airtight container. This keeps the burritos fresh and prevents drying out. To freeze, wrap each burrito in plastic wrap. Then, place them in a freezer-safe bag. Make sure to remove as much air as possible. To reheat, unwrap the burrito and microwave it for 2-3 minutes. You can also bake it at 350°F for about 15-20 minutes. In the fridge, these burritos last about 3-4 days. In the freezer, they can last up to 3 months. Always check for any signs of spoilage before eating. Enjoy them as a quick breakfast or snack! Yes, you can use various tortillas. Flour tortillas are soft and easy to wrap. Corn tortillas add a nice flavor and crunch. Try whole wheat for a healthier option. Each type brings a unique taste to your breakfast burrito. You can pair your burritos with many sides. Fresh fruit adds a sweet touch. A simple green salad brings a nice crunch. You can also serve yogurt or sour cream for creaminess. Salsa or hot sauce offers a spicy kick. To reheat your burritos, wrap them in foil. Place them in the oven at 350°F for about 15-20 minutes. This keeps them warm without drying out. You can also microwave them for 1-2 minutes. Just be careful not to overheat. Yes, making the filling ahead is a great idea. Cook the potatoes and eggs, then store them in the fridge. You can keep it for about 3 days. Just reheat the filling before assembling the burritos. You can add many toppings to your burritos. Avocado or guacamole gives a creamy texture. Chopped green onions add a fresh bite. You might enjoy diced tomatoes or jalapeños for extra flavor. Cheese, of course, never hurts! This blog post detailed how to make tasty breakfast burritos. We covered key ingredients like Yukon gold potatoes, eggs, and cheeses. I also shared easy steps for cooking and wrapping them. You learned tips for selecting good potatoes and perfecting scrambled eggs. Try different fillings or toppings for a fun twist. These burritos are great for any meal. With proper storage, leftovers can last. Enjoy making this dish your own!

Breakfast Burritos with Potatoes and Eggs Delight

Looking for a tasty breakfast idea? You’ve found it! These Breakfast Burritos with Potatoes and Eggs are delicious, filling, and

To make Pumpkin Pie Spiced Almonds, you will need the following ingredients: - 2 cups raw almonds - 2 tablespoons coconut oil, melted - 3 tablespoons brown sugar (or coconut sugar) - 1 teaspoon pumpkin pie spice - 1/2 teaspoon sea salt - 1/4 teaspoon cayenne pepper (optional) - 1 teaspoon vanilla extract These ingredients blend perfectly to create a warm, sweet, and slightly spicy snack. The raw almonds serve as a healthy base, while the coconut oil adds richness. Brown sugar brings a sweet touch, and pumpkin pie spice gives that cozy fall flavor. A hint of cayenne pepper adds a kick, but feel free to skip it if you prefer no heat. Vanilla extract rounds out the flavor beautifully, making each bite delightful. For the complete recipe and instructions, check out the Full Recipe. - Preheat your oven to 350°F (175°C). Line a baking sheet with parchment paper. - In a large bowl, mix the melted coconut oil, brown sugar, pumpkin pie spice, sea salt, cayenne pepper (if using), and vanilla extract. Stir until it's smooth and well combined. - Add the raw almonds to the bowl. Stir gently until each almond gets coated evenly with the spiced mixture. Make sure no almond is left uncoated. - Spread the coated almonds in a single layer on the prepared baking sheet. - Bake in the oven for 15 to 20 minutes. Stir them halfway through to help them roast evenly. Keep an eye on them. Nuts can go from perfect to burnt quickly. - Check for doneness by looking for a golden color and a nice aroma. When they smell good and look golden, they are ready. - Remove the almonds from the oven and let them cool on the baking sheet for about 10 minutes. They will harden as they cool. - Once cooled, break apart any clusters. Transfer the spiced almonds to an airtight container for storage. - For the full recipe, you can refer to the earlier section. To avoid burning the nuts, keep a close watch on them while baking. Nuts can go from golden to burnt in a flash. Set a timer for 15 minutes, but check them sooner. Stirring halfway through the baking time is key. This helps the almonds roast evenly. It also allows all sides to get that nice golden color. Don’t skip this step! These pumpkin pie spiced almonds are great for snacking. You can enjoy them straight from the bowl. They also make a fun topping for salads or oatmeal. Try mixing them into trail mix. They add a tasty crunch and a seasonal twist. Pair them with a warm drink for a cozy treat! You can experiment with spices to make them your own. Consider adding a dash of cinnamon or nutmeg for extra warmth. A sprinkle of ginger can also add a nice kick. If you want heat, try more cayenne or a pinch of chili powder. Each twist brings a new flavor to the table. Have fun with it! {{image_2}} You can switch raw almonds for other nuts. Cashews, walnuts, or pecans work great. Each nut brings its own taste and texture. For a richer flavor, try using hazelnuts. Remember, different nuts might roast at different rates. Keep an eye on them while baking. Brown sugar is tasty, but there are other choices. Coconut sugar adds a nice caramel note. Honey or maple syrup can also work. For a sugar-free option, use stevia or monk fruit. These sweeteners can help you enjoy a healthier snack without losing flavor. You can spice things up by adding chocolate. Melt dark chocolate and mix it with the almonds. For a fruity twist, toss in some dried cranberries or cherries. You can also sprinkle some cinnamon or nutmeg for extra warmth. Experiment with flavors to find your perfect mix. To keep your pumpkin pie spiced almonds fresh, store them in an airtight container. This helps prevent moisture from ruining the crunch. I recommend using glass jars or food storage bags. Keep the container in a cool, dry place away from sunlight. Avoid the pantry if it gets warm, as heat can spoil the nuts quickly. When stored properly, pumpkin pie spiced almonds can last up to two weeks. After this time, they might lose their crunch and flavor. If you want the best taste, eat them within the first week. This ensures you enjoy their full flavor and crunchiness. You can freeze pumpkin pie spiced almonds for longer storage. To do this, place them in a freezer-safe bag. Squeeze out as much air as possible before sealing. When you want to enjoy them again, simply take out the amount you need. Let them thaw at room temperature for about 30 minutes. This keeps them crunchy and delicious. To make pumpkin pie spiced almonds, follow these steps: 1. Preheat your oven to 350°F (175°C) and line a baking sheet with parchment paper. 2. In a large bowl, mix melted coconut oil, brown sugar, pumpkin pie spice, sea salt, cayenne pepper, and vanilla extract until smooth. 3. Add the raw almonds and stir until they are fully coated. 4. Spread the almonds in a single layer on the baking sheet. 5. Bake for 15-20 minutes, stirring halfway to ensure even roasting. Keep a close eye to prevent burning. 6. Once golden, remove them from the oven and let them cool for 10 minutes. The almonds will harden as they cool. 7. Break apart any clusters and store in an airtight container. You can find pumpkin pie spiced almonds at many grocery stores. Look in the snack aisle or health food section. Online options are also great. Websites like Amazon and specialty food stores often sell them. Yes, you can! Make them a few days in advance. Just store them in an airtight container at room temperature. This keeps them fresh and crunchy. If you need an oil alternative, use vegetable oil or melted butter. Both work well and give a nice flavor. You can also try olive oil for a different taste. To make this recipe nut-free, you can use pumpkin seeds or sunflower seeds. They will still taste great with the pumpkin pie spices. Just follow the same steps in the recipe for a fun twist. In this article, we covered how to make delicious pumpkin pie spiced almonds. You learned about the key ingredients, step-by-step instructions, and helpful tips. Remember to pay attention while baking to avoid burning and to explore different nut and flavor options. These almonds make a great snack or gift. Storing them properly keeps them fresh for longer. Enjoy experimenting with this easy recipe, and make it your own!

Pumpkin Pie Spiced Almonds Tasty Snack Recipe

Are you craving a tasty snack that captures fall’s flavors? Look no further! In this post, I’ll show you how

Older posts
Newer posts
← Previous Page1 … Page89 Page90 Page91 … Page104 Next →

dsad

© 2025 pureeatsnow • Built with GeneratePress

Our Policies

  • Copyright Policy
  • Cookie Policy
  • GDPR Policy
  • Privacy Policy
  • Disclaimer
  • Terms Of Use

More Information

  • Home
  • About
  • Contact
  • Appetizers
  • Dessert
  • Dinner
  • Drinks
©2025, pureeatsnow About Back To Top