Skip to content
DisclaimerTerms Of UseGDPR PolicyCookie Policy

pureeatsnow

  • Home
  • Drinks
  • Appetizers
  • Dinner
  • Dessert
  • About
  • Contact
  • Privacy Policy
DisclaimerTerms Of UseGDPR PolicyCookie Policy

Rachel

To make 7-Minute Marshmallow Frosting, you need a few simple ingredients. Each plays a key role in creating that light and fluffy texture. Here’s the list: - 2 large egg whites - 1/4 teaspoon cream of tartar - 3/4 cup granulated sugar - 2 cups mini marshmallows - 1 teaspoon vanilla extract - 1 tablespoon water Egg whites give this frosting its volume. They whip up into airy peaks. Cream of tartar stabilizes the egg whites. This step is crucial to keep your frosting from collapsing. Granulated sugar adds sweetness and helps form a stable structure. Mini marshmallows melt into a smooth mixture, adding that delightful marshmallow flavor. Together, they create a sweet and fluffy base. Vanilla extract adds a warm, sweet note to the frosting. Water helps melt the marshmallows, making them easier to mix in. This combination brings everything together into a delicious treat. For the full recipe, check out the detailed instructions to whip up this delightful frosting! Setting up your mixer is the first step. You can use a stand mixer or a hand mixer. Make sure your mixing bowl is clean and dry. Any grease can ruin your frosting. So, take a moment to check your bowl and beaters. This small step helps you get the best results. Next, we whip the egg whites. Add the egg whites and cream of tartar to the bowl. Beat on medium speed. Watch for soft peaks to form. This should take about one minute. Soft peaks look like small waves in the egg whites. They are not stiff yet, but they give a nice base for your frosting. Now it's time to add sugar. Gradually add the granulated sugar while you keep beating the egg whites. This process should take about two to three minutes. You want to see stiff peaks—these peaks stand tall and do not fall. For the marshmallows, take a microwave-safe bowl. Mix the mini marshmallows with water. Microwave on high for 30 to 45 seconds. Stir halfway through to ensure they melt evenly. The marshmallows should be smooth and cool a bit before you add them. With the mixer on low speed, gently pour in the melted marshmallow mixture. Add the vanilla extract too. Mix on medium speed until fully combined. This will take about one to two minutes. You want to achieve a light and fluffy texture. Now you can frost your favorite cake or cupcakes with this light and fluffy treat. For the full recipe, remember to check the link provided. Enjoy your sweet creation! Understanding Peaks When making 7-minute marshmallow frosting, the texture is key. You need to know about peaks. There are two types: soft and stiff. Soft peaks look like little waves. They hold their shape but bend over. Stiff peaks stand straight up. They hold their shape well. To achieve stiff peaks, keep beating your egg whites. This usually takes about 2 to 3 minutes. Tips for Fluffiness To make your frosting light and fluffy, pay attention to a few details. First, use fresh egg whites. Older whites may not whip well. Second, don’t rush adding sugar. Add it slowly while mixing. This helps create a better texture. Lastly, fold in your melted marshmallows gently. This keeps the air in the mixture. Best Use Cases for 7-Minute Marshmallow Frosting This frosting is perfect for cakes and cupcakes. It adds a sweet and light touch. Use it on chocolate cakes, vanilla cakes, or even fruit-flavored ones. It can also top brownies or layer in dessert jars. The options are endless! Pairing with Cakes and Cupcakes You can pair this frosting with many flavors. Try it with red velvet or lemon cupcakes. It contrasts well with rich flavors. You can also add toppings like sprinkles or fruit. This makes your treats look even better. Fixing Runny Frosting If your frosting is runny, don’t worry. This can happen. Try adding more powdered sugar to thicken it. Beat it again until it reaches the right consistency. If it stays runny, check your egg whites. They may not have been whipped enough. Preventing Sugar Crystallization To prevent sugar from crystallizing, use granulated sugar only. Make sure your mixing bowl is clean and dry. Avoid any contact with grease or water. If you see crystals forming, heat the mixture gently. Stir until they dissolve. This will keep your frosting smooth. For the full recipe, check the section above. Enjoy your fluffy creation! {{image_2}} You can easily change the taste of your marshmallow frosting. One simple way is by adding cocoa powder. This gives your frosting a rich chocolate flavor. To do this, mix in 1/4 cup of cocoa powder after you whip the egg whites. You can adjust the amount based on how chocolatey you want it. Another fun option is to try different extracts. Instead of vanilla, use almond or coconut extract. Just a teaspoon will bring a new twist to your frosting. This small change can surprise your taste buds. Adding color to your frosting makes it more fun! You can use food coloring to match any theme. Just add a few drops of your favorite color before the final mixing. Mix well until the color is even. You can also create swirl patterns. To do this, add two colors of frosting to a piping bag. When you pipe it out, you'll get a beautiful swirl effect. This is perfect for birthdays or special occasions! Want to make your frosting even more exciting? Try adding sprinkles or crushed candy. This gives your frosting a nice crunch and a pop of color. Mix in about a half cup of your favorite sprinkles right before you frost. You can also add coconut or nuts for extra flavor. Shredded coconut adds a tropical twist. Chopped nuts add a nice texture. Just a half cup of either will do the trick. These add-ins make your frosting unique and fun. For the full recipe, check out the instructions above. - Refrigeration Tips: Store your 7-minute marshmallow frosting in the fridge if you have leftovers. It stays fresh and fluffy for a bit longer this way. Make sure to cover it tightly. This keeps out air and moisture. - Containers to Use: Use an airtight container. Glass or plastic containers work well. Avoid metal containers, as they can react with the frosting. - How Long Does Frosting Last?: In the fridge, your frosting can last about 5 to 7 days. After this time, it may lose its fluffiness and flavor. - Signs of Spoilage: If you see any discoloration or if it develops an off smell, it's time to throw it away. Also, if the frosting appears watery, it’s best not to use it. - Can You Freeze Marshmallow Frosting?: Yes, you can freeze this frosting. It can last up to 2 months in the freezer. However, the texture may change slightly once thawed. - Thawing Instructions: To thaw, place the frosting in the fridge overnight. When ready to use, gently re-whip it for the best texture. Avoid using the microwave, as it can change the consistency. 7-Minute Marshmallow Frosting is a light and fluffy topping made quickly. It uses egg whites, sugar, and marshmallows. Unlike buttercream, it is airy and sweet. You whip egg whites to soft peaks and add melted marshmallows. This gives it a smooth and creamy texture. Common uses in baking include frosting cakes and cupcakes. It can also be used as a filling for pastries or as a dip for fruits. This frosting is perfect for adding a sweet touch to any dessert. Yes, you can make this frosting ahead of time. It stays fresh for about two days in the fridge. Store it in an airtight container to keep its texture. To refresh before use, gently stir it. If it seems too thick, you can add a few drops of water. This helps restore its fluffiness and makes it easy to spread. Yes, you can make a vegan version of this frosting. Instead of egg whites, use aquafaba. Aquafaba is the liquid from canned chickpeas and works well as an egg white substitute. You can also use vegan marshmallows. Check the label to ensure they are free from animal products. These changes make the frosting suitable for vegan diets while keeping it light and fluffy. Yes, you can pipe this frosting! For the best results, use a piping bag with a large round tip. This helps create beautiful swirls and designs on your desserts. Some good techniques for piping include starting from the outside and working inward. This creates a nice layered look. Use a spatula to smooth out the top if needed. Enjoy piping this frosting on cakes, cupcakes, or any sweet treat. For the full recipe, you can check the detailed instructions above. In this blog, we explored how to make 7-minute marshmallow frosting. We covered essential ingredients, step-by-step instructions, and handy tips. You learned about variations, storage info, and frequently asked questions. With the right techniques, you can create a fluffy frosting that brightens any dessert. Experiment with flavors and colors for a fun twist. Remember, mastering this frosting opens the door to delightful treats. Enjoy making this classic recipe and impress your guests!

7-Minute Marshmallow Frosting Light and Fluffy Treat

Looking for a light and fluffy frosting that’s quick to whip up? Look no further! This 7-Minute Marshmallow Frosting is

- 1 can (15 oz) chickpeas, drained and rinsed - 1 small red onion, roughly chopped - 3 cloves garlic, minced - 1 cup fresh parsley, packed - 1 teaspoon ground cumin - 1 teaspoon ground coriander - ½ teaspoon baking powder - 1 teaspoon salt - ½ teaspoon black pepper - 2 tablespoons tahini - 1 tablespoon lemon juice - ½ cup breadcrumbs (or oat flour for gluten-free) - Olive oil spray Chickpeas are the heart of falafel. They provide protein and flavor. I love using canned chickpeas for ease. Just drain and rinse them. Fresh herbs like parsley give the falafel a bright taste. I always add garlic and onion for extra depth. Spices make this dish sing. Cumin and coriander add warmth. Baking powder helps the falafel puff up and be light. Salt and pepper enhance all the flavors. Tahini and lemon juice add creaminess and tang. Breadcrumbs help bind the mixture. You can use oat flour if you want it gluten-free. - Gluten-free alternatives: Use oat flour instead of breadcrumbs. - Vegan additions: Add chopped spinach or carrots for extra nutrition. If you need gluten-free options, oat flour works well. It keeps the texture just right. Want to add more veggies? Try spinach or carrots for extra color and nutrition. This makes the falafel even more fun! - Sauces and dips: Tahini sauce, garlic sauce, or yogurt sauce. - Fresh vegetables: Cucumber, tomato, or lettuce. - Grains and breads: Pita bread, quinoa, or rice. Serving falafel is all about balance. A creamy tahini sauce complements the crispy falafel. Fresh veggies like cucumber and tomato add crunch. Pita bread is perfect for wrapping the falafel. For a hearty meal, serve with grains like quinoa or rice. These ideas will make your meal colorful and tasty. For the full recipe, check out the link above. - Preparing the chickpea mixture: Start by adding the drained chickpeas, chopped red onion, minced garlic, and fresh parsley into a food processor. Pulse it until you have a coarse mixture. Scrape down the sides if needed to ensure an even blend. - Adding seasonings and forming the mixture: Next, add the ground cumin, ground coriander, baking powder, salt, black pepper, tahini, and lemon juice. Pulse until well mixed but still slightly chunky. Transfer this mixture to a bowl. Mix in the breadcrumbs. If it's too wet, add more breadcrumbs until you can form balls easily. - Preheating the air fryer: Preheat your air fryer to 375°F (190°C). This step helps achieve a perfect crispy texture. - Arranging and cooking the falafel: Shape the mixture into small balls or patties. They should be about the size of a golf ball. Lightly spray the air fryer basket with olive oil spray. Arrange the falafel in a single layer, making sure they do not touch. Lightly spray the tops with olive oil for extra crispiness. Cook them for 12-15 minutes, flipping halfway through, until golden brown and crispy. - Checking doneness: After 12-15 minutes, check if the falafel are golden brown and crispy. They should be firm to the touch. - Plating and garnishing tips: Once done, remove the falafel from the air fryer and let them cool slightly. Serve them with a dollop of tahini sauce and garnish with fresh parsley. Pair with pita bread, sliced cucumber, and tomato for a delightful meal. For the complete details, refer to the Full Recipe. To make your falafel crispy, follow these steps: - Use dried chickpeas instead of canned ones. Soak them overnight for the best texture. - Don’t over-process the mixture. You want it coarse, not a paste. This keeps the falafel light and airy. - Spray the falafel lightly with olive oil. This adds crunch without excess grease. A good texture is key to great falafel. When you avoid over-processing, the chickpeas stay chunky. This small step makes a big difference in texture. Here are common pitfalls when making falafel: - Using canned chickpeas: They often make the mixture too wet. - Over-processing: This leads to dense, heavy falafel. - Not letting the mixture rest: It helps the flavors blend and makes shaping easier. If your falafel falls apart, add more breadcrumbs or oat flour. This helps bind the mixture. If they are too dry, add a splash of water or lemon juice. Adjust your air fryer time and temperature with these tips: - For a smaller air fryer, reduce cooking time by a few minutes. - For larger models, keep an eye on them. They may cook faster. You can also modify the recipe for your taste: - Add more garlic or spices for a bolder flavor. - Swap parsley for cilantro for a different herb note. With these tips, you can make the best air fryer falafel! For the full recipe, check the details above. {{image_2}} Using an air fryer makes your food healthier. Air frying uses hot air, not oil, to cook. Traditional frying soaks food in oil. This adds calories and fat. In contrast, air frying needs little to no oil. You can cut your oil use by about 75% or more. This is great if you want a tasty meal without the extra fat. Air fryers keep the crispy texture without the bad stuff. This is key for making falafel. You still enjoy that crunch while being mindful of your health. Air fryers cook food quickly. They are faster than traditional methods like frying or baking. Falafel takes about 12-15 minutes to cook. This is much quicker than frying in a pan. You save time and effort. You can also make multiple batches at once. If you want to feed a crowd, this is a game-changer. Just shape your falafel and place them in the air fryer. While one batch cooks, you can prepare the next. This efficiency is perfect for busy weeknights. Air fryers create less mess than deep frying. There is no hot oil to splash everywhere. You don’t need to worry about oil stains on your kitchen. Just line the basket and you’re good to go! Cleanup is easy too. Most air fryer baskets are dishwasher safe. A quick wash is all it takes. For extra convenience, use parchment paper. This keeps your air fryer clean and helps with cooking. Enjoy your crispy air fryer falafel with less fuss and mess! You can change the taste of your falafel by adding different spices and herbs. For example, try adding smoked paprika for a warm flavor. Fresh mint can also brighten the dish. You can even add a pinch of cayenne for heat. Mixing in vegetables like grated carrots or zucchini adds moisture and nutrients. These additions keep the falafel unique and fun! Falafel is great in many forms. Wrap them in pita for a classic meal. Add fresh veggies and sauces for a burst of flavor. You can also serve them as a bowl with grains like quinoa or rice. For a fun twist, make falafel sliders. Shape smaller patties for a tasty bite-sized treat. Kids love these, and they make great party snacks! Dips can elevate your falafel. A homemade tahini sauce pairs well with the crispy texture. Just mix tahini, lemon juice, and a bit of water to thin it out. If you want a creamier option, try yogurt-based sauces. Mix yogurt with garlic, lemon, and herbs for a refreshing dip. These sauces can enhance your meal and add extra flavor. Yes, you can use dried chickpeas. First, soak them overnight in water. This helps soften them. After soaking, drain the chickpeas and cook them. Boil them in fresh water for about 1-2 hours until tender. Then, drain again before using them in the falafel recipe. Using dried chickpeas gives a fresher taste and better texture. If your falafel falls apart, don't worry! This can happen. First, make sure you added enough breadcrumbs. If the mixture feels too wet, add more breadcrumbs until it holds together. Also, try chilling the mixture for 30 minutes. This helps firm it up before shaping. Lastly, be gentle when forming the balls to avoid breaking them. To make falafel in a traditional oven, preheat it to 400°F (200°C). Shape the falafel mixture into balls or patties. Place them on a lined baking sheet. Spray the tops with olive oil for crispiness. Bake for 20-25 minutes, flipping halfway through. This way, you get a nice golden color and crispy texture. Store leftover falafel in an airtight container. Keep them in the fridge for up to three days. To reheat, place them in the air fryer at 350°F (175°C) for about 5-7 minutes until warm. You can also use a regular oven for reheating. This keeps them crispy and delicious. Making falafel in an air fryer is easy and fun. You learned about the main ingredients, like chickpeas and herbs. I shared tips for the best texture and how to avoid common mistakes. The air fryer lets you create a healthier dish quickly and with less mess. You can spice up your falafel or try different serving styles. Remember that the key is to enjoy your cooking process and be creative. With these steps, tasty falafel is just a fry away!

Air Fryer Falafel Versatile and Flavorful Recipe

Craving a quick, tasty snack? Try my Air Fryer Falafel recipe! These bites are packed with flavor and are easier

- 1 lb ground chicken - 1/2 cup Panko breadcrumbs - 1 tablespoon fresh ginger, grated - 2 cloves garlic, minced - 1 tablespoon soy sauce - 1 teaspoon sesame oil - 1 teaspoon chili garlic sauce - Salt and pepper to taste - 4 small slider buns - 1 cup shredded lettuce - 1/2 cup pickled cucumbers - 1/4 cup mayonnaise - 1 tablespoon sriracha (optional) - Fresh cilantro for garnish Gather these ingredients before you start. Fresh ingredients make a big difference in flavor. The ground chicken acts as the base for a juicy patty. Panko breadcrumbs help with texture and crunch. Ginger and garlic give your sliders a nice kick. Soy sauce and sesame oil add depth to the taste. The chili garlic sauce brings heat, but you can adjust it to your liking. For toppings, use shredded lettuce and pickled cucumbers for freshness. The creamy mayonnaise mixed with sriracha adds a spicy touch. Lastly, cilantro makes a perfect garnish. It adds color and a fresh taste. - Mixing bowl - Skillet - Cooking oil - Spatula Make sure you have a mixing bowl for combining the ingredients. A skillet is key for cooking the patties. Use cooking oil to prevent sticking. A spatula helps flip the patties without breaking them. These simple tools make your cooking process smooth and easy. For the full recipe, refer to the detailed instructions listed above. - In a large mixing bowl, combine the following ingredients: - 1 lb ground chicken - 1/2 cup Panko breadcrumbs - 1 tablespoon fresh ginger, grated - 2 cloves garlic, minced - 1 tablespoon soy sauce - 1 teaspoon sesame oil - 1 teaspoon chili garlic sauce - Salt and pepper to taste - Mix until all ingredients blend well. - Shape the mixture into small patties, about the size of slider buns. - You should get around four patties from this mix. - Preheat a skillet over medium heat. - Lightly grease the skillet with cooking oil. - Once hot, add the chicken patties to the skillet. - Cook for about 4-5 minutes on each side. - The patties should turn golden brown and be cooked through. - Toast the slider buns in the same skillet until lightly golden. - In a small bowl, mix mayonnaise with sriracha to make a spicy mayo. - Spread a generous amount of spicy mayo on the bottom half of each bun. - Place a chicken patty on each bun. - Top with a handful of shredded lettuce and a few slices of pickled cucumbers for crunch. - Finally, place the top half of the bun on each slider. - Garnish with fresh cilantro if you wish. Follow this guide, and you will have delicious Bang Bang Chicken Sliders ready to enjoy! For the complete list of steps and details, check the Full Recipe. To make the best Bang Bang Chicken Sliders, focus on even cooking. This ensures that every bite is juicy and tender. Here are a few tips: - Ensure patties are evenly cooked: Cook each patty for about 4-5 minutes on both sides. You want them golden brown and fully cooked through. Use a spatula to flip them carefully. This helps keep them intact. - Adjust spice levels with chili garlic sauce: If you like it spicy, add more chili garlic sauce. Start with just one teaspoon. Taste and then add more if needed. You control the heat! These sliders shine when paired with the right sides. Here are some ideas to enhance your meal: - Pair with dipping sauces and side salads: Serve with a side of extra spicy mayo for dipping. A fresh salad also balances the rich flavors of the sliders. - Consider options for meal prep and entertaining: These sliders are great for gatherings. You can make the patties ahead of time. Just cook and assemble them when guests arrive. This keeps things easy and fun! With these tips, your Bang Bang Chicken Sliders will impress everyone at the table! Enjoy the flavorful journey! {{image_2}} You can swap ground chicken for other meats. Turkey or beef sliders work great too. Both options hold flavor well and taste delicious. If you want a meatless choice, try black beans or chickpeas. They create a hearty patty and are full of protein. Just mash them and mix with your spices. You can still enjoy that bang bang flavor with any of these proteins. Adding different spices or sauces can change the whole dish. Try adding cumin for warmth or paprika for smokiness. You can also use different hot sauces to find your favorite kick. For toppings, think outside the box! Adding avocado gives creaminess, while jalapeños add a spicy crunch. Mix and match to make each slider your own. These simple tweaks can take your sliders to a whole new level! To store chicken patties in the fridge, first cool them to room temperature. Place the patties in an airtight container. They can last for up to three days. If you want to freeze sliders, wrap each one in plastic wrap. Then, place them in a freezer bag or container. They can last for up to three months. To reheat and keep the texture, use an oven or skillet. If using an oven, preheat it to 350°F (175°C). Heat for about 10-15 minutes. In a skillet, warm over medium heat for about 5 minutes on each side. This method keeps sliders crispy. Always check the internal temperature. It should reach 165°F (74°C) for safety. You can use ground turkey instead of chicken. It has a similar texture and taste. If you prefer plant-based options, try using mashed chickpeas or black beans. Both will give you a hearty slider. Yes, you can prep many parts ahead. You can mix the chicken ingredients and form patties. Store them in the fridge for up to a day. You can also make the spicy mayo earlier. Just keep it in the fridge until you're ready to use it. The spice level can change based on your taste. The chili garlic sauce adds heat. If you want less spice, use less sauce. You can also add more mayo to tone it down. These sliders taste great with sweet potato fries or a fresh salad. Try pairing them with a cold drink like iced tea or lemonade. They also go well with a light beer or sparkling water. You can find the full recipe [here](#). It has all the details you need to make these delicious sliders. In this post, I shared a fun way to make Bang Bang Chicken Sliders. I covered ingredients, tools, and step-by-step instructions to ensure your sliders come out great. Remember to mix the chicken well and cook the patties until golden. You can make these sliders your own with different toppings and spice levels. Lastly, keep leftovers stored properly for future meals. Enjoy trying this recipe and feel free to explore variations for your taste!

Bang Bang Chicken Sliders Flavorful and Easy Recipe

Craving something fun and flavorful? Let me introduce you to Bang Bang Chicken Sliders! This easy recipe packs a punch,

For the White Cheddar Spinach Chicken Burgers, you'll need: - 1 lb ground chicken - 1 cup fresh spinach, finely chopped - 1 cup white cheddar cheese, shredded - 1/4 cup breadcrumbs - 1 egg, lightly beaten - 2 cloves garlic, minced - 1 tsp onion powder - 1/2 tsp black pepper - 1/2 tsp salt - 1 tbsp olive oil - Burger buns of your choice - Sliced tomatoes, lettuce, and avocado for topping If you don’t have ground chicken, you can use ground turkey instead. For a dairy-free option, try using a plant-based cheese or omit the cheese altogether. If fresh spinach is not available, you can use frozen spinach, but be sure to drain it well. For breadcrumbs, gluten-free options work great too. Each burger has approximately: - Calories: 300 - Protein: 26g - Fat: 17g - Carbohydrates: 10g - Fiber: 1g - Sugar: 1g This information helps you plan your meals while keeping track of your nutrition. For the full recipe, check out the details above. First, gather your ingredients. You'll need ground chicken, fresh spinach, white cheddar cheese, breadcrumbs, an egg, garlic, onion powder, black pepper, salt, and olive oil. 1. In a large mixing bowl, mix the ground chicken, finely chopped spinach, and shredded cheese. 2. Add breadcrumbs and minced garlic to the mix. 3. Crack the egg into the bowl, then add onion powder, black pepper, and salt. 4. Use your hands to mix everything gently. Don’t overwork the chicken; you want soft burgers. 5. Split the mixture into four equal parts. Shape each part into a patty. Make them slightly larger than your buns. Now it's time to cook. 1. Heat olive oil in a skillet over medium heat. 2. Once the oil is hot, add the patties to the skillet. 3. Cook each side for about 6-7 minutes. 4. Check the burgers with a meat thermometer. They should reach 165°F (75°C). The outside should be golden brown. 5. If you like, toast your burger buns while the patties cook. To check if your burgers are done, use a meat thermometer. Insert it into the center of the patty. - An internal temperature of 165°F (75°C) means they are safe to eat. - If you don’t have a thermometer, cut a patty in half. The meat should be white and no longer pink. - Don’t forget to let the patties rest for a minute before serving. This helps keep them juicy. For the full recipe, refer to the earlier section. Enjoy creating these tasty White Cheddar Spinach Chicken Burgers! To make juicy burgers, start with fresh ground chicken. Fresh meat holds moisture better than frozen. Mix in spinach and cheese to add flavor and moisture. When forming patties, avoid pressing them too hard. A gentle touch keeps them tender. Cook on medium heat to prevent drying out. Always check the internal temperature. It should reach 165°F (75°C) for safety. Using the right tools can make cooking easier. A sturdy skillet works well for frying burgers. A spatula helps flip them without breaking. A meat thermometer ensures they are fully cooked. If you want to grill, use a grill pan or outdoor grill. Don’t forget a mixing bowl for your ingredients and a knife for chopping. Handle ground chicken with clean hands. Keep it cold until you are ready to cook. When mixing, use your hands gently. Overworking the meat makes the burgers tough. Wash your hands and tools after touching raw chicken to prevent bacteria. Always store any leftovers in the fridge and use within a few days. For detailed cooking steps, refer to the Full Recipe. {{image_2}} If you want to mix it up, try different cheeses. Mozzarella gives a mild flavor and melts well. Feta adds a salty, tangy bite. Pepper jack is great for a spicy kick. Each cheese changes the burger’s taste and texture. You can easily add more veggies to your burgers. Finely chopped bell peppers or mushrooms work great. Zucchini can add moisture without changing the flavor much. Grated carrots also bring sweetness and color. These veggies boost nutrition and flavor. For a gluten-free option, skip the breadcrumbs. Use crushed gluten-free crackers or oats instead. If you want low-carb, wrap your burger in lettuce. You can also serve it in a portobello mushroom cap. These swaps keep the taste while meeting your needs. For the full recipe, check out [Full Recipe]. To store your leftover White Cheddar Spinach Chicken Burgers, let them cool first. Place them in an airtight container. You can keep them in the fridge for up to three days. Make sure to separate each burger with parchment paper to prevent sticking. This keeps them fresh and ready to eat. To reheat your burgers, the best way is to use a skillet. Heat the skillet on medium heat. Place the burger in the skillet for about three to four minutes on each side. This method keeps the burger juicy. You can also use a microwave, but this may make the burgers less tasty. If you use the microwave, heat them for about 30 seconds or until warm. If you want to save burgers for later, freezing is a great option. After cooking, let them cool completely. Wrap each burger in plastic wrap or foil. Then, place them in a freezer bag or container. They can last for up to three months in the freezer. To thaw, move them to the fridge overnight before reheating. This helps maintain their flavor and texture. For the full recipe, check out the earlier sections! To make these tasty burgers, you start with fresh ingredients. First, mix ground chicken, chopped spinach, shredded white cheddar, and breadcrumbs in a bowl. Then, add a beaten egg, minced garlic, onion powder, salt, and pepper. It's important to mix gently. Shape the mix into patties, slightly bigger than your buns. Heat olive oil in a skillet, and cook the patties for 6-7 minutes on each side. You want them golden and cooked through. For the full recipe, check out the detailed steps. These burgers pair well with many sides. You can serve them with sweet potato fries for a fun twist. A simple green salad adds freshness and crunch. You could also try coleslaw for a creamy contrast. If you want something light, cucumber slices work great too. Don’t forget your favorite dipping sauces! Yes, you can grill these burgers! Grilling adds a nice smoky flavor. Preheat the grill to medium heat and lightly oil the grates. Cook the patties for about 6-7 minutes on each side, just like in the skillet. Make sure they reach an internal temperature of 165°F (75°C) for safety. Grilling is a great option, especially in warm weather! In this post, I covered how to make tasty chicken burgers. You learned about the ingredients, easy steps to cook, and tips for juiciness. I shared storage info to keep leftovers fresh and answered common questions you might have. Remember, cooking can be fun and rewarding. Each step, from prep to storage, helps you create amazing meals. Enjoy experimenting with flavors and techniques to make your burgers your own. Happy cooking!

White Cheddar Spinach Chicken Burgers Flavorful Recipe

Craving a delicious and healthy twist on your burger night? You’re in the right place! My White Cheddar Spinach Chicken

To make Cinnamon Roll French Toast Bites, you need simple, tasty items. Here’s what you will need: - 4 cinnamon rolls (store-bought or homemade) - 3 large eggs - ½ cup milk (dairy or non-dairy) These main ingredients form the base of the dish. The cinnamon rolls bring sweetness and flavor, while the eggs and milk create a rich coating. To boost the taste, add these flavor enhancers: - 1 teaspoon vanilla extract - 1 teaspoon ground cinnamon - ¼ teaspoon nutmeg (optional) The vanilla extract adds depth. Ground cinnamon gives that warm spice, while nutmeg can add a hint of warmth, if you choose to use it. You will need a few cooking essentials to bring it all together: - 2 tablespoons butter (for cooking) - Maple syrup (for serving) - Powdered sugar (for dusting) Butter helps to create a golden crust when frying. Maple syrup adds sweetness, and powdered sugar gives that beautiful finish. For the full recipe, check out the detailed instructions. Start by taking your cinnamon rolls and cutting each one into 6 bite-sized pieces. This makes them easy to cook and eat. You want small chunks that soak up the egg mixture well. Make sure to use a sharp knife for clean cuts. This will help the pieces to hold their shape while cooking. In a large mixing bowl, whisk together the following ingredients: - 3 large eggs - ½ cup milk (dairy or non-dairy) - 1 teaspoon vanilla extract - 1 teaspoon ground cinnamon - ¼ teaspoon nutmeg (optional) Mix these until they are well combined. The eggs and milk create a rich coating that will make the bites flavorful. The vanilla and spices add a nice touch to the taste. Heat a large skillet or griddle over medium heat. Add 1 tablespoon of butter and let it melt. Once hot, dip each piece of cinnamon roll into the egg mixture. Make sure to coat them well but avoid soaking them too long. Place the coated pieces in a single layer in the skillet. Cook for about 2-3 minutes on each side until they turn golden brown and slightly crispy. After cooking the first batch, add the remaining tablespoon of butter to the skillet. Repeat the process with the leftover pieces. Once all bites are cooked, arrange them on a serving platter. Dust them with powdered sugar and serve warm with maple syrup drizzled on top. For the full recipe, you can refer to the earlier section. Enjoy! To ensure even cooking, use a medium heat. This helps the bites cook through without burning. Dip each cinnamon roll piece quickly into the egg mixture. Avoid soaking them too long to prevent sogginess. Fry the bites in a single layer. This lets them brown nicely. If your skillet is crowded, cook in batches. Keep the cooked bites warm in an oven set to low until ready to serve. For an attractive dish, stack the French toast bites on a plate. Drizzle warm maple syrup over them right before serving. Dust with powdered sugar for a sweet touch. Add fresh fruit like strawberries or blueberries around the bites. This not only adds color but also fresh flavor. If you want a dairy-free option, use almond or oat milk instead of regular milk. For gluten-free bites, choose gluten-free cinnamon rolls. These swaps keep all the taste while meeting different needs. You can enjoy these bites no matter your dietary preferences. For more ideas, check the Full Recipe. {{image_2}} You can spice up your Cinnamon Roll French Toast Bites by adding chocolate chips or nuts. Chocolate chips melt and add a sweet, gooey touch. Just sprinkle them on the cinnamon roll pieces before dipping them in the egg mixture. Walnuts or pecans bring a nice crunch. They also add healthy fats and protein. You can mix and match to suit your taste! Change the flavor based on the season. In fall, add a pinch of pumpkin spice or a bit of apple pie filling. In summer, fresh berries like blueberries or strawberries can brighten the bites. These fruits not only taste great but also add color. You can even use sliced bananas for a sweet twist. Just remember to adjust the coating mixture to balance the added moisture. If you want a lighter version, try using low-calorie bread or whole grain cinnamon rolls. You can use egg substitutes like flaxseed meal or applesauce for a vegan option. For the milk, almond or oat milk works well. This keeps the bites tasty without extra calories. You can enjoy these treats while sticking to your diet goals! For more details on making these delightful bites, check out the Full Recipe. To store leftover Cinnamon Roll French Toast Bites, first let them cool down. Place them in an airtight container. You can keep them in the fridge for up to three days. When ready to eat, simply reheat in the microwave. Heat for 20 to 30 seconds. This will warm them without making them too dry. If you want to keep them longer, consider freezing. Arrange the bites in a single layer on a tray. Freeze for about an hour until solid. After that, transfer them to a freezer bag. They can last for up to two months. To reheat, take them out and let them thaw overnight in the fridge. Then, pop them in the oven at 350°F for about 10 minutes. This helps regain a crispy texture. To maintain the texture and flavor, avoid stacking the bites while storing. If they are stacked, they may get soggy. Use parchment paper between layers to keep them from sticking. Always store them in a cool, dry place. This will help keep the flavors bright and enjoyable. Enjoy your sweet bites even after a few days! Can I use leftover cinnamon rolls for this recipe? Yes, you can use leftover cinnamon rolls. This is a great way to avoid waste. Just cut them into bite-sized pieces as you would fresh rolls. The taste will still be delicious, and it adds a fun twist to your breakfast. How long should I cook the bites to ensure they are done? Cook the bites for about 2-3 minutes on each side. You want them golden brown and slightly crispy. Keep an eye on them to avoid burning. If you adjust the heat, check them often to ensure they cook evenly. How many servings does this recipe yield? This recipe yields about 4 servings. Each serving has enough bites for a tasty morning treat. Feel free to double the recipe if you expect more guests or want leftovers! Where to find nutritional details for the Cinnamon Roll French Toast Bites? You can find nutritional details in the Full Recipe section. This includes calories, protein, and other key nutrients. It’s helpful if you're tracking your intake or planning meals. How can I make this recipe more nutritious or lower in sugar? To make it healthier, use whole grain cinnamon rolls or add fruit like bananas or berries. You can also reduce the sugar in the egg mixture. Consider using a sugar substitute for a lower-calorie option. We explored how to make delicious Cinnamon Roll French Toast Bites using simple ingredients. You learned about the key components, flavor enhancers, and essential cooking tips. I shared variations to suit different diets and how to store leftovers for freshness. Remember, the best part of this recipe is that you can customize it to your taste. Enjoy the process and the tasty treat! Your kitchen will smell amazing, and these bites are hard to resist.

Cinnamon Roll French Toast Bites Tasty Morning Treat

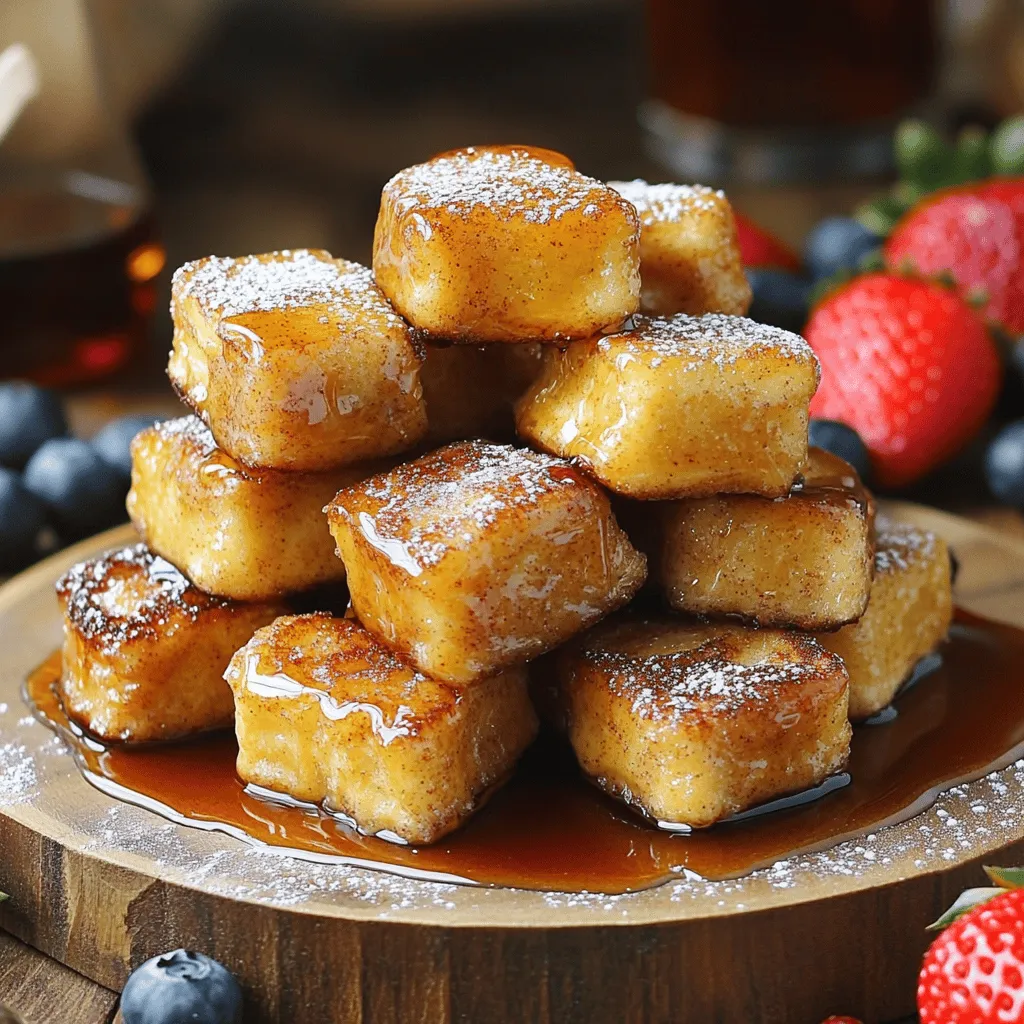
Start your day right with these Cinnamon Roll French Toast Bites! They combine soft, gooey cinnamon rolls with a rich

To make Skinny Strawberry Cake, you'll need these key ingredients: - 1 ½ cups whole wheat flour - 1 cup coconut sugar (or granulated sugar) - 1 teaspoon baking powder - ½ teaspoon baking soda - ¼ teaspoon salt - 1 cup unsweetened applesauce - 1 teaspoon vanilla extract - 2 large egg whites - 1 cup fresh strawberries, hulled and sliced - ½ cup Greek yogurt (plain) - Optional: powdered sugar for dusting These ingredients work together to create a tasty cake that is light on calories. You can swap some ingredients for even fewer calories. For example: - Use almond flour instead of whole wheat flour for a nuttier taste. - Replace coconut sugar with monk fruit sweetener for a sugar-free option. - Try flax eggs instead of egg whites for a vegan version. - Use low-fat yogurt in place of Greek yogurt to cut more calories. These swaps help you stick to your diet while enjoying a sweet treat. Each ingredient in this cake offers health benefits: - Whole wheat flour adds fiber, which helps digestion. - Coconut sugar has a lower glycemic index than regular sugar, helping with blood sugar control. - Unsweetened applesauce acts as a natural sweetener and keeps the cake moist. - Greek yogurt provides protein and probiotics, good for gut health. - Fresh strawberries are low in calories and high in vitamins C and K. These ingredients not only make your cake delicious but also add nutrition to your diet. For the complete recipe, check out the Full Recipe section. Start by gathering all your ingredients. You will need whole wheat flour, coconut sugar, baking powder, baking soda, salt, applesauce, vanilla extract, egg whites, fresh strawberries, and Greek yogurt. Preheat your oven to 350°F (175°C). Grease a 9-inch round cake pan or use parchment paper. This helps the cake not stick. In a large bowl, whisk together the dry ingredients. Combine the whole wheat flour, coconut sugar, baking powder, baking soda, and salt. Make sure they mix well. In a separate bowl, mix the wet ingredients. Combine the applesauce, vanilla extract, and egg whites. Whisk them until smooth. Gradually add the wet mix to the dry mix. Stir gently until just combined. Be careful not to over-mix. Gently fold in the sliced strawberries and Greek yogurt. This adds flavor and moisture. Pour the batter into your prepared cake pan. Smooth the top with a spatula. Bake in the preheated oven for about 25-30 minutes. Check with a toothpick; it should come out clean. Once baked, let the cake cool in the pan for 10 minutes. Then, transfer it to a wire rack to cool completely. For a sweet touch, dust the top with powdered sugar before serving. For the full recipe, check the previous section. To keep your Skinny Strawberry Cake moist, use unsweetened applesauce. This adds moisture without extra fat. Don't over-mix the batter; stir until just combined. Over-mixing can make the cake tough. Adding Greek yogurt also helps with moisture. It gives a nice texture and taste. For even baking, make sure your oven is preheated. This helps the cake rise evenly. Use a light-colored pan; dark pans absorb more heat and can cause uneven baking. Rotate the cake halfway through baking. This ensures all sides bake the same. Check doneness with a toothpick. It should come out clean from the center. Serve your cake on a pretty platter for a nice touch. Add fresh strawberry slices on top for color and flavor. A dollop of Greek yogurt on the side adds creaminess. You can also dust the top with powdered sugar for sweetness. This makes it look fancy and inviting. Enjoy your creation with friends or family! {{image_2}} You can easily make this cake gluten-free. Use almond flour or a gluten-free flour blend instead of whole wheat flour. These options keep the cake light and fluffy. Just make sure your baking powder is gluten-free too. This way, everyone can enjoy a slice. Want to change it up? Add lemon or almond flavor for a twist. A teaspoon of lemon zest brightens the cake. It adds a fresh taste that pairs well with strawberries. If you love almond, use almond extract instead of vanilla. Just a little will give a warm, nutty taste. You can also swap ingredients to lower calories. Instead of coconut sugar, use stevia or monk fruit sweetener. Both options are great for cutting sugar. For fat, replace Greek yogurt with unsweetened silken tofu. It keeps the cake moist and creamy without extra fat. Try these variations to make the cake your own. You can find the full recipe above to get started on your delicious creation! To keep your Skinny Strawberry Cake fresh, store it in an airtight container. This helps prevent it from drying out. If you have extra slices, place parchment paper between them. This way, they won’t stick together. Keep the cake in the fridge for up to five days. For best taste, eat it within three days. Freezing your cake is easy. First, let the cake cool completely. Then, slice it into individual pieces. Wrap each slice tightly in plastic wrap. Next, place the wrapped slices in a freezer-safe bag or container. Label it with the date. You can freeze the cake for up to three months. When you want a slice, take it out and let it thaw in the fridge overnight. The Skinny Strawberry Cake stays fresh for a few days at room temperature. However, it lasts longer in the fridge. If you notice any changes in smell or texture, it’s best to throw it away. Always trust your senses! For long-term storage, freezing is the best option. This keeps your cake delicious and ready to enjoy. For more details on making this treat, check the Full Recipe. Yes, you can use frozen strawberries in this cake. Just thaw them first. Drain any excess liquid before adding them to the batter. This helps keep your cake from getting too soggy. Frozen strawberries may change the cake's texture slightly, but they still taste great! To make this cake vegan, swap the egg whites for flax eggs. Mix 1 tablespoon of ground flaxseed with 2.5 tablespoons of water. Let it sit until it thickens, about 5 minutes. You may also replace Greek yogurt with a plant-based yogurt. This keeps the cake moist while ensuring it's vegan-friendly. If you don’t have Greek yogurt, you can use applesauce or coconut yogurt. Both options keep the cake moist. You can also use silken tofu blended until smooth. Each of these options will add creaminess to the batter without losing flavor. If you're looking for a lower-calorie option, applesauce is an excellent choice. For the full recipe, check out the details above! In this blog post, we explored the key ingredients for a delicious Skinny Strawberry Cake. We looked at how to prepare, bake, and cool your cake, plus tips for keeping it moist and even. I also shared variations for gluten-free options and creative flavor additions. Finally, we covered storage best practices and common questions. Now, you have everything you need to bake this cake with confidence. Enjoy every slice and impress your friends with your baking skills!

Skinny Strawberry Cake Easy and Low-Calorie Treat

If you crave a sweet treat without the guilt, I’ve got just the thing for you! My Skinny Strawberry Cake

- 1 large loaf of French bread - 2 cups cooked chicken, shredded - 1 cup Alfredo sauce (store-bought or homemade) - 1 cup mozzarella cheese, shredded - 1/2 cup Parmesan cheese, grated - 4 cloves garlic, minced - 1/4 cup unsalted butter, softened - 1 tablespoon fresh parsley, chopped - Salt and pepper to taste When I create Chicken Alfredo stuffed garlic bread, I focus on fresh, tasty ingredients. The French bread serves as a sturdy base. I recommend using a large loaf to hold all the filling. Shredded chicken adds protein and flavor. You can use any cooked chicken you like. I often go for rotisserie chicken for quick prep. The Alfredo sauce ties everything together. You can buy it pre-made or whip up a simple homemade version. I love using mozzarella cheese for its meltiness. The Parmesan gives a nice sharp bite, enhancing the dish's flavor. Garlic is key. It brings a bold taste to the garlic butter. I mix the minced garlic with softened butter and fresh parsley to create a flavorful spread. Remember to season everything with salt and pepper. This small step makes a big difference. You can swap out the Alfredo sauce for creamy pesto or a cheese sauce. If you like spicy food, try adding some pepper jack cheese. For bread, I suggest trying sourdough or ciabatta for a different flavor. Feel free to add veggies like spinach or mushrooms to the filling. Cooking is all about making it your own! - Preheat the oven: Preheat your oven to 375°F (190°C). This step is key for even baking. - Prepare the garlic butter: In a small bowl, mix softened butter, minced garlic, and chopped parsley. This mixture adds great flavor. - Mix the filling: In a medium bowl, combine the shredded chicken, Alfredo sauce, mozzarella cheese, and half of the Parmesan cheese. Season with salt and pepper to taste. This mix is creamy and packed with flavor. - Slice and prepare the French bread: Carefully slice the French bread in half lengthwise, creating a boat for the filling while keeping the bottom intact. This helps hold everything inside. - Spread garlic butter: Take the garlic butter mixture and generously spread it over both halves of the cut bread. This adds a tasty crust. - Fill the bread: Spoon the chicken Alfredo mixture evenly over the bottom half of the bread. Make sure to fill it well for every bite. - Top with cheese: Sprinkle the remaining grated Parmesan cheese on top of the chicken filling. This gives a nice cheesy finish. - Close and wrap: Place the top half of the bread back on and wrap the entire loaf in aluminum foil. Wrapping keeps the bread soft as it bakes. - Bake: Place the wrapped bread in the preheated oven and bake for about 15-20 minutes, until the garlic bread is heated through. This step warms everything nicely. - Unwrap and toast: Carefully unwrap the bread and place it back in the oven, open-faced, for an additional 5-7 minutes, or until the top is golden and bubbly. This adds a crispy touch. - Slice and serve: Remove from the oven, let cool slightly, and slice into portions. Serve warm, garnished with extra parsley if desired. Each slice is a cheesy delight. For the full recipe, you can check the detailed instructions above. Enjoy every cheesy bite! To make the best Chicken Alfredo stuffed garlic bread, keep a few tips in mind: - Ensure the bread doesn't split completely: When cutting the French bread, slice it down the middle, but don’t cut all the way through. This way, the filling stays in place. - Avoid soggy filling: Use cooked chicken and let any sauce cool a bit before mixing. This keeps the bread from getting too wet. Getting the baking time and temperature right is key to success: - Optimal baking times for best results: Bake the wrapped bread at 375°F (190°C) for 15-20 minutes. This warms everything without drying it out. - Adjusting oven settings for softer or crispier bread: After unwrapping, leave the bread open for an extra 5-7 minutes. This step creates a nice, crispy top while keeping the inside soft and gooey. By following these tips, you can ensure your Chicken Alfredo stuffed garlic bread comes out just right every time. For the full steps, check the Full Recipe. {{image_2}} You can make Chicken Alfredo stuffed garlic bread even better. Adding veggies is a great way to do this. Spinach or bell peppers add color and crunch. You can also try mushrooms for an earthy taste. These will mix well with the creamy Alfredo sauce. Using different spices can change the flavor too. A pinch of red pepper flakes adds warmth. Italian herbs like oregano or basil give a fresh taste. Feel free to get creative and mix your favorite flavors into the filling. You don’t have to bake this dish in the oven. An air fryer works great too. It cooks the bread faster and gives it a nice crisp. Set the air fryer to 350°F (175°C) and cook for about 10-12 minutes. If you want a fun twist, try mini versions. Cut the French bread into smaller pieces. Stuff them just like the big loaf. These make great appetizers for parties. You can serve them with marinara sauce for dipping. For the complete recipe, check out the [Full Recipe]. To store your stuffed garlic bread, let it cool first. Wrap the bread tightly in plastic wrap or aluminum foil. It helps keep moisture in. Place it in an airtight container for the best results. You can store it in the fridge for up to three days. For freezing, slice the bread first. Wrap each slice in plastic wrap. Then, place the wrapped slices in a freezer bag. This keeps them fresh for up to three months. When you are ready to eat, you can defrost them in the fridge overnight. For reheating, you want to keep that tasty texture. The oven method works best. Preheat your oven to 350°F (175°C). Place the wrapped bread in the oven for about 10-15 minutes. This warms it without drying it out. If you need a faster way, use the microwave. Heat each slice for 30 seconds. Check if it's warm enough. If not, heat for an additional 10-15 seconds. Just remember, the microwave may make the bread a bit soft. To restore some crunch, finish in the oven for a few minutes. Follow these tips, and your Chicken Alfredo Stuffed Garlic Bread will taste just as good as when you first made it! Can I use rotisserie chicken? Yes, you can use rotisserie chicken. It saves time and adds flavor. Just shred it before mixing with the Alfredo sauce. This option cuts your prep time and gives you tasty results. How do I make homemade Alfredo sauce? To make homemade Alfredo sauce, melt butter in a pan. Add minced garlic and cook until fragrant. Next, stir in heavy cream and let it simmer. Finally, mix in grated Parmesan cheese until smooth. This sauce is rich and creamy, perfect for your stuffed garlic bread. What to do if the bread is too hard or too soft? If the bread is hard, bake it for less time. You want a golden crust, not a rock. If it’s too soft, try a firmer bread. French bread is great, but a baguette can work too. How can I prevent overflowing filling? To prevent overflowing filling, don't overstuff the bread. Spoon the filling in slowly and pack it gently. If you notice excess sauce, add less next time. You want it full but not bursting. This blog post shared a simple recipe for Chicken Alfredo Stuffed Garlic Bread. We covered key ingredients, easy steps, and helpful tips. You learned how to make delicious stuffed bread while exploring variations and storing methods. As you cook this dish, feel free to customize it with your favorite flavors. Enjoy making a meal that tastes great and is fun to share. You’ll impress everyone with this tasty treat!

Chicken Alfredo Stuffed Garlic Bread Easy and Delicious

Craving a cheesy, creamy delight that’s sure to impress? Let’s make Chicken Alfredo Stuffed Garlic Bread! This easy and delicious

- 4 large russet potatoes: These potatoes are starchy and create crispy fries. - 2 tablespoons olive oil: This oil helps the fries crisp up in the oven. - 1 teaspoon paprika: Adds a deep, smoky flavor to the fries. - 1 teaspoon smoked paprika: Gives a richer, more intense smoky taste. - 1 teaspoon garlic powder: Adds a savory kick that enhances the overall flavor. - 1 teaspoon onion powder: Complements garlic and adds more depth to the taste. - ½ teaspoon cayenne pepper (adjust to taste): Adds heat and zest. You can add more or less based on your spice preference. - Salt and pepper to taste: Simple seasonings that bring out the other flavors. - 1 cup shredded cheddar cheese: Melts beautifully and adds creaminess to the dish. - ½ cup sour cream: Provides a cool contrast to the hot fries. - ¼ cup chopped green onions: Adds a fresh crunch and bright flavor. - 2 tablespoons fresh cilantro, chopped: Enhances the dish with a burst of freshness. - 1 small jalapeño, sliced (optional for extra heat): Adds more spice if you want a fiery kick. - Bacon bits: Crispy bacon adds a savory crunch and richness. - Guacamole: A creamy addition that pairs well with the spices. - Hot sauce: Drizzle for an extra layer of heat and flavor. - Different cheeses: Experiment with pepper jack or blue cheese for unique tastes. Adding these optional ingredients can elevate your Voodoo Fries. They let you play with flavors and create a snack that's truly your own. Whether you want it spicy, creamy, or packed with savory goodness, these toppings help you achieve that! For the complete recipe, check out [Full Recipe]. Start with washing the potatoes under cold water. Scrub away any dirt. Next, peel the potatoes using a vegetable peeler. Cut the peeled potatoes into thin strips. Aim for about 1/4 inch thick for even cooking. In a large bowl, combine the cut potatoes with olive oil. Add paprika, smoked paprika, garlic powder, onion powder, cayenne pepper, salt, and pepper. Toss the fries well until all pieces are covered in the spices. This step is key for flavor. Preheat your oven to 425°F (220°C). While the oven heats, line a baking sheet with parchment paper. This helps the fries not stick. Spread the seasoned fries in a single layer on the baking sheet. Bake your fries for 30-35 minutes. Turn them halfway through to get an even crisp. Look for a golden brown color. They should be crispy on the outside and tender inside. After baking, sprinkle shredded cheddar cheese over the hot fries. Return them to the oven for 5 minutes. This melts the cheese perfectly. Once done, take them out and drizzle with sour cream. Add chopped green onions and cilantro on top. If you want more heat, toss on sliced jalapeños. For serving, use a large plate or a fun basket. This makes your Voodoo Fries look appealing. You can now enjoy this deliciously crispy snack! For the full recipe, click here. - Choose large russet potatoes. They have the best starch content for fries. - Look for firm potatoes without dark spots or soft areas. - Cut the fries into even pieces, about 1/4 inch thick. This helps them cook evenly. - Spread the fries in a single layer on the baking sheet. Overcrowding leads to soggy fries. - Turn the fries halfway through cooking. This ensures they brown evenly on all sides. - Start with the basic seasonings, then adjust to your taste. More cayenne adds heat; less gives a milder flavor. - Try adding different spices like chili powder or cumin for a unique kick. - For extra crunch, soak the cut fries in cold water for 30 minutes. This removes excess starch. - Pat the soaked fries dry with a towel before cooking. This helps them crisp up nicely. - Serve Voodoo Fries with sour cream for dipping. The coolness balances the spice. - Consider pairing with guacamole or salsa for a fresh twist. - For a fun presentation, stack the fries in a tall cone or on a wooden board. - Top with sliced jalapeños for added heat and color. Explore more about Voodoo Fries in the Full Recipe! {{image_2}} You can change up the spice mix to suit your taste. Try using: - Cajun seasoning for a bold kick. - Italian herbs like oregano and basil for a fresh twist. - Taco seasoning for a fun, zesty flavor. These blends can make your Voodoo Fries even more exciting. You can also create themed variations. For example, make a BBQ version with smoked paprika and a bit of brown sugar. Voodoo Fries are a canvas for toppings. Here are some ideas to make them unique: - Swap out cheddar cheese for pepper jack or blue cheese. - Drizzle with ranch or spicy aioli for extra flavor. - Top with crispy bacon bits or guacamole for a rich bite. - Add fresh jalapeños or pickled onions for a tangy crunch. These toppings can elevate your fries into a full meal. Feel free to mix and match to find your favorite combo! You can make Voodoo Fries in an air fryer for a healthier option. Here’s how: 1. Preheat your air fryer to 400°F (200°C). 2. Toss the seasoned fries in olive oil. 3. Cook in batches for about 15-20 minutes, shaking the basket halfway. This method gives you a crispy texture with less oil. You can also try deep frying for a classic, crunchy fry experience. Frying takes about 3-4 minutes until golden brown. Whatever method you choose, enjoy experimenting with Voodoo Fries! To store leftover Voodoo Fries, let them cool first. Place them in an airtight container. This will keep them fresh longer. Try to eat them within three days for the best taste. Avoid stacking them to prevent sogginess. A single layer helps maintain their crispiness. Reheating fries can be tricky. You want them crispy, not soggy. The oven works best for reheating. Preheat your oven to 400°F (200°C). Spread the fries on a baking sheet. Bake them for about 10 minutes. This way, they get hot and crispy again. If you use a microwave, they may turn soft. If you must, use the microwave for just 20-30 seconds. You can freeze Voodoo Fries before or after cooking. If freezing raw, cut the fries and toss them in oil and spices. Spread them out on a baking sheet and freeze until solid. Then, store them in a freezer bag. If you freeze them cooked, wait until they cool completely. To revive texture, bake them in the oven at 400°F (200°C) for about 15 minutes. This helps bring back their crunch. Enjoy your Voodoo Fries even after freezing! Voodoo Fries are a fun, flavorful snack that combines crispy fries with bold spices. They likely come from the Southern U.S., where spicy food is popular. You can find them at food trucks and festivals, often topped with cheese and sauces. Their charm lies in the mix of smoky and spicy flavors, which keep you coming back for more. Yes, you can easily make Voodoo Fries gluten-free. Start with gluten-free potatoes, which are naturally safe. Check your spices to ensure they are gluten-free. Many brands offer gluten-free versions of paprika and cayenne pepper. Always read labels to avoid hidden gluten. To adjust the heat in your Voodoo Fries, play with the cayenne pepper. Start with less and add more as needed. You can also add mild ingredients like paprika for flavor without heat. If you want more spice, consider using sliced jalapeños or hot sauce on top. This way, you can make them just as fiery as you like! Voodoo Fries combine essential ingredients and creative toppings to deliver a unique taste. By following the step-by-step instructions, you can create crispy, flavorful fries at home. Use the tips and variations to customize them for your liking, whether you prefer extra heat or a different cooking method. Store leftovers well and reheat them for a satisfying snack. You now have the tools to enjoy Voodoo Fries, making every bite a delightful experience. Enjoy your culinary journey with this fun dish!

Voodoo Fries Deliciously Crispy and Flavorful Snack

Craving a snack that’s crispy, zesty, and completely unforgettable? Voodoo Fries deliver all that and more, turning ordinary potatoes into

To make Louisiana BBQ shrimp, you need: - 1 pound large shrimp, peeled and deveined - 4 tablespoons unsalted butter - 3 cloves garlic, minced - 1 tablespoon Worcestershire sauce - 1 tablespoon lemon juice - 2 teaspoons Cajun seasoning - 1 teaspoon smoked paprika - 1 teaspoon black pepper - 1/2 teaspoon cayenne pepper (adjust for heat preference) - 1 cup chicken broth - 2 tablespoons fresh parsley, chopped (for garnish) - Crusty French bread (for serving) Large shrimp are the stars of this dish. They should be juicy and firm. You want shrimp that are at least 16-20 count per pound. This means you get just the right amount of meat in each bite. Cajun seasoning is key. It adds depth and warmth. You can find it in stores or make your own. A mix of paprika, garlic powder, and pepper works well. Garlic, Worcestershire sauce, and lemon juice bring brightness and richness. Garlic gives a nice aroma. Worcestershire adds umami, while lemon juice balances the dish. Not a fan of butter? You can use olive oil or margarine instead. Both will keep the dish rich and tasty. For a lighter option, low-sodium chicken broth works well. It allows you to control the salt level without losing flavor. Fresh shrimp is always best. They taste great and have a crisp texture. Look for shrimp from local markets or trusted sources. Frozen shrimp can work too. Just make sure they are high quality. Thaw them in the fridge overnight for the best results. This keeps them from getting mushy. Choosing the right shrimp is crucial for an authentic flavor. Quality shrimp makes a big difference in your dish. To start, you need to peel and devein the shrimp. First, take your shrimp and hold it firmly. Twist off the head if it’s still on. Next, use your fingers to peel off the shell. Leave the tail on for a nice look. To devein, look for the dark line on the back. Use a small knife to make a shallow cut and pull it out with your fingers. You will need a few essential tools for this recipe: - Large skillet - Sharp knife - Cutting board - Tongs or slotted spoon - Measuring spoons Now, let’s cook your Louisiana BBQ shrimp. First, melt the butter in a large skillet over medium heat. Add the minced garlic and sauté for about 1 minute. Be careful not to let it brown. Then, stir in Worcestershire sauce, lemon juice, Cajun seasoning, smoked paprika, black pepper, and cayenne pepper. Cook this for another 1-2 minutes. This step helps the spices blend with the butter. Next, pour in the chicken broth and bring it to a simmer. Let this cook for about 5 minutes. This time allows the flavors to meld together beautifully. Now, it’s time to add the shrimp. Cook them for about 3-5 minutes. You want them to turn pink and opaque. Stir occasionally to ensure even cooking. For presentation, serve the BBQ shrimp hot in a large bowl. Make sure to have plenty of sauce for dipping. Pair your dish with slices of crusty French bread. The bread is perfect for soaking up the savory sauce. Optionally, you can garnish with extra parsley for a pop of color. Enjoy your delicious Louisiana BBQ shrimp! To get the spice levels just right, you can adjust the cayenne pepper. Start with half a teaspoon if you want mild heat. If you like more spice, add more cayenne gradually. Taste as you go to find your perfect balance. For the sauce consistency, you want it thick enough to coat the shrimp. If it's too thin, let it simmer longer to reduce. If it's too thick, add a splash of chicken broth. Stir well to blend. One big mistake is overcooking shrimp. Look for shrimp that turn pink and opaque. They cook fast, usually in 3 to 5 minutes. If they curl tightly, it's a sign they are overdone. Not infusing the flavors properly is another issue. Make sure to let the garlic and spices cook in the butter before adding broth. This step builds a deep, rich flavor that makes the dish shine. For added spice, consider using smoked paprika or even a dash of hot sauce. These can deepen the flavor and heat. When it comes to herbs, fresh parsley gives a bright taste. Dried herbs work too, but fresh always shines. Adding fresh herbs at the end boosts the dish’s aroma and color, making it more inviting. For the full recipe, check out the complete guide. {{image_2}} You can cook Louisiana BBQ shrimp in different ways. Each method gives you a unique taste. - Grilled Louisiana BBQ Shrimp: Grilling brings a smoky flavor. To grill, marinate the shrimp in the sauce. Thread them onto skewers. Grill on medium heat for about 3-4 minutes per side. Keep an eye on them; shrimp cooks fast. - Oven-baked version of the dish: Baking is easy and hands-off. Preheat your oven to 400°F. Place shrimp in a baking dish and cover them with the sauce. Bake for about 10-12 minutes. The shrimp will be juicy and tender. Want to change things up? You can add new flavors to your dish. - Adding balsamic vinegar for tanginess: Balsamic vinegar adds a nice kick. Mix in a tablespoon when you add the broth. It gives a sweet and tangy flavor that pairs well with shrimp. - Experimenting with different types of hot sauce: Different hot sauces can change the heat level and taste. Try a garlic-based sauce for extra flavor. Or use a sweet sauce for balance. It's fun to find your favorite! Louisiana is known for its rich culinary history. Different styles add to the dish's charm. - Influence of Creole versus Cajun styles: Creole cooking leans on tomatoes and more spices. Cajun cooking is about bold flavors and rustic ingredients. Try mixing both styles for a unique twist. - Unique twists from local Louisiana chefs: Many chefs in Louisiana put their spin on BBQ shrimp. Some add local ingredients like andouille sausage. Others might use fresh herbs from their gardens. Each chef's touch makes the dish special. Explore these variations to find your favorite way to enjoy Louisiana BBQ shrimp. For a complete guide, check out the Full Recipe! To store leftovers safely, let the shrimp cool first. Place them in an airtight container. This keeps the shrimp fresh. Use a glass or plastic container that seals well. If you have extra sauce, store it separately. For reheating, the stove is your best friend. Place the shrimp in a skillet over low heat. Stir gently to avoid overcooking. To keep the sauce tasty, add a splash of chicken broth. This helps rehydrate the sauce. You can freeze Louisiana BBQ shrimp. Make sure to cool it completely before freezing. Use freezer-safe bags or containers. Remove as much air as possible. This helps keep the shrimp from getting freezer burn. You can store it for up to three months. When ready to eat, thaw in the fridge overnight. Louisiana BBQ shrimp is a famous dish from New Orleans. It is not grilled like other BBQ dishes. Instead, it features shrimp cooked in a rich, buttery sauce. The dish reflects the area's Creole and Cajun roots. It combines bold flavors with a unique cooking method. The shrimp soak up spices like Cajun seasoning and garlic, creating a savory experience. This dish is often served with crusty French bread, perfect for dipping into the sauce. You can feel the warmth of Louisiana in each bite. Yes, you can prepare Louisiana BBQ shrimp ahead of time. Cook the shrimp and sauce, then cool them quickly. Store them in an airtight container in the fridge for up to two days. When you're ready to eat, just reheat them gently on the stove. Add a splash of chicken broth to keep the sauce moist. This dish tastes even better after the flavors meld overnight. Several side dishes complement Louisiana BBQ shrimp well. Here are some great options: - Coleslaw: The crunch adds freshness. - Rice: A fluffy bed for the sauce. - Corn on the cob: Sweetness balances the spices. - Grilled vegetables: Adds color and flavor. - Crusty French bread: Essential for sauce dipping. Pair these sides with a light beer or white wine for a well-rounded meal. Louisiana BBQ shrimp can be spicy, but you can adjust the heat. The cayenne pepper adds a kick. If you prefer less spice, reduce the cayenne or skip it altogether. You can also serve hot sauce on the side. Each person can add as much heat as they like. This way, everyone enjoys the dish in their own way. In this blog post, we explored the key ingredients for Louisiana BBQ shrimp, including the best shrimp and seasonings that enhance flavor. We detailed preparation steps, cooking methods, and tips to avoid common mistakes. Lastly, we shared storage tips and answered frequently asked questions about this iconic dish. Now, you can confidently create your own Louisiana BBQ shrimp that impresses everyone. Remember to experiment with flavors and methods. Enjoy your cooking adventure!

Louisiana BBQ Shrimp Savory Journey to Flavor

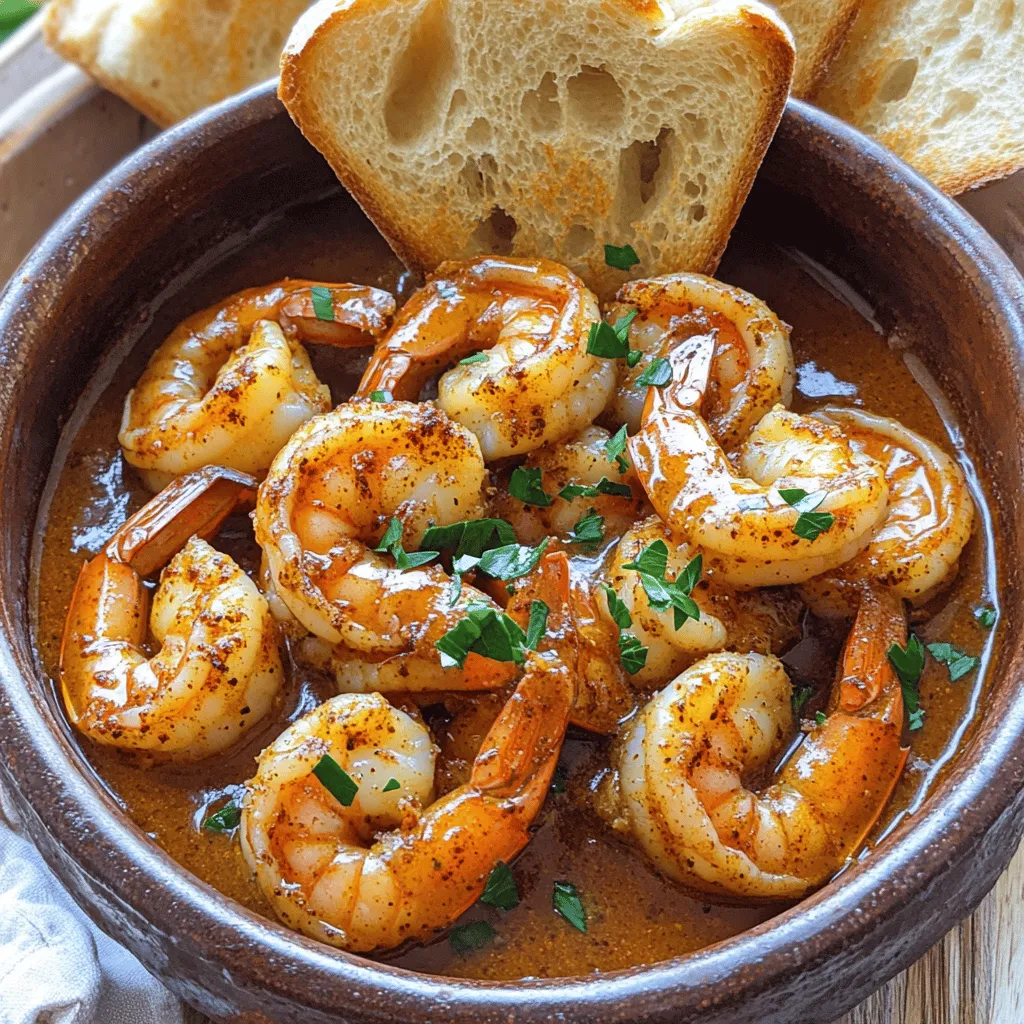
Are you ready to dive into the bold flavors of Louisiana BBQ Shrimp? This dish is a true southern delight,

To make One-Pot Creamy Beef Pasta, you need: - 1 lb (450g) ground beef - 8 oz (225g) pasta (penne or rotini) - 1 medium onion, finely chopped - 3 cloves garlic, minced - 1 cup beef broth - 1 cup heavy cream - 1 cup grated Parmesan cheese - 1 teaspoon Italian seasoning - 1/2 teaspoon paprika - Salt and pepper to taste - 2 tablespoons olive oil - Fresh parsley, chopped (for garnish) Choosing the right ingredients can make your dish shine. Here are my top tips: - Beef: Look for ground beef with a good fat content. 80/20 is ideal for flavor and moisture. - Pasta: Use high-quality pasta that cooks evenly. Whole grain options add a nice touch. - Broth: Opt for low-sodium beef broth. It lets you control the saltiness. - Cream: Heavy cream gives the sauce its richness. Avoid half-and-half for a lighter result. - Cheese: Freshly grated Parmesan melts better than pre-grated cheese. You can modify the recipe for different diets. Here are some ideas: - Gluten-Free: Use gluten-free pasta. Rice or quinoa pasta works well. - Dairy-Free: Substitute heavy cream with coconut cream or cashew cream. Nutritional yeast can replace cheese. - Lean Meat: Use ground turkey or chicken for a lighter option. Adjust cooking time as needed. - Vegan: Swap beef for lentils or mushrooms. Use vegetable broth and plant-based cream. These substitutions keep the dish tasty while accommodating various dietary needs. To start, gather your ingredients. You will need: - 1 lb (450g) ground beef - 8 oz (225g) pasta (penne or rotini) - 1 medium onion, finely chopped - 3 cloves garlic, minced - 1 cup beef broth - 1 cup heavy cream - 1 cup grated Parmesan cheese - 1 teaspoon Italian seasoning - 1/2 teaspoon paprika - Salt and pepper to taste - 2 tablespoons olive oil - Fresh parsley, chopped (for garnish) Next, chop your onion and garlic. This helps add flavor to the meat. In a large pot, heat the olive oil over medium heat. Add the onion and cook until soft, about 3-4 minutes. Then, add the garlic and cook for 1 minute. This step builds a strong flavor base. Now, raise the heat to medium-high. Add the ground beef and break it apart with a spoon. Cook until it turns brown, which takes about 5-6 minutes. Drain excess fat if needed. Next, mix in the Italian seasoning, paprika, salt, and pepper. Stir well to coat the beef evenly. Add the pasta and beef broth to the pot. Make sure the pasta is fully covered in broth. Bring it to a boil. Once it boils, lower the heat and cover the pot. Cook for 10-12 minutes. Stir occasionally to keep the pasta from sticking. You want it to be al dente, or firm to the bite. After the pasta cooks, remove the pot from heat. Stir in the heavy cream and grated Parmesan cheese. Mix until creamy and well combined. Taste and adjust seasoning if needed. If the sauce seems too thick, add a bit of water or broth. Serve hot, garnished with fresh parsley for extra flavor and color. Enjoy your meal! For the full recipe, check out the details above. To make your one-pot creamy beef pasta shine, follow these tips: - Use fresh ingredients. Fresh garlic and onion bring out great flavors. - Brown the beef well. This step adds depth to the sauce. - Stir often. This helps the pasta cook evenly and prevents sticking. - Adjust heat carefully. Too high can burn, while too low makes it soggy. Avoid these common pitfalls for a perfect dish: - Skipping the sauté step. This builds a rich base for the sauce. - Not seasoning enough. Taste as you cook to balance flavors. - Overcooking the pasta. You want it al dente for the best texture. - Ignoring the cream. Stir it in gently to keep the sauce smooth. For a velvety sauce, try these methods: - Use high-fat cream. Heavy cream gives the richest texture. - Add cheese gradually. This helps it melt smoothly into the sauce. - Stir continuously while adding cream. This keeps the sauce from clumping. - If too thick, add broth or water slowly. This helps reach your desired creaminess. For the full recipe, check out the details above. Enjoy your cooking! {{image_2}} You can easily make this dish vegetarian or vegan. Replace the ground beef with lentils or mushrooms. Both options add great flavor and texture. Use vegetable broth instead of beef broth. For a creamy touch, switch heavy cream with coconut milk or cashew cream. This keeps the dish rich but plant-based. To make this meal healthier, add more veggies. Spinach, bell peppers, or zucchini work well. Simply chop them and add to the pot when you cook the onions. They’ll soften and blend in nicely. This not only boosts flavor but adds vitamins too. You can switch up the pasta for a different taste. Use whole wheat, gluten-free, or chickpea pasta. Each type brings its own flavor and texture. Just adjust the cooking time as needed. Make sure to check the package for specifics. Mixing different shapes can also add fun to your meal! For the full recipe, check out the link above. After enjoying your One-Pot Creamy Beef Pasta, let it cool down. Place it in an airtight container. Store it in the fridge for up to three days. This keeps it fresh and tasty. If you follow this, your leftovers will still taste great. To reheat, take your pasta out of the fridge. Place it in a pot over low heat. Add a splash of water or broth to help it warm up. Stir it often to avoid sticking. Heat until warm, but don’t let it boil. This helps keep the cream smooth. For longer storage, freeze your pasta. Use a freezer-safe container or bag. Make sure to remove as much air as possible. This prevents freezer burn. You can freeze it for up to three months. When ready to eat, thaw it in the fridge overnight. Then, reheat it as mentioned above. For the full recipe, check out the details on how to make it! Yes, you can make One-Pot Creamy Beef Pasta ahead of time. Cook it fully and let it cool down. Store it in an airtight container in the fridge for up to three days. When you are ready to eat, reheat it on the stove. Add a splash of water or broth to help it stay creamy. To reheat creamy pasta dishes, the stove is best. Heat a pan over low heat. Add the pasta and a little water or broth. Stir often to keep it from sticking. You can also use the microwave. Place it in a bowl, cover it, and heat in short bursts. Stir between each burst to heat it evenly. Yes, you can use ground turkey or chicken. These meats will change the flavor slightly but will still taste great. Cook them the same way as the beef. Just ensure they are fully cooked before adding the other ingredients. This makes a lighter meal without losing the creamy taste. To add spice, include red pepper flakes or a bit of hot sauce. You can also add more garlic or onion for extra flavor. Fresh herbs like basil or oregano can boost the taste too. Experiment with your favorite spices to find what you love best. Yes, you can use gluten-free pasta. Choose your favorite type, like rice or quinoa pasta. Just follow the package instructions for cooking. The rest of the recipe stays the same. This way, everyone can enjoy the creamy goodness. In this post, we covered how to make One-Pot Creamy Beef Pasta. I shared a complete ingredient list and tips for choosing the best items. You learned easy prep and cooking steps to get it just right. We also examined fun variations and ways to store leftovers. With these insights, you can create a dish that suits your taste and needs. Enjoy making this creamy pasta your own!

One-Pot Creamy Beef Pasta Easy Weeknight Meal

Are you looking for a quick and tasty meal? One-Pot Creamy Beef Pasta is the answer! This dish brings together

Older posts
Newer posts
← Previous Page1 … Page91 Page92 Page93 … Page104 Next →

dsad

© 2025 pureeatsnow • Built with GeneratePress

Our Policies

  • Copyright Policy
  • Cookie Policy
  • GDPR Policy
  • Privacy Policy
  • Disclaimer
  • Terms Of Use

More Information

  • Home
  • About
  • Contact
  • Appetizers
  • Dessert
  • Dinner
  • Drinks
©2025, pureeatsnow About Back To Top