Skip to content
DisclaimerTerms Of UseGDPR PolicyCookie Policy

pureeatsnow

  • Home
  • Drinks
  • Appetizers
  • Dinner
  • Dessert
  • About
  • Contact
  • Privacy Policy
DisclaimerTerms Of UseGDPR PolicyCookie Policy

Rachel

To make Pineapple Heaven Cake, gather these items: - 2 cups all-purpose flour - 1 ½ cups granulated sugar - 1 teaspoon baking powder - ½ teaspoon baking soda - ½ teaspoon salt - ½ cup unsalted butter, softened - 1 cup buttermilk - 2 large eggs - 1 teaspoon vanilla extract - 1 cup crushed pineapple, drained - 1 cup sweetened shredded coconut You can make your cake even better with these add-ins: - ½ cup chopped pecans - Fresh pineapple slices for garnish - Extra shredded coconut on top If you need to swap an ingredient, try these options: - Use coconut milk instead of buttermilk for a dairy-free cake. - Replace eggs with flaxseed meal mixed with water for a vegan option. - Use whole wheat flour instead of all-purpose flour for a heartier cake. These options still keep the cake tasty while letting you adjust to your needs. For the full recipe, check out the detailed instructions. Start by preheating your oven to 350°F (175°C). Grease and flour two 9-inch round cake pans. In a large mixing bowl, combine the dry ingredients: 2 cups of all-purpose flour, 1 ½ cups of granulated sugar, 1 teaspoon of baking powder, ½ teaspoon of baking soda, and ½ teaspoon of salt. Whisk them together until they blend well. Next, add ½ cup of softened unsalted butter to the mix. Use an electric mixer to cream the butter until it’s light and fluffy. Slowly pour in 1 cup of buttermilk while mixing. This will help create a smooth batter. Now, add 2 large eggs, one at a time. Mix well after each egg to ensure they are fully blended. Then, stir in 1 teaspoon of vanilla extract. Gently fold in 1 cup of drained crushed pineapple, 1 cup of sweetened shredded coconut, and ½ cup of chopped pecans if you choose to use them. Make sure these ingredients are evenly spread throughout the batter. Once your batter is ready, divide it evenly between the two prepared cake pans. Smooth the tops with a spatula. Place the pans in the preheated oven and bake for 25-30 minutes. To check if the cakes are done, insert a toothpick into the center. If it comes out clean, your cakes are ready! After baking, remove them from the oven and let them cool in the pans for about 10 minutes. Then, transfer the cakes to wire racks to cool completely. For the frosting, I like to keep it simple with whipped cream or cream cheese frosting. To make whipped cream, beat together 1 cup of heavy cream, ½ cup of powdered sugar, and 1 teaspoon of vanilla extract. Continue mixing until stiff peaks form. This frosting will be light and delicious! Spread the frosting between the layers of your cooled cake and on top as well. For a fun touch, you can garnish the cake with extra shredded coconut and pineapple slices. Enjoy this Pineapple Heaven Cake, and don’t forget to check the Full Recipe for more details! To make your Pineapple Heaven Cake moist, start with room temperature ingredients. This helps them blend better. Use fresh buttermilk for a rich flavor. Drain the crushed pineapple well to avoid excess moisture. Adding shredded coconut keeps the cake tender. Always measure your flour correctly. Too much flour can dry out your cake. After baking, let the cakes cool in the pans for just 10 minutes. This helps them firm up. Then, transfer the cakes to wire racks to cool completely. Once cool, use a serrated knife to level the tops if needed. This ensures even stacking. Place the first layer on your serving plate. Spread frosting on top before adding the second layer. For a beautiful finish, use whipped cream or cream cheese frosting. You can pipe it for a fancy look. Top the cake with extra shredded coconut and pineapple slices. Fresh mint leaves add a nice touch. Serve your cake on a decorative stand for added flair. Check out the Full Recipe for more ideas on garnishing! {{image_2}} You can change up the flavor by adding other fruits. Try diced mango, banana, or kiwi. These fruits pair well with pineapple. They add color and sweetness. You can mix them right into the batter. This gives you a tropical burst in each bite. The frosting can be just as fun. Instead of whipped cream, try cream cheese frosting. Mix together cream cheese, powdered sugar, and vanilla. This makes a tangy and sweet frosting. You could also use a simple glaze. Just mix powdered sugar with pineapple juice for a fruity touch. You can make this cake gluten-free! Use a gluten-free flour blend instead of all-purpose flour. This keeps the cake soft and moist. For a vegan version, swap eggs with flaxseed meal and buttermilk with almond milk. Use coconut cream for the frosting. These swaps keep the cake tasty and light. Explore the [Full Recipe] for more details on making this delightful cake! To keep your Pineapple Heaven Cake fresh, wrap it tightly in plastic wrap. This helps seal in moisture and flavor. You can also store it in an airtight container. Place it in the fridge if you have leftover cake. It stays fresh for about five days. If you want to save some cake for later, freezing is a great option. First, let the cake cool completely. Then, slice it into pieces. Wrap each piece in plastic wrap, then place them in a freezer bag. This way, you can enjoy cake anytime! The cake can freeze well for up to three months. When you are ready to eat your frozen cake, take it out of the freezer. Let it thaw in the fridge overnight. If you want to warm it up, use a microwave. Heat it in short bursts, around 15 seconds at a time. This keeps the cake moist and tasty. You can also enjoy it cold if you prefer! For more details, check the Full Recipe. Pineapple Heaven Cake is a moist, sweet dessert. It features layers of cake with crushed pineapple and coconut. This cake is simple yet delicious. The flavor is bright and tropical. It is a perfect treat for any occasion. You can easily impress friends and family with this cake. You can make Pineapple Heaven Cake a day in advance. Bake the cake layers and let them cool. Wrap them tightly in plastic wrap. Store them in the fridge. You can also prepare the frosting ahead of time. Just keep it in the fridge until you’re ready to frost the cake. Yes, you can use fresh pineapple. Just make sure to chop it finely. If you use fresh pineapple, drain any extra juice. This keeps your cake from getting too soggy. Fresh pineapple gives a nice, bright flavor to the cake. Pineapple Heaven Cake lasts about 3-4 days at room temperature. If you store it in the fridge, it can last up to a week. Make sure to cover it well to keep it fresh. You can also freeze it for up to three months. Just wrap each slice tightly before freezing. In this article, we explored how to make Pineapple Heaven Cake. We went through the key ingredients, from essential to optional add-ins. I shared my step-by-step instructions for preparing the batter, baking, and making frosting. We also covered tips for a moist cake and fun decorating ideas. You learned variations for different tastes and dietary needs, plus how to store leftovers effectively. Baking this cake can be fun and rewarding. Enjoy your baking adventure!

Pineapple Heaven Cake Delightful and Easy Recipe

Are you ready to make the best Pineapple Heaven Cake? This delightful, easy recipe will wow your friends and family.

To make a wonderful seafood lasagna, you need to gather some key ingredients. Here's a detailed list: - Seafood Selection - 1 pound shrimp, peeled and deveined - 1 pound scallops, chopped - 1 cup lump crab meat - Cheese Variants - 2 cups ricotta cheese - 1 cup grated Parmesan cheese - 3 cups shredded mozzarella cheese - Noodle Type and Quantity - 9 lasagna noodles - Additional Flavor Components - 2 cups fresh spinach, chopped - 3 cups marinara sauce - 1 tablespoon olive oil - 3 cloves garlic, minced - 1 teaspoon dried oregano - 1 teaspoon dried basil - Salt and pepper to taste - Fresh parsley for garnish These ingredients blend well to create layers of flavor. The seafood selection gives your dish a fresh and rich taste. The mix of cheeses adds creaminess, while the noodles provide structure. Don't forget the spices and marinara sauce for extra depth. You can find the full recipe to guide you through the cooking process. 1. Cooking the Lasagna Noodles: Boil a large pot of salted water. Add 9 lasagna noodles. Cook them until al dente, about 8 to 10 minutes. Drain and lay them flat on a clean kitchen towel to cool. 2. Sautéing the Seafood and Spinach: In a skillet, heat 1 tablespoon of olive oil over medium heat. Add 3 minced garlic cloves and sauté until fragrant. Next, add 1 pound of shrimp and 1 pound of scallops. Cook for 3-4 minutes until they turn opaque. Fold in 1 cup of crab meat and 2 cups of chopped spinach. Cook until the spinach wilts. Season this mix with 1 teaspoon of dried oregano, 1 teaspoon of dried basil, salt, and pepper to taste. 3. Combining the Cheese Mixtures: In a mixing bowl, combine 2 cups of ricotta cheese, 1 cup of grated Parmesan cheese, and half of the 3 cups of shredded mozzarella cheese. Mix these well to create a creamy texture. 1. Initial Layering with Marinara: In a 9x13 inch baking dish, spread a thin layer of 3 cups of marinara sauce on the bottom. This will keep the noodles moist. 2. Assembling the Seafood and Cheese Layers: Begin with 3 lasagna noodles atop the marinara. Spread half of the ricotta mixture over these noodles. Next, add half of the seafood mix. Pour 1 cup of marinara sauce over the seafood. Repeat these layers, finishing with the last 3 noodles. 3. Final Layering and Cheese Topping: Spread the remaining marinara sauce over the final noodle layer. Top with the remaining mozzarella cheese. This creates a delicious, cheesy crust. 1. Preheating the Oven: Preheat your oven to 375°F (190°C). This ensures even cooking. 2. Covered vs. Uncovered Baking Times: Cover the dish with aluminum foil. Bake for 25 minutes. Then, remove the foil and bake for an additional 15 minutes. This helps the cheese become bubbly and golden. 3. Letting the Dish Rest Before Serving: Once baked, remove the dish from the oven. Let it rest for 10 minutes. This helps the layers set, making slicing easier. For the full recipe, refer to Ocean's Bounty Seafood Lasagna. When making seafood lasagna, fresh seafood is a must. Here are some tips: - Identifying Fresh Shrimp and Scallops: Look for shrimp that are firm and have a mild scent. They should be slightly translucent. Scallops should also smell sweet and look moist, not dry. Avoid any that smell strong or fishy. - Understanding Crab Meat Variants: You can find different types of crab meat. Lump crab is the best for lasagna. It has big pieces and offers great flavor. Imitation crab is cheaper but lacks the real taste. Always choose real crab for a richer dish. - Importance of Seasonal Ingredients: Fresh seafood tastes best in season. Wild-caught shrimp and scallops are often superior in flavor. Check local markets for what's in season. It can make your lasagna shine. Here are my best tips to ensure your seafood lasagna turns out perfect: - Avoiding Soggy Layers: Overcooked noodles can lead to soggy layers. Cook them just until al dente. Drain well and let them cool. This prevents excess water from making your dish watery. - Tips for Flavor Enhancement: Layering flavors is key. Use fresh herbs like basil and oregano. A splash of white wine in your seafood mix adds depth. Always taste your seafood filling before layering. - Ensuring Proper Cheese Melting: Use a mix of cheeses for great melting. Mozzarella is a must for gooeyness. Mixing in ricotta keeps it creamy. Sprinkle Parmesan on top for a nice crust. Cover the lasagna with foil first to help it melt evenly. For the full recipe, please refer to the earlier section. Enjoy making your seafood lasagna! {{image_2}} You can switch up the seafood mix in your lasagna. Using lobster or clams adds a touch of luxury. Their sweet flavors shine through, making each bite special. If you want a vegetarian option, try using mushrooms and zucchini. They give texture and flavor without seafood. For a smoky twist, add some smoked fish. It enhances the dish with a unique taste that pairs well with the cheese. If gluten is a concern, gluten-free lasagna noodles work great. They hold up well and taste fantastic. For those watching calories, use low-fat cheese or substitute with Greek yogurt. This keeps the lasagna creamy without extra fat. If you need dairy-free options, look for plant-based cheese. Almond or cashew cheese melts nicely and adds flavor. These swaps let anyone enjoy this seafood lasagna. For the Full Recipe, visit the recipe section. After you make your seafood lasagna, let it cool down. This helps keep it fresh. Place it in a shallow dish for quick cooling. Once it cools, cover it tightly with plastic wrap or foil. This keeps out air and moisture. Store it in the fridge. It will stay good for about three to four days. If you want to keep leftovers longer, freezing is the best option. Cut the lasagna into portions. Wrap each piece tightly in plastic wrap. Then, place them in a freezer-safe bag. This way, you can enjoy it later. It can last up to three months in the freezer. When you’re ready to eat, thaw it in the fridge overnight. For reheating, place it back in the oven. Preheat to 350°F (175°C). Bake for about 20-25 minutes until it’s hot and the cheese is melted. This keeps the texture nice and creamy. Enjoy your delicious creation again with the same great taste! Seafood lasagna stays fresh in the fridge for about three to four days. Store it in an airtight container to keep it safe. This way, you can enjoy leftovers without worry. Yes, you can make seafood lasagna ahead of time. Just prepare it and cover it tightly. Store it in the fridge for up to two days before baking. This lets the flavors blend nicely. Seafood lasagna goes well with light salads or steamed veggies. A fresh green salad adds crunch. Garlic bread also makes a great side. It helps soak up the sauce and adds a nice touch. You can lighten seafood lasagna by using low-fat cheese. You might also replace some noodles with zucchini slices. This adds veggies while cutting calories. Use less oil when sautéing seafood for a healthier dish. To boost your marinara sauce, try adding fresh herbs. Basil and parsley enhance the taste. A pinch of red pepper flakes adds heat. You could also sauté onions and bell peppers for depth. Check the [Full Recipe] for more tips! In this blog post, we explored how to make a delicious seafood lasagna. We covered key ingredients like fresh seafood, different cheeses, and noodle types. I shared step-by-step instructions, tips for perfecting your dish, and various ways to adapt the recipe. Remember to choose fresh seafood and avoid soggy layers for the best results. Enjoy experimenting with different flavors and variations. This dish is sure to impress everyone at your table. Happy cooking!

Savory Seafood Lasagna Comfort Food Recipe

Are you ready to dive into a dish that brings comfort to the table? My Savory Seafood Lasagna combines rich,

Mongolian Ground Beef Noodles need a few key ingredients. Each plays a role in making this dish tasty and filling. - Ground Beef - Noodles and Vegetables - Sauces and Seasonings Ground Beef: I use 1 pound of ground beef. It adds richness and protein to the dish. Noodles and Vegetables: For noodles, I pick 8 ounces of egg noodles. They cook fast and soak up flavor well. You will also need: - 1 medium onion, thinly sliced - 3 cloves garlic, minced - 1 inch fresh ginger, minced - 1 bell pepper (any color), sliced - 2 cups bok choy, chopped Sauces and Seasonings: The flavors come together with a mix of sauces. You need: - 3 tablespoons soy sauce - 1 tablespoon hoisin sauce - 1 tablespoon oyster sauce (or mushroom sauce for a vegetarian option) - 1/2 teaspoon crushed red pepper flakes (adjust to taste) - 2 green onions, chopped - Sesame seeds for garnish (optional) - Fresh cilantro for garnish (optional) These ingredients create a hearty meal that is sure to please. Each one adds flavor, texture, and color to your plate. For the complete process, check out the Full Recipe. To cook the noodles, start by boiling a large pot of salted water. Add 8 oz of egg noodles and cook them until they are al dente. This usually takes about 6-8 minutes. Stir occasionally to keep them from sticking. Once done, drain the noodles and set them aside. A tip for perfect noodles: rinse them briefly in cold water to stop the cooking process. This helps keep them firm. Next, we need to brown the ground beef. Heat 2 tablespoons of vegetable oil in a large skillet or wok over medium-high heat. Add 1 lb of ground beef, breaking it up with a spatula. Cook for about 5-7 minutes until it turns brown. If there's excess grease, drain it off. This step keeps your dish from being oily. After browning the beef, it’s time to add flavor. Toss in 1 medium onion (sliced), 3 cloves of minced garlic, and 1 inch of minced ginger. Sauté these for about 2-3 minutes until the onion is clear. Then, add 1 sliced bell pepper and 2 cups of chopped bok choy. Cook everything for another 2-3 minutes. This timing helps the vegetables stay crisp and colorful. Now let’s create the sauce. In a small bowl, mix 3 tablespoons of soy sauce, 1 tablespoon of hoisin sauce, 1 tablespoon of oyster sauce (or mushroom sauce for a veggie option), and 1/2 teaspoon of crushed red pepper flakes. Pour this mixture over the beef and veggies in the skillet. Make sure to stir well. Mixing well is key for a balanced flavor in every bite. Finally, it’s time for garnishing. Remove the skillet from heat and stir in 2 chopped green onions. For a nice touch, sprinkle sesame seeds and fresh cilantro on top. These garnishes add color and freshness to your dish. Enjoy your Mongolian Ground Beef Noodles! They are flavorful and filling, perfect for any meal. For the complete recipe, check out the Full Recipe. To ensure you have flavorful beef, start with quality ground beef. Use beef that has a bit of fat for better taste. Heat your pan well before adding the meat; this helps it brown nicely. Break the meat into small pieces as it cooks. This way, it cooks evenly and absorbs more flavor from the sauces. Prepping ingredients ahead of time makes cooking easier. Chop your vegetables and store them in the fridge. You can even cook the noodles and toss them with a little oil to prevent sticking. This will save you time on busy days. Store your prepped ingredients in separate containers to keep them fresh. If you have leftover noodles, get creative! You can use them in a stir-fry or as a base for a salad. Mix them with scrambled eggs and veggies for a quick breakfast. You might also try adding them to soups for a hearty meal. Leftover noodles can be a great way to reduce waste and enjoy new dishes. For the full recipe, check out the Mongolian Ground Beef Noodles 🥢. {{image_2}} You can make Mongolian Ground Beef Noodles vegetarian. Simply swap the ground beef for plant-based options. Here are some great substitutes: - Mushroom Crumbles: Use finely chopped mushrooms for a meaty texture. - Lentils: Cooked lentils add protein and a hearty feel. - Tofu: Crumbled or cubed tofu works well in this dish. - Seitan: This wheat-based meat alternative has a chewy texture. These options keep the dish flavorful and filling. If you love heat, add more spice to your noodles. Here are some ideas: - Chili Paste: Stir in a spoonful for a bold kick. - Fresh Jalapeños: Slice and toss them in for extra heat. - Sriracha: Drizzle on top for a tangy spice. Adjust the heat to your liking, and enjoy the flavor boost! Not a fan of egg noodles? No problem! You can use various noodles for this recipe: - Rice Noodles: These are gluten-free and light. - Whole Wheat Noodles: A healthier option that adds fiber. - Zucchini Noodles: For a low-carb twist, spiralize zucchini. Trying different noodles can change the dish's texture and taste. Each option brings something unique to your plate! For the full recipe, check the section above. To keep your Mongolian Ground Beef Noodles fresh, store them in an airtight container. This helps to lock in flavors and moisture. Refrigerate the leftovers within two hours of cooking. They will stay good for about three to four days. If you want to enjoy them later, don't forget to label your container with the date. When reheating, use a skillet if possible. Heat over medium-low heat. Add a splash of water or broth to keep the dish moist. Stir often to ensure even heating. This method helps to maintain the texture of the noodles and beef. Avoid using a microwave, as it can make everything soggy. You can freeze Mongolian Ground Beef Noodles for up to three months. Use a freezer-safe container or a heavy-duty freezer bag. Leave some space at the top, as the food will expand when frozen. To thaw, place the container in the fridge overnight. Reheat it on the stove with a little liquid to restore that fresh taste. Enjoy your meal any time! Mongolian Ground Beef Noodles is not a traditional dish from Mongolia. Instead, it shows a mix of flavors from Asian cuisine. This dish reflects a fusion of Chinese and American tastes. The name comes from the beef's cooking style and noodle use, which is popular in many Asian meals. You can find similar recipes in various Asian restaurants. Yes, you can make Mongolian Ground Beef Noodles gluten-free. Use gluten-free noodles, such as rice noodles or zucchini noodles. For soy sauce, pick a gluten-free version or tamari. This way, you can enjoy the same great taste without gluten. Making this dish is quick and easy. It takes about 10 minutes to prep and 15 minutes to cook. In total, you can have a delicious meal ready in just 25 minutes. That is perfect for busy nights or quick lunches. For the full recipe, check the main section! In this post, I covered how to make Mongolian ground beef noodles. We talked about key ingredients like ground beef, noodles, and sauces. I provided step-by-step instructions to help you cook perfectly. You learned tips for prepping ahead and using leftovers. Also, I shared variations for veggie lovers and those who like heat. Remember, reheating and storing leftovers the right way keeps your dish tasty. Enjoy your cooking adventures, and don't hesitate to explore new flavors!

Mongolian Ground Beef Noodles Flavorful and Filling Meal

Looking for a meal that’s both flavorful and filling? Mongolian Ground Beef Noodles fit the bill perfectly! I’ll guide you

For a great seafood salad, you need fresh seafood. I love using: - 200g shrimp, peeled and deveined - 200g scallops - 150g calamari, sliced into rings These ingredients create a lovely mix of flavors and textures. Each seafood type brings its own taste. Shrimp adds a sweet touch. Scallops provide a soft, buttery bite. Calamari adds a nice chew. The right vegetables make your salad pop. I recommend: - 1 cup cherry tomatoes, halved - 1 cucumber, diced - 1 avocado, cubed - 1/4 cup red onion, finely chopped - 1/4 cup fresh parsley, chopped These veggies add color and crunch. The tomatoes burst with juice. The cucumber keeps things crisp. The avocado gives a creamy feel. Lastly, parsley brightens the dish with its fresh taste. Seasoning is key to a tasty salad. Here are my favorites: - Juice of 2 limes - 3 tablespoons olive oil - Salt and pepper to taste - Pinch of chili flakes (optional) Lime juice adds a zesty kick. Olive oil gives a rich flavor. Salt and pepper enhance all the tastes. If you like heat, add chili flakes for extra spice. You can find the full recipe for this delightful dish in the Ocean Breeze Seafood Salad recipe. To cook the seafood, start by boiling water. Bring a large pot of salted water to a rolling boil. Add the shrimp first. Cook them for 2-3 minutes until they turn pink. This means they are ready. Use a slotted spoon to remove the shrimp and set them aside. Next, in the same pot, add the scallops and calamari. Cook them for 2-4 minutes. The scallops should look opaque, and the calamari must be tender. Once done, drain the seafood and let it cool. This cooling step helps keep the seafood fresh and tasty. Now, let's chop our vegetables. You need cherry tomatoes, cucumber, avocado, red onion, and fresh parsley. Cut each vegetable into bite-sized pieces. This size ensures they mix well with the seafood. Once chopped, grab a large mixing bowl. Combine the tomatoes, cucumber, avocado, red onion, and parsley in the bowl. Gently toss the veggies together to mix them evenly. Now, add the cooled seafood to the vegetable mix. This blend of seafood and fresh ingredients brings a burst of flavor. For the dressing, you need lime juice, olive oil, salt, and pepper. If you like a bit of heat, add a pinch of chili flakes. In a small bowl, mix the lime juice and olive oil first. Then, sprinkle in the salt, pepper, and chili flakes. Whisk the dressing until it’s well combined. Pour this dressing over your seafood and vegetable mix. Gently toss everything together so the flavors combine. Let the salad rest for about 10 minutes. This helps the flavors meld together beautifully. For the full recipe, refer to the Ocean Breeze Seafood Salad. Enjoy your fresh and flavorful delight! To create the best seafood salad, you need to balance flavors and textures. Combine tender seafood with crunchy veggies. This mix gives each bite a delightful crunch. Start by ensuring your seafood is not overcooked. Overcooked seafood becomes tough and chewy. For shrimp, cook until they turn pink, about 2-3 minutes. Scallops should be opaque, taking 2-4 minutes in boiling water. Calamari should be tender, which takes just a few minutes. After cooking, chill the seafood before mixing it into the salad. I recommend chilling for at least 10-15 minutes. This time allows the flavors to blend nicely and keeps the salad fresh. The right dressing can elevate your seafood salad. A simple lime and olive oil dressing works wonders. It enhances the seafood without overwhelming it. For a twist, try adding a splash of soy sauce or sesame oil. These flavors pair well with seafood. You can also use a creamy dressing, like a light mayo or yogurt mix, for richness. Adjust the dressing quantity based on your taste. Start with a few tablespoons and mix. If you want more flavor, add more. Just remember, it’s easier to add than to take away! For the full recipe of Ocean Breeze Seafood Salad, check out the detailed guide. {{image_2}} You can switch up the seafood in this salad. Try using crab or lobster for a rich taste. You can also mix in fish like salmon or tuna. This adds different flavors and textures. Fusion ideas can be fun. Combine Asian flavors with a sesame dressing. Top it with crispy wontons for crunch. You can also add a Mediterranean twist. Use olives and feta cheese for a different profile. Making seafood salad gluten-free is easy. Just ensure any dressing or added spices are gluten-free. You can swap regular soy sauce for tamari. If you want a low-carb version, skip the avocado or reduce the amount of cucumber. This keeps the dish light but tasty. For a seafood-free salad, try chickpeas or tofu. These options provide protein without seafood. Toss in seaweed for a hint of ocean flavor. You can still enjoy the fresh taste of this salad without seafood. For more details, check the Full Recipe. To keep your seafood salad fresh, store it in the fridge. Place it in an airtight container. This helps lock in the flavors and keeps it cool. If you plan to eat it later, try to avoid adding avocado until you serve it. The avocado can brown quickly. When it comes to reheating seafood salads, I recommend not reheating them at all. Seafood tastes best cold or at room temperature. Reheating can change the texture and make it rubbery. You can keep leftovers of your seafood salad for about 2 days in the fridge. After that, it’s best to throw it away. Always check for any signs of spoilage before eating. How can you tell if your seafood salad is no longer good? Look for these signs: - A strong, sour smell - Changes in color, especially in the seafood - A slimy texture on the seafood or veggies If you notice any of these, it’s time to discard the salad. Enjoy your Ocean Breeze Seafood Salad fresh for the best taste! To boost the flavor of your seafood salad, use fresh herbs. Fresh herbs like parsley, dill, or cilantro add depth. You can also add a pinch of chili flakes for heat. A squeeze of lemon juice brightens the dish. Try different oils too; sesame oil gives a nice twist. Marinating the seafood in lime juice before mixing can enhance the taste. Yes, you can use frozen seafood. Just make sure to thaw it first. Place it in the fridge overnight or run it under cold water. After thawing, pat it dry to remove excess moisture. This step helps prevent a watery salad. Cook the seafood as you would with fresh. Follow the cooking time carefully for best results. Seafood salad pairs great with crusty bread or crackers. A fresh green salad complements it well too. You can serve it alongside a tangy coleslaw for crunch. For a light meal, consider serving it with a side of fruit salad. These sides enhance the overall dining experience and balance the flavors. For the complete recipe, check out the Ocean Breeze Seafood Salad. This dish is healthy, fresh, and easy to make. It combines seafood and veggies beautifully, offering a delightful meal. This seafood salad combines fresh seafood, crisp vegetables, and tasty dressings. I covered key steps to cook your seafood well and prepare the vegetables. I shared tips for the best texture and ideas for unique variations. Also, I discussed how to store your salad and signs of spoilage. Remember, you can adjust flavors and dietary needs easily. Enjoy making your own ocean breeze seafood salad and taste the difference!

Seafood Salad Fresh and Flavorful Delight

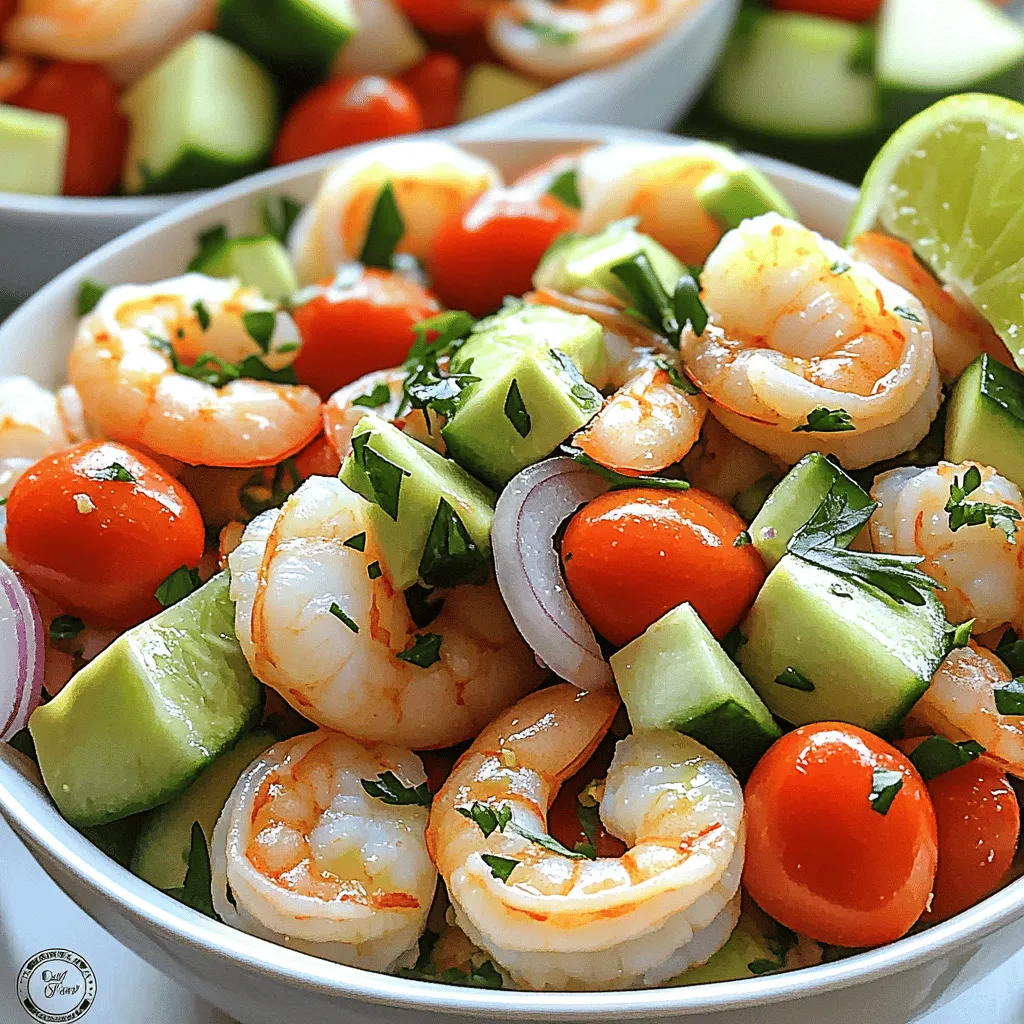
Are you ready to dive into a bowl of freshness? My Seafood Salad Fresh and Flavorful Delight is the perfect

To make a tasty chicken stroganoff, gather these ingredients: - 500g boneless, skinless chicken breasts, sliced into thin strips - 2 cups mushrooms, sliced (preferably a mix of cremini and button) - 1 medium onion, finely chopped - 3 cloves garlic, minced - 1 cup chicken broth - 1 cup sour cream - 2 tablespoons all-purpose flour - 1 tablespoon Dijon mustard - 2 tablespoons olive oil - Salt and pepper to taste - Fresh parsley, chopped (for garnish) - Cooked egg noodles (for serving) Each serving of chicken stroganoff has about: - Calories: 400 - Protein: 30g - Carbohydrates: 35g - Fat: 18g - Fiber: 2g These numbers can vary based on your exact ingredients. You can easily adjust this recipe to fit your needs. Here are some ideas: - For a dairy-free option, swap sour cream with coconut cream or cashew cream. - Use gluten-free flour to replace all-purpose flour. - Chicken can be swapped for turkey or even plant-based proteins like tofu. These changes keep the dish flavorful while meeting your dietary needs. To make Chicken Stroganoff, follow these simple steps. First, gather your ingredients. You need chicken, mushrooms, onion, garlic, broth, sour cream, flour, mustard, olive oil, salt, and pepper. 1. Heat 2 tablespoons of olive oil in a large skillet over medium-high heat. 2. Add 500g of sliced chicken. Season with salt and pepper. Cook for 5-7 minutes until golden. Remove the chicken and set it aside. 3. In the same skillet, add 1 medium chopped onion. Cook for 3-4 minutes until soft. 4. Add 3 minced garlic cloves and 2 cups of sliced mushrooms. Cook for another 5-6 minutes until mushrooms are golden. 5. Sprinkle 2 tablespoons of flour over the mix. Stir well for 1 minute, cooking off the raw flour taste. 6. Gradually add 1 cup of chicken broth, stirring until thickened. 7. Lower the heat. Stir in 1 tablespoon of Dijon mustard and 1 cup of sour cream. Let it simmer for 2-3 minutes. 8. Return the chicken to the skillet. Mix well to heat through. Adjust salt and pepper to taste. 9. Serve the stroganoff over cooked egg noodles and garnish with chopped parsley. To make your Chicken Stroganoff really shine, consider these tips: - Use a mix of mushrooms for added depth. - Don't rush the cooking time. Let the ingredients develop flavor. - Taste your sauce before serving. Adjust seasoning as needed. - For a thicker sauce, let it simmer a bit longer. To execute this recipe well, you'll need: - A large skillet for cooking. - Measuring cups for precise ingredients. - A sharp knife for slicing chicken and vegetables. - A cutting board for safe food prep. These tools make cooking easier and ensure great results. For the full recipe, check out the complete instructions. To make your chicken stroganoff pop, add fresh herbs. I love using parsley or thyme. Just chop them finely and sprinkle them in at the end. You can also add a squeeze of lemon juice for a bright taste. This little trick can brighten the dish and balance the creaminess. One common mistake is overcooking the chicken. Keep an eye on it while it cooks. You want it cooked through, but still tender. Also, don’t skip the flour step. It helps thicken the sauce and adds depth. Lastly, taste as you go! Adjust salt and pepper to suit your taste. If you're in a hurry, use pre-sliced chicken and mushrooms. This saves you time on prep. You can also make the sauce ahead of time and just heat it later. If you know you’ll be busy, cook the egg noodles in advance. They can stay in the fridge until you’re ready to serve. For the full recipe, check out the details above! {{image_2}} You can easily make this dish vegetarian or vegan. Swap the chicken for tofu or tempeh. Use vegetable broth instead of chicken broth. For a creamy texture, replace sour cream with cashew cream or a store-bought vegan sour cream. This way, you keep the same taste and texture, but in a plant-based version. Mushrooms are the star of stroganoff. You can use different types of mushrooms for unique flavors. Cremini mushrooms offer a rich taste. Shiitake mushrooms add a nice, earthy flavor. Portobello mushrooms provide a hearty bite. Feel free to mix and match any mushrooms you like. Their varied textures and tastes will add depth to your dish. If you need a gluten-free option, you can make simple swaps. Use gluten-free all-purpose flour instead of regular flour. Choose gluten-free noodles or serve the stroganoff over rice. Ensure your broth is gluten-free as well. These changes keep the meal gluten-free without losing flavor. For the full recipe, check out the detailed instructions I provided. To keep your chicken stroganoff fresh, store it in an airtight container. Let it cool to room temperature first. Place it in your fridge if you plan to eat it within three days. For longer storage, freeze it. Use a freezer-safe container and leave some space for expansion. When you're ready to eat leftovers, you can reheat them on the stove or in the microwave. If using the stove, heat it over low to medium heat, stirring often. If using the microwave, cover the dish and heat for one to two minutes. Stir halfway through to ensure even heating. Chicken stroganoff lasts about three days in the fridge. In the freezer, it stays good for up to three months. After that, the taste may fade, but it will still be safe to eat. Always check for any off-smells or changes in texture before consuming. You can serve Chicken Stroganoff with many sides. I love to pair it with cooked egg noodles. Rice is also a great option. For a fresh touch, add a side salad. Steamed veggies like green beans or broccoli work well too. They add color and crunch to your plate. Yes, you can make Chicken Stroganoff ahead of time. Just cook it as usual, then cool it down. Store it in the fridge for up to three days. When you're ready to eat, reheat it gently on the stove. This dish tastes even better the next day! To thicken the sauce, use more flour. Mix a little flour with water, then stir it in. You can also let it simmer longer. This helps reduce moisture and thickens the sauce. If you want, use cornstarch mixed with cold water too. Just remember to stir it in slowly. Absolutely! You can swap chicken for beef or turkey. Pork also works well in a stroganoff. If you're feeling adventurous, try using shrimp or tofu. Each protein brings its own flavor to the dish. Just adjust cooking times based on what you choose. You can cut calories in a few easy ways. Use skinless chicken breasts instead of thighs. Swap sour cream for Greek yogurt for a lighter option. You can also use low-fat broth. If you want, reduce the amount of pasta you serve. These small changes help keep the flavor while lowering calories. For the full recipe, check out [Full Recipe]. Homemade Chicken Stroganoff is simple and rewarding. We covered ingredients, cooking steps, and tips to enhance flavor. You learned about substitutions, variations, and ideal storage methods. Remember, this dish adapts well to your needs. Use different proteins or go vegetarian. With these guidelines, you can create a tasty meal that suits your taste. Enjoy your cooking!

Homemade Chicken Stroganoff Flavorful Weeknight Meal

Weeknights can be busy, but dinner doesn’t have to be boring! Homemade Chicken Stroganoff is the perfect dish to warm

For Loaded Baked Potato Gnocchi, you will need a few key ingredients that pack a lot of flavor. Here’s what you’ll need: - 1 pound potato gnocchi - 2 large russet potatoes (baked, cooled, and mashed) - 1/2 cup cream cheese, softened - 1/2 cup sour cream - 1 cup shredded cheddar cheese - 1/2 cup cooked bacon, crumbled - 1/4 cup green onions, chopped - 1 teaspoon garlic powder - Salt and pepper to taste - Olive oil for drizzling - Fresh parsley for garnish These ingredients create a creamy and comforting dish. The potato gnocchi serves as a soft base. The baked russet potatoes add richness and depth. Cream cheese and sour cream make the dish creamy and delicious. Shredded cheddar cheese provides that classic loaded baked potato flavor. Cooked bacon gives a nice crunch and smoky taste. Green onions add freshness and brightness to the dish. Garlic powder boosts the overall flavor. A drizzle of olive oil adds richness, while fresh parsley gives a touch of color. Using high-quality ingredients is key for the best taste. You can find most of these items at your local grocery store. For the full recipe, check out the complete instructions. Baking and Cooling the Potatoes Start by baking two large russet potatoes. Preheat your oven to 400°F (200°C). Place the potatoes on a baking sheet. Bake them for about 45-60 minutes, until they are soft. When done, take them out and let them cool for a bit. Mashing Techniques Once the potatoes are cool, cut them in half. Scoop out the flesh into a bowl. Use a fork or potato masher to mash them until smooth. This will give your gnocchi a nice creamy texture. Combining Ingredients In a large mixing bowl, mix the mashed potatoes with cream cheese and sour cream. Add garlic powder, salt, and pepper to taste. Stir until everything looks creamy and well combined. Salting the Water Fill a large pot with water and add salt. Bring the water to a boil. The salt helps to flavor the gnocchi as they cook. Cooking Time Gently add the potato gnocchi to the boiling water. Cook them until they float to the surface, which takes about 2-3 minutes. Use a slotted spoon to remove them and set aside. Heating Techniques in Skillet In a large skillet, drizzle some olive oil over medium heat. Add the cooked gnocchi to the skillet. Then, pour in the creamy cheese mixture. Stir gently to combine and heat everything through for about 5 minutes. Incorporating Bacon and Cheddar Stir in the crumbled bacon and half of the shredded cheddar cheese. Mix until the gnocchi is well coated and the cheese is melted. Proper Broiling Techniques Transfer the loaded gnocchi mixture to a baking dish. Top with the remaining cheddar cheese. Place it under the broiler for 3-5 minutes until it's golden and bubbly. Serving Suggestions Once broiled, take it out and sprinkle with chopped green onions and fresh parsley. Serve hot and enjoy! You can find the Full Recipe for more details. - Cooking Tips for Fluffy Gnocchi When making gnocchi, use a light touch. Overworking the dough makes it dense. Cook the gnocchi in salted water. They should float when ready. This means they are cooked perfectly. - Avoiding Common Mistakes Do not use too much flour. This can make the gnocchi heavy. Ensure your potatoes are dry after baking. Too much moisture can ruin the texture. - Additional Seasonings Add a pinch of smoked paprika for a kick. A dash of onion powder can deepen the flavor. You can also try fresh herbs like thyme or rosemary. - Cheese Choices Cheddar is classic, but try mozzarella for a stretchy texture. Parmesan can add a nice savory note. Mixing cheeses can create a richer taste. - Plating Techniques Use a large bowl to serve. This allows the colorful layers to show. Create height by stacking the gnocchi. This makes the dish look inviting. - Garnish Suggestions Fresh parsley or chives add a pop of color. A sprinkle of crispy bacon on top enhances flavor. Drizzle with olive oil for a shiny finish. For more detailed steps, check the Full Recipe. {{image_2}} If you want to change things up, consider these options: - Dairy-Free Options: Use plant-based cream cheese and sour cream. They blend well and keep the dish creamy. - Alternative Cheeses: Try using mozzarella or a vegan cheese blend. Both melt nicely and add a different taste. You can easily make this dish vegetarian or vegan: - Plant-Based Alternatives: Swap out the bacon for mushrooms or tempeh. This adds a nice texture and flavor while keeping it plant-based. Enhance your Loaded Baked Potato Gnocchi with these extras: - Ingredients for Extra Flavor: Add crispy onions, jalapeños, or smoked paprika for a spicy kick. Each will give your dish a new twist. - Adding Vegetables: Mix in spinach, broccoli, or bell peppers. They add color, nutrition, and taste, making every bite exciting. For the complete recipe, check out the Full Recipe. To keep your loaded baked potato gnocchi fresh, store it in an airtight container. Place it in the fridge within two hours of cooking. This step helps it stay tasty for up to three days. Make sure to let the dish cool before sealing it. This prevents moisture buildup, which can make the gnocchi soggy. When you want to enjoy your leftovers, the stovetop is the best method. Heat a skillet over medium heat. Add a splash of water or broth to keep it moist. Stir gently until it warms through, about 5-7 minutes. You can also use the microwave. Place the gnocchi in a microwave-safe dish, cover it, and heat in short bursts. Check often to avoid overcooking. If you want to save some for later, freezing is a great option. First, let the gnocchi cool completely. Then, portion it into freezer bags. Squeeze out the air to prevent freezer burn. It can last up to three months in the freezer. When you’re ready to eat, transfer it to the fridge to thaw overnight. For best results, let the frozen gnocchi thaw in the fridge. This method keeps the texture nice. If you're in a hurry, you can thaw it in the microwave on low power. Once thawed, reheat as mentioned earlier. Enjoy the rich flavors again with every bite! For gnocchi, I recommend using russet potatoes. They are starchy and fluffy. This helps create a light texture. Yukon Gold potatoes also work well. They add a creamy taste to the gnocchi. Avoid waxy potatoes like red or new potatoes. They can make the gnocchi dense and heavy. To make this dish gluten-free, choose gluten-free gnocchi. Many brands offer tasty options made from rice or potatoes. Always check the label for gluten-free certification. You can also make your own gnocchi using gluten-free flour. Just mix it with the mashed potatoes and follow the same steps. Yes, you can prepare Loaded Baked Potato Gnocchi ahead of time. You can make the cheese mixture and cook the gnocchi. Store them separately in the fridge. When you are ready to eat, combine them and bake. This saves time on busy nights. Gnocchi cooks quickly. They are done when they float to the surface of the water. This usually takes about 2-3 minutes. If they sink, they need more time. Keep an eye on them, so they don't overcook. Overcooked gnocchi can become mushy. Making Loaded Baked Potato Gnocchi is simple and fun. We covered every step, from choosing the right potatoes to adding toppings. Remember, properly mashing your potatoes and using the right techniques makes a difference. Have fun experimenting with variations and flavors. This dish is perfect for sharing or enjoying on your own. With the right tips, you can create a dish that is both tasty and satisfying. Enjoy your cooking and savor each bite!

Loaded Baked Potato Gnocchi Flavorful Comfort Meal

Comfort food takes a delicious twist in this Loaded Baked Potato Gnocchi recipe! Imagine soft, pillowy gnocchi loaded with creamy

To make Bang Bang Shrimp Pasta, you need a few key ingredients. Here’s the complete list to get you started: - 8 oz fettuccine or spaghetti - 1 lb medium shrimp, peeled and deveined - 1/2 cup mayonnaise - 1/4 cup sweet chili sauce - 1 teaspoon sriracha (adjust for spice preference) - 2 tablespoons lime juice - 2 tablespoons olive oil - 3 cloves garlic, minced - 1/4 cup green onions, chopped (for garnish) - 1/2 cup panko breadcrumbs - Salt and pepper to taste - Optional: Fresh cilantro leaves for garnish Gathering these ingredients is simple. You can find most of them in your kitchen or at a local store. The shrimp adds a nice touch, and the sauce brings bold flavors to the dish. The optional garnishes elevate the presentation and taste. Enjoy the process of cooking, as it will lead to a tasty meal! For the full recipe, check out the detailed steps provided. First, bring a large pot of salted water to a boil. Add your fettuccine or spaghetti. Cook it until it's al dente, which means it's firm yet cooked through. This usually takes about 8-10 minutes, but check the package for exact times. Once done, drain the pasta in a colander and set it aside. Next, grab a medium bowl for the sauce. Whisk together 1/2 cup mayonnaise, 1/4 cup sweet chili sauce, 1 teaspoon sriracha, and 2 tablespoons lime juice. Blend these until smooth. If you want it spicier, feel free to add more sriracha. Set this tasty sauce aside for later. In a large skillet, heat 2 tablespoons of olive oil over medium heat. Add 3 cloves of minced garlic and sauté for about one minute until it smells great. Then, raise the heat to medium-high and add 1 pound of medium shrimp. Season them with salt and pepper. Cook the shrimp for about 2-3 minutes on one side until they turn pink. Then flip them and cook for another minute. Now, it’s time to mix! Pour the Bang Bang sauce over the cooked shrimp. Toss gently until all the shrimp are coated. Reduce the heat to medium and add the cooked pasta to the skillet. Toss everything together until the pasta is evenly coated in that delicious sauce. For a crunchy topping, toast 1/2 cup of panko breadcrumbs in a small pan over medium heat. Stir them frequently for about 3-4 minutes until they turn golden brown. Finally, sprinkle the toasted breadcrumbs over the pasta before serving. Enjoy your Bang Bang Shrimp Pasta! For the full recipe, check out the earlier instructions. Timing is key when cooking Bang Bang Shrimp Pasta. Start by boiling water for the pasta. Once it reaches a rolling boil, add your fettuccine or spaghetti. Cook it until al dente. This usually takes about 8-10 minutes. While the pasta cooks, heat your skillet for the shrimp. This way, both will finish around the same time. You’ll have hot pasta and perfectly cooked shrimp ready to mix together. To make the sauce fit your taste, start with the sriracha. If you like it spicy, add more. If you prefer less heat, keep it simple. You can also mix in a bit of honey to balance the spice. This adds sweetness and makes the sauce creamy and tasty. Taste it as you go. This way, you can find the perfect heat level for you. Bang Bang Shrimp Pasta pairs well with several sides. A fresh green salad with light dressing is a great choice. Garlic bread also works well, giving you a nice crunch. For drinks, try a crisp white wine or sparkling water with lime. These drinks will enhance the meal and make it even more enjoyable. You can find the Full Recipe linked here to help you get started! {{image_2}} You can easily switch shrimp for chicken or tofu. For chicken, use cooked, diced chicken breast. Sauté it until golden brown. For tofu, press it to remove water and cut it into cubes. Sauté the tofu in olive oil until crispy. Both options taste great with the Bang Bang sauce. While fettuccine or spaghetti works well, you can try other pasta shapes. Penne or rigatoni hold sauce nicely and add fun texture. You might also use whole wheat or gluten-free pasta for a healthier choice. Just be sure to follow the cooking times on the package. To make a meat-free version, load your dish with vegetables. Bell peppers, zucchini, and broccoli work well. Sauté them until tender before adding the Bang Bang sauce. You can also add cooked chickpeas for protein. This way, you keep the meal filling and delicious. For the full recipe, check out my Bang Bang Shrimp Pasta recipe. Store your Bang Bang Shrimp Pasta in airtight containers. This keeps it fresh for later. Make sure it cools down before sealing. If you store it right, it can last 3 to 4 days in the fridge. To reheat, you can use the microwave or stovetop. If using a microwave, put it in a bowl and cover it lightly. Heat for 1 to 2 minutes, stirring halfway through. For the stovetop, add a splash of water or broth in a pan. Heat it on low, stirring gently. This helps keep the pasta soft and creamy. Yes, you can freeze Bang Bang Shrimp Pasta. Use freezer-safe containers, and store it for up to 2 months. When freezing, leave some space at the top. This allows the pasta to expand. To thaw, place it in the fridge overnight. Reheat it gently to enjoy the flavors again. For the full recipe, check the link. Bang Bang Shrimp Pasta is a fun dish that mixes shrimp with creamy sauce and pasta. It has a kick from the sriracha and a sweet touch from the chili sauce. This meal has grown popular for its bold flavors and quick prep time. You can whip it up in about 30 minutes, making it perfect for busy nights or special dinners. Yes, you can make Bang Bang Shrimp Pasta ahead of time. Cook the pasta and shrimp, but keep them separate. Store them in airtight containers. On the night you plan to serve, just reheat the pasta and shrimp together with the sauce. This saves you time and still gives you a fresh taste. To complete your meal, try serving a light salad or garlic bread. A fresh side salad with greens adds crunch and balance. Garlic bread is great for soaking up any extra sauce. For drinks, a chilled white wine or sparkling water pairs well with the flavors. Adjusting the spice level is easy. To make it spicier, add more sriracha to the sauce. Start with half a teaspoon and add more until it’s just right for you. If you prefer it milder, reduce the sriracha or skip it altogether. The sweet chili sauce still adds flavor. Bang Bang Shrimp comes from the United States. It started as an appetizer at a popular restaurant chain. The name comes from the sound of shrimp frying. The dish quickly grew in fame and made its way into home kitchens. Now, it’s a favorite for many who love bold flavors. This blog post explored the delicious Bang Bang Shrimp Pasta. We covered the key ingredients and how to cook them step-by-step. With tips to adjust spice levels and serving ideas, you can make it just right for your taste. You can easily switch proteins or make a veggie version. Proper storage and reheating also keep leftovers tasty. Now, you have the tools to create this flavorful dish. Enjoy cooking and savor each bite!

Bang Bang Shrimp Pasta Creamy Flavorful Dinner Delight

If you’re craving a dinner that’s both creamy and full of flavor, you’re in for a treat! Today, I’ll share

This dish starts with bold flavors. You need: - 1 pound chorizo sausage, casings removed - 4 medium potatoes, peeled and diced - 1 medium onion, chopped - 1 red bell pepper, diced - 4 large eggs - 1 cup milk - 1 cup shredded cheddar cheese - 1 teaspoon smoked paprika - 1 teaspoon garlic powder - Salt and pepper to taste - Fresh cilantro, chopped (for garnish) These ingredients create a hearty meal. The chorizo adds spice, while the potatoes provide comfort. Want to kick it up a notch? Consider these add-ins: - 1 cup black beans for extra protein - 1 jalapeño, diced for heat - 1 cup frozen corn for sweetness - ½ cup diced tomatoes for freshness Each option brings a new twist. Feel free to mix and match to suit your taste. Need to adjust for diets? Here are some easy swaps: - Use turkey or chicken chorizo for a leaner choice. - Swap regular milk for almond or oat milk for lactose-free. - Replace potatoes with sweet potatoes for a healthier twist. - Try vegan cheese to make it dairy-free. These substitutions help everyone enjoy this dish. You can still savor the rich flavors while meeting dietary needs. For the full recipe, check the earlier section. Start by gathering all your ingredients. You need: - 1 pound chorizo sausage, casings removed - 4 medium potatoes, peeled and diced - 1 medium onion, chopped - 1 red bell pepper, diced - 4 large eggs - 1 cup milk - 1 cup shredded cheddar cheese - 1 teaspoon smoked paprika - 1 teaspoon garlic powder - Salt and pepper to taste - Fresh cilantro, chopped (for garnish) Make sure to wash and chop all veggies. This step keeps your work area clean. Set everything aside for easy access while you cook. Heat a large skillet over medium heat. Add the chorizo and cook it for about 5-7 minutes. Break it apart with a spoon. The chorizo should be browned and crumbly. If there is too much fat, drain it. Next, add the diced potatoes and onion to the same pan. Cook them for around 10-12 minutes. Stir often until the potatoes start to get soft. After that, add the red bell pepper. Cook for another 5 minutes until all the veggies are tender. This blend of flavors will be the base of your casserole. Now it's time to put everything together. In a mixing bowl, whisk together the eggs and milk. Add smoked paprika, garlic powder, salt, and pepper. Mix until well combined. Grease a 9x13 inch baking dish. Layer the cooked chorizo over the potato mixture evenly. Pour the egg mixture over this layer. Make sure everything is well coated. Finally, sprinkle the shredded cheddar cheese on top. Bake in your preheated oven at 375°F for 25-30 minutes. The casserole is done when the eggs are set and the cheese looks bubbly and golden. Let it cool for a few minutes before slicing. This dish is great for breakfast or brunch. You can find the full recipe above to guide you through. To get the best texture in your casserole, cook the potatoes first. You want them tender but not mushy. Sauté them until they are just starting to brown. This adds flavor and keeps them firm. The chorizo should be cooked until it’s crispy. This gives a nice bite to each forkful. When mixing the eggs, whisk them well. This helps create a fluffy texture. Pour the egg mixture evenly over the layers. This ensures every bite has the right mix of flavors. Layering is key to a great casserole. Start with the cooked chorizo at the bottom. This helps keep the meat moist. Next, add the potato and vegetable mixture. Make sure they cover the chorizo well. It creates a nice barrier. When pouring the egg mix, do it slowly. This allows the eggs to seep down and mix with the layers. Top with cheese for a delicious, golden crust. Always remember to grease your baking dish. This makes serving easier. Serve your casserole warm for the best taste. Fresh cilantro adds a nice touch. For extra flavor, drizzle some hot sauce around the edges. Sliced avocados make a great side. They add creaminess that balances the spice. If you want more crunch, serve with tortilla chips. A simple green salad pairs well too. It adds freshness and balances the richness of the dish. For more ideas, check out the Full Recipe for extra tips and pairings. {{image_2}} You can easily make a vegetarian version of this dish. Instead of chorizo, use a plant-based sausage. Look for options that have bold flavors. You can also add mushrooms for a meaty texture. Bell peppers and onions will still give you that great taste. Just follow the same steps in the recipe, and you will have a delicious meal. If you're cutting carbs, swap out potatoes for cauliflower. Cauliflower rice works well and keeps it light. You can also use zucchini or sweet potatoes for a different flavor. These choices still give you a satisfying base for the casserole. Just be sure to adjust the cooking time based on what you use. Cheese adds a rich taste to the casserole. While cheddar is a classic choice, you can try other cheeses too. Monterey Jack gives a mild flavor with a nice melt. Feta cheese adds a tangy twist. You could even mix cheeses for a unique blend. Adding a sprinkle of Parmesan on top gives a nice crust. Each cheese brings its own character to this filling meal. For the full recipe, check out the main article. To keep your Chorizo & Potato Egg Casserole fresh, let it cool first. Once cooled, cut it into portions. Store these portions in airtight containers. Place them in the fridge. Your casserole will stay good for about 3-4 days. Label each container with the date to track freshness. If you want to save some for later, freezing is great! Wrap each piece in plastic wrap tightly. Then, place the wrapped pieces in a freezer-safe bag or container. They will stay fresh for up to 2-3 months. Remember to label the bags with the date. When you're ready to eat, just thaw it in the fridge overnight. For the best taste when reheating, preheat your oven to 350°F (175°C). Place the casserole in an oven-safe dish. Cover it with foil to keep it moist. Heat for about 20-25 minutes, or until it's hot all the way through. You can also reheat in the microwave, but the oven gives a better texture. Enjoy your meal with a sprinkle of fresh cilantro on top for added flavor! You can store your Chorizo & Potato Egg Casserole in the fridge for up to 3 days. Just keep it in an airtight container. This way, it stays fresh and safe to eat. When you want to enjoy it again, just reheat it in the oven or microwave. Yes, you can make this recipe ahead of time. You can prepare the casserole a day before and keep it in the fridge. Just bake it when you are ready to serve. This makes it perfect for busy mornings or special occasions. You can serve this casserole with a simple green salad or sliced avocado. A dollop of sour cream adds a nice touch. You might also enjoy some hot sauce on the side for extra flavor. Try pairing it with fresh fruit for a balanced meal. For the full experience, check out the Full Recipe. This blog post walks you through making a tasty Chorizo & Potato Egg Casserole. You learned about the main ingredients and some fun add-ins. I shared tips on prepping, cooking, and serving your dish. You also found ways to customize it for different diets and flavors. Remember, leftovers can be stored well and reheated easily. Enjoy making your casserole your way—it's a dish loaded with flavor and joy.

Chorizo & Potato Egg Casserole Flavorful and Filling Meal

Are you ready to whip up a dish that’s both hearty and flavorful? My Chorizo & Potato Egg Casserole is

To make a fantastic banana pudding cheesecake, you will need: - 1 ½ cups graham cracker crumbs - ½ cup unsalted butter, melted - 2 tablespoons sugar - 3 (8 oz) packages cream cheese, softened - 1 cup granulated sugar - 1 teaspoon vanilla extract - 3 large eggs - 1 cup heavy cream - 1 cup ripe bananas, mashed (about 2 medium bananas) - 1 teaspoon lemon juice - 1 package instant vanilla pudding mix (3.4 oz) - 2 cups milk - Whipped cream and banana slices for garnish These ingredients create a rich and creamy dessert that everyone will love. The graham cracker crust gives it a nice crunch, while the bananas add a sweet touch. You can change the flavor and look of your cheesecake with these optional ingredients: - Chocolate chips for a chocolatey twist - Caramel sauce for drizzling on top - Chopped nuts for added crunch - Coconut flakes for a tropical vibe Feel free to get creative! You can mix and match these options to suit your taste. To choose the best bananas for your cheesecake, look for: - Firmness: They should be firm but not hard. - Color: A bright yellow color with a few small brown spots is perfect. - Ripeness: Overripe bananas have more flavor for your cheesecake. Always smell the bananas. They should have a sweet, fruity scent. This means they are fresh and ready to use in your recipe. Enjoy making your banana pudding cheesecake! For the full recipe, check out the detailed instructions. To start, we need to make the crust. First, preheat your oven to 325°F (162°C). In a medium bowl, mix these ingredients: - 1 ½ cups graham cracker crumbs - ½ cup unsalted butter, melted - 2 tablespoons sugar Stir until everything blends well. Now, take a 9-inch springform pan and press the mixture firmly into the bottom. Bake this crust for 10 minutes. When done, remove it and let it cool. Next, we will create the cheesecake batter. Grab a large mixing bowl and beat together: - 3 (8 oz) packages cream cheese, softened - 1 cup granulated sugar - 1 teaspoon vanilla extract Use an electric mixer for a smooth and creamy texture. Add in 3 large eggs, one at a time. Mix on low speed after each addition until just blended. Then, fold in: - 1 cup ripe bananas, mashed (about 2 medium bananas) - 1 teaspoon lemon juice Now, let’s mix the pudding. In a separate bowl, whisk together: - 1 package instant vanilla pudding mix (3.4 oz) - 2 cups milk Let it sit for about 5 minutes to thicken. Gently fold this pudding mixture into your cheesecake batter until smooth and free of lumps. Now, it's time to bake the cheesecake. Pour the batter over the cooled crust. Bake in the oven for about 50-60 minutes. The edges should be set, but the center needs a slight jiggle. After baking, turn off the oven and crack the door open. Let the cheesecake cool in the oven for about 1 hour. This helps to prevent cracking. Once cooled, cover it and refrigerate for at least 4 hours or overnight for the best taste. After chilling, your cheesecake is ready! You can garnish it with whipped cream and banana slices. Enjoy every bite of your banana pudding cheesecake! For the full recipe, check out the details above. To prevent cracks in your cheesecake, follow these steps. First, cool the cheesecake slowly. After baking, turn off the oven and crack the door open. This helps the cheesecake cool down gradually. Second, don’t overmix the batter. Mix just until smooth to avoid adding too much air. Lastly, bake the cheesecake in a water bath. This creates steam, which keeps the temperature even. For a creamy texture, use room temperature cream cheese. Cold cream cheese can lead to lumps. Beat the cream cheese well until it's fluffy. Add eggs one at a time, mixing on low speed. This prevents too much air from getting in the batter. Incorporate the mashed bananas gently to maintain airiness. Finally, don’t overbake. The center should jiggle slightly when done. Serve your banana pudding cheesecake cold for the best taste. Garnish with whipped cream and banana slices. For added flair, drizzle caramel or chocolate sauce on the plate. You can also sprinkle crushed graham crackers on top. This adds a nice crunch. The mix of textures will wow your guests. For more details, check out the Full Recipe. {{image_2}} You can switch up the crust for more flavor. Instead of graham crackers, try using crushed vanilla wafers. They add a nice twist that complements the banana flavor. Another option is an Oreo crust. Just crush Oreos and mix with melted butter. The chocolate will give your cheesecake a rich taste. Feel free to play with flavors in your cheesecake. Adding a teaspoon of cinnamon gives a warm touch. You can also mix in some chopped nuts for crunch, like walnuts or pecans. Want a tropical vibe? Add a bit of coconut extract! For a lighter option, use Greek yogurt instead of cream cheese. This keeps it creamy but adds protein. Mini cheesecakes are perfect for parties or quick bites. Use a muffin tin and line it with paper liners. Press the crust mixture into each liner just like you would in a springform pan. Fill with the cheesecake batter and bake for 20-25 minutes. Chill them just like the full cheesecake. Top with whipped cream and banana slices for a cute treat. You can find the full recipe for these mini delights in the main article. To keep your banana pudding cheesecake fresh, first let it cool completely. Then, cover it tightly with plastic wrap or aluminum foil. This helps keep moisture in and odors out. If you have a springform pan, leave it in that for easy storage. Always place it in the fridge. Cheesecake does best at a cool temperature. Banana pudding cheesecake can last up to five days in the fridge. After that, the texture may change. If you see any signs of spoilage, like mold or off smells, it's best to throw it away. Always check for freshness before enjoying your dessert! If you want to save some cheesecake for later, freezing is a great option. First, slice the cheesecake into pieces. Wrap each slice in plastic wrap, then place them in an airtight container. This helps prevent freezer burn. You can freeze banana pudding cheesecake for up to three months. When you're ready to eat it, thaw the slices in the fridge overnight. Enjoy your treat whenever you like! For the full recipe, check out the details above. Yes, you can make this cheesecake ahead of time. I often prepare it the day before serving. This allows the flavors to blend well. Just remember to chill it for at least four hours. For best taste, overnight is ideal. If you need a substitute for cream cheese, try mascarpone or ricotta cheese. Both options will keep the creaminess. You can also use Greek yogurt as a lighter choice. Just make sure to adjust the sugar to taste. To check if your cheesecake is done, look for the edges. They should be set while the center remains slightly jiggly. It will firm up as it cools. A toothpick test can also help. Insert it in the center; it should come out clean or with a few moist crumbs. For more details, check the Full Recipe. This blog post covered how to make a delicious Banana Pudding Cheesecake. We discussed essential and optional ingredients, preparation steps, and tips for a smooth texture. I shared ways to prevent cracking and served helpful variations. Storing tips ensure your cheesecake stays fresh longer. Enjoy experimenting with flavors and customizations. This recipe allows you to make a treat everyone will love. Go ahead and make your own creamy, tasty cheesecake!

Irresistible Banana Pudding Cheesecake Easy Recipe

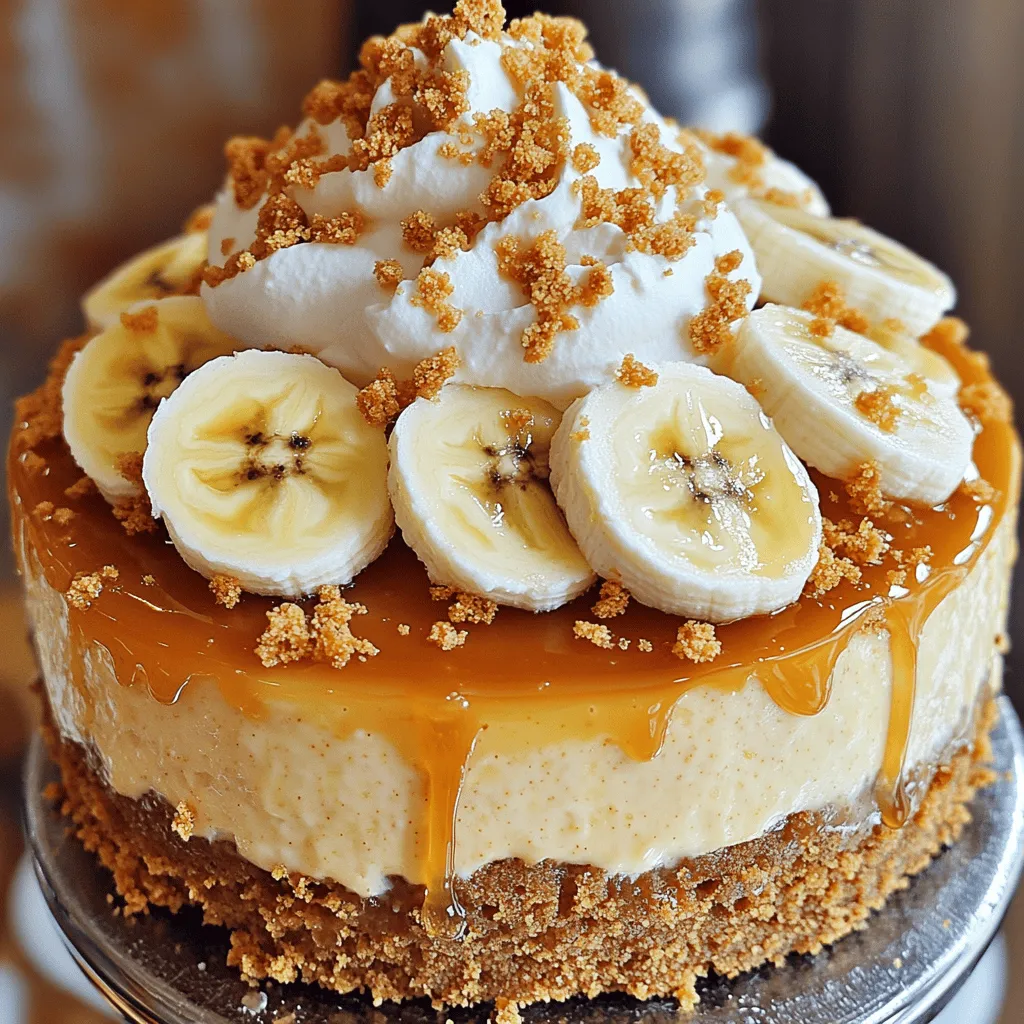
Craving something sweet and creamy? Let me introduce you to my irresistible Banana Pudding Cheesecake. This easy recipe combines the

To make a tasty shrimp fried rice, gather these main ingredients: - 2 cups cooked jasmine rice (preferably day-old) - 1 pound large shrimp, peeled and deveined - 2 tablespoons vegetable oil - 1 cup mixed frozen vegetables (peas, carrots, corn) - 3 green onions, chopped (white and green parts separated) - 2 cloves garlic, minced - 2 large eggs, lightly beaten - 3 tablespoons soy sauce - 1 tablespoon oyster sauce (optional) - Salt and pepper to taste - 1 teaspoon sesame oil (for drizzling) Each of these ingredients plays a part in building flavor. The day-old rice helps keep things light and fluffy. Fresh shrimp adds a nice protein boost. To elevate your dish, consider these optional ingredients: - 1 tablespoon of fresh ginger, minced - 1 tablespoon of chili paste for heat - A splash of rice vinegar for brightness Adding these can change the flavor profile and make your dish unique. You can mix and match based on your taste. Here are some tools you will need for easy cooking: - A large skillet or wok - A spatula or wooden spoon - A sharp knife and cutting board - Measuring spoons and cups - A bowl for mixing eggs Having the right tools makes cooking more enjoyable. They help you work faster and keep your kitchen organized. If you want to see the full recipe, check out the detailed steps provided above. To start, use day-old jasmine rice. Fresh rice is too sticky. Cold rice helps it fry better. If you don't have day-old rice, make some and chill it. Spread it out on a tray to cool down quickly. Heat 1 tablespoon of vegetable oil in your skillet. Use medium-high heat. Once hot, add the shrimp. Season them lightly with salt and pepper. Cook the shrimp for about 2-3 minutes. They should turn pink and opaque. Remove the shrimp and set them aside. In the same skillet, add the remaining oil. Toss in the minced garlic and the white parts of the green onions. Sauté for about 30 seconds. Let the aroma fill the kitchen! Next, add your frozen mixed vegetables. Stir-fry them for 2-3 minutes until they heat through. Now, push the veggies to one side. Pour the beaten eggs on the other side. Scramble the eggs until they are fully cooked. Mix everything together to combine. Now it’s time to add the cold jasmine rice. Break up any clumps as you mix. Stir in the cooked shrimp next. Drizzle in the soy sauce and oyster sauce if you choose to use it. Stir continuously until all the ingredients are heated through. Finally, drizzle sesame oil over the fried rice for flavor. Mix gently and taste. Adjust the seasoning with salt and pepper if needed. Stir in the green parts of the chopped onions for a fresh crunch. For the full recipe, you can refer to the Full Recipe section. To keep your rice firm, use day-old jasmine rice. Freshly cooked rice holds water and can become mushy. When cooking, rinse the rice until the water runs clear. This removes extra starch. After cooking, spread the rice out on a tray to cool. This helps it dry out and firm up. I recommend using large shrimp for this dish. They have a nice bite and flavor. You can choose fresh or frozen shrimp. If using frozen, thaw them under cold water. Always peel and devein your shrimp for the best texture. Look for shrimp that are firm and have a slight sheen. For extra flavor, consider marinating the shrimp. A mix of soy sauce, garlic, and ginger works well. You can also add more veggies for color and nutrition. Try bell peppers or bean sprouts. Stir-frying over high heat gives a nice char and flavor. Always keep your ingredients moving to avoid burning. You can find the full recipe for this delicious dish above. {{image_2}} You can change the shrimp in this recipe easily. Chicken is a great option. Use diced chicken breast and cook it until it is fully done. Tofu is another good choice. Press it to remove water, then cube it and sauté it until golden. Both give a nice texture and flavor to the fried rice. Feel free to swap in seasonal veggies. In spring, add fresh peas and asparagus. In summer, use zucchini and bell peppers. Fall is perfect for adding butternut squash or mushrooms. Winter calls for hearty greens like kale or bok choy. This keeps your meal fresh and interesting. If you need a gluten-free option, use tamari instead of soy sauce. It tastes just as good! For a vegetarian dish, skip the shrimp and use more vegetables or tofu. You can also add some nuts for crunch and protein. These small changes let everyone enjoy this meal. For the full flavor experience, check out the Full Recipe. To keep leftover shrimp fried rice fresh, place it in an airtight container. Allow it to cool first. Store it in the fridge for up to three days. When storing, separate the shrimp from the rice if possible. This helps maintain the shrimp's texture. Reheat the shrimp fried rice in a skillet over medium heat. Add a splash of water to help steam it. Stir often to heat evenly. You can also use a microwave. Cover it with a damp paper towel to keep moisture in. Heat in short bursts, stirring in between. For longer storage, freeze shrimp fried rice in a freezer-safe bag. Press out as much air as you can before sealing. It can last up to three months in the freezer. To use, thaw it overnight in the fridge. Reheat as mentioned above for the best taste. For the [Full Recipe], make sure to check the specific steps to create this delightful dish! The best rice for fried rice is jasmine rice. It has a nice texture and flavor. Day-old rice works best because it dries out a bit. This helps prevent mushy rice when you stir-fry. If you don’t have day-old rice, spread fresh rice on a tray to cool and dry it out a bit. Yes, you can use fresh shrimp! Just make sure it's peeled and deveined. Fresh shrimp may taste sweeter and more tender. When using fresh shrimp, cook them until they turn pink and opaque. This usually takes about 2-3 minutes. Shrimp fried rice can last up to 3 days in the fridge. Make sure to store it in an airtight container. When you want to eat it, just reheat it in the microwave or on the stove. You can serve shrimp fried rice with several tasty sides. Some great options are: - Egg rolls - Spring rolls - Hot and sour soup - Sweet and sour chicken These dishes pair well and add variety to your meal. For a full guide on making this dish, check the Full Recipe. You now have all the tools to make delicious Chinese style shrimp fried rice. We explored key ingredients, step-by-step cooking methods, and important tips to enhance your dish. Remember, you can substitute proteins and adjust veggies based on your needs. Store any leftovers properly for later enjoyment. This easy meal is versatile and fun to make. With a little practice, you'll impress yourself and others with your cooking skills. Enjoy your time in the kitchen and savor every bite of your shrimp fried rice!

Chinese Style Shrimp Fried Rice Flavorful Meal Option

Looking for a tasty and quick meal? Chinese Style Shrimp Fried Rice hits the spot. This dish brings together juicy

Older posts
Newer posts
← Previous Page1 … Page94 Page95 Page96 … Page104 Next →

dsad

© 2025 pureeatsnow • Built with GeneratePress

Our Policies

  • Copyright Policy
  • Cookie Policy
  • GDPR Policy
  • Privacy Policy
  • Disclaimer
  • Terms Of Use

More Information

  • Home
  • About
  • Contact
  • Appetizers
  • Dessert
  • Dinner
  • Drinks
©2025, pureeatsnow About Back To Top