Skip to content
DisclaimerTerms Of UseGDPR PolicyCookie Policy

pureeatsnow

  • Home
  • Drinks
  • Appetizers
  • Dinner
  • Dessert
  • About
  • Contact
  • Privacy Policy
DisclaimerTerms Of UseGDPR PolicyCookie Policy

Rachel

- Potatoes: Use waxy potatoes like Yukon Gold. They hold moisture well and make fluffy dumplings. Avoid starchy potatoes, as they can make the dumplings heavy. - Flour and Other Ingredients: All-purpose flour is key. It adds structure without making the dumplings tough. One egg helps bind the mixture, giving it a nice texture. Salt adds flavor, so don't skip it. - Optional Garnishes: Fresh parsley brightens the dish. It adds color and a fresh taste. You can also drizzle melted butter on top for extra richness. Serve the dumplings with a meat dish or sauce for a complete meal. For the full recipe, check the complete list above. Boiling the Potatoes: Start by choosing waxy potatoes. They hold their shape well. Place the potatoes in a large pot. Cover them with water and bring it to a boil. Cook the potatoes until they are fork-tender, which takes about 20 to 25 minutes. Once done, drain the water and let them cool for a short time. This cooling step is key for easy peeling. Making the Dough: While the potatoes are still warm, peel them. Use a potato ricer or a masher to create a smooth base. Transfer the mashed potatoes to a bowl and let them cool completely. Once cooled, add the all-purpose flour, egg, and salt. Mix everything gently. Be careful not to overwork the dough. It should be soft but still hold together well. Forming and Cooking Dumplings: Dust your hands with flour to prevent sticking. Take a piece of dough about the size of a golf ball. Flatten it slightly and place a teaspoon of breadcrumbs in the center. Enclose the breadcrumbs with the dough and roll it into a ball. Repeat this for all the dough. Next, bring a large pot of salted water to a boil. Carefully drop the dumplings into the water. Cook for about 10 to 15 minutes. You'll know they are done when they float to the top. Let them cook for an extra 3 to 4 minutes once they float. For added flavor, sauté the dumplings in melted butter after boiling. This gives them a nice golden and slightly crispy outside. Enjoy your delicious German potato dumplings! You can find the full recipe for more detailed instructions. Tips for Potato Selection: Choose waxy potatoes like Yukon Gold or red potatoes. These types hold moisture and create a fluffy texture. Avoid starchy potatoes, as they can make your dumplings dense. Common Mistakes: One mistake is overworking the dough. Mix just until combined to keep your dumplings light. Another issue is using cold potatoes. Always use warm, freshly cooked potatoes for the best results. Best Practices for Cooking: When boiling, make sure your water is at a gentle boil. If the boil is too strong, the dumplings may break apart. Once they float, let them cook for a few more minutes. This ensures they are cooked through and ready to enjoy. If you want to impress, try sautéing them in butter after boiling. This adds a nice golden color and crispy texture. Follow these tips, and you’ll make perfect German potato dumplings every time! For the full recipe, check out the details above. {{image_2}} You can make German potato dumplings unique by changing a few things. First, think about the filling. Instead of plain breadcrumbs, try using: - Cheese - Herbs like chives or dill - Cooked bacon bits These options add new flavors and textures. You can also switch up the cooking method. You can steam the dumplings instead of boiling them. Steaming gives them a lighter texture and keeps them fluffy. Next, consider adding different spices. You can mix in: - Nutmeg for warmth - Paprika for a bit of heat - Garlic powder for a savory kick Cheeses also work well. Adding a soft cheese like ricotta gives a creamy center. The options are endless! Feel free to get creative with your favorite flavors. For the full recipe, check out the [Full Recipe]. Refrigeration Tips After cooking, let the dumplings cool to room temperature. Place them in an airtight container. Store in the fridge for up to three days. This keeps them fresh and tasty. Make sure to separate layers with parchment paper if you stack them. Freezing Dumplings You can freeze both raw and cooked dumplings. For raw dumplings, lay them on a baking sheet in a single layer. Freeze until firm, then transfer to a zip-top bag. This way, they won’t stick together. For cooked dumplings, cool them first. Place in a container and cover tightly. They can last up to three months in the freezer. Reheating Instructions To reheat cooked dumplings, use a pan on medium heat. Add a bit of butter. This keeps them crispy. If you prefer, you can also steam them. Place dumplings in a steamer basket over boiling water. Heat until warmed through, about five minutes. This method helps maintain their soft texture and flavor. Can I use other types of potatoes? Yes, you can use other types of potatoes, but waxy potatoes work best. Waxy potatoes hold their shape when cooked. They give the dumplings a nice, fluffy texture. If you use starchy potatoes, the dumplings might get too mushy. How do I know when the dumplings are done cooking? Dumplings are done when they float to the top. Once they float, let them cook for an extra 3-4 minutes. This ensures they are cooked through. You can also check one by cutting it in half. It should be soft and well-cooked inside. What are some traditional dishes to serve with dumplings? Dumplings pair well with many dishes. Some classic options include roast meats, like pork or beef. They also go great with mushroom sauce or rich gravies. For a lighter dish, serve them with sautéed greens. You can enjoy them any way you like! For the complete recipe, check out the Full Recipe. In this post, we explored how to make great German potato dumplings. We covered the best potatoes, flour, optional garnishes, and step-by-step cooking tips. I shared common mistakes to avoid and some tasty variations to try. You now know how to store leftovers and keep them tasty. Making dumplings can be fun and rewarding. With practice, your dumplings will impress everyone. Enjoy cooking and experimenting with flavors!

German Potato Dumplings Flavorful and Easy Recipe

If you’re craving a comforting meal, German potato dumplings are a must-try. These soft, fluffy bites are made with simple

The key to making delicious Spinach Garlic Mozzarella Meatballs is using fresh, quality ingredients. Here’s what you need: - 1 lb ground beef or turkey - 1 cup fresh spinach, finely chopped - 1 cup mozzarella cheese, shredded - 1/2 cup breadcrumbs - 1/4 cup grated Parmesan cheese - 2 cloves garlic, minced - 1 large egg - 1 teaspoon dried oregano - 1 teaspoon salt - 1/2 teaspoon black pepper - 1 tablespoon olive oil (for cooking) - Marinara sauce (for serving) These ingredients work together to create a tasty and healthy dish. I always choose fresh spinach for its bright flavor. Mozzarella cheese adds creaminess. The garlic gives a warm, savory taste that blends well with the meat. When picking ground meat, I often switch between beef and turkey. Turkey makes the dish lighter, while beef offers a richer taste. You can also use gluten-free breadcrumbs if needed. This recipe is all about flexibility, so feel free to adapt it to your taste. You can find the Full Recipe, which contains detailed steps to make these meatballs, to ensure your dish turns out perfectly. - Preheat your oven to 400°F (200°C) and line your baking sheet with parchment paper. - In a large mixing bowl, combine the ground beef or turkey, chopped spinach, mozzarella cheese, breadcrumbs, grated Parmesan cheese, minced garlic, egg, oregano, salt, and black pepper. - Use your hands to mix the ingredients until just combined. Be careful not to overwork the meat. - Shape the mixture into meatballs, about 1.5 inches in diameter, and place them onto the prepared baking sheet. - Drizzle a tablespoon of olive oil over the meatballs for added moisture during cooking. - Bake the meatballs in the preheated oven for 20-25 minutes. They should be browned and cooked through. - While the meatballs bake, heat marinara sauce in a saucepan over medium heat until warmed through. - Serve the meatballs hot, nestled in a bowl of marinara sauce or on a platter. - For presentation, arrange the meatballs on a serving platter and drizzle with extra marinara sauce. Garnish with fresh basil leaves or a sprinkle of parsley for a pop of color. For the full recipe, check out the Spinach Garlic Mozzarella Meatballs section. For the best meatballs, mix gently. Overworking the meat can make them tough. Use your hands to blend the ingredients just until they come together. Shape the meatballs to about 1.5 inches wide for even cooking. Bake the meatballs at 400°F for 20-25 minutes. This high heat helps them brown nicely. Check that they are cooked through. You want an internal temperature of 165°F. This ensures they are safe to eat and juicy. Feel free to adjust the spices. Add more garlic for a bolder taste or a pinch of red pepper flakes for heat. Fresh herbs like basil or parsley can also give a nice lift. Consider adding chopped sun-dried tomatoes or olives for a twist. These ingredients add unique flavors that can surprise your palate. You can also swap out the mozzarella for feta cheese for a tangy kick. Serve the meatballs with marinara sauce for a classic touch. They pair well with spaghetti or on a sub roll. Top with extra cheese and fresh herbs for a nice finish. For a fun twist, make meatball sliders. Use small buns and add some fresh greens. You can also serve them on a charcuterie board with cheese and crackers for a great appetizer. For the complete recipe, check the Full Recipe section above. {{image_2}} You can switch up the meat in this recipe. Ground turkey works well if you want a lighter option. For those who prefer beef, that works great too. If you want a vegetarian dish, consider using lentils or chickpeas instead of meat. These options still pack a punch of flavor. You might want to bake or pan-fry your meatballs. Baking gives a nice, even cook and keeps them healthier. On the other hand, pan-frying adds a crispy texture that many love. You can also add sauces or toppings. Try marinara for a classic touch or pesto for a fresh flavor boost. These meatballs are perfect for parties. You can serve them as appetizers on toothpicks. They can also be a hit at family dinners. Everyone loves a hearty meatball served with pasta or in a sub. You can even make mini versions for kids’ meals. The options are endless! For the full recipe, don't forget to check the ingredients and instructions to get started. To keep your Spinach Garlic Mozzarella Meatballs fresh, follow these tips: - Refrigeration: Place cooked meatballs in an airtight container. They stay good for up to 4 days in the fridge. - Freezing: For longer storage, let meatballs cool. Then, place them in a freezer-safe bag. Use parchment paper between layers to prevent sticking. Frozen meatballs can last for up to 3 months. You can reheat meatballs in several ways: - Oven: Preheat your oven to 350°F (175°C). Place meatballs on a baking sheet and heat for 10-15 minutes. - Microwave: Place meatballs in a microwave-safe dish. Cover and heat for 1-2 minutes. - Stovetop: Add meatballs to a pan with a little marinara sauce. Heat on low for about 5 minutes. To keep meatballs moist, add a splash of water or sauce while reheating. This helps to prevent them from drying out. Knowing how long your meatballs last is key: - Freshness: Cooked meatballs in the fridge should be eaten within 4 days. - Frozen: When stored properly, frozen meatballs are best used within 3 months. - Signs of Spoilage: If you see any discoloration, foul smell, or slimy texture, it's time to toss them out. For the full recipe, check out the details above. To make these meatballs gluten-free, simply swap breadcrumbs for a gluten-free option. Here are some great substitutes: - Almond flour - Crushed gluten-free crackers - Oats (ensure they are gluten-free) - Cooked quinoa These options keep the meatballs moist and tasty while removing gluten. Yes, you can use frozen spinach! To maintain flavor and texture, follow these tips: - Thaw the spinach first. - Squeeze out any excess water. - Chop it finely before mixing it in. This helps balance the moisture and flavor in your meatballs. You have many options for sides and sauces to enjoy with your meatballs: - Spaghetti or pasta - A fresh salad - Garlic bread - Zucchini noodles Pair them with marinara sauce for a classic touch. For more ideas, check the Full Recipe. This article covered everything you need for delicious Spinach Garlic Mozzarella Meatballs. We discussed key ingredients, step-by-step instructions, and tips for cooking and serving. I shared how to store meatballs and also provided interesting variations. Whether you’re cooking for a family dinner or a party, these meatballs can impress everyone. Enjoy experimenting with the flavors and serving ideas. You have the tools to make a great meal ahead!

Spinach Garlic Mozzarella Meatballs Flavorful Recipe

Are you ready to elevate your dinner game? Spinach Garlic Mozzarella Meatballs are not just tasty; they pack a punch

- Ramen noodles: 200g - Mushrooms: 250g shiitake & 100g enoki - Aromatics: garlic and ginger - Broth and seasonings: vegetable broth, soy sauce, miso paste, chili paste - Fresh greens and garnishes: baby spinach, green onions, toasted sesame seeds, cilantro When I make Asian mushroom ramen, I focus on fresh, vibrant ingredients. Ramen noodles are the heart of this dish. They soak up flavors and bring a satisfying chew. I prefer using 200g of ramen noodles for two to three servings. Mushrooms add depth and umami. I like to use 250g of shiitake mushrooms and 100g of enoki mushrooms. Shiitake offers a robust flavor, while enoki adds a nice crunch. Aromatics like garlic and ginger kick up the taste. I always use three cloves of minced garlic and a one-inch piece of grated ginger for that perfect zing. The broth is key to a great ramen. I choose four cups of vegetable broth, along with two tablespoons of soy sauce. For an extra boost, I add one tablespoon of miso paste and one teaspoon of chili paste. Adjust the chili paste based on your spice level. Fresh greens make the dish come alive. I add one cup of baby spinach, which wilts perfectly in the hot broth. For garnishing, I slice two green onions, sprinkle one tablespoon of toasted sesame seeds, and add fresh cilantro. With these ingredients, you will craft a bowl of flavorful comfort. For the full recipe, be sure to check out the detailed instructions. To cook the ramen noodles, start by boiling water in a large pot. Add a pinch of salt to the water. Once it boils, add 200g of ramen noodles. Cook them according to the package instructions, usually around 3-4 minutes. Drain the noodles in a colander and set them aside. To prevent sticking, toss them with a splash of sesame oil. This keeps them separate and adds a nice flavor. For the aromatics, heat 1 tablespoon of sesame oil in a large skillet over medium heat. Add 3 cloves of minced garlic and 1 inch of grated ginger. Sauté these for about 1 minute until they smell great. Make sure the heat is not too high, or the garlic will burn. Cooking at the right temperature helps keep the flavors bright and fresh. Now, it’s time to build your flavor! Increase the heat to medium-high. Add 250g of sliced shiitake mushrooms and 100g of trimmed enoki mushrooms to the skillet. Sauté them for about 5-7 minutes, stirring often, until they are tender and slightly caramelized. Pour in 4 cups of vegetable broth next. Bring it to a simmer and stir in 2 tablespoons of soy sauce, 1 tablespoon of miso paste, and 1 teaspoon of chili paste. Let everything cook for another 5 minutes so the flavors meld beautifully. Then, add the cooked ramen noodles and 1 cup of baby spinach to the broth. Stir gently until the spinach wilts, which should take about 2 minutes. Now you can serve! Ladle the soup into bowls and add sliced green onions, toasted sesame seeds, and fresh cilantro for garnish. Enjoy this flavorful comfort dish! For the complete details, refer to the Full Recipe. To make your Asian mushroom ramen noodles shine, focus on your broth first. A rich, flavorful broth can elevate your dish. Use high-quality vegetable broth. If you want extra depth, add miso paste. This gives a nice umami boost. You can also adjust ingredients based on your taste. Add more garlic or ginger for a bolder flavor. If you like heat, increase the chili paste. Perfect sautéing is key to great flavor. Start with medium heat when cooking garlic and ginger. This keeps them fragrant without burning. When adding mushrooms, raise the heat to medium-high. This helps them caramelize and release their natural flavors. To avoid mushy noodles, don’t overcook them. Follow the package instructions carefully. Rinse them with cold water after cooking to stop the cooking process. Garnishing makes your dish pop! After serving, sprinkle sliced green onions on top for color. Add toasted sesame seeds for crunch and a nutty flavor. Fresh cilantro adds a bright touch. For special occasions, serve in nice bowls. You can also add a lime wedge on the side for a zesty finish. This simple step can impress your guests and enhance the meal. Enjoy your flavorful comfort dish! If you want the complete recipe, check out the Full Recipe section. {{image_2}} You can easily add protein to your Asian mushroom ramen. Tofu is a great choice. It absorbs flavors well and adds texture. Simply cube it and sauté it with the mushrooms. For meat lovers, chicken works too. Use cooked, shredded chicken for quick prep. Shrimp is another tasty option. Just add it in the last few minutes of cooking. This way, it stays tender and juicy. To keep the dish vegan, skip the chicken or shrimp. You can replace them with extra mushrooms or tofu. Many veggies also fit well. Try adding bok choy or carrots for crunch. Zucchini or bell peppers can add color and flavor. Feel free to mix and match your favorite vegetables. This keeps your ramen fresh and exciting. You can control the spice level in your ramen. If you like it mild, reduce the chili paste. Start with half a teaspoon and adjust to taste. For those who love heat, add more chili paste or fresh chili slices. You can also use sriracha for a different kick. Just remember to taste as you go. This way, you create the perfect bowl for your palate. To store your Asian mushroom ramen noodles, follow these simple steps. First, let the dish cool down to room temperature. Then, place it in an airtight container. You can refrigerate it for up to three days. If you want to keep it longer, freeze it. In the freezer, it will last for about a month. Just be sure to separate the noodles from the broth to avoid mushy noodles later. When you're ready to enjoy leftovers, reheating properly is key. Use a saucepan over low heat for best results. Add a splash of water or broth to keep it moist. You can also microwave it, but cover it with a damp paper towel. This helps maintain moisture. Stir occasionally to heat evenly. This way, your flavors and texture will stay great, just like the first time you made it! Shiitake and enoki mushrooms shine in this dish. Shiitake mushrooms are rich and earthy, adding a deep flavor. They also have a meaty texture that enhances the broth. Enoki mushrooms offer a delicate crunch and mild taste, creating a nice contrast. You can also try oyster mushrooms for a buttery flavor. Each type brings its own unique taste, making your ramen even better. Yes, you can use different noodles. Soba noodles are a great choice. They have a nutty flavor that pairs well with the broth. Udon noodles are thicker and chewier, adding a nice bite. Rice noodles work too, especially for gluten-free options. Just cook them according to their package instructions and add them to the broth. Absolutely! You can use gluten-free ramen or rice noodles. Be sure to check the labels for gluten-free options. For the broth, use tamari instead of soy sauce. This provides the same salty flavor without the gluten. Miso paste can also be gluten-free, just verify the brand you choose. To boost umami, add a tablespoon of miso paste to the broth. It gives depth and richness. You can also toss in a few dried shiitake mushrooms while simmering. They will release more flavor into the broth. Adding a splash of soy sauce or a few drops of fish sauce will also enhance that savory taste. These tips will make your ramen even more delicious. For the full recipe, check out the detailed cooking instructions. In this guide, we explored the elements that make a delicious ramen dish. We covered key ingredients like noodles, mushrooms, and broth. You learned how to cook the noodles and sauté the aromatics for rich flavor. We also shared tips to enhance taste, serve beautifully, and store leftovers. Ramen is versatile and fun to customize. Whether you add protein or adjust spices, your dish will shine. Experiment with different ingredients to create your perfect bowl. Enjoy your ramen journey!

Asian Mushroom Ramen Noodles Flavorful Comfort Dish

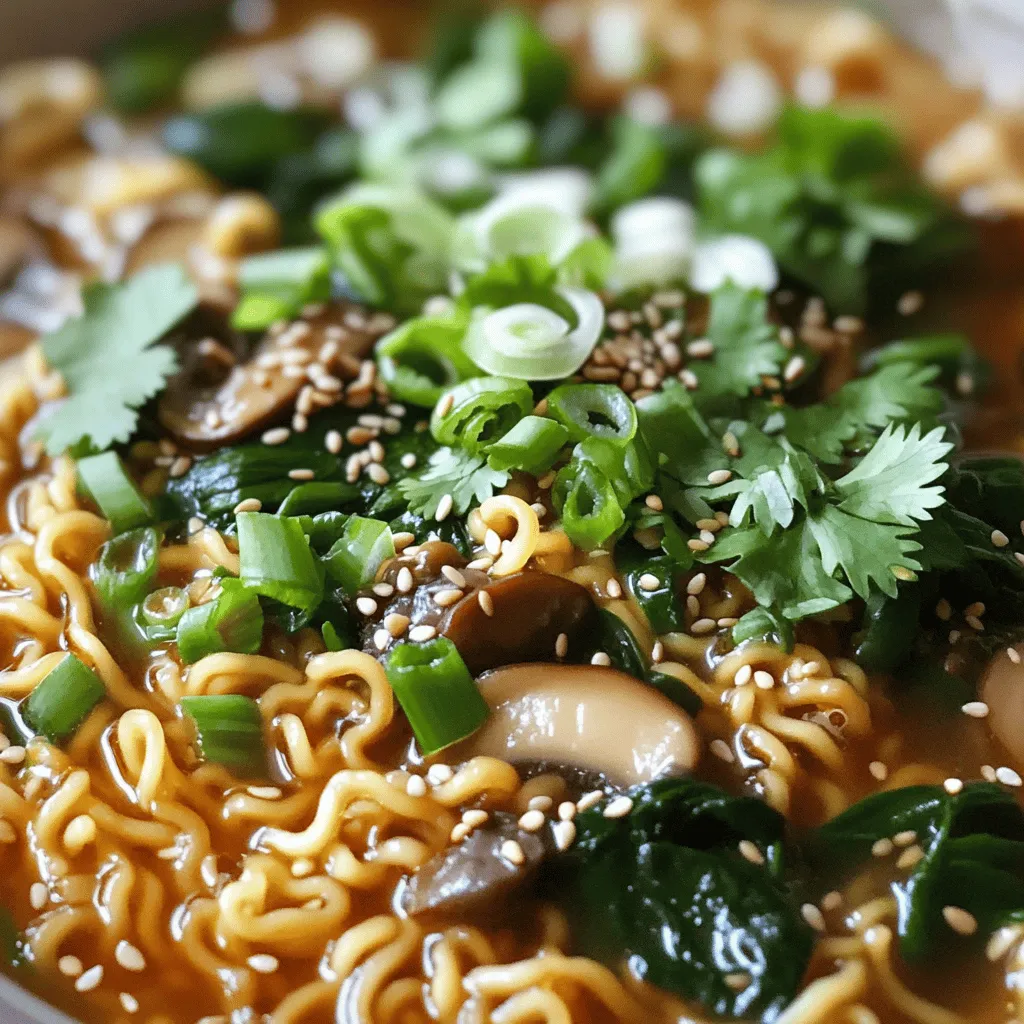
Are you ready for a bowl of steaming goodness? My Asian Mushroom Ramen Noodles are the perfect comfort dish to

To create the best herb and garlic swirl rolls, you need simple yet flavorful ingredients. Here’s the list: - 3 cups all-purpose flour - 1 packet (2 ¼ teaspoons) instant yeast - 1 teaspoon sugar - 1 teaspoon salt - 1 cup warm milk (110°F) - 3 tablespoons unsalted butter, melted - 2 cloves garlic, minced - 2 tablespoons fresh parsley, finely chopped - 1 tablespoon fresh rosemary, finely chopped - 1 tablespoon fresh thyme, finely chopped - ½ teaspoon black pepper - 1 egg (for egg wash) These ingredients blend together to create a rich dough. The warm milk helps to activate the yeast. Using fresh herbs adds a burst of flavor that makes these rolls truly special. You can find the full recipe to guide you through the steps. - Combine warm milk, sugar, and yeast for frothy consistency. - Wait 5 minutes after mixing. Start with warm milk, around 110°F. It should feel warm to the touch, not hot. Add one teaspoon of sugar and one packet of instant yeast. Stir it gently, then set it aside. After 5 minutes, it will look foamy. This frothy mix shows that your yeast is active. It means your dough will rise well. - Add melted butter, salt, and flour to the yeast mixture. - Mix and knead to form a soft dough. Next, add three tablespoons of melted butter and one teaspoon of salt to the yeast mix. Then, add two cups of all-purpose flour. Stir this together until it forms a thick paste. Gradually add more flour, mixing until the dough pulls away from the bowl. Knead it on a floured surface for about 5 to 7 minutes. You want a soft and smooth dough that springs back when you poke it. - Let the dough rise for an hour until doubled. - Prepare and set aside herb-garlic filling mixture. Now, shape the dough into a ball and place it in a greased bowl. Cover it with a clean cloth. Let it rise in a warm spot for about an hour. The dough should double in size. While this happens, mix your filling. In a bowl, combine minced garlic, chopped parsley, rosemary, thyme, and black pepper. Set this aside for later. - Roll out the dough into a rectangle. - Spread the filling and cut into equal pieces. After the dough rises, punch it down gently to release air. Roll it out on a floured surface. Aim for a rectangle about 12x18 inches. Spread melted butter on the surface, then sprinkle the herb-garlic mixture evenly. Roll the dough tightly from the long edge into a log. Pinch the seam to seal it. - Allow rolls to rise for another 30-40 minutes. - Proceed to bake until golden brown. Cut the log into 12 equal pieces. Place these cut-side up in a greased baking dish. Cover again with a cloth and let them rise for another 30 to 40 minutes. Preheat your oven to 375°F (190°C) while the rolls are rising. Just before baking, whisk one egg and brush it on top of the rolls for a nice finish. Bake for 20 to 25 minutes until they turn golden brown. Enjoy your delicious Herb & Garlic Swirl Rolls! For more details, check the Full Recipe. - Use fresh herbs for enhanced flavor. Fresh herbs make your rolls taste alive and bright. I love using parsley, rosemary, and thyme. They add a nice depth to the rolls. - Knead dough thoroughly for a better texture. Kneading helps develop gluten, which makes the rolls fluffy. Aim to knead for 5-7 minutes until the dough is smooth. You’ll feel it become more elastic under your hands. - Pair with garlic butter for added flavor. Garlic butter complements these rolls perfectly. Just melt butter and mix in minced garlic. Brush it on while the rolls are warm. - Best served warm or slightly cooled. I find these rolls taste best fresh out of the oven. The flavors are at their peak, and the texture is soft. For a delightful treat, serve them with a sprinkle of fresh herbs on top. {{image_2}} Want to add a cheesy twist? You can easily make cheese herb and garlic swirl rolls. Just mix in mozzarella or cheddar cheese with your herb filling. The gooey cheese adds a delightful richness. It melts perfectly and enhances the flavor. You’ll have a savory treat that everyone will love! For a healthier option, try whole wheat herb and garlic swirl rolls. Simply substitute half the all-purpose flour with whole wheat flour. This gives the rolls a nutty flavor and more fiber. The texture will be hearty yet still fluffy. You can enjoy a guilt-free indulgence while savoring the delicious taste. If you want a kick, make spicy herb and garlic swirl rolls. Just add red pepper flakes to the filling mix. This simple change brings heat to the rolls. The spicy flavor pairs well with the herbs and garlic. It creates a fun surprise in every bite! For more ideas, check out the Full Recipe for detailed steps. After baking your Herb & Garlic Swirl Rolls, let them cool. Then, store them in an airtight container at room temperature. They stay fresh for 2-3 days. This method keeps them soft and tasty for your next meal. Want to keep them longer? You can freeze the rolls. This works for both unbaked and baked rolls. Place them in a freezer bag or container for up to 2 months. When you are ready to enjoy, reheat them in the oven. This method helps restore their soft texture and warm flavor. Yes, just ensure to activate it properly. To do this, dissolve the active dry yeast in warm milk with sugar. Let it sit for about 5 minutes until it becomes frothy. This step is key for a good rise. Make sure to knead well and allow to rise adequately. Knead the dough for about 5-7 minutes to develop the gluten. This makes the rolls soft and airy. Let the dough rise in a warm spot until it doubles in size. This can take about an hour. Patience pays off! Yes, they freeze well both before and after baking. You can freeze the unbaked rolls after shaping them. Just cover them well and pop them in the freezer. When ready to bake, let them thaw and rise first. If you freeze baked rolls, wrap them tightly. Reheat in the oven for the best taste and texture. You now have a simple, tasty recipe for herb and garlic swirl rolls. We covered important steps like activating the yeast and preparing the dough. Fresh herbs and proper kneading bring great flavor and texture. You can explore different variations to suit your taste. Remember, these rolls store well, making them perfect for future meals. Enjoy baking and savoring each warm roll! Cooking at home can be fun and rewarding. Happy baking!

Herb & Garlic Swirl Rolls Fluffy and Flavorful Treat

If you crave a warm, fluffy treat that bursts with flavor, you’re in the right place. My Herb & Garlic

- 4 large russet potatoes, peeled and diced - 1 medium onion, chopped - 2 cloves garlic, minced - 4 cups chicken or vegetable broth - 1 cup heavy cream - 1 tablespoon Cajun seasoning - 1 teaspoon smoked paprika - 1/2 teaspoon cayenne pepper (adjust for spice preference) - 1 cup corn kernels (fresh or frozen) - 1/2 cup diced green bell pepper - 1/4 cup chopped green onions (for garnish) - Salt and pepper to taste - 2 tablespoons olive oil When cooking, the right measurements matter. For potatoes, select large russet ones. They give a creamy texture. Use one medium onion for a good base flavor. Two cloves of garlic add depth. For the broth, you can choose chicken or vegetable, both work well. Heavy cream adds richness, so don’t skip it. Cajun seasoning is your key spice here. Smoked paprika gives a unique taste, while cayenne pepper adds heat. Adjust the cayenne to fit your spice level. Corn adds sweetness, and green bell pepper brings crunch. Use fresh or frozen corn based on what's handy. Finally, season to taste with salt and pepper. If you need to swap ingredients, here are some ideas: - Potatoes: Yukon gold or red potatoes can work. - Broth: Use water with seasonings if broth is not available. - Cream: Coconut cream is a great dairy-free option. - Cajun seasoning: Make your own blend with paprika, garlic powder, and oregano. - Corn: You can use peas if corn isn’t available. - Green bell pepper: Any color bell pepper will do, or skip it for a simpler soup. Using these substitutions keeps the dish tasty and satisfying. Explore different blends to find what you love! To start, gather your ingredients. You'll need four large russet potatoes, a medium onion, and two cloves of garlic. Also, have four cups of chicken or vegetable broth ready. Don't forget the heavy cream, Cajun seasoning, smoked paprika, and cayenne pepper. You will also need corn kernels and a diced green bell pepper. Lastly, chop some green onions for garnish. Next, peel and dice the potatoes. Chop the onion and mince the garlic. If you are using fresh corn, you should cut it off the cob. Heat two tablespoons of olive oil in a large pot over medium heat. Add the chopped onion and diced bell pepper. Sauté these for about five minutes until they soften. Now, stir in the minced garlic and cook for one more minute until it smells great. Add the diced potatoes, chicken or vegetable broth, Cajun seasoning, smoked paprika, and cayenne pepper. Bring this mixture to a boil. Then, reduce the heat and let it simmer for about twenty minutes. The potatoes should be tender when done. After the potatoes cook, grab an immersion blender. Blend the soup until it is as smooth or chunky as you like. Stir in the corn kernels and heavy cream. Let the soup simmer for another five minutes to heat everything through. Remember to taste it and adjust the seasoning with salt and pepper as needed. Serve the soup hot and sprinkle chopped green onions on top. Enjoy your flavorful and hearty Cajun potato soup! For the complete recipe, see the [Full Recipe]. To boost the taste of your Cajun potato soup, use good quality broth. Homemade broth adds rich flavor. A splash of hot sauce can also enhance the spice. If you love herbs, try adding fresh thyme or parsley. These herbs brighten the soup and add depth. When cooking potatoes, choose russet potatoes for their creamy texture. Cut them into even-sized pieces. This helps them cook evenly. Don’t rush the cooking time; let them simmer until tender. For a creamier soup, blend the potatoes longer. Serve your soup hot with crusty bread on the side. Cornbread pairs well, adding a sweet touch. For a fun twist, top with crispy bacon bits or shredded cheese. You can also offer a dollop of sour cream for a creamy finish. Enjoy your flavorful meal with family and friends! {{image_2}} You can change up your Cajun potato soup with fun add-ins. Try adding cooked sausage for a meaty touch. Shrimp is another great choice. It adds a nice seafood flavor. You can also toss in some diced tomatoes. They add sweetness and color. If you like greens, stir in some spinach or kale. They cook down well and add nutrients. To make this soup vegetarian, use vegetable broth instead of chicken broth. Swap heavy cream with coconut milk for a creamy texture. This gives a nice twist and keeps it dairy-free. You can also add more veggies like carrots or celery. They boost flavor and make it heartier. This way, you get a delicious meal that everyone can enjoy. Adjust the spice levels to fit your taste. If you want it mild, skip the cayenne pepper. You can also use less Cajun seasoning. For more heat, add more cayenne or even hot sauce. Experiment with different spices to find your favorite mix. Remember, cooking is all about personal taste. Enjoy finding your perfect flavor! After you enjoy your Cajun potato soup, store it in an airtight container. Let the soup cool to room temperature first. Place the lid on tightly and keep it in the fridge. It will stay fresh for about three to four days. If you want to keep it longer, consider freezing it. To reheat the soup, pour it into a pot. Heat it over medium-low heat. Stir often to avoid sticking. You can also use a microwave. Place the soup in a microwave-safe bowl. Cover it loosely and heat for 1 to 2 minutes. Stir halfway through to heat evenly. If you want to freeze your Cajun potato soup, let it cool completely. Use freezer-safe containers or bags. Leave some space at the top for expansion. Label the bags with the date. This soup can stay good for up to three months in the freezer. When ready to eat, thaw it in the fridge overnight before reheating. Enjoy your flavorful soup any time! For the full recipe, check out the details above. Cajun potato soup is a rich and hearty dish. It combines potatoes, broth, and Cajun spices. The soup has a creamy base, thanks to heavy cream. You can taste the warmth of Cajun flavors in every bite. It also contains corn, onions, and peppers for added texture. This soup is perfect for chilly nights. It warms you up inside and out. Yes, you can easily make this recipe gluten-free. Use gluten-free broth instead of regular broth. Check the Cajun seasoning to ensure it is gluten-free. Most brands are safe, but it’s good to verify. All other ingredients in this recipe are naturally gluten-free. This makes it simple to enjoy without worry. To make Cajun potato soup spicier, add more cayenne pepper. Start with an extra 1/4 teaspoon and taste it. You can also use a spicier Cajun seasoning blend. If you want more heat, add diced jalapeños when cooking. For an extra kick, top with hot sauce before serving. Adjust spice to fit your taste! We’ve covered everything you need to make Cajun Potato Soup. You learned about key ingredients, preparation, and cooking methods. I shared tips for boosting flavor and ways to adapt the recipe. You now know how to store and reheat your soup, and answered common questions. This soup is simple, tasty, and perfect for any meal. Try it out, and enjoy the warm, spicy goodness.

Cajun Potato Soup Flavorful and Hearty Meal

Welcome to a taste of the South! This Cajun Potato Soup is both flavorful and hearty, perfect for any meal.

To make Healthy Apple Nachos, you will need: - 2 large apples (like Fuji or Honeycrisp), sliced - 1/4 cup natural almond butter (or peanut butter) - 1 tablespoon honey (or maple syrup for vegan option) - 1/4 cup granola (your choice) - 2 tablespoons mini dark chocolate chips (optional) - 1 tablespoon chia seeds or sunflower seeds - 1/2 teaspoon cinnamon - Fresh mint leaves for garnish (optional) These ingredients come together to create a sweet and crunchy treat. For apples, I love using Fuji or Honeycrisp. They are sweet and crisp. When it comes to nut butter, brands like Justin's or Skippy offer great options. For honey, local raw honey adds a nice touch. If you're vegan, try maple syrup from brands like Grade A or Grade B. For granola, I recommend Nature Valley or Purely Elizabeth for tasty choices. You can swap out apples for pears or bananas if you want. Any nut butter works, too, like cashew or sunflower butter. If you want a different sweetener, agave syrup is a great choice. Instead of granola, you can use crushed nuts or seeds for crunch. You can skip chocolate chips for a lighter version or use dried fruit instead. Start by washing the apples well. This step is key for freshness. Next, remove the core from each apple. Slice them into thin, even rounds. Aim for about 1/4 inch thick. Arrange the apple slices in a single layer on a large plate. This makes them easy to top later. In a small bowl, add the almond butter. You can also use peanut butter if you prefer. Measure out 1/4 cup and place it in the bowl. Then, add 1 tablespoon of honey or maple syrup for a vegan version. Warm the mixture in the microwave for 15 to 20 seconds. Stir until it blends well and becomes smooth. Drizzle the almond butter mixture over the sliced apples. Make sure to coat them well. Next, sprinkle the granola evenly across the apple slices. If you like, add mini dark chocolate chips for a sweet touch. Then, sprinkle chia seeds or sunflower seeds on top. Finally, dust 1/2 teaspoon of cinnamon over everything. This adds a warm flavor. If you want, garnish with fresh mint leaves for a lovely finish. Enjoy your Healthy Apple Nachos! Check out the Full Recipe for more details. To get the best apple slices, use a sharp knife. Cut each apple into even rounds. Aim for a thickness of about a quarter-inch. This size helps with topping coverage and keeps them sturdy. If you want, you can use a mandoline for even slices. Just be careful with your fingers! You can make your apple nachos unique with extra toppings. Try adding nuts for crunch. Walnuts or almonds work well. Dried fruit like cranberries or raisins adds sweetness. For a fun twist, use yogurt instead of almond butter. This gives a creamy texture and a different flavor. Serve the nachos on a big plate to show off the colors. Arrange the apple slices in a circle for a nice look. Drizzle the almond butter mix over the apples in a zigzag. Sprinkle toppings evenly to make them pop. For a touch of green, add mint leaves on top. This makes your dish not just tasty but pretty too. {{image_2}} You can make apple nachos vegan and nut-free easily. Swap almond butter for sunflower seed butter. Use maple syrup instead of honey. This way, you keep the flavor and stay plant-based. Mix flavors to make your nachos special. Try adding dried fruit like cranberries or raisins. You could also use coconut flakes for a tropical twist. For a spicy kick, add a dash of cayenne pepper. Each choice brings new taste to your snack. Use seasonal fruits to change your nachos with the times. In fall, add sliced pears or pomegranate seeds. In winter, sprinkle on some citrus zest for brightness. Fresh berries in summer make a colorful and tasty topping. These additions keep your nachos fresh and fun. For the full recipe, check out how to make Healthy Apple Nachos! To keep your healthy apple nachos fresh, store them right. Use an airtight container. This limits air exposure, which can make apples brown. If you want to keep them crunchy, add toppings later. Store sliced apples separately from the almond butter and other toppings. If you have leftover apple nachos, place them in a sealed container. It’s best to keep them in the fridge. Avoid adding toppings until you're ready to eat. This helps maintain texture and flavor. The almond butter can be stored in a separate jar. Healthy apple nachos stay fresh for about one day in the fridge. After that, the apples may get too soft. To enjoy them best, aim to eat them on the same day they are made. For the full recipe, check back to make these tasty snacks! Yes, you can use many types of apples for this recipe. Fuji and Honeycrisp are my favorites. They are sweet and crisp. Other good choices include Gala, Granny Smith, and Braeburn. Each type gives a unique taste and texture. You can mix different apples for more flavor. Just remember to choose fresh apples for the best crunch. If you want to skip chocolate chips, try these options. You can use dried fruit like raisins or cranberries. They add natural sweetness and chew. Chopped nuts or seeds also work well. They bring crunch and healthy fats. You can even add coconut flakes for a tropical twist. Each alternative boosts flavor without added sugar. Making apple nachos gluten-free is easy! All the ingredients in the recipe are naturally gluten-free. Just ensure your granola is gluten-free. Many brands offer great options. Always check the label to be safe. This way, you can enjoy this tasty snack without worry. This blog post shared how to make delicious apple nachos. We explored the essential ingredients and helpful brands. I offered easy steps to prepare the apples and mix almond butter. You can customize your nachos with yummy toppings and variations. We also covered how to store leftovers to keep them fresh. In the end, apple nachos are a fun and tasty snack. Enjoy making them your way, and share with friends!

Healthy Apple Nachos Simple and Tasty Snack Idea

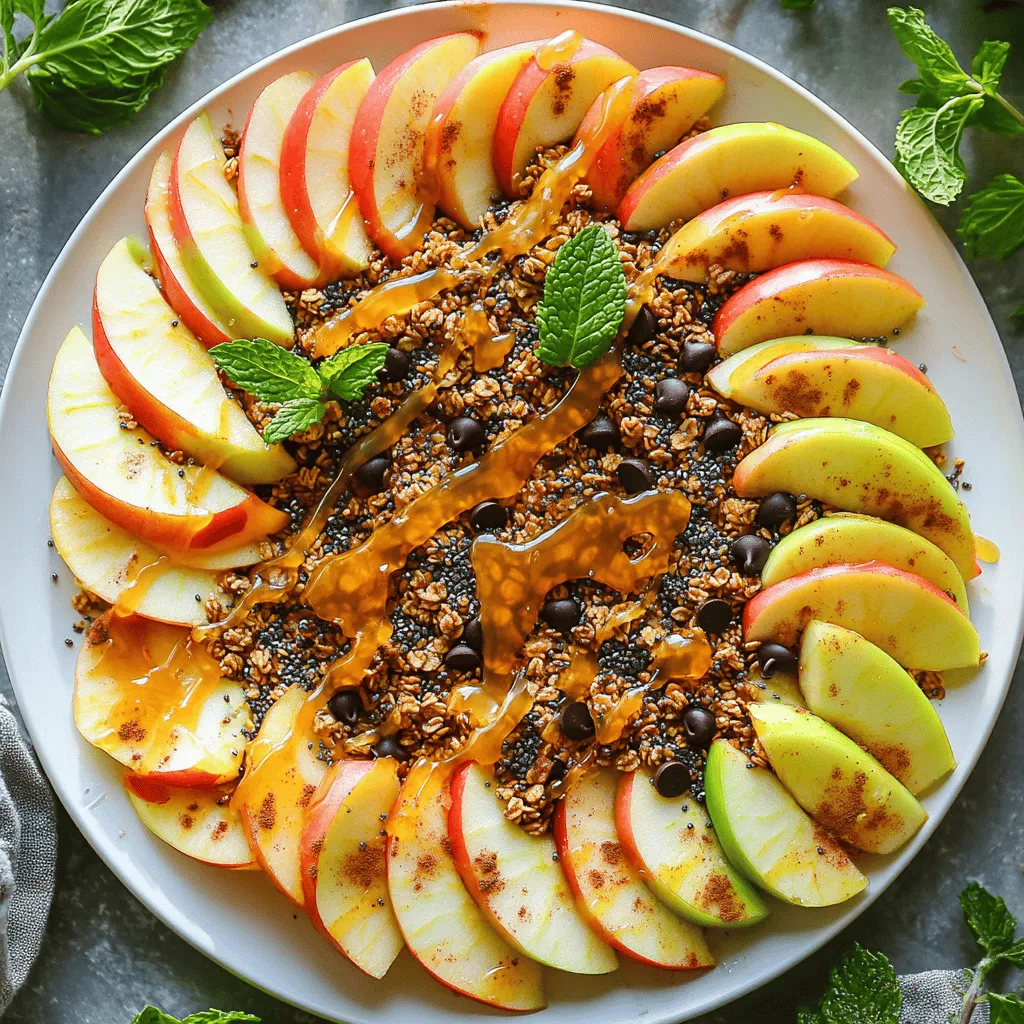
If you’re looking for a fun and healthy snack, you’ve come to the right place! Healthy Apple Nachos are a

To make Milk and Cookies Fudge, you will need: - 1 cup sweetened condensed milk - 2 cups white chocolate chips - 1 cup crushed chocolate chip cookies - 1/2 teaspoon vanilla extract - Pinch of salt - 1/4 cup rainbow sprinkles (for topping) These ingredients work together to create a sweet and creamy treat. The sweetened condensed milk forms the base. The white chocolate chips add smoothness and sweetness. The crushed cookies give texture and flavor. Vanilla extract enhances the taste, while a pinch of salt balances the sweetness. Rainbow sprinkles add a fun and colorful touch. You can easily swap some ingredients if you need to. - Alternative sweeteners: You can use honey or maple syrup instead of sweetened condensed milk for a different taste. - Different types of chocolate: If you prefer, use milk chocolate or dark chocolate chips. Each will give a unique flavor. - Types of cookies to use: You can try other cookies like Oreo or peanut butter cookies. Each will create a unique fudge flavor. To prepare your fudge, you will need a few simple tools: - Medium saucepan - 8-inch square baking dish - Rubber spatula Using the right tools makes the process easier. A medium saucepan helps melt the chocolate evenly. An 8-inch baking dish is perfect for setting the fudge. A rubber spatula is great for mixing and spreading the fudge smoothly. For the full recipe, check out the detailed steps to create this tasty treat! Choose an 8-inch square baking dish for the best shape. This size helps the fudge set evenly. Next, line the dish with parchment paper. Leave some paper hanging over the sides. This makes it easy to lift the fudge out later. Use low heat when melting the chocolate. High heat can burn the chocolate and ruin the fudge. Stir the mixture often. This helps it melt evenly and become smooth. If you notice lumps, keep stirring. The goal is to have a creamy texture. Once the chocolate is smooth, remove it from the heat. Stir in the vanilla extract and a pinch of salt. This adds depth to the flavor. Now, fold in the crushed chocolate chip cookies. Make sure they are evenly distributed. Pour the mixture into the prepared pan. Use a rubber spatula to spread it out evenly. This ensures every bite is delicious. To make the best milk and cookies fudge, avoid common mistakes. One big mistake is cooking at too high a heat. This can burn the chocolate. Instead, keep the heat low. It helps the chocolate melt without clumping. Monitor the cooking temperature closely. Use a thermometer to check the heat. The ideal temperature is around 120°F. This keeps the chocolate smooth and creamy. You can serve fudge in fun ways. Cut it into small squares and place them on a colorful plate. This makes a great display. You can also garnish each piece with extra sprinkles for a pop of color. Pair the fudge with a glass of milk. It creates a fun "cookies and milk" theme. You can also serve it with coffee or tea. The rich flavors go well together. To boost the flavor of your fudge, try different extract options. Almond extract adds a lovely twist. You can also use peppermint for a fresh taste. Adding spices can change the whole vibe. A pinch of cinnamon or nutmeg can make your fudge special. Experiment with what you love. Each small change can lead to great results! {{image_2}} You can use different types of chocolate for your fudge. Milk chocolate adds a sweeter taste, while dark chocolate gives a richer flavor. Both options work well with the other ingredients. You can also swirl in peanut butter. This adds a creamy texture and a nutty taste. Just drop spoonfuls of peanut butter into the fudge and swirl with a knife for a fun pattern. Try using different cookie types to change the flavor. Oreos, peanut butter cookies, or even snickerdoodles work great. Each cookie brings its own twist to the fudge. You can also add nuts or dried fruit. Walnuts, almonds, or raisins add a nice crunch and extra flavor. Just make sure to chop the nuts finely so they mix well. You can make your fudge fit special occasions. Use holiday-themed sprinkles for a festive look. Red and green for Christmas or pastel colors for Easter make it fun. Also, play with flavor combinations. Try adding peppermint extract for winter holidays or orange zest for summer parties. These small changes can make your fudge stand out at any event. To keep your milk and cookies fudge fresh, store it in an airtight container. This will help maintain its taste and texture. You can use a glass or plastic container with a tight lid. If you don’t have one, wrap the fudge tightly in plastic wrap. Make sure no air can get in, as this can cause it to dry out. When stored correctly, your fudge will last about one week at room temperature. If you keep it in the fridge, it can last up to two weeks. Always check for freshness. Signs that your fudge is still good include a soft texture and a sweet smell. If it feels hard or has a strange odor, it’s best to throw it away. You can freeze your fudge if you want to keep it longer. To freeze, cut the fudge into squares and place them in a single layer on a baking sheet. Freeze for about two hours, then transfer the pieces to an airtight container or freezer bag. This will prevent them from sticking together. When you want to eat the fudge, remove it from the freezer. Let it thaw in the fridge for a few hours. For the best taste, avoid thawing it in the microwave, as that can change the texture. Enjoy your delicious treat any time! Yes, you can use different types of milk. Almond milk or coconut milk works well. They give a nice flavor too. Just make sure they are unsweetened. This way, your fudge stays sweet and tasty. The fudge needs to chill for at least 2 hours. Chilling helps it set properly. This gives the fudge its nice texture. If you skip this step, your fudge may end up too soft. You can make this fudge ahead of time. It is perfect for parties or special events. Just store it in an airtight container. This keeps it fresh until you are ready to serve. If your fudge is too soft, try chilling it longer. This can help it firm up. You can also add more crushed cookies to thicken it. If it’s still too soft, consider melting it again and adding more chocolate. This blog post covered how to make a delicious fudge using simple ingredients. You learned about the perfect blend of sweetened condensed milk, chocolates, and cookies. I shared tips for making great fudge, including storage and variations. Experimenting with flavors can take your fudge to the next level. Remember, enjoy the process! Making fudge should be fun and rewarding. With these tips, you can create a treat your friends and family will love. Happy baking!

Milk and Cookies Fudge Simple and Delicious Treat

Craving a sweet treat that combines nostalgia and fun? Look no further than Milk and Cookies Fudge! This simple and

- 3 medium zucchinis - 1 cup grated Parmesan cheese - 1 cup breadcrumbs - 2 tablespoons olive oil - 2 teaspoons garlic powder - 1 teaspoon Italian seasoning - Salt and pepper to taste - Fresh parsley, finely chopped Baked Parmesan Zucchini uses simple and fresh ingredients. The star of this dish is the zucchini. Choose firm zucchinis for the best results. They should feel heavy and have smooth skin. Next, we need the cheese. Grated Parmesan adds a strong and savory flavor. It pairs well with the zucchini. The breadcrumbs create a crispy coating. They provide texture and crunch. Use whole wheat for a healthier option. For seasonings, we have olive oil, garlic powder, and Italian seasoning. Olive oil helps the coating stick. Garlic powder brings rich flavor without overpowering. Italian seasoning adds herbs that complement the dish. Salt and pepper are essential. They enhance all the flavors. Finally, fresh parsley adds color and a fresh taste. It makes the dish look pretty too. This mix of ingredients creates a delicious snack. It is easy to make and fun to eat. You can find the Full Recipe for more details on how to prepare this tasty dish. 1. Preheat your oven to 400°F (200°C). This helps the zucchini cook evenly. 2. Line a large baking sheet with parchment paper. This makes cleanup easy. 3. In a large bowl, mix together grated Parmesan cheese, breadcrumbs, garlic powder, Italian seasoning, salt, and pepper. Stir well to blend the flavors. 1. Take your sliced zucchinis and drizzle them with olive oil. Toss them gently so they are well coated. 2. Now, dip each zucchini slice into the cheese mixture. Press lightly to make sure the mix sticks. 1. Place the coated zucchini slices on the prepared baking sheet in a single layer. 2. Bake in your preheated oven for 20-25 minutes. You want them tender with golden brown tops. 3. Once done, let them cool for a couple of minutes, then transfer to a serving platter. Enjoy this crispy and flavorful snack! For the complete recipe, check out the [Full Recipe]. To make your Baked Parmesan Zucchini crispy, use breadcrumbs. They create a nice crust. I prefer whole wheat breadcrumbs for extra texture and flavor. The right oven temperature is key too. Set your oven to 400°F (200°C). This heat cooks the zucchini and crisps the topping. Adjust seasonings to suit your taste. If you love garlic, add more garlic powder. You might also try adding cayenne pepper for a kick. Fresh herbs can make a big difference. Basil, oregano, or thyme can enhance the dish. Experiment with what you enjoy most! Baked Parmesan Zucchini pairs well with dips. Try marinara or a yogurt-based dip. They add a nice contrast to the zucchini's flavor. As for side dishes, serve them alongside grilled chicken or a fresh salad. This makes for a balanced meal that everyone will enjoy. {{image_2}} You can switch up the cheese to make this dish more fun. Try using mozzarella for a stretchy texture. Feta cheese adds a nice tang. To spice things up, mix in red pepper flakes or cayenne. These add heat without changing the dish's base flavor. If you're looking for gluten-free options, use almond flour instead of breadcrumbs. This keeps the crunch while being more nutritious. For a low-calorie twist, cut back on cheese or use less oil. You can still enjoy the taste without the extra calories. Take advantage of seasonal veggies to enhance your dish. Try adding sliced bell peppers or cherry tomatoes. These will give new flavors and colors. Adjust your spices based on what’s fresh. For summer, consider adding fresh basil or dill. In winter, use thyme or rosemary for a cozy touch. For the complete recipe, check out Baked Parmesan Zucchini Delight. To keep baked Parmesan zucchini fresh, store it in an airtight container. Place it in the fridge. It stays good for about 3 to 4 days. If you want the best taste, eat it sooner. When reheating, the oven is your best friend. Set it to 350°F (175°C) and bake for about 10 minutes. This keeps the zucchini crispy. Avoid the microwave if possible. It can make your snack soggy. You can freeze baked zucchini, but follow some steps. First, let it cool completely. Then, place the pieces in a single layer on a baking sheet. Freeze for about 1 hour. After that, transfer them to a freezer bag. They last up to 3 months. To cook frozen zucchini, thaw it in the fridge overnight. Then, reheat it in the oven for best results. Enjoy your tasty snack anytime! Yes, you can use frozen zucchini. First, thaw the zucchini completely. You should place it in the fridge overnight or run it under cold water. Once thawed, squeeze out excess water. Too much moisture can make the zucchini soggy. Then, follow the same steps as in the Full Recipe. This will help the flavors mix well when you coat the zucchini. If you need a different cheese, try nutritional yeast. It gives a cheesy flavor and is vegan. You can also use cashew cheese or almond cheese. These options are great for non-dairy diets. You can even use a mix of other hard cheeses if you want a different taste. Look for a golden brown top and crisp edges. The zucchini should feel tender when pierced with a fork. If you see a nice crust, it’s ready to eat! Baking for 20-25 minutes usually works well. But, keep an eye on it to avoid burning. You’ve learned how to make baked zucchini with simple steps. We covered ingredients, seasoning, and baking tips. Storing and reheating your leftovers was also discussed. Remember, you can adjust flavors and play with variations. Feel free to get creative with this dish! Enjoy your healthy snack with different dips or sides. This recipe offers so much room for fun and flavor. Dive into the joy of cooking and make it your own!

Baked Parmesan Zucchini Crispy and Flavorful Snack

Are you looking for a quick, tasty snack? Baked Parmesan Zucchini is your answer! This simple recipe combines crunchy zucchini,

- 2 cups cooked rice (jasmine or basmati) - 2 large chicken breasts, diced - 1 cup broccoli florets - 1 cup bell peppers, sliced (mix of red and yellow for color) - 1 cup snap peas - 1 tablespoon sesame oil - 1 cup teriyaki sauce (store-bought or homemade) - 1 teaspoon fresh ginger, grated - 2 garlic cloves, minced - 1 cup shredded mozzarella cheese - 2 tablespoons green onions, chopped (for garnish) - Sesame seeds (for garnish) - Salt and pepper to taste Use fresh vegetables for the best flavor. Choose chicken that is free from hormones. For teriyaki sauce, homemade is great if you have the time. It tastes better than store-bought. If you use store-bought, pick one that has no added sugars or preservatives. Fresh ginger adds a nice kick. Don't skip the garlic. It enhances the dish’s overall taste. You can swap chicken for tofu for a vegetarian dish. Quinoa or cauliflower rice can replace regular rice for a low-carb option. For the sauce, soy sauce works in a pinch if you run out of teriyaki sauce. If you don't have bell peppers, try zucchini or carrots. You can use any cheese you like, but mozzarella melts best. First, set your oven to 375°F (190°C). This step is key for even cooking. While it warms up, prepare your dish. In a large skillet, pour in one tablespoon of sesame oil. Heat it over medium heat. Add two diced chicken breasts, seasoned with salt and pepper. Cook for 5-7 minutes. You want the chicken to brown and be fully cooked. Once the chicken is cooked, add two minced garlic cloves and one teaspoon of grated fresh ginger. Cook for one more minute to release their flavors. Next, stir in one cup of broccoli florets, one cup of sliced bell peppers, and one cup of snap peas. Cook for about 3-4 minutes. The veggies should be tender but still crisp. Grab a large mixing bowl. Combine the cooked rice, the chicken and vegetable mix, and one cup of teriyaki sauce. Stir everything well. Make sure every piece is coated in that tasty sauce. Take your greased 9x13 inch casserole dish. Pour the combined mixture into it, spreading it evenly. Top it off with one cup of shredded mozzarella cheese. This will melt beautifully in the oven. Cover the casserole with aluminum foil. Bake it for 20 minutes in your preheated oven. After that, remove the foil and bake for 10-15 more minutes. You want the cheese to be bubbly and golden brown. Now your Teriyaki Chicken Casserole is ready to serve! To make the chicken juicy, start with fresh, high-quality chicken breasts. Cut them into even pieces. This helps them cook at the same rate. Sear the chicken in sesame oil over medium heat. This locks in flavor and moisture. Season the chicken with salt and pepper while it cooks. This adds taste right from the start. Avoid overcooking it. Perfectly cooked chicken should be golden brown, tender, and juicy. For great flavor, use fresh vegetables. Broccoli, bell peppers, and snap peas add color and crunch. Cut them into bite-sized pieces for even cooking. Stir-fry the veggies quickly after adding garlic and ginger. This keeps them crisp and bright. Avoid cooking them too long. You want them tender but still crunchy. The bright colors and fresh taste will shine in your dish. A good cheese topping makes the casserole even better. I recommend using mozzarella for its nice melt. It gives a creamy texture that pairs well with teriyaki sauce. You can also mix in some sharp cheddar for a bit of bite. If you want a twist, try adding pepper jack for heat. Spread the cheese evenly on top before baking. This helps it melt nicely and creates a golden, bubbly crust. For a fun finish, sprinkle sesame seeds on top for extra crunch and flavor. For full details on making this dish, check the Full Recipe. {{image_2}} If you want a low-carb dish, swap rice for cauliflower rice. Cauliflower rice keeps the texture while lowering carbs. You can also use shredded zucchini or spaghetti squash instead. These swaps offer a fresh take on your casserole. For a vegetarian version, replace chicken with tofu or tempeh. Both soak up flavors well and add protein. You can also add mushrooms for a hearty texture. For a vegan option, ensure your teriyaki sauce is free from animal products. Use nutritional yeast for a cheesy flavor without dairy. To boost flavor, add a splash of lime juice or a dash of chili flakes. Pineapple chunks add sweetness and a tropical twist. You could also mix in chopped cilantro or basil for fresh herb notes. Each enhancement makes your dish unique and memorable. For the full recipe, check out the Teriyaki Chicken Casserole section. To keep your teriyaki chicken casserole fresh, store it in an airtight container. This protects it from odors and keeps it moist. Ensure the casserole is completely cool before sealing it. It can last up to three days in the fridge. When reheating, use the oven for the best taste. Preheat your oven to 350°F (175°C). Place the casserole in an oven-safe dish and cover it with foil. Heat for about 20 minutes or until warmed through. You can also use the microwave, but it may not keep the texture as nice. Heat in short bursts of 1-2 minutes, checking often. To freeze the casserole, let it cool completely. Cut it into portions for easier thawing. Wrap each piece in plastic wrap, then place it in a freezer bag. It can last for up to two months in the freezer. When ready to eat, thaw overnight in the fridge and reheat as mentioned above. Enjoy your delicious meal! Teriyaki Chicken Casserole lasts about three to four days in the fridge. Store it in an airtight container. This helps keep the flavors fresh. Yes, you can. Prepare the casserole and store it before baking. Cover it well and keep it in the fridge. Bake it just before serving for best results. I love serving this casserole with a side of steamed rice or a fresh salad. You can also pair it with crispy wontons or egg rolls for extra crunch. To make teriyaki sauce, mix 1/2 cup soy sauce, 1/4 cup honey, and 1 tablespoon rice vinegar. Add 1 teaspoon minced garlic and 1 teaspoon grated ginger. Simmer for about 10 minutes until it thickens slightly. For the full recipe, you can check out the detailed steps and ingredients [here](#). This blog post covered a delicious Teriyaki Chicken Casserole recipe. You learned about the key ingredients like rice, chicken, and veggies. We also shared cooking steps and handy tips for making it perfect. Remember, feel free to adapt the recipe to suit your taste or diet. This meal is easy to make and sure to please everyone. Enjoy trying this tasty dish with your family and friends!

Teriyaki Chicken Casserole Flavorful and Easy Dish

Looking for a dish that’s both tasty and easy to make? I’ve got you covered! This Teriyaki Chicken Casserole is

Slow Cooker Broccoli Cheese Bliss 🥦 - 4 cups broccoli florets - 1 cup carrots, diced - 1 cup celery, diced - 1 small onion, chopped - 3 cloves garlic, minced - 4 cups vegetable broth - 1 cup heavy cream - 2 cups shredded sharp cheddar cheese - 1 tablespoon Dijon mustard - 1 teaspoon paprika - Salt and pepper to taste - 2 tablespoons olive oil Broccoli is the star of this soup. It gives a bright, fresh taste. The carrots add a touch of sweetness. They also add color and nutrients. Celery brings a nice crunch and depth. Onion and garlic provide a solid base of flavor. They make everything taste better. The vegetable broth is key for a rich liquid. It blends well with the cream and cheese. The heavy cream makes the soup smooth and rich. Sharp cheddar cheese adds a bold taste that melts beautifully. Finally, Dijon mustard and paprika give a hint of spice and tang. You can add a pinch of nutmeg for warmth. A splash of lemon juice brightens the soup. If you like heat, try adding red pepper flakes. For extra creaminess, use cream cheese or a dollop of sour cream at the end. Even a handful of fresh herbs like parsley or chives can elevate the dish. Feel free to mix and match these optional ingredients to suit your taste. Start by gathering your veggies. You need broccoli, carrots, celery, onion, and garlic. Chop the onion, celery, and carrots into small pieces. Heat olive oil in a large skillet. Sauté the chopped onion, celery, and carrots for about five minutes. You want them soft. Then, add minced garlic and cook for one more minute. Once the veggies are soft, move them to the slow cooker. Add the broccoli florets next. Pour in the vegetable broth to cover the veggies. Stir in Dijon mustard, paprika, salt, and pepper for flavor. Cover the slow cooker. Cook on low for four to six hours or high for two to three hours. The broccoli should be tender when it’s done. After cooking, it’s time to blend. Use an immersion blender to puree the soup until smooth. If you like it chunkier, blend it less. Next, add the heavy cream and shredded cheddar cheese. Stir until the cheese melts and the soup is creamy. Taste it and adjust the seasoning with salt and pepper if needed. Let the soup cook on low for another twenty minutes. This helps all the flavors mix well. Now you're ready to enjoy your savory slow cooker broccoli cheese soup! For more details, check the Full Recipe. To make this soup shine, focus on the vegetables. Start by sautéing the onions, carrots, and celery. This step brings out their natural sweetness. Cook them until they are soft, about five minutes. When you add garlic, you’ll get a rich aroma that makes the soup special. Blending the soup creates a smooth texture. If you like chunks, blend only half. This gives you both smooth and hearty bites. Your taste buds should guide your seasoning. If you want more zing, add a bit of lemon juice. A dash of hot sauce can bring some heat. If you love herbs, toss in thyme or rosemary for a fresh taste. Don’t forget to taste the soup as it cooks. Adjust salt and pepper to make it just right. Making a big batch is smart. This soup freezes well! Let the soup cool completely before you store it. Use airtight containers to keep it fresh. When you're ready to eat, thaw it in the fridge overnight. Reheat it on the stove over low heat. Stir it often to keep it smooth. For the best taste, add a little fresh cheese when serving. You can find the full recipe here: [Full Recipe]. {{image_2}} You can make this soup lighter with some easy swaps. Instead of heavy cream, use low-fat milk or almond milk. This keeps the soup creamy but cuts calories. You can also use less cheese. Try one cup of cheese instead of two. This change still gives you great flavor without all the fat. Want to add some protein? Try adding cooked chicken or turkey. Shredded rotisserie chicken works well. If you prefer beans, add white beans for an extra boost. You can also toss in more veggies. Try spinach, peas, or corn for extra color and taste. Just make sure to adjust the cooking time for any new veggies. The cheese you choose can change the soup’s flavor. While sharp cheddar is classic, feel free to experiment. Try gouda for a smoky kick or pepper jack for some heat. If you're looking for a vegan option, use nutritional yeast. It gives a cheesy taste without dairy. You can mix cheeses for a unique blend too! After making your soup, let it cool first. Pour it into airtight containers. This helps keep the soup fresh. Store the containers in your fridge. It stays good for about 3-5 days. Always check for any signs of spoilage before eating. If you want to save some for later, freezing is great. Let the soup cool completely. Use freezer-safe containers or bags. Leave some space at the top for expansion. You can freeze it for up to 3 months. When you're ready to eat, thaw it in the fridge overnight. Reheating soup is simple. You can do it on the stove or in the microwave. For the stove, pour the soup into a pot. Heat it over medium heat, stirring often. In the microwave, use a microwave-safe bowl. Heat on high for 1-2 minutes, stirring halfway through. Always check the temperature before eating. This soup is best served warm. You can store this soup in the fridge for about 3-4 days. Make sure to keep it in an airtight container. If you want to keep it longer, freeze it. It can last up to 3 months in the freezer. Just thaw it in the fridge before reheating. Yes, you can use frozen broccoli. It saves time and is still tasty. Just add it straight to the slow cooker. There’s no need to thaw it first. The soup will still turn out creamy and delicious. This soup pairs well with crusty bread or a fresh salad. You can also enjoy it with grilled cheese sandwiches. For a heartier meal, add a protein like chicken or ham. Each option brings out the flavors of the soup and makes it more filling. This blog post dives into making delicious Slow Cooker Broccoli Cheese Soup. You learned about key ingredients, steps for preparation, and some helpful tips. Each section provided practical advice to enhance flavor and texture. Remember, you can make it your own with healthy swaps or extra veggies. Proper storage ensures this soup stays fresh and tasty. With these insights, you can enjoy a warm and creamy bowl any time. Happy cooking!

Savory Slow Cooker Broccoli Cheese Soup Recipe

If you’re craving a warm and creamy dish, my Savory Slow Cooker Broccoli Cheese Soup is exactly what you need.

Older posts
Newer posts
← Previous Page1 … Page95 Page96 Page97 … Page104 Next →

dsad

© 2025 pureeatsnow • Built with GeneratePress

Our Policies

  • Copyright Policy
  • Cookie Policy
  • GDPR Policy
  • Privacy Policy
  • Disclaimer
  • Terms Of Use

More Information

  • Home
  • About
  • Contact
  • Appetizers
  • Dessert
  • Dinner
  • Drinks
©2025, pureeatsnow About Back To Top