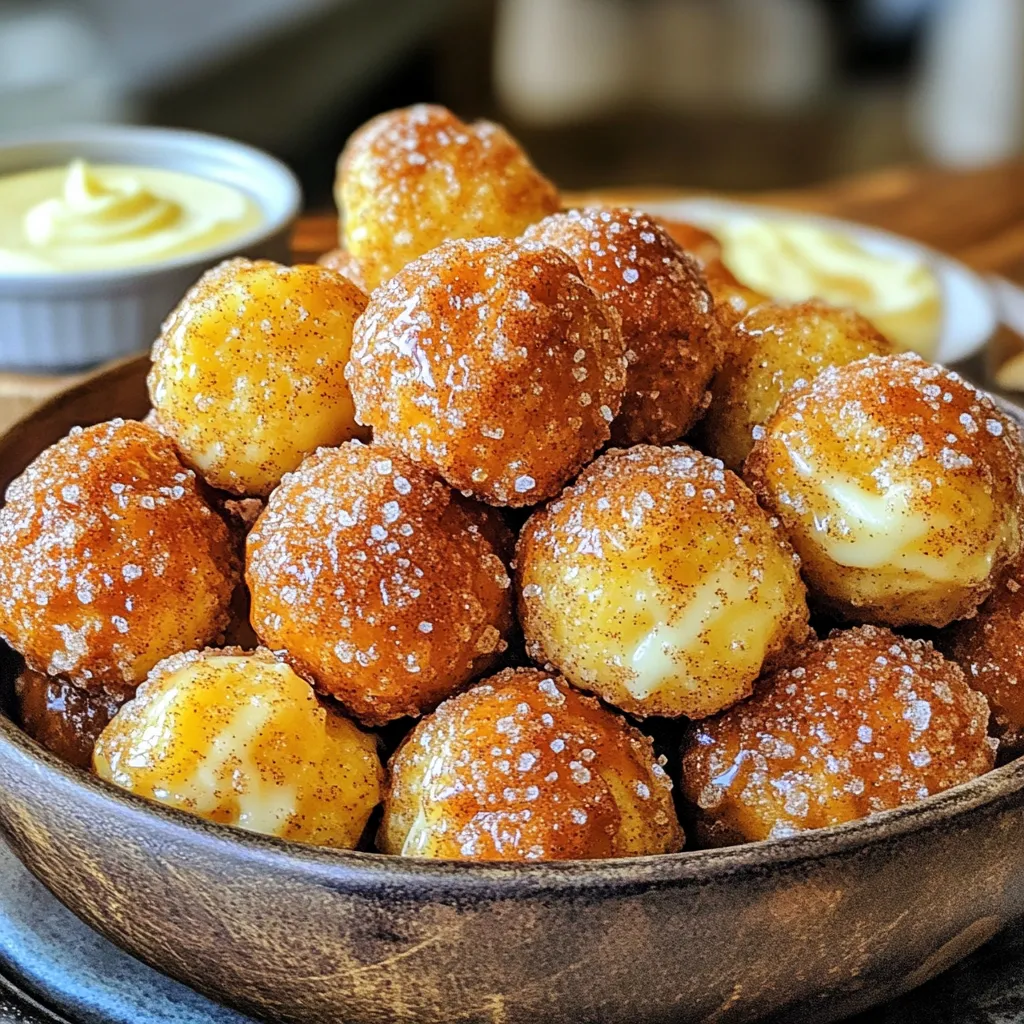
If you crave a warm, sweet snack, these Bakery-Style Cinnamon Sugar Pretzel Bites are for you! They’re soft, chewy, and coated in a perfect blend of cinnamon and sugar. You don’t have to visit a bakery to enjoy these delights. I’ll guide you through each simple step, from mixing the dough to adding tasty toppings. Get ready to impress your friends and family with this fun treat right from your kitchen!
Ingredients
List of Essential Ingredients
– 1 ¼ cups warm water (110°F)
– 1 packet (2 ¼ teaspoons) active dry yeast
– 2 tablespoons granulated sugar
– 3 ¼ cups all-purpose flour
– 1 teaspoon salt
– ½ cup baking soda
– ½ cup unsalted butter, melted
– ¾ cup granulated sugar (for coating)
– 2 teaspoons ground cinnamon
To make bakery-style cinnamon sugar pretzel bites, we need a few key ingredients. First, warm water helps activate the yeast. The yeast is crucial; it makes the dough rise. We mix in some sugar for sweetness.
Next, all-purpose flour provides the dough’s base. Salt adds flavor. Baking soda is vital for boiling, giving the pretzels their classic taste.
Melted butter makes the bites rich and helps the sugar stick. For the sweet topping, we need granulated sugar and ground cinnamon, which give our pretzel bites their delightful flavor.
Equipment Needed
– Mixing bowl
– Slotted spoon
– Baking sheet
– Parchment paper
– Dough roller
You will also need a few tools. A mixing bowl is essential to combine your ingredients. A slotted spoon helps remove the pretzel bites from boiling water. A baking sheet lined with parchment paper ensures easy cleanup and prevents sticking. Lastly, a dough roller helps shape your pretzel bites perfectly.
With these ingredients and tools ready, you can start making delicious pretzel bites!
Step-by-Step Instructions
Preparing the Dough
1. Start by combining warm water, yeast, and 2 tablespoons of sugar in a large bowl. Stir gently.
2. Let this mix sit for about 5 minutes. You will see it become frothy.
3. Next, add the all-purpose flour and salt into the yeast mixture. Mix until a soft dough forms.
4. Knead the dough on a floured surface for about 5 minutes. It should feel smooth and elastic.
Letting the Dough Rise
1. Place the dough in a greased bowl. Cover it with a damp cloth.
2. Let the dough rise in a warm place. This will take around 1 hour.
3. The dough is ready when it has doubled in size. You can poke it gently. If it springs back, it’s ready!
Boiling and Baking the Pretzel Bites
1. Preheat your oven to 450°F (230°C) and line a baking sheet with parchment paper.
2. In a large pot, bring 8 cups of water and ½ cup of baking soda to a boil.
3. Once the dough has risen, punch it down and divide it into 8 equal pieces.
4. Roll each piece into a long rope, about 12 inches. Cut each rope into 1-2 inch pieces.
5. Carefully drop the pretzel bites into the boiling water for about 30 seconds. Use a slotted spoon to remove them.
6. Allow excess water to drain off. Place the boiled bites on the prepared baking sheet.
7. Brush each bite with melted butter.
8. In a small bowl, mix ¾ cup of sugar and 2 teaspoons of cinnamon. Sprinkle this mixture over the pretzel bites.
9. Bake for 10-12 minutes, or until they are golden brown.
10. Let them cool slightly before serving. Enjoy these warm and delicious bites!
Tips & Tricks
Achieving the Perfect Texture
To get soft and chewy pretzel bites, kneading is key. Knead the dough for about 5 minutes. This helps develop gluten, giving your pretzel bites the right chew. You should feel the dough become smooth and elastic under your hands.
For the dough to rise well, find a warm spot in your kitchen. Cover the dough with a damp cloth to keep it moist. It should double in size in about an hour. If your kitchen is cold, try placing the bowl near a warm oven.
Flavor Enhancements
To spice things up, try adding different seasonings. You can mix in some vanilla for a sweet twist. Or, add a dash of nutmeg for a warm flavor. Don’t forget to experiment with your sugar coating too. You can roll the bites in a mix of sugar and cocoa powder.
For dipping, I recommend cream cheese icing or rich chocolate sauce. Both add a great contrast to the sweet cinnamon. You might also enjoy a tangy yogurt dip for a fresh taste.
Presentation Ideas
Serve your pretzel bites in a big, fun bowl. This makes them look inviting and ready to eat. You can also arrange them on a platter with small bowls of dips.
For a gorgeous finish, sprinkle a little sea salt on top before serving. You can even add a light dusting of powdered sugar for a touch of sweetness. This helps make your pretzel bites look as good as they taste!
Variations
Sweet Variations
You can make your cinnamon sugar pretzel bites even more exciting! Try adding chocolate chips for a sweet twist. Just mix in 1 cup of chocolate chips after you knead the dough. This change makes each bite a delightful surprise.
Another fun option is apple cinnamon pretzel bites. Chop one medium apple into small pieces. Mix the apple pieces with 1 tablespoon of sugar and 1 teaspoon of cinnamon. Fold the apple mixture into the dough before shaping it into bites. The fruity flavor pairs well with the cinnamon sugar coating.
Savory Alternatives
If you prefer savory flavors, consider cheese-stuffed pretzel bites. Use string cheese or your favorite cheese. Cut the cheese into small sticks. When shaping the dough, wrap it around the cheese pieces to create cheesy bites. They bake up gooey and delicious!
You can also try garlic herb pretzel bites. Mix 2 teaspoons of garlic powder and 1 teaspoon of Italian herbs into the dough when you mix in the flour. This adds a nice savory flavor. Brush the baked bites with melted butter and sprinkle with garlic salt.
Gluten-Free Option
Want to make gluten-free pretzel bites? You can use a gluten-free flour blend instead of all-purpose flour. Choose a blend that works for baking. This change helps keep the texture light and fluffy. Follow the same steps in the recipe. Enjoy your gluten-free treat!
Storage Info
Storing Pretzel Bites
To keep your pretzel bites fresh, store them at room temperature. Place them in an airtight container. This method retains their softness and flavor. They will stay good for about two days. Make sure to keep them away from heat and sunlight.
If you need to store them longer, refrigeration is an option. However, this may change their texture. Wrap the bites in plastic wrap or foil before placing them in the fridge. Eat them within a week for the best taste.
Freezing Instructions
To freeze pretzel bites, let them cool completely. Arrange them in a single layer on a baking sheet. Place this sheet in the freezer for about an hour. After they are frozen, transfer them to a freezer bag. Remove as much air as possible. This helps prevent freezer burn. They can be stored for up to three months.
For thawing, take the pretzel bites out of the freezer. Leave them in the fridge overnight or at room temperature for a few hours. To reheat, place them in a 350°F oven for about 5-7 minutes. This restores their warmth and texture. Enjoy them fresh!
FAQs
What can I use instead of active dry yeast?
You can use instant yeast or fresh yeast. Instant yeast works well without proofing. Just mix it into your dry ingredients. Fresh yeast can also be used but requires about 3 times the amount of active dry yeast. If you use 1 packet of active dry yeast, use about 2 tablespoons of fresh yeast.
How do I know when my dough has risen enough?
Your dough is ready when it doubles in size. You can press your finger into the dough lightly. If the indent stays, it has risen enough. If it springs back, let it rise a bit longer. A warm place helps the dough rise faster.
Can these pretzel bites be made ahead of time?
Yes, you can prepare the dough ahead of time. After kneading, cover it and place it in the fridge for up to 24 hours. When you’re ready, let it sit at room temperature until it doubles in size. You can also bake the pretzel bites, cool them, and store them in an airtight container. Reheat them in the oven before serving for best results.
This article covered everything you need to make delicious pretzel bites. You learned about the key ingredients, the right equipment, and the step-by-step instructions for success. I shared tips to enhance flavor and texture, along with fun variations. Proper storage and freezing techniques keep your pretzel bites fresh. With these methods, you can create tasty snacks for any occasion. So, roll up your sleeves and enjoy this fun baking adventure!