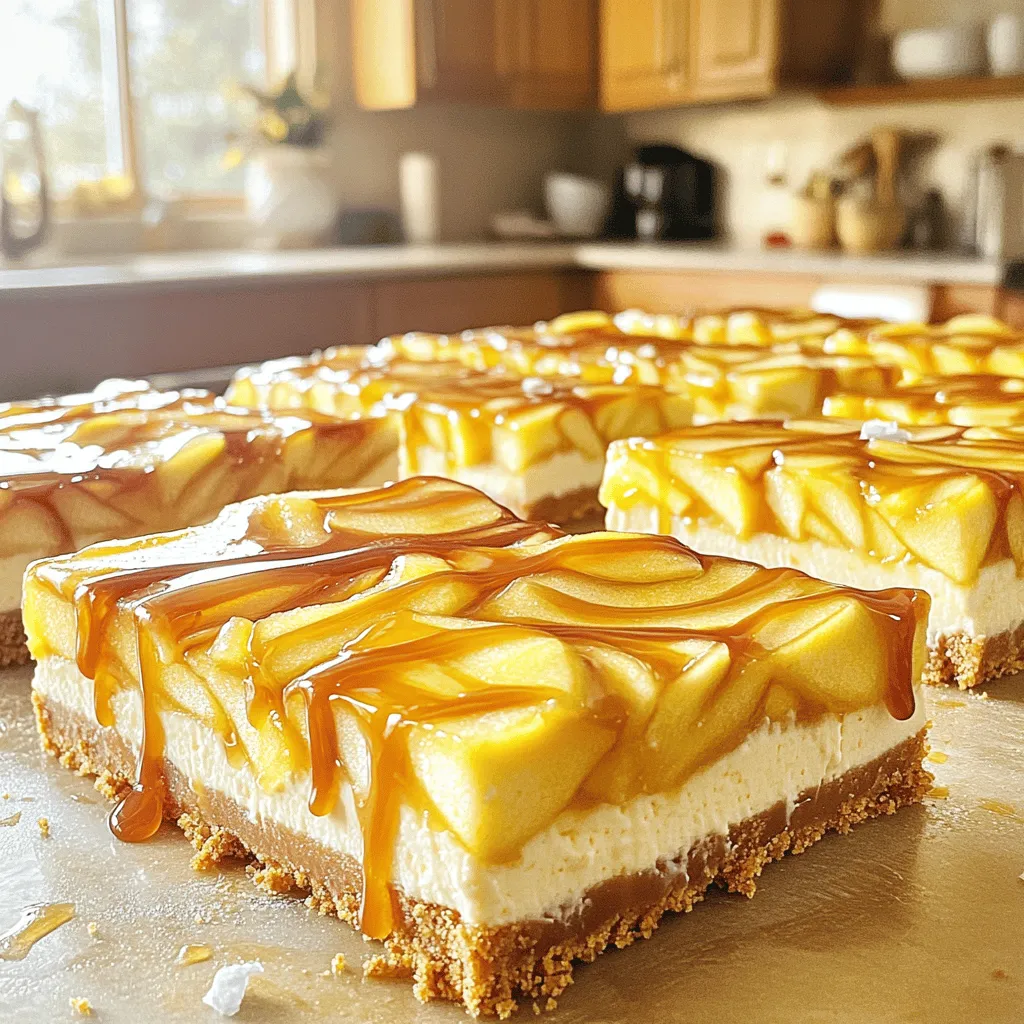
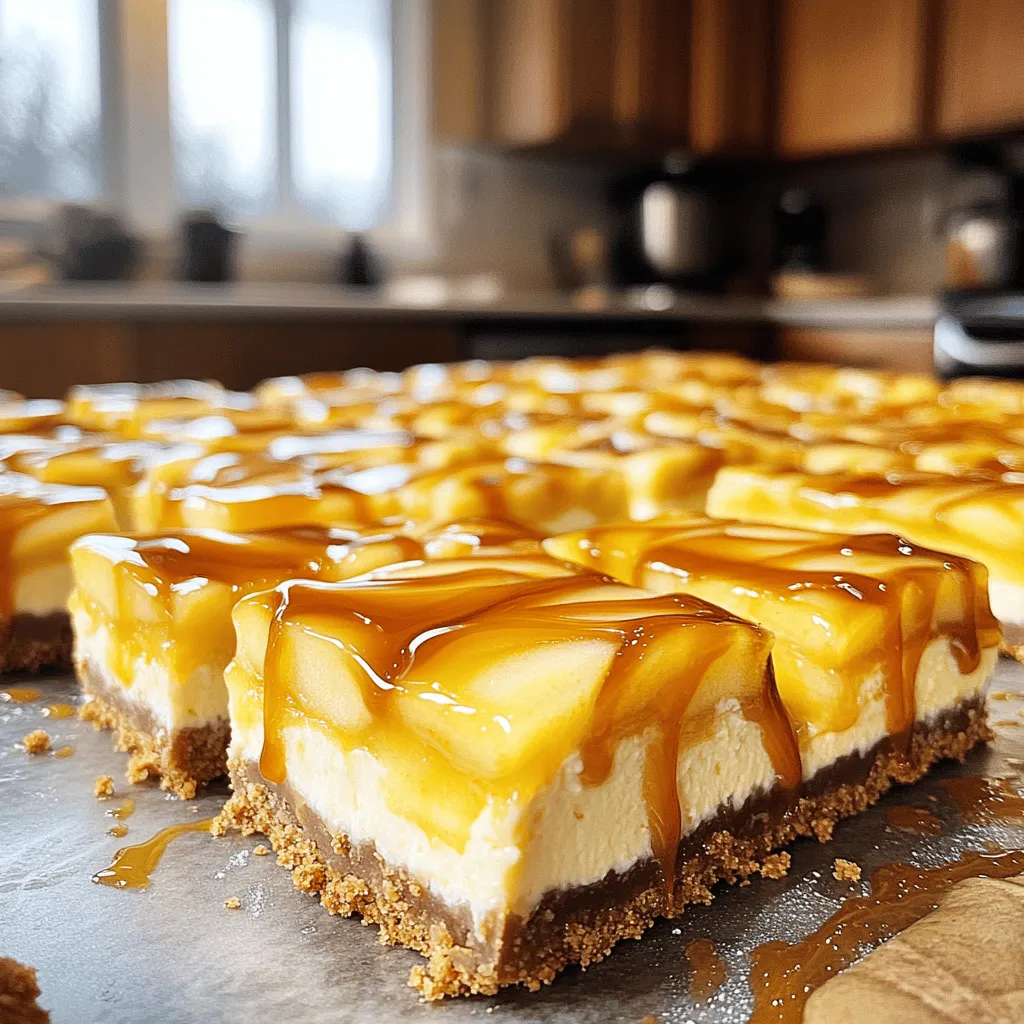
Indulge in a taste of fall with my Caramel Apple Cheesecake Bars! These bars blend rich cheesecake, sweet apples, and sticky caramel for a delightful dessert. You can impress your family and friends with this simple recipe. Whether you’re new to baking or a pro, I’ll guide you step by step. Let’s dive into the layers of flavor and joyful autumn vibes—your perfect treat is just a few steps away!
Ingredients
List of Ingredients for Caramel Apple Cheesecake Bars
To make these tasty caramel apple cheesecake bars, gather the following ingredients:
– 1 1/2 cups graham cracker crumbs
– 1/2 cup unsalted butter, melted
– 1/4 cup granulated sugar
– 2 (8-ounce) packages cream cheese, softened
– 1 cup granulated sugar
– 2 large eggs
– 1 teaspoon vanilla extract
– 2 cups peeled and diced apples (like Granny Smith or Honeycrisp)
– 1 teaspoon ground cinnamon
– 1/4 teaspoon nutmeg
– 1 cup caramel sauce (store-bought or homemade)
– Sea salt for garnish (optional)
Measuring Tips for Accurate Ingredients
Measuring ingredients carefully makes a big difference in baking. Use dry measuring cups for solids, like flour or sugar. For liquids, use a clear liquid measuring cup. Always level off dry ingredients with a flat edge for precision. When using sticky ingredients like honey or syrup, spray the measuring cup with cooking spray first. This makes pouring easier and helps you get every last drop!
Recommended Types of Apples for Optimal Flavor
Choosing the right apples is key for flavor. Granny Smith apples are tart and hold their shape well. They add a nice contrast to the creamy filling. Honeycrisp apples are sweet and juicy, adding a lovely texture. You can also mix different kinds for a fun taste. Just make sure your apples are fresh for the best flavor!
Step-by-Step Instructions
Preparation and Pre-Baking Steps
To start, preheat your oven to 350°F (175°C). Grab a 9×13 inch baking pan and line it with parchment paper. Leave some overhang on the sides; this helps later when you lift out the bars. In a mixing bowl, combine 1 ½ cups of graham cracker crumbs, ½ cup of melted butter, and ¼ cup of granulated sugar. Mix until it looks like wet sand. Press this mixture firmly into the bottom of the pan. Bake for 10 minutes, then let it cool for a few minutes.
Making the Cheesecake Filling
Now, let’s make the filling. In a large bowl, beat together two packages of softened cream cheese and 1 cup of sugar until it’s smooth and creamy. Add two large eggs, mixing well after each one. Stir in 1 teaspoon of vanilla extract. In another bowl, take 2 cups of peeled and diced apples, and toss them with 1 teaspoon of ground cinnamon and ¼ teaspoon of nutmeg. Gently fold the apples into the cheesecake batter.
Baking and Cooling Process
Pour the apple cheesecake mixture over your cooled crust. Spread it evenly with a spatula. Drizzle half of the caramel sauce on top. Use a knife to swirl it for a marbled look. Bake the bars for 30-35 minutes. The edges should be set, but the center will still jiggle a bit. Let them cool in the pan for about an hour. Then, refrigerate for at least 4 hours, or overnight if you can wait. Once chilled, lift the bars out using the parchment and cut them into squares. Drizzle the remaining caramel sauce on top, and add a sprinkle of sea salt if you like.
Tips & Tricks
How to Achieve the Perfect Cheesecake Texture
To get a smooth and creamy cheesecake, start with room-temperature cream cheese. Cold cream cheese creates lumps. Beat it well until it’s fluffy. Mix in sugar slowly to keep it airy. When you add the eggs, do it one at a time. This helps keep the batter smooth. Don’t overmix once the eggs are in. You want a light texture, not dense. Bake at the right temperature. If it’s too hot, the cheesecake can crack. A slight jiggle in the center means it’s just right.
Storage Tips for Freshness
To keep your cheesecake bars fresh, wrap them tightly in plastic wrap. This stops them from drying out. You can also store them in an airtight container. Place parchment paper between layers if stacking. Always store them in the fridge. They last about five days this way. If you want to keep them longer, freeze them. Just wrap them well and store in the freezer for up to three months. Thaw them in the fridge when you’re ready to enjoy.
Serving Suggestions and Pairing Ideas
Serve your caramel apple cheesecake bars chilled for the best taste. A drizzle of caramel sauce on top adds charm. You can also sprinkle some chopped nuts for crunch. Pair these bars with a dollop of whipped cream or vanilla ice cream. A side of spiced cider or coffee makes a great drink choice. For a festive touch, add a sprinkle of cinnamon. These ideas will make your dessert table shine and please your guests.
Variations
Gluten-Free Crust Options
If you want a gluten-free crust, use almond flour or gluten-free graham crackers. Mix these with melted butter and a bit of sugar. Press this mix into your pan, just like the regular crust. Bake it the same way. This will create a tasty base that is safe for those avoiding gluten.
Alternative Toppings and Add-ins
You can change the toppings to suit your taste! Try adding chopped nuts for crunch. Pecans or walnuts work great. You can also mix in chocolate chips for a sweet twist. Drizzle extra caramel on top for an even richer flavor. These small changes can make each batch unique.
Seasonal Flavor Variations
Think about seasonal fruits to mix in. In fall, use pears or cranberries for a fun twist. In spring, add fresh berries for a bright taste. You can also spice it up with seasonal spices like pumpkin spice in the fall. These variations keep the dessert fresh and exciting all year long.
Storage Info
Best Practices for Refrigerating Leftovers
After you make your caramel apple cheesecake bars, let them cool completely. Once cooled, cover them tightly with plastic wrap or foil. This keeps them fresh and prevents them from drying out. You can also place them in an airtight container. Refrigerating them helps the flavors meld and enhances their taste.
Freezing Caramel Apple Cheesecake Bars
You can freeze these bars for later enjoyment. First, let them cool completely. Cut them into squares, then wrap each piece in plastic wrap. After that, place the wrapped bars in a freezer-safe bag or container. This protects them from freezer burn. When you want to eat them, thaw them in the fridge overnight before serving.
How Long Do They Last?
In the fridge, your caramel apple cheesecake bars stay fresh for about 5 days. If you freeze them, they can last up to 3 months. Just remember to label your containers with the date. This way, you know how long they’ve been stored. Enjoying these bars later is a real treat!
FAQs
Can I use a different type of crust?
Yes, you can use many types of crust for these cheesecake bars. A simple cookie crust works well too. Try using Oreo cookies, gingersnaps, or even a nut crust. Just make sure the crust holds together well. If you want a gluten-free option, use gluten-free cookies or almond flour. This gives you more choices for a perfect match to the apple flavor.
How do I know when the cheesecake bars are done?
The cheesecake bars are done when the edges look set, but the center still jiggles a bit. They will firm up as they cool. After baking for 30-35 minutes, check the bars with a toothpick. If it comes out clean from the edges, it’s ready. If the center is still too wet, give it a few more minutes. Always let them cool down before cutting.
Can I make these bars ahead of time?
Yes, you can make these bars ahead of time. In fact, they taste even better after chilling overnight. Just store them in the fridge. Cover them tightly with plastic wrap or foil. You can also freeze them if you want to keep them longer. Just remember to thaw them in the fridge before serving. For the best taste, drizzle the caramel just before you serve.
In this post, we covered how to make caramel apple cheesecake bars. We listed all the ingredients you need and shared tips on measuring. I showed you how to prepare, bake, and cool the bars for a perfect result. You now know tips for storage, variations, and solutions for common questions.
Making these bars can be easy and fun. With the right steps, you will impress your friends and family. Enjoy every bite of this tasty treat!