Caramelized Onion Dip with Greek Yogurt Delight

WANT TO SAVE THIS RECIPE?

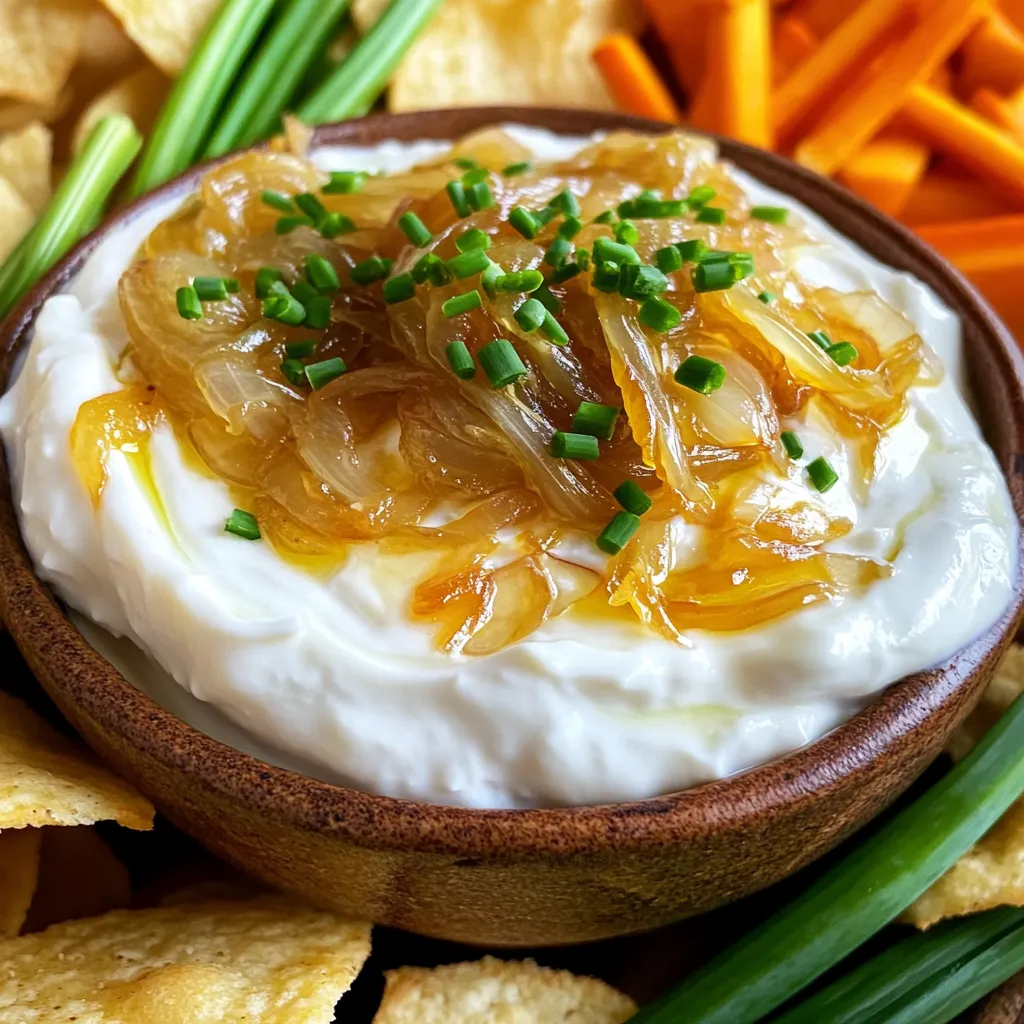
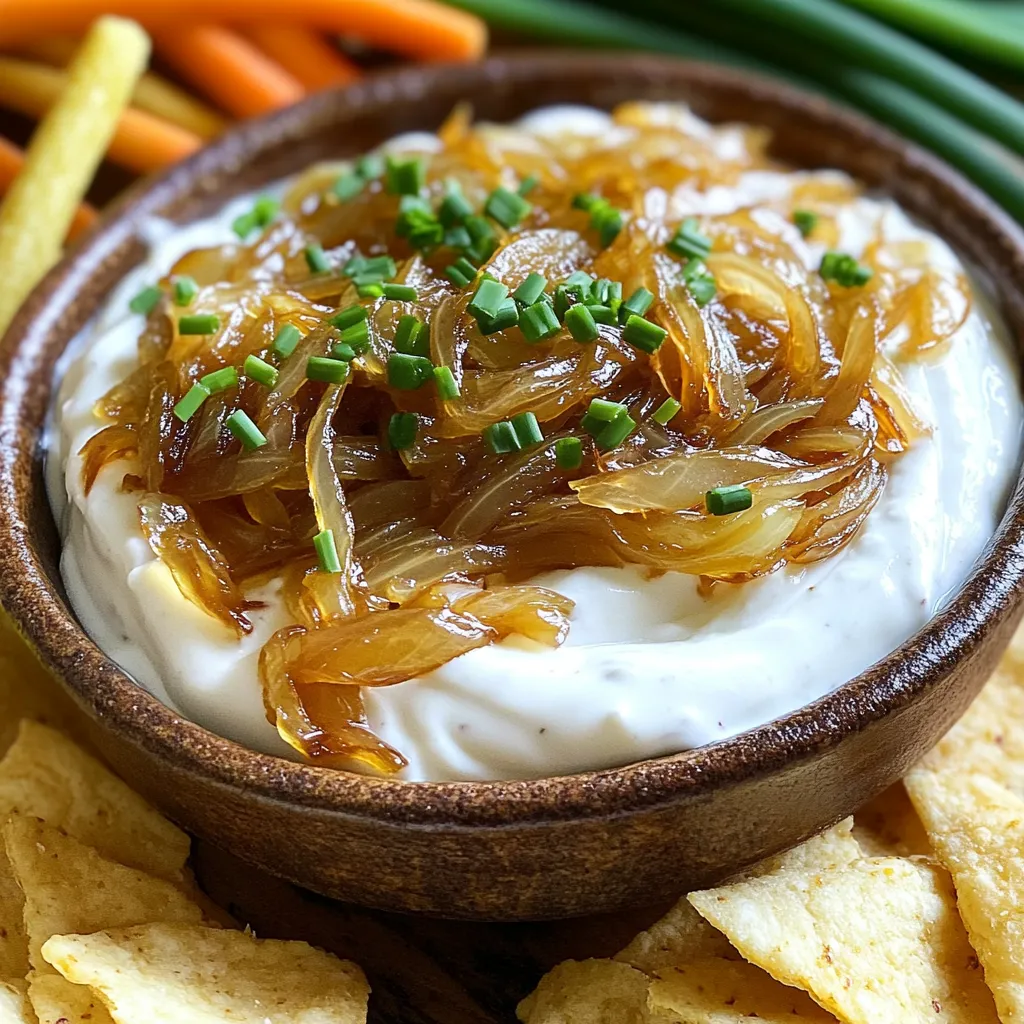
If you’re seeking a dip that delights every palate, you’ve found it! My Caramelized Onion Dip with Greek Yogurt is creamy, savory, and perfect for any gathering. You’ll learn how to make the perfect dip using simple ingredients and easy steps. Trust me, this recipe not only tastes great but also brings a healthy twist. Stick around, and let’s dive into the delightful world of flavorful dips!

Ingredients

Main Ingredients List

To make this creamy and tasty dip, you need:

– 3 large onions, thinly sliced

– 2 tablespoons olive oil

– 1 teaspoon sugar

– 1/2 teaspoon salt

– 1 cup Greek yogurt

– 1/2 cup mayonnaise

– 1 teaspoon garlic powder

– 1 tablespoon fresh thyme leaves (or 1 teaspoon dried thyme)

– Freshly ground black pepper to taste

Each ingredient plays a role. The onions bring sweetness, while the Greek yogurt adds creaminess. The mayonnaise makes it richer, and the garlic powder gives a nice kick.

Optional Garnishes

You can make your dip even better with these garnishes:

– Chopped chives

– Fresh thyme leaves

– Extra black pepper

These not only look good but also add fresh flavor. You can mix and match based on what you like best.

Substitutions for Healthier Options

Want to make it lighter? Here are some swaps:

– Use low-fat Greek yogurt instead of regular yogurt.

– Swap mayonnaise for avocado or hummus for a healthier option.

– Use less sugar or try honey for a natural sweetener.

These changes keep the flavor while making it a bit lighter. You enjoy great taste and feel good about it!

Step-by-Step Instructions

Detailed Cooking Process

To start, heat 2 tablespoons of olive oil in a large skillet on medium heat. Add 3 large onions that you have thinly sliced. Sprinkle in 1 teaspoon of sugar and 1/2 teaspoon of salt. This combination helps the onions cook evenly. Stir well to coat the onions in the oil. Cook the onions for about 30 to 40 minutes. Stir occasionally to prevent them from sticking. Watch closely as they turn a deep golden brown. If they start to brown too quickly, lower the heat. Once the onions are caramelized, remove them from the heat and let them cool slightly.

Tips for Caramelizing Onions Perfectly

Caramelizing onions takes patience. Keep stirring them to avoid burning. If you notice they are browning too fast, turn down the heat. You can also add a splash of water if they seem dry. This keeps the onions from burning. Sugar helps with the caramelization process, but don’t add too much. Just 1 teaspoon is enough to enhance their natural sweetness. When they are golden brown, you know they are ready.

Combining Ingredients for the Dip

In a mixing bowl, add 1 cup of Greek yogurt and 1/2 cup of mayonnaise. Next, sprinkle in 1 teaspoon of garlic powder and 1 tablespoon of fresh thyme leaves. If you use dried thyme, 1 teaspoon will work. Stir these ingredients until smooth and well blended. Once the onions have cooled, fold them into the yogurt mixture. Mix until everything is fully incorporated. Season with freshly ground black pepper to taste. Transfer the dip to a serving bowl and garnish with chopped chives. Cover and refrigerate for at least 30 minutes to let the flavors meld.

Tips & Tricks

Best Practices for Flavor Enhancement

To boost the flavor of your caramelized onion dip, use fresh ingredients. Fresh thyme adds a bright taste to the dip. You can also add a splash of lemon juice for a zing. If you want more depth, try adding some smoked paprika. This will give your dip a smoky twist. Remember, don’t rush the caramelizing process. Slow cooking the onions brings out their natural sweetness.

Making It Ahead of Time

You can prepare the dip a day in advance. This allows the flavors to meld beautifully. Just follow the recipe and store it in an airtight container. When you’re ready to serve, take it out and let it warm slightly. This dip tastes better after sitting for a while. If you make it ahead, you’ll save time on party day!

Serving Suggestions for Different Occasions

For a casual gathering, serve the dip with pita chips or veggie sticks. It’s perfect for dipping! For a more elegant event, try pairing it with toasted baguette slices. You can also use it as a spread on sandwiches or wraps. This dip is versatile and fits many occasions. Whether it’s a game night or a fancy dinner, it always shines!

Variations

Additional Flavor Add-Ins

You can add more flavor to your dip. Try mixing in some shredded cheese. A blend of cheddar and mozzarella works great. You can also stir in some diced jalapeños for a spicy kick. If you like, add a splash of balsamic vinegar for a touch of sweetness. Fresh herbs like parsley or dill can brighten the dip. Experiment with flavors to find what you love!

Alternative Yogurt Options

Greek yogurt is creamy and tangy, but you can swap it. Use regular plain yogurt for a lighter dip. If you want a dairy-free option, try coconut yogurt. It gives a different taste but still works well. For more protein, use a high-protein yogurt brand. Each option will change the flavor, but they all taste good.

Seasonal Ingredient Swaps

Switching out ingredients makes this dip fun for any season. In spring, add fresh peas or asparagus for a fresh taste. In fall, mix in roasted pumpkin for a cozy flavor. You can also use caramelized shallots instead of onions for a sweeter touch. Seasonal swaps keep your dip exciting and full of new flavors!

Storage Info

Refrigeration Guidelines

After making your caramelized onion dip, allow it to cool. Transfer it to an airtight container. Store it in the fridge for up to five days. This dip tastes better the longer it sits, as the flavors meld. Always cover it to keep it fresh and tasty.

Freezing Instructions

You can freeze this dip if you want to save some for later. Place the dip in a freezer-safe container. Make sure to leave some space at the top for expansion. Seal it tight and label it with the date. When ready to eat, thaw it overnight in the fridge.

Shelf Life of Caramelized Onion Dip

In the fridge, this dip lasts about five days. If frozen, it will keep for about three months. Always check for signs of spoilage, like off smells or changes in texture. When in doubt, it’s best to throw it out. Enjoy the flavors of this dip without worry!

FAQs

Can I make this dip vegan?

Yes, you can easily make this dip vegan. To do this, swap out Greek yogurt and mayonnaise for vegan versions. Look for plant-based yogurt and mayonnaise at your local store. You can also add some nutritional yeast for a cheesy flavor. This way, you keep the taste while making it friendly for a vegan diet.

How long can I store leftovers?

You can store leftovers in the fridge for about 3 to 5 days. Make sure to keep the dip in an airtight container. If you notice any changes in smell or color, it’s best to toss it. Enjoy it fresh for the best taste!

What can I serve with caramelized onion dip?

This dip pairs well with many tasty dippers. Here are some ideas:

– Pita chips

– Veggie sticks like carrots and celery

– Toasted baguette slices

– Crackers

– Tortilla chips

These options make it fun for parties or casual snacking.

Can I use store-bought caramelized onions?

Yes, you can use store-bought caramelized onions if you’re short on time. Just check the label to ensure they contain no unwanted additives. This shortcut can save you time and still give you great flavor in your dip. However, homemade onions offer a fresh taste and deeper flavor.

This blog post explored the world of caramelized onion dip. We covered essential ingredients, cooking steps, and tips for perfect flavor. You can enhance your dish with the right garnishes and substitutes. I shared ways to make it ahead and suggested serving ideas for any occasion. Plus, we looked at variations to keep things fresh.

In the end, this dip is simple and tasty. You can impress your friends with your skills! Remember, your creativity can make this dip uniquely yours.

To make this creamy and tasty dip, you need: - 3 large onions, thinly sliced - 2 tablespoons olive oil - 1 teaspoon sugar - 1/2 teaspoon salt - 1 cup Greek yogurt - 1/2 cup mayonnaise - 1 teaspoon garlic powder - 1 tablespoon fresh thyme leaves (or 1 teaspoon dried thyme) - Freshly ground black pepper to taste Each ingredient plays a role. The onions bring sweetness, while the Greek yogurt adds creaminess. The mayonnaise makes it richer, and the garlic powder gives a nice kick. You can make your dip even better with these garnishes: - Chopped chives - Fresh thyme leaves - Extra black pepper These not only look good but also add fresh flavor. You can mix and match based on what you like best. Want to make it lighter? Here are some swaps: - Use low-fat Greek yogurt instead of regular yogurt. - Swap mayonnaise for avocado or hummus for a healthier option. - Use less sugar or try honey for a natural sweetener. These changes keep the flavor while making it a bit lighter. You enjoy great taste and feel good about it! To start, heat 2 tablespoons of olive oil in a large skillet on medium heat. Add 3 large onions that you have thinly sliced. Sprinkle in 1 teaspoon of sugar and 1/2 teaspoon of salt. This combination helps the onions cook evenly. Stir well to coat the onions in the oil. Cook the onions for about 30 to 40 minutes. Stir occasionally to prevent them from sticking. Watch closely as they turn a deep golden brown. If they start to brown too quickly, lower the heat. Once the onions are caramelized, remove them from the heat and let them cool slightly. Caramelizing onions takes patience. Keep stirring them to avoid burning. If you notice they are browning too fast, turn down the heat. You can also add a splash of water if they seem dry. This keeps the onions from burning. Sugar helps with the caramelization process, but don’t add too much. Just 1 teaspoon is enough to enhance their natural sweetness. When they are golden brown, you know they are ready. In a mixing bowl, add 1 cup of Greek yogurt and 1/2 cup of mayonnaise. Next, sprinkle in 1 teaspoon of garlic powder and 1 tablespoon of fresh thyme leaves. If you use dried thyme, 1 teaspoon will work. Stir these ingredients until smooth and well blended. Once the onions have cooled, fold them into the yogurt mixture. Mix until everything is fully incorporated. Season with freshly ground black pepper to taste. Transfer the dip to a serving bowl and garnish with chopped chives. Cover and refrigerate for at least 30 minutes to let the flavors meld. To boost the flavor of your caramelized onion dip, use fresh ingredients. Fresh thyme adds a bright taste to the dip. You can also add a splash of lemon juice for a zing. If you want more depth, try adding some smoked paprika. This will give your dip a smoky twist. Remember, don’t rush the caramelizing process. Slow cooking the onions brings out their natural sweetness. You can prepare the dip a day in advance. This allows the flavors to meld beautifully. Just follow the recipe and store it in an airtight container. When you’re ready to serve, take it out and let it warm slightly. This dip tastes better after sitting for a while. If you make it ahead, you’ll save time on party day! For a casual gathering, serve the dip with pita chips or veggie sticks. It’s perfect for dipping! For a more elegant event, try pairing it with toasted baguette slices. You can also use it as a spread on sandwiches or wraps. This dip is versatile and fits many occasions. Whether it’s a game night or a fancy dinner, it always shines! {{image_2}} You can add more flavor to your dip. Try mixing in some shredded cheese. A blend of cheddar and mozzarella works great. You can also stir in some diced jalapeños for a spicy kick. If you like, add a splash of balsamic vinegar for a touch of sweetness. Fresh herbs like parsley or dill can brighten the dip. Experiment with flavors to find what you love! Greek yogurt is creamy and tangy, but you can swap it. Use regular plain yogurt for a lighter dip. If you want a dairy-free option, try coconut yogurt. It gives a different taste but still works well. For more protein, use a high-protein yogurt brand. Each option will change the flavor, but they all taste good. Switching out ingredients makes this dip fun for any season. In spring, add fresh peas or asparagus for a fresh taste. In fall, mix in roasted pumpkin for a cozy flavor. You can also use caramelized shallots instead of onions for a sweeter touch. Seasonal swaps keep your dip exciting and full of new flavors! After making your caramelized onion dip, allow it to cool. Transfer it to an airtight container. Store it in the fridge for up to five days. This dip tastes better the longer it sits, as the flavors meld. Always cover it to keep it fresh and tasty. You can freeze this dip if you want to save some for later. Place the dip in a freezer-safe container. Make sure to leave some space at the top for expansion. Seal it tight and label it with the date. When ready to eat, thaw it overnight in the fridge. In the fridge, this dip lasts about five days. If frozen, it will keep for about three months. Always check for signs of spoilage, like off smells or changes in texture. When in doubt, it's best to throw it out. Enjoy the flavors of this dip without worry! Yes, you can easily make this dip vegan. To do this, swap out Greek yogurt and mayonnaise for vegan versions. Look for plant-based yogurt and mayonnaise at your local store. You can also add some nutritional yeast for a cheesy flavor. This way, you keep the taste while making it friendly for a vegan diet. You can store leftovers in the fridge for about 3 to 5 days. Make sure to keep the dip in an airtight container. If you notice any changes in smell or color, it’s best to toss it. Enjoy it fresh for the best taste! This dip pairs well with many tasty dippers. Here are some ideas: - Pita chips - Veggie sticks like carrots and celery - Toasted baguette slices - Crackers - Tortilla chips These options make it fun for parties or casual snacking. Yes, you can use store-bought caramelized onions if you're short on time. Just check the label to ensure they contain no unwanted additives. This shortcut can save you time and still give you great flavor in your dip. However, homemade onions offer a fresh taste and deeper flavor. This blog post explored the world of caramelized onion dip. We covered essential ingredients, cooking steps, and tips for perfect flavor. You can enhance your dish with the right garnishes and substitutes. I shared ways to make it ahead and suggested serving ideas for any occasion. Plus, we looked at variations to keep things fresh. In the end, this dip is simple and tasty. You can impress your friends with your skills! Remember, your creativity can make this dip uniquely yours.

Caramelized Onion Dip with Greek Yogurt

Discover the creamy delight of Caramelized Onion Dip with Greek Yogurt! This scrumptious dip combines deeply caramelized onions with rich Greek yogurt and a hint of garlic for a flavor explosion that’s perfect for any gathering. Easy to make and served chilled, it's an ideal party appetizer. Click to explore the full recipe, tips, and serving ideas that will make your next event unforgettable!

Ingredients
  

3 large onions, thinly sliced

2 tablespoons olive oil

1 teaspoon sugar

1/2 teaspoon salt

1 cup Greek yogurt

1/2 cup mayonnaise

1 teaspoon garlic powder

1 tablespoon fresh thyme leaves (or 1 teaspoon dried thyme)

Freshly ground black pepper to taste

Chopped chives for garnish

Instructions
 

In a large skillet, heat the olive oil over medium heat.

    Add the sliced onions, sugar, and salt. Stir well to coat the onions in the oil.

      Cook the onions for about 30-40 minutes, stirring occasionally, until they are deep golden brown and caramelized. Reduce heat if they start to brown too quickly.

        Once the onions are caramelized, remove them from the heat and let them cool slightly.

          In a mixing bowl, combine the Greek yogurt, mayonnaise, garlic powder, and thyme. Stir until smooth and well blended.

            Fold the cooled caramelized onions into the yogurt mixture until fully incorporated. Season with freshly ground black pepper to taste.

              Transfer the dip to a serving bowl and garnish with chopped chives.

                Cover and refrigerate for at least 30 minutes to allow the flavors to meld.

                  Prep Time: 10 minutes | Total Time: 1 hour 10 minutes | Servings: 6-8

                    - Serving Suggestions: Serve with a variety of dippers such as pita chips, veggie sticks, or toasted baguette slices for a delightful party appetizer.

                      WANT TO SAVE THIS RECIPE?

                      Leave a Comment

                      Recipe Rating