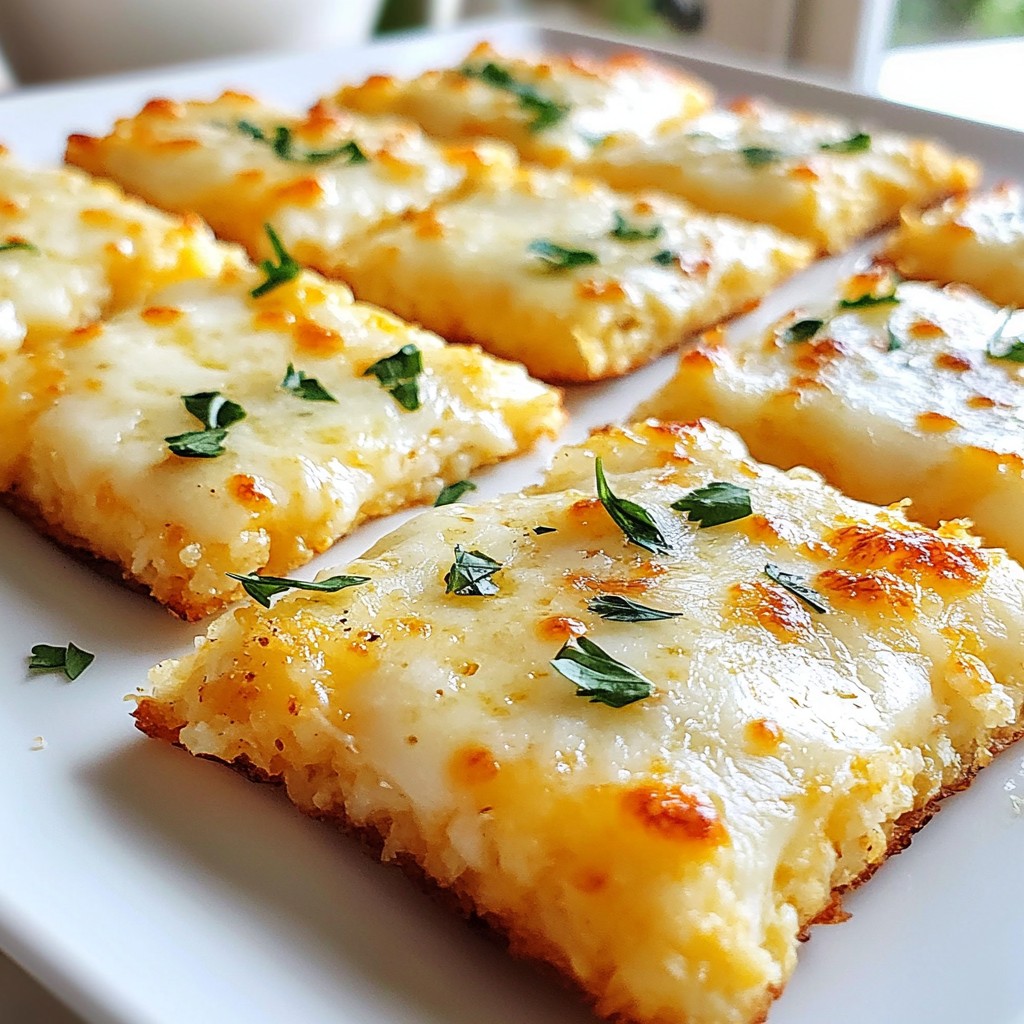
Looking for a delicious snack that fits your healthy lifestyle? Cheesy Cauliflower Breadsticks are the answer! These flavorful and easy-to-make treats are packed with cheesy goodness and offer a fun twist on traditional breadsticks. I’ll guide you through the simple steps and share tips to make them perfect every time. Get ready to impress your family or guests with this tasty, guilt-free option!
Why I Love This Recipe
- Deliciously Cheesy: The combination of mozzarella and parmesan creates a rich and gooey texture that makes these breadsticks irresistible.
- Healthy Alternative: Using cauliflower instead of traditional bread gives you a low-carb and gluten-free option without sacrificing flavor.
- Easy to Make: This recipe is straightforward and quick to prepare, making it perfect for a weeknight snack or appetizer.
- Customizable: Feel free to add your favorite herbs and spices or even some chopped vegetables to the mixture for a personal touch.
Ingredients
Main Ingredients
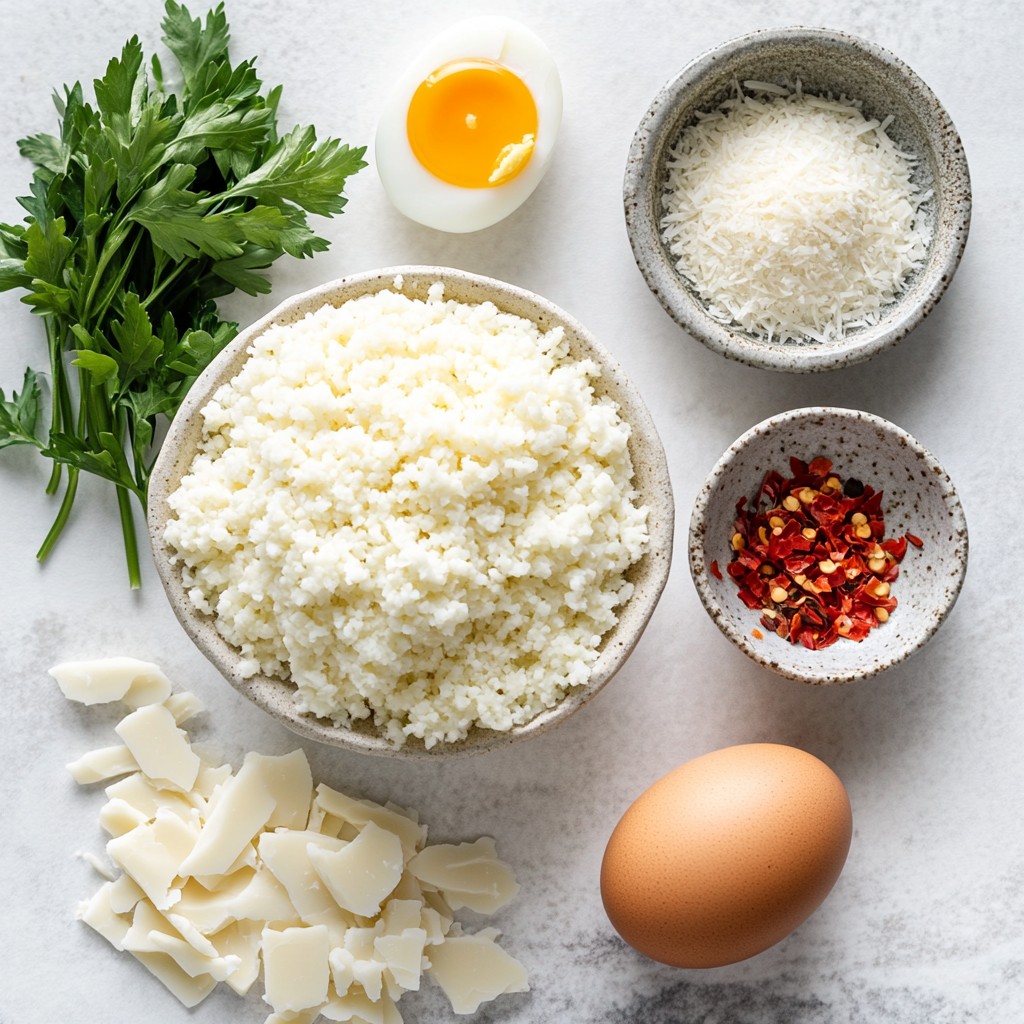
- 1 medium head of cauliflower, riced
- 1 cup shredded mozzarella cheese
- 1/2 cup grated parmesan cheese
The heart of these cheesy cauliflower breadsticks is the riced cauliflower. It gives a great texture and makes them light. You also need shredded mozzarella cheese. This will melt and give a nice stretch. Grated parmesan cheese adds a sharp flavor that balances the dish.
Additional Seasonings
- 2 teaspoons garlic powder
- 1 teaspoon onion powder
- 1/2 teaspoon dried oregano
Seasonings are key for taste. Garlic powder adds a bold flavor. Onion powder brings a sweet note. Dried oregano adds a lovely earthiness. These simple spices make a big impact.
Optional Add-ins
- 1/4 teaspoon red pepper flakes
- Extra mozzarella for topping
- Fresh parsley for garnish
For a kick, add red pepper flakes. If you love cheese, sprinkle more mozzarella on top. Fresh parsley makes a beautiful garnish and adds color. These add-ins let you customize each bite.
Step-by-Step Instructions
Preparation and Cooking
1. Start by preheating your oven to 425°F (220°C). Line a baking sheet with parchment paper. This helps to prevent sticking and makes cleanup easy.
2. Rinse the cauliflower, remove the stems, and chop it into smaller florets. You can steam or microwave the cauliflower for about 5-7 minutes. It should be tender but not mushy.
3. After cooking, let the cauliflower cool. Place it in a kitchen towel or cheesecloth. Squeeze out as much moisture as you can. This step is key. If the cauliflower is wet, your breadsticks will be soggy.
Mixing the Ingredients
1. In a mixing bowl, combine the riced cauliflower with shredded mozzarella, grated parmesan, and the egg.
2. Add garlic powder, onion powder, oregano, red pepper flakes, salt, and pepper. Mix everything well until combined. The mixture should be thick and sticky.
3. Spread the cauliflower mixture onto the prepared baking sheet. Form it into a rectangle about 1/2 inch thick. This shape helps the breadsticks cook evenly.
Baking Tips
1. Bake your breadsticks in the preheated oven for 15-20 minutes. Look for golden brown edges. This means they are ready for the next step.
2. If you like extra cheese, sprinkle some mozzarella on top now. Bake again for 5 more minutes. This makes the cheese melt and bubble, adding more flavor.
3. Once done, let the breadsticks cool for a few minutes. Cut them into sticks before serving. Enjoy these delicious cheesy cauliflower breadsticks!
Tips & Tricks
Perfecting the Texture
To make great cheesy cauliflower breadsticks, squeezing out moisture is key. If you skip this step, the breadsticks will be soggy. After steaming the cauliflower, let it cool. Then, wrap it in a kitchen towel. Squeeze it hard until no water drips out. This will help your breadsticks stay firm and crunchy.
For ricing the cauliflower, you can use a food processor. Pulse it until you get fine pieces, like rice. If you don't have a food processor, you can grate the cauliflower with a box grater. Both methods work well, so choose what you have!
Flavor Enhancements
Adding fresh herbs can really brighten up your breadsticks. Try using parsley, basil, or even chives. These herbs add a fresh taste that makes your dish pop. You can chop them finely and mix them in with the other ingredients.
Spices are also fun to experiment with. While the recipe has garlic and onion powder, you can add more. A pinch of smoked paprika or Italian seasoning can give extra depth. Feel free to adjust the red pepper flakes for some heat, too!
Serving Suggestions
For dipping, marinara sauce is a classic choice. Its tangy flavor pairs perfectly with cheesy breadsticks. You can also try ranch or garlic butter for a twist. These dips add extra flavor and make it more fun to eat.
For presentation, serve the breadsticks on a wooden board. This gives a rustic look that is always appealing. Add a small bowl of marinara on the side. You can sprinkle extra herbs on top for a colorful finish. This makes your dish look beautiful and appetizing!
Pro Tips
- Use Fresh Cauliflower: For the best flavor and texture, use a fresh head of cauliflower rather than pre-riced or frozen options.
- Pressing for Perfection: Don't skip the step of squeezing out moisture from the cauliflower; this ensures your breadsticks are not soggy.
- Cheese Variations: Feel free to experiment with different cheese combinations, like adding cheddar or mozzarella for extra flavor.
- Serving Suggestions: Pair these breadsticks with a variety of dips, such as marinara, ranch, or garlic butter for a delicious appetizer.
Variations
Keto-Friendly Options
For keto lovers, you can easily switch up the cheeses. Instead of mozzarella and parmesan, try cheddar or gouda. These cheeses melt well and add a nice flavor. You can also use cream cheese for a richer taste.
When it comes to spices, feel free to get creative. You can add smoked paprika or cayenne for a smoky kick. Herbs like thyme or rosemary work well too. They add freshness and depth to your breadsticks.
Gluten-Free Modifications
Make sure all your ingredients are gluten-free. Most cheeses are safe, but always check the labels. Common gluten sources hide in processed foods, so read carefully.
If you want to add more veggies, consider grated zucchini or shredded carrots. These add nutrition and flavor without losing the breadstick vibe. Just remember to squeeze out excess moisture from these veggies too.
Vegan Adaptations
To make your breadsticks vegan, you need to replace the egg. Flaxseed meal mixed with water is a great choice. Use one tablespoon of flaxseed meal with three tablespoons of water. Let it sit until it thickens, then add it to your mix.
For cheese, use dairy-free options like cashew cheese or nutritional yeast. Nutritional yeast gives a cheesy flavor without dairy. It’s a tasty option for those on a plant-based diet.
Storage Info
Refrigeration Guidelines
To store leftovers, place the breadsticks in an airtight container. You can also wrap them in plastic wrap. This keeps them fresh and tasty. The shelf life in the fridge is about three days. After that, they might lose flavor and texture.
Freezing Instructions
You can freeze these breadsticks before or after baking. If you freeze them before baking, shape the mixture and place it on a baking sheet. Once firm, transfer them to a freezer bag. If freezing after baking, let them cool first. Then, wrap them well in foil or plastic wrap.
For thawing, keep it simple. Place frozen breadsticks in the fridge overnight. This helps maintain their texture. You can also thaw them quickly in the microwave on low.
Reheating Tips
For the best reheating methods, use your oven or toaster oven. Preheat it to 350°F (175°C). Place the breadsticks on a baking sheet and heat for about 10 minutes. This keeps them crispy.
You can also use the microwave if you’re in a hurry. Microwave them for 30 seconds, but they may lose some crunch. To maintain flavor and texture, add a sprinkle of cheese on top before reheating.
FAQs
How do I know when the breadsticks are done?
Look for a golden brown color on the edges. The center should feel firm to the touch. This means the breadsticks are ready to come out of the oven.
Can I make these ahead of time?
Yes, you can prep these breadsticks in advance. Mix the ingredients and spread them on the baking sheet. Cover and store in the fridge for up to a day. When ready, bake them as instructed.
To store leftovers, place them in an airtight container. They last about three days in the fridge. When reheating, use the oven for best results. Bake at 350°F (175°C) for about 10 minutes. This keeps them crispy.
What can I serve with cheesy cauliflower breadsticks?
These breadsticks pair well with marinara sauce for dipping. You can also try ranch or garlic sauce. For side dishes, consider a fresh salad or roasted vegetables. They add color and flavor to your meal.
This blog post covered a simple yet delicious recipe for cheesy cauliflower breadsticks. We discussed essential ingredients like riced cauliflower and cheeses, plus seasonings for extra flavor. I shared tips for perfecting the texture and variations for different diets. You also learned how to store and reheat leftovers.
These breadsticks are tasty and versatile. Enjoy experimenting with flavors and sharing them with friends or family. You’ll impress everyone with your cooking skills and healthy choices.