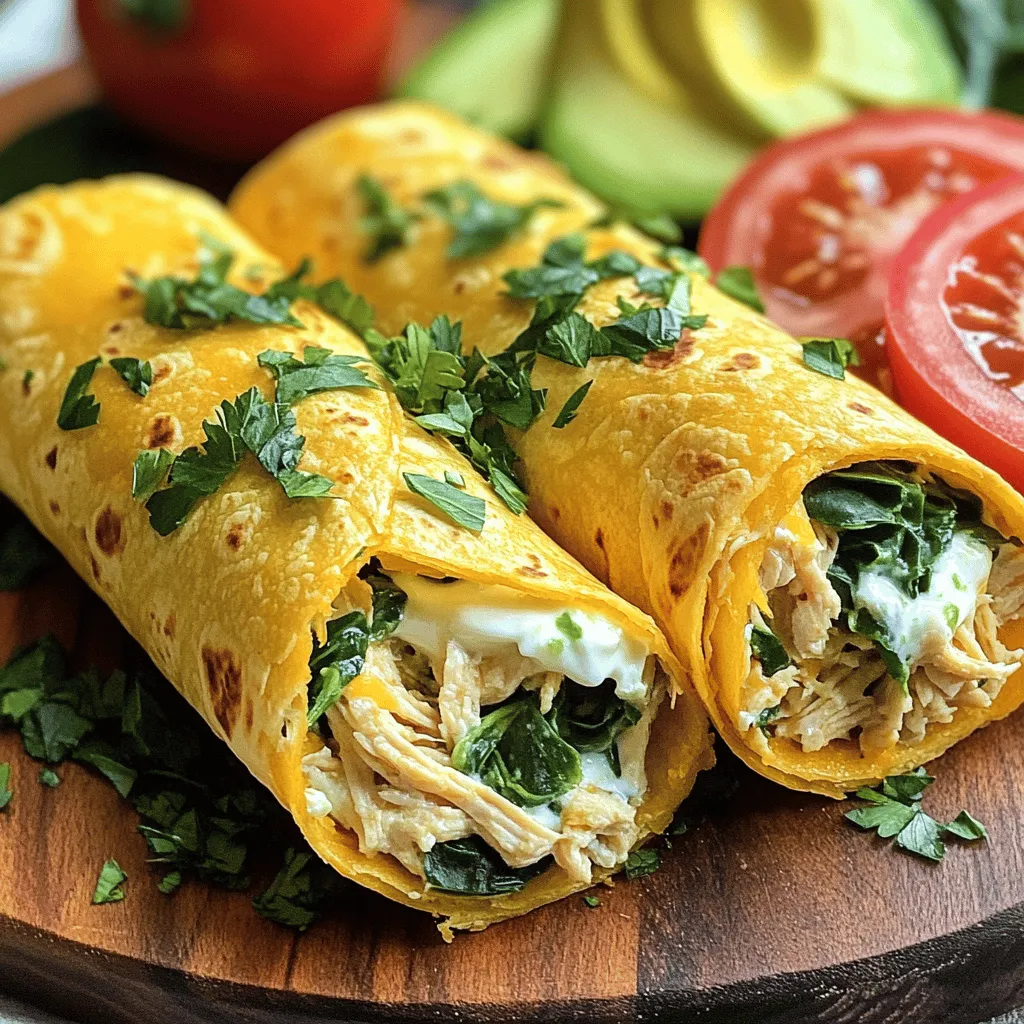
Craving a meal that’s both cheesy and filled with flavor? Look no further than my Cheesy Garlic Chicken Wraps! This dish combines tender chicken, creamy cheeses, and savory garlic all wrapped in a warm tortilla. It’s quick to prepare and sure to satisfy your taste buds. Whether you’re cooking for family or prepping for a busy week, these wraps are a perfect solution. Let’s dive into the ingredients and get started on this delicious journey!
Ingredients
List of Ingredients
– 2 cups cooked chicken, shredded
– 1 cup shredded mozzarella cheese
– 1/2 cup cream cheese, softened
– 2 cloves garlic, minced
– 1 teaspoon garlic powder
– 1 tablespoon fresh parsley, chopped
– 4 large tortillas
– 1 cup fresh spinach leaves
– Salt and pepper to taste
– 2 tablespoons olive oil
Gathering the right ingredients is key to making great Cheesy Garlic Chicken Wraps. Start with cooked chicken; it adds protein and flavor. I prefer using rotisserie chicken for ease. Mozzarella cheese gives a stretchy, melty quality. Cream cheese adds a rich, creamy texture that makes each bite delightful.
Don’t forget the garlic! Fresh minced garlic and garlic powder boost the flavor. Fresh parsley adds a pop of color and freshness.
You’ll also need large tortillas to hold all this goodness. Fresh spinach leaves provide a nice crunch and color. Lastly, have salt and pepper on hand to season your mix.
Equipment Needed
– Mixing bowl
– Large skillet
– Cooking spoon
– Cutting board
– Knife
You will need a few simple tools. A mixing bowl is essential for combining everything. Use a large skillet to cook the mixture and get it all warm and melty. A cooking spoon helps stir things up well. A cutting board and knife make prepping easy and safe.
Nutritional Information
– Calories per serving: About 400
– Macronutrients breakdown:
– Protein: 30g
– Fats: 20g
– Carbs: 30g
– Dietary considerations: Gluten-free tortillas can be used
These wraps are tasty and filling. Each serving has about 400 calories. They are packed with protein from the chicken and cheese. This meal can fit well in many diets. You can swap regular tortillas for gluten-free options.Enjoy cooking!
Step-by-Step Instructions
Preparation Steps
To start, gather your ingredients. In a mixing bowl, combine the following:
– 2 cups cooked chicken, shredded
– 1 cup shredded mozzarella cheese
– 1/2 cup cream cheese, softened
– 2 cloves garlic, minced
– 1 teaspoon garlic powder
– 1 tablespoon fresh parsley, chopped
– Salt and pepper to taste
Mix these ingredients well until they blend into a creamy filling. This mix is where the magic begins. The chicken, cheeses, and garlic create a rich flavor that is hard to resist.
Cooking Process
Next, heat 2 tablespoons of olive oil in a large skillet over medium heat. Once the oil is hot, add your chicken mixture to the skillet. Cook for about 5–7 minutes, stirring often. You want the cheeses to melt and the mixture to heat through. The aroma will fill your kitchen and make your mouth water.
After cooking, remove the skillet from the heat. Add 1 cup of fresh spinach leaves to the mixture. Stir gently until the spinach wilts. This adds a nice color and boosts the nutrition of your wraps.
Assembling the Wraps
Now, it’s time to assemble your wraps. Lay out 4 large tortillas on a clean surface. Spoon an even amount of your cheesy chicken filling onto the center of each tortilla.
To fold, take the sides of the tortilla and fold them over the filling. Then, roll it up tightly from the bottom. This keeps all the cheesy goodness inside.
If you want a crispy touch, you can toast the wraps. Place them seam-side down in the skillet with a little oil. Toast for 2–3 minutes on each side until they turn golden brown. This step is optional, but I highly recommend it for added crunch and flavor.
Let the wraps cool for a minute before slicing them in half. Serve warm, and enjoy this cheesy, garlicky delight.
Tips & Tricks
Perfecting the Recipe
To make your Cheesy Garlic Chicken Wraps truly creamy, use cream cheese. It adds a rich texture that blends well with mozzarella. Mix it with the chicken and garlic to bring out the flavors. Taste the filling as you mix. Adjust the salt and pepper to your liking. You can add a pinch more garlic powder if you love garlic. Fresh parsley adds a nice touch, so don’t skip it!
Serving Suggestions
These wraps pair well with dips like ranch or salsa. A fresh guacamole adds a nice kick too. For sides, consider a crisp salad or roasted vegetables. They add color and balance to your meal. Try serving your wraps with a side of sweet potato fries for a satisfying crunch.
Reheating Leftovers
To reheat, place the wraps in the oven. Set it to 350°F (175°C) for about 10 minutes. This keeps them warm without making them soggy. If you prefer the skillet, heat it over medium heat. Cook the wraps for a few minutes on each side until they are hot. Store leftovers in an airtight container. Keep them in the fridge for up to three days to maintain quality.
Variations
Alternative Fillings
You can change the protein in these wraps. Turkey works well if you want a lighter taste. Ground beef adds a hearty kick. If you prefer a vegetarian option, use beans instead. They add protein and fiber. You can also swap cheeses. Try cheddar for a sharper flavor, or pepper jack for some heat.
Flavor Enhancements
Add spices or sauces to make your wraps pop. A dash of sriracha brings heat and flavor. Ranch dressing adds a creamy touch. You can also toss in extra veggies. Bell peppers, onions, or mushrooms will make your wraps colorful and tasty. Each addition changes the flavor profile, so have fun with it!
Low-Carb and Gluten-Free Options
If you want a low-carb meal, try lettuce wraps. They offer a crisp bite and are healthy. You can use large leaves, like romaine, to hold your filling. Cauliflower tortillas are another great alternative. They have a mild flavor and are gluten-free. Both options keep the wrap delicious while meeting dietary needs.
Storage Info
Storing Unassembled Wraps
For the best taste, keep each ingredient separate. Store cooked chicken, cheese, and veggies in airtight containers. This way, they stay fresh and tasty. You can refrigerate them for up to three days. Remember to check for any signs of spoilage before using.
Storing Leftover Assembled Wraps
If you have leftover wraps, seal them tightly in plastic wrap or use a container. This keeps them from drying out. You can store these in the fridge for up to two days. If they start to smell or look off, it’s best to throw them away.
Freezing Tips
To freeze Cheesy Garlic Chicken Wraps, wrap each one tightly in plastic wrap. Then, place them in a freezer-safe bag. They will stay good for about three months. When you’re ready to eat, thaw them in the fridge overnight. After thawing, reheat them in a skillet until warm. Enjoy your delicious meal later!
FAQs
How long do Cheesy Garlic Chicken Wraps last in the refrigerator?
Cheesy Garlic Chicken Wraps can last for about 3 to 4 days in the fridge. Store them in an airtight container. This keeps them fresh and tasty. If they smell off or look strange, it’s best to discard them.
Can I make Cheesy Garlic Chicken Wraps ahead of time?
Yes, you can make these wraps ahead of time. Prepare the filling and store it separately from the tortillas. This way, the wraps stay fresh. When you’re ready to eat, just assemble and enjoy. You can also wrap the finished product in foil for easy grab-and-go meals.
What is the best way to reheat Cheesy Garlic Chicken Wraps?
The best way to reheat these wraps is in a skillet. Heat the skillet over medium heat, and add a little oil. Place the wrap in the skillet for about 2–3 minutes on each side. This method helps keep the wrap crispy and gooey inside. You can also use a microwave but it may make the wrap a bit soggy.
Can I substitute the chicken with another protein?
Absolutely! You can use turkey or even beef if you like. For a vegetarian option, try black beans or chickpeas. Each choice brings a new flavor. Just adjust cooking times as needed to ensure everything is cooked well.
In this blog post, we explored how to make Cheesy Garlic Chicken Wraps step by step. We covered ingredients, equipment, and helpful tips. You learned about different variations and how to store your wraps properly. My final thought: these wraps are easy to make and delicious. They are great for any meal! Try them out, and feel free to get creative with your ingredients! You can enjoy this tasty dish any night of the week.