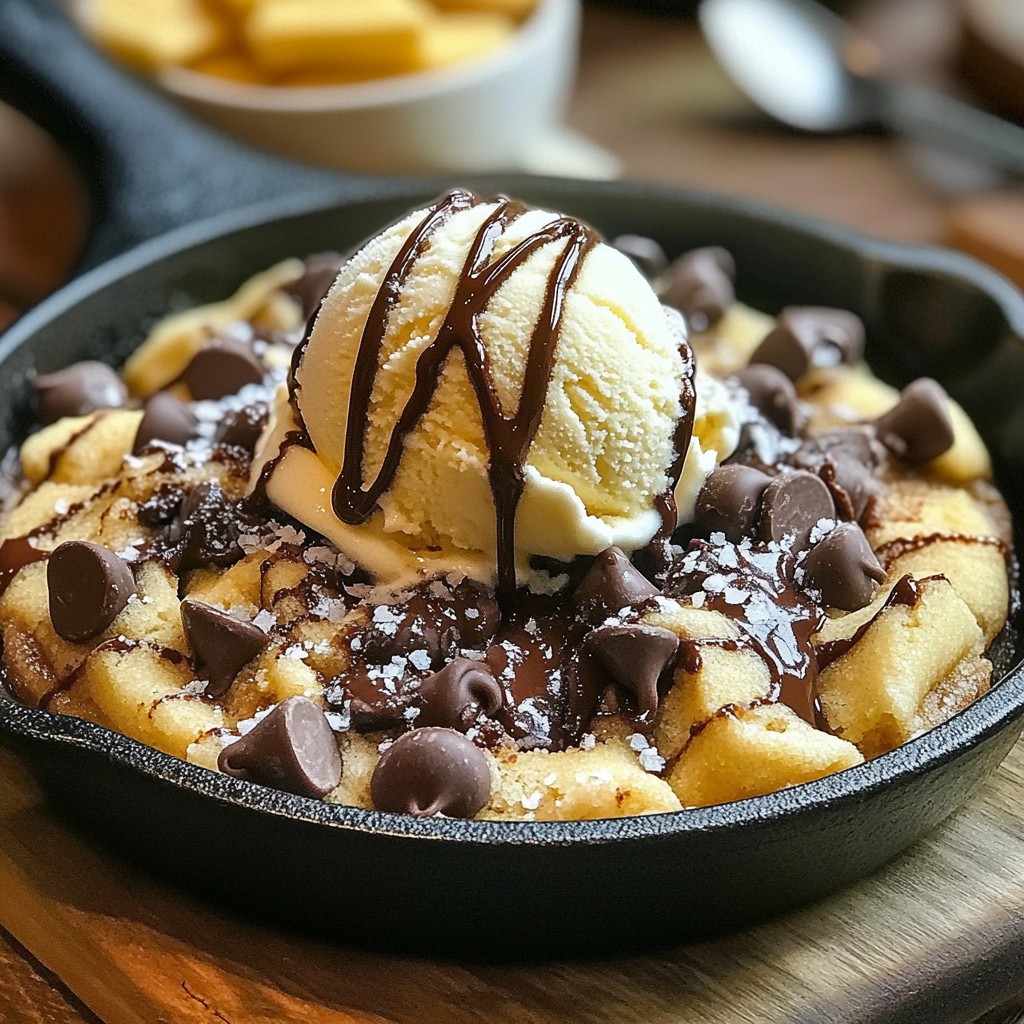
Craving a sweet treat that’s easy and fun to make? Let me introduce you to the Chocolate Chip Cookie Skillet. This giant cookie is crispy on the edge and gooey in the middle. It's perfect for sharing or just indulging on your own. In this guide, I’ll walk you through simple steps, tasty variations, and tips to make the perfect cookie every time. Let’s dive into this delicious adventure!
Why I Love This Recipe
- Easy to Make: This skillet cookie recipe is quick and simple, making it perfect for any baking novice or last-minute dessert craving.
- Shareable Delight: Baked directly in the skillet, it’s easy to slice and serve, making it a great dessert for gatherings and parties.
- Warm and Gooey: Nothing beats the experience of enjoying a warm, gooey chocolate chip cookie right out of the oven, especially when paired with ice cream.
- Customizable: This recipe is versatile; you can add your favorite mix-ins or swap out ingredients to suit your taste preferences.
Ingredients
List of Ingredients
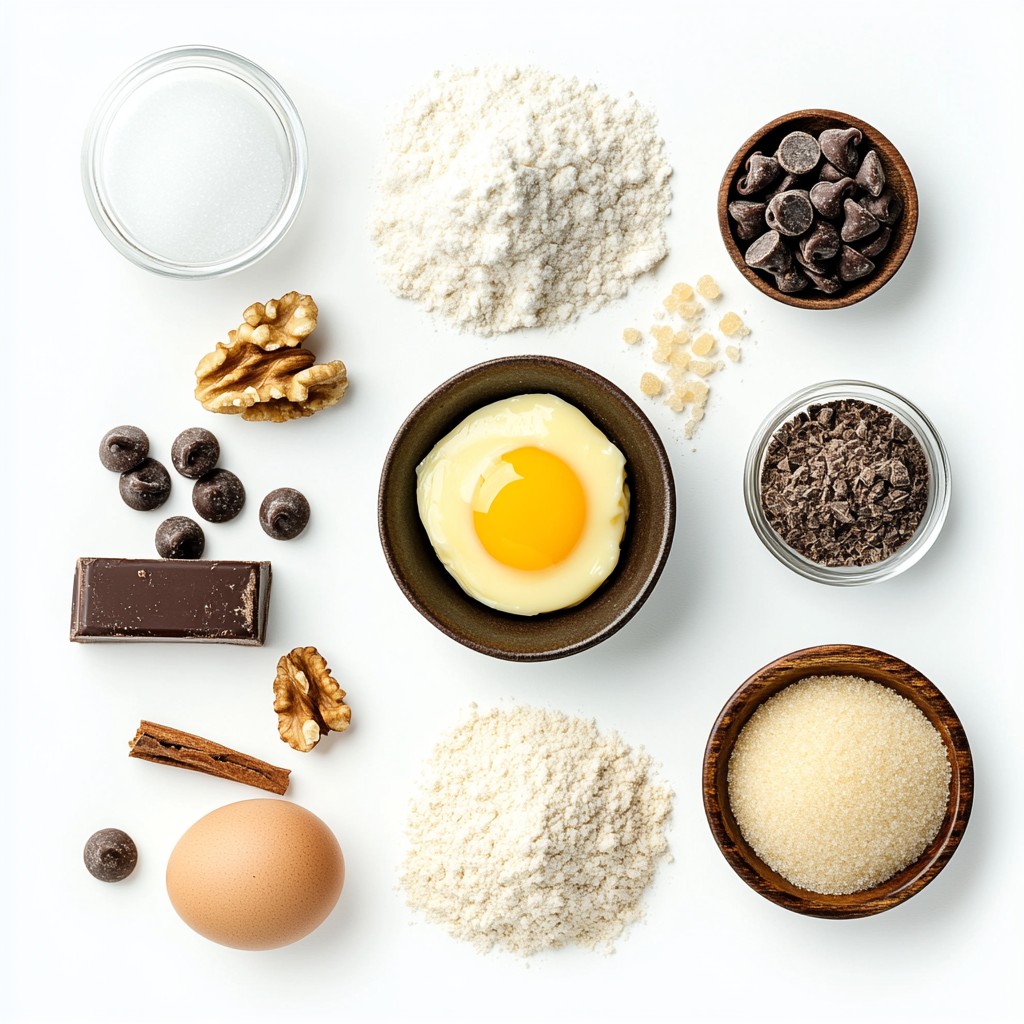
To make this chocolate chip cookie skillet, you need:
- 1 cup all-purpose flour
- 1/2 teaspoon baking soda
- 1/4 teaspoon salt
- 1/2 cup unsalted butter, melted and slightly cooled
- 1/2 cup brown sugar, packed
- 1/4 cup granulated sugar
- 1 large egg
- 1 teaspoon vanilla extract
- 1 cup semi-sweet chocolate chips
- 1/4 cup chopped walnuts (optional)
- Vanilla ice cream (for serving)
Ingredient Substitutions
If you want to change some ingredients, here are some good swaps:
- Use whole wheat flour for a healthier option.
- Coconut oil or margarine can replace unsalted butter.
- For the sugar, try using coconut sugar instead.
- You can use flaxseed meal mixed with water as a vegan egg substitute.
- Dark chocolate chips or milk chocolate chips can change the flavor.
- Skip the walnuts if you need a nut-free cookie.
Recommended Brands
Choosing good brands can make a difference. Here are some I trust:
- For flour, King Arthur Baking Company is a great choice.
- Use Land O'Lakes for quality unsalted butter.
- For chocolate chips, Ghirardelli or Nestlé are tasty options.
- Try using Bob's Red Mill for gluten-free flour if needed.
- For vanilla extract, I prefer Nielsen-Massey for its strong flavor.
Step-by-Step Instructions
Preparation Overview
Start by gathering all your ingredients. You need flour, baking soda, salt, butter, sugars, egg, vanilla, chocolate chips, and walnuts if you want them. Preheat your oven to 350°F. Grease a 10-inch cast-iron skillet with non-stick spray or butter. This will help your cookie come out easily.
Detailed Baking Instructions
1. Mix Dry Ingredients: In a bowl, whisk together 1 cup of flour, 1/2 teaspoon of baking soda, and 1/4 teaspoon of salt. This mix helps your cookie rise.
2. Combine Wet Ingredients: In another bowl, mix 1/2 cup of melted butter, 1/2 cup of brown sugar, and 1/4 cup of granulated sugar. Stir until it is smooth and creamy.
3. Add Egg and Vanilla: Crack 1 egg into the butter and sugar mix. Add 1 teaspoon of vanilla extract. Stir until everything is well mixed.
4. Combine All Ingredients: Slowly add the dry mix to the wet mix. Stir gently until just combined. Be careful not to overmix.
5. Fold in Chocolate Chips: Add 1 cup of semi-sweet chocolate chips and walnuts if you like. Use a spatula to fold them into the dough evenly.
6. Spread in Skillet: Pour the dough into the greased skillet. Use a spatula to smooth the top.
7. Bake: Place the skillet in the preheated oven. Bake for 25-30 minutes. Look for golden edges and a soft center.
8. Cool and Slice: Remove from the oven. Let it cool for 10 minutes. Slice into wedges, and enjoy!
Common Mistakes to Avoid
- Overmixing: Don't mix too much after adding the dry ingredients. This can make your cookie tough.
- Skipping Preheating: Always preheat your oven. This helps the cookie bake evenly.
- Not Using a Skillet: A cast-iron skillet works best for this recipe. Other pans may not give the same results.
- Baking Too Long: Keep an eye on the time. Check for golden edges. The center should be soft, not hard.
Tips & Tricks
How to Achieve the Perfect Gooey Center
To get that perfect gooey center, I recommend baking the cookie skillet just right. Bake it for 25 to 30 minutes. You want the edges to be golden brown. The center should still feel soft when you poke it. This balance makes it chewy and delicious. Let it cool for about 10 minutes. This helps the cookie set without losing its gooeyness.
Serving Suggestions for the Best Experience
Serving this cookie skillet is fun and easy. I love to serve it warm right from the skillet. Add a scoop of vanilla ice cream on top. The hot cookie and cold ice cream create a dreamy combo. For extra flavor, drizzle chocolate sauce over the ice cream. A sprinkle of sea salt also adds a nice touch, enhancing the chocolate flavor.
Best Skillets for Baking
Using the right skillet makes a big difference. A 10-inch cast-iron skillet works best for this recipe. It heats evenly and gives a nice crust. If you don't have cast iron, a non-stick oven-safe skillet is also good. Avoid using glass pans, as they can break in high heat. Always grease your skillet well to prevent sticking.
Pro Tips
- Tip for the Perfect Texture: Make sure your butter is melted but not too hot; this helps achieve a chewy cookie texture.
- Chill Your Dough: For even better flavor and texture, chill the cookie dough for 30 minutes before baking.
- Watch the Baking Time: Keep an eye on the cookies as they bake; removing them when they’re slightly underbaked will give you that gooey center.
- Serving Suggestions: Enhance your dessert by serving with a drizzle of caramel sauce or a sprinkle of sea salt to elevate the flavors.
Variations
Nut-Free Option
If you want a nut-free version, just skip the walnuts. This cookie skillet will still taste great without them. You can add more chocolate chips for extra flavor. Try using a mix of semi-sweet and milk chocolate chips. This gives you a sweet treat without nuts.
Gluten-Free Adaptation
To make this skillet gluten-free, swap the all-purpose flour with a gluten-free blend. Look for one that works well for baking. Make sure it has a good mix of starches and proteins for the best results. Check the label to confirm it's gluten-free. Your cookie will still be soft and chewy!
Flavor Add-Ins
You can spice things up with flavor add-ins. Try adding a pinch of cinnamon or nutmeg for warmth. You can also mix in some peanut butter chips or white chocolate chips. Each option gives a new twist to the classic cookie. Don't be afraid to experiment!
Storage Info
How to Store Leftover Cookie Skillet
To keep your cookie skillet fresh, let it cool first. Then, cover it tightly with plastic wrap or foil. You can also use an airtight container. Store it at room temperature for up to 3 days. If you want to keep it longer, the fridge works too. Just note that it may lose some softness in the fridge.
Reheating Instructions
When you’re ready to enjoy your cookie skillet again, preheat your oven to 350°F (175°C). Place the skillet in the oven for about 10 minutes. This will warm it up nicely. You can also microwave individual slices for 15-20 seconds if you prefer quick heat. Adding a scoop of ice cream on top makes it even better!
Freezing and Thawing Tips
You can freeze your leftover cookie skillet for up to 2 months. First, let it cool completely. Then, wrap it well in plastic wrap, followed by aluminum foil. When you want to eat it, take it out and thaw it in the fridge overnight. Reheat it in the oven before serving for the best taste and texture.
FAQs
Can I make this cookie skillet ahead of time?
Yes, you can prepare the dough ahead of time. Mix all the ingredients and put the dough in a bowl. Cover it tightly and store it in the fridge for up to 24 hours. When you are ready, just spread the dough in a greased skillet, and bake it. This saves time and helps with planning.
What can I use instead of a cast-iron skillet?
If you don't have a cast-iron skillet, you can use a round cake pan or a baking dish. Just make sure to grease it well with non-stick spray or butter. The baking time may vary slightly, so check the cookie at the 25-minute mark.
How do I know when the cookie is done baking?
To check if the cookie is done, look for golden brown edges. The center should be set but soft. You can gently press the surface with a finger. If it springs back, it is ready. Let it cool for about 10 minutes before slicing. Enjoy your warm, gooey cookie!
Now you have all the tools to make a delicious cookie skillet. We covered the right ingredients, helpful substitutions, and great brands. You learned step-by-step how to bake it to perfection and avoid common mistakes.
Use the tips for a gooey center and the best serving ideas. Explore nut-free and gluten-free options for everyone to enjoy. Lastly, you know how to store leftovers, reheat, and freeze them too. Enjoy your baking journey!