Chocolate Kataifi Bars Delightful and Easy Recipe

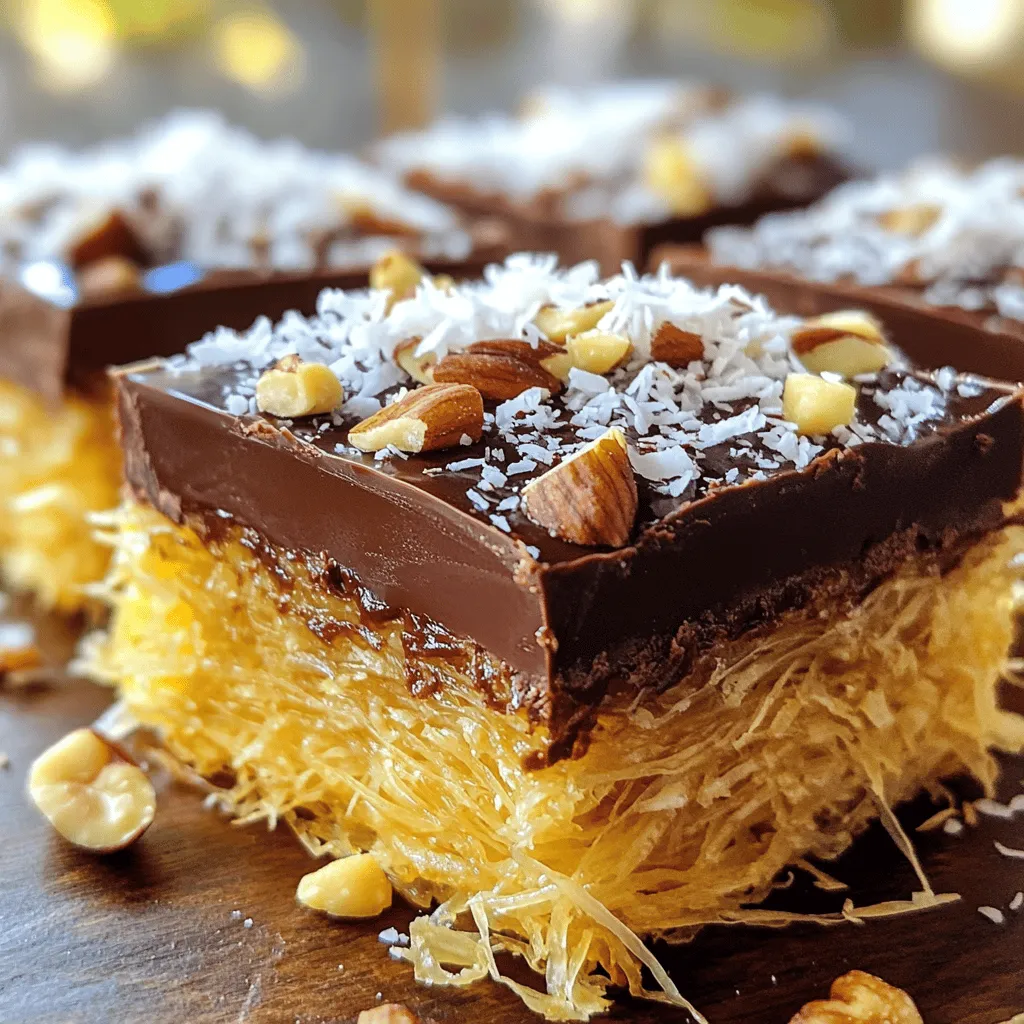
Are you ready to treat yourself to a sweet delight? In this blog post, I’ll guide you through making Chocolate Kataifi Bars that are both tasty and easy. You’ll discover simple ingredients, step-by-step instructions, and some handy tips to ensure your dessert shines. Whether you’re a beginner or a seasoned baker, these bars will impress friends and family alike. Let’s dive into this delicious recipe together!

Ingredients

Main Ingredients Needed

To make Chocolate Kataifi Bars, you need the following main ingredients:

– 200g kataifi (shredded phyllo dough)

– 100g unsalted butter, melted

– 150g dark chocolate, chopped

– 100g condensed milk

– 50g chopped nuts (walnuts or pistachios)

– 1 teaspoon vanilla extract

– A pinch of salt

These ingredients work together to create a rich and crunchy treat. The kataifi dough gives a unique texture, while the chocolate filling adds sweetness.

Optional Ingredients for Toppings

You can add some tasty toppings to enhance the bars:

– 50g shredded coconut (optional for topping)

Shredded coconut adds a nice chewiness and extra flavor. You can skip it if you prefer a simpler taste.

Kitchen Tools Required

Gather these kitchen tools for an easy cooking experience:

– A large mixing bowl

– A square baking pan (8×8 inches)

– A spatula for mixing

– A microwave-safe bowl for melting chocolate

– A knife for cutting the bars

These tools make the process smooth and enjoyable. Preparing your workspace helps you stay organized while making these delicious bars.

Step-by-Step Instructions

Preparation and Preheating

Start by preheating your oven to 180°C (350°F). Grease an 8×8-inch baking pan. You can also use parchment paper for easy removal later.

Making the Kataifi Base

Next, take a large bowl. Add 200g of kataifi and pour in 100g of melted unsalted butter. Mix well until the kataifi is coated. Press half of this mixture evenly into the bottom of the pan. This forms your base layer.

Preparing the Chocolate Filling

In another bowl, place 150g of chopped dark chocolate. Microwave it in 30-second bursts. Stir after each burst until it melts. Then, mix in 100g of condensed milk, 1 teaspoon of vanilla extract, and a pinch of salt. Stir until it is smooth. Fold in 50g of chopped nuts.

Assembling and Baking the Bars

Pour the chocolate mixture over the kataifi base in the pan. Spread it out evenly. Top with the remaining kataifi mixture, pressing it down gently. If you like, sprinkle 50g of shredded coconut on top. Bake for about 25 minutes. The top should be golden brown and the chocolate set. Once done, cool for 15 minutes before cutting into bars. Enjoy your delicious creation! For the full recipe, check out the details above.

Tips & Tricks

How to Achieve the Perfect Texture

To get the right texture for your Chocolate Kataifi Bars, keep a few things in mind. First, make sure the kataifi is fully coated with melted butter. This helps it crisp up nicely. Next, press the layers down firmly but not too hard. You want them to hold together without losing air. Lastly, watch the baking time. Bake until the top turns golden brown for the best crunch.

Common Mistakes to Avoid

Avoid these common mistakes to ensure your bars turn out great. One big mistake is not melting the chocolate enough. Be patient, and check it often in the microwave. Another mistake is overmixing the chocolate filling. Mix just until smooth. Also, don’t skip the salt! A pinch of salt brings out the chocolate’s flavor. Lastly, let the bars cool before cutting. This helps them set properly.

Serving Suggestions for Chocolate Kataifi Bars

Serve your Chocolate Kataifi Bars warm or at room temperature. They pair well with a scoop of vanilla ice cream. You can also sprinkle some extra chopped nuts on top for a fun crunch. For a special touch, drizzle melted chocolate over each bar. These bars make a great dessert for parties or just a cozy night in. For the full recipe, check the earlier section!

Variations

Flavored Chocolate Options

You can change the taste of your chocolate filling by using flavored chocolate. Look for options like orange, mint, or raspberry. These flavors add a fun twist. Just melt and mix them as you would with dark chocolate. I love how these flavors play with the kataifi!

Nut Alternatives for Different Taste

Nuts add crunch and flavor. While walnuts and pistachios are great, you can try others. Almonds, hazelnuts, or even peanuts work well. Each nut gives a unique taste and texture. Chop them finely and mix them into the chocolate for a surprise in every bite.

Additional Toppings for Extra Crunch

Want to make your bars even more exciting? Add toppings! Crushed cookies, pretzels, or seeds can provide that extra crunch. You can also sprinkle more nuts or coconut on top before baking. Each topping brings its own flavor and makes the bars more fun to eat.

Explore these ideas and make the recipe your own! For the full recipe, check the earlier section.

Storage Info

Best Practices for Storing Leftovers

To keep your Chocolate Kataifi Bars fresh, store them in an airtight container. Place parchment paper between layers to prevent sticking. You can keep them at room temperature for up to three days. If your kitchen is warm, place them in the fridge. Cold bars may taste even better!

How to Reheat Chocolate Kataifi Bars

To reheat, simply place the bars in the microwave. Heat them for about 10-15 seconds. This warms them without making them too soft. You can also reheat them in the oven. Set your oven to 150°C (300°F) and bake for 5-10 minutes. This method keeps the texture crispy.

Freezing for Future Enjoyment

To freeze your Chocolate Kataifi Bars, wrap them tightly in plastic wrap. Then, place them in a freezer bag or container. They can last up to three months in the freezer. When you’re ready to enjoy, let them thaw in the fridge overnight. You can reheat them afterward for the best taste.

FAQs

What is the origin of Kataifi?

Kataifi comes from the Middle East and Greece. It is a type of shredded pastry. People often use it in sweet and savory dishes. The name “kataifi” means “to wrap” in Arabic. This pastry is similar to other phyllo dough but is thinner and more delicate. It is perfect for layering with fillings like nuts and chocolate.

Can I use different types of chocolate?

Yes, you can use various chocolates in this recipe. Dark chocolate gives a rich taste. Milk chocolate makes it sweeter and creamier. White chocolate adds a nice touch too. Choose the type you enjoy most. Feel free to mix different chocolates for a unique flavor!

Where can I buy Chocolate Kataifi Bars?

You can find Chocolate Kataifi Bars at specialty bakeries. Some grocery stores also carry them in the dessert section. If you want to try making them, check the ingredients list. You can also find kataifi dough in Middle Eastern or Mediterranean markets. For a fun twist, make your own at home using the Full Recipe.

How long do Chocolate Kataifi Bars last?

Chocolate Kataifi Bars can last about a week if stored properly. Keep them in an airtight container at room temperature. If you want them to last longer, you can refrigerate them. Just allow them to come to room temperature before serving for the best taste and texture.

Can I make these bars gluten-free?

Yes, you can make Chocolate Kataifi Bars gluten-free! Look for gluten-free kataifi dough at specialty stores. Check the labels to ensure no gluten is present. You can also use gluten-free flour in the recipe if needed. Enjoy this treat without worry!

You now know how to make delicious Chocolate Kataifi Bars. We covered the key ingredients, essential tools, and simple steps. I shared tips to help you avoid common mistakes. You also learned ways to store your tasty bars and some fun variations to try.

Enjoy making these bars with your own twist. I hope they become a favorite in your kitchen. Happy baking!

To make Chocolate Kataifi Bars, you need the following main ingredients: - 200g kataifi (shredded phyllo dough) - 100g unsalted butter, melted - 150g dark chocolate, chopped - 100g condensed milk - 50g chopped nuts (walnuts or pistachios) - 1 teaspoon vanilla extract - A pinch of salt These ingredients work together to create a rich and crunchy treat. The kataifi dough gives a unique texture, while the chocolate filling adds sweetness. You can add some tasty toppings to enhance the bars: - 50g shredded coconut (optional for topping) Shredded coconut adds a nice chewiness and extra flavor. You can skip it if you prefer a simpler taste. Gather these kitchen tools for an easy cooking experience: - A large mixing bowl - A square baking pan (8x8 inches) - A spatula for mixing - A microwave-safe bowl for melting chocolate - A knife for cutting the bars These tools make the process smooth and enjoyable. Preparing your workspace helps you stay organized while making these delicious bars. Start by preheating your oven to 180°C (350°F). Grease an 8x8-inch baking pan. You can also use parchment paper for easy removal later. Next, take a large bowl. Add 200g of kataifi and pour in 100g of melted unsalted butter. Mix well until the kataifi is coated. Press half of this mixture evenly into the bottom of the pan. This forms your base layer. In another bowl, place 150g of chopped dark chocolate. Microwave it in 30-second bursts. Stir after each burst until it melts. Then, mix in 100g of condensed milk, 1 teaspoon of vanilla extract, and a pinch of salt. Stir until it is smooth. Fold in 50g of chopped nuts. Pour the chocolate mixture over the kataifi base in the pan. Spread it out evenly. Top with the remaining kataifi mixture, pressing it down gently. If you like, sprinkle 50g of shredded coconut on top. Bake for about 25 minutes. The top should be golden brown and the chocolate set. Once done, cool for 15 minutes before cutting into bars. Enjoy your delicious creation! For the full recipe, check out the details above. To get the right texture for your Chocolate Kataifi Bars, keep a few things in mind. First, make sure the kataifi is fully coated with melted butter. This helps it crisp up nicely. Next, press the layers down firmly but not too hard. You want them to hold together without losing air. Lastly, watch the baking time. Bake until the top turns golden brown for the best crunch. Avoid these common mistakes to ensure your bars turn out great. One big mistake is not melting the chocolate enough. Be patient, and check it often in the microwave. Another mistake is overmixing the chocolate filling. Mix just until smooth. Also, don’t skip the salt! A pinch of salt brings out the chocolate's flavor. Lastly, let the bars cool before cutting. This helps them set properly. Serve your Chocolate Kataifi Bars warm or at room temperature. They pair well with a scoop of vanilla ice cream. You can also sprinkle some extra chopped nuts on top for a fun crunch. For a special touch, drizzle melted chocolate over each bar. These bars make a great dessert for parties or just a cozy night in. For the full recipe, check the earlier section! {{image_2}} You can change the taste of your chocolate filling by using flavored chocolate. Look for options like orange, mint, or raspberry. These flavors add a fun twist. Just melt and mix them as you would with dark chocolate. I love how these flavors play with the kataifi! Nuts add crunch and flavor. While walnuts and pistachios are great, you can try others. Almonds, hazelnuts, or even peanuts work well. Each nut gives a unique taste and texture. Chop them finely and mix them into the chocolate for a surprise in every bite. Want to make your bars even more exciting? Add toppings! Crushed cookies, pretzels, or seeds can provide that extra crunch. You can also sprinkle more nuts or coconut on top before baking. Each topping brings its own flavor and makes the bars more fun to eat. Explore these ideas and make the recipe your own! For the full recipe, check the earlier section. To keep your Chocolate Kataifi Bars fresh, store them in an airtight container. Place parchment paper between layers to prevent sticking. You can keep them at room temperature for up to three days. If your kitchen is warm, place them in the fridge. Cold bars may taste even better! To reheat, simply place the bars in the microwave. Heat them for about 10-15 seconds. This warms them without making them too soft. You can also reheat them in the oven. Set your oven to 150°C (300°F) and bake for 5-10 minutes. This method keeps the texture crispy. To freeze your Chocolate Kataifi Bars, wrap them tightly in plastic wrap. Then, place them in a freezer bag or container. They can last up to three months in the freezer. When you're ready to enjoy, let them thaw in the fridge overnight. You can reheat them afterward for the best taste. Kataifi comes from the Middle East and Greece. It is a type of shredded pastry. People often use it in sweet and savory dishes. The name "kataifi" means "to wrap" in Arabic. This pastry is similar to other phyllo dough but is thinner and more delicate. It is perfect for layering with fillings like nuts and chocolate. Yes, you can use various chocolates in this recipe. Dark chocolate gives a rich taste. Milk chocolate makes it sweeter and creamier. White chocolate adds a nice touch too. Choose the type you enjoy most. Feel free to mix different chocolates for a unique flavor! You can find Chocolate Kataifi Bars at specialty bakeries. Some grocery stores also carry them in the dessert section. If you want to try making them, check the ingredients list. You can also find kataifi dough in Middle Eastern or Mediterranean markets. For a fun twist, make your own at home using the Full Recipe. Chocolate Kataifi Bars can last about a week if stored properly. Keep them in an airtight container at room temperature. If you want them to last longer, you can refrigerate them. Just allow them to come to room temperature before serving for the best taste and texture. Yes, you can make Chocolate Kataifi Bars gluten-free! Look for gluten-free kataifi dough at specialty stores. Check the labels to ensure no gluten is present. You can also use gluten-free flour in the recipe if needed. Enjoy this treat without worry! You now know how to make delicious Chocolate Kataifi Bars. We covered the key ingredients, essential tools, and simple steps. I shared tips to help you avoid common mistakes. You also learned ways to store your tasty bars and some fun variations to try. Enjoy making these bars with your own twist. I hope they become a favorite in your kitchen. Happy baking!

- Chocolate Kataifi Bars

Discover the delightful world of Chocolate Kataifi Bars, a unique treat that blends the crispiness of shredded phyllo with rich chocolate and nuts. This easy recipe will guide you step-by-step to create these delicious bars perfect for any occasion. In just 40 minutes, you can impress friends and family with an irresistible dessert. Click through to explore the recipe and indulge in this sweet sensation today!

Ingredients
  

200g kataifi (shredded phyllo dough)

100g unsalted butter, melted

150g dark chocolate, chopped

100g condensed milk

50g chopped nuts (walnuts or pistachios)

1 teaspoon vanilla extract

A pinch of salt

50g shredded coconut (optional for topping)

Instructions
 

Preheat your oven to 180°C (350°F). Grease a square baking pan (8x8 inches) with a little butter or line it with parchment paper.

    In a large bowl, combine the kataifi with melted butter and mix well until the dough is well-coated.

      Press half of the kataifi mixture evenly into the bottom of the prepared baking pan to form the base layer.

        In another bowl, heat the chopped dark chocolate in a microwave in 30-second bursts until melted, stirring after each interval to prevent burning.

          Once melted, mix in the condensed milk, vanilla extract, and a pinch of salt until smooth and well combined. Fold in the chopped nuts.

            Pour the chocolate mixture over the kataifi layer in the baking pan, spreading it out evenly.

              Top the chocolate layer with the remaining kataifi mixture, pressing it down gently to make sure it adheres.

                If desired, sprinkle shredded coconut evenly on top for added texture and flavor.

                  Bake in the preheated oven for about 25 minutes, or until the top is golden brown and the chocolate is set.

                    Remove from the oven and allow to cool in the pan for at least 15 minutes before cutting into bars.

                      Serve warm or at room temperature. Enjoy!

                        Prep Time: 15 minutes | Total Time: 40 minutes | Servings: 9 bars

                          Leave a Comment

                          Recipe Rating