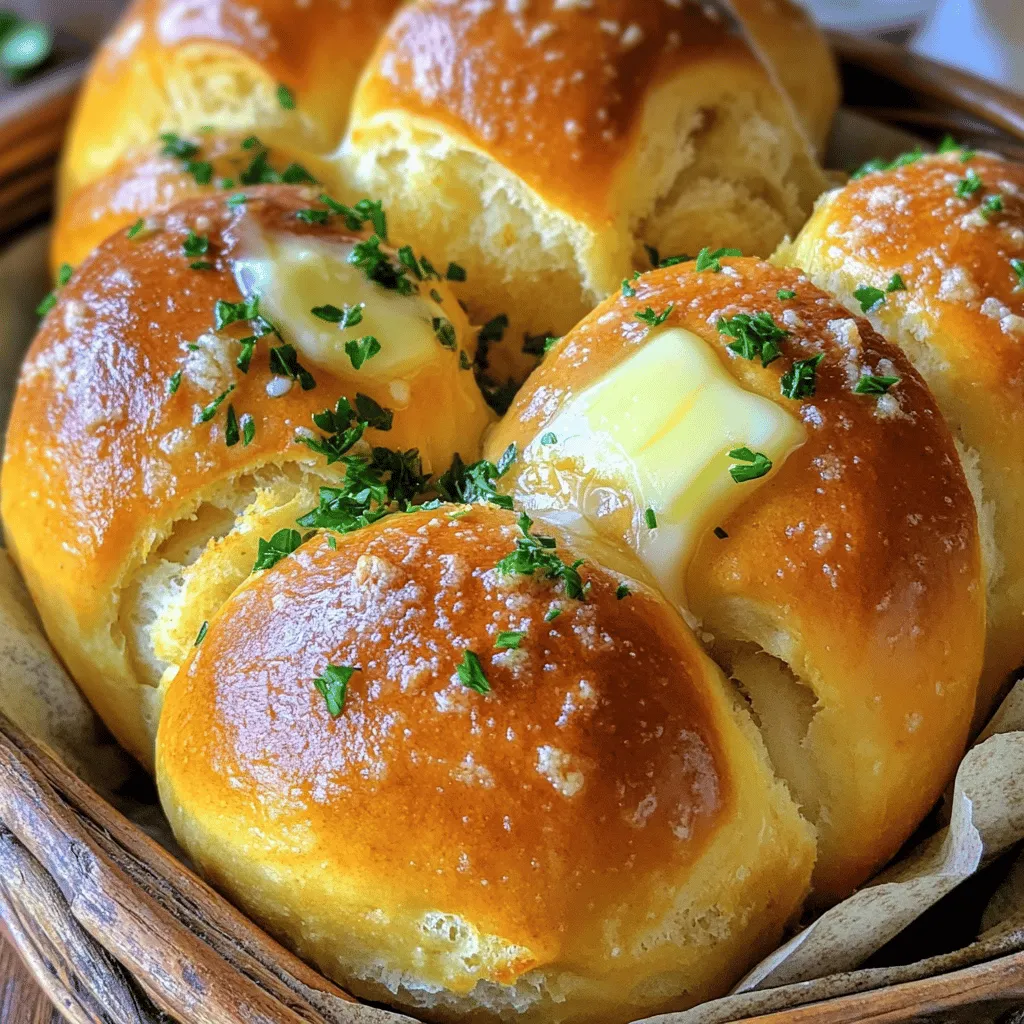
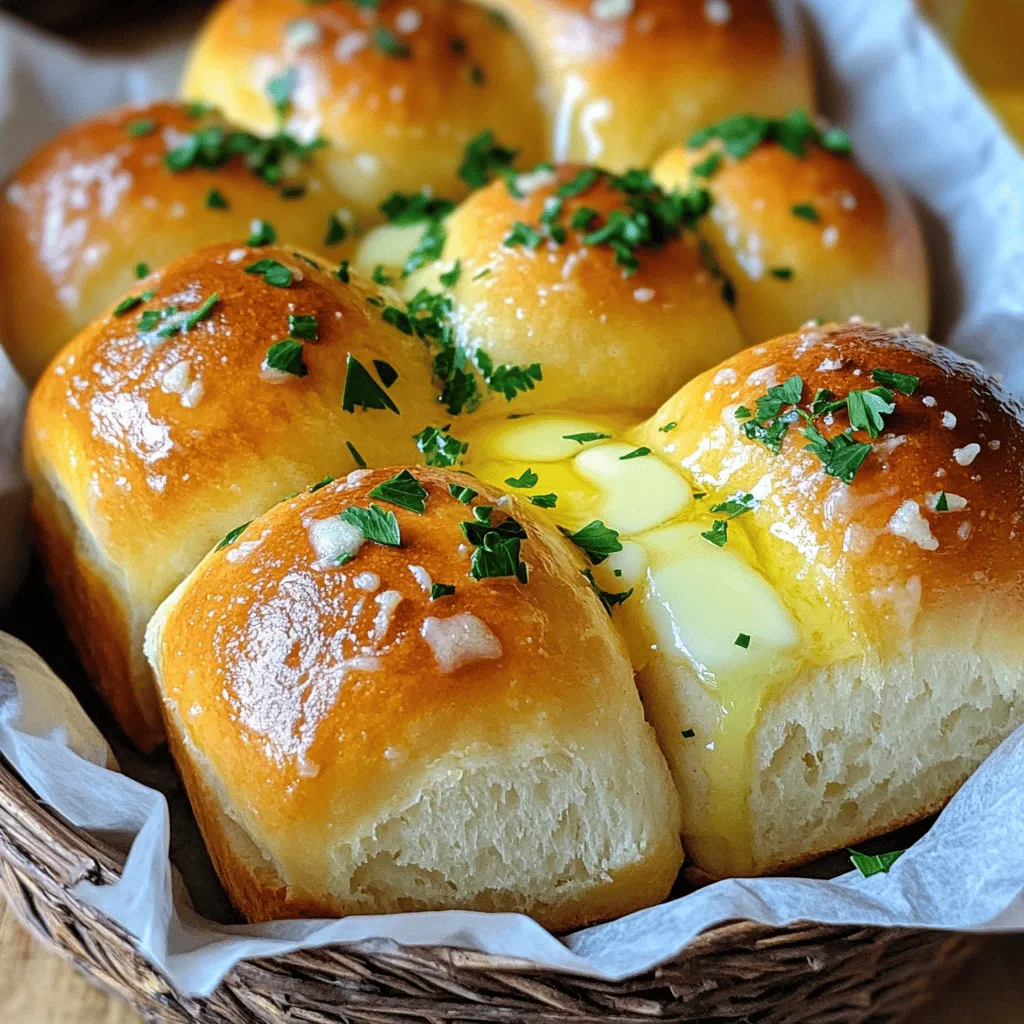
Garlic Parmesan Pull Apart Rolls are a delightful treat for any family meal. With their soft texture and rich flavor, they make every dinner special. In this post, I’ll share easy steps and useful tips to help you create these tasty rolls. Whether you want to impress guests or enjoy a cozy night in, these rolls are sure to please. Let’s dive into creating this savory favorite!
Ingredients
List of Ingredients
– 3 cups all-purpose flour
– 1 packet (2 ¼ tsp) active dry yeast
– 1 tablespoon sugar
– 1 teaspoon salt
– 1 cup warm water (110°F)
– 3 tablespoons unsalted butter, melted
– 4 cloves garlic, minced
– ½ cup grated Parmesan cheese
– 2 tablespoons fresh parsley, chopped
– 1 teaspoon Italian seasoning
– Optional: Extra melted butter for brushing
Measurement Details
I recommend measuring the flour by spooning it into a cup. This method helps avoid packing. For the warm water, use a thermometer to check the temperature. It should feel warm but not hot. Accurate measurements ensure that your rolls rise well and taste great.
Quality Tips for Ingredients
– Choose fresh garlic for a strong flavor. Look for firm cloves with no green sprouts.
– Use high-quality Parmesan cheese. Grating it fresh gives better taste than pre-grated options.
– For the best rolls, use unbleached all-purpose flour. It has a better texture and flavor.
– Fresh parsley adds a burst of color and taste. If dry is all you have, use less since it’s more potent.
– Check your yeast’s expiration date. Fresh yeast helps your rolls rise nicely.
These small details will help your Garlic Parmesan Pull Apart Rolls shine.
Step-by-Step Instructions
Preparing the Yeast Mixture
To start, you need to prepare the yeast. In a small bowl, mix warm water, sugar, and yeast. Stir gently. Let this sit for 5 to 10 minutes. You will see bubbles form on top. This means the yeast is alive and ready to use.
Making the Dough
Next, grab a large mixing bowl. Whisk together the flour and salt. Make a well in the center. Pour in your yeast mixture and the melted butter. Mix until a dough forms. Then, knead the dough on a floured surface for 5 to 7 minutes. It should feel smooth and elastic.
Now, place the dough in a greased bowl. Cover it with a clean cloth. Let it rise in a warm place. This should take about 1 hour or until it doubles in size.
Shaping and Baking the Rolls
Once the dough has risen, punch it down. Divide it into small balls, about 1 inch each. In another bowl, mix together minced garlic, grated Parmesan cheese, chopped parsley, and Italian seasoning.
Dip each dough ball into this garlic-Parmesan mix. Arrange them close together in a greased baking dish. If you like, brush extra melted butter on top. Cover the dish with a cloth. Let it rise again for 20 to 30 minutes.
Preheat your oven to 375°F (190°C). Bake the rolls for 25 to 30 minutes. They should turn golden brown on top. Allow them to cool slightly before you pull them apart and serve.
Tips & Tricks
Perfecting the Dough Texture
To get the best dough, you want it soft but not sticky. Start by adding flour slowly while mixing. Knead the dough for 5 to 7 minutes. This helps develop gluten, which gives the rolls their lovely structure. If your dough feels too wet, sprinkle in more flour, little by little. The right texture is key to fluffy rolls.
Best Practices for Rising
Rising is crucial for light rolls. After kneading, put the dough in a warm area. Cover it with a clean cloth to keep moisture in. I like to use my oven with just the light on, so it stays warm. Let it rise until it doubles in size, about one hour. This step allows the yeast to work its magic, creating air pockets.
Serving Suggestions
Serve the rolls warm for the best taste. You can place them in a rustic basket for a nice touch. Garnish with fresh parsley for color and flavor. These rolls pair well with soups or salads. You can also serve them as a snack with extra melted butter. Everyone will love pulling apart these tasty bites!
Variations
Add-Ins and Flavorings
You can easily change the taste of your Garlic Parmesan Pull Apart Rolls. Here are some fun ideas:
– Cheese: Add mozzarella or cheddar for a cheesy twist.
– Herbs: Mix in rosemary, thyme, or basil for extra flavor.
– Spices: A pinch of red pepper flakes adds a spicy kick.
– Vegetables: Try chopped spinach or sun-dried tomatoes for freshness.
Gluten-Free Options
Making these rolls gluten-free is simple. Use a 1-to-1 gluten-free flour blend. Look for one that has xantham gum. This will help the rolls hold together well.Just be sure to check the yeast is also gluten-free.
Vegetarian Alternatives
These rolls are already vegetarian, but you can make them even better. Here are a few ideas:
– Nuts: Add chopped walnuts or pine nuts for crunch.
– Seeds: Sprinkle sesame or poppy seeds on top for extra flavor.
– Plant-Based Cheese: Use vegan cheese instead of Parmesan for a dairy-free option.
These simple changes will make your Garlic Parmesan Pull Apart Rolls unique and fun for everyone. Enjoy experimenting!
Storage Info
Storing Leftover Rolls
After enjoying your garlic Parmesan pull apart rolls, you may have some left. To store them, let the rolls cool completely. Place them in an airtight container. You can also wrap them tightly in plastic wrap. This keeps them fresh. They stay good for about 2-3 days at room temperature. If you want them to last longer, refrigerate them. Just be aware that refrigeration can change their texture.
Reheating Instructions
When it’s time to eat those leftover rolls, reheating is key. Preheat your oven to 350°F (175°C). Place the rolls on a baking sheet. Cover them with aluminum foil to prevent drying out. Heat them for about 10-15 minutes. You can also microwave them for a quick option. Just heat for 15-20 seconds each roll. If you like a crispy crust, use the oven.
Freezing Tips
Freezing your garlic Parmesan pull apart rolls is a great way to save them. After they cool completely, wrap each roll in plastic wrap. Then, place them in a freezer bag. Squeeze out as much air as possible before sealing. They can stay in the freezer for up to 3 months. When you want to eat them, thaw rolls overnight in the fridge. Reheat them in the oven for the best results. Enjoy the same great taste as fresh!
FAQs
How can I make the rolls fluffier?
To make the rolls fluffier, use warm water. It should be about 110°F. This helps activate the yeast. Let the dough rise in a warm place. If the area is too cool, the rolls may not rise well. Knead the dough until it’s smooth and elastic. This helps create air pockets. You can also try adding an extra tablespoon of sugar. Sugar feeds the yeast and helps it grow.
Can I use whole wheat flour instead?
Yes, you can use whole wheat flour. It will change the texture and flavor. Whole wheat flour makes the rolls denser. If you want a lighter roll, mix half whole wheat and half all-purpose flour. This gives you some health benefits while keeping a light texture. Remember, you may need to adjust the water. Whole wheat flour absorbs more water than all-purpose flour.
How do I know when the rolls are fully baked?
To check if the rolls are fully baked, look at their color. They should be golden brown on top. You can also tap the bottom of a roll. If it sounds hollow, it is done. Another way is to use a food thermometer. The center should reach 190°F. If you follow the baking time closely, they should come out just right. Enjoy these rolls fresh from the oven for the best taste.
We covered the key steps for making perfect rolls, from choosing ingredients to final touches. You can craft soft, fluffy rolls using simple methods and tips. Remember to experiment with flavors and storage options for freshness. Whether you want gluten-free or vegetarian versions, there’s a path for you. Enjoy your baking! With practice, you’ll impress everyone with your homemade rolls.