Are you tired of hard candy loaded with corn syrup? You’re not alone! In this easy homemade recipe, I’ll show you how to create delicious, corn syrup-free hard candy right at home. With simple ingredients and clear steps, your sweet treats can be customized with flavors and colors you love. Let’s dive in and make candy that’s fun, tasty, and guilt-free!
Ingredients
To make hard candy without corn syrup, you need simple ingredients. This recipe is easy and fun. Here is what you will need:
– 2 cups granulated sugar
– 1/2 cup water
– 1/4 teaspoon cream of tartar
– 1 teaspoon flavored extract (like peppermint, lemon, or raspberry)
– Food coloring (optional)
– Powdered sugar (for dusting)
Using these ingredients, you can create tasty treats. Each flavor brings its own twist. You can mix and match flavors to suit your taste. The cream of tartar helps to keep the sugar from crystallizing. This tip is key for a smooth finish. Adding food coloring can make your candy even more fun. Use bright colors for a festive look. Don’t forget to dust your candy with powdered sugar. This helps prevent sticking.Now, let’s get cooking!
Step-by-Step Instructions
Preparing the Sugar Mixture
Start by gathering your ingredients. In a medium saucepan, combine:
– 2 cups granulated sugar
– 1/2 cup water
– 1/4 teaspoon cream of tartar
Stir gently until everything blends well. This step helps dissolve the sugar and keeps it smooth.
Cooking the Candy
Next, place the saucepan over medium heat. Bring the mixture to a boil. Do not stir as it cooks. You want to reach 300°F (149°C) on a candy thermometer. This is called the hard crack stage. It’s key for making the candy hard and crunchy.
Adding Flavors and Coloring
Once you reach the right temperature, remove the saucepan from the heat. Let it sit briefly. Now, add your flavored extract, like peppermint or lemon. If you want color, add a few drops of food coloring. Stir carefully but quickly to mix everything.
Cooling and Cutting the Candy
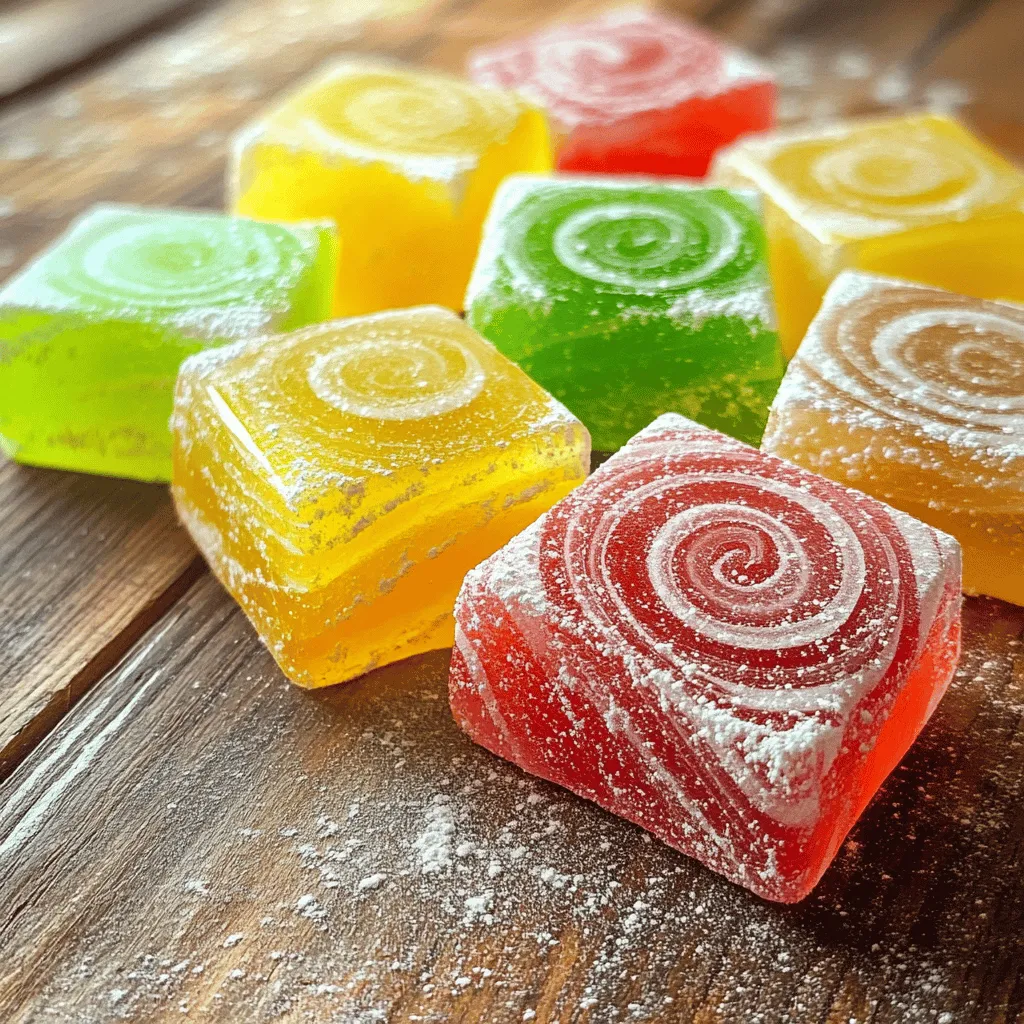
Pour the hot candy mixture onto a silicone baking mat or greased baking sheet. Spread it out to your desired thickness. Let the candy cool completely, which takes about 20-30 minutes. Once it’s hard, break it into pieces or cut it into squares. To keep the candy from sticking, dust each piece with powdered sugar.
This recipe is simple and fun to make. Enjoy creating your own hard candy without corn syrup!
Tips & Tricks
Perfecting the Candy Texture
To get hard candy right, you need to reach the hard crack stage. This is when the candy mixture hits 300°F (149°C). Use a candy thermometer for accuracy. If you don’t have one, you can test by dropping a bit of the mixture into cold water. If it forms a hard ball, you’re set!
Common issues include the candy not hardening. This can happen if the temperature is too low. Make sure to keep the heat steady and avoid stirring once it starts boiling. Another problem is sugar crystallization. To avoid this, don’t let any sugar crystals touch the sides of the pan. Wipe them down with a wet brush if needed.
Flavoring Suggestions
For flavor, the options are endless! Popular choices include peppermint, lemon, and raspberry. You can also mix flavors, like lemon and ginger, for a fun twist.
When choosing extracts, consider using natural ones for better taste. Synthetic extracts can have a strong flavor but might lack depth. Natural extracts tend to give a smoother and more balanced taste.
Presentation and Serving Ideas
When it comes to serving your candy, get creative! You can break the candy into fun shapes or use cookie cutters. For a gift, package them in pretty bags or jars. Tie a ribbon for a nice touch!
To make your candy look even better, dust it with powdered sugar. This helps keep the pieces from sticking together. It also gives a nice finish that looks professional.

Variations
Different Sweeteners to Use
You can swap granulated sugar with other sweeteners. Honey and agave syrup are great options. Both add unique flavors to your candy.
Pros and cons of each sweetener:
– Honey: It brings a floral taste and is natural. However, it may alter the candy’s texture slightly.
– Agave syrup: This sweetener is low on the glycemic index. It keeps the candy softer but may require adjustments in cooking time.
Flavor Variations
Experimenting with flavors can make your candy special. You can use spices like cinnamon or ginger. Fresh herbs like mint or basil can also add a twist.
Seasonal flavor inspirations:
– Fall: Try pumpkin spice or apple cinnamon.
– Winter: Think of peppermint or spiced orange.
– Spring: Use floral notes like lavender or lemon verbena.
– Summer: Refreshing flavors like watermelon or coconut work well.
Themed Hard Candies
Creating themed hard candies is a fun way to celebrate. You can make holiday treats or personalized designs for gifts.
Ideas for holiday-themed candies:
– Christmas: Use red and green colors with peppermint flavor.
– Halloween: Shape candies like ghosts or pumpkins with orange and black colors.
– Valentine’s Day: Heart-shaped candies with strawberry or cherry flavor.
Personalized candy designs:
You can add names or messages with food-safe markers. This makes your candy special for any occasion.Enjoy your candy-making adventure!
Storage Info
Best Practices for Storage
Store your hard candy in a cool, dry place. Use airtight containers to keep it fresh. Glass jars or plastic containers with tight lids work well. Avoid using paper bags, as they let in moisture.
Shelf Life of Homemade Hard Candy
Homemade hard candy lasts for about two to three weeks. It stays fresh if stored properly. Look for signs of spoilage, like stickiness or a change in color. If your candy feels soft, it may be past its prime.
Tips for Reviving Stale Candy
To soften hard candy, place it in a sealed plastic bag with a slice of bread. The moisture from the bread helps revive the candy. You can also melt it down to use in other recipes. Try adding melted candy to desserts like cookies or cakes for a fun twist. For a new treat, sprinkle crushed stale candy over ice cream or yogurt. This adds a sweet crunch to your favorite snacks!
FAQs
Can I use granulated sugar substitutes?
You can use sugar substitutes like stevia, monk fruit, or erythritol. However, they may not cook the same way as sugar does. This can change the texture of your candy. Always check the package for heat settings. Some substitutes may not handle high heat well.
Is there a vegan option for this recipe?
Yes, this recipe is naturally vegan! It does not use any animal products. Just ensure your flavored extracts are vegan-friendly too. Many brands offer plant-based options.
How do I adjust the recipe for different quantities?
To scale the recipe, simply multiply or divide the ingredient amounts. For example, if you need more candy, double each ingredient. If you want less, cut everything in half. Keep the cooking time the same, but check the candy for doneness.
What equipment do I need for making hard candy without corn syrup?
You will need a few key tools:
– Medium saucepan
– Candy thermometer
– Silicone baking mat or greased baking sheet
– Sharp knife or mallet for breaking
Having these tools will help you make perfect hard candy.
Where can I buy corn syrup-free hard candy?
You can find corn syrup-free hard candy at health food stores or online. Look for brands like YumEarth and Surf Sweets. They offer tasty options without corn syrup. Always read the label to ensure it fits your needs.
Making homemade hard candy is fun and rewarding. You learned about the ingredients, the step-by-step process, and key tips for success. Experiment with flavors and sweeteners to create your own unique treats. Don’t forget to store your candy properly for freshness! With these insights, you can confidently craft delicious candies for any occasion. Enjoy the sweet journey ahead!