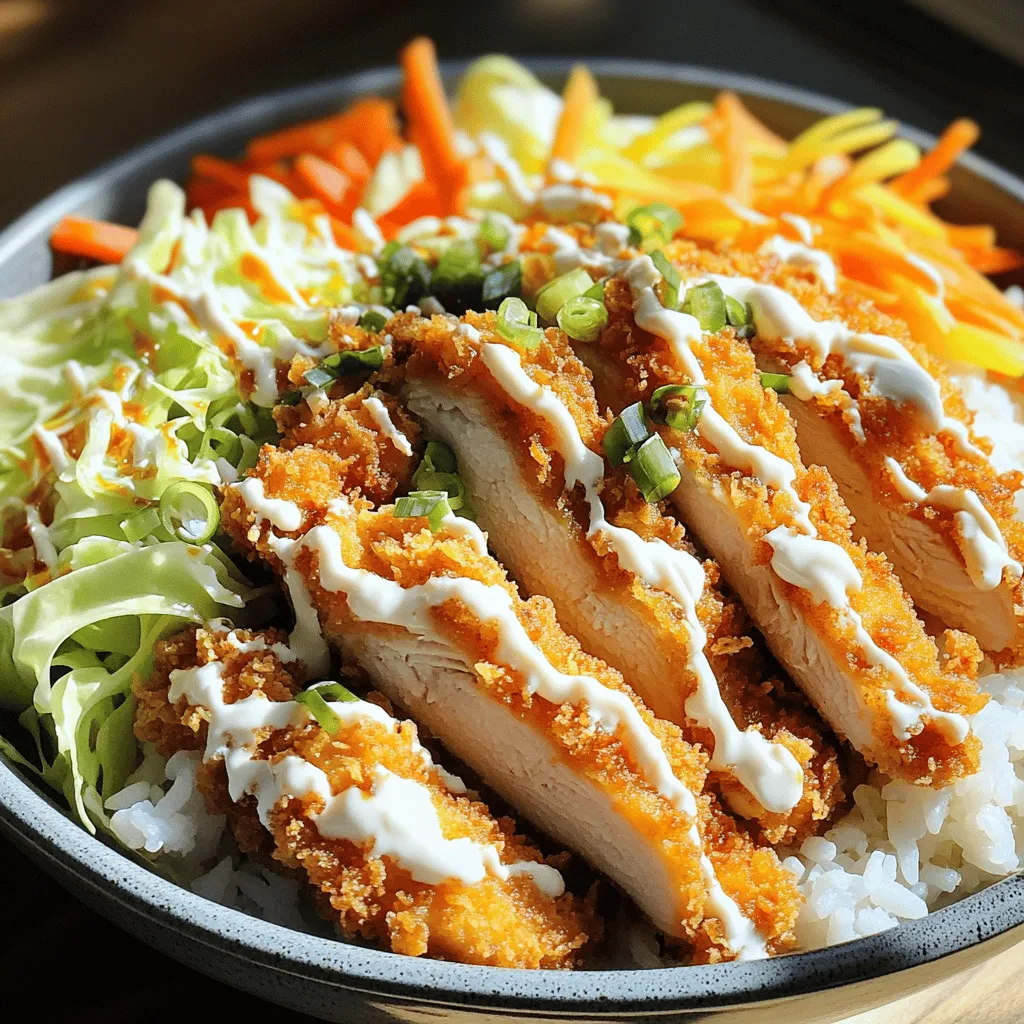
Are you ready to find your new favorite meal? Japanese Katsu bowls are fresh, crunchy, and packed with flavor. In this guide, I’ll share how to create the perfect Katsu bowl, from selecting ingredients to cooking techniques. Whether you love chicken, pork, or tofu, there’s a Katsu variation for you. Get ready to impress your taste buds and bring a slice of Japan into your kitchen!
Ingredients
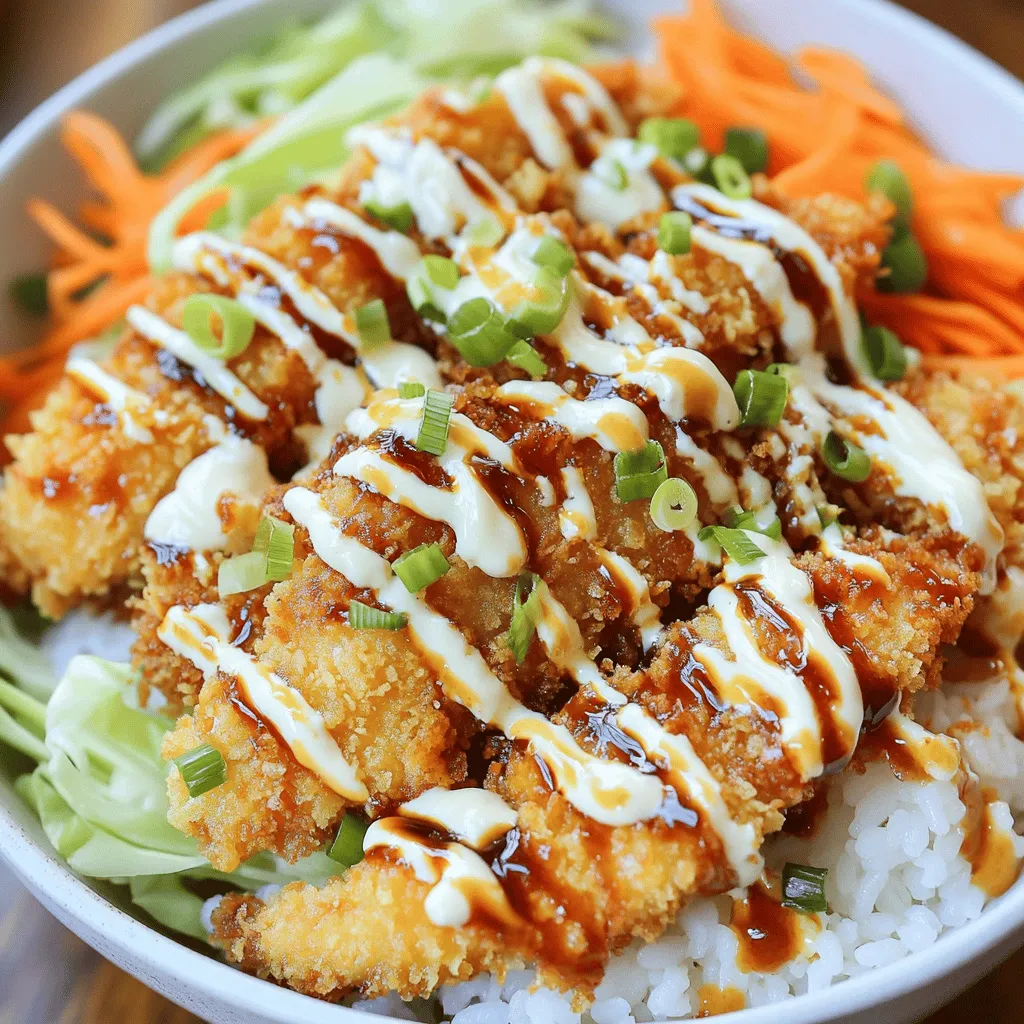
Main Ingredients for Crunchy Chicken Katsu Bowl
To make a tasty Chicken Katsu Bowl, you need the following:
– 2 boneless, skinless chicken breasts
– 1 cup panko breadcrumbs
– 1/2 cup all-purpose flour
– 2 large eggs
– 1 tablespoon soy sauce
– 2 cups cooked sushi rice
– 1/4 cup tonkatsu sauce
– 1/4 cup mayonnaise (optional, for drizzling)
– 1 green onion, sliced (for garnish)
– 1 cup shredded cabbage
– 1 small carrot, julienned
– Salt and pepper to taste
– Oil for frying
These ingredients create a crunchy and flavorful experience. The panko breadcrumbs give the dish its signature crispiness. Chicken breasts are easy to cook and pair well with the rice and veggies.
Optional Ingredients for Customization
You can change your Katsu Bowl to fit your taste. Consider adding:
– Pickled ginger for a tangy kick
– Avocado slices for creaminess
– Edamame for extra protein
– Sesame seeds for crunch
These extras can boost flavor and texture. Feel free to mix and match based on what you like.
Recommended Side Dishes
To make your meal even better, serve it with these sides:
– Miso soup for warmth
– Steamed broccoli for color
– Japanese pickles for a nice contrast
These sides complement the Katsu Bowl well. They add balance and more taste to your meal.Enjoy cooking!
Step-by-Step Instructions
Preparing the Chicken
Start with your chicken breasts. Place them between two pieces of plastic wrap. Use a meat mallet to pound them gently until they are about 1/2 inch thick. This helps the chicken cook evenly. Season both sides with salt and pepper. Make sure to cover all areas for flavor.
Setting Up Your Breading Station
Now it’s time for the breading. Gather three shallow bowls. In the first bowl, add all-purpose flour. In the second bowl, beat two eggs and mix in a tablespoon of soy sauce. This adds extra flavor. In the last bowl, add panko breadcrumbs. This will give your katsu that beautiful crunch.
Cooking the Katsu
Heat about 1/2 inch of oil in a large frying pan over medium heat. Wait until the oil shimmers. Carefully place the breaded chicken into the hot oil. Fry for about 4-5 minutes on each side. You want it golden brown. Use a meat thermometer to check that the inside reaches 165°F (75°C). After frying, move the chicken to a paper towel-lined plate to drain excess oil. Let it rest for a few minutes, then slice it into strips.
With these steps, your katsu will be fresh and crunchy. Now, let’s put it all together in a bowl.
Tips & Tricks
Achieving Perfectly Crispy Katsu
To get that perfect crunch, start with panko breadcrumbs. They are lighter and crispier than regular breadcrumbs. Make sure to press the breadcrumbs gently onto the chicken. This helps them stick better while frying. Also, use enough oil in your pan. The oil should cover half the chicken. This allows for even cooking and a golden crust.
Ways to Enhance Flavor
You can add flavor in simple ways. Try marinating the chicken in soy sauce for about 30 minutes. This gives it a tasty base. Also, mix some spices into your flour. A pinch of garlic powder or paprika can add a nice kick. Don’t forget the tonkatsu sauce! It adds sweetness and tang. Drizzling mayonnaise on top can give it a creamier texture too.
Common Mistakes to Avoid
Avoid using too much flour on the chicken. It can make your katsu heavy instead of light. Also, don’t rush the frying process. Frying too quickly can burn the outside while leaving the inside raw. Remember to check the temperature of the chicken. It should reach 165°F (75°C) for safety. Finally, let the cooked chicken rest before slicing. This keeps it juicy and flavorful.
Variations of Katsu Bowls
Pork Katsu Bowls: A Flavorful Alternative
Pork katsu bowls use tender pork instead of chicken. They offer a rich, savory taste. For this dish, you can use pork loin or pork chops. The steps are similar to chicken katsu. First, season and bread the pork like the chicken. Fry it until golden brown, then slice it. Serve it over sushi rice with fresh veggies. The tonkatsu sauce adds a sweet and tangy kick.
Tofu Katsu Bowls for Plant-Based Options
Tofu katsu bowls are perfect for those who prefer plant-based meals. Start with firm tofu for a great texture. Press the tofu to remove excess moisture. Then slice it into thick pieces. Coat the tofu in flour, dip in egg or a plant-based substitute, and cover with panko. Fry until crispy and serve it over rice. You can add a drizzle of tonkatsu sauce to enhance the flavor. This dish is not only tasty but also healthy.
Exploring Regional Variations of Katsu Bowls
Katsu bowls vary across Japan, showing local tastes. In some areas, people use different meats like beef or shrimp. Others might add unique toppings like kimchi or pickled vegetables. Some regions even serve katsu with curry sauce instead of tonkatsu sauce. Each variation brings new flavors and textures. Try different styles to find your favorite! Each bowl tells a story of its origin. For those who want to explore, the crunchy chicken katsu bowl is a classic and a great start.
Storage Info
Storing Leftovers Properly
After enjoying your crunchy chicken katsu bowl, store leftovers in an airtight container. This helps keep the chicken crispy and the rice fresh. If you have extra katsu, separate it from the rice and veggies. This way, they won’t get soggy. You can keep leftovers in the fridge for up to three days.
Reheating Methods for Best Results
To reheat your katsu bowl, use an oven or an air fryer. Preheat the oven to 350°F (175°C). Place the chicken on a baking sheet. Heat it for about 10 minutes. This keeps it crispy. You can also use an air fryer at 350°F (175°C) for about 5-7 minutes. Avoid the microwave, as it makes the chicken soft.
Shelf Life of Ingredients
The cooked chicken katsu lasts about three days in the fridge. Sushi rice is best eaten within two days. Cabbage and carrots can stay fresh for about a week if stored properly. Always check for any signs of spoilage before using. Keeping track of your food helps reduce waste and ensures you enjoy fresh meals.
FAQs
What is the origin of Katsu?
Katsu comes from Japan and is short for “katsuretsu.” It means cutlet. The dish gained popularity in the late 19th century. It has roots in European cooking, especially the French dish “cotoletta.” Katsu features breaded and fried meat, often pork or chicken. Over time, it evolved into a beloved comfort food in Japan.
Can I make Katsu bowls gluten-free?
Yes, you can make Katsu bowls gluten-free. Use gluten-free panko breadcrumbs and flour. Many brands offer these options. Ensure that other ingredients like soy sauce are also gluten-free. This way, you can enjoy a crunchy and tasty Katsu bowl without gluten.
What are the best sauces for Katsu bowls?
Tonkatsu sauce is the classic choice for Katsu bowls. It has a rich, sweet, and tangy taste. You can also try curry sauce for a unique flavor twist. Some people enjoy drizzling spicy mayo for extra kick. Each sauce adds a different layer to your Katsu experience.
How to adjust the recipe for meal prep?
To adjust the recipe for meal prep, cook larger batches of Katsu and rice. Store them separately to keep them fresh. You can slice the Katsu and store it in airtight containers. Reheat the chicken in an oven to keep it crispy. This makes for easy, delicious meals throughout the week.
In this blog post, we explored the delicious Crunchy Chicken Katsu Bowl. We covered main and optional ingredients and even suggested tasty side dishes. The step-by-step guide helped you prepare and cook the katsu perfectly. We shared tips for achieving that crunchy texture and avoiding common mistakes. Plus, we looked at tasty variations and how to store any leftovers.
Katsu bowls are fun and easy to make. With these insights, you’ll impress your friends and family. Happy cooking!