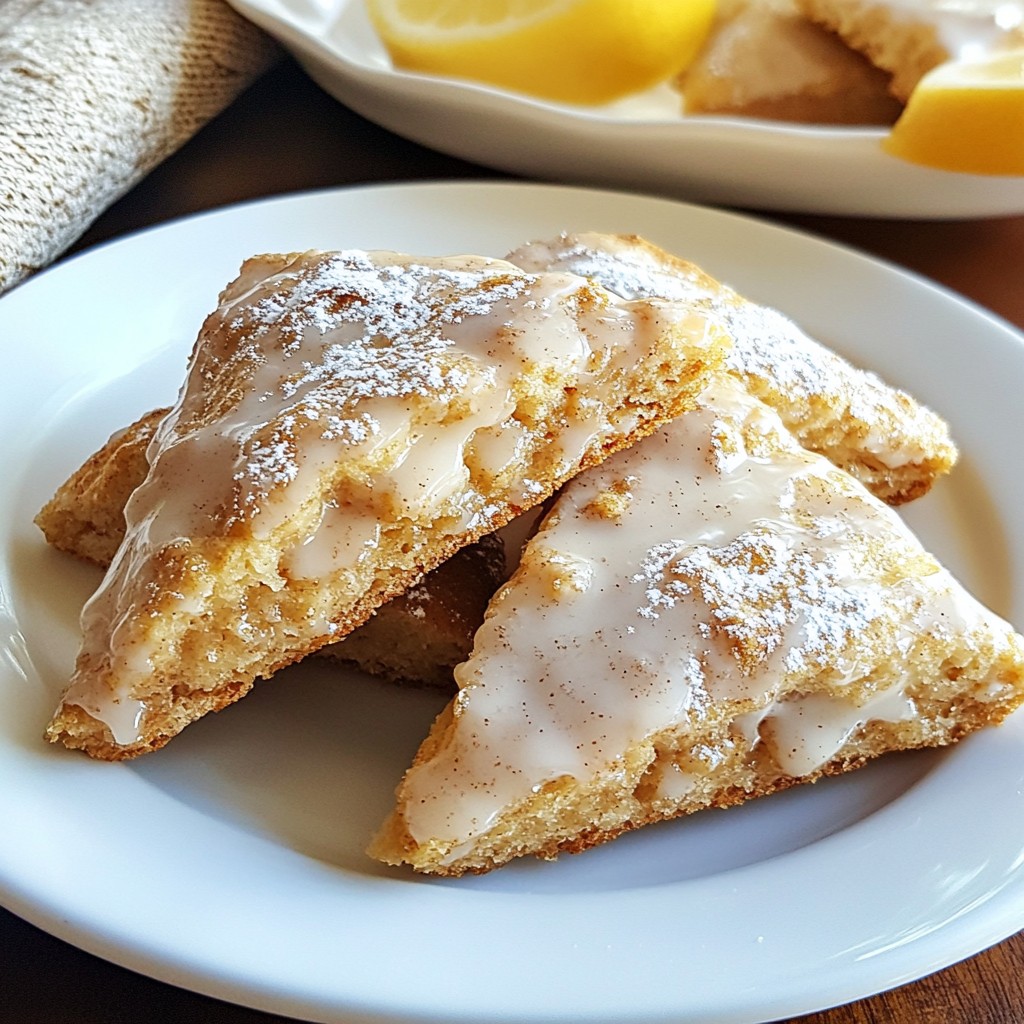
Get ready to elevate your baking game with my Maple Glazed Cinnamon Scones. These treats blend warm spices and sweet maple for a perfect bite. Even better, they’re super easy to make! I’ll guide you through each step and share tips to avoid common mistakes. Whether you’re a novice or a baking pro, you'll want to try these delicious scones. Let’s dive in and make something amazing together!
Why I Love This Recipe
- Easy to Make: This recipe is straightforward and requires minimal ingredients, making it perfect for both novice and experienced bakers.
- Delicious Flavor: The combination of maple and cinnamon offers a warm and comforting flavor that’s perfect for any season.
- Perfect for Sharing: These scones are great for gatherings, brunches, or as a sweet treat to share with friends and family.
- Customizable: You can easily add nuts, dried fruits, or even chocolate chips to the dough for a personal twist on this classic recipe.
Ingredients
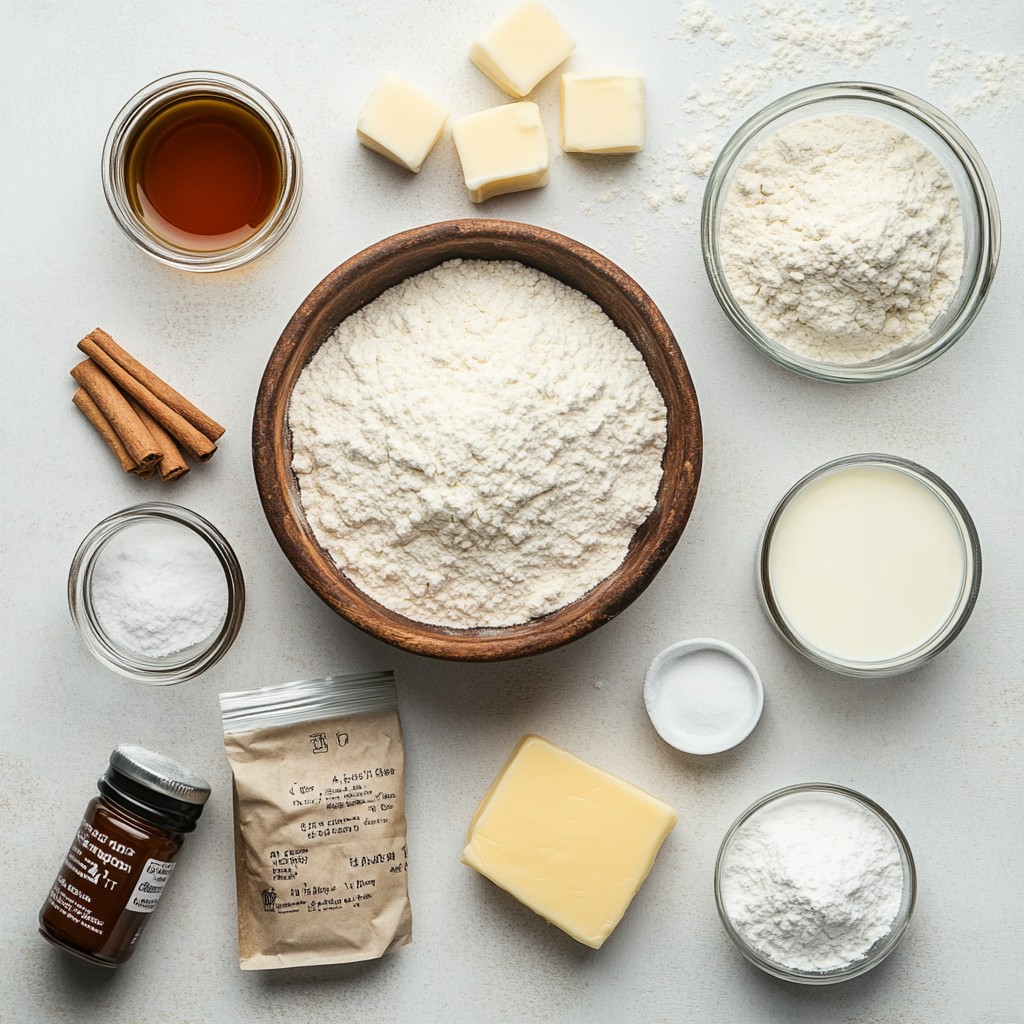
List of Required Ingredients
To make these tasty maple glazed cinnamon scones, you need:
- 2 cups all-purpose flour
- 1/2 cup granulated sugar
- 2 teaspoons baking powder
- 1/2 teaspoon baking soda
- 1 teaspoon ground cinnamon
- 1/4 teaspoon salt
- 1/2 cup unsalted butter, cold and cubed
- 3/4 cup buttermilk
- 1 teaspoon vanilla extract
- 1/2 cup maple syrup (for glazing)
- 1/4 cup powdered sugar (for glazing)
Ingredient Spotlight
Let’s talk about the star ingredients. First, we have all-purpose flour. This flour gives the scones their perfect structure. Next is cold butter. Cold butter helps create a light and flaky scone. The buttermilk adds moisture and a nice tang. Lastly, maple syrup gives the glaze its sweet and rich flavor. You can’t go wrong with these ingredients!
Possible Substitutions
If you don’t have all-purpose flour, you can use whole wheat flour. This swap makes the scones a bit denser but still tasty. For the buttermilk, you can mix milk with a splash of vinegar or lemon juice. This creates a similar tangy flavor. If you prefer, you can use a dairy-free butter for a vegan option. Just make sure to choose a butter that can be cold and cubed!
Step-by-Step Instructions
Prepping the Dough
Start by preheating your oven to 400°F (200°C). Line a baking sheet with parchment paper. In a big bowl, mix together 2 cups of all-purpose flour, 1/2 cup of granulated sugar, 2 teaspoons of baking powder, 1/2 teaspoon of baking soda, 1 teaspoon of ground cinnamon, and 1/4 teaspoon of salt. Make sure everything is well combined.
Next, take 1/2 cup of cold, cubed unsalted butter. Add it to the flour mix. Use a pastry cutter or your fingers to rub the butter into the flour. Keep going until it looks like coarse crumbs.
In another bowl, mix 3/4 cup of buttermilk with 1 teaspoon of vanilla extract. Pour this mix into the dry ingredients. Stir gently until it just comes together. Don’t overmix.
Transfer the dough to a lightly floured surface. Pat it into a circle that is about 1 inch thick. Cut the dough into 8 equal wedges. Place the wedges on your prepared baking sheet, leaving space between each one.
Baking the Scones
Now, it’s time to bake! Put your baking sheet in the oven. Bake for 15 to 20 minutes. They are ready when they turn golden brown on the edges. To check, insert a toothpick into a scone. If it comes out clean, they are done.
Once baked, take them out and let them cool on a wire rack. This step gives them a nice texture.
Making the Maple Glaze
While the scones cool, you can make the glaze. In a small bowl, whisk together 1/2 cup of maple syrup and 1/4 cup of powdered sugar. Keep whisking until the glaze is smooth.
Once the scones are cool, drizzle the maple glaze over them. Be generous! Let the glaze set for a few minutes before serving. Enjoy your tasty treat!
Tips & Tricks
Achieving the Perfect Texture
To get that soft and flaky texture, keep your butter cold. This helps your scones rise well. When you mix the butter into the flour, do it gently. You want small bits of butter in the dough. This creates layers. Be careful not to overmix when adding buttermilk. Stir just enough to combine. If you see dry flour, it's ready.
Common Mistakes to Avoid
A common mistake is using warm butter. This can lead to dense scones that lack fluffiness. Another mistake is overbaking. Keep an eye on your scones in the oven. They should be golden brown, not dark. Lastly, don’t skip the glaze! It adds flavor and makes your scones shine.
Essential Baking Tools
You will need a few tools for success. A mixing bowl is a must for your dry ingredients. Use a pastry cutter or your fingers to mix in the butter. A rolling pin helps flatten the dough. A sharp knife or pizza cutter is great for cutting scones. Finally, have a baking sheet lined with parchment paper ready. This keeps your scones from sticking.
Pro Tips
- Use Cold Butter: Ensure your butter is very cold for flaky scones. Cut it into the flour quickly to avoid melting.
- Don’t Overmix: Mix the dough just until combined to keep the scones tender. Overmixing can lead to tough scones.
- Pat, Don’t Roll: Pat the dough into shape instead of rolling it out. This prevents the formation of too much gluten.
- Glaze While Warm: Drizzle the glaze on the scones while they are still warm for better absorption and flavor.
Variations
Flavor Combinations
You can mix flavors to create fun scone variations. Try adding 1/2 cup of chocolate chips for a sweet twist. For a fresh taste, fold in 1/2 cup of chopped apples or pears. Nuts also work well. Chopped pecans or walnuts add crunch and flavor. You can swap some of the cinnamon for nutmeg for a different spice note.
Gluten-Free Option
To make gluten-free scones, replace the all-purpose flour with a gluten-free blend. Look for a blend that has xanthan gum. This helps mimic the texture of regular flour. Keep the other ingredients the same. Your scones will still be soft and delicious.
Seasonal Toppings
Seasonal toppings can add fun flair to your scones. In fall, sprinkle chopped pecans on top before baking. In winter, try a sprinkle of crushed peppermint candy for a holiday touch. In spring, add a light lemon glaze instead of maple for a bright flavor. For summer, fresh berries on top can be delightful. These toppings will change the scone experience each season.
Storage Info
How to Store Leftovers
To store leftover maple glazed cinnamon scones, place them in an airtight container. This keeps them fresh. You can leave them at room temperature for up to three days. If you want to store them longer, consider refrigeration.
Reheating Instructions
Reheating is simple. Preheat your oven to 350°F (175°C). Place the scones on a baking sheet. Warm them for about 5 to 10 minutes. This restores their soft texture. You can also use a microwave. Heat for 15-20 seconds, but they may lose some crispiness.
Freezing Scones for Later
Freezing is a great way to save scones. First, let them cool completely. Then, wrap each scone tightly in plastic wrap. Place them in a freezer bag or container. They can last up to three months in the freezer. When you’re ready to eat them, thaw overnight in the fridge, then reheat. Enjoy your scones whenever you like!
FAQs
Can I make these scones ahead of time?
Yes, you can make these scones ahead of time. You can prepare the dough a day before. Just wrap it tightly in plastic wrap and store it in the fridge. When you're ready, cut the dough into wedges and bake. You can also bake the scones and store them. Just let them cool completely before wrapping them. They will stay fresh when stored at room temperature for a couple of days.
How do I know when the scones are done?
You can tell when the scones are done by checking their color. They should be golden brown on the edges. You can also insert a toothpick into a scone. If it comes out clean, the scones are ready. Keep an eye on them as they bake, as oven times can vary. Usually, they take about 15 to 20 minutes.
What can I serve with maple glazed cinnamon scones?
These scones taste great on their own, but you can serve them with many things. Try pairing them with a hot cup of coffee or tea. You can also add a dollop of whipped cream or a side of fruit. A nice fruit jam or butter goes well too. For a special treat, serve them with a drizzle of extra maple syrup.
You've now learned all about making delicious scones. We covered ingredients, step-by-step instructions, helpful tips, and fun variations. Remember to use the right tools and avoid common mistakes for the best results. Storing and reheating your scones properly keeps them fresh. You can even freeze them for later treats. With these insights, you can confidently create scones that impress. Enjoy the process of baking and share your tasty results with others!