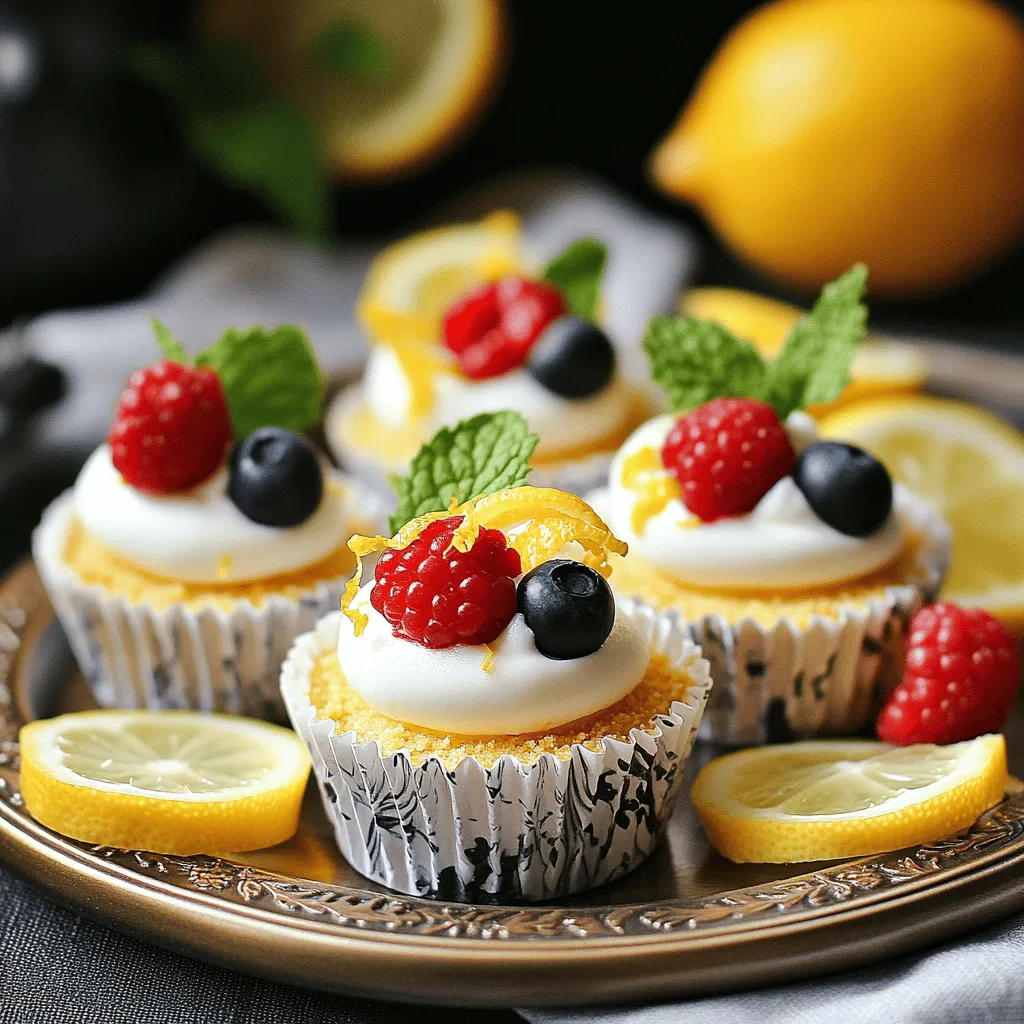
If you’re craving a sweet treat that’s both easy and refreshing, these No-Bake Mini Lemon Cheesecakes are perfect for you! I’ll guide you through each step to make this delicious dessert without turning on the oven. With simple ingredients and quick instructions, you can impress family and friends in no time. Let’s dive into the cheerful world of lemony goodness that will brighten any occasion!
Ingredients
List of Required Ingredients
To make these no-bake mini lemon cheesecakes, gather the following items:
– 1 cup graham cracker crumbs
– 1/4 cup unsalted butter, melted
– 2 tablespoons sugar
– 8 oz cream cheese, softened
– 1/2 cup powdered sugar
– 1/2 cup heavy cream
– 1/4 cup fresh lemon juice
– Zest of 1 lemon
– 1 teaspoon vanilla extract
– Fresh berries (for garnish, optional)
Substitutions and Allergens
If you need to make swaps, here are some ideas:
– Use gluten-free graham crackers for a gluten-free crust.
– Replace cream cheese with a dairy-free alternative for a vegan version.
– Substitute heavy cream with coconut cream for a lighter option.
Always check for allergens. Use caution if you have any food sensitivities.
Equipment Needed
You will need a few tools to make this recipe:
– A medium mixing bowl
– A large mixing bowl
– An electric mixer
– Mini cheesecake cups or a muffin tin lined with cupcake liners
– A spatula for mixing and scraping
– A refrigerator for chilling
These tools help make the process smooth and fun!
Step-by-Step Instructions
Preparing the Crust
Start by gathering your materials. You need graham cracker crumbs, melted butter, and sugar. In a medium bowl, mix the crumbs, butter, and sugar. Stir until it looks crumbly. This is your crust base. Now, take mini cheesecake cups or a muffin tin lined with cupcake liners. Press the crumb mixture firmly into the bottom of each cup. Make sure the crust is even. This step helps hold the filling well.
Making the Cheesecake Filling
Now, let’s make the filling! You’ll need softened cream cheese, powdered sugar, heavy cream, fresh lemon juice, lemon zest, and vanilla extract. In a large bowl, beat the cream cheese with an electric mixer. Mix until it’s smooth and creamy. Gradually add the powdered sugar while mixing. Next, add the heavy cream, lemon juice, lemon zest, and vanilla extract. Beat again until it’s well-blended. This mixture should be fluffy and light.
Assembling and Chilling the Mini Cheesecakes
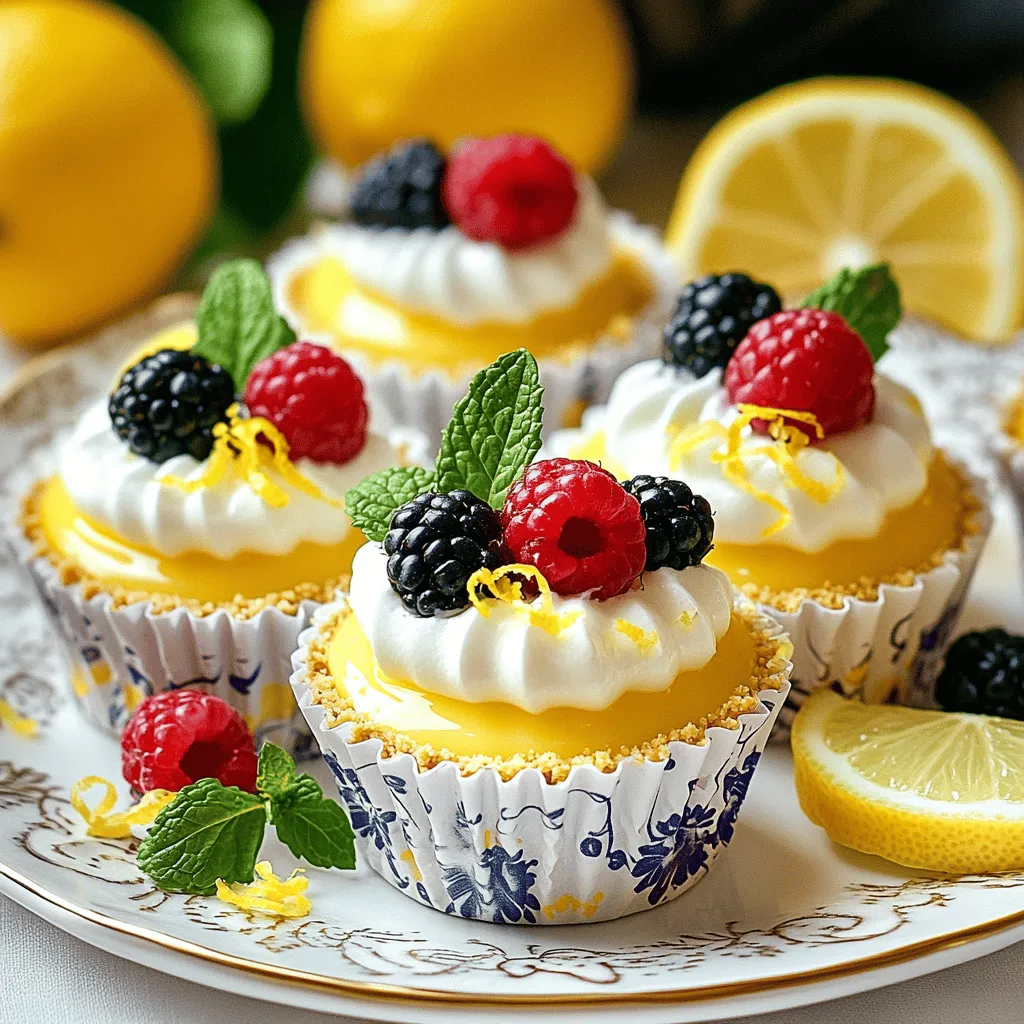
Spoon the cheesecake filling into each crust-lined cup. Fill them about three-quarters full. Tap the cups gently on the counter. This helps remove any air bubbles. Once filled, place the mini cheesecakes in the fridge. Chill them for at least four hours or until they set. When they’re ready, you can garnish them with fresh berries and a sprinkle of lemon zest. Enjoy your delightful mini lemon cheesecakes!
Tips & Tricks
How to Achieve the Perfect Texture
To get a smooth and creamy texture, start with softened cream cheese. Cold cream cheese makes lumps. Use an electric mixer to blend it well. Mix until it’s fluffy and free of lumps. When you add the heavy cream, beat it until soft peaks form. This step adds lightness to your cheesecake. Don’t overmix after adding lemon juice or zest. This keeps the texture perfect.
Common Mistakes to Avoid
One common mistake is not chilling long enough. If you skip this step, the cheesecakes won’t hold their shape. Another mistake is using too much liquid. Measure lemon juice carefully to avoid a runny filling. Also, don’t skip pressing the crust firmly. A loose crust can crumble when you serve. Lastly, avoid using cold ingredients. They must be at room temperature to mix well.
Serving and Garnishing Suggestions
Serve these mini cheesecakes cold for the best taste. Top each one with fresh berries for color and flavor. You can use strawberries, blueberries, or raspberries. Adding extra lemon zest gives a nice touch. A sprig of mint can brighten the plate. For a fun twist, drizzle some honey or a fruit sauce on top. It adds sweetness and makes them look fancy.
Variations
Fruit-flavored Alternatives
You can easily change the flavor of these mini cheesecakes. Instead of lemon, try lime or orange juice. You can also use other fruits like strawberries or blueberries. Just replace the lemon juice in the recipe with the fruit juice of your choice. For a fun twist, add some zest from these fruits too. This gives the cheesecakes a fresh taste and bright color.
Gluten-Free Options
If you want to make these cheesecakes gluten-free, swap the graham cracker crumbs for gluten-free crumbs. You can find these at most grocery stores. Use the same amount as in the recipe. The taste remains the same, and you can enjoy this dessert without worry. Just make sure all other ingredients are gluten-free as well.
Vegan No-Bake Mini Cheesecakes
To create a vegan version, use vegan cream cheese and coconut cream instead of heavy cream. You can also use maple syrup or agave for sweetness instead of powdered sugar. For the crust, use oats or almond flour mixed with coconut oil. This version is just as creamy and delicious. Every bite will be full of flavor, and it’s a great way to share with everyone.
Storage Info
How to Store Leftover Cheesecakes
To keep your no-bake mini lemon cheesecakes fresh, place them in an airtight container. Make sure to cover them well. You can use plastic wrap or a lid. Store them in the fridge for best results. This way, they stay cool and tasty for later.
Freezing Tips
You can freeze these mini cheesecakes for up to three months. First, wrap each cheesecake in plastic wrap. Then, place them in a freezer bag. Make sure to remove as much air as possible. When you’re ready to enjoy, let them thaw in the fridge overnight before serving.
Shelf Life of No-Bake Mini Cheesecakes
These cheesecakes last about five days in the fridge. You can enjoy them cold or let them sit for a few minutes at room temperature. If they are frozen, remember to eat them within three months for the best taste.
FAQs
Can I use a different crust type?
Yes, you can! While graham cracker crumbs are classic, try using crushed cookies like Oreos or shortbread. You could even use nut-based crusts for a gluten-free option. Each crust brings a unique flavor and texture, so feel free to experiment!
How long do the cheesecakes need to chill?
These mini cheesecakes need to chill for at least 4 hours. This time helps them set properly. If you can wait longer, chilling them overnight gives better texture. Just be sure to cover them to keep them fresh.
Can I make these ahead of time?
Absolutely! These mini cheesecakes are perfect for making ahead. You can prepare them a day or two in advance. Just store them in the fridge, covered well. This way, you have a sweet treat ready to impress your guests!
You now have all you need to make mini cheesecakes. We covered the key ingredients, the equipment, and how to prepare each step clearly. I shared helpful tips for great texture and common mistakes to avoid. Plus, I included tasty variations and storage advice.
Mini cheesecakes are fun to make and easy to enjoy. Try your new skills today!