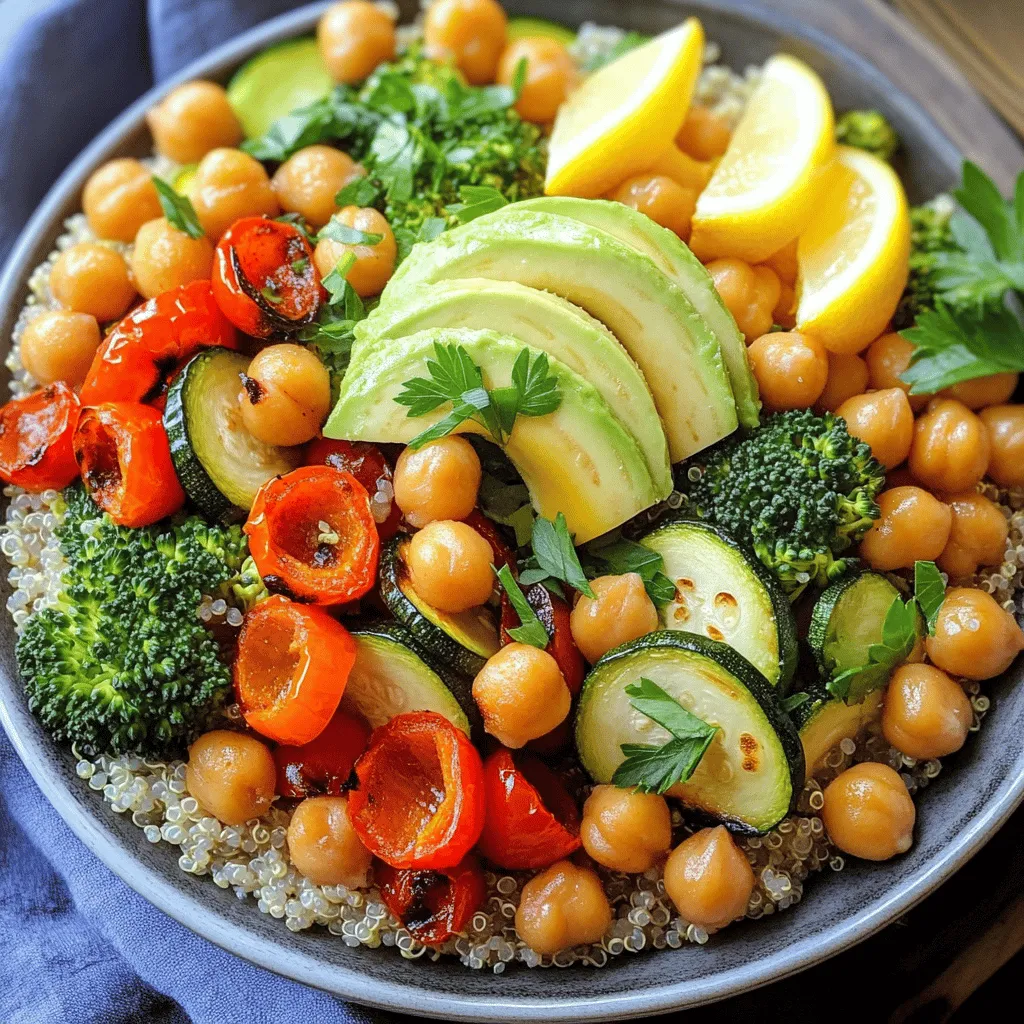
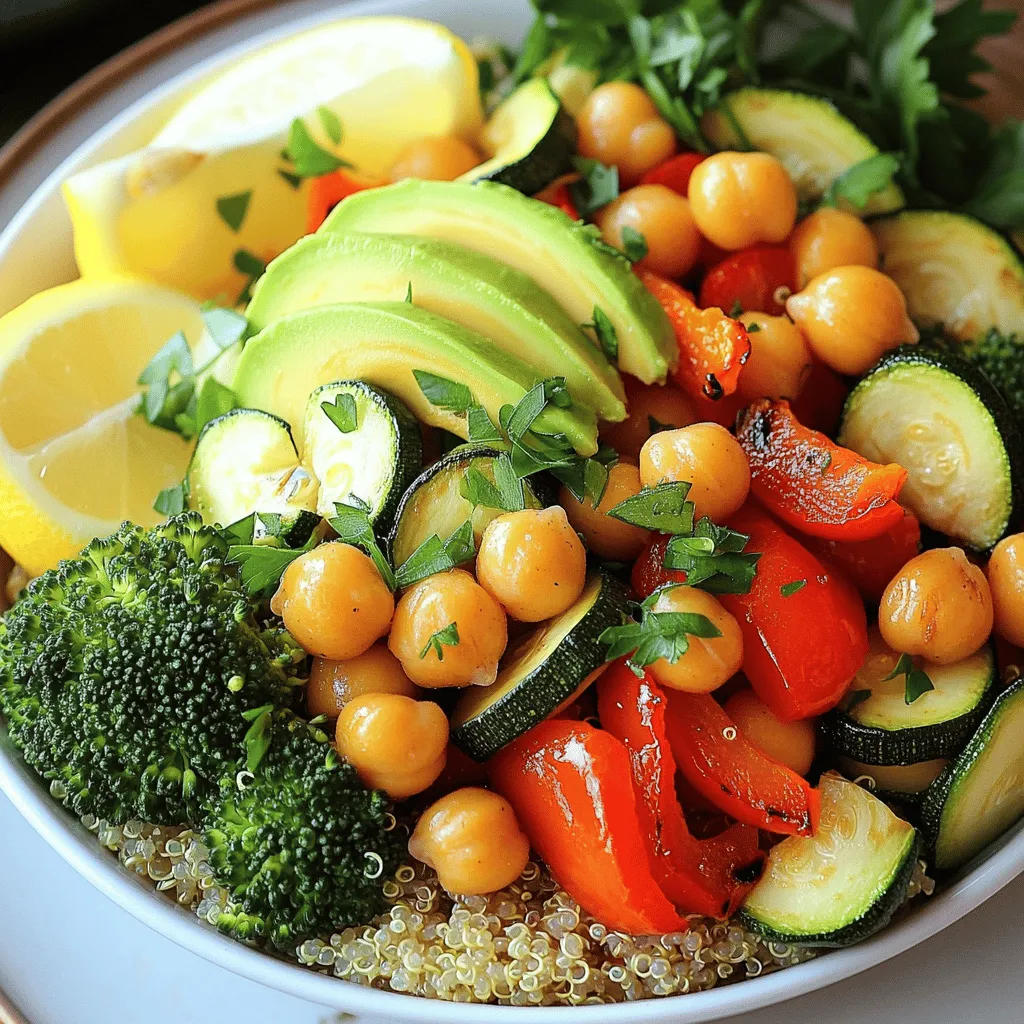
If you’re searching for a meal that’s both healthy and filling, the Roasted Veggie Quinoa Power Bowl is your answer! Packed with vibrant veggies and hearty quinoa, this dish is easy to make and perfect for any time of day. Whether you’re a busy parent or a meal prep pro, this bowl offers nutrition and taste that will keep you energized. Dive into the recipe and elevate your lunch or dinner game!It uses fresh veggies and protein-rich quinoa. This bowl combines flavors and textures in a fun way. You can enjoy it at lunch or dinner.
Detailed Ingredient List
– Quinoa
Use 1 cup of rinsed quinoa. It serves as a great base and is rich in protein.
– Vegetables
Choose colorful veggies:
– 1 red bell pepper, diced
– 1 zucchini, sliced
– 1 cup cherry tomatoes, halved
– 1 cup broccoli florets
– Chickpeas
Add 1 can (15 oz) of chickpeas, drained and rinsed. They add protein and fiber.
– Seasonings
Season with simple spices:
– 2 tablespoons olive oil
– 1 teaspoon garlic powder
– 1 teaspoon smoked paprika
– Salt and pepper to taste
– Garnishes
Top with fresh ingredients:
– 1 avocado, sliced
– Fresh parsley or cilantro for garnish
– Lemon wedges for serving
This blend of ingredients makes the dish tasty and satisfying. Enjoy making your Roasted Veggie Quinoa Power Bowl!
Step-by-Step Instructions
Preparation Steps
To start, gather all your ingredients. You will need:
– 1 cup quinoa, rinsed
– 2 cups vegetable broth
– 1 red bell pepper, diced
– 1 zucchini, sliced
– 1 cup cherry tomatoes, halved
– 1 cup broccoli florets
– 2 tablespoons olive oil
– 1 teaspoon garlic powder
– 1 teaspoon smoked paprika
– Salt and pepper to taste
– 1 can (15 oz) chickpeas, drained and rinsed
– 1 avocado, sliced
– Fresh parsley or cilantro for garnish
– Lemon wedges for serving
Preheat your oven to 400°F (200°C). This step helps the veggies roast well. Next, prepare a large baking sheet. Spread out the diced red bell pepper, zucchini, cherry tomatoes, and broccoli florets.
Now, drizzle the vegetables with olive oil. Add garlic powder, smoked paprika, salt, and pepper. Toss everything to coat evenly. This step adds great flavor to your veggies.
Cooking Process
While the veggies roast, bring the vegetable broth to a boil in a medium saucepan. Stir in the rinsed quinoa. This is where the magic happens! Reduce the heat to low, cover it, and let it simmer for about 15 minutes. Your quinoa will become fluffy and absorb the broth.
In the last few minutes of cooking, add the chickpeas to the baking sheet with the veggies. Toss to combine, and return to the oven. This warms the chickpeas and melds the flavors together. Roast for another 5 minutes until everything is nice and hot.
Once done, remove the baking sheet from the oven. Let the vegetables and chickpeas cool slightly.
Assembling the Power Bowl
Now, it’s time to build your power bowl! Start by scooping some quinoa as a base into bowls. Top it with the roasted veggies and chickpeas. Now comes the fun part—add sliced avocado on top for creaminess.
Garnish with fresh parsley or cilantro for a pop of color. Serve with lemon wedges for an added zing. This bowl is not just healthy; it’s also filling and bursting with flavor.Enjoy your meal!
Tips & Tricks
Perfecting Roasting Techniques
To roast veggies perfectly, start with even cuts. Aim for slices about the same size. This helps them cook evenly. Use a large baking sheet, so veggies have room to breathe. Overcrowding can lead to steaming instead of roasting. I suggest a hot oven at 400°F (200°C). This gives veggies a nice char. Toss them halfway through cooking for even browning. Check for tenderness with a fork. They should be soft but not mushy.
How to Cook Fluffy Quinoa
Cooking quinoa is simple. First, rinse it under cold water. This removes bitter saponins. Use a 2:1 ratio of broth to quinoa for flavor. Bring the broth to a boil before adding quinoa. Once added, lower the heat and cover. Let it simmer for about 15 minutes. After cooking, let it sit for five minutes. Fluff it gently with a fork for that light, airy texture. This is key for a great power bowl.
Serving and Presentation Ideas
Presentation makes a power bowl pop. Start with a base of fluffy quinoa. Then, artfully arrange your roasted veggies on top. Add chickpeas for protein and crunch. A slice of avocado adds creaminess and color. Finish with fresh herbs for brightness. Serve with lemon wedges for a refreshing squeeze. This elevates the dish and adds zing. Use colorful veggies for a feast for the eyes. Remember, we eat with our eyes first!
Variations
Adding Different Vegetables
You can switch up the veggies in your power bowl. Try carrots, sweet potatoes, or spinach. Roasting brings out their natural sweetness. Use what you have at home for a unique twist. Mix colors and textures for a fun look. This keeps your meals interesting and tasty.
Protein Substitutions
Chickpeas are a great protein source, but you have options. Use black beans for a different flavor. Tofu is another good choice; it soaks up all the spices. Cooked chicken or shrimp can add extra protein for meat lovers. Each option makes your bowl filling and satisfying.
Dietary Alternatives (Gluten-Free, Vegan)
This power bowl is already gluten-free and vegan with simple swaps. Quinoa is gluten-free and a great grain choice. For a vegan protein boost, stick with chickpeas or black beans. Make sure to check your vegetable broth for gluten. This makes it easy to enjoy for everyone.
Storage Info
Best Practices for Refrigeration
To keep your Roasted Veggie Quinoa Power Bowl fresh, store it in an airtight container. This helps to keep flavors in and air out. You can refrigerate it for up to four days. Make sure to let the bowl cool down before putting it in the fridge. This prevents moisture build-up, which can make it soggy.
Reheating Instructions
When it’s time to enjoy your leftovers, reheat them carefully. You can use a microwave or a skillet. For the microwave, place the bowl in for about 1-2 minutes. Stir halfway through to heat evenly. If you use a skillet, add a splash of water. Cover it and heat on low for about 5 minutes. This keeps the veggies from drying out.
Meal Prep Tips
Meal prep makes cooking easy and saves time. You can prepare the quinoa and veggies ahead of time. Store each in separate containers. This way, you can mix and match throughout the week. If you want, chop the veggies a day before cooking. Just keep them in the fridge in a sealed bag. For a quick meal, assemble your bowl right before eating. This keeps everything fresh and tasty.
FAQs
Can I make this recipe ahead of time?
Yes, you can make this recipe ahead of time. Cook the quinoa and roast the veggies. Store them separately in the fridge. They stay fresh for about three to four days. When you’re ready to eat, just heat them up together. This makes a quick meal or lunch.
What are some good substitutes for quinoa?
If you want to switch it up, try brown rice or farro. These grains have a similar texture. You can also use couscous for a lighter option. Each substitute offers a unique flavor. Adjust the cooking time based on the grain you choose.
How do I store leftover Roasted Veggie Quinoa Power Bowl?
For storing leftovers, keep them in an airtight container. Make sure they cool down first. You can refrigerate them for up to four days. If you want to enjoy them later, you can freeze them. Just label your container with the date. To reheat, warm it in the microwave or on the stove. Enjoy your tasty meal again!
This blog post covers how to make a tasty Roasted Veggie Quinoa Power Bowl. You learned about essential ingredients like quinoa, veggies, and chickpeas. I shared steps for preparing and cooking your meal. Tips on roasting and serving can help improve your bowl. I also provided variations and storage info to suit your needs.
Enjoy your cooking adventure, and remember to have fun with each step!