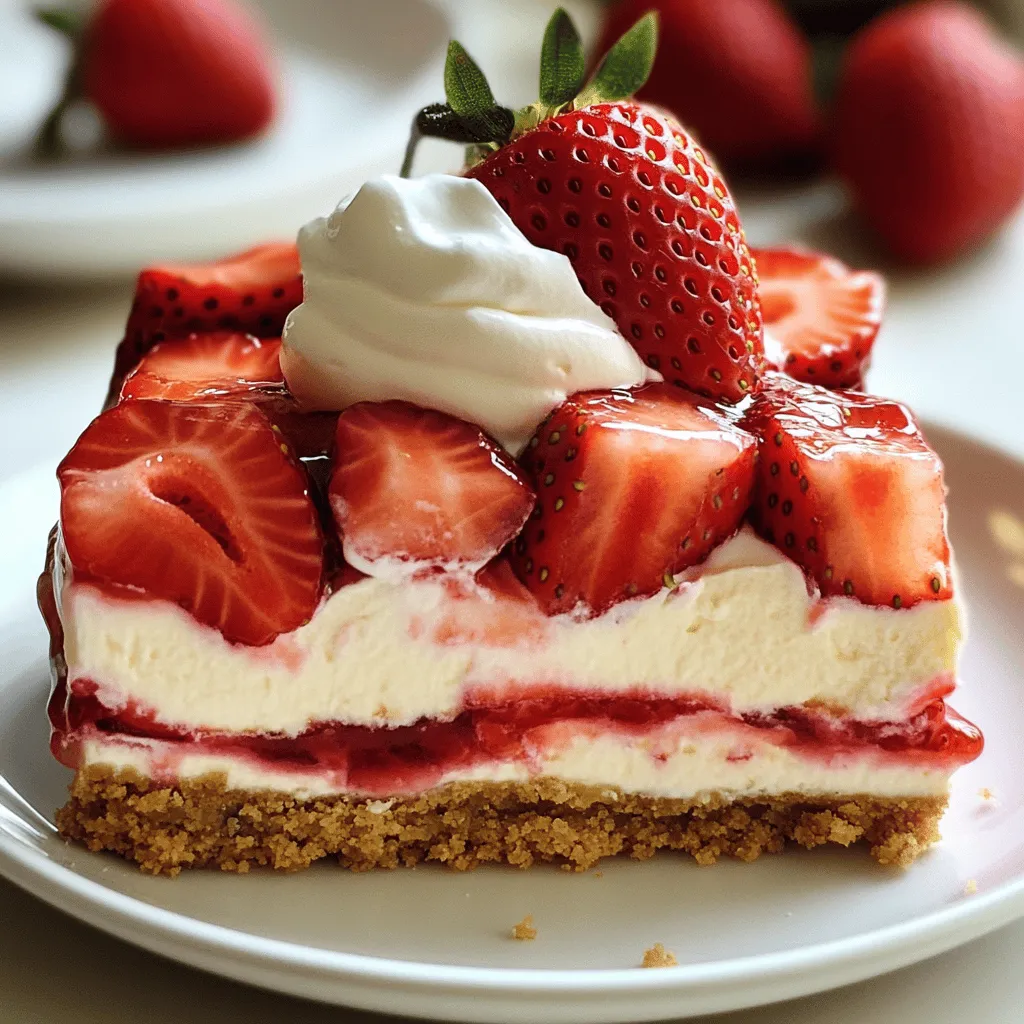
Craving a dessert that’s both tasty and simple? Look no further than this Strawberry Cheesecake Icebox Cake! It layers creamy cheesecake with fresh strawberries and a crunchy crust, creating a treat that’s sure to impress. I’ll walk you through every step, from gathering ingredients to serving suggestions. Let’s dive into this deliciously easy recipe and transform your next gathering into a sweet success!
Ingredients
Fresh Strawberries
To make the best Strawberry Cheesecake Icebox Cake, you need fresh strawberries. Use about 2 cups of hulled and sliced strawberries. Look for bright red berries that smell sweet. This will make your cake taste amazing.
Cream Cheese Mixture
The cream cheese filling is the star of this cake. You need 8 oz of softened cream cheese to start. Mix this with 1/2 cup of powdered sugar and 1 teaspoon of vanilla extract. This combination creates a rich and sweet flavor. Then, whip 1 cup of heavy cream until it holds stiff peaks. Fold the whipped cream into the cream cheese mixture gently. This step keeps the filling light and airy.
Crust Components
For the crust, gather 1 cup of graham cracker crumbs and 1/4 cup of melted unsalted butter. Add a small pinch of salt to bring out the flavors. Combine these ingredients in a bowl. This mixture should look like wet sand. Press it firmly into the bottom of your dish. This crust adds a crunchy base to your creamy cake.
Step-by-Step Instructions
Preparing the Crust
To make the crust, grab a medium bowl. Mix 1 cup of graham cracker crumbs with 1/4 cup of melted unsalted butter and a pinch of salt. Stir until it feels like wet sand. Next, press this mixture into the bottom of an 8×8-inch dish. Make sure it’s even and packed tight.
Making the Cheesecake Filling
In a large bowl, use an electric mixer to beat 8 oz of softened cream cheese until smooth. Slowly add in 1/2 cup of powdered sugar and 1 teaspoon of vanilla extract. Mix this until it becomes creamy. In another bowl, whip 1 cup of heavy whipping cream until it forms stiff peaks. Gently fold this whipped cream into the cream cheese mixture until it is smooth.
Assembling the Icebox Cake
Now it’s time to layer. First, spread the sliced fresh strawberries evenly over the crust. Spoon half of the cheesecake filling on top of the strawberries, smoothing it out. Then, add another layer of sliced strawberries. Finally, spoon the rest of the cheesecake filling on top. Smooth it out so it covers the strawberries completely.
Setting in the Refrigerator
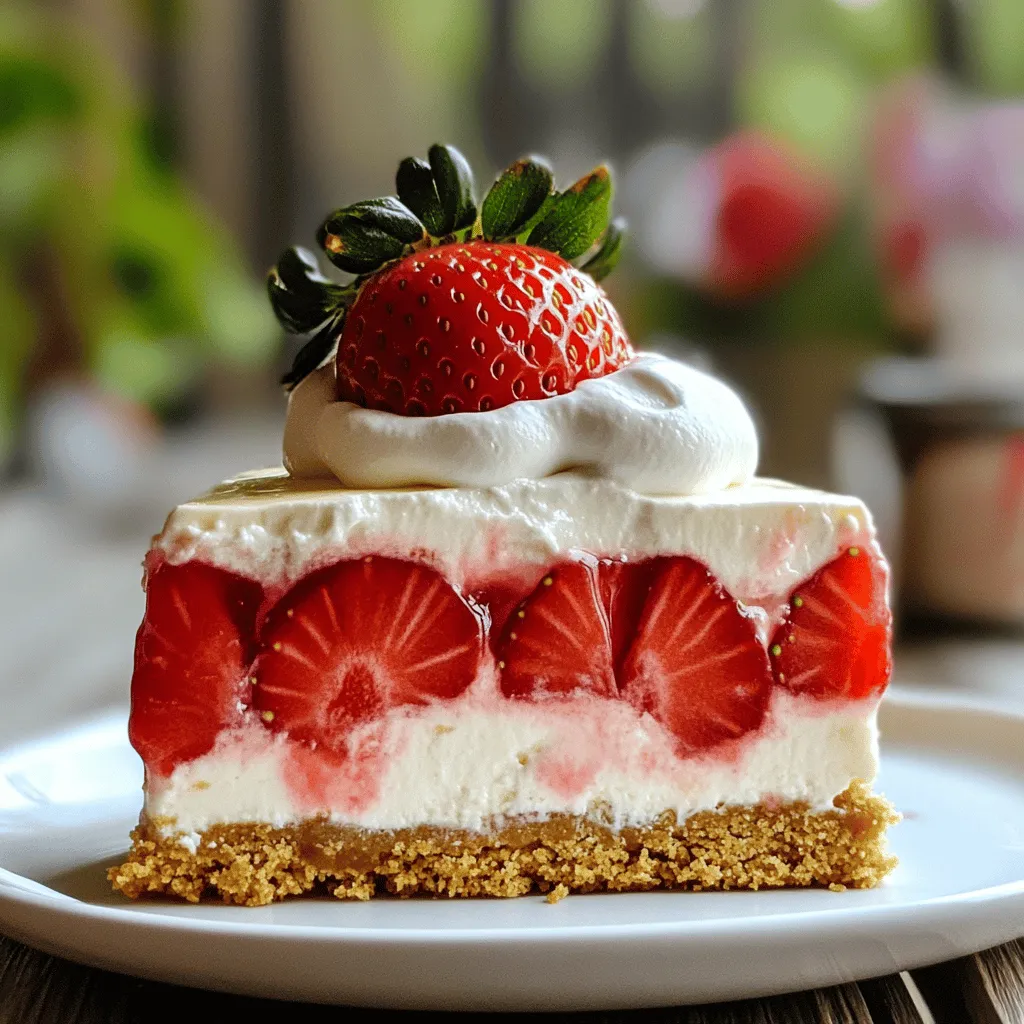
Cover the dish with plastic wrap and place it in the fridge. Let it chill for at least 4 hours, but overnight is best. This time allows the cake to set properly. When you’re ready to serve, garnish with more fresh strawberries and a dollop of whipped cream for a delightful touch!
Tips & Tricks
Perfecting the Whipped Cream
Whipped cream makes this dessert light and fluffy. Start with chilled heavy cream. Cold cream whips better and faster. Use a clean bowl and beaters for best results. Beat the cream until stiff peaks form. This means the cream holds its shape well. Fold the whipped cream gently into the cream cheese mix. This way, you keep it airy and light.
Achieving the Right Texture
The texture of your icebox cake is key. Make sure the cream cheese is soft. Soft cream cheese blends smoothly with the sugar and vanilla. Mix until there are no lumps. When you layer the cake, smooth out each layer well. This helps every bite taste even and rich. Let it chill in the fridge for at least four hours. Overnight is best to get that perfect set.
Serving Suggestions
When ready to serve, slice the cake into squares. Place each piece on a dessert plate. Garnish with whole strawberries and whipped cream. This adds a nice touch and looks pretty. You can also drizzle some strawberry sauce on top for extra flavor. Enjoy your delicious treat with family and friends!
Variations
Flavor Alternatives (e.g., Using Different Berries)
You can switch the strawberries for other berries. Try blueberries, raspberries, or blackberries. Each berry adds a unique taste and color. You can mix different berries too! This gives a fun twist to your cake. Use the same amount of berries as the recipe calls for. The process stays the same, making it easy to explore new flavors.
Gluten-Free Options
To make this cake gluten-free, swap the graham crackers. Use gluten-free graham crackers or crushed nuts. Almond flour is a great choice as a base. Mix it with melted butter and a pinch of salt. Press this mix into the dish for a tasty crust. This way, everyone can enjoy this dessert without worry.
Vegan Substitutes
To make a vegan version, replace the cream cheese. Use vegan cream cheese or blended silken tofu. Sweeten with maple syrup or coconut sugar. For the whipped cream, use coconut cream. Chill a can of coconut milk, then whip the solid part. This keeps the cake creamy and delicious. You will still get that delightful cheesecake flavor!
Storage Info
Best Practices for Refrigeration
To keep your Strawberry Cheesecake Icebox Cake fresh, store it in the fridge. Use an airtight container or cover it tightly with plastic wrap. This helps maintain its creamy texture and prevents it from absorbing other smells in the fridge.
Freezing Instructions
If you want to store the cake for a longer time, freezing works well. First, slice the cake into squares. Wrap each piece in plastic wrap, then place them in a freezer-safe bag. Label the bag with the date. You can freeze it for up to three months.
Shelf Life Guidelines
In the fridge, the icebox cake lasts about four days. After that, the strawberries may get mushy, and the crust can become soggy. If you freeze it, remember to eat it within three months for the best taste. Always check for any off smells or changes in color before serving.
FAQs
Can I use frozen strawberries?
Yes, you can use frozen strawberries. Just thaw them first. Drain excess water before adding them to the cake. They work well, but fresh strawberries taste best.
How long can this icebox cake be kept?
You can keep this icebox cake in the fridge for up to four days. Make sure to cover it tightly with plastic wrap or a lid. This way, it stays fresh and tasty.
Can I make this dessert ahead of time?
Absolutely! In fact, making this dessert ahead is a great idea. It needs time to set in the fridge. Prepare it a day in advance for the best flavor and texture.
What can I use instead of heavy cream?
If you want a lighter option, you can use coconut cream or whipped topping. Both will give you a nice texture. Just remember, the flavor might change a bit.
This blog post covered how to make a delicious icebox cake. We explored key ingredients like fresh strawberries, the cream cheese mixture, and the crust. I shared easy step-by-step instructions to prepare the cake, along with helpful tips for perfecting it. We also discussed flavor variations and how to store your cake.
In closing, this dessert is simple and fun to make. Enjoy the sweet taste and impress your family and friends!