Strawberry Vanilla Chia Seed Jam Simple and Sweet

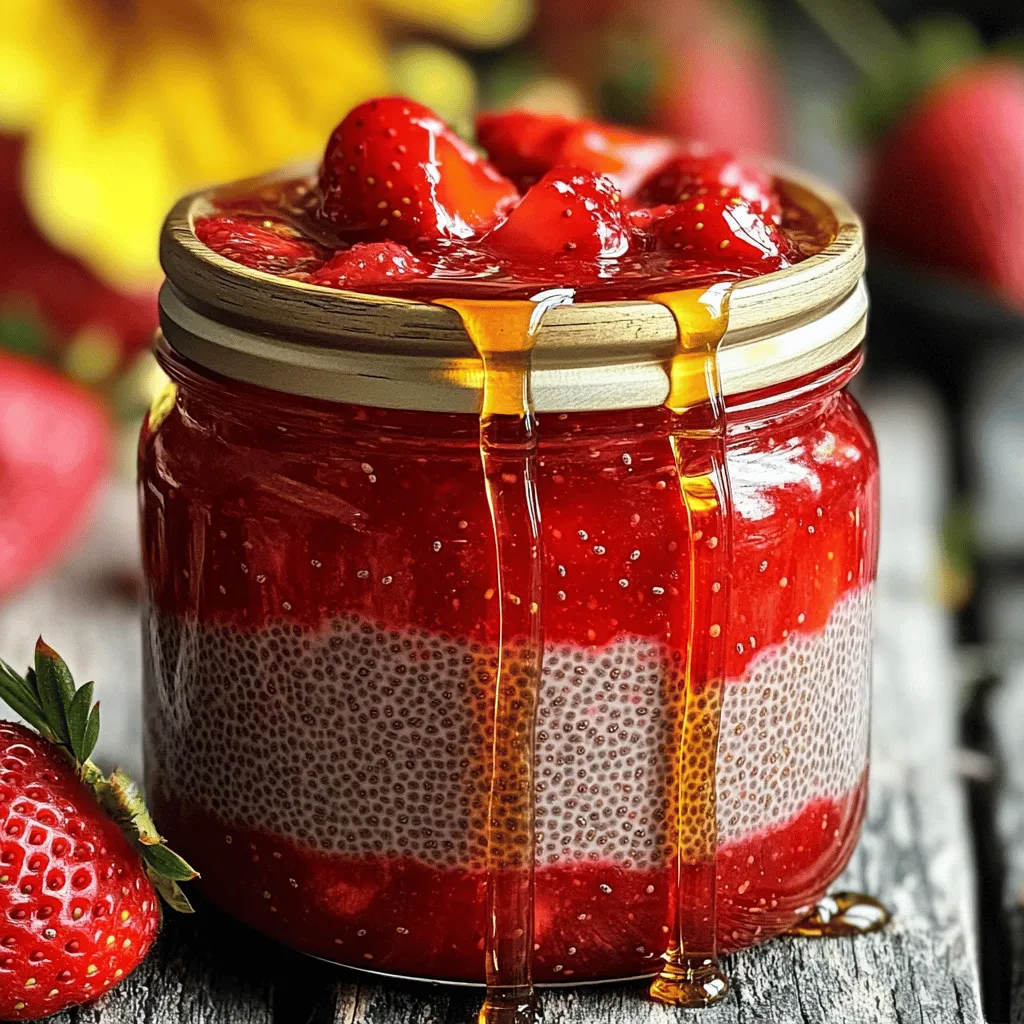
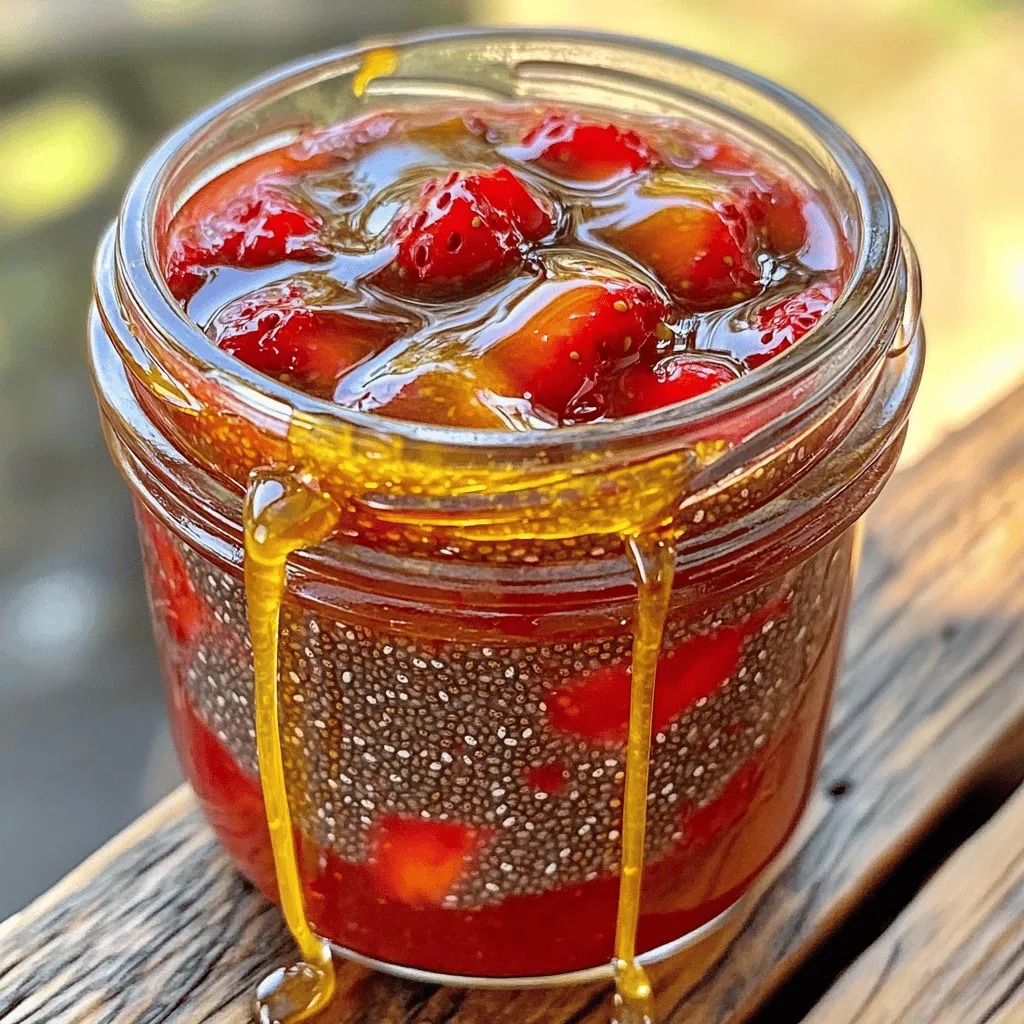
Are you ready to elevate your breakfast game with homemade Strawberry Vanilla Chia Seed Jam? This simple and sweet recipe combines fresh strawberries, creamy vanilla, and power-packed chia seeds to create a delightful spread. It’s not just easy to make but also packed with flavor and nutrition. Jump in, and I’ll guide you through each step, from choosing ripe berries to delicious serving ideas. You’ll love how this jam brightens your meals!

Ingredients

List of Ingredients

– Fresh strawberries

– Pure maple syrup

– Chia seeds

– Vanilla extract

– Salt

Ingredient Notes

Choosing ripe strawberries

When making jam, select ripe strawberries. Look for bright red berries without any dark spots. Ripe strawberries taste sweet and will give your jam the best flavor.

Maple syrup alternatives

If you want a different sweetener, try honey or agave syrup. Adjust the amount to match your taste. Always test a small spoonful to find the right sweetness.

Benefits of chia seeds

Chia seeds are small but mighty! They are high in fiber and healthy fats. They also help the jam thicken and give it a nice texture. Plus, they add a nice crunch if you leave them whole.

Step-by-Step Instructions

Preparation Steps

Start by preparing the strawberries. You need 2 cups of fresh strawberries. Remove the green tops and chop them into small pieces. This helps them cook evenly.

Next, cook the strawberries in a medium-sized saucepan. Set the heat to medium. Add the chopped strawberries, 1/4 cup of pure maple syrup, and a pinch of salt to the pan. Stir gently to mix them.

Cook the mixture for 5-7 minutes. Stir occasionally. You want the strawberries to soften and release their juices. This creates a sweet base for your jam.

Mashing and Mixing

Now it’s time to mash the strawberries. Use a fork or a potato masher. Mash until you reach your desired consistency. You can make it smooth or leave some chunks for texture.

Once you finish mashing, add 2 tablespoons of chia seeds and 1 teaspoon of vanilla extract. Mix well. This ensures the chia seeds spread evenly throughout the jam. They will help thicken it as they absorb the liquid.

Cooling and Storage

After mixing, remove the saucepan from heat. Let the jam sit for about 10-15 minutes. This waiting time helps the chia seeds absorb liquid and thicken the jam.

Taste the jam. If you want it sweeter, add more maple syrup. Once you are happy with the flavor, transfer the jam to a clean jar or container. Let it cool completely before sealing.

Finally, refrigerate the jam for at least an hour. This extra cooling time helps it thicken further. Now, your strawberry vanilla chia seed jam is ready to enjoy!

Tips & Tricks

Perfecting the Recipe

Adjusting sweetness

You can change the sweetness of your jam by adding more or less maple syrup. Start with 1/4 cup, then taste it. If it is not sweet enough, add a little more. Remember, the sweetness can change as the jam cools. Always taste it before sealing the jar.

Achieving the right texture

For a smooth jam, mash the strawberries well. If you like it chunky, leave some bits whole. The chia seeds will thicken the jam, so don’t worry if it seems runny at first. Let it sit for about 15 minutes. It will get thicker as it cools.

Serving Suggestions

Pairing with breakfast foods

This jam is great on toast or pancakes. You can also add it to yogurt for a fruity kick. Try it with oatmeal or cottage cheese for a healthy breakfast. It adds flavor and makes your meal colorful.

Creative uses in cooking and baking

Use this jam in many ways beyond breakfast. Spread it on a cake or cookies for extra sweetness. Stir it into smoothies for a berry flavor. You can even use it as a filling for pastries. The options are endless!

Variations

Flavor Variations

You can make this jam even more fun by adding other fruits. Raspberries and blueberries mix well with strawberries. These fruits add new colors and flavors.

Try mixing in spices for a twist. A pinch of cinnamon or nutmeg can give your jam warmth. Just a little goes a long way. You can experiment with different fruits and spices to find your perfect taste.

Dietary Adjustments

If you want a sugar-free jam, you can use a sugar substitute. Stevia or erythritol works great here. These options keep the jam sweet without the sugar.

For vegan-friendly options, the recipe is already perfect. Maple syrup is plant-based. So, you can enjoy this jam without any animal products. This makes it a tasty choice for everyone!

Storage Info

How to Store the Jam

Store your strawberry vanilla chia seed jam in the fridge. Use a clean jar with a tight lid. Make sure the jam cools to room temperature first. This keeps it fresh longer.

If you want to keep it for a while, freezing is a great option. Pour the jam into freezer-safe containers. Leave some space at the top, as it will expand when frozen. You can also use ice cube trays for smaller portions.

Shelf Life

Your jam will stay fresh in the fridge for about one week. Keep it sealed to avoid any odors. For the best taste, use it within this time.

If you freeze it, the jam can last for up to six months. Just remember to label your containers with the date. This way, you will always know when you made it. Enjoy your jam at its best by using these storage tips!

FAQs

Common Questions

Can I use frozen strawberries to make chia seed jam?

Yes, you can use frozen strawberries. Just thaw them first. This saves time and works well. The flavor remains tasty and fresh.

How long does homemade chia seed jam last?

Homemade chia seed jam lasts about one week in the fridge. Store it in a clean jar with a tight lid. You can check for changes in color or smell before use.

Is chia seed jam healthy?

Yes, chia seed jam is healthy. Chia seeds are full of fiber, omega-3s, and protein. Strawberries add vitamins and antioxidants. This jam is a great choice for a sweet treat.

Can I can chia seed jam for later use?

Canning chia seed jam is not common. It may not set well for long-term storage. Instead, refrigerate or freeze it. This keeps the flavor and texture fresh.

This blog post shared how to make delicious chia seed jam using fresh strawberries and simple ingredients. You learned the steps to prepare, mash, and store your jam. We explored tips for perfecting the recipe and creative uses for serving. You can adjust flavors and make dietary changes, too.

Making your own chia seed jam is fun and rewarding. With practice, you can create a tasty treat that fits your tastes. So, grab those strawberries and start making your jam today!

- Fresh strawberries - Pure maple syrup - Chia seeds - Vanilla extract - Salt Choosing ripe strawberries When making jam, select ripe strawberries. Look for bright red berries without any dark spots. Ripe strawberries taste sweet and will give your jam the best flavor. Maple syrup alternatives If you want a different sweetener, try honey or agave syrup. Adjust the amount to match your taste. Always test a small spoonful to find the right sweetness. Benefits of chia seeds Chia seeds are small but mighty! They are high in fiber and healthy fats. They also help the jam thicken and give it a nice texture. Plus, they add a nice crunch if you leave them whole. Start by preparing the strawberries. You need 2 cups of fresh strawberries. Remove the green tops and chop them into small pieces. This helps them cook evenly. Next, cook the strawberries in a medium-sized saucepan. Set the heat to medium. Add the chopped strawberries, 1/4 cup of pure maple syrup, and a pinch of salt to the pan. Stir gently to mix them. Cook the mixture for 5-7 minutes. Stir occasionally. You want the strawberries to soften and release their juices. This creates a sweet base for your jam. Now it’s time to mash the strawberries. Use a fork or a potato masher. Mash until you reach your desired consistency. You can make it smooth or leave some chunks for texture. Once you finish mashing, add 2 tablespoons of chia seeds and 1 teaspoon of vanilla extract. Mix well. This ensures the chia seeds spread evenly throughout the jam. They will help thicken it as they absorb the liquid. After mixing, remove the saucepan from heat. Let the jam sit for about 10-15 minutes. This waiting time helps the chia seeds absorb liquid and thicken the jam. Taste the jam. If you want it sweeter, add more maple syrup. Once you are happy with the flavor, transfer the jam to a clean jar or container. Let it cool completely before sealing. Finally, refrigerate the jam for at least an hour. This extra cooling time helps it thicken further. Now, your strawberry vanilla chia seed jam is ready to enjoy! Adjusting sweetness You can change the sweetness of your jam by adding more or less maple syrup. Start with 1/4 cup, then taste it. If it is not sweet enough, add a little more. Remember, the sweetness can change as the jam cools. Always taste it before sealing the jar. Achieving the right texture For a smooth jam, mash the strawberries well. If you like it chunky, leave some bits whole. The chia seeds will thicken the jam, so don’t worry if it seems runny at first. Let it sit for about 15 minutes. It will get thicker as it cools. Pairing with breakfast foods This jam is great on toast or pancakes. You can also add it to yogurt for a fruity kick. Try it with oatmeal or cottage cheese for a healthy breakfast. It adds flavor and makes your meal colorful. Creative uses in cooking and baking Use this jam in many ways beyond breakfast. Spread it on a cake or cookies for extra sweetness. Stir it into smoothies for a berry flavor. You can even use it as a filling for pastries. The options are endless! {{image_2}} You can make this jam even more fun by adding other fruits. Raspberries and blueberries mix well with strawberries. These fruits add new colors and flavors. Try mixing in spices for a twist. A pinch of cinnamon or nutmeg can give your jam warmth. Just a little goes a long way. You can experiment with different fruits and spices to find your perfect taste. If you want a sugar-free jam, you can use a sugar substitute. Stevia or erythritol works great here. These options keep the jam sweet without the sugar. For vegan-friendly options, the recipe is already perfect. Maple syrup is plant-based. So, you can enjoy this jam without any animal products. This makes it a tasty choice for everyone! Store your strawberry vanilla chia seed jam in the fridge. Use a clean jar with a tight lid. Make sure the jam cools to room temperature first. This keeps it fresh longer. If you want to keep it for a while, freezing is a great option. Pour the jam into freezer-safe containers. Leave some space at the top, as it will expand when frozen. You can also use ice cube trays for smaller portions. Your jam will stay fresh in the fridge for about one week. Keep it sealed to avoid any odors. For the best taste, use it within this time. If you freeze it, the jam can last for up to six months. Just remember to label your containers with the date. This way, you will always know when you made it. Enjoy your jam at its best by using these storage tips! Can I use frozen strawberries to make chia seed jam? Yes, you can use frozen strawberries. Just thaw them first. This saves time and works well. The flavor remains tasty and fresh. How long does homemade chia seed jam last? Homemade chia seed jam lasts about one week in the fridge. Store it in a clean jar with a tight lid. You can check for changes in color or smell before use. Is chia seed jam healthy? Yes, chia seed jam is healthy. Chia seeds are full of fiber, omega-3s, and protein. Strawberries add vitamins and antioxidants. This jam is a great choice for a sweet treat. Can I can chia seed jam for later use? Canning chia seed jam is not common. It may not set well for long-term storage. Instead, refrigerate or freeze it. This keeps the flavor and texture fresh. This blog post shared how to make delicious chia seed jam using fresh strawberries and simple ingredients. You learned the steps to prepare, mash, and store your jam. We explored tips for perfecting the recipe and creative uses for serving. You can adjust flavors and make dietary changes, too. Making your own chia seed jam is fun and rewarding. With practice, you can create a tasty treat that fits your tastes. So, grab those strawberries and start making your jam today!

Strawberry Vanilla Chia Seed Jam

Get ready to indulge in a delicious homemade strawberry vanilla chia seed jam that’s both healthy and easy to make! This delightful blend of fresh strawberries, maple syrup, and vanilla creates a sweet spread perfect for toast, yogurt, or desserts. In just 30 minutes, you can whip up this tasty treat with minimal ingredients. Click through to explore the full recipe and enjoy a burst of fruity flavor in every bite!

Ingredients
  

2 cups fresh strawberries, hulled and chopped

1/4 cup pure maple syrup (adjust to taste)

2 tablespoons chia seeds

1 teaspoon vanilla extract

A pinch of salt

Instructions
 

Begin by placing the chopped strawberries in a medium-sized saucepan over medium heat.

    Add the maple syrup and a pinch of salt to the strawberries. Stir gently to combine.

      Cook the strawberries for about 5-7 minutes, stirring occasionally until they start to break down and release their juices.

        Once the strawberries are softened, use a fork or a potato masher to mash them to your desired consistency (smooth or chunky).

          Stir in the chia seeds and vanilla extract. Mix well to ensure the chia seeds are evenly distributed.

            Remove the saucepan from the heat and let the mixture sit for about 10-15 minutes. The chia seeds will absorb liquid and help thicken the jam.

              Taste the jam and adjust sweetness if necessary, adding more maple syrup if you prefer a sweeter jam.

                Transfer the jam to a clean jar or container and let it cool completely before sealing.

                  Refrigerate the jam for at least an hour before using, allowing it to thicken further.

                    Prep Time, Total Time, Servings: 10 mins | 30 mins | Makes about 1 cup

                      Leave a Comment

                      Recipe Rating