Skip to content
DisclaimerTerms Of UseGDPR PolicyCookie Policy

pureeatsnow

  • Home
  • Drinks
  • Appetizers
  • Dinner
  • Dessert
  • About
  • Contact
  • Privacy Policy
DisclaimerTerms Of UseGDPR PolicyCookie Policy

NO-ING-IMG

- 4 medium beets, scrubbed and trimmed - 4 cups mixed greens (arugula, spinach, and kale) - 1/2 cup goat cheese, crumbled - 1/4 cup walnuts, toasted - 1/4 cup pomegranate seeds - 1/4 cup extra-virgin olive oil - 2 tablespoons balsamic vinegar - 1 tablespoon honey - Salt and pepper to taste The roasted beet and goat cheese salad is not just tasty; it’s also healthy. Each serving has about 250 calories. The macronutrient breakdown includes roughly 15 grams of carbs, 18 grams of fats, and 7 grams of protein. When choosing beets, look for firm and smooth skin. Avoid any that are soft or have blemishes. For greens, a mix of arugula, spinach, and kale adds great flavor and nutrition. Each green complements the beets and goat cheese beautifully. To start, preheat your oven to 400°F (200°C). This step is key for roasting beets perfectly. Next, scrub and trim the beets to remove any dirt. Wrap each beet in aluminum foil. This helps keep the moisture in while they roast. Place the wrapped beets on a baking tray. Roast them for about 45 to 60 minutes. They are done when you can easily pierce them with a fork. After roasting, let them cool for a bit. Use gloves while peeling to keep your hands clean. Once peeled, slice the beets into wedges or rounds, and set them aside. For the dressing, gather these ingredients: - 1/4 cup extra-virgin olive oil - 2 tablespoons balsamic vinegar - 1 tablespoon honey - Salt and pepper to taste In a small bowl, add the olive oil, balsamic vinegar, honey, salt, and pepper. Now, whisk them together until well combined. This dressing adds a sweet and tangy flavor that pairs perfectly with the beets. To assemble your salad, start with the mixed greens. Layer them on a large platter or individual plates. I use a mix of arugula, spinach, and kale for a colorful base. Next, drizzle the dressing over the greens. Toss them gently to coat every leaf. Now, add the sliced roasted beets on top. Sprinkle crumbled goat cheese over the beets. Then, add toasted walnuts and pomegranate seeds for crunch and sweetness. For a beautiful presentation, arrange the beets in a circular pattern. This creates an eye-catching look. Finish by drizzling any remaining dressing on top. You can add extra salt and pepper if needed. To check if your beets are done, pierce them with a fork. If it goes in easily, they are ready. This simple test helps you avoid undercooked or mushy beets. You can also steam or boil beets if you prefer. Steaming keeps more flavor and nutrients. Boiling is quick but may lose some taste. Roasted beet and goat cheese salad pairs well with proteins like grilled chicken or salmon. These add a nice contrast and boost the meal's heartiness. You can also enjoy it with chickpeas for a vegetarian option. For drinks, a crisp white wine like Sauvignon Blanc matches well. If you prefer non-alcoholic, try sparkling water with lemon. One big mistake is overcooking the beets. This makes them mushy and bland. Instead, stick to the roasting time and check for doneness often. Another mistake is skipping the seasoning. Beets need salt and pepper to enhance their flavor. Don’t forget to season your dressing as well. A little salt can make a big difference! For the full recipe, check out the recipe section above. {{image_2}} You can add grilled chicken or chickpeas to this salad. Grilled chicken gives a nice flavor and protein boost. Just slice it thin and place it on top. Chickpeas are a great vegan option. You can roast them for extra crunch and flavor. Toss them in some olive oil and spices before roasting. This makes your salad filling and tasty. Swap ingredients based on the season. In spring, add fresh strawberries or asparagus. These fruits and veggies bring bright colors and flavors. In the fall, think about adding apples or pears. They add sweetness and crunch. Use seasonal fruits to keep your salad fresh and exciting. Adding herbs or spices can elevate your salad. Fresh basil or mint can add a nice touch. Sprinkle some crushed red pepper for heat. You can also switch up the cheese. Try feta or blue cheese for a different flavor profile. Each cheese brings its own taste, so experiment and find your favorite! Store your salad in an airtight container. This keeps it fresh. It lasts for up to three days in the fridge. But, the beets may lose some crunch. So, eat it sooner for the best taste. This salad is best served cold. If you want to warm it, heat the beets only. Use a microwave or oven. Warm them for just a few seconds. This keeps the salad fresh and tasty. Avoid reheating the greens, cheese, or nuts, as they may lose their texture. I do not recommend freezing this salad. The beets can freeze well, but the other ingredients won't. If you want to freeze beets, peel and chop them first. Place them in a freezer bag. They can last for up to three months. Thaw them overnight in the fridge when you need them. Then, add your fresh ingredients back in. Enjoy the vibrant flavors of your salad. For the full recipe, check out the earlier section. Roasting beets takes about 45 to 60 minutes. Start by preheating your oven to 400°F (200°C). Wrap each beet in foil and place them on a tray. Check for doneness by piercing them with a fork. If it goes in easily, they are ready. For even cooking, choose beets that are similar in size. Yes, you can use canned beets. They save time and are easy to find. However, fresh beets have better flavor and texture. Canned beets may also have added salt or sugar, which can alter the taste. If you use canned beets, rinse them well before adding to your salad. You can try different dressings for your salad. A lemon vinaigrette adds a bright touch. A honey mustard dressing works nicely, too. You can mix yogurt with herbs for a creamy option. Feel free to get creative with your flavors! You can prepare parts of this salad in advance. Roast the beets a day before and store them in the fridge. You can also make the dressing early. Keep it in a jar and shake before using. Assemble the salad just before serving to keep the greens fresh. This salad combines fresh, vibrant ingredients for a delicious dish. We explored essential components like roasted beets, mixed greens, goat cheese, and dressing. You learned how to prepare each part, from roasting to assembling. Plus, we shared tips to avoid common mistakes and variations for different tastes. Enjoy experimenting with this salad. It’s easy to customize for your palate. Happy cooking!

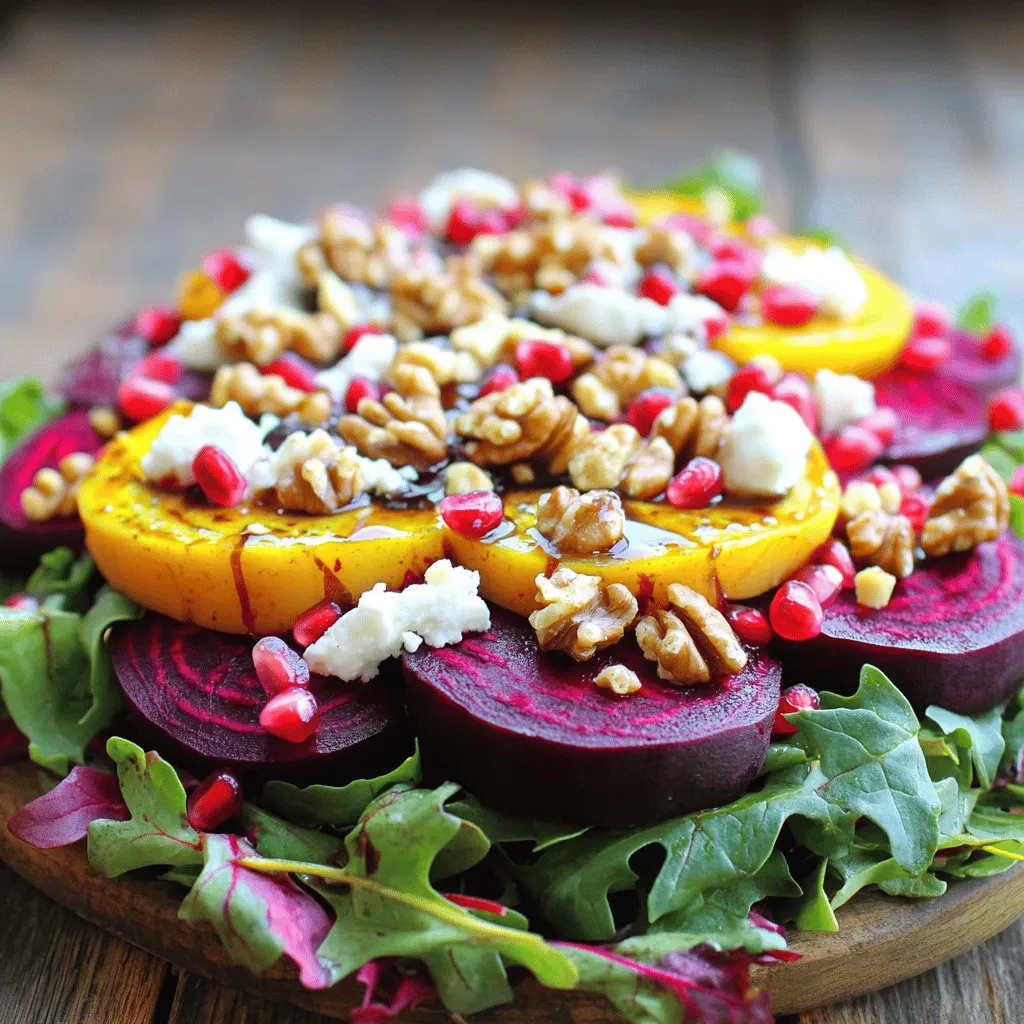
Roasted Beet and Goat Cheese Salad Vibrant Delight

Are you ready to elevate your salad game? This Roasted Beet and Goat Cheese Salad is a vibrant delight bursting

- 4 slices of artisan sourdough bread - 1 cup sharp cheddar cheese, grated - ½ cup mozzarella cheese, grated - 2 tablespoons unsalted butter, softened - 1 teaspoon garlic powder - 1 teaspoon fresh basil, chopped (or ½ teaspoon dried basil) - Salt and pepper to taste - 1 can (14 oz) diced tomatoes - 1 cup vegetable broth - ½ onion, diced - 1 clove garlic, minced - 1 teaspoon olive oil - 1 teaspoon sugar (optional, to balance acidity) - Fresh basil leaves for garnish Gathering these ingredients is key to making a great grilled cheese with tomato soup. I love using artisan sourdough bread for that crunchy bite. The sharp cheddar melts beautifully, while the mozzarella adds a creamy richness. Unsalted butter is perfect for grilling the bread, and garlic powder gives it a tasty kick. Fresh basil brings a bright flavor to both the sandwich and the soup. For the soup, diced tomatoes are my go-to base. Vegetable broth adds depth, while onion and garlic provide a fragrant start. A little sugar helps balance the acidity of the tomatoes. Don't forget the fresh basil leaves for garnish! They add color and flavor. This combination of ingredients makes for a comforting meal that warms the soul. For the full recipe, check out the Gourmet Grilled Cheese Delight with Creamy Tomato Bliss. To make the best tomato soup, start with the sauté. Heat olive oil in a pot over medium heat. Add diced onion and minced garlic. Cook them until the onion looks clear. This takes about five minutes. Next, it’s time for the tomatoes. Add the canned diced tomatoes, juice included, and the vegetable broth. If you like, add a teaspoon of sugar. This helps balance the soup's acidity. Bring the mix to a simmer and let it cook for about 15 to 20 minutes. Now, we want smooth soup. Use an immersion blender to puree the soup right in the pot. If you don’t have one, transfer it to a blender in batches. Be careful, as it’s hot. Once smooth, season with salt, pepper, and fresh basil. Keep the soup warm while you make the grilled cheese. Assembling the grilled cheese is simple and fun. Start by buttering one side of each slice of sourdough bread. Use softened butter for easy spreading. On the unbuttered side of two slices, add your cheeses. Layer sharp cheddar and mozzarella. Sprinkle garlic powder and fresh basil over the cheese. Top with the other slices of bread, keeping the buttered side up. Now, your sandwiches are ready to grill. Grilling is where the magic happens. First, preheat your skillet over medium heat. Once hot, place the assembled sandwiches in the skillet. Cook them for about three to four minutes on each side. You want the bread to turn golden brown, and the cheese to melt. To ensure even grilling, press down lightly with a spatula. This helps the bread crisp up nicely. When both sides are golden, it’s time to take them off the heat. Now, slice the grilled cheese sandwiches diagonally. Serve them hot with a bowl of creamy tomato soup. Enjoy the perfect comfort meal! For the full recipe, check out the detailed instructions above. - Choosing the right bread and cheese: Use artisan sourdough for a crunchy crust. Sharp cheddar and mozzarella blend well for taste and meltiness. - Techniques for even grilling: Heat your pan over medium heat. This helps the bread toast without burning. Flip your sandwich only once for a golden crust. - Using a spatula for pressing: Gently press down on the sandwich with a spatula. This helps the cheese melt evenly and adhere to the bread. - Adding herbs or spices for flavor: Fresh basil and garlic powder boost the soup's taste. Consider adding a pinch of oregano for extra depth. - Adjusting acidity with sugar: If your tomatoes taste too tart, add a teaspoon of sugar. This balances the flavors and adds sweetness. - Garnishing with fresh basil: Top your soup with fresh basil leaves. This not only looks nice but also adds a fresh flavor. - Best pairings with grilled cheese and soup: Serve with a side salad or pickles for crunch. A glass of iced tea also pairs well. - Presentation ideas for a gourmet look: Use a rustic wooden board for serving. Place the soup in a small bowl and drizzle with olive oil. This adds a touch of elegance. For the complete recipe, check out the Full Recipe. {{image_2}} You can mix up your grilled cheese by using different types of bread. Whole grain bread adds a nutty flavor. Rye bread gives a nice twist with its earthy taste. You can even try a soft brioche for a sweeter bite. For cheese, think beyond basic cheddar. Gouda melts great and has a creamy texture. Brie offers a rich flavor and pairs well with fruits. Mixing different cheeses can take your sandwich to the next level. Tomato soup can also change to suit your taste. Adding cream makes it rich and smooth. For a dairy-free option, use coconut milk for a twist. You can also add vegetables to the soup. Carrots add sweetness, while bell peppers boost flavor. These veggies not only taste good but also make the soup healthier. If you need gluten-free options, choose gluten-free bread. Many brands offer good choices that taste great. For lactose-free diets, try lactose-free cheese. You can also use vegan cheese for a plant-based option. These swaps keep the meal delicious and enjoyable for everyone. For the full recipe, check out the Gourmet Grilled Cheese Delight with Creamy Tomato Bliss. To store your leftover grilled cheese and soup, follow these steps: - Cool down: Let them cool to room temperature before storing. - Wrap your sandwich: Use plastic wrap or foil to keep the sandwich fresh. - Use airtight containers: Place the tomato soup in a sealed container. Keep the grilled cheese in the fridge for up to 3 days. The soup can last for 4-5 days. Always check for signs of spoilage before eating. Reheating grilled cheese can be tricky. Here’s how to keep it crispy: - Use a skillet: Heat a skillet over medium heat. Place the sandwich in the skillet. - Cover: Use a lid to trap heat. This helps the cheese melt while keeping the bread crisp. - Flip: Cook for about 3-4 minutes on each side. For the tomato soup: - Stovetop method: Pour the soup into a saucepan. Heat it on medium, stirring often. - Add water or broth: If it’s too thick, add a splash of water or broth to thin it out. These methods will give you a tasty meal that feels fresh and warm. If you want more ideas, check the Full Recipe for tips! What cheese is best for grilled cheese? The best cheese for grilled cheese is sharp cheddar. It melts well and adds rich flavor. I also love mozzarella for its gooey texture. Combining these two gives a great taste! Can I make this recipe vegan? Yes, you can make this recipe vegan. Use vegan butter and cheese instead. Look for plant-based cheeses that melt well. You can still enjoy that creamy texture! Is grilled cheese with tomato soup healthy? Grilled cheese with tomato soup can be part of a balanced diet. It has carbohydrates for energy and protein from the cheese. Add fresh tomatoes for vitamins. Enjoy in moderation for best health! How many calories are in this dish? A serving of grilled cheese with tomato soup has about 600 calories. The count can change with different ingredients, so check labels. It's a hearty meal, perfect for a cozy day. Can I make the soup ahead of time? Yes, you can make the soup ahead of time. Store it in the fridge for up to three days. Just reheat it on the stove when you're ready to eat! How can I avoid soggy grilled cheese sandwiches? To avoid soggy sandwiches, use dry bread. Butter the outside well and grill on medium heat. Press down lightly while cooking. This helps achieve a crispy, golden crust! Grilled cheese and tomato soup is a classic combo. We explored its key ingredients, from sourdough bread to fresh basil. You learned how to make smooth soup and perfectly grilled sandwiches. Tips and tricks can help you elevate flavors and presentations. Variations let you explore different breads and cheeses, plus dietary substitutes. Now, you can enjoy this dish in many ways. Whether for lunch or a comforting dinner, it’s always a winner. Happy cooking!

Grilled Cheese with Tomato Soup Delicious Comfort Meal

There’s nothing quite like the warm hug of a grilled cheese paired with creamy tomato soup. This classic combination offers

- 1 medium head of cauliflower, grated or processed into rice-sized pieces - 1 cup mixed vegetables (peas, carrots, corn) - 2 green onions, sliced - 2 cloves garlic, minced - 2 eggs, lightly beaten - 3 tablespoons soy sauce (or tamari for gluten-free option) - 1 tablespoon sesame oil - 1 tablespoon olive oil - Salt and pepper to taste - Optional: 1 teaspoon grated ginger for an extra kick Cauliflower fried rice is a great dish. It is healthy and tasty. The base is cauliflower, which I love. It mimics rice well. Plus, it has lots of good nutrients. Cauliflower is low in calories and carbs. This makes it great for many diets. It is also high in fiber and vitamins. Fiber helps digestion, while vitamins boost health. Cauliflower contains antioxidants too. These can help protect your body from damage. You will need some tools to make this dish. You need a food processor or box grater. This helps make the cauliflower rice. A large skillet or wok is also needed. It cooks everything evenly. Don’t forget your cooking utensils. They make mixing and serving easier. You can find the full recipe above. This dish is simple and quick to make. Enjoy trying it out! Preparing the cauliflower First, remove the leaves and stem of the cauliflower. Cut the head into smaller florets. This makes it easier to rice. Grating the cauliflower Use a food processor or box grater to pulse the florets until they look like rice grains. Take your time to get a fine texture. Set the riced cauliflower aside for later. Heating the oil and sautéing garlic In a large skillet or wok, heat the olive oil over medium-high heat. Add minced garlic and grated ginger if you like a kick. Cook for about 30 seconds. The smell will be amazing! Adding vegetables and eggs Next, toss in your mixed vegetables. Stir them often for about 4-5 minutes. You want them heated through and slightly tender. Push the veggies to one side of the skillet, and pour the beaten eggs into the other side. Scramble the eggs until they fully cook. Mixing in the riced cauliflower Now, add the riced cauliflower to the skillet. Mix it with the eggs and veggies. Pour in the soy sauce and sesame oil. Stir well to combine everything. Cook for an extra 5-7 minutes. This lets the cauliflower soften a bit but not get mushy. Seasoning and garnishing Season with salt and pepper to your taste. Toss in the sliced green onions right before serving. This adds a fresh taste and looks great. Enjoy your cauliflower fried rice! For a detailed guide, check the Full Recipe. To make your cauliflower fried rice perfect, focus on cooking times and techniques. Start by heating the oil in your skillet over medium-high heat. This helps to cook the garlic quickly and keeps it from burning. Sauté the garlic for only about 30 seconds. This releases its flavor without bitterness. When you add the mixed vegetables, stir them often for about 4-5 minutes. This keeps them tender-crisp and colorful. Balancing flavors is key. Use soy sauce for umami and sesame oil for richness. Adjust these amounts to fit your taste. Don’t skip the salt and pepper; they enhance the dish. If you like a bit of heat, add grated ginger or a pinch of red pepper flakes. Presentation matters. Serve your cauliflower fried rice in a large bowl or on individual plates. Garnish with fresh green onions and a sprinkle of sesame seeds. This makes the dish pop visually. You can also add slices of avocado for creaminess or lime wedges for zest. Pair this dish with proteins like grilled chicken, shrimp, or tofu. These choices add more flavor and nutrients. Cauliflower fried rice also works well as a side dish with your favorite Asian meals. One big mistake is overcooking the cauliflower. This can turn it mushy. Cook it just enough to soften but still keep some bite. Remember, you want a nice texture. Another mistake is skipping ingredient prep steps. Prep your vegetables and cauliflower before cooking. This helps everything cook evenly and saves time during the cooking process. If you miss this step, you may end up with unevenly cooked rice. For a full step-by-step guide, check out the Full Recipe. {{image_2}} You can easily make your cauliflower fried rice vegan or egg-free. Simply skip the eggs or replace them with tofu. Scramble the tofu in the pan until golden brown. This keeps the dish flavorful and adds protein. For a gluten-free option, use tamari instead of soy sauce. Tamari tastes similar but has no gluten. It’s a great way to keep the flavor while meeting dietary needs. You can add protein to your fried rice for an extra boost. Chicken, shrimp, or tofu work great. Just cook them in the skillet first. Remove them before adding the veggies and cauliflower. Mix them back in at the end. Feel free to switch up the vegetables too. Broccoli, bell peppers, or snap peas add color and crunch. Adding spices like cumin or curry powder can give your dish a unique twist. You can create Asian-inspired variations by adding ingredients like bok choy or sesame seeds. These give a nice crunch and flavor. For a fun twist, explore herbs and spices from other cuisines. Try adding cilantro or lime for a Mexican flair. Or use curry powder for an Indian taste. The options are endless and delicious! For the complete recipe, check the Full Recipe section. To store leftover cauliflower fried rice, place it in an airtight container. This keeps the moisture in and prevents odors from other foods. Make sure the rice is cool before sealing. Properly stored, it lasts about 3 to 4 days in the fridge. Always check for any off smells or signs of spoilage before eating. Freezing is a great way to extend the life of your cauliflower fried rice. To freeze, let it cool completely. Then, portion it into freezer-safe bags or containers. Squeeze out as much air as possible to prevent freezer burn. It can last up to 3 months in the freezer. When you're ready to eat, take it out and let it thaw in the fridge overnight. For quick thawing, you can microwave it on low. You can reheat cauliflower fried rice in two ways: the microwave or stovetop. For microwave reheating, place it in a bowl and cover it with a damp paper towel. This keeps it moist. Heat for 1-2 minutes, stirring halfway through. For stovetop reheating, use a skillet over medium heat. Add a splash of water or oil to help steam it. Stir occasionally until heated through. This method helps maintain its texture and flavor better than the microwave. For the best taste, avoid overcooking. Enjoy your meal with confidence knowing you stored it well! For the full recipe, check out the details above. Yes, you can use frozen cauliflower rice. Just heat it in the skillet for about 5-7 minutes. You can skip the grating step. Frozen rice cooks quickly and saves time. Yes, cauliflower fried rice is low in carbs. It has about 5 grams of carbs per serving. This is much lower than regular rice, which has about 45 grams. Cauliflower is a great choice for low-carb diets. To add spice, try these options: - Add red pepper flakes for heat. - Use sriracha or chili garlic sauce. - Stir in diced jalapeños for fresh flavor. These additions will give your dish a nice kick. You can use different sauces for flavor. Here are some options: - Coconut aminos for a sweet touch. - Hoisin sauce for a sweet and savory mix. - A splash of rice vinegar for tanginess. These sauces can change the flavor profile. Cut your vegetables small and even. This helps them cook faster and more evenly. Here are some tips: - Dice carrots and bell peppers into small pieces. - Slice green onions thinly for easy mixing. - Use a sharp knife for clean cuts. This ensures a great texture in your fried rice. Cauliflower fried rice is a healthy, tasty dish filled with veggies. You learned how to prepare it, with cooking tips and variations to suit your taste. Remember to avoid common mistakes like overcooking the cauliflower. This dish is easy to customize with proteins or spices. Enjoy making this dish for your family. It’s a fun way to eat healthy while exploring different flavors. You have the tools and knowledge to create a delicious meal that everyone will love. Happy cooking!

Cauliflower Fried Rice Healthy and Flavorful Dish

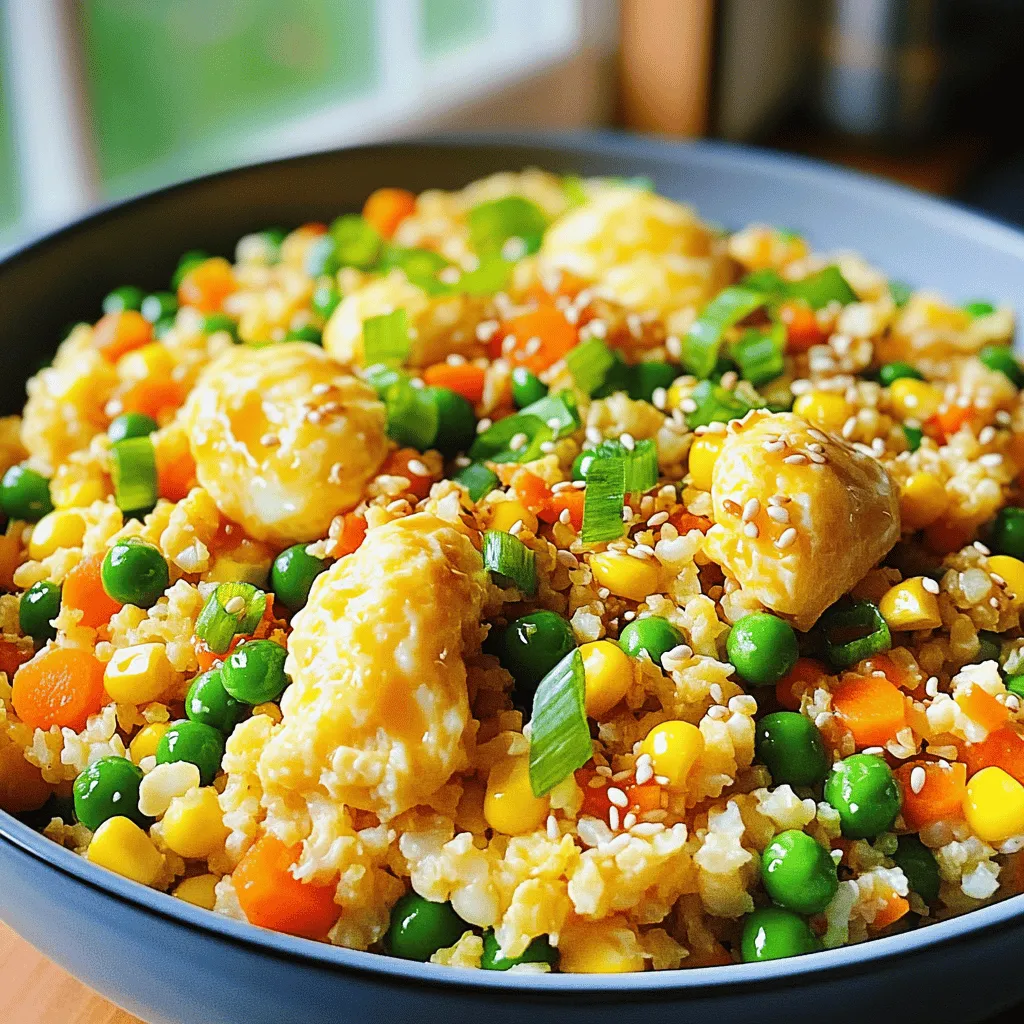
Looking for a healthy, delicious meal? Cauliflower Fried Rice is your answer! This dish packs flavor and nutrition into every

To make Chicken Caesar Salad Wraps, gather these key items: - 2 cups cooked chicken, shredded - 4 large tortillas or wrap bread - 1 cup romaine lettuce, chopped - 1/2 cup cherry tomatoes, halved - 1/4 cup Parmesan cheese, grated - 1/2 cup Caesar dressing (make your own or store-bought) - 1/4 cup croutons, crushed - Salt and pepper to taste These ingredients create a solid base for your wraps. The chicken gives protein, while the lettuce adds crunch. You can use any cooked chicken, like grilled or rotisserie. You can add these ingredients for extra flavor: - Fresh herbs, like parsley or basil - Avocado slices for creaminess - Cooked bacon for a smoky taste - Red onion slices for a bit of bite These optional ingredients can change the taste. Feel free to mix and match based on what you like. Each wrap has a balanced profile. Here’s an estimate per wrap: - Calories: 350 - Protein: 25g - Carbs: 30g - Fat: 15g - Fiber: 3g These wraps pack protein and fiber, making them filling. They fit well into a healthy meal plan. If you want to reduce calories, use less dressing and cheese. For the full recipe, check out the earlier section. First, gather your ingredients. You need cooked chicken, tortillas, romaine lettuce, cherry tomatoes, Parmesan cheese, Caesar dressing, croutons, salt, and pepper. 1. In a large bowl, mix the shredded chicken, chopped romaine lettuce, halved cherry tomatoes, and grated Parmesan cheese. 2. Pour the Caesar dressing over the mixture. Gently toss to coat all the ingredients. 3. Taste the mix and add salt and pepper as needed. Now, it’s time to make your wraps. 1. Place one tortilla flat on a clean surface. 2. Spoon a good amount of the chicken Caesar salad mixture into the center. 3. Sprinkle some crushed croutons on top for extra crunch. 4. Fold in the sides of the tortilla. Then roll it up tightly from the bottom. 5. Repeat this step with the remaining tortillas. To make your wraps look nice: 1. Cut each wrap in half diagonally. 2. Place the wraps on a platter. 3. Drizzle with extra Caesar dressing and sprinkle with more Parmesan cheese. 4. Add fresh basil leaves on top to make them pop. Now you have a tasty Chicken Caesar Salad Wrap ready to enjoy! For the full recipe, refer to the earlier section. To shred chicken easily, use two forks. Hold one fork in each hand. Pull the chicken apart in opposite directions. This method works best with warm chicken. If you have leftover chicken, it shreds well cold too. You can also use a stand mixer with a paddle attachment. Just mix on low speed for a few seconds. This saves time and effort when you have a lot to shred. When picking a tortilla, look for large ones. Flour tortillas are soft and easy to roll. They also hold fillings well. Corn tortillas are gluten-free and have a nice taste. They can be a bit firmer but are still tasty. Pick tortillas that are fresh for the best flavor. Check the package for any signs of damage. Soft and flexible tortillas make wrapping easier. To make your Chicken Caesar Salad Wraps even tastier, add some extras. Try mixing in chopped olives for a briny kick. Sliced avocado brings creaminess and depth. You can also add a sprinkle of red pepper flakes for heat. If you love garlic, try adding minced garlic to the dressing. Fresh herbs like parsley or cilantro can brighten the flavors. These simple additions make your wraps a standout dish. For the full recipe, refer to the earlier section. {{image_2}} To make a vegetarian version, swap the chicken for chickpeas. Use 2 cups of canned chickpeas, drained and rinsed. They add protein and a nice texture. You can also use grilled tofu for a heartier bite. Keep the other ingredients the same for a tasty twist. For a gluten-free wrap, choose gluten-free tortillas. Many stores offer great options made from rice or corn. Just check the label to ensure they meet your needs. This simple change keeps your wrap delicious without the gluten. You can customize your wraps easily. Try adding sliced cucumbers for crunch. Avocado adds creaminess and healthy fats, too. If you like spice, add some jalapeños or red pepper flakes. You can also switch the dressing. A yogurt-based dressing gives a lighter feel. Explore these options to keep your meals exciting. For the full recipe, check the section above. After you make your Chicken Caesar Salad Wraps, store any extras in a tight container. Wraps taste best when fresh, but you can keep them in the fridge. Use plastic wrap or foil for individual wraps. This way, they stay fresh and tasty. To reheat your wraps, use a microwave for about 30 seconds. If you want a crispy wrap, heat them in a skillet for 2-3 minutes on each side. Just watch closely to avoid burning. Heating gives the wrap a nice warm feel that enhances the flavors. Chicken Caesar Salad Wraps last about 3 days in the fridge. If you want to save them longer, you can freeze them. Wrap each one in plastic, then store in a freezer bag. They will keep for about 2 months in the freezer. When ready, thaw in the fridge overnight before reheating. This helps keep the flavor and texture intact. For the full recipe, check the main section. Yes, you can make Chicken Caesar Salad Wraps ahead of time. This makes them great for meal prep. Just follow the recipe, but don’t roll them up yet. Store the salad mixture in a bowl and the tortillas separately. When you’re ready to eat, just assemble the wraps. They taste fresh and delightful this way. If you need a substitute for Caesar dressing, you have options. You can use ranch dressing for a milder taste. Greek yogurt mixed with lemon juice is also a healthy choice. For a vegan option, try tahini mixed with lemon juice and garlic. Each substitute brings a unique flavor. To boost the nutrition in your Chicken Caesar Salad Wraps, add more veggies. Spinach, bell peppers, or cucumbers add crunch and vitamins. You can also use whole-grain tortillas for more fiber. Adding avocados gives healthy fats, too. These small changes make your meal even better. This blog post offered a clear guide to making Chicken Caesar Salad Wraps. We covered essential and optional ingredients, nutrition facts, and step-by-step instructions for preparation and assembly. I shared tips for shredding chicken, selecting tortillas, and enhancing flavor. We explored variations for vegetarian and gluten-free diets, along with storage and reheating tips. Now, you can enjoy wraps that suit your taste and needs. Follow these steps to create a meal that's not only delicious but also easy to store and pack. Happy cooking!

Delicious Chicken Caesar Salad Wraps Quick and Easy Recipe

Looking for a quick and tasty meal? You’re in the right place! My Chicken Caesar Salad Wraps combine fresh flavors

- 4 Italian sausages (mild or spicy) - 1 red bell pepper, sliced - 1 yellow bell pepper, sliced - 1 green bell pepper, sliced - 1 medium onion, thinly sliced (preferably red or yellow) - 3 cloves garlic, minced - 2 tablespoons olive oil - 1 tablespoon balsamic vinegar - Salt and pepper to taste - Fresh basil leaves for garnish - Crusty bread or hoagie rolls (optional, for serving) For this recipe, precise measurements matter. Use 4 sausages for a hearty meal. Slice each bell pepper to make about 1 cup total. One medium onion adds a sweet touch. Use 3 cloves of garlic for rich flavor. The olive oil is crucial for cooking, so don’t skip it! Balsamic vinegar adds a nice tang. Lastly, season with salt and pepper to bring out the flavors. For the full recipe, refer to the earlier section! To cook the sausages perfectly, heat your skillet to medium. Add one tablespoon of olive oil. Place the Italian sausages in the pan. Cook them for about 6-7 minutes on each side. You want them browned and cooked through. The right temperature ensures they stay juicy. Once done, remove them from the pan. Let them rest for a few minutes before you slice them into bite-sized pieces. Next, it’s time for the vegetables. Keep the skillet hot and add the other tablespoon of olive oil. Toss in the sliced onion and bell peppers. Sauté them for 5-7 minutes. This time keeps them soft but still crisp. You want that nice crunch when you bite into them. The colors will brighten your dish and make it more fun. Now, let’s meld the flavors. Lower the heat and return the cooked sausage pieces to the skillet. Drizzle balsamic vinegar over everything. Toss it all together for another 2-3 minutes. This helps the flavors mix well. Season with salt and pepper to taste. For serving, think about how to make it look pretty. You can serve the mixture in hoagie rolls or alongside crusty bread. Garnish with fresh basil leaves for color and flavor. This adds a nice touch to your meal. If you want to see all the details, check the Full Recipe. To make your Italian sausage and peppers shine, add some herbs. Fresh basil or oregano works great. You can also sprinkle some crushed red pepper for heat. A splash of white wine can lift the dish. Try using sweet or spicy Italian sausage based on your taste. Always season with salt and pepper. This will help the flavors pop. You can cook Italian sausage and peppers in various ways. The skillet method is quick and easy. You can also grill them for a smoky flavor. Baking is another option; just place everything in a dish and let the oven do the work. Slow cooking gives you tender meat and infused flavors. Each method gives a unique twist to the dish. One mistake is not browning the sausage well. This adds flavor and texture. Another pitfall is overcooking the vegetables. You want them soft but still crisp. Don’t skip the balsamic vinegar; it adds a nice tang. Finally, taste as you cook. Adjust seasoning as needed for the best results. For a complete guide, check the Full Recipe. {{image_2}} You can change the taste of Italian sausage and peppers in fun ways. For a spicy kick, use hot Italian sausages. They add heat and flavor. If you prefer a sweet touch, choose sweet sausage. This will balance the peppers' natural sweetness. You can also add herbs. Fresh basil or oregano can brighten the dish. If you follow a gluten-free diet, pick gluten-free sausages. They taste just as good! For low-carb options, skip the hoagie rolls. Instead, serve it over a bed of greens. This keeps the meal light and fresh. You can also use zucchini noodles as a base. They are a tasty twist! You can cook Italian sausage and peppers in different ways. Oven roasting gives a nice caramelization. To do this, place everything on a baking sheet and roast at 400°F for about 30 minutes. Grilling adds a smoky flavor. Just grill the sausages and veggies until they’re cooked through. Slow cooking is another great method. It lets the flavors blend well over time. Just add everything to a slow cooker, set it, and forget it! Each method brings a unique taste to the dish. For the full recipe, check out the earlier section. To keep your Italian sausage and peppers fresh, store leftovers in an airtight container. Make sure the food cools down before sealing it tight. This helps prevent moisture buildup. You can keep it in the fridge for up to three days. If you want to keep it longer, consider freezing it. When reheating, aim to keep the flavors intact. Use a skillet over medium heat for the best results. Add a splash of water or broth to help steam the dish. Stir it often to ensure even heating. You can also use a microwave, but cover it to keep moisture in. Freezing is a great option to extend your meal’s life. Place the cooled dish in a freezer-safe container. It’s best to eat it within three months for peak quality. When you're ready to enjoy it, thaw in the fridge overnight. Reheat it slowly to keep the flavors vibrant. For the full recipe, check out the details above! Italian sausage and peppers come from Italy. This dish has roots in Southern Italy, where farmers used fresh ingredients. The blend of sausage and peppers is simple yet full of flavor. In Italian culture, it often appears in street food. It became popular in America when Italian immigrants arrived. They brought their flavors and traditions, making it a beloved meal. Yes, you can use different types of sausage. While Italian sausage is traditional, feel free to try others. Chicken sausage, turkey sausage, or even bratwurst work well. Each type adds a unique flavor. Adjust the spices if you choose a milder sausage. This gives you fun options to mix things up. To check if the sausage is fully cooked, use a meat thermometer. The safe internal temperature is 160°F (71°C) for pork. Cut a piece of sausage to check. It should be brown inside, with no pink. Proper cooking is crucial for safety and taste. Always follow these tips for a great meal. Yes, you can make this dish in advance. Prepare the sausage and peppers and store them in the fridge. This keeps well for about three days. Reheat gently on the stove or microwave. The flavors will meld and become even better. Just remember to store it in an airtight container. Italian sausage and peppers pair well with many sides. Try serving them with crusty bread or hoagie rolls. A fresh salad or pasta is also a great choice. You can even add some sautéed greens for color. These options enhance the meal and make it even more enjoyable. In this blog post, we covered the key ingredients for Italian Sausage and Peppers. You learned how to cook the sausages and sauté the veggies for the best flavor. I shared tips to enhance taste, avoid mistakes, and even offered variations for different diets. Remember to store leftovers properly and reheat them wisely. Italian Sausage and Peppers is a dish you can easily make your own. Enjoy experimenting with flavors and cooking methods to create your perfect meal!

Italian Sausage and Peppers Flavorful Dinner Option

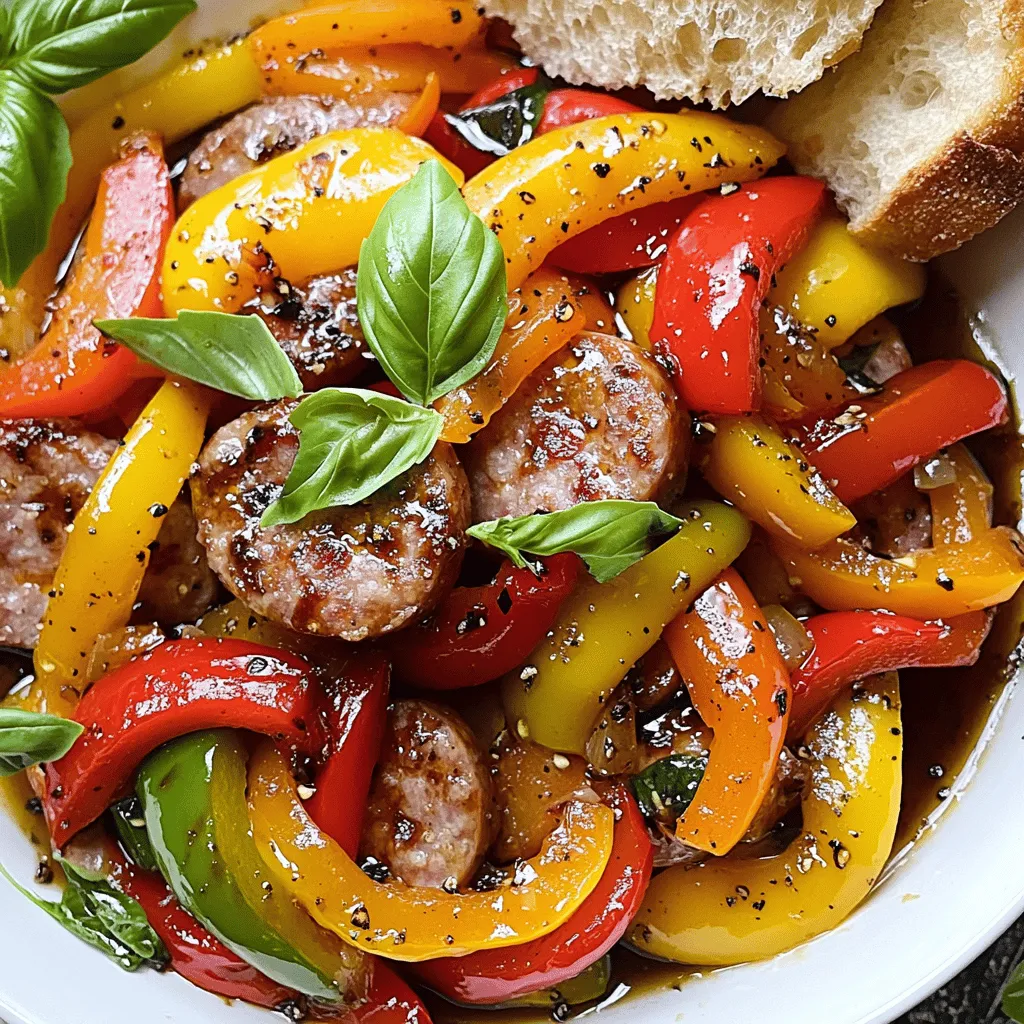
Looking for a tasty dinner idea? Italian Sausage and Peppers could be your new favorite dish! This meal bursts with

- 1 cup dried chickpeas (soaked overnight) - 1 small onion, roughly chopped - 2 cloves garlic, minced - 1/4 cup fresh parsley, chopped - 1/4 cup fresh cilantro, chopped - 1 teaspoon ground cumin - 1 teaspoon ground coriander - 1/2 teaspoon baking soda - 1 tablespoon lemon juice - Salt and pepper to taste - 2 tablespoons olive oil - Whole wheat pita or lettuce leaves for serving - Optional: tahini sauce or yogurt for drizzling You can swap dried chickpeas for canned ones if you're short on time. Just rinse them well before using. If you don't have fresh herbs, try using dried ones. The flavor may change a bit, but they still work well. Each serving has about 180 calories. You get around 10 grams of protein, 7 grams of fat, and 24 grams of carbs. This makes falafel a great choice for a balanced meal. Chickpeas are rich in fiber and protein. They help keep you full and energized. The fresh herbs add vitamins and minerals. Parsley and cilantro can aid digestion and boost your immune system. Spices like cumin and coriander not only add flavor but also have antioxidant properties. These spices can help reduce inflammation and improve your overall health. Enjoying these crispy baked falafels gives you a tasty meal that’s good for you! Soaking chickpeas is key for making falafel. Dried chickpeas need to soak overnight. This softens them, making them easier to blend. Draining and rinsing is just as important. After soaking, drain the chickpeas well. Rinse them under cold water. This helps remove any grit and ensures a clean taste. Using a food processor makes blending easy. Start by adding the drained chickpeas, onion, garlic, and herbs. Next, add cumin, coriander, baking soda, lemon juice, salt, and pepper. Pulse the mixture until it's coarsely chopped. You want it to hold together when formed into a ball. If it’s too dry, add a splash of water. If too wet, add a bit more chickpea flour. Shaping falafel is fun! Use your hands to form small balls, about 1.5 inches wide. Place them on a baking sheet lined with parchment paper. Preheat your oven to 400°F (200°C). Drizzle olive oil over the falafel. This helps them crisp up in the oven. Bake for 25 to 30 minutes. Halfway through, flip them for even cooking. They are done when golden brown and crispy outside. Enjoy them warm in pita or lettuce leaves. To get crispy falafel, you must coat them in oil. This helps them brown nicely. Use about two tablespoons of olive oil. Make sure to turn each ball in the oil, so they are fully coated. Baking techniques also matter. Preheat your oven to 400°F (200°C). Bake the falafel for 25-30 minutes. Flip them halfway through for even crispiness. They should look golden brown and feel firm. Avoid over-blending your mixture. If you blend too much, it becomes mushy. You want a coarse texture that holds together. Also, don’t skip seasoning. Taste as you go to get the right flavor. Chilling the mixture is key. If you don’t chill it for at least 30 minutes, the falafel may fall apart when baking. Chilling helps them firm up and keeps them intact. Serve your crispy baked falafel with tasty sides. Tahini sauce is a classic choice. It adds a creamy touch. You can also use yogurt for a tangy flavor. For presentation, use a vibrant platter. Garnish with fresh herbs and lemon wedges. Adding pickled vegetables can bring color and extra flavor. This makes your meal not just tasty but also beautiful to look at. For the full recipe, check out the detailed steps above. Enjoy your cooking! {{image_2}} You can change the taste of your falafel by using different herbs and spices. Try adding fresh mint for a refreshing twist. If you want heat, add cayenne pepper or chili powder. You can also mix in spices like smoked paprika for a deeper flavor. Incorporating vegetables into the mixture is a fun way to add nutrition. Grated carrots or zucchini can make the falafel even more colorful and tasty. Just make sure to squeeze out excess water from any veggies to keep the mixture from getting too wet. If you need a gluten-free option, serve falafel in lettuce wraps instead of pita. Romaine or butter lettuce works well. You can also make a delicious falafel salad with greens and your favorite toppings. For a vegan-friendly sauce, swap out yogurt for tahini or a simple avocado dressing. These creamy alternatives will still add richness without the dairy. You could also mix lemon juice with olive oil for a light dressing. Serving your falafel inside pita is classic and easy. Fill it with fresh veggies like tomatoes, cucumbers, and greens. If you prefer a lighter option, create a falafel salad bowl. Start with a base of greens and layer on falafel, cherry tomatoes, and cucumber. Drizzle your favorite sauce on top for added flavor. Enjoy experimenting with these variations to find your favorite way to serve crispy baked falafel! To keep your leftover falafel fresh, use airtight containers. Glass or BPA-free plastic works well. Store them in the fridge for up to three days. Make sure they cool down before sealing to avoid moisture buildup. This helps keep them crispy. You can freeze both raw and cooked falafel. For raw falafel, shape them, then place them on a baking sheet. Freeze until firm, then transfer to a freezer bag. They last for about three months. For cooked falafel, let them cool, then store in a freezer bag. They also last three months. To reheat, bake or pan-fry until hot. To keep falafel crispy, reheating in the oven is best. Preheat your oven to 375°F (190°C). Place falafel on a baking sheet and bake for about 10 minutes. You can also use a toaster oven for smaller batches. Avoid microwaving as it makes them soggy. Always check for warmth inside, ensuring a tasty bite! Yes, you can use canned chickpeas. Just rinse and drain them well. Canned chickpeas have more moisture. You may need to adjust the baking time. A shorter bake may help them stay crispier. To add heat, mix in cayenne pepper or crushed red pepper flakes. You can also try adding diced jalapeños. Adjust the spice level based on your taste. A little goes a long way, so start small. Crispy baked falafel pairs well with fresh salads or dips. Serve with tahini sauce, yogurt, or hummus. Whole wheat pita or lettuce wraps make great vessels too. Add a side of pickled veggies for more crunch. Look for a golden brown color on the outside. They should feel firm but not hard. A crispy texture is key, so check for that. Let them cool slightly before serving for the best taste. Yes, you can prepare falafel in advance. Form the balls and chill them in the fridge. Bake them right before serving for fresh flavor. This makes them perfect for parties or meal prep. For the full recipe, check the detailed instructions above. You now know how to make delicious falafel from scratch. We covered the essential ingredients, with tips on swaps and measurements. The step-by-step guide helped you prep, blend, shape, and bake perfectly crispy falafel. Don't forget the variations that let you tailor the flavor to your taste. Lastly, the storage tips ensure your leftovers stay fresh. Enjoy creating these healthy, tasty bites, and share them with friends or family. Happy cooking!

Crispy Baked Falafel Tasty and Healthy Meal Option

Are you ready to dive into a dish that’s crispy, tasty, and healthy? This crispy baked falafel offers a fun

To make a tasty spinach and mushroom quiche, you need simple ingredients. The full recipe brings together fresh flavors and creamy textures. You'll enjoy the mix of eggs, cream, and cheese with the earthy mushrooms and bright spinach. It’s easy and quick to prepare. Here’s what you need to create this delicious dish: - 1 pre-made pie crust - 2 cups fresh spinach, chopped - 1 cup mushrooms, sliced (any variety) - 1 small onion, finely chopped - 3 large eggs - 1 cup heavy cream - 1 cup shredded cheese (cheddar or Gruyère work well) - 1 teaspoon garlic powder - 1/2 teaspoon nutmeg - Salt and pepper to taste - 1 tablespoon olive oil These ingredients blend well, giving a rich and satisfying flavor. The pie crust provides a nice base, while the filling is creamy and savory. You can also add extras to make your quiche unique. Here are some ideas: - Fresh herbs like thyme or parsley add brightness. - Diced bell peppers or zucchini can add more veggies. - Crumbled feta or goat cheese gives a tangy twist. - Cooked bacon or ham adds a hearty touch. Feel free to mix and match these add-ins to suit your taste! Each option brings its own flavor, making your quiche special. Start by gathering all your ingredients. This helps keep things organized. You need a pre-made pie crust, fresh spinach, mushrooms, onion, eggs, heavy cream, cheese, garlic powder, nutmeg, salt, and pepper. Here’s how to prepare: 1. Preheat the oven to 375°F (190°C). This ensures even baking. 2. Heat olive oil in a skillet over medium heat. Add chopped onion and cook until soft. 3. Add sliced mushrooms to the skillet. Cook until they brown and release moisture. This takes about 5-7 minutes. 4. Stir in chopped spinach. Cook for 2-3 minutes until it wilts. Then, remove the skillet from heat and let it cool slightly. This preparation makes your quiche filling rich and tasty. Once your filling is ready, it’s time to bake. Follow these steps: 1. Whisk together eggs and heavy cream in a bowl. Add garlic powder, nutmeg, salt, and pepper. Mix well. 2. Combine the sautéed veggies and shredded cheese with the egg mixture. Stir until combined. 3. Pour the filling into your pre-made pie crust. Spread it evenly. 4. Bake in the preheated oven for 35-40 minutes. The quiche should puff up and turn lightly golden. Baking at this temperature gives you a perfect texture. To ensure your quiche is done, follow these simple checks: - Look for a firm center: Gently shake the quiche. If it jiggles slightly, it needs more time. - Check for browning: The top should be golden brown. This shows it's cooked well. - Use a knife: Insert a knife into the center. If it comes out clean, your quiche is ready. These tips help you avoid undercooked or overcooked quiche. Enjoy your delicious Spinach and Mushroom Delight Quiche! When making your quiche, avoid these common mistakes: - Using too much filling: Overfilling can lead to a soggy crust. - Not sautéing vegetables enough: Undercooked veggies release water, making your quiche watery. - Skipping the cooling step: Letting it cool helps it set and slice better. To make your quiche stand out, follow these expert tips: - Use fresh ingredients: Fresh spinach and mushrooms bring the best flavor. - Mix flavors: Combine cheeses for a more complex taste. Try cheddar with Gruyère. - Let it rest: Allow the quiche to sit for a few minutes before cutting. This helps the slices hold their shape. A flaky pie crust is key to a great quiche. Here’s how to get it right: - Keep ingredients cold: Use chilled butter and ice-cold water. This helps create steam during baking. - Don’t overwork the dough: Mix just until combined to keep it tender. - Pre-bake the crust: This prevents sogginess and ensures a crispy bottom. For the full recipe, check the Spinach & Mushroom Delight Quiche section. {{image_2}} You can change the taste of your quiche easily. Try using different cheeses like feta or goat cheese. They give a tangy flavor that pairs well with spinach. If you prefer a creamy taste, you can use ricotta cheese instead. You can also swap fresh spinach for kale or Swiss chard for a heartier bite. Each green brings its own unique flavor. Want to add some meat? Bacon or ham works great in this quiche. Cook bacon until crispy, then chop it into small pieces. Mix it into the spinach and mushroom filling. For ham, use diced, cooked ham. It adds a savory taste that balances the creaminess. Both choices make the quiche more filling and satisfying. If you want a vegan quiche, you can make simple swaps. Use a plant-based pie crust or make your own from flour and coconut oil. Replace the eggs with a mix of silken tofu and chickpea flour. This creates a creamy texture. For cream, use coconut milk or almond milk. You can add nutritional yeast for a cheesy flavor. With these changes, you can enjoy a delicious vegan quiche. For more details on the recipe, check out the Full Recipe. To store leftover quiche, let it cool first. Wrap each slice tightly in plastic wrap. You can also place slices in an airtight container. This keeps the quiche fresh and moist. If you plan to eat it later, try to refrigerate it within two hours of baking. When stored properly, your quiche can last up to four days in the fridge. If you need it to last longer, consider freezing it. Frozen quiche can stay tasty for up to three months. Just remember to wrap it well to prevent freezer burn. To reheat, place the quiche in a preheated oven at 350°F (175°C). Bake for about 15 to 20 minutes. This warms it evenly and keeps the crust crisp. You can also use the microwave, but it may make the crust a bit soggy. For best flavor, pair reheating with a fresh salad or side. Check the [Full Recipe] for more tips on serving! Yes, you can use frozen spinach. Just make sure to thaw it first. Squeeze out any extra water before adding it to the mix. This prevents a soggy quiche. Frozen spinach can save you time. It still gives great flavor and nutrition. You can serve this quiche with many tasty sides. A fresh mixed green salad works well. The light crunch of greens contrasts nicely with the creamy quiche. You might also enjoy serving it with roasted veggies or a fruit salad. These sides add color and flavor to your meal. Check your quiche at the 35-minute mark. It should be set in the middle and golden on top. If you gently shake the pan, the filling should not jiggle. A toothpick inserted in the center should come out clean. If it’s still wet, bake for a few more minutes. In this article, we explored the tasty world of spinach and mushroom quiche. We covered essential ingredients and how optional add-ins can boost flavor. I shared clear steps for preparation, baking, and checking if your quiche is done. You learned tips to avoid common mistakes and how to achieve a flaky crust. We looked at variations, storage tips, and answered key questions. Enjoy making your quiche, and don’t be afraid to experiment! It's all about balancing flavors and enjoying the process.

Savory Spinach and Mushroom Quiche Easy Recipe Guide

If you’re craving a tasty dish that’s easy to make, this Spinach and Mushroom Quiche is the answer! Packed with

To make Moroccan spiced carrot soup, you need fresh and vibrant ingredients. Here’s what you'll need: - 1 lb (450g) carrots, peeled and chopped - 1 onion, finely chopped - 2 cloves garlic, minced - 1 tablespoon fresh ginger, grated - 1 teaspoon ground cumin - 1 teaspoon ground coriander - 1/2 teaspoon ground cinnamon - 1/4 teaspoon cayenne pepper (adjust to taste) - 4 cups vegetable broth - 1 can (14 oz) coconut milk - 2 tablespoons olive oil - Salt and pepper to taste These ingredients create a warm and rich flavor in every spoonful. The spices work together to give depth and warmth. The carrots add natural sweetness, and the coconut milk brings creaminess. In addition to the main ingredients, there are a few pantry staples that help round out the flavors: - Olive oil: This is essential for sautéing the onions and spices. - Salt: Enhances the taste of the soup. - Pepper: Adds a little kick. Have these staples ready, and you'll have a solid base for any soup. Adding garnishes can elevate your soup. Consider these options: - Fresh cilantro or parsley: Adds a fresh touch. - Lemon wedges: Squeeze some juice for brightness. These garnishes not only look great but also add layers of flavor. You can serve this soup with crusty bread for a complete meal. For the full recipe, check out the details provided earlier. Start by gathering all your ingredients. For this Moroccan spiced carrot soup, you need: - 1 lb (450g) carrots, peeled and chopped - 1 onion, finely chopped - 2 cloves garlic, minced - 1 tablespoon fresh ginger, grated - 1 teaspoon ground cumin - 1 teaspoon ground coriander - 1/2 teaspoon ground cinnamon - 1/4 teaspoon cayenne pepper (adjust to taste) - 4 cups vegetable broth - 1 can (14 oz) coconut milk - 2 tablespoons olive oil - Salt and pepper to taste - Fresh cilantro or parsley for garnish - Lemon wedges for serving Make sure your veggies are clean and ready to go. Chop the carrots and onion into small pieces. This helps them cook faster. In a large pot, heat the olive oil over medium heat. Add the chopped onion. Sauté until it softens, about 5 minutes. As the onion cooks, it releases sweet flavors. Next, add the minced garlic and grated ginger. Stir often for about 1 minute. You want to release their aromas without burning them. Then, stir in the spices: cumin, coriander, cinnamon, and cayenne pepper. Cook them for another minute. This toasts the spices, bringing out their rich flavors. Now, add the chopped carrots to the pot. Stir them well to coat with the spice mixture. Pour in the vegetable broth and bring the mix to a boil. Once it boils, reduce the heat to low and cover the pot. Let it simmer for 20 to 25 minutes. The carrots should become tender during this time. After the carrots are soft, it's time to blend the soup. You can use an immersion blender right in the pot. If you don't have one, carefully transfer the soup in batches to a regular blender. Blend until smooth. Once blended, stir in the coconut milk. This adds creaminess and a hint of sweetness. Season with salt and pepper to taste. If the soup needs heat, adjust the cayenne pepper. Gently heat the soup again, but don’t let it boil after adding the coconut milk. Serve the soup hot. Garnish with fresh cilantro or parsley. A squeeze of lemon juice adds brightness. Don’t forget to include lemon wedges on the side. Enjoy this flavorful and comforting dish! For the full recipe, check the earlier section. To make your Moroccan spiced carrot soup shine, use fresh spices. Always buy whole spices and grind them just before cooking. This keeps the flavors strong and bright. You can also add a splash of orange juice for a hint of sweetness. This will balance the spices and add depth to the dish. Fresh herbs like cilantro or parsley make great garnishes, offering a pop of color and flavor. Spice levels can change the whole soup. If you love heat, add more cayenne pepper. Start with a small amount and taste as you go. If you prefer a milder soup, skip the cayenne or reduce it. You can also add a bit of honey if the soup is too spicy. This sweetness will help balance the heat. One common mistake is overcooking the carrots. They should be tender but not mushy. Keep an eye on them while simmering. Another mistake is not blending the soup well. A smooth texture makes every bite enjoyable. If you don’t have an immersion blender, blend in small batches. Lastly, avoid boiling the soup after adding coconut milk. Boiling can cause the milk to curdle, ruining the creamy texture. For the full recipe, check out the complete instructions. {{image_2}} To make Moroccan spiced carrot soup vegan, simply use vegetable broth and coconut milk. These ingredients keep the soup rich and creamy. You can even add more veggies like sweet potatoes or bell peppers for extra flavor. This soup is already plant-based, so you are off to a great start! If you don't have an ingredient, don’t worry! Here are some swaps you can try: - Carrots: You can use parsnips or butternut squash instead. - Coconut milk: Try almond or cashew milk for a nutty taste. - Spices: If you lack cumin or coriander, curry powder is a great substitute. - Olive oil: Avocado oil works well for sautéing too. Feel free to experiment and find what works best for your taste! Serving this soup can be fun! Here are some ideas: - Pour the soup into bowls and top with fresh herbs like cilantro or parsley. - Add a dollop of dairy-free yogurt for creaminess. - Serve with crusty bread or pita for dipping. - For a twist, drizzle with chili oil or a sprinkle of feta cheese. Each of these ideas can take your soup to the next level. Enjoy the warmth and comfort of this dish, especially on chilly days. For the full recipe, check back to see how to make this delicious soup! Once you enjoy your Moroccan spiced carrot soup, store the leftovers right. Let the soup cool down first. Then, pour it into a clean, airtight container. Make sure to leave some space at the top for expansion. Label the container with the date. This way, you keep track of how fresh it is. You can store it in the fridge for up to five days. Freezing your soup is a great option for longer storage. Use freezer-safe containers or bags for this. Pour in the cooled soup, leaving some space again. Seal tightly to avoid freezer burn. You can freeze the soup for up to three months. When you’re ready to eat it, just pull it out and thaw it. To reheat, you can use a pot on the stove. Pour the thawed soup into the pot and heat it on low. Stir it often to ensure even heating. You can also use a microwave. Place the soup in a microwave-safe bowl. Heat it in short bursts, stirring in between. If the soup seems thick, add a splash of water or broth to loosen it up. Enjoy your warm, flavorful soup! You can enjoy this soup with a few tasty sides. Here are some ideas: - Crusty bread: A warm baguette complements the soup well. - Salad: A fresh green salad adds crunch and color. - Hummus: Serve with pita for a fun dip. - Rice: A scoop of fluffy rice makes it heartier. These choices will enhance your meal and make it more satisfying. To adjust the heat in your soup, modify the cayenne pepper. For spice lovers, add more cayenne. Start with an extra 1/4 teaspoon. Taste as you go. If you want it milder, reduce or omit the cayenne. You can also add a dollop of yogurt to balance the spice. This adds creaminess and cools down the heat. Yes, you can swap out carrots for other veggies. Sweet potatoes or butternut squash work great for a similar flavor. You can also mix in some bell peppers or zucchini for more variety. Just remember to adjust cooking times if needed. Each veggie has a different cooking time, but all can create a delicious soup. For the full recipe, check out the details above. In summary, we explored how to make Moroccan spiced carrot soup. We started with the ingredients you’ll need, from main components to optional garnishes. Then, we broke down the cooking process into clear steps, ensuring your soup turns out tasty. I shared tips to boost flavors and common mistakes to avoid. We also covered variations, storage tips, and answered key questions. Enjoy making this delicious, cozy soup again and again!

Moroccan Spiced Carrot Soup Flavorful and Comforting

If you’re looking to warm your soul and excite your taste buds, try Moroccan Spiced Carrot Soup. This dish combines

To make this tasty dish, gather these main items: - 1 lb (450g) boneless, skinless chicken thighs, sliced - 2 tablespoons honey - 3 tablespoons soy sauce - 3 cloves garlic, minced - 1 tablespoon ginger, grated - 1 bell pepper (red or yellow), sliced - 1 cup broccoli florets - 1 carrot, julienned - 1 tablespoon vegetable oil - Salt and pepper to taste These ingredients create a sweet and savory flavor. The chicken thighs add richness, while the veggies bring crunch and color. You can add some optional items to enhance the taste: - 1 tablespoon rice vinegar - 1 teaspoon chili flakes for heat - 1 tablespoon cornstarch for thickening Using rice vinegar can give a tangy kick. Chili flakes add a nice spice, while cornstarch helps the sauce cling to the chicken. Make your dish look nice with these garnishes: - 2 green onions, sliced - Sesame seeds These garnishes add freshness and a touch of elegance. They also provide a nice contrast to the dish's rich flavors. You can find the full recipe to guide you through the cooking process and enjoy this delightful meal! First, gather all your ingredients. This makes cooking smooth and quick. You need: - 1 lb boneless, skinless chicken thighs, sliced - 2 tablespoons honey - 3 tablespoons soy sauce - 3 cloves garlic, minced - 1 tablespoon ginger, grated - 1 bell pepper, sliced - 1 cup broccoli florets - 1 carrot, julienned - 1 tablespoon vegetable oil - 2 green onions, sliced for garnish - Sesame seeds for garnish - Salt and pepper to taste In a small bowl, whisk together honey, soy sauce, minced garlic, and grated ginger. Set this sauce aside for later. Heat the vegetable oil in a large skillet or wok over medium-high heat. Once hot, add the sliced chicken thighs. Lightly season with salt and pepper. Cook for 5-7 minutes, stirring often. You want the chicken to brown and cook through. Once done, remove the chicken from the skillet. Set it aside on a plate. In the same skillet, add the sliced bell pepper, broccoli florets, and julienned carrot. Stir-fry these vegetables for about 3-4 minutes. You want them to be tender but still crisp. Lower the heat slightly, then return the cooked chicken to the skillet. Pour the honey garlic sauce over everything. Stir well to coat the chicken and veggies. Cook for an additional 2-3 minutes until heated through. The sauce should slightly thicken. Remove from heat and garnish with sliced green onions and sesame seeds. Enjoy your colorful and tasty meal! For the full recipe, check out the section above. To get the right sauce thickness, use cornstarch. Mix one tablespoon of cornstarch with two tablespoons of cold water in a small bowl. Add this mixture to the sauce while cooking. Stir it in as you heat the sauce. This will make it glossy and thick. Keep stirring for about a minute. This technique works well for many stir-fry dishes. Cook the chicken for about 5-7 minutes. It should be brown and no longer pink. For the veggies, stir-fry them for about 3-4 minutes. They should stay bright and crisp. If you overcook them, they lose their crunch. Always check the chicken's doneness with a knife. Ensure it is fully cooked before adding the sauce. Garnishing adds a nice touch to your dish. Use sliced green onions and sesame seeds for a pop of color. Sprinkle them on right before serving. This makes your dish look fresh and appetizing. You can also add a dash of chili flakes for a hint of spice. This extra step makes your meal more inviting. For more ideas, check the Full Recipe. {{image_2}} You can switch the chicken for other proteins. Try shrimp, beef, or tofu. Each option offers a new taste. Shrimp cooks quickly, while beef adds a hearty feel. Tofu soaks up the honey garlic sauce well. Adjust the cooking time based on your choice. Feel free to use different vegetables in your stir-fry. Zucchini, snap peas, or mushrooms work great. You can also add baby corn or bok choy for a twist. Mix and match to suit your taste. Just keep the cooking time similar for best results. For a gluten-free dish, use tamari instead of soy sauce. This keeps the flavor but removes gluten. Check all other ingredients, too, for gluten. Most fresh veggies and proteins are safe. Enjoy a tasty meal without the worry! For the full recipe, check out the Honey Garlic Chicken Stir-Fry. After you make Honey Garlic Chicken Stir-Fry, let it cool down. Store it in an airtight container. It will stay fresh in the fridge for up to three days. Make sure to keep it sealed tight. This helps to hold in the flavors. When you're ready to eat leftovers, you can reheat them easily. Use a pan on medium heat. Add a splash of water or broth to keep it moist. Stir for about five minutes until it's hot. You can also use the microwave. Place it in a microwave-safe bowl and heat for about two minutes. Stir halfway through for even heat. If you want to save some for later, freezing works well. First, let the stir-fry cool completely. Then, place it in a freezer-safe bag. Squeeze out excess air before sealing it. You can freeze it for up to three months. When you're ready to eat, thaw it overnight in the fridge. Reheat it as mentioned above. This way, you can enjoy your tasty meal anytime! To make Honey Garlic Chicken Stir-Fry from scratch, gather your ingredients first. You need chicken, honey, soy sauce, garlic, ginger, and colorful veggies. Start by mixing honey, soy sauce, garlic, and ginger in a bowl. Heat oil in a skillet over medium-high heat. Cook the chicken until it’s browned. Remove it and set it aside. Next, add your veggies and stir-fry them until they’re tender-crisp. Return the chicken to the pan and pour in your sauce. Cook until everything is hot and the sauce thickens. This simple process makes a tasty meal with fresh flavors. You can find the full recipe above for more details. You can serve this stir-fry with rice or noodles. Both options soak up the honey garlic sauce well. Steamed rice adds a nice texture. Noodles give a fun twist and are easy to eat. You could also pair it with a fresh salad for a crunchy side. If you want to add more greens, try serving it with steamed broccoli or snap peas. These sides balance the flavors and add variety to your meal. Yes, you can make this dish in advance. Prepare the chicken and sauce, then store them in the fridge. Cook your veggies fresh right before serving. This way, they stay crisp and bright. You can also reheat the stir-fry in a pan over low heat. Just be careful not to overcook it. This method keeps the chicken tender and the sauce flavorful. Making it ahead saves time and makes a quick meal on busy days. You’ve learned how to make Honey Garlic Chicken Stir-Fry step by step. We covered the key ingredients, cooking tips, and tasty variations. You now know how to achieve the right sauce and store leftovers properly. This dish is simple and offers room for creativity. Experiment with different proteins and veggies to find your favorite mix. Enjoy making this stir-fry for your next meal. It's sure to impress!

Honey Garlic Chicken Stir-Fry Quick and Easy Recipe

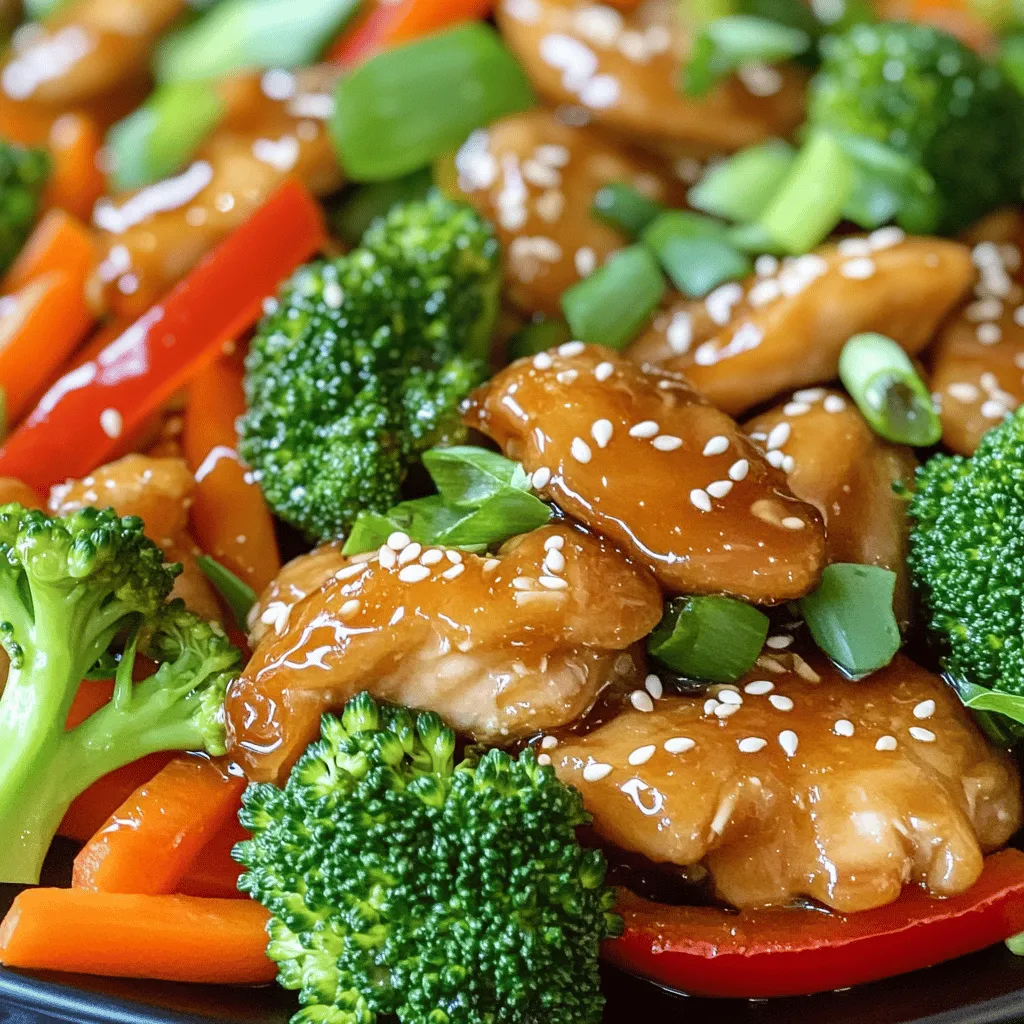
Looking for a quick and easy dinner idea? You’ll love this Honey Garlic Chicken Stir-Fry! This dish is packed with

- 1 cup jasmine rice - 1 cup coconut milk - 1/2 cup water - 1 tablespoon sugar - 1/4 teaspoon salt - 1 ripe mango, peeled and diced - 2 tablespoons toasted coconut flakes - Fresh mint leaves for garnish (optional) When making coconut rice with mango, it’s crucial to choose high-quality ingredients. Jasmine rice gives a lovely aroma and flavor. Coconut milk adds creaminess, while fresh mango provides sweetness. If you want crunch, use toasted coconut flakes. - Calories per serving: Approximately 300 - Macronutrient breakdown: - Carbohydrates: 60g - Proteins: 4g - Fats: 10g This dish is rich in carbs from the rice and natural sugars from the mango. Coconut milk adds healthy fats, making it a satisfying meal. - Medium saucepan - Measuring cups and spoons - Fork for fluffing rice Gathering the right tools helps you cook efficiently. A medium saucepan is perfect for cooking the rice. Measuring cups and spoons ensure accuracy. Lastly, a fork is essential for fluffing the rice, making it light and airy. For the full recipe, check out the Tropical Coconut Rice with Mango section. - Rinsing the jasmine rice: First, rinse 1 cup of jasmine rice under cold water. Keep rinsing until the water runs clear. This helps remove excess starch and keeps the rice fluffy. - Combining ingredients in the saucepan: Next, in a medium saucepan, mix the rinsed rice with 1 cup of coconut milk, 1/2 cup of water, 1 tablespoon of sugar, and 1/4 teaspoon of salt. Stir gently to combine all the ingredients well. - Bringing to a boil and simmering: Bring the mixture to a gentle boil over medium heat. Once it starts boiling, reduce the heat to low. Cover the saucepan with a lid. - Importance of keeping the lid closed: It is vital to keep the lid closed during cooking. This helps trap the steam and ensures even cooking. Let it simmer for about 15 minutes until the rice absorbs all the liquid and becomes tender. - Steaming the rice after cooking: Once cooked, take the saucepan off the heat but keep it covered. Let it sit for another 10 minutes. This extra time allows the rice to steam and become even fluffier. - Fluffing and serving with mango: After steaming, fluff the rice with a fork. To serve, scoop the coconut rice onto plates and top with freshly diced mango. Sprinkle 2 tablespoons of toasted coconut flakes on top for a lovely crunch. Enjoy your meal! Check out the Full Recipe for more details. To make great coconut rice, you want the right texture. Start with jasmine rice. Rinsing it helps remove excess starch. Rinse until the water runs clear. This keeps the rice light and fluffy. Using a good quality coconut milk is key. Look for full-fat coconut milk for richer flavor. Avoid brands with added sugars or preservatives. The best coconut milk makes a big difference in taste. For this recipe, the best types of mango are Ataulfo or Haden. They are sweet and soft, perfect for this dish. When choosing mangoes, look for ones that give a little when you press them. This means they are ripe and ready to eat. Peeling and dicing mango can be tricky. A simple way is to slice off both sides of the mango, avoiding the pit. Then, score the flesh in a grid pattern. Use a spoon to scoop out the pieces easily. Coconut rice pairs well with protein dishes. Try it with grilled chicken or shrimp. The sweetness of the rice balances the savory flavors. This dish is great for special occasions like birthdays or holidays. Serve it at summer barbecues or family gatherings. It adds a tropical flair to any meal. For the full recipe, check out the Tropical Coconut Rice with Mango. {{image_2}} You can enhance coconut rice by adding spices. Cardamom gives a warm, sweet note. A dash of vanilla adds depth too. Want a healthier choice? Use brown rice instead of white. Brown rice gives a nutty taste and more fiber. While mango shines in this dish, other fruits work well too. Pineapple adds a tropical punch. Bananas bring creaminess, and berries add color. For seasonal options, try peaches in summer or apples in fall. Each fruit offers a different twist! If you want a dairy-free option, swap coconut milk. Almond or oat milk makes a great substitute. Both have a mild flavor that blends well. You can also use cashew cream for a rich touch. These alternatives keep the dish creamy and tasty. For more details, check the [Full Recipe]. Coconut rice stays fresh in the fridge for up to four days. Store it in an airtight container. Keep the mango separate to avoid sogginess. Place diced mango in a small bowl and cover tightly with plastic wrap or a lid. To reheat coconut rice, use the microwave or stovetop. For the microwave, add a splash of water to keep it moist. Heat in short bursts, stirring in between. On the stovetop, warm it in a pan over low heat, adding a bit of coconut milk if it seems dry. To freeze coconut rice, let it cool completely. Then, scoop it into a freezer-safe bag or container. Remove excess air and seal tightly. When ready to eat, thaw in the fridge overnight. Reheat in the microwave or on the stovetop, adding a little liquid to keep it fluffy. Jasmine rice is the best choice for coconut rice. It gives a nice aroma and a soft texture. Other rice types, like basmati or long grain, can work, but they may not be as fluffy. Jasmine rice absorbs coconut milk well, adding rich flavor. Using jasmine rice helps create a dish that is both light and creamy. This rice has a slight sweetness that pairs perfectly with coconut milk and mango. When you serve it, the rice will feel tender in every bite. Yes, you can make coconut rice in advance. It’s a great dish for meal prep. Cook the rice and let it cool before storing. Place the rice in an airtight container and keep it in the fridge. It will last about three to four days. When you are ready to serve, just reheat the rice with a splash of coconut milk. This will help it stay moist. You can also add fresh diced mango right before serving for the best flavor. If you want more sweetness, try adding extra sugar or honey. Start with one tablespoon and taste it. You can also add a splash of vanilla extract for a deeper flavor. Another option is to use sweeter fruits, like ripe bananas or pineapple, along with the mango. This will give you a colorful and tasty dish. Adjusting sweetness helps make it just right for your taste. For the full recipe, check out the Tropical Coconut Rice with Mango. Coconut rice with mango offers a tasty treat that's easy to make. We covered the ingredients, cooking steps, and storage tips to help you enjoy this dish. Use the suggested tools and follow the tips for perfect results. This dish shines with fresh flavors and can fit many meals. Experiment with different fruits and flavors to make it your own. Enjoy your cooking, and share this delightful recipe with friends and family!

Coconut Rice with Mango Delightfully Sweet Recipe

Get ready to indulge in a tropical treat with my Coconut Rice with Mango recipe! This dish combines creamy coconut

Newer posts
← Previous Page1 … Page83 Page84

dsad

© 2026 pureeatsnow • Built with GeneratePress

Our Policies

  • Copyright Policy
  • Cookie Policy
  • GDPR Policy
  • Privacy Policy
  • Disclaimer
  • Terms Of Use

More Information

  • Home
  • About
  • Contact
  • Appetizers
  • Dessert
  • Dinner
  • Drinks
©2026, pureeatsnow About Back To Top